iPhone Food Photography: 15 Pro Tips for Restaurant-Quality Photos (2025)
Your iPhone is more powerful than professional cameras from just 10 years ago. Yet most restaurant owners still struggle to capture appetizing food photos for their menus and social media.
The difference isn't the equipment – it's knowing the right techniques. Today, we'll share the exact methods professional food photographers use, adapted specifically for iPhone food photography.
Whether you're updating your restaurant menu, shooting for Instagram, or creating content for delivery apps, these tips will transform your food photos with iPhone from amateur snapshots to professional-looking images.
Why iPhone Food Photography Matters for Your Business
Before diving into techniques, let's address the elephant in the room: Can an iPhone really produce professional food photos?
The short answer: Absolutely.
Modern iPhones (especially iPhone 11 and newer) have:
- Multiple lenses for different perspectives
- Advanced computational photography
- Professional-grade color accuracy
- Built-in editing capabilities
Major food brands and restaurants now use iPhone food photography for their social media content. The key is understanding how to use these features effectively.
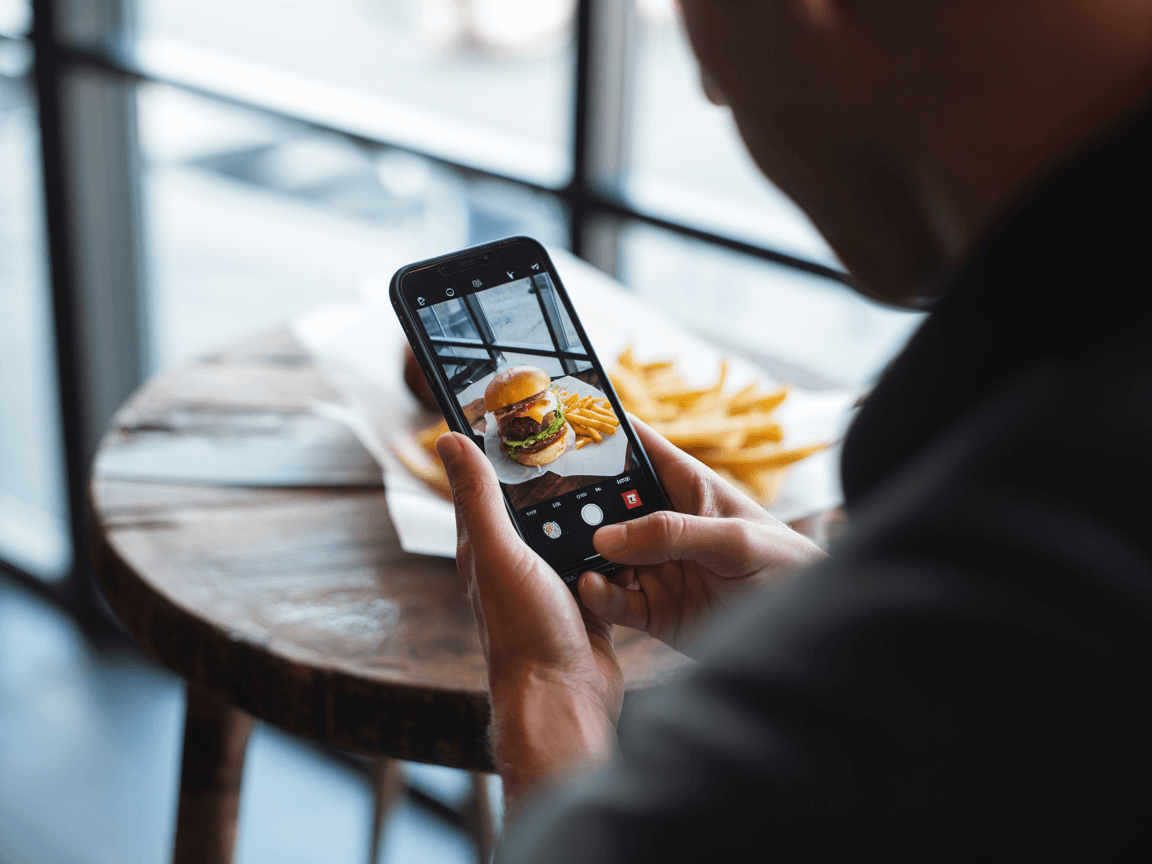
1. Master Your iPhone Camera Settings
Enable Grid Lines (Rule of Thirds)
The first step to better iPhone food photography is composition. Here's how to set it up:
1. Go to Settings > Camera 2. Enable "Grid" 3. Use the grid to align your dish
Pro tip: Place your main subject at grid intersections, not dead center. This creates more dynamic, professional-looking compositions.
Grid lines help you compose balanced food photos
Lock Focus and Exposure
Nothing ruins a food photo faster than poor focus. Here's the iPhone food photography tip pros use:
1. Tap and hold on your main subject 2. "AE/AF LOCK" will appear 3. Slide up/down to adjust brightness 4. This prevents the camera from refocusing
This technique is crucial for food photography with iPhone because it gives you complete control over what's sharp and properly exposed.
2. Natural Light: Your Best Friend
Professional food photographers will tell you: lighting makes or breaks a photo. The good news? You don't need expensive equipment.
Window Light Magic
The best iPhone food photography lighting is free and available in every restaurant:
Setup:
- Position your dish 1-3 feet from a window
- Use north-facing windows for soft, even light
- Avoid direct sunlight (creates harsh shadows)
- Best times: 10 AM - 2 PM for optimal natural light
Pro technique: Turn off overhead lights. Mixed lighting creates color cast issues that are hard to fix later.
DIY Light Modifiers
Create professional results with simple tools:
Diffuser (softens harsh light):
- White curtain or parchment paper
- Hold between window and food
- Creates soft, even lighting
Reflector (fills in shadows):
- White foam board or poster board
- Place opposite the window
- Bounces light back onto dark areas
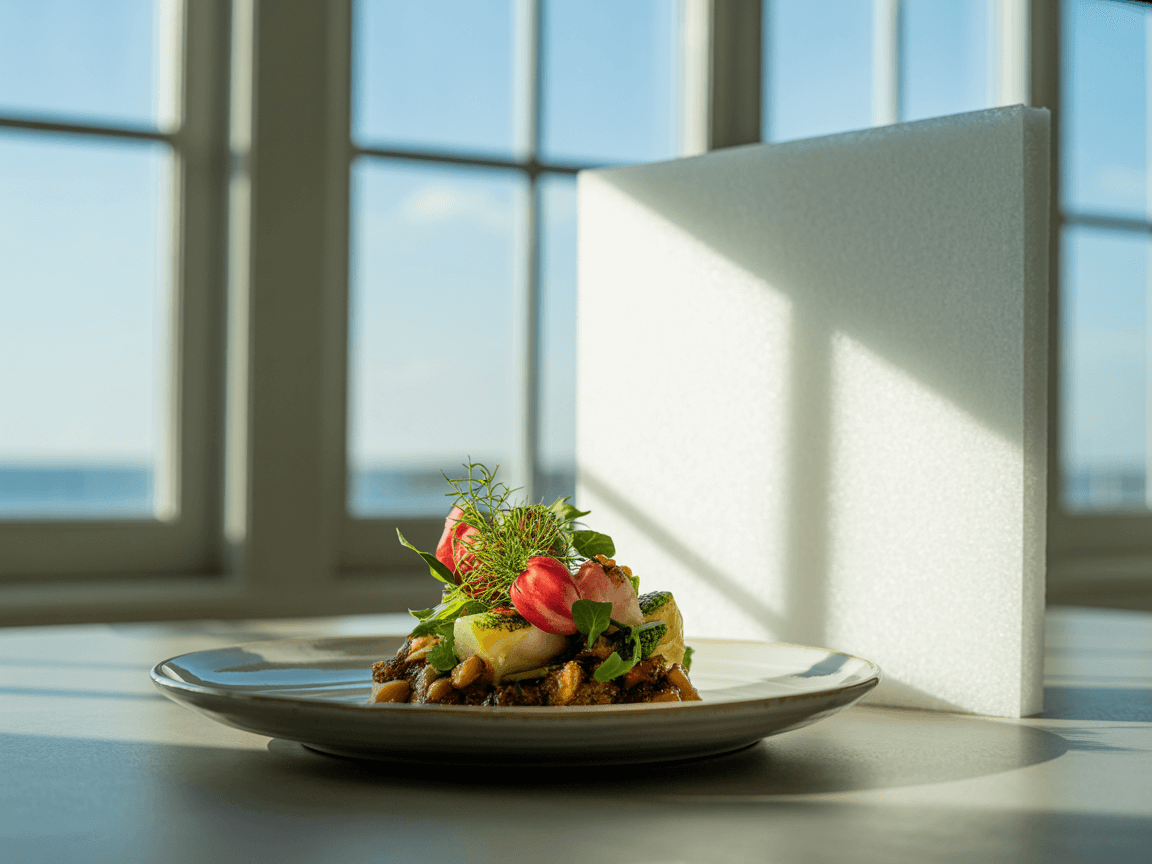
Simple window light setup for professional results
3. The Perfect Angles for Food Photography
Different dishes require different approaches. Here are the three essential iPhone food photography angles:
The 45-Degree Angle (Most Versatile)
Perfect for:
- Burgers and sandwiches
- Pasta dishes
- Salads
- Most plated meals
How to nail it:
- Hold iPhone at eye level with the table
- Angle down approximately 45 degrees
- Capture both the top and front of the dish
- Shows dimension and layers
Flat Lay (90-Degree Overhead)
Perfect for:
- Pizza
- Shared platters
- Table spreads
- Dishes with toppings
iPhone flat lay tips:
- Stand on a chair for height
- Keep iPhone perfectly parallel to table
- Watch for your shadow in the shot
- Use portrait mode for subtle depth
Eye Level (0-Degree)
Perfect for:
- Tall drinks
- Stacked foods (pancakes, burgers)
- Layered desserts
Execution tips:
- Get down to table level
- Focus on the front edge
- Let background blur naturally
- Great for showing height and layers
Three essential angles for stunning food photos
4. iPhone-Specific Features That Transform Food Photos
Portrait Mode for Food (Game Changer)
Yes, Portrait mode works on food! Here's how to use it:
1. Select Portrait mode 2. Position 2-8 feet from your dish 3. Tap to focus on the main element 4. Adjust depth effect after shooting
Best practices:
- Works best with single dishes
- Creates professional background blur
- Ideal for hero shots
Macro Mode (iPhone 13 Pro and Later)
For those detail shots that make mouths water:
- Activates automatically when very close
- Perfect for texture shots (cheese pulls, steam)
- Shows ingredients in stunning detail
- Great for garnish close-ups
Live Photos for Action
Capture the perfect moment:
- Pouring sauces
- Steam rising
- Cheese stretching
- Breaking into desserts
Pro tip: After capturing, edit and select the best frame.
5. Common iPhone Food Photography Mistakes (And How to Fix Them)
Mistake 1: Using Flash
Never use iPhone flash for food photography. It creates:
- Harsh, unappetizing shadows
- Blown-out highlights
- Flat, lifeless images
Solution: Always use natural or ambient light.
Mistake 2: Over-Editing
The "Instagram filter trap" ruins more photos than bad lighting:
- Oversaturation makes food look artificial
- Heavy filters hide natural colors
- Too much sharpening creates halos
Solution: Subtle adjustments only. Enhance, don't transform.
Mistake 3: Cluttered Backgrounds
Messy backgrounds distract from your food:
- Dirty tables
- Random objects
- Busy patterns
Solution: Keep it simple. Use clean surfaces or shallow depth of field.
Mistake 4: Wrong White Balance
Indoor lighting creates orange/yellow cast:
- Makes food look unappetizing
- Difficult to correct later
- Inconsistent across photos
Solution: Shoot near windows or manually adjust white balance.
6. Quick Editing Tips for iPhone Food Photos
You don't need expensive software. The iPhone Photos app is surprisingly powerful:
Essential Adjustments (In Order):
1. Exposure: Brighten slightly (+10 to +30) 2. Highlights: Reduce if any areas are too bright (-50 to -100) 3. Shadows: Lift to reveal detail (+30 to +60) 4. Contrast: Add punch (+10 to +20) 5. Saturation: Enhance colors subtly (+10 to +20) 6. Warmth: Add for cozy feel (+10 to +20)
Pro tip: Save your edit recipe to apply to multiple photos for consistency.
7. Advanced Techniques for Restaurant Menus
Creating Consistent Menu Photos
The biggest challenge for restaurants is maintaining visual consistency across dozens of dishes. Here's how iPhone food photography pros do it:
Setup a "Photo Station":
- Dedicate a table near a window
- Use the same plates/props
- Mark tripod position with tape
- Shoot at the same time of day
Create a Shot List:
- List all dishes needing photos
- Group by similar presentations
- Prep garnishes in advance
- Work systematically
Batch Processing for Efficiency
When shooting multiple dishes: 1. Use consistent settings 2. Apply same edit to all photos 3. Maintain similar crop ratios 4. Keep backgrounds uniform
8. When iPhone Photography Isn't Enough
Let's be honest – even with perfect technique, iPhone food photography has limitations:
Time Constraints:
- Each dish needs individual attention
- Food quality degrades quickly
- Limited by natural light hours
- Editing takes significant time
Technical Limitations:
- Can't change backgrounds easily
- Props and styling required
- Multiple angles need multiple shots
- Inconsistent results with different operators
This is where AI food photography tools become invaluable. Instead of spending hours perfecting each shot, you can:
- Transform basic iPhone photos into professional images
- Change backgrounds instantly
- Maintain perfect consistency
- Generate multiple variations in seconds
9. The FoodShot AI Advantage
Combine your iPhone photography skills with AI enhancement:
1. Capture with iPhone using techniques above 2. Upload to FoodShot AI 3. Select professional style (delivery, restaurant, marketing) 4. Generate variations in 150 seconds
Real results:
- Restaurant owners save 90% on photography costs
- Update menus in minutes, not days
- Perfect consistency across all platforms
- No technical expertise required
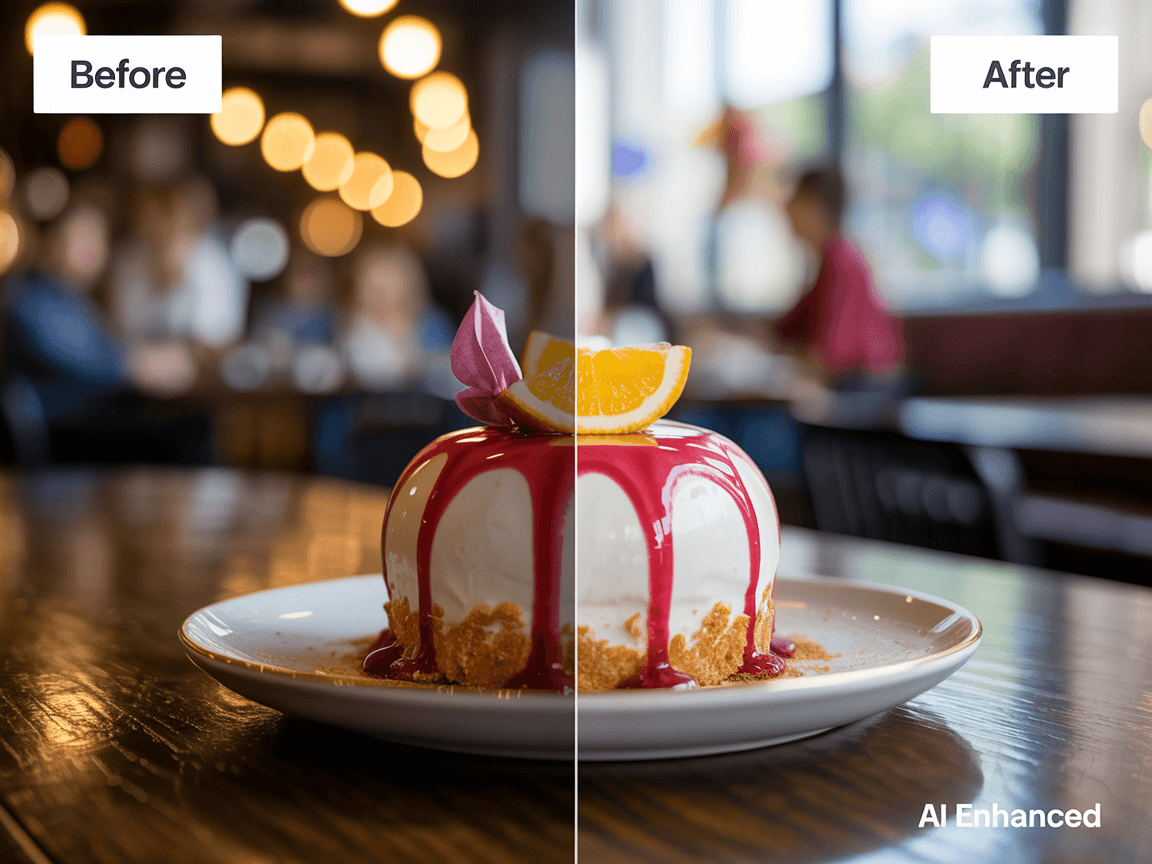
iPhone photo transformed with FoodShot AI
10. Action Plan: Start Today
Here's your step-by-step plan to improve your iPhone food photography immediately:
Week 1: Master the Basics
- Enable grid lines
- Practice focus/exposure lock
- Find your best window light
- Shoot 5 dishes using 45-degree angle
Week 2: Experiment with Features
- Try Portrait mode on single dishes
- Test macro mode for details
- Capture Live Photos of action shots
- Compare results with regular mode
Week 3: Develop Your Style
- Create consistent editing preset
- Build simple prop collection
- Establish shooting routine
- Document what works best
Week 4: Scale with AI
- Upload best shots to FoodShot AI
- Generate professional variations
- Update all marketing materials
- Track engagement improvements
Conclusion
iPhone food photography doesn't have to be complicated. With these techniques, you can capture professional-quality images that make your dishes irresistible.
Remember:
- Natural light beats expensive equipment
- Composition trumps camera specs
- Consistency matters more than perfection
- Practice makes permanent
But when you need to scale – when you have 50 dishes to shoot, multiple locations to manage, or daily specials to promote – that's when combining iPhone photography with AI enhancement becomes your secret weapon.
The best camera is the one you have with you. Your iPhone is more than capable of capturing stunning food photos. Now you have the knowledge to use it like a pro.
---
Ready to transform your iPhone food photos into professional marketing materials? Try FoodShot AI and see the difference in seconds.
