Cocktail Photography: Pro Tips for Bars & Menus (2026)
Cocktail photography is the hardest discipline in food photography. You're juggling glass, liquid, ice, garnish, and a clock that's running the second the bartender pours. Most cocktail photography tips online were written by photographers for photographers — they assume two hours, a softbox, and patience to redo the shot. Bar owners don't have any of that.
This guide is for the other side of the bar: the operator photographing their own menu, the marketing manager updating Instagram on a Tuesday, the bartender shooting a new signature on the rail between services. The tips here survive contact with a working bar.
Quick Summary: Great cocktail photos come down to three things — controlling reflections with side-back lighting, beating the melt clock with sequence (ice, then liquid, then garnish), and choosing the right angle for the glass shape. For bars shooting 20+ menu items, AI tools like FoodShot now turn a phone snap into a menu-ready cocktail photo in 90 seconds, saving the $700–$1,400 of a traditional shoot day.
Why cocktail photography is harder than food photography
A burger sits still. A steak doesn't sweat. A salad won't collapse if you take an extra two minutes adjusting the rim light. Cocktails do all three at once.
Every shot is a race against five variables happening simultaneously: ice melting, condensation building, garnishes wilting, foam dying, and the glass reflecting everything in your room. Miss any one and the cocktail photo is dead.
For a working bar this matters more than for a hobbyist photographer. You're shooting 20 to 40 menu items, they need to look consistent, you'll redo the menu every season, and nobody's paying you to spend a shoot day on the espresso martini. According to the National Restaurant Association's 2026 State of the Industry report, operators are facing the tightest margin environment in years — making the math on professional cocktail shoots harder every quarter.
So the question isn't "how do I get one perfect cocktail photo?" It's "how do I get a whole menu of drink photos shot in an afternoon, without it looking like 40 different photos taken by 40 different people?"
The 5 unique challenges of cocktail photography
Every problem you'll hit fits in one of these five buckets. Solve them in this order and the rest of the shoot becomes mechanical.
1. Reflections on the glass
Glass reflects everything — ceiling lights, the window across the room, the camera, your own face leaning in. A cocktail glass under bad lighting looks like a fisheye lens pointed at your kitchen.
The single most effective fix is to move your main light behind and slightly above the drink — the 10 to 11 o'clock position if your camera is at 6 o'clock. Side-back lighting eliminates roughly 80% of front reflections in one move. Pure backlight kills almost all of them but flattens the drink, so the 10-11 o'clock compromise is the bar workhorse.
Place a black foam-core board (a "flag") between yourself and the glass to absorb stray reflections. A $4 piece works as well as a $200 studio flag.
One tip most guides miss: don't eliminate every reflection. A glass with zero highlights looks fake. You want a thin, controlled rim of light hugging the edge — that tells the viewer it's a real glass full of real liquid.
Finally, polish the glass with a microfiber cloth and a drop of isopropyl alcohol before the pour. Fingerprints under raking light look like fungus.
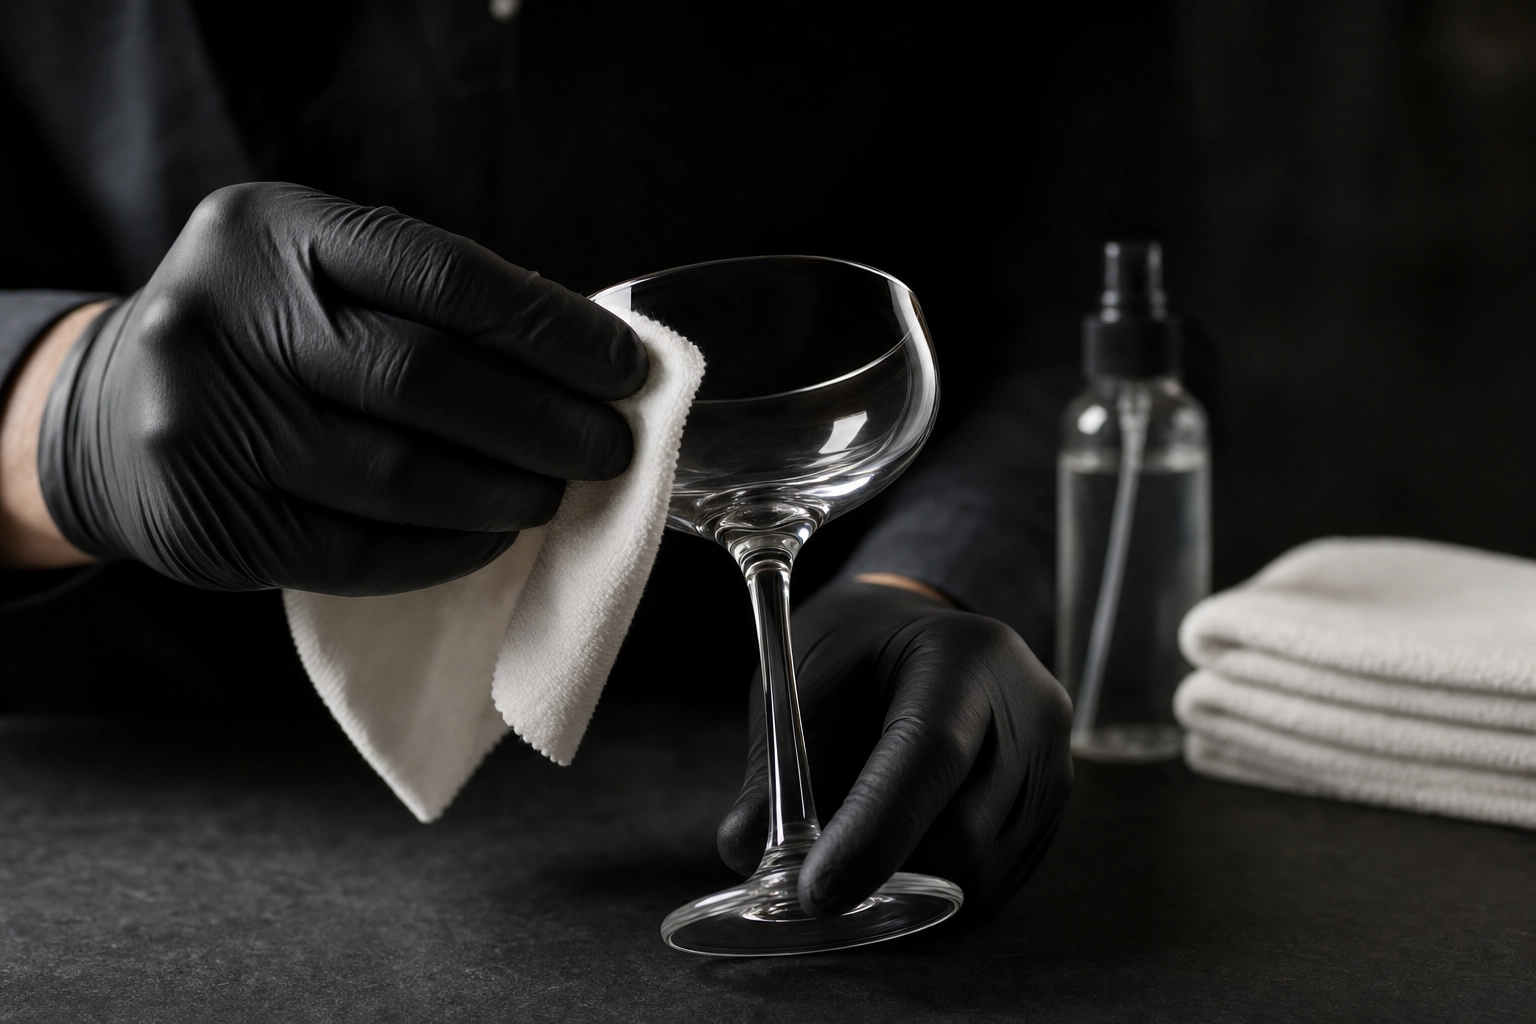 Gloved hands polishing a crystal coupe glass with a microfiber cloth before a cocktail shoot — controlling reflections and fingerprints in cocktail photography
2. Condensation that disappears (or won't form)
Condensation says "this is cold and refreshing." Lose it and a margarita looks like fruit punch. Get too much and the glass looks like it's been sitting on the bar for ten minutes.
Natural method: freeze the glass for 20–30 minutes before pour. A frosted glass forms a perfect bloom within a minute, holding about two minutes before it streaks.
The pro trick is a 50/50 mix of food-grade glycerin and filtered water in a fine-mist spray bottle. Glycerin slows evaporation, so beads hold for 20+ minutes. Spray from 12 to 18 inches — closer gives streaks, farther gives nothing. Glycerin runs about $6 at any drugstore.
Wear nitrile gloves. Every fingerprint pulls water away from condensation and shows as a smudge — the single most common reason home-shot cocktail photos look amateur.
3. Ice that melts during the shot
The melt clock by format:
- Crushed/pebble (mojito, julep): ~90 seconds before slush
- Standard cubes (highball, gin & tonic): 2–3 minutes
- Large clear cube (old fashioned, negroni): 3–5 minutes
- Sphere ice (lowball whiskey): 4–6 minutes
For editorial clear ice, make it ahead. "Directional freezing" works in any bar: fill an insulated cooler (lid off), put it in a chest freezer for 24–36 hours. Water freezes top-down, pushing air to the bottom. Cut off the cloudy third for bar-grade clear ice.
For repeated takes, acrylic fake ice ($15–$30/set) won't move during a 30-minute setup. Most commercial cocktail photography in ad campaigns is shot with fake ice — the clarity is too consistent to be real.
Sequence matters: lock composition with ice in place, then pour, then drop the garnish.
4. Garnishes that wilt in real time
Mint is the most punishing garnish. A sprig droops within 90 seconds. Keep sprigs floating in ice water until the second you place them — prep three or four backups per shot.
Citrus peels lose oil expression in two minutes. The moment a bartender expresses a peel, volatile oils fire on the surface. Catch that with a burst of five to ten frames immediately.
Foam (espresso martini, whiskey sour, ramos gin fizz) is the worst timer in the business. Dense crema dies in 30 to 45 seconds. For these drinks, the camera fires before you reach for anything else.
Rule for any bar shoot: never improvise. Pre-stage extras for every garnish that could fail.
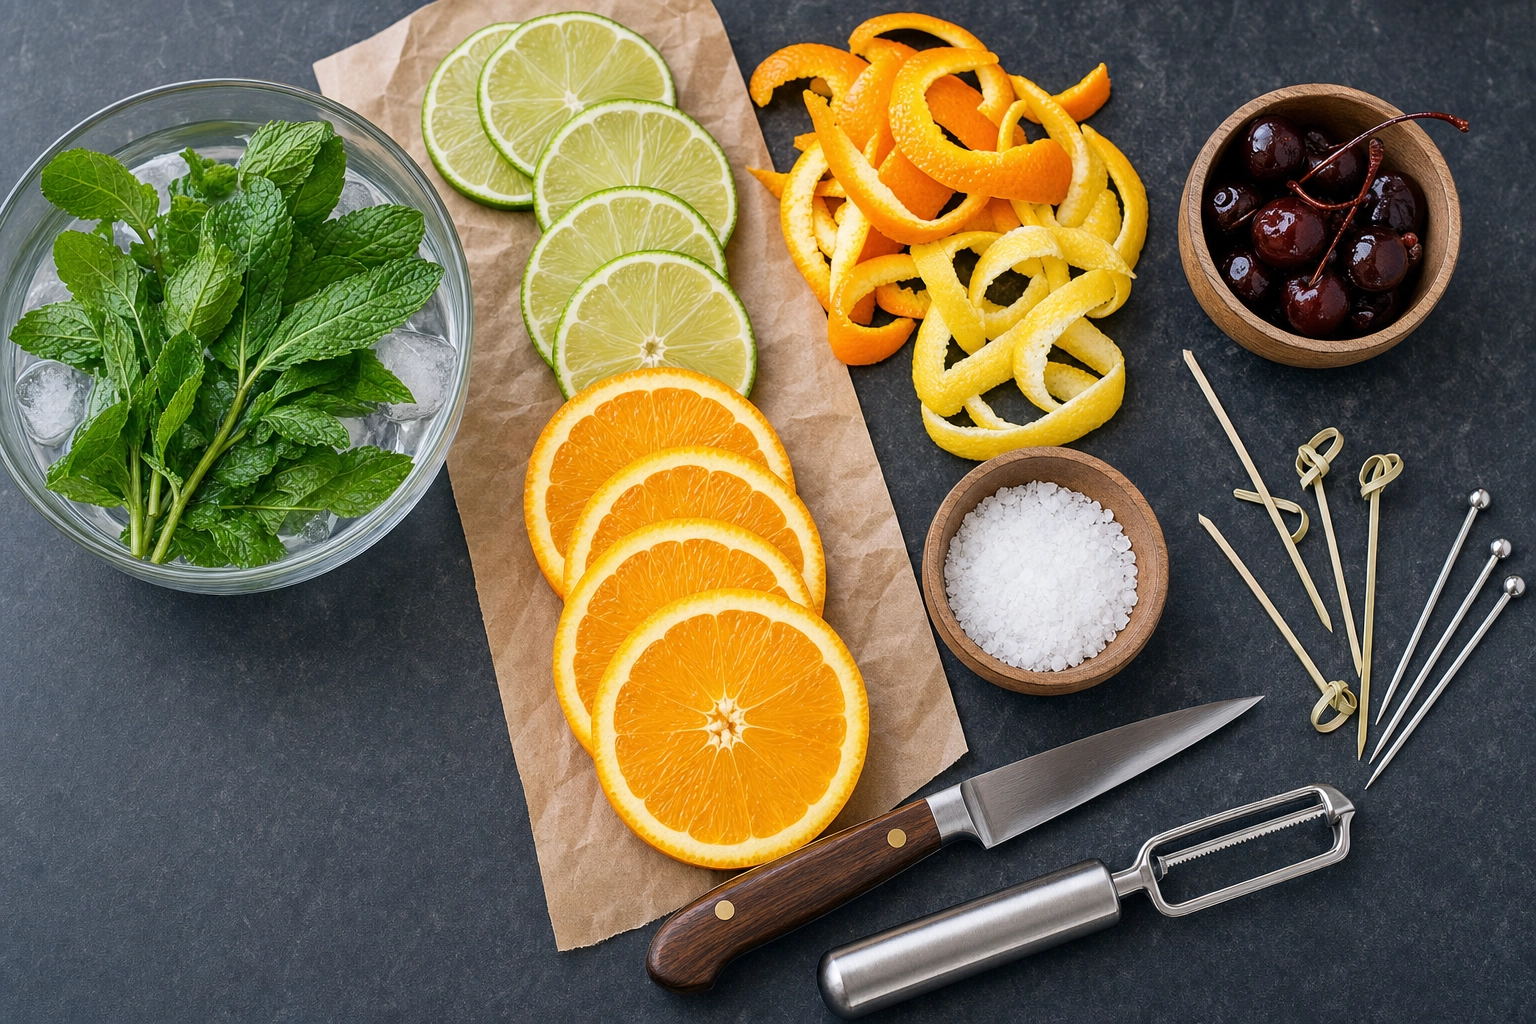 Overhead flat-lay of prepared cocktail garnishes — mint sprigs in ice water, citrus wheels, peels, and cherries staged for a bar menu photo shoot
5. Glass distortion that warps the liquid
A curved glass works like a lens. Anything behind it gets stretched, inverted, or doubled. The worst distortion shows in conical glasses — martini, coupe, Nick & Nora.
Three rules:
- Stemmed and conical glasses photograph best at table level, dead straight on (0° tilt). Move one degree off and the V-shape distorts.
- Use a longer focal length. A phone's main lens (24mm equivalent) bends straight lines. The 2x or 3x telephoto on a recent iPhone or Pixel (48–77mm) gives a much truer glass shape. Real cameras: 85mm or longer.
- Move the camera back, not closer. Crowding the glass with a wide lens stretches the front rim into an oval.
Three lighting setups for cocktail photography in any bar
Pick one and master it. Trying all three on your first menu shoot is how you end up with 12 inconsistent cocktail photos and a missed deadline.
Setup 1: Natural side-back light (cheapest, best for daytime menus)
Place the drink 2 to 3 feet from a north- or east-facing window. North windows give the softest, most consistent light. East windows work until about 10 a.m.
Position a white foam-core board on the opposite side to bounce light into the shadow side. Without it, half the glass goes black. With it, shadows fill to about 50% and the drink reads dimensional.
If midday sun is too harsh, tape parchment paper to the window or hang a sheer curtain. Both diffuse for about $5.
Best for: brunch cocktails, daytime social content, cafés with cocktail programs.
Setup 2: Artificial overhead (most consistent, best for evening menus)
A single LED softbox at the 11 o'clock position, 18 to 24 inches above the drink, angled down at 45°. Use a continuous LED rated at 5600K (daylight balanced) — no flash needed.
On the opposite side, a black v-flag deepens the shadow side. That's where the "moody bar" look comes from.
Budget kit: a 60cm LED softbox runs $80 to $150 on Amazon. Add a stand, a flag, and gaffer tape, and you're at $120 to $300 total — one decent shoot's worth of professional cost, amortized forever.
Best for: speakeasies, evening menus, brand consistency across multi-location bars.
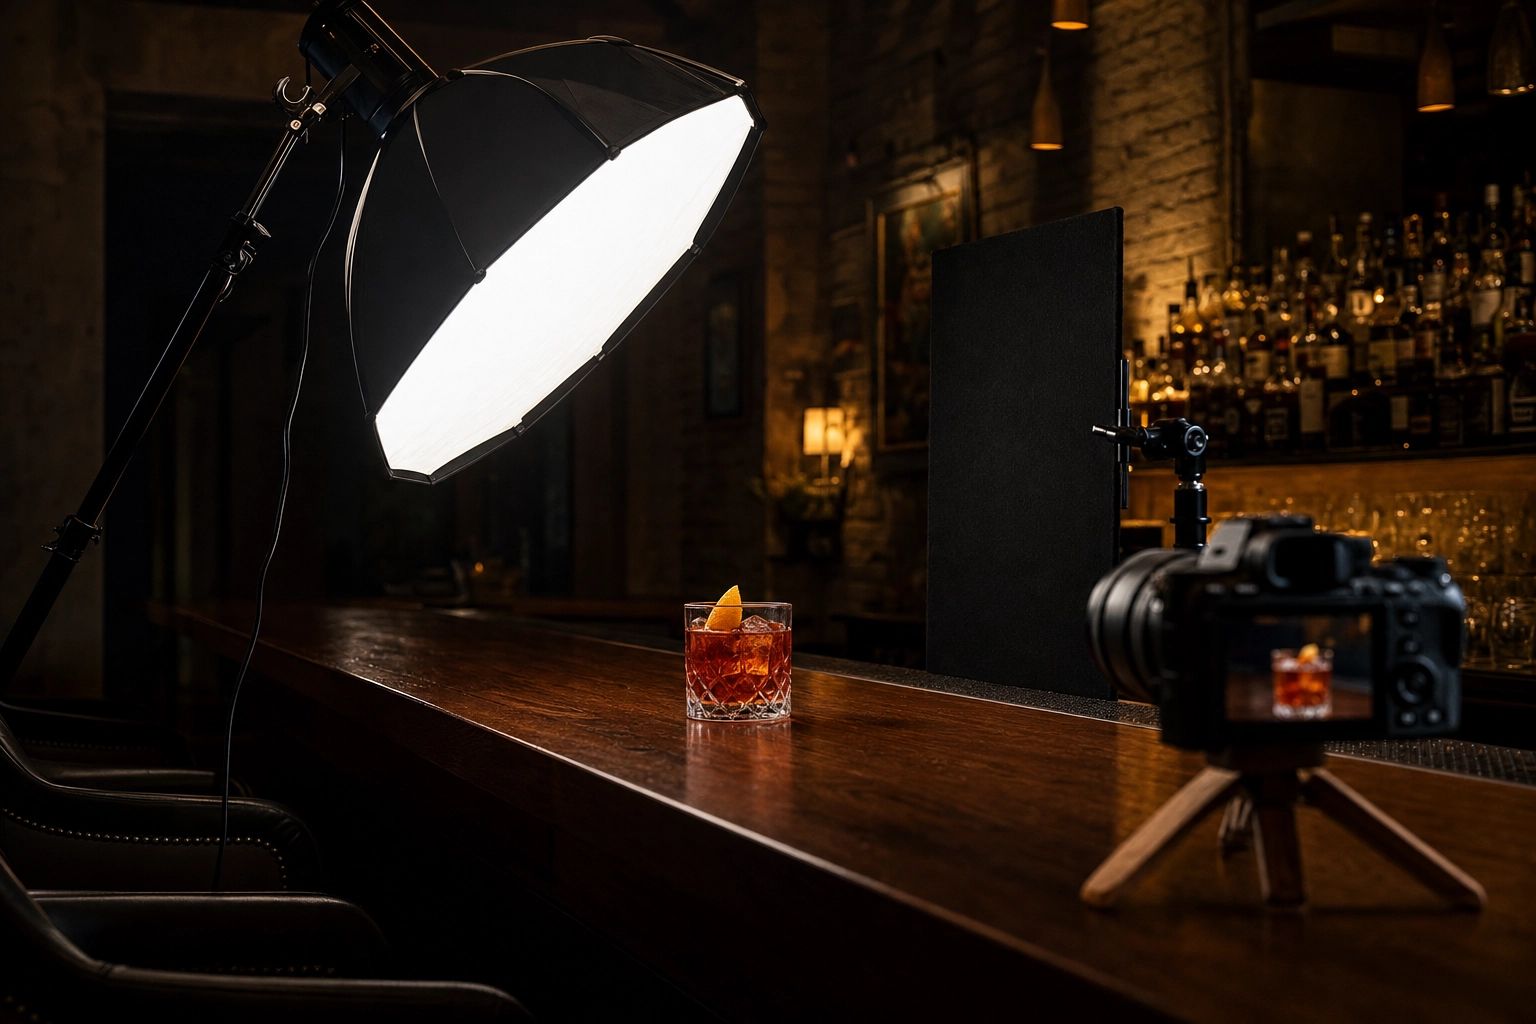 Behind-the-scenes cocktail photography lighting setup with a single LED softbox, black flag, and a negroni on a dark walnut bar — bar menu shoot
Setup 3: Dual-source (editorial polish, best for hero shots)
Two lights: a key softbox at 11 o'clock about 3 feet from the drink, and a smaller LED panel directly behind the glass, slightly elevated, at half the key's power.
The back light is what makes editorial cocktail photography look the way it does. It ignites the translucency of the liquid — gin, vodka, light rum drinks come alive — and shows the inside structure of the ice. Without backlight, ice reads as opaque white. With it, crystal.
Cost: $250 to $600 for a two-light kit. Worth it for press kits, spirit brand work, or hero shots.
Glassware tricks the pros never talk about
A few operating shortcuts that don't make it into most cocktail photography tips lists:
Anti-fog spray. The same drugstore spray people use on eyeglasses ($7) prevents surface fog when a cold glass meets warm room air. Wipe a thin coat on the outside.
Shoot the empty glass first to lock composition. Set camera, frame, focus, exposure — all on an empty glass in final position. When the bartender pours, you just press the shutter.
Stand-in cocktails. Cold-brewed tea for whiskey. Watered cranberry juice for cosmos and negronis. Plain water for vodka. Grenadine + soda for tequila sunrise. Get lighting and props dialed using stand-ins, then have the bartender make the real drink the moment before you shoot.
Tape an X on the surface. Gaffer tape under the base marks the exact spot. Knock the glass off-mark? Reset to the X.
Source glassware from thrift stores. Vintage coupes, etched lowballs, and cut-glass tumblers run $1 to $3 each at Goodwill or estate sales. They catch light better than mass-market bar glasses.
Best angles by cocktail type
The shape of the glass dictates the angle, not personal preference.
Stemmed and coupe glasses → straight-on, table level
Martini, coupe, Nick & Nora, champagne flute, sour glass.
Camera at the liquid line, dead level (0° tilt). Shows the full stem, the geometric V or U of the bowl, and the liquid surface as a clean horizontal line. This is the angle for AI cocktail photography presets tagged "classic" or "editorial."
Highball and longdrinks → 30 to 45° angle
Mojito, paloma, gin & tonic, Aperol spritz, Tom Collins, Dark 'n Stormy.
Tilt the camera down 30 to 45° so you see the rim, the ice column, the garnish on top, and a sliver of the base prop. This is also how customers see the drink when it lands in front of them.
Layered cocktails → pure side, 0° tilt
Tequila sunrise, mai tai, Pousse-Café, B-52.
Camera at the exact level of the liquid bands, dead level. Any tilt and the layers compress. Backlight is mandatory — without it the colors blend into mud.
Lowball and rocks → 30° or overhead flat lay
Old fashioned, negroni, sazerac, whiskey neat, boulevardier.
A 30° tilt shows the cube and the oil sheen on top — the money shot for any whiskey-forward drink. The flat-lay overhead is the alternative: shoot directly down for a graphic menu-grid look.
The 8-cocktail bar photography playbook
A per-drink cheat sheet with the gotchas for each.
Martini
Coupe or V-glass, frozen 20 minutes pre-shoot. Olive on a pick or lemon twist. Camera straight on, table level. Dual-source lighting with rim backlight. Gotcha: V-glasses distort badly at any angle except 0°.
Old fashioned
Lowball, 2-inch clear ice cube, expressed orange peel. 30° angle. Side-back key light makes bourbon's amber glow. Gotcha: dark backgrounds eat the classic Old Fashioned. Use mid-tone walnut or leather instead of pure black.
Margarita
Coupe or rocks, kosher salt rim, lime wheel. 45° angle. Side-back light makes salt crystals sparkle. Gotcha: salt slides into the liquid within 60 seconds.
Mojito
Highball, crushed ice, lime wheel, fresh mint sprig (only the topper sprig should be visible). 45° angle. Bright daylight key pops the green. Gotcha: mint wilt clock is 90 seconds.
Espresso martini
Coupe, dense crema foam, exactly three espresso beans (the trinity is iconic). Camera straight on, table level. Gotcha: foam collapse in 30 to 45 seconds — the only cocktail where you shoot before anything else is adjusted.
Negroni
Lowball, large clear cube, expressed orange peel. 30° angle. Equal red-amber-orange tones. Gotcha: the classic Negroni's oil sheen on top is gone two minutes after the peel express.
Aperol spritz
Large wine glass (balloon, not flute), orange wheel, green olive optional. 45° angle. Gotcha: carbonation flat in 60 seconds. Top with prosecco last.
Gin & tonic
Copa de balón glass, large ice, juniper berries, citrus wedge, optional rosemary. 45° angle. Backlight mandatory to show tonic clarity and bubbles. Gotcha: garnish hierarchy — tall botanical back, citrus front.
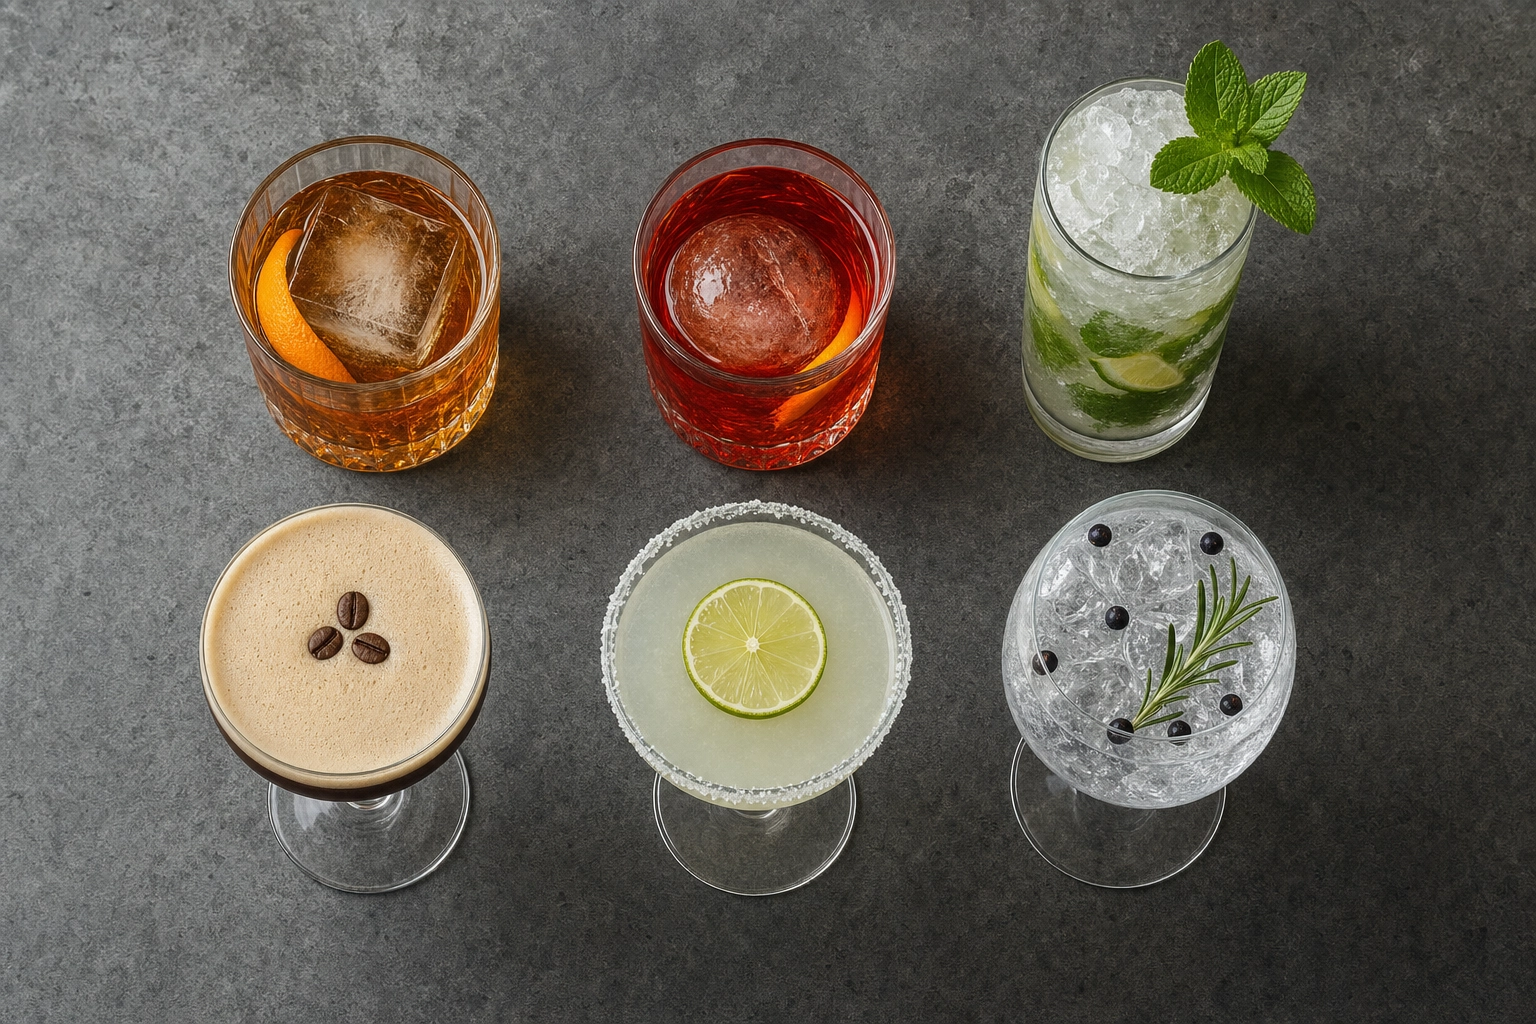 Top-down flat-lay grid of six classic cocktails for a menu — old fashioned, negroni, mojito, espresso martini, margarita, gin and tonic
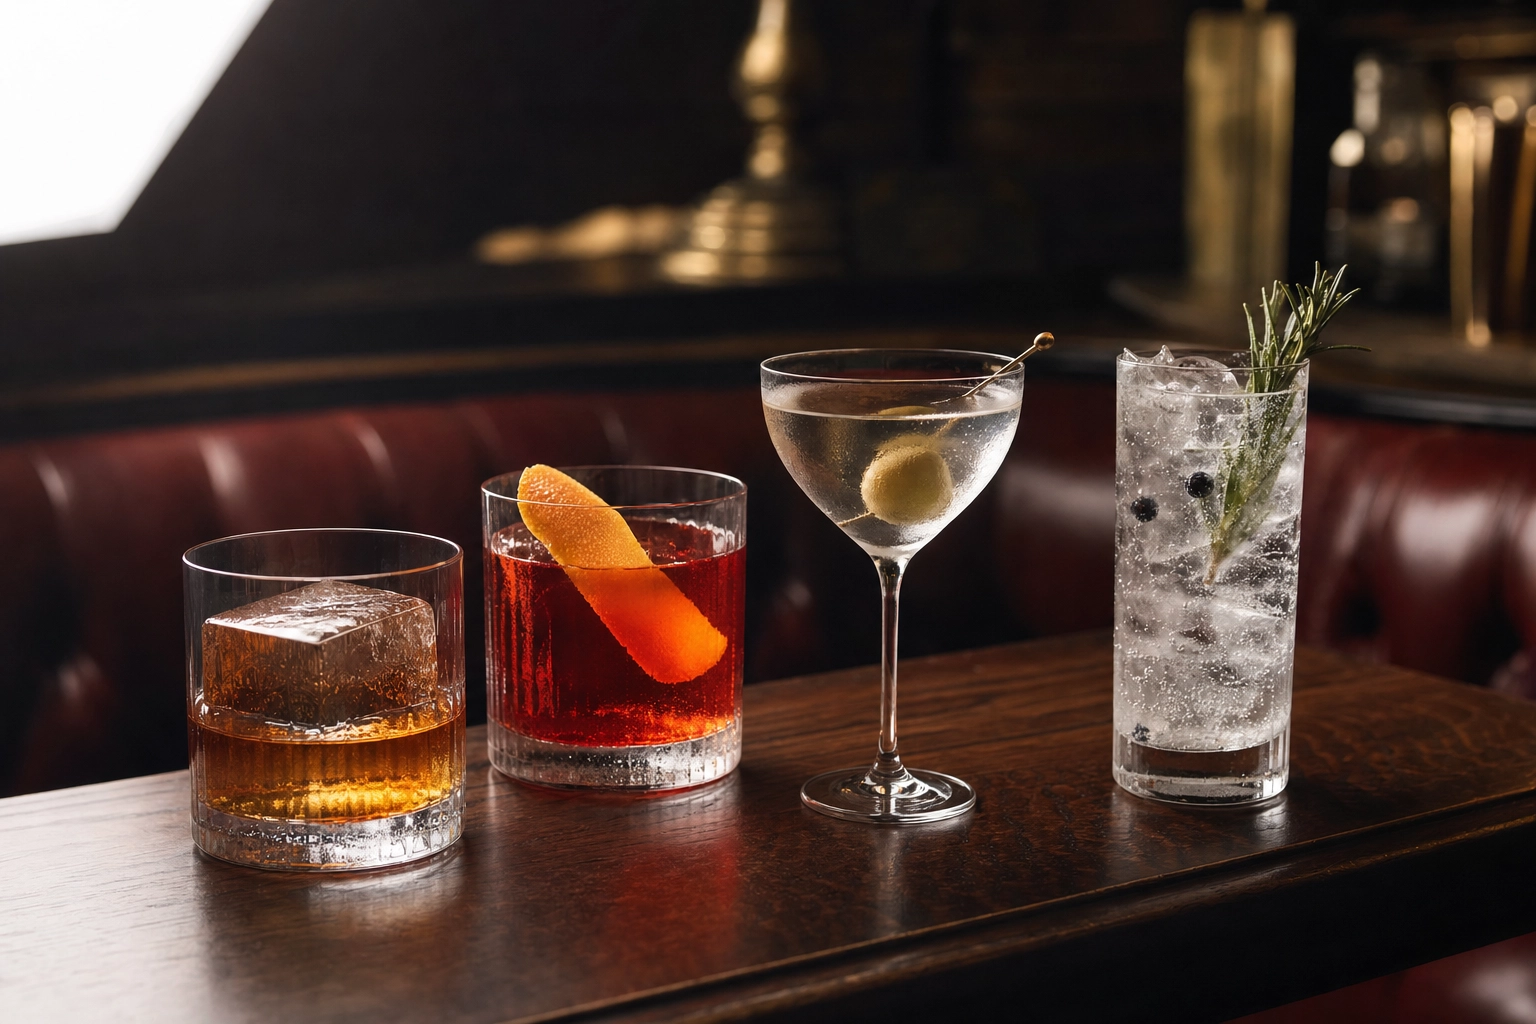
Editing cocktail photos for jewel-tone colors
Cocktails live in a jewel-tone palette: amber (whiskey), ruby (negroni, cosmo), emerald (basil drinks, midori), sapphire (gin-based with blue curaçao), citrine (Aperol, paloma), garnet (Manhattan, boulevardier). Editing should make those colors true and rich without going neon.
Step 1: White balance. Most bars are lit at 2,800 to 3,200K — a warm amber cast that makes every cocktail photo look like Instagram in 2015. Pull the temperature toward cool until the color reads true. Target 4,000 to 4,500K. A white napkin in the frame should read white, not yellow.
Step 2: Exposure and contrast. Pull highlights down 20 to 30 to recover detail on glass rim and ice. Lift shadows 15 to 25 to keep depth without going flat. Push contrast +10 last.
Step 3: Vibrance over saturation. Vibrance boosts undersaturated colors without blowing out already-saturated ones. Try vibrance +15 to +25, saturation +5 to +10. Never reverse the ratio.
Step 4: HSL panel for the jewel tones. This is where pros separate from amateurs. The Adobe Lightroom HSL panel lets you tune oranges and reds independently — a negroni's orange should read warm, not red. Greens shift toward emerald, not lime. Pull purples slightly toward magenta if you've shot a cosmo.
Step 5: Clarity for ice texture. Clarity +10 to +15 pulls out the crystal structure in ice without making the image look HDR. Higher than +20 and you're in "phone filter" territory.
Step 6: Selective sharpening on the rim. Brush sharpness +20 to +30 over just the rim of the glass.
A whole edit should take 90 seconds per cocktail photo once you have a preset dialed.
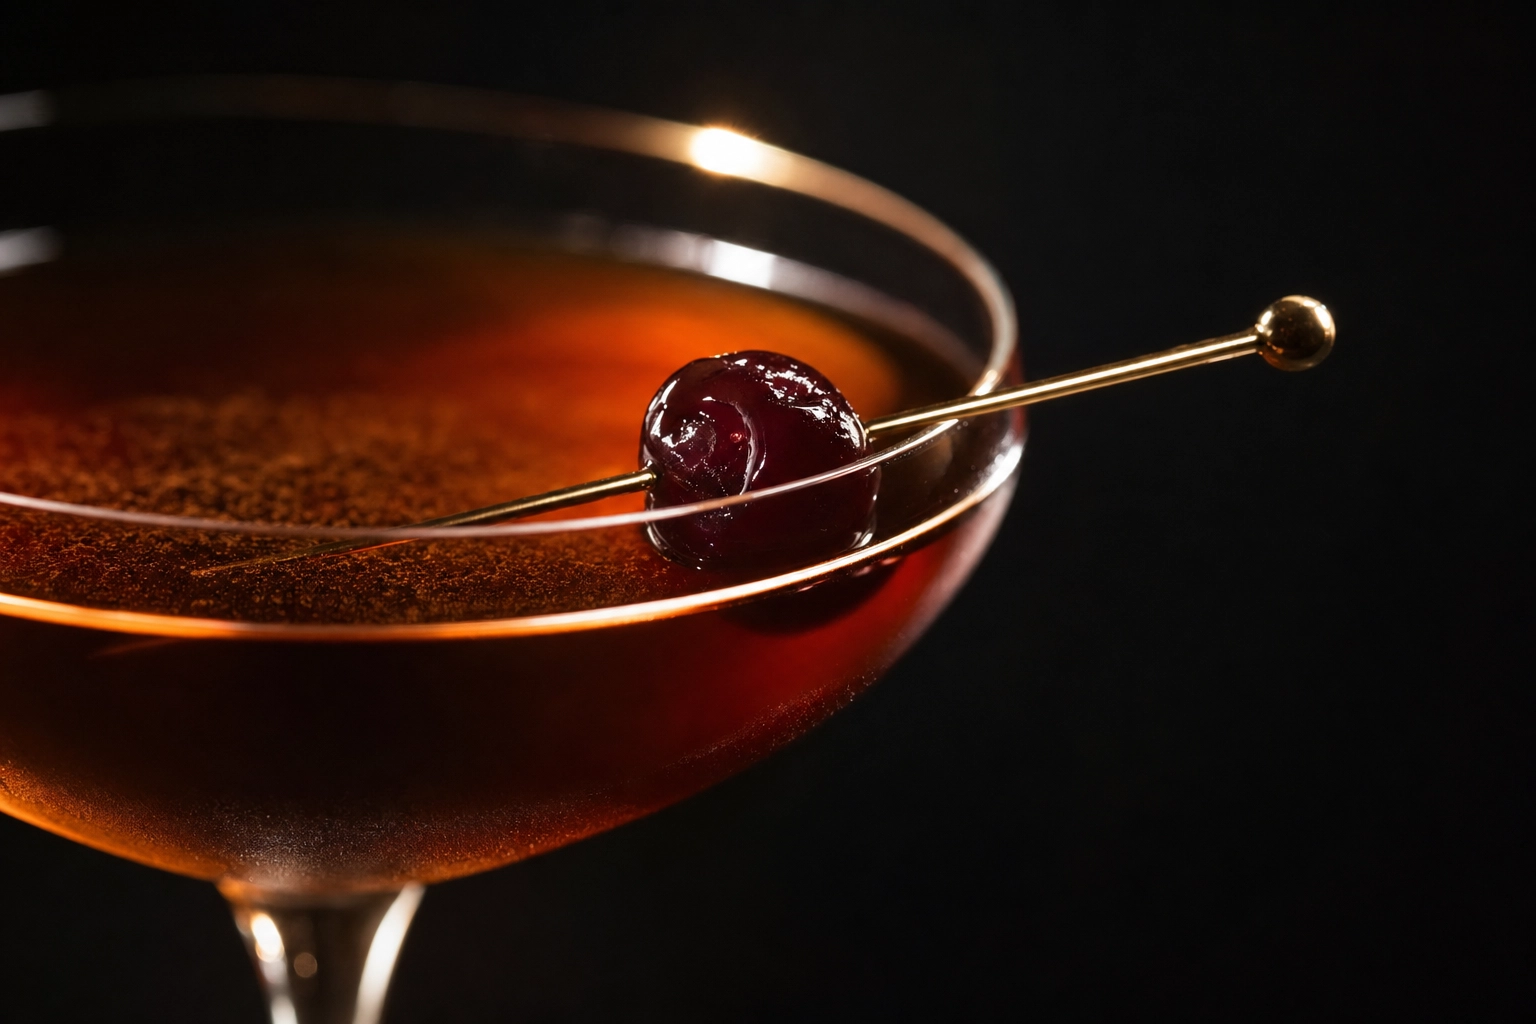 Macro close-up of a Manhattan cocktail showing jewel-tone amber color, backlit rim highlight, and brandied cherry — color editing example
The AI shortcut: when shooting cocktails isn't worth the hours
Honest math for a working bar: 30 menu items, five minutes setup per shot, three takes per drink because of melt and reflection issues, plus reshoots when one in four come out unusable. That's eight to twelve hours of real shoot time for a single menu refresh — multiplied by every seasonal turn.
Or hire a commercial food photographer. Industry rates run $700 to $1,400 for a half-day covering 5 to 15 drinks. A full menu shoot with a food stylist climbs to $1,500 to $3,500. Most independent bars don't do this more than once every couple of years.
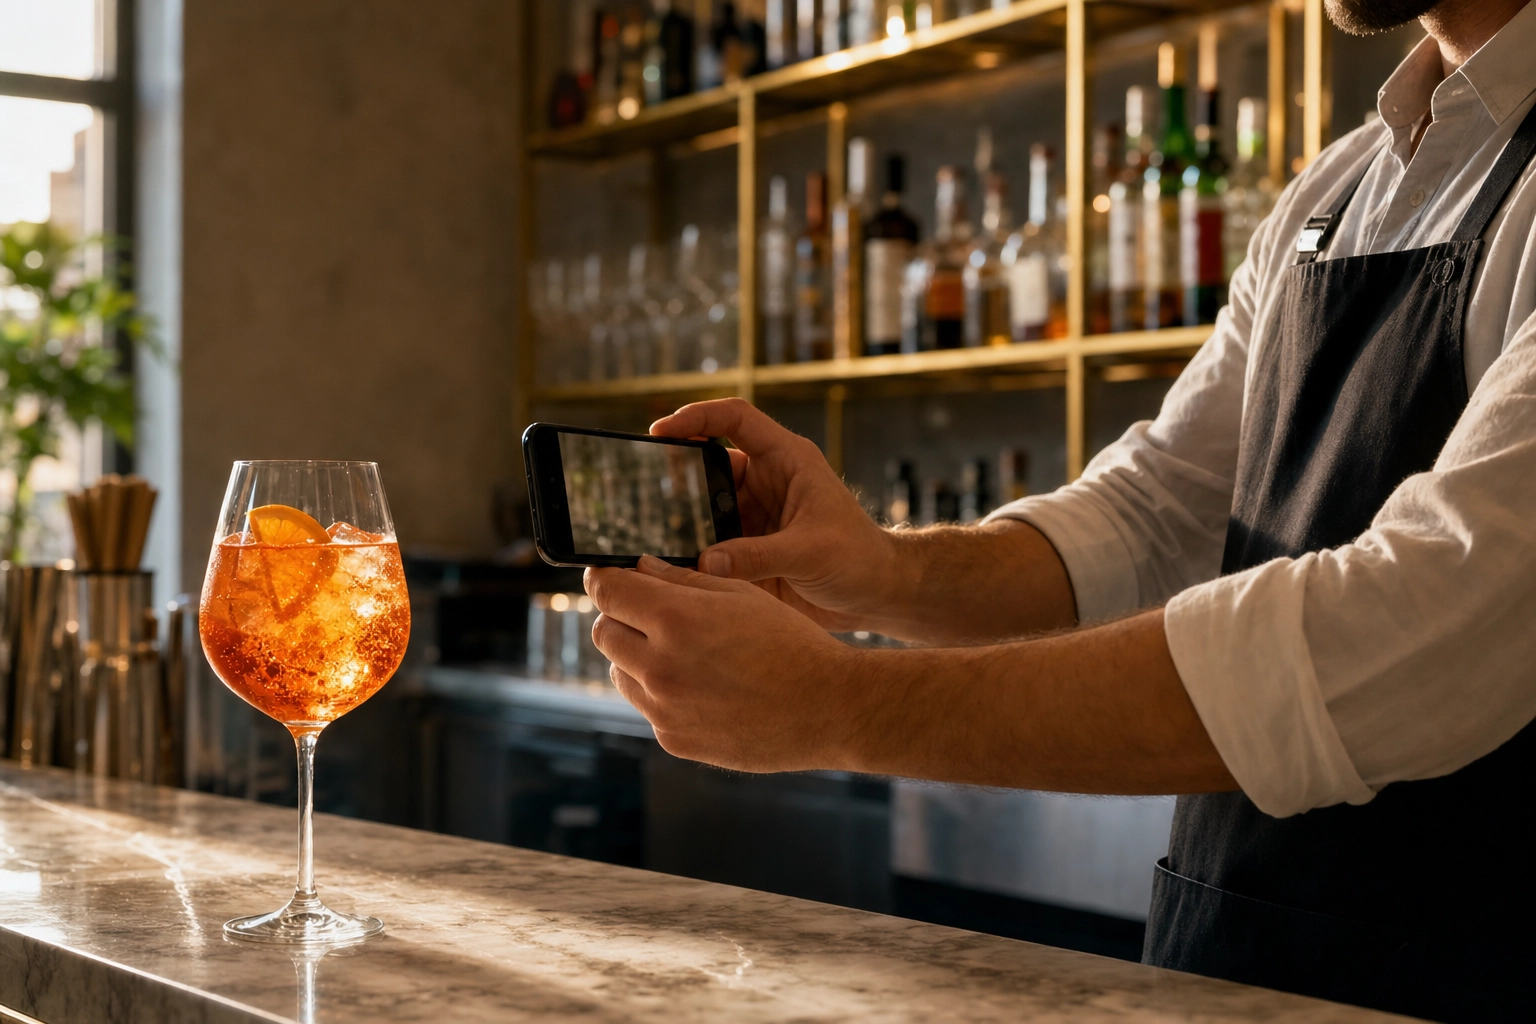 Bar manager photographing an Aperol spritz on a marble bar top with a smartphone — phone-based bar menu photography workflow
This is where AI tools have changed the calculation. FoodShot's cocktail photography styles are tuned for the exact problems above: ice clarity, condensation, the moody register craft bars want, garnish detail, glassware sheen. You shoot a real cocktail with your phone, upload, pick a Bar/Lounge style — output lands in 90 seconds.
For a bar and lounge menu shoot at scale, that turns an eight-hour photo day into an afternoon of phone shots plus a coffee while the AI runs. The Starter plan ($9/month yearly) gives 25 cocktail photos a month — enough for a full menu refresh. The Business plan is $27/month for 100 images. See the FoodShot pricing page.
Where multi-location bars get the biggest lift: My Styles lets you upload reference photos of your house aesthetic, and every subsequent cocktail comes back in that look. Same trick works for wine photography programs and craft beer photography.
The honest limitation: AI tools need a real photo input. They can't conjure a drink from a text prompt and have it match reality. The AI handles studio polish — lighting, reflections, moody background, menu-ready finish. You still make the cocktail and shoot a phone snap.
Still hire a human photographer for: signature cocktail launch press kits, a cocktail book, or a flagship opening. For everyday menu, social rotation, and delivery app listings — including fine dining menus — AI handles it cheaper and faster. For inspiration before you shoot, Pinterest-style cocktail moodboards can match any aesthetic.
Frequently Asked Questions
What lighting is best for cocktail photography?
Side-back natural window light is the easiest start — drink 2 to 3 feet from a north-facing window with a white foam-core fill opposite. For consistency across a whole menu, switch to a single LED softbox at the 11 o'clock position with a black flag opposite. Both setups eliminate roughly 80% of the reflections that plague beginner cocktail photos.
How do you avoid reflections on cocktail glasses?
Move the main light behind and slightly to the side of the drink. Place a black foam-core flag between yourself and the glass to absorb the photographer's reflection. Polish the glass exterior with a microfiber cloth and isopropyl alcohol before pouring. Keep a thin controlled rim of highlight on the edge — eliminating every reflection makes the glass look fake.
What's the best angle for cocktail photos?
Depends on the glass shape. Stemmed and coupe glasses (martini, Nick & Nora) work best straight-on at table level. Highball and longdrinks (mojito, gin & tonic, spritz) want a 30 to 45° angle. Layered cocktails like a tequila sunrise need a pure side profile at 0° tilt. Lowball drinks (old fashioned, negroni) look best at 30° or shot overhead as a flat lay.
Can I shoot menu cocktail photos with just my phone?
Yes. Modern phones have enough sensor and dynamic range for menu-quality cocktail photos. Use the 2x or 3x telephoto (not the main wide lens) to avoid barrel distortion of curved glassware. Lock exposure and focus on the rim, and shoot RAW or ProRAW if your phone supports it.
How long do I have before a cocktail starts looking bad?
Foam-topped drinks like espresso martinis collapse in 30 to 45 seconds. Mojito mint droops within 90 seconds. Highball and spritz carbonation flat in 60 seconds. Crushed ice slumps in 90 seconds. Standard cubes hold 2 to 3 minutes. A 2-inch large clear cube gives 3 to 5 minutes. Shoot in sequence: empty glass, ice, pour, garnish.
How much does professional cocktail photography cost?
Industry rates run $700 to $1,400 per session for 5 to 15 drinks shot in a half-day. Adding a food stylist pushes the cost to $1,500 to $3,500. Higher-end editorial work for spirit brand campaigns starts at $5,000 per day. AI alternatives like FoodShot start at $9/month for 25 menu-ready cocktail images — roughly a 95% cost reduction.
Can AI generate cocktail photos for my bar's menu?
Yes. AI cocktail photography tools transform a real phone photo of your drink into a studio-quality, menu-ready image. You shoot the cocktail with your phone, upload, choose a style preset (Bar/Lounge, Speakeasy, Editorial), and the AI handles the lighting, reflections, condensation, and moody background. The limitation: AI needs a real photo input — it can't create a drink from a text description and have it match what you serve.
Cocktail photos that earn their place on your menu
The entire craft of cocktail photography comes down to a workflow you can run in any bar:
- Light from behind and to the side — kills reflections, makes the liquid glow.
- Sequence the build — empty glass first, ice, pour, garnish, shoot immediately.
- Match the angle to the glass — straight-on for stemmed, 45° for highball, side-on for layered, 30° or flat for rocks.
- Beat the clocks — foam at 30 seconds, mint at 90, bubbles at a minute, big ice at five.
- Edit for jewel tones — cool the white balance, recover highlights, vibrance over saturation, sculpt the HSL.
If you only remember one of these cocktail photography tips, remember the side-back lighting position. It solves more cocktail photo problems than any other single technique.
And if you're running a 30-item menu that turns four times a year, the math is what it is — at some point the eight-hour shoot day stops making sense. Try a real phone photo of your house old fashioned through FoodShot's cocktail styles on the free plan, watch what comes back in 90 seconds, and decide what's worth your team's time. The first three are free — no shoot day required.
