Food Photography for Restaurant Menus: A Complete Guide
Food photography for a restaurant menu is one of the highest-ROI investments you can make. Your menu photos are doing one of two things right now: driving orders or losing them. There's no neutral ground.
A text-only menu listing "Grilled Salmon with Lemon Butter Sauce" asks diners to imagine what they're getting. A sharp, well-lit photograph of that salmon — glistening butter, charred edges, a sprig of dill — removes the guesswork and opens their wallet.
This complete guide to food photography for restaurant menus walks you through everything: which dishes to shoot first, how to set up lighting, exact photo specs for every platform, and a practical workflow for photographing all 50+ items without losing your mind. Whether you're a 20-seat café or a multi-location restaurant chain, you'll find actionable steps you can use this week.
Quick Summary: Restaurant menu photography increases sales by 20–45% and boosts online ordering conversions by 25%+. You don't need a $5,000 professional photoshoot — a smartphone, natural light, and an AI tool like FoodShot can produce a full professional menu in about three days for under $100. This guide gives you the complete playbook.
Why Menu Photos Directly Impact Your Revenue
This isn't about making your restaurant menu look pretty. It's about money.
According to a 2025 Toast survey reported by Tablein, 84% of diners want to see photos of food and drinks before choosing a restaurant. And 65% say those visuals heavily influence where they decide to eat. When your menu has photos, you're not decorating — you're selling.
The numbers back this up across every channel:
- Online ordering conversions jump 25%+ when menus include food photography instead of text descriptions alone
- Sales increase 20–45% for restaurants using professional-quality menu photography
- 82% of people will order a dish based purely on how it looks in a photo — even if they hadn't planned to
For delivery apps, the impact is even more dramatic. Diners scrolling through Uber Eats or DoorDash can't smell your kitchen or see your plating. Your photo is your entire pitch. Restaurants without menu images on these platforms are essentially invisible.
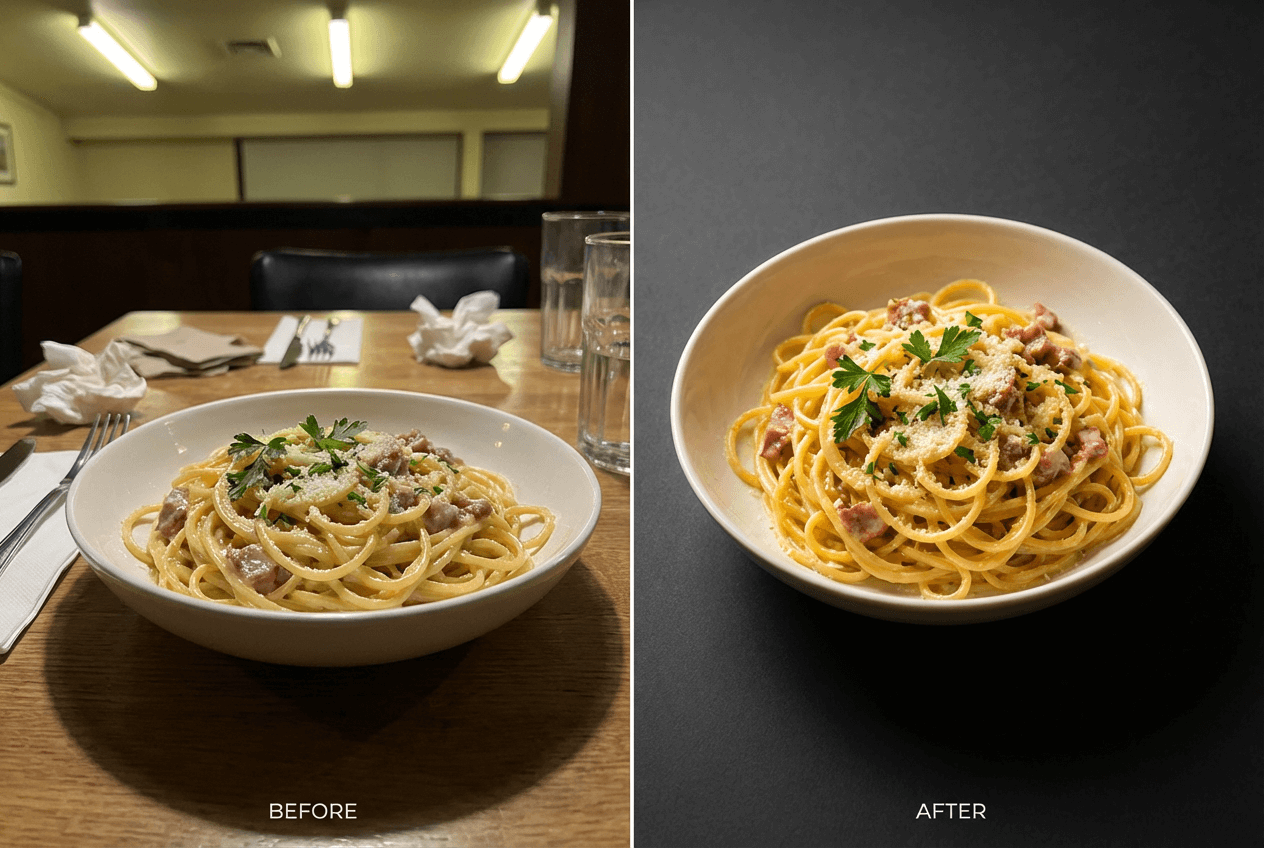 Before and after comparison of amateur versus professional restaurant menu food photography transformation
The bottom line: every item on your menu that doesn't have a professional photo is leaving revenue on the table. Good food photography doesn't just help — it sells.
Planning Your Restaurant Menu Photoshoot
Before you pick up a camera (or phone), you need a plan. Shooting 50 menu items without preparation is how you end up with inconsistent lighting, forgotten dishes, and a two-week editing nightmare. A little structure goes a long way.
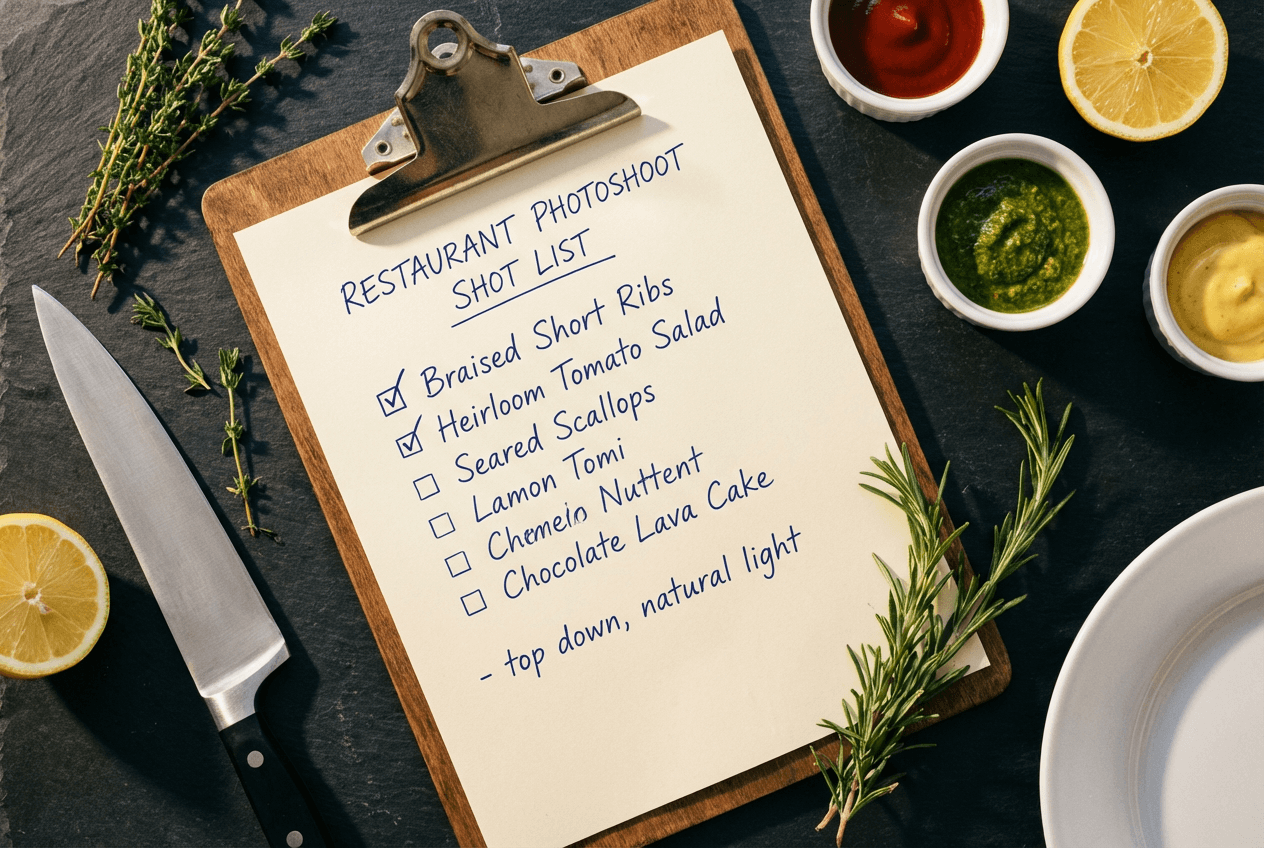 Menu photoshoot planning with handwritten shot list on clipboard surrounded by fresh ingredients on dark slate surface
Which Dishes to Prioritize
Not all dishes are created equal when it comes to food photography ROI. Start with these categories, in order:
- Your top 10 sellers. These photos will be seen the most and directly impact the most revenue. Get these right first.
- High-margin items. That $18 appetizer with 70% margins? A great photo can help nudge diners from the $12 option to this one. Visual upselling is real.
- Signature dishes. Whatever makes your restaurant yours — the dish people drive across town for — needs the best possible photo.
- Delivery-first items. If you're on Uber Eats or DoorDash, prioritize items that photograph well and travel well. Check our delivery app photo guide for platform-specific tips.
- Everything else. Round out the menu once your priority shots are done.
How Many Photos Do You Actually Need?
For a 50-item menu, plan for 50–80 final images. Here's the math:
- 1 hero shot per item = 50 photos (the minimum for a complete visual menu)
- 1 alternate angle for your top 15 items = 15 additional photos (for delivery app headers, social posts, or printed menu layouts)
- 2–3 lifestyle/context shots = showing food in your actual dining room for website banners and social media
Shoot more than you need. For every final image, plan to take 5–10 shots with your camera or phone. A 50-item menu means around 300–500 raw photos, which you'll cull down to your best 50–80.
Three Approaches to Food Photography for Restaurant Menus
There's no single right way to handle menu photography. The best approach depends on your budget, timeline, and how often your menu changes. Here's an honest comparison that can help you decide:
| Factor | DIY (Smartphone) | Professional Photographer | AI-Enhanced (Smartphone + AI) |
|---|---|---|---|
| Cost for 50 items | $0–50 (your time + props) | $2,000–5,000+ | $45–99/month |
| Time to complete | 2–3 full days | 1–2 shoot days + 1–3 weeks editing | 1 day shooting + 1 day processing |
| Quality | Inconsistent | Excellent | Professional-grade, consistent |
| Consistency | Hard to maintain | High (one photographer, one session) | Very high (AI applies same style) |
| Updating ease | Re-shoot everything | Book another session ($$$) | Upload new photo, transform in 90 seconds |
| Best for | Tight budget, social media only | Brand launches, print campaigns | Ongoing menu coverage, multi-platform |
For a deeper cost analysis, see our food photography cost breakdown.
DIY Smartphone Photography
You already have the most important piece of equipment in your pocket. Modern smartphone cameras take remarkably good food photos — the challenge is consistency and lighting.
What you need: Your phone, a window with indirect natural light, a white foam board (about $3) for bouncing light, and a clean background surface (wood cutting board, marble slab, or even a clean white plate on a dark table).
What to expect: Budget a full day for shooting 25 items, with another day for the remaining 25. You'll spend most of your time on plating and repositioning, not actually pressing the shutter. Results will be good enough for social media but rarely consistent — slight variations in light, angle, and color temperature add up across 50 dishes.
For step-by-step camera technique, check our iPhone food photography tips.
Hiring a Professional Food Photographer
Professional food photographers bring lighting equipment, food styling skills, and post-production expertise that's hard to replicate. Expect to pay $750–$2,000 for a session covering 10–15 dishes, or $3,000–$5,000+ for a full 50-item menu. Large restaurant chains sometimes spend upward of $10,000 per image for advertising campaigns.
The trade-off: The photos will be outstanding, but you'll wait 1–3 weeks for edited files. And when you add three new dishes next month? You'll need to book another session, match the original style, and pay again. This is where the professional photoshoot model breaks down for restaurants with frequently changing menus.
AI-Enhanced Food Photography
This is the approach gaining the most traction for restaurant menu photography, and it's what we built FoodShot for. The concept is simple: you shoot with your smartphone camera (you're already doing this anyway), then AI transforms those raw photos into professional, studio-quality images.
 Restaurant owner photographing chocolate lava cake dessert with smartphone near window light during menu photoshoot
With FoodShot, you upload a dish photo, choose a style preset (Delivery, Fine Dining, Instagram, Lifestyle — there are 30+ options), and get a polished result in about 90 seconds. The AI handles lighting correction, background replacement, styling consistency, and can even help with plate swaps or garnish additions.
Cost math for a 50-item restaurant menu: The Business plan at $45/month gives you 100 image generations — enough for your full menu with room for alternate angles. That's roughly $0.45 per professional image, compared to $40–100+ per image with a photographer.
The biggest advantage isn't cost, though — it's speed. When you change your seasonal menu, you photograph the new dishes on your phone and transform them the same afternoon. For a detailed comparison, see traditional vs AI food photography.
Food Photography Tips by Menu Section
Different dishes need different photography techniques. Here's what works for each section of a typical restaurant menu, along with the angles and lighting that help each category shine.
Appetizers and Small Plates
Best angle: Overhead (flat-lay) at 90 degrees. Appetizers are usually arranged flat on a plate or board, and an overhead shot captures the full spread of colors and textures.
Styling tips: Group 2–3 items if they're typically shared (think bruschetta trio or mezze platter). Add a hand reaching for one piece to help create motion and context. Use small props — a cocktail napkin, a ramekin of dipping sauce — to fill negative space without distracting from the food.
Entrées and Main Courses
Best angle: 45 degrees (the "diner's eye view"). This is how your customer actually sees the plate when it arrives at their table, so it feels the most natural and appetizing.
Styling tips: Show the full plate with a fork or knife partially in frame to give scale. If there's steam, capture it — it signals freshness and helps the photo feel alive. Side dishes should support, not compete. If your steak comes with mashed potatoes and asparagus, arrange them so the steak is clearly the star of the image.
Desserts
Best angle: Varies — and this is where you can get creative with your camera. Tall desserts (layer cakes, parfaits) look best at eye level or slightly below to show height. Flat desserts (crème brûlée, tarts) work well with an overhead shot.
Styling tips: Desserts are the most "Instagrammable" category on any restaurant menu, so invest extra effort here. Cut into a slice to reveal layers. Capture action — a fork breaking through a crème brûlée, chocolate sauce being drizzled, powdered sugar falling. Use bright, high-key lighting. Dark and moody works for steaks, but desserts sell with brightness and color.
Drinks and Cocktails
Best angle: Straight-on or slightly below eye level. This angle shows the drink's color, layers, and garnish to their best advantage.
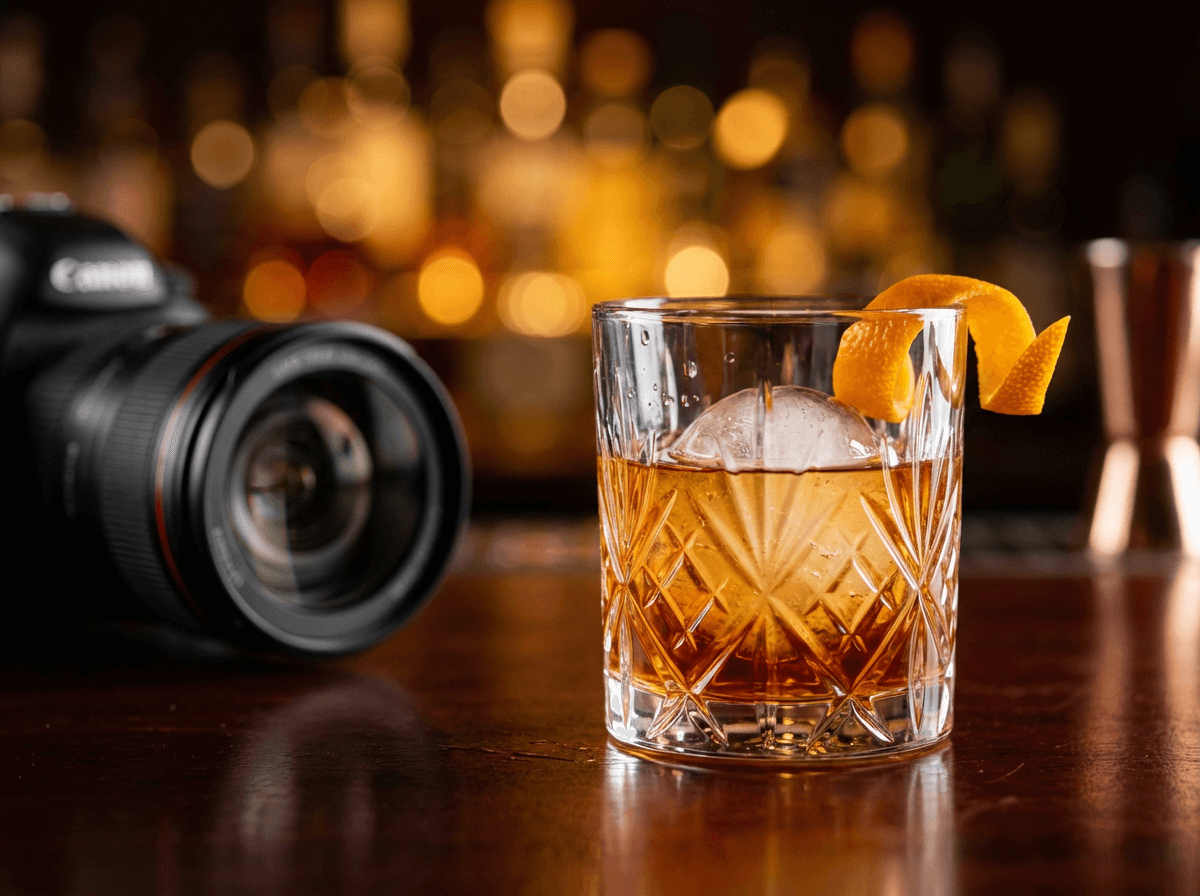 Close-up craft cocktail photography showing amber drink with spherical ice and orange peel garnish for restaurant menu
Styling tips: Condensation on the glass adds realism and makes drinks look refreshing — mist the glass with water if needed. Ice matters: use large, clear cubes (not cloudy crushed ice) for cocktails. Garnishes and glassware help set the mood — a copper mug says Moscow Mule, a coupe glass says craft cocktail.
Dark, moody backgrounds work beautifully for spirits-based cocktails. Bright, airy backgrounds with natural light are better for juices, smoothies, and coffee drinks.
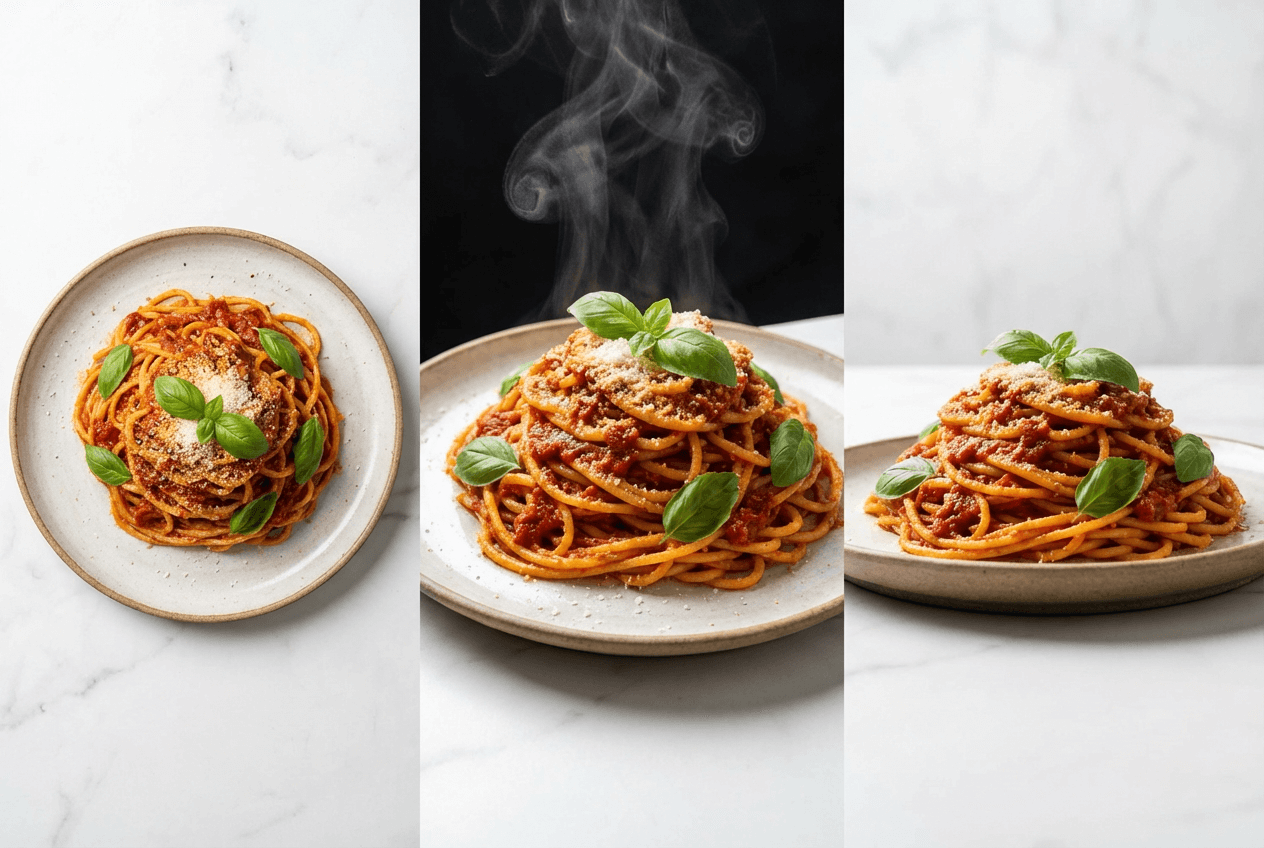 Comparison of three food photography angles showing overhead, 45-degree, and straight-on views of the same pasta dish
Building Visual Consistency Across Your Entire Restaurant Menu
Individual great photos aren't enough. Your menu needs to look like one cohesive collection, not 50 random images scraped from different Instagram accounts.
Consistency is what separates professional restaurant menus from amateur ones. Here's how to achieve it:
Lock your lighting. Choose one light setup and don't change it during your entire shoot. Natural window light from one direction (typically from the left or behind at 45 degrees) is the simplest approach. If you're shooting over two days, shoot at the same time of day to help match conditions.
Pick one background. A dark wood surface, white marble, a slate board — whatever fits your restaurant's brand. Use it for every shot. Having two backgrounds (one for entrées, one for desserts) is fine, but more than that creates visual chaos.
Maintain your camera angle. Shoot all entrées at 45 degrees, all flat items overhead, all drinks straight-on. This categorical consistency helps diners scan your menu without visual friction.
Create a one-page style guide. Before your shoot, write down: lighting direction, background surface, camera angle per category, prop list (same two forks, same linen napkin), and distance from dish. Print it out and tape it to the wall. This document is worth more than any piece of equipment you'll use during the photoshoot.
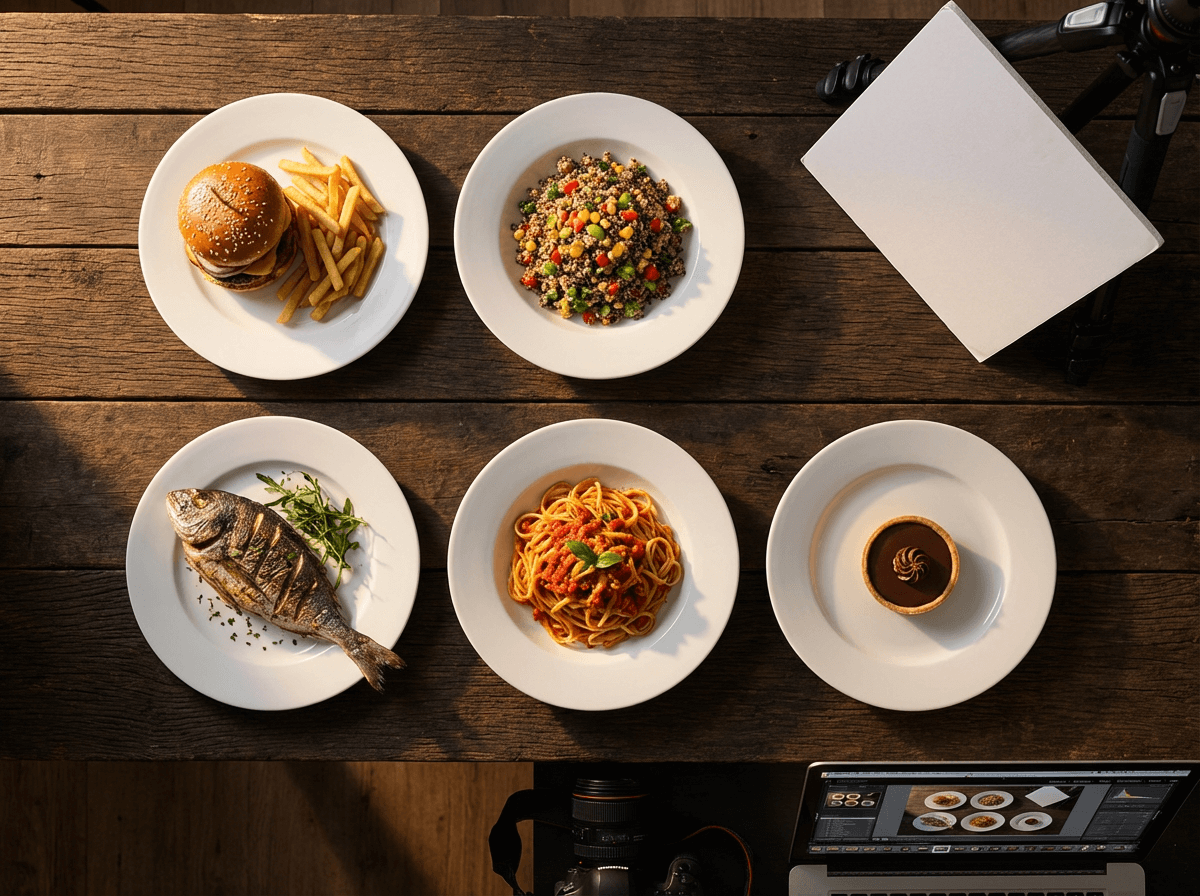 Five restaurant menu dishes arranged on identical white plates demonstrating visual consistency in food photography lighting and background
If you're using FoodShot's AI food photo editor, consistency becomes almost automatic. Choosing the same style preset across all your dishes ensures identical lighting, color temperature, and mood — even if your original smartphone photos were taken under very different conditions. This is one of the biggest advantages of AI-assisted food photography for restaurant menus.
Photo Specifications for Every Platform
You'll use your restaurant menu photos in at least four places. Each has different technical requirements, and using the wrong specs can result in blurry images or rejected uploads.
 Multi-platform menu photo deployment showing restaurant food photography across website, printed menu, and delivery app
Printed Menus
- Resolution: 300 DPI minimum (72 DPI web images will look blurry in print)
- Color mode: CMYK for offset printing, RGB is fine for digital printing
- Format: TIFF or high-quality JPEG
- Pro tip: Leave 3mm bleed if the photo extends to the page edge
Website and Digital Menus
- Dimensions: 1200×800px minimum for sharp display on retina screens
- File size: Compress to under 200KB per image for fast page loading
- Format: WebP (best compression) or JPEG
- Color space: sRGB
Delivery Apps
This is where things get tricky — each platform requires different specs for food photography. Check our complete delivery app photo guide for detailed breakdowns.
| Platform | Aspect Ratio | Minimum Size | Notes |
|---|---|---|---|
| Uber Eats | 5:4 | 1200×800px | Used for catalog/item views |
| DoorDash | 16:9 | 1400×800px | Manual review, 1–5 business days |
| Grubhub | Varies | 1200×800px | Check current guidelines |
Key insight: You can't use the same crop for Uber Eats and DoorDash. Budget for at least two export crops per priority dish. Name files consistently (e.g., grilled-salmon_5x4_uber.jpg and grilled-salmon_16x9_dd.jpg). For more on getting your images approved, check our guide on food delivery app photography.
Social Media
- Instagram Feed: 1:1 (square) or 4:5 (portrait, gets more screen space)
- Instagram Stories/Reels: 9:16 vertical
- Pinterest: 2:3 vertical pins perform significantly better
- Facebook: 1.91:1 landscape for link shares
The smart move: Shoot at the highest resolution your camera allows and crop for each platform, rather than shooting separate photos for each channel.
Keeping Your Menu Photos Updated
Here's the problem nobody talks about during a photoshoot: restaurant menus change. Seasonal rotations, new specials, ingredient swaps, price changes that require new combo photos — your perfect menu photography has a shelf life.
How often most restaurants need photo updates:
- Seasonal menus: 3–4 full refreshes per year
- Weekly specials: Every week (if featured on delivery apps or social media)
- New dish additions: As they're added (don't launch a dish without a photo)
- Removed items: Delete photos of dishes you no longer serve — outdated images erode customer trust
With a professional photographer, each update means scheduling a new session, matching the original style, and waiting for edited files. That's 1–3 weeks per update, at $500+ per session.
With an AI-powered workflow, updates happen same-day. Photograph the new dish on your phone during prep, upload to FoodShot, apply the same style preset you used for your existing menu, and deploy the finished image before dinner service. This is how restaurants running AI food photography for cafes and fine dining photography stay current without ongoing photographer costs.
Build a simple photo library organized by dish name, and note which platforms each image is deployed to. When a dish changes, you swap one image across all platforms rather than hunting through old folders.
The Complete 50-Item Menu Photography Workflow
Here's how to photograph your entire restaurant menu in three days using a smartphone and AI — the practical workflow we recommend to restaurant owners tackling food photography for the first time.
Day 1: Plan and Prep (2–3 hours)
- Write your shot list. List every menu item, organized by section (appetizers, entrées, desserts, drinks). Note the priority tier for each dish.
- Create your style guide. Decide on your background surface, lighting direction, camera angle per category, and two props max.
- Prep your shooting station. Set up near your best window for natural light. Position your background, bounce card, and a spot for the dishes to land.
- Coordinate with your kitchen. Give your chef the shot list so they can plate dishes in batches during the shoot. Group items that use similar ingredients to help minimize food waste.
Day 2: Shoot Day (4–6 hours)
- Shoot in batches of 10 dishes. Take 5–10 photos per dish from your planned angle. Adjust plating between shots as needed.
- Work through sections systematically. All appetizers, then all entrées, then desserts, then drinks. This helps maintain consistency within each menu category.
- Check as you go. Review every 10th photo on a larger screen (tablet or laptop) to catch lighting shifts or framing issues before you get too far.
- Capture your alternate angles for priority items (top sellers and delivery app headers).
- Total output: ~300–500 raw photos from 50 dishes.
Day 3: Transform and Export (3–4 hours)
- Cull your photos. Select the best 1–2 raw shots per dish. You should have 50–80 selects.
- Upload to FoodShot's AI food photo editor. Choose your style preset (Delivery, Restaurant, Fine Dining — whatever matches your brand).
- Transform each photo. Apply the same preset across all dishes for consistency. Each AI transformation takes about 90 seconds.
- Export for each platform. Crop and save in the dimensions required for your printed menu, website, delivery apps, and social media.
- Deploy. Upload to your menu builder, delivery app dashboards, website, and social channels.
Total time: ~3 days (roughly 10–13 hours of active work) Total cost: Under $100 (a FoodShot Business plan at $45/month covers 100 transformations) Compared to professional photography: 2–4 weeks and $3,000–5,000+
For cafés with smaller menus, the process is even faster — see our 90-second menu refresh guide.
Frequently Asked Questions
How much does food photography for a restaurant menu cost?
It ranges enormously. DIY is essentially free (your time only), professional food photographers charge $750–$5,000+ per session depending on scope, and AI-enhanced approaches like FoodShot run $45–99/month for 100–250 image generations. For a 50-item restaurant menu, that works out to roughly $0 (DIY), $60–100+ per image (professional), or under $1 per image (AI). Our detailed food photography cost breakdown covers every pricing scenario.
Can I use my phone camera for menu photos?
Yes — and most restaurants should. Modern iPhones and flagship Android phones shoot at resolutions well above what menus and delivery apps require. The key is good lighting (natural window light), a clean background, and steady hands (or a cheap tripod). Where smartphone camera photos fall short is consistency and polish, which is exactly what AI photography tools help correct. See our iPhone food photography tips for technique specifics.
How often should I update my menu photos?
At minimum, every time your menu changes. Seasonal restaurants should refresh photos 3–4 times per year. If you run weekly specials or limited-time offers on delivery apps, those need fresh photos each week. The single biggest photography mistake restaurants make is keeping images of dishes they no longer serve — read about food photography mistakes that kill online orders.
What's the best angle for food photography?
It depends on the dish. 45 degrees (the diner's perspective) is the most versatile and works best for plated entrées. Overhead (90 degrees) is ideal for flat items like pizza, salads, and charcuterie boards. Straight-on (0 degrees) works for tall items like burgers, stacked pancakes, and layered drinks. Most 50-item restaurant menus need a mix of all three angles to help showcase each dish at its best.
Do delivery apps have specific photo requirements?
Yes, and they differ by platform. Uber Eats prefers a 5:4 aspect ratio at minimum 1200×800px. DoorDash requires 16:9 at minimum 1400×800px and has a manual review process that can take 1–5 business days. You cannot use the same image file for both platforms without cropping. See our full delivery app photo guide for complete specs and avoid the common mistakes that get photos rejected.
