Cookie Photography: Style & Shoot Cookies for Bakery Menus
Cookies are deceptively hard to photograph. They're small, mostly flat, often brown, and the details that make them special — royal icing relief, melty chocolate, a macaron's foot, a snickerdoodle's crackle — disappear under bad lighting.
The good news: you don't need a $2,500 photo shoot to fix this. A clean phone lens, one window of soft light, and a handful of tactical choices can turn a flat-looking tray into menu-ready cookie photography. These cookie photography tips will help you nail every shot, light angle, surface, and cookie type bakeries actually use — plus the AI shortcut for when you're shooting 30 SKUs in a morning.
Quick Summary: Great cookie photography uses four shot types (single hero, scattered cluster, in-progress action, stacked tower), soft side light at 30–45°, and backgrounds that contrast the cookie color. Use your phone with window light and a white reflector. For rotating bakery menus, AI tools like FoodShot turn each phone snap into a 4K menu photo in about 90 seconds.
The 4 must-have cookie shots for any bakery menu
Most bakeries default to overhead phone snaps and wonder why their cookie photos look tired. The fix is to shoot four different angles of every cookie. Each shot does a different job — together they cover every channel from delivery apps to printed menu boards.
1. The single hero — one cookie, perfectly lit
One cookie. Centered. Shot at a 45° angle so you see both the top decoration and the side profile. The money shot for menu cards, delivery app thumbnails, and product cards. Frame tight, leave 20–25% breathing room, and crop out anything busy.
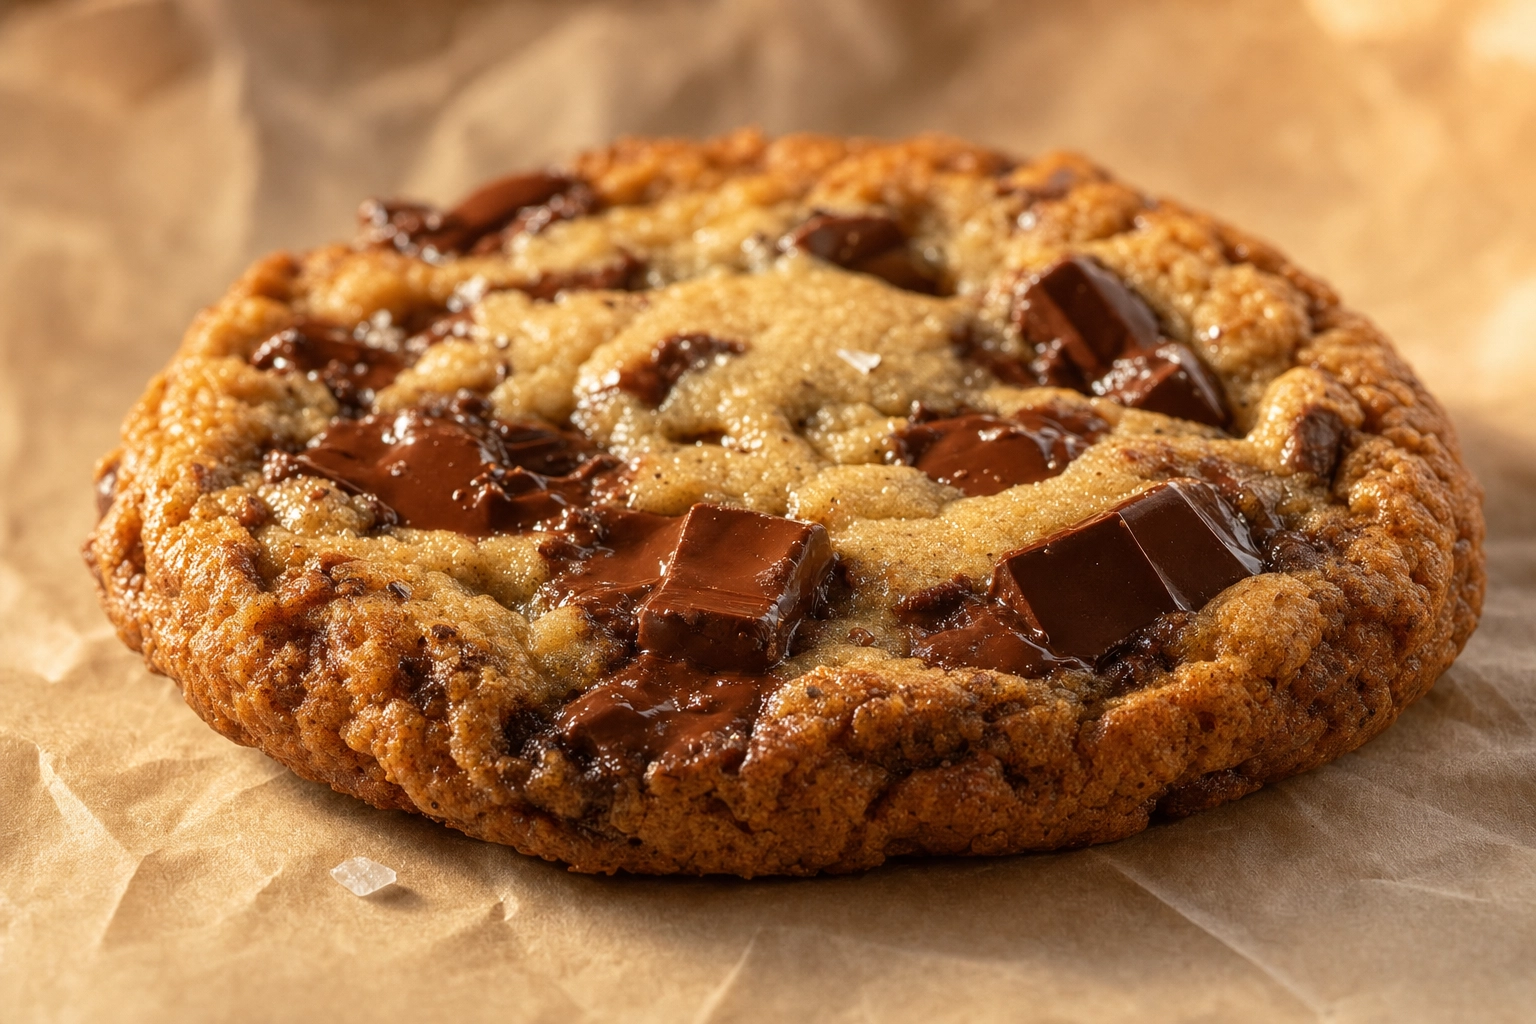 Single chocolate chip cookie shot at 45 degrees with melty chocolate and side light revealing texture
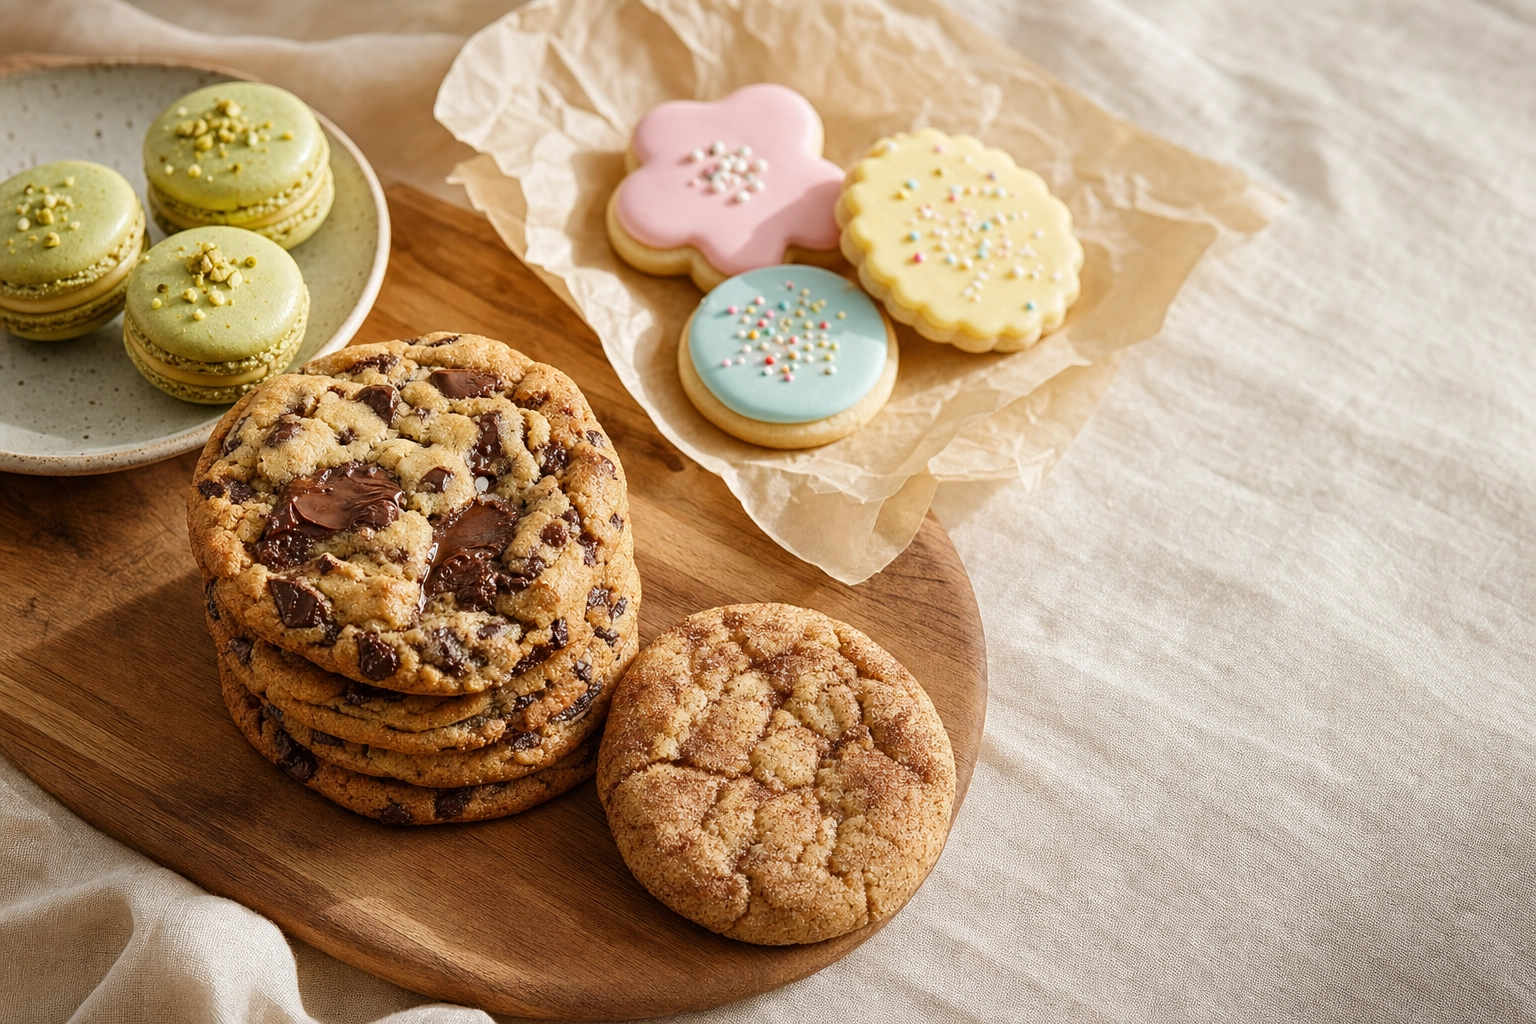
2. The cluster — multiple cookies, scattered naturally
Three, five, or seven cookies arranged with intentional asymmetry. The rule of odds beats even numbers — your eye tries to pair four cookies; it accepts five. Shoot top-down. Best for assortments, seasonal collections, and gift boxes.
 Top-down flat-lay of seven decorated sugar cookies scattered on blush plaster showing cluster composition
3. The action shot — dipping, decorating, sprinkling
In-progress shots add motion a static cookie can't. A hand piping royal icing. A spoon dipping into chocolate. Sprinkles falling mid-air. Gold for social photos and Pinterest saves. Use burst mode and pick the frame where motion is sharpest.
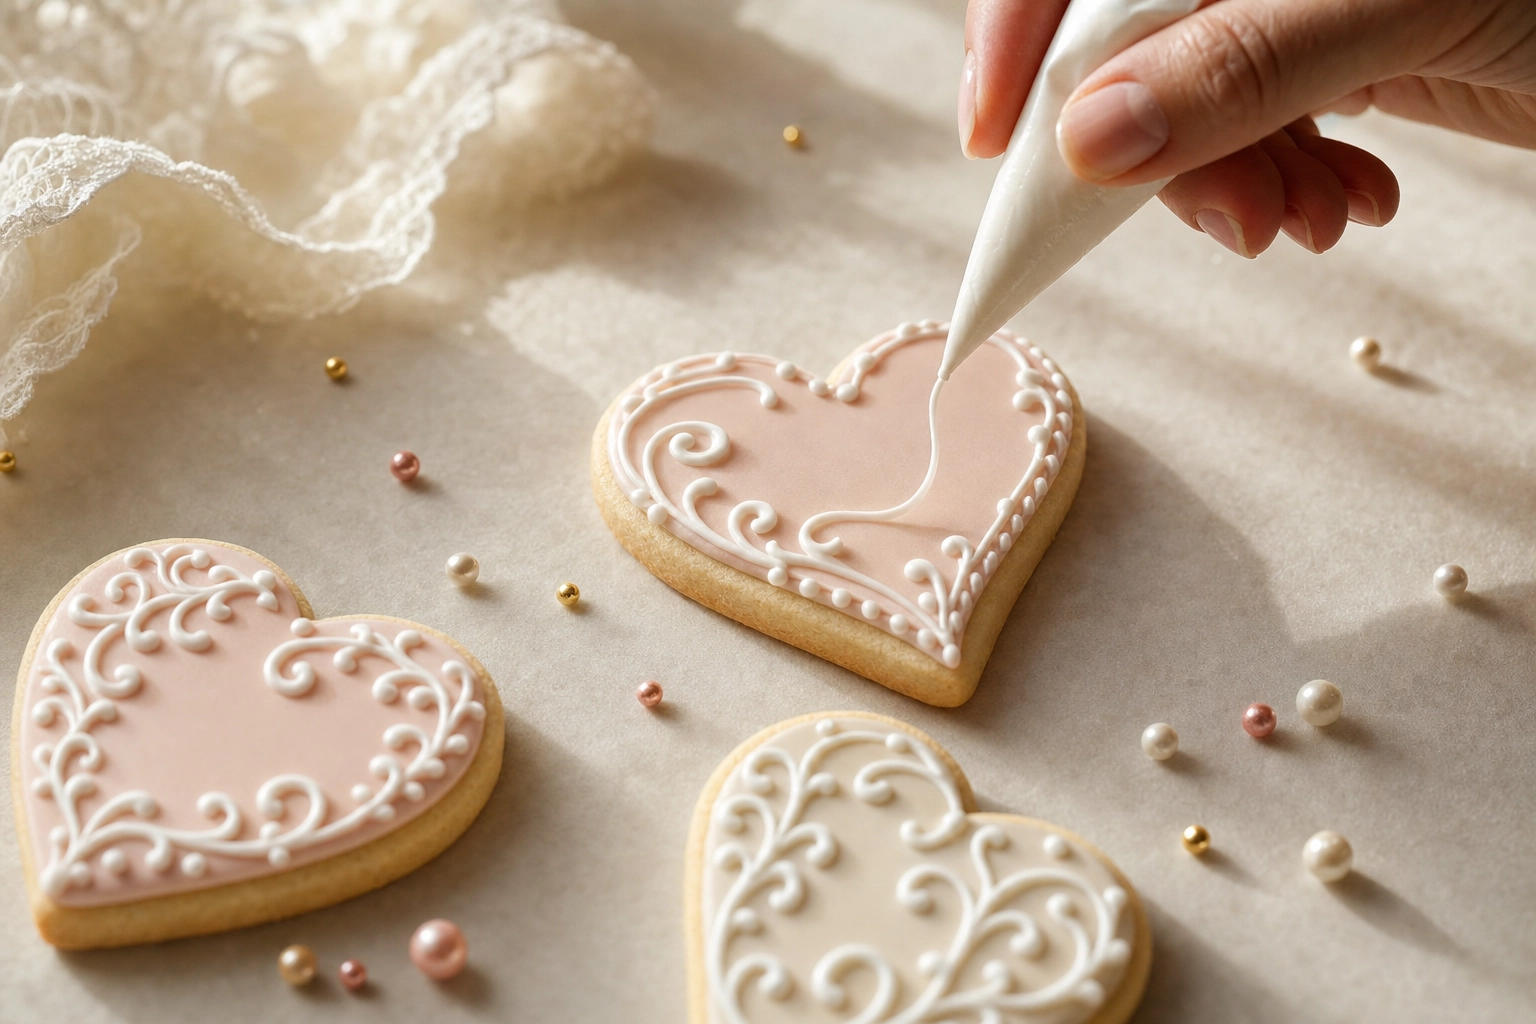 Hand piping fresh royal icing onto a decorated heart cookie in a motion-captured action shot
4. The stacked tower — height, profile, drama
Four to seven cookies stacked, shot straight-on at eye level, with one slightly askew for character. The only shot that solves the "cookies are flat" problem. For sandwich cookies and biscotti, the stack also reveals the cross-section inside.
Lighting cookies: why side light beats everything else
If you remember one thing from this guide: light from the side, not from above.
Side light — light hitting the cookie from a 30°–90° angle relative to the camera — skims across the surface and creates the micro-shadows that reveal royal icing relief, sugar crystal sparkle, chocolate chip topography, biscotti's porous edge, and a macaron's foot. Overhead light flattens all of it. This is the single biggest principle in food photography for any small, detailed subject.
Natural light setup. Place a small table 1–2 feet from a window. North-facing windows give consistent indirect light all day. East- or west-facing work in the morning or late afternoon. The cookie sits perpendicular to the window so light hits from the side. Add a $3 white foam board on the opposite side as a reflector — it bounces light back into the shadow so icing details don't disappear.
Cheap artificial setup. A single 5500–6500K continuous LED panel diffused through parchment paper at 30–45°. Color temperature matters: tungsten kitchen lights at around 2700K turn whites cream and skew icing colors muddy. That's why royal icing looks off in photos even when the cookie looks perfect in person.
Three things to avoid. Direct flash flattens texture and creates harsh shine on icing. Direct midday sun blows out whites and casts inky shadows on intricate decoration. Overhead can lights kill detail and add a yellow cast no editor can fully fix.
How to capture cookie texture without expensive gear
Texture is what makes a flat-looking cookie crave-worthy. The food photography tips below cover the textures bakeries actually sell.
Royal icing. Side light at 30–45°. Tap and hold to lock focus on the highest point of icing relief. Shoot fresh — royal icing dulls noticeably after 24–48 hours.
Chocolate chip melty middle. Cookies cool fast and chips stop being glossy within minutes. Microwave the cookie 10–15 seconds right before shooting to revive the melt. Press a few unbaked chocolate chunks onto the warm top so they glisten. Shoot at 30–45° with side light. Flaky sea salt pushes the photo into prestige territory.
Sprinkles, jimmies, and sanding sugar. Switch to macro mode — Apple documents the iPhone macro feature on iPhone 13 Pro and newer. Without macro, get 4–6 inches from the cookie. Side light is non-negotiable — it casts a tiny shadow behind each sprinkle so they read as dimensional instead of stuck-on flat.
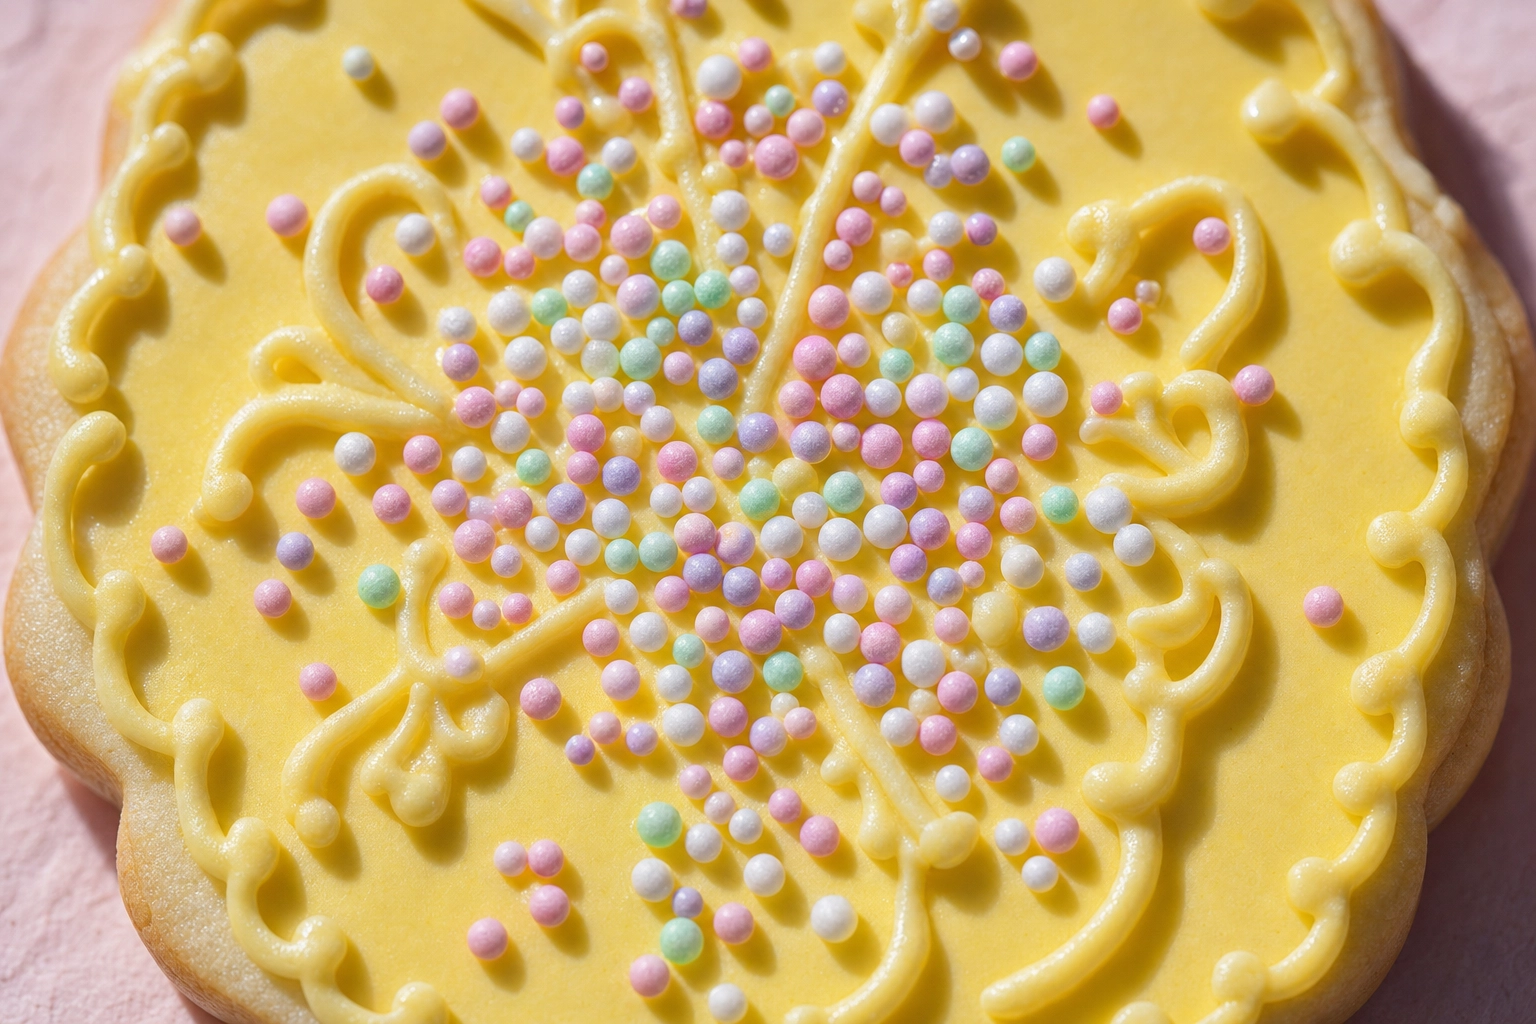 Macro close-up of decorated sugar cookie with royal icing and pastel sprinkles in raking side light
Sandwich cookies. The filling is the hero. Break one in half to show the cross-section, or twist the top off. Soft side light at 45°. Match prop colors to the filling.
Snickerdoodle crackle. The crackle pattern is the cookie's whole personality. Shoot top-down or 45° with side light to catch the sugar crystals glinting like frost.
Biscotti porous edge. Stack three or four and lean one against the others to reveal the cross-section. Straight-on at eye level so the light rakes across the cut edge.
Backgrounds that make cookies pop (not disappear)
Pick the wrong background and the cookie vanishes. The rule: the background should contrast the cookie, not compete with it.
Neutral whites and creams. Best for colorful decorated cookies, royal-iced sugar cookies, and macarons. White parchment, off-white linen, blush plaster, soft gray ceramic. The cookie's colors do the work.
Dark moody surfaces. Best for chocolate-forward cookies, biscotti, and premium positioning. Black slate, charcoal linen, espresso-toned wood. One source of side light; keep overhead ambient dim.
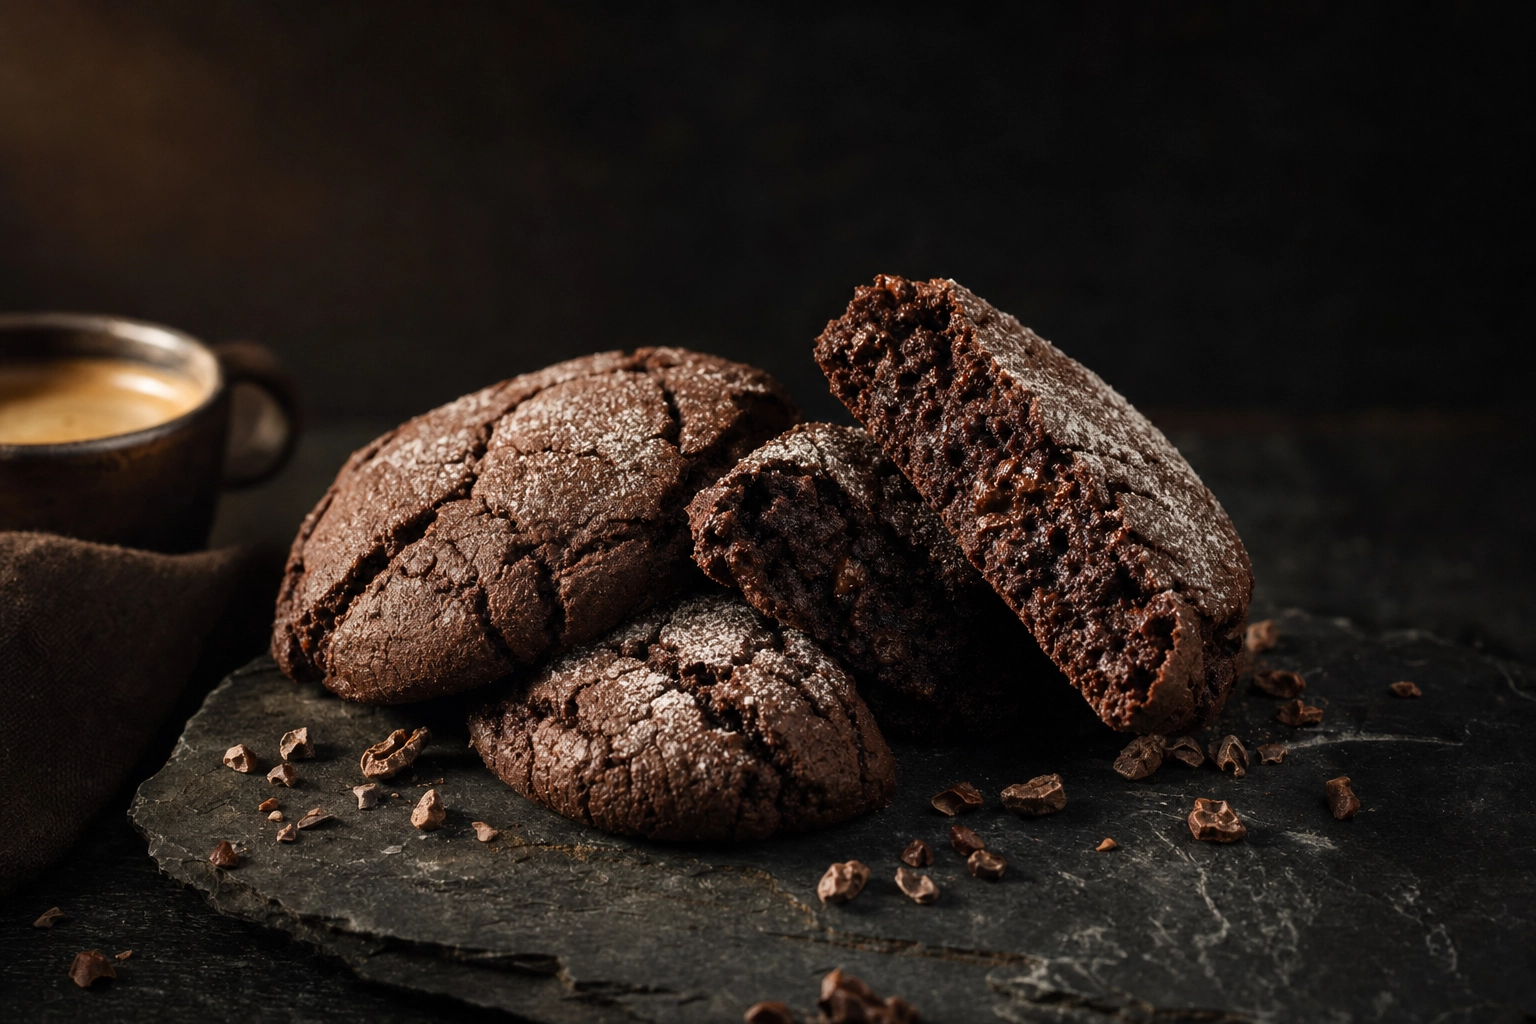 Dark chocolate cookies on black slate with moody side lighting demonstrating dark backgrounds
Warm wood and butcher block. Best for chocolate chip, snickerdoodles, oatmeal raisin — cookies that want to feel homey and just-baked. Avoid lacquered surfaces that catch reflections.
Lifestyle scenes. A crumpled sheet of parchment, a glass of cold milk, a piping bag with a smear of icing, a flour-dusted rolling pin. Great for social photos and email. Keep props slightly out of focus at the edges so they don't upstage the cookie.
Avoid glossy plates — they catch your kitchen ceiling, your overhead lights, and sometimes even your phone.
A photography playbook for 6 popular cookie types
Every cookie has a "hero element" — the thing that makes it sell. Once you know what to feature, the shot composes itself.
Chocolate chip cookies
Hero: Melty chocolate middle and golden-brown crispy edges. Shoot at 45° with a slight downward tilt so chip topography catches the light. Microwave 10–15 seconds, press in extra warm chocolate chunks, shoot within 60 seconds. Light kraft paper or butcher block keeps the photo warm.
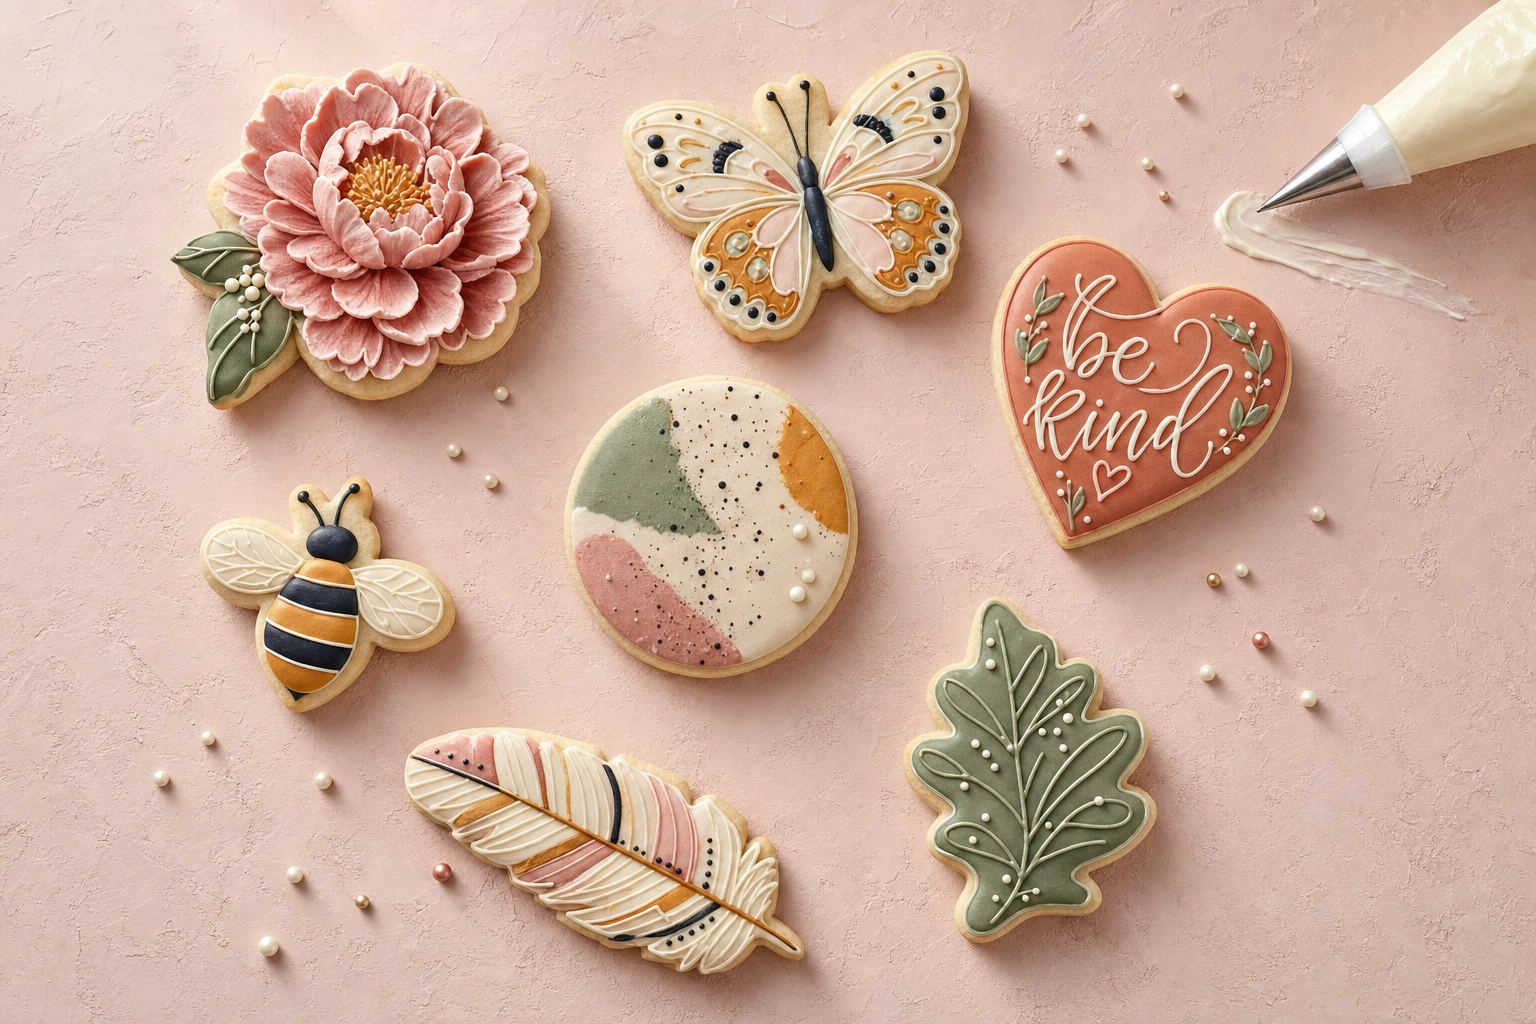
Sugar and royal-iced cookies
Hero: The icing design. Top-down flat-lay shows the whole artwork. Soft diffused side light at 30°. Shoot decorated cookie photography within 8 hours of finishing the icing — colors fade and shine dulls after that.
Macarons
Hero: The foot (the ruffled bottom rim), the smooth dome, the ganache layer. The straight-on profile shot is the money shot in macaron photography. Put the macaron on a small riser — a coin, an upturned ramekin — so it aligns with your phone lens at eye level. Soft diffused side light at 45° — harsher light creates ugly shadows under the foot.
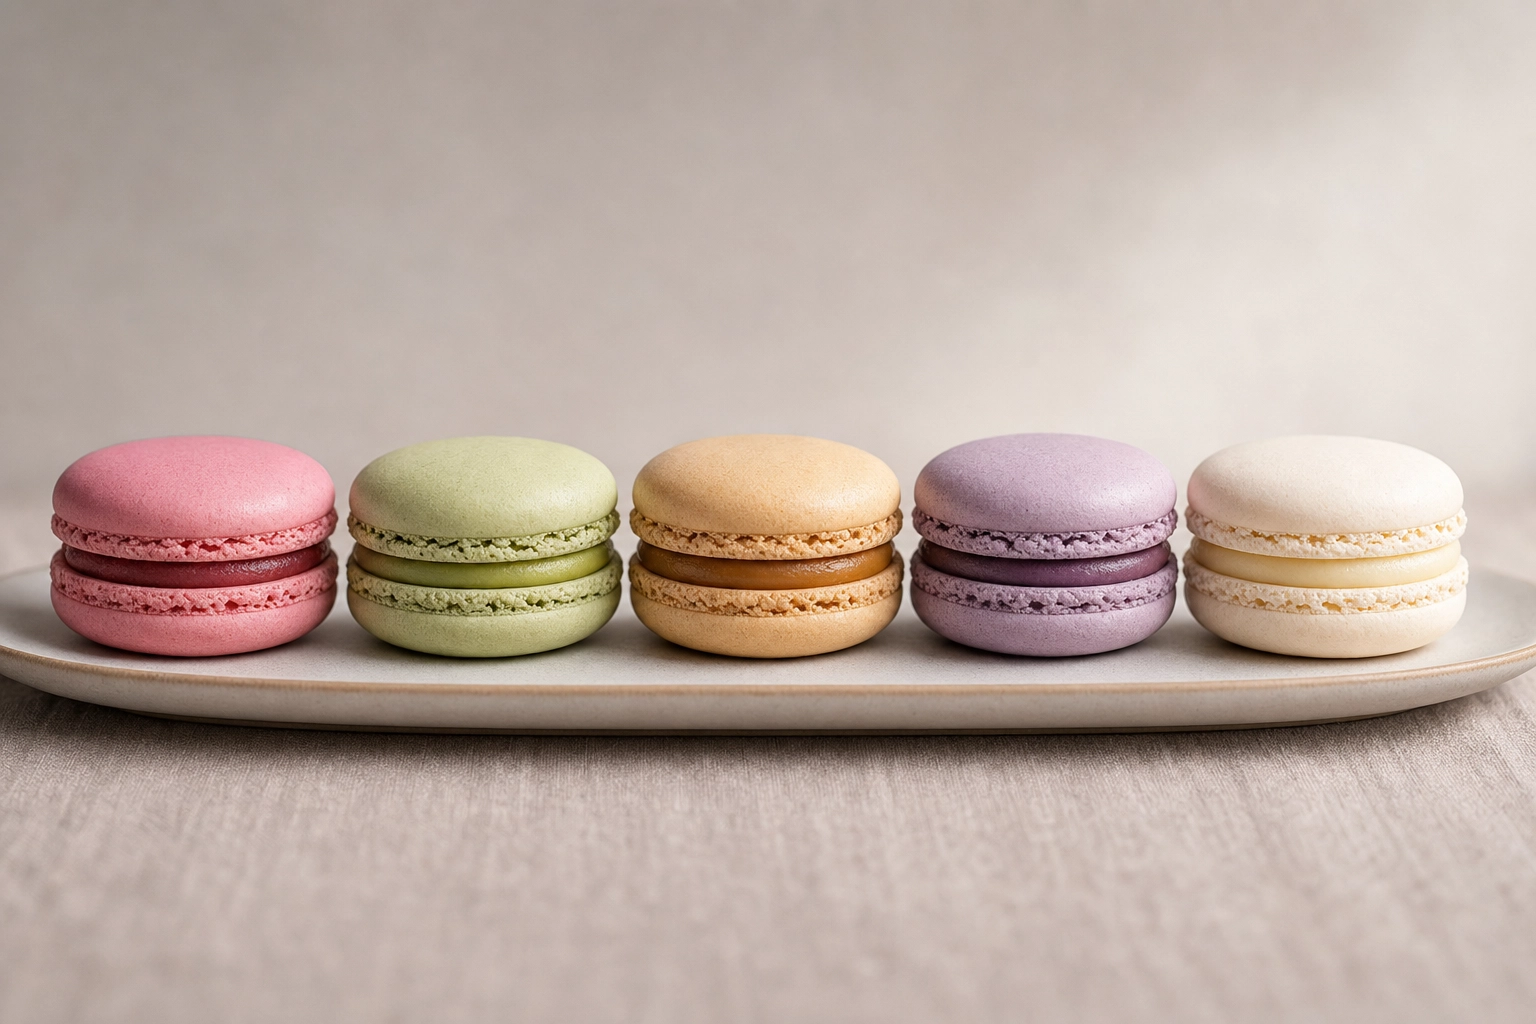 Five pastel macarons in a row shot straight-on at eye level showing the foot and ganache layers
One macaron rule: never refrigerate the shells before shooting. Condensation forms as they warm up and kills the matte sheen. Community consensus in r/macarons photography discussions confirms it — shoot at room temperature.
Sandwich cookies
Hero: The visible filling. Break, twist, or tilt one cookie to expose the cross-section. Straight-on for stacks; 45° for singles. Colorful fillings (raspberry, pistachio, matcha) carry the photo on a neutral white plate.
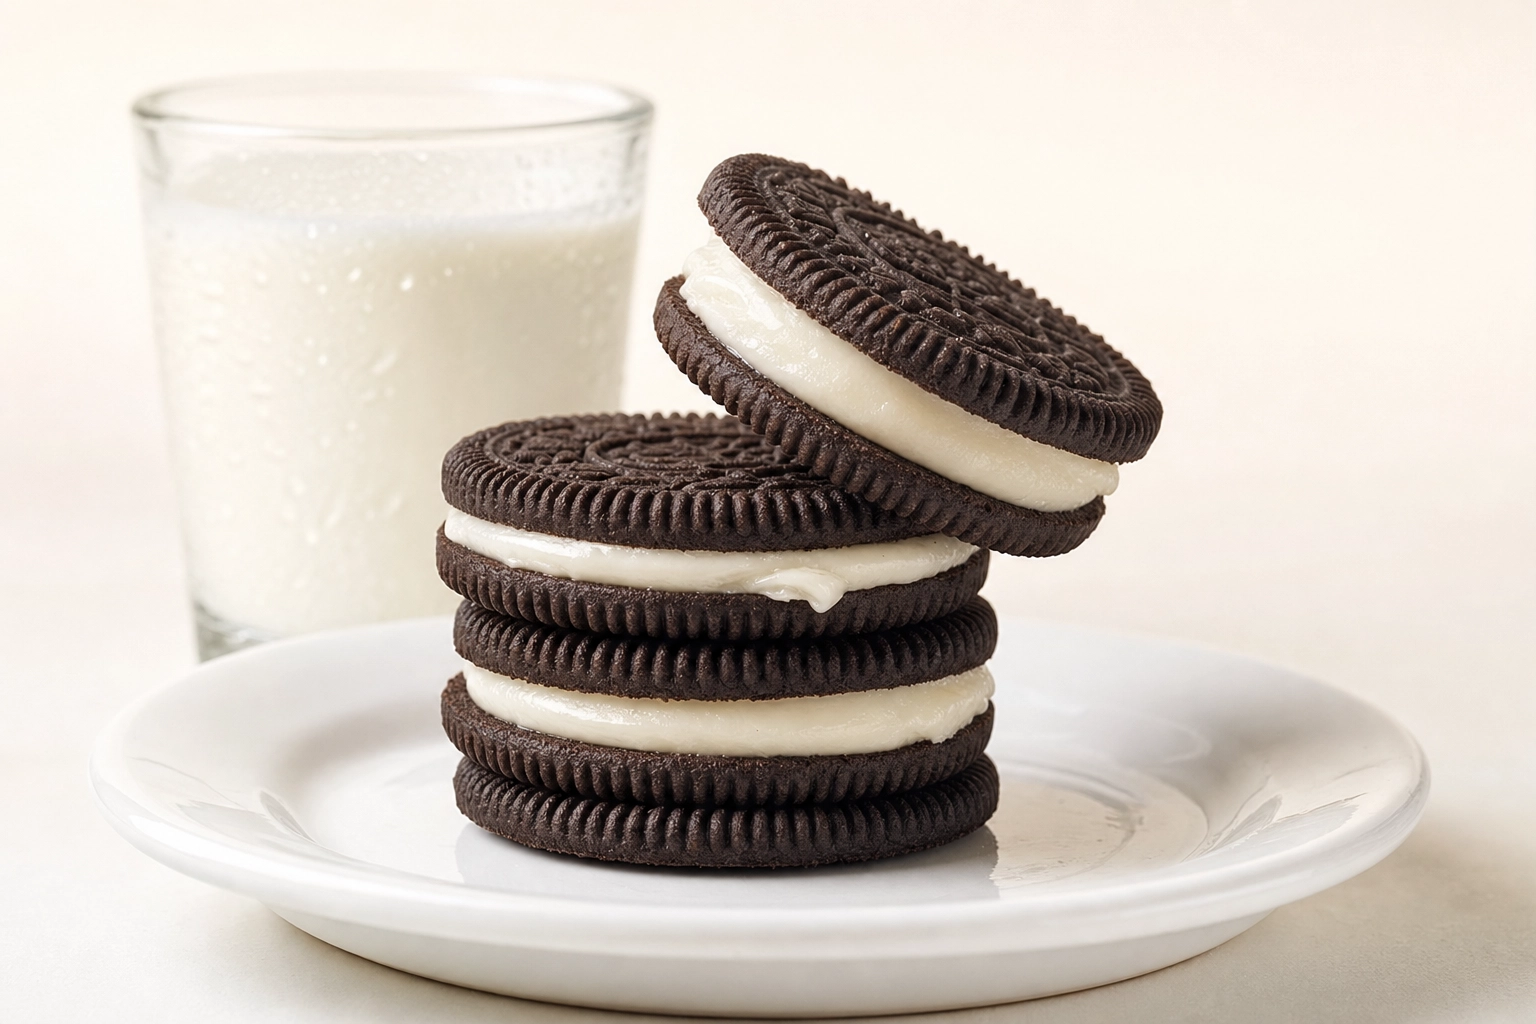 Stack of chocolate sandwich cookies with one twisted open showing vanilla buttercream filling cross-section
Biscotti
Hero: The long, porous, dunkable cross-section. Straight-on stacked or fanned with one biscotti leaning to reveal the interior. Pair with espresso or vin santo. Dark walnut, marble, or kraft paper for the Italian-café feel.
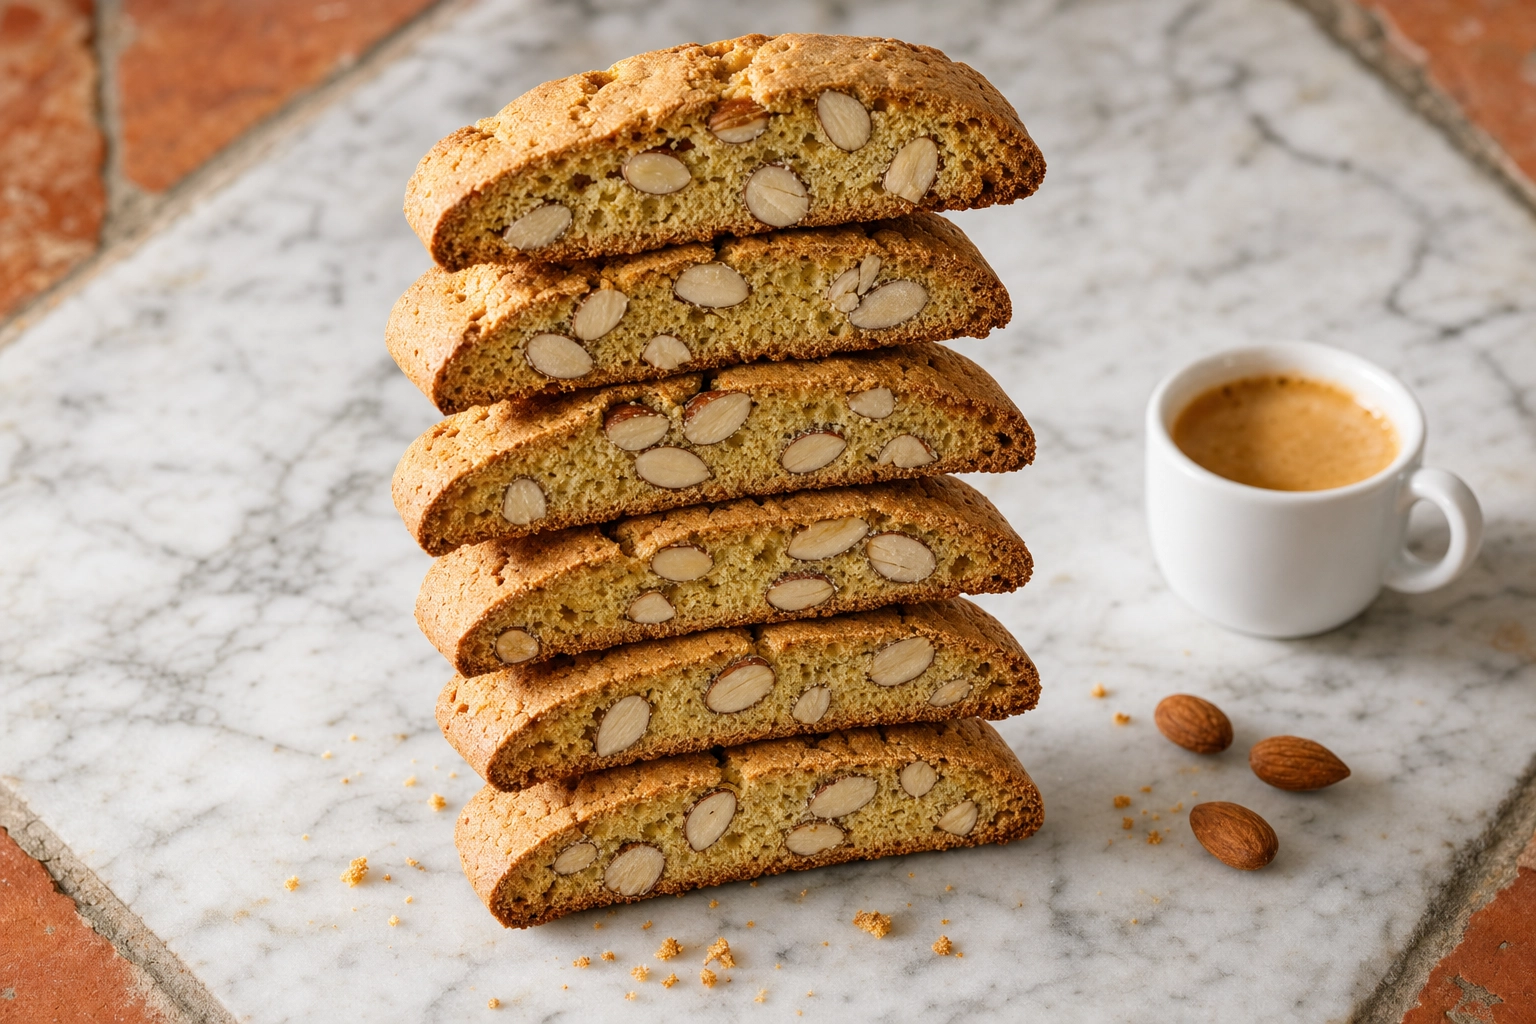 Stack of almond biscotti shot straight-on on marble showing porous cross-section with espresso cup
Snickerdoodles
Hero: The cinnamon-sugar crackle. Top-down or 45° to catch the sugar crystals. Warm side light at 30° makes them sparkle. Cream linen or oat-toned surface keeps the autumn palette warm.
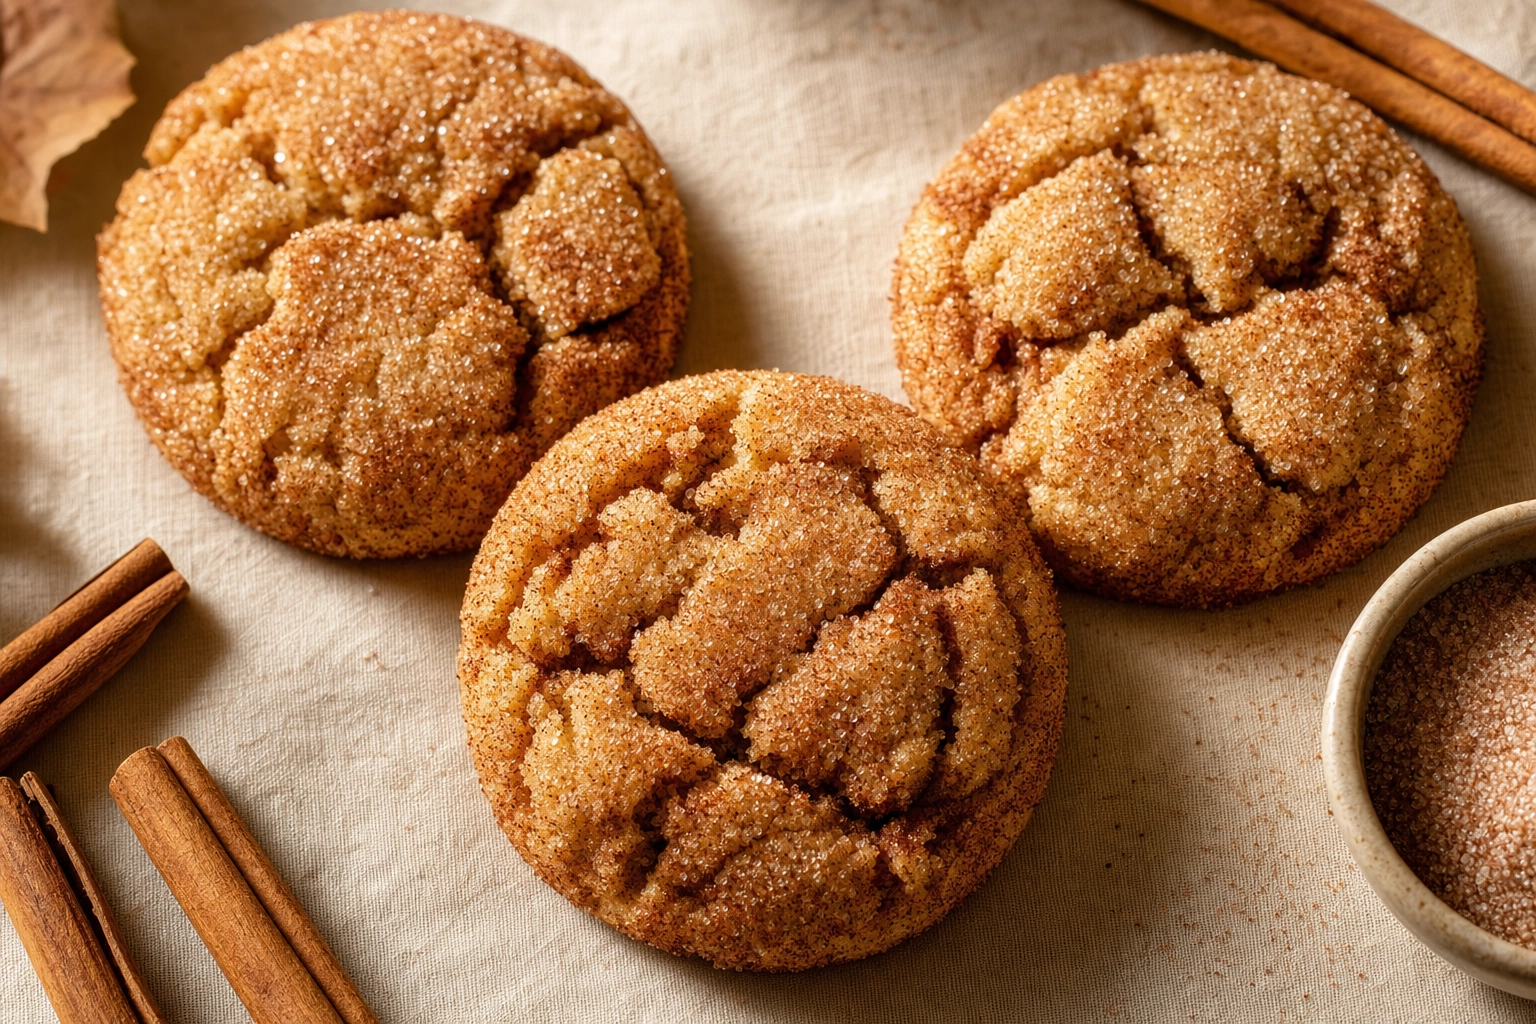 Three snickerdoodle cookies overhead showing cinnamon-sugar crackle pattern in raking warm side light
Holiday and seasonal cookie photography
Seasonal cookies sell because they look seasonal. The cookie itself does maybe 30% of the work — the background, props, and color palette do the rest. These tips help you turn the same shapes into completely different photos for each holiday push.
Christmas cookies
Palette: Deep red, forest green, gold, kraft brown, ivory. Props: Pine sprigs, cinnamon sticks, vintage tins, twine, sugared cranberries, powdered sugar "snow." Lighting: Moody warm side light, slightly underexposed for a candlelit feel. Surface: Dark wood or charcoal linen.
 Christmas iced sugar cookies styled with pine sprigs and cinnamon sticks in moody warm holiday lighting
Valentine's Day cookies
Palette: Blush pink, rose red, cream, burgundy. Props: Dried roses, parchment hearts, vintage lace, raspberry jam in a small bowl. Lighting: Soft diffused light at 45°, brighter and airier than Christmas. Surface: White marble or blush linen. Heart-shaped iced sugar cookies and pink macarons are the workhorses.
Easter and spring cookies
Palette: Pastel mint, lavender, robin's-egg blue, butter yellow, blush. Props: Fresh tulips, woven baskets, speckled finishes, ceramic egg shells. Lighting: Bright, airy, diffused window light — slightly overexposed for a high-key feel. Surface: Cream linen, pale wood, watercolor paper.
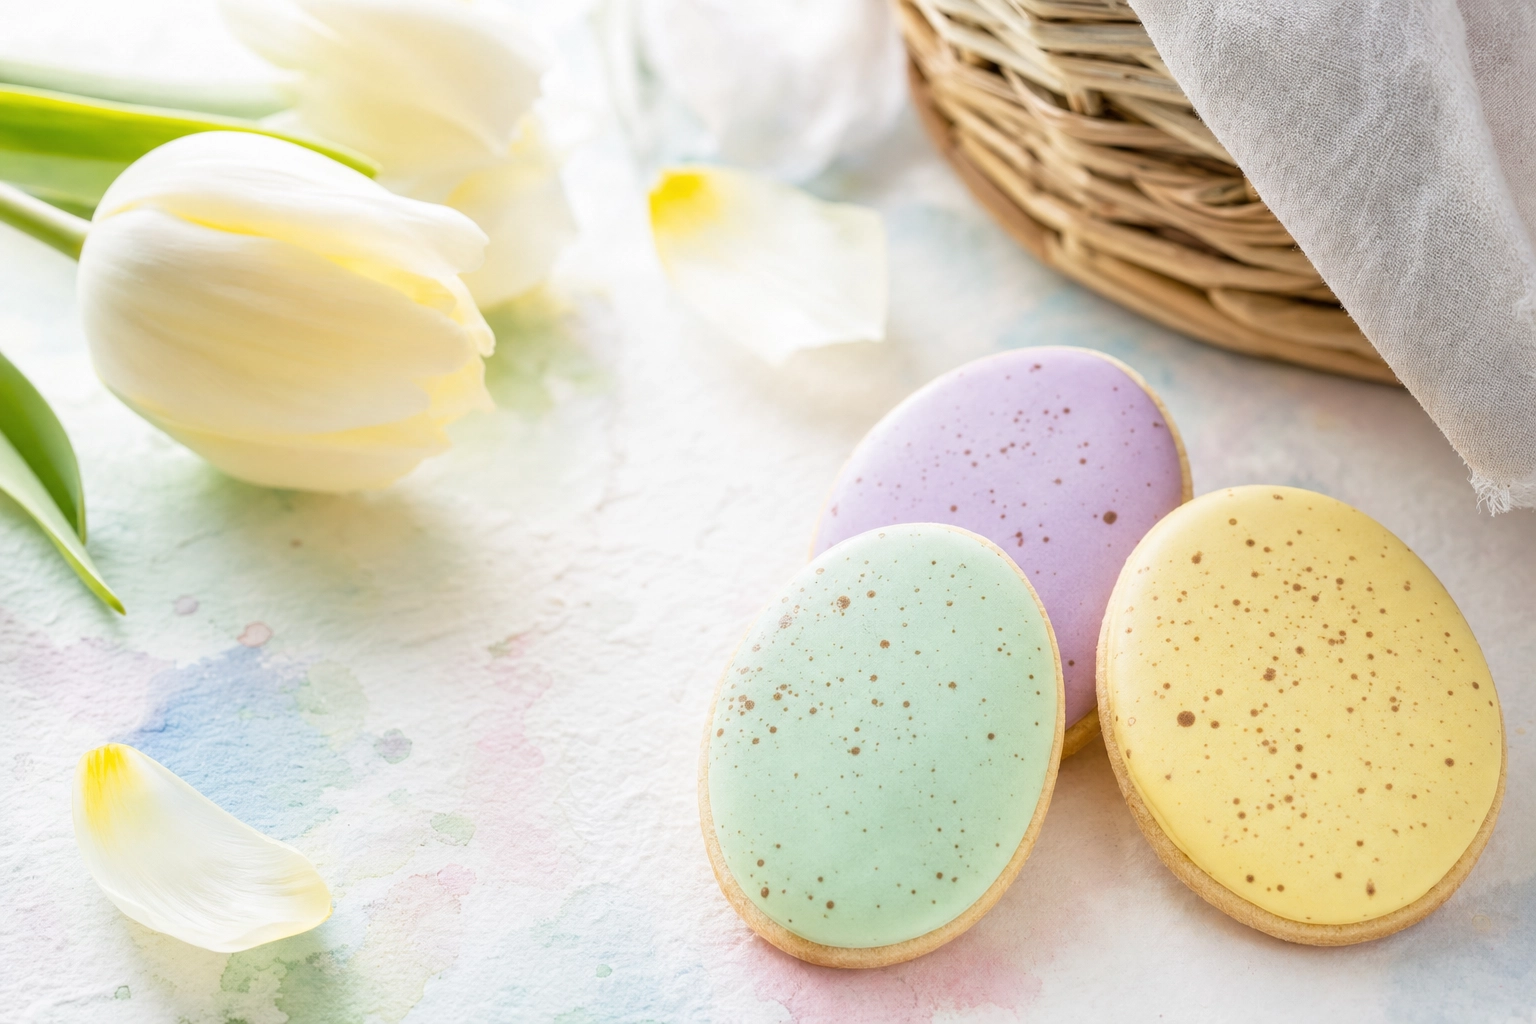 Pastel speckled Easter sugar cookies styled with fresh tulips in airy bright spring lighting
A bakery-tested phone-only workflow
You don't need a DSLR. You need 15 minutes and the workflow below.
- Clean the phone lens with a microfiber cloth. Biggest free upgrade — fingerprint smears cause soft, hazy photos no editor can fully fix.
- Set up window light. Cookie table 1–2 feet from a window, perpendicular to the light. White foam board on the opposite side. Diffuse a sunny window with a sheer curtain or parchment taped to the glass.
- Lock focus and exposure. Tap and hold on the highest detail point until "AE/AF Lock" appears (iPhone) or the focus square stays put (Android). Slide exposure down 1/3 stop to protect white icing highlights.
- Shoot the 4-shot set. Single hero (45°), cluster (top-down), action (burst), stack (straight-on). About 8–10 minutes per cookie type once set up.
- Light editing only. Brighten shadows about +15, drop highlights about -10, add slight warmth (+5) for warm cookies, sharpen +10. Skip heavy Instagram filter presets — they kill icing color accuracy.
- Export at full resolution. Don't downsize until upload.
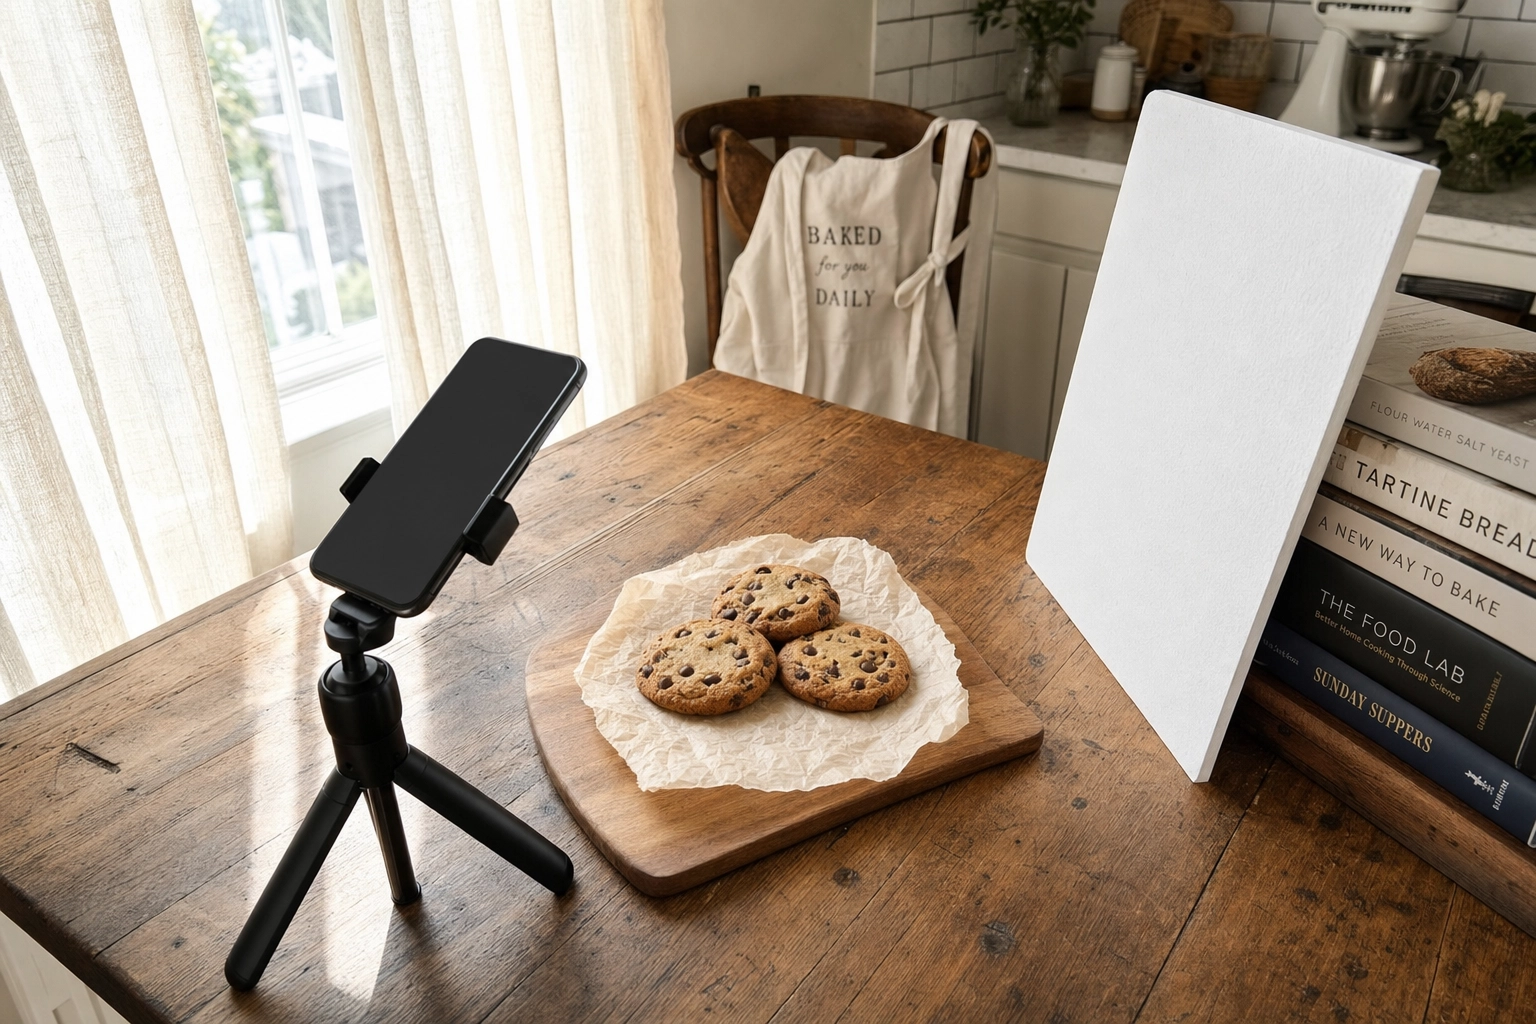 Phone food photography setup with window light, white foam reflector, and tripod for cookie shots
This produces honest, real-cookie photos. It's also the bottleneck when you've got 30+ SKUs to shoot before Friday's menu drops.
The AI shortcut: bakery-ready in seconds
A rotating bakery menu kills the phone workflow. Three new sugar cookie collections per month, a fresh macaron flavor each week, seasonal sandwich specials — even at 10 minutes per SKU, that's hours every week, and cookie photos look inconsistent across days and lighting.
That's where AI changes the math. With FoodShot's AI food photo editor, the workflow is: snap a phone photo of your cookie on the counter (any lighting, any background), upload, pick a style or describe one in plain English, and get a 4K studio-quality menu image back in about 90 seconds.
A few things make this especially useful for cookie photography:
- 200+ styles built for bakery contexts — fresh-baked tray, gift box, holiday assortment, café flat-lay, macaron showcase, decorated-cookie hero. Browse cookie photography styles built for bakeries.
- My Styles for collection consistency. Upload reference photos of your brand's look and FoodShot matches every new shoot to it.
- Multi-variation generation. One uploaded photo yields a menu version, a 1:1 delivery-app version, a 4:5 Instagram version, and a 16:9 website header — without re-shooting.
- Poster Mode for seasonal promo creative: Valentine's heart-cookie boxes, Easter assortments, Christmas tins, template-ready.
- Commercial license on every paid plan (starting at $9/month billed yearly).
The cost comparison is hard to argue with. Professional food photography typically runs $500–$2,500 per session, often more once you add a food stylist ($500–$1,200/day) and studio rental. A FoodShot Starter plan runs $9/month billed yearly and delivers 25 cookie-ready menu images — roughly 95% cheaper per image than a traditional shoot.
For more, see our food photography techniques breakdown and our food styling guide. Bakers shooting bread alongside cookies should also read the bread photography guide. Explore use cases on the bakery photography page, or compare plans on our pricing page.
Frequently asked questions
What is the best lighting for cookie photography?
Soft, diffused side light at a 30°–45° angle from the camera. Natural window light is the gold standard — north-facing for consistent indirect light, or any window in the morning or late afternoon. Add a white foam-board reflector on the opposite side to fill shadows. Avoid overhead kitchen lights, direct phone flash, and direct midday sunlight — all of them flatten texture or blow out whites.
How do I photograph macarons so the foot is visible?
Shoot straight-on at eye level, not from above. Place the macaron on a small riser — a coin, an upturned ramekin, or a 1-inch wood block — so it aligns with your phone lens. Use soft diffused side light at 45°; harsher light creates ugly shadows underneath the foot. Never refrigerate the shells before the shoot: condensation forms as they warm up and dulls the signature matte sheen.
How do I capture sprinkles in sharp detail?
Switch your phone to macro mode (iPhone 13 Pro and newer, Pixel 6 Pro and newer, recent Galaxy flagships all support it), or get 4–6 inches from the cookie. Use side light so each sprinkle casts a tiny shadow — that's what makes them read as dimensional instead of stuck-on flat. Tap and hold to lock focus on the densest sprinkle cluster, then scatter a few extras around for context.
Why do my royal icing colors look muddy in photos?
White balance, almost always. Standard kitchen tungsten bulbs run around 2700K and add a yellow-orange cast that turns whites cream, blues green, and pinks muddy. Shoot near a daylight-balanced window (around 5500K) instead, or correct white balance manually before exporting. Heavy filter presets also desaturate decorated cookie photography — keep edits light and color-true.
Can I shoot bakery menu photos using only my phone?
Yes. Any modern phone (iPhone 12 and newer, Pixel 6 and newer, recent Galaxy flagships) has enough resolution for menu, delivery app, and social use. Lock exposure with tap-and-hold, use the 2x lens for compression and to avoid fisheye distortion, and stabilize with a small tripod or stack of books. For commercial-grade output across a rotating cookie menu, AI food photo editing turns the same phone snap into a 4K menu shot in about 90 seconds.
Your cookies deserve photos that sell them. Snap a phone shot, upload, and your tray is bakery-ready in seconds. Try FoodShot free — 3 credits, no card required.
