Beer Photography: Pour, Foam & Glass Tips for Breweries
You poured the perfect beer. You opened the camera. By the time you focused, the head was gone, the glass was sweating in a weird streak, and the photo looked like a phone snapshot at a wedding reception.
Beer photography is the hardest beverage photography to do well and the easiest to do badly. Three forces fight you on every pour: time (foam decays in under 60 seconds), light (you're shooting through liquid and glass, not at a solid object), and reflections (your phone, your hand, the ceiling — all of it ends up in the shot).
This beer photography guide is for brewery owners, taproom managers, and craft beer brands who need menu shots, social posts, and release announcements that actually sell pints — not photographer portfolios. We'll cover the pour, the foam, the lighting, a style-by-style cheat sheet, a five-shot starter kit you can build for under $100, and the AI shortcut that takes a phone photo of any drink and makes it menu-ready in 90 seconds.
Quick Summary: Great beer photography is mostly about controlling foam, lighting amber translucency, and matching glassware to beer style. A $100 kit (glycerin spray, chopsticks, foamcore, phone tripod) gets a brewery 90% of the way there. AI tools like FoodShot handle the rest when you need volume — tap menu updates, weekly socials, new release shots — without booking a $500 shoot every Tuesday.
Why beer is the hardest drink to photograph
Wine sits still. Cocktails behave. Beer fights you. The foam collapses while you're focusing, the carbonation streams die in 90 seconds, and the moment a strobe warms the glass, your beautiful condensation runs in streaks.
Add the fact that most beer is brown — and brown on brown wood under warm bar lighting reads as a muddy blur — and you've got the trifecta of why so many brewery Instagram feeds look amateur. The good news: every problem in beer photography has a known solution. Most of them cost less than a six-pack.
The perfect pour shot: how to time the head and control the foam
Most "good" beer photos are won or lost in 15 seconds — from the moment you start pouring to the moment foam stabilizes.
Here's the bartender pour, adapted for camera: tilt the glass at 45 degrees, pour against the side, straighten the glass at the halfway mark, and let the final third build the head. Pour too gently and you get no foam. Pour straight down and you get nothing but foam. The perfect pour for beer photography lands somewhere in between, and it's the same technique pro bartenders use — just slowed down for camera.
For the photo itself, always do a setup pour first. Fill the glass halfway with a "stand-in" beer, lock your camera framing, then dump it and pour fresh for the real shot. This trick is borrowed from commercial beverage photography — it saves you from rushing the framing while foam is collapsing.
Foam science (the part nobody explains). Beer foam holds together because of surface tension between water, dissolved CO2, and proteins from malted grains. Anything that breaks that surface tension — dish soap residue, grease, oils — destroys head retention. Homebrewers have tested this exhaustively, and as the BeerSmith homebrewing blog documents, dish-soap-washed glasses kill foam every time. For shoot glasses, always rinse in hot water only.
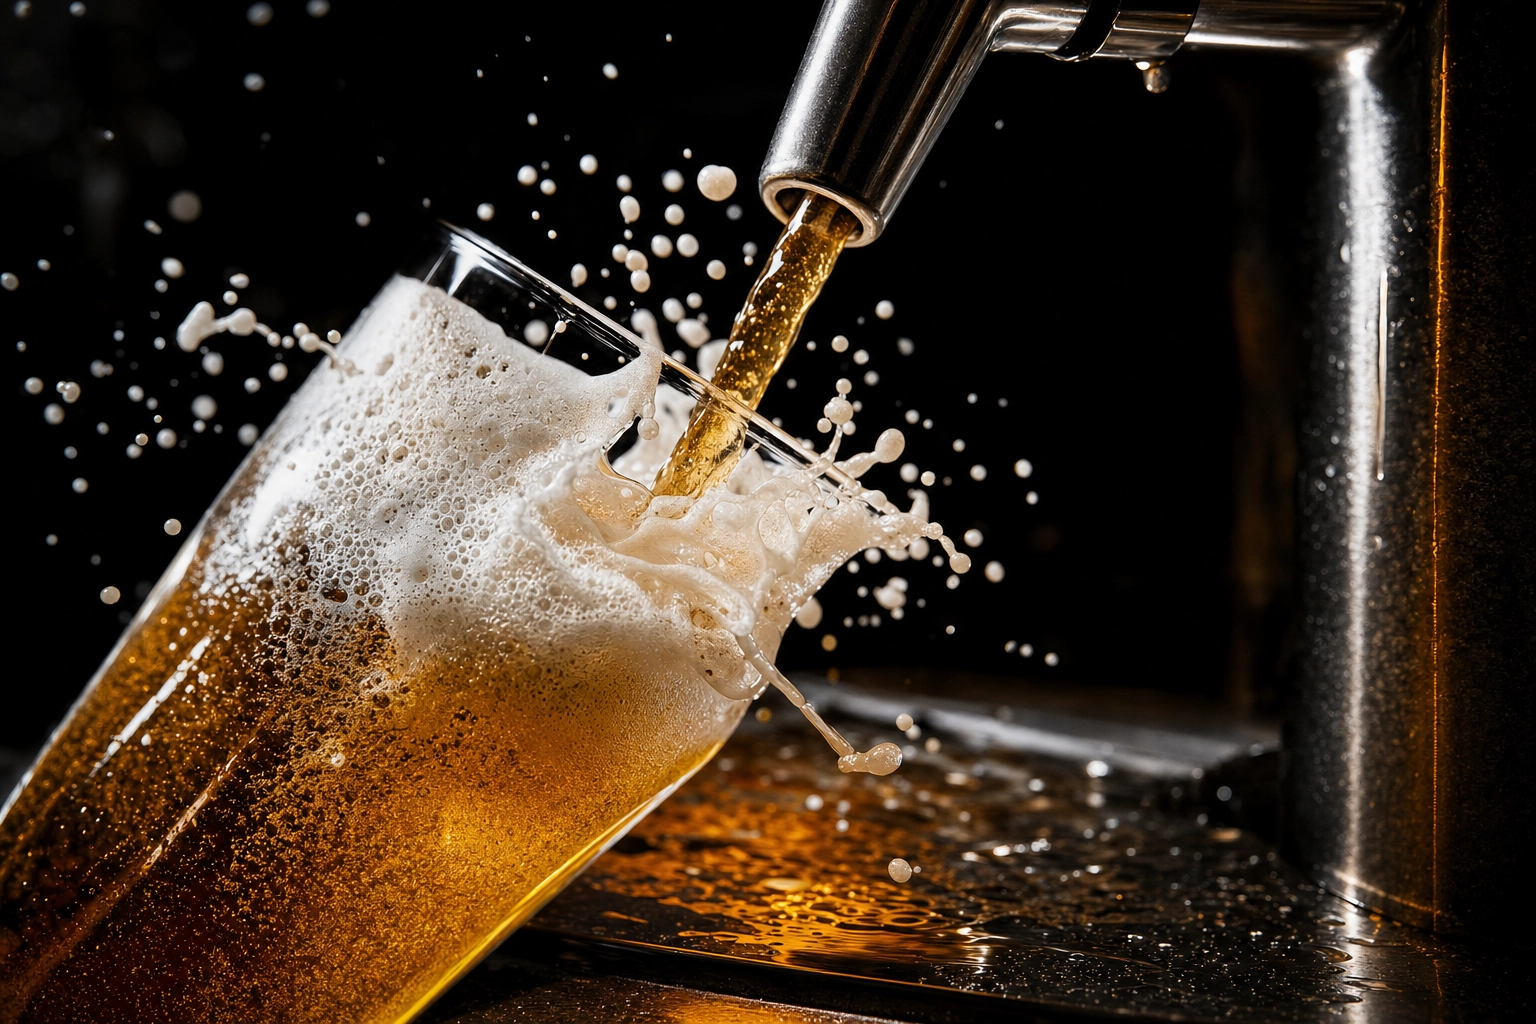 Macro action pour shot — golden lager cascading from stainless brewery tap into tilted pint glass with frozen foam bubbles mid-splash
The foam revival kit for perfect beer photos:
- Table salt. A few grains create nucleation points — tiny rough surfaces where dissolved CO2 forms new bubbles. Stir gently and the head rebuilds in seconds. Use fine table salt, not flakes.
- Wooden chopstick. Stir the beer with a wooden chopstick (not metal, not plastic) and the wood's surface releases trapped CO2 in a controlled cascade. Food stylists call this the chopstick trick for a reason — it's the cleanest, most predictable foam revival in beer photography.
- Crushed Alka-Seltzer. A quarter tablet creates dramatic, photogenic fizz that looks more natural than a soap-foamed beer. Use sparingly.
- Warm beer. Counterintuitive but true: warmer beer foams more reliably. Pull the bottle out of the fridge 5–10 minutes before the shoot.
What you should never use: dish soap or detergent. It produces lots of bubbles, but they look like dish-soap bubbles — too uniform, too round, no lacing on the glass.
The chopstick trick (and why it works)
If you photograph beer regularly, get a 50-pack of bamboo chopsticks for $5 and stash them in your bar drawer. Between shots, stir the glass for two seconds. The head rebuilds, you reset the camera, you shoot again. You can get six to eight good captures off a single pint instead of repouring every time — a small habit that transforms your beer photography productivity.
This is also the trick to use when a customer is in the frame holding a beer. The bartender hands them the pint, you stir for a beat off-camera, then shoot. Nobody notices.
Bottle, can, or glass: when to shoot each
Three vessels, three jobs in beer photography. Pick the wrong one and the photo never lands.
Glass shots are your hero 90% of the time. They show color, foam, clarity, and the actual product the customer will drink. Use a glass shot for menu boards, taproom signage, hero social posts, and tap takeover announcements.
Can shots sell the brand. The label, the artwork, the shelf appeal. Use a can shot for product launches, retail-facing marketing, online bottle shop listings, and anywhere customers buy by brand rather than by sip.
Bottle shots signal premium. A 750ml corked bottle, a barrel-aged stout, a brewery anniversary release — bottles do "occasion" better than cans. They also reflect more light (good for drama, hard for label readability).
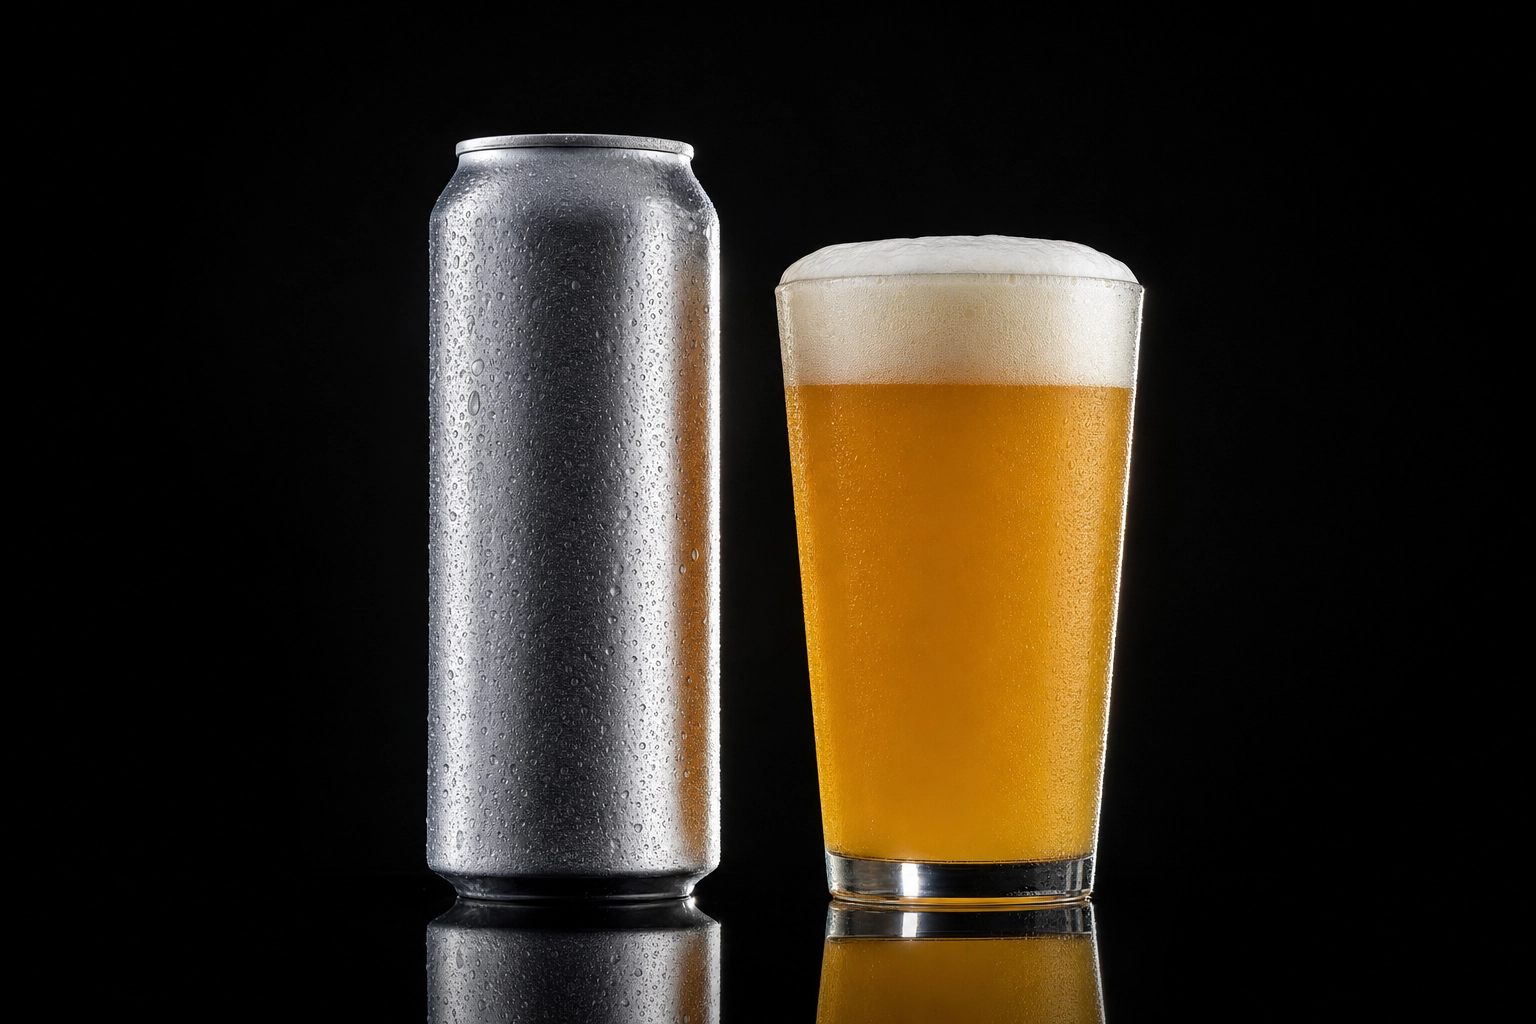 Craft beer can paired with matching pint glass on black acrylic — bottle vs glass product photography comparison for breweries
The pro move: always shoot the can or bottle with a glass next to it. The glass shows what's inside; the package shows what to buy. This is why every Allagash, Sierra Nevada, and Firestone Walker hero shot you've ever seen has both — it's the most reliable composition in commercial beer photography.
Label prep matters. Two rules that separate amateur from acceptable beer photography:
- Seal paper labels. Hit them with two coats of Krylon Crystal Clear (matte or gloss, depending on your brand's look) before you spray any glycerin or water. Unsealed paper labels bleed, wrinkle, and ruin shots. A $10 can seals dozens of bottles.
- Remove the rear label. It shows through the liquid in the front-facing photo and looks like a mistake. Soak the bottle in warm water for 20 minutes and peel.
For cans, polish with a microfiber cloth right before the shot — fingerprints kill the look. And for darker brown bottles, backlight is non-negotiable; without light passing through the glass, the bottle reads as a black silhouette.
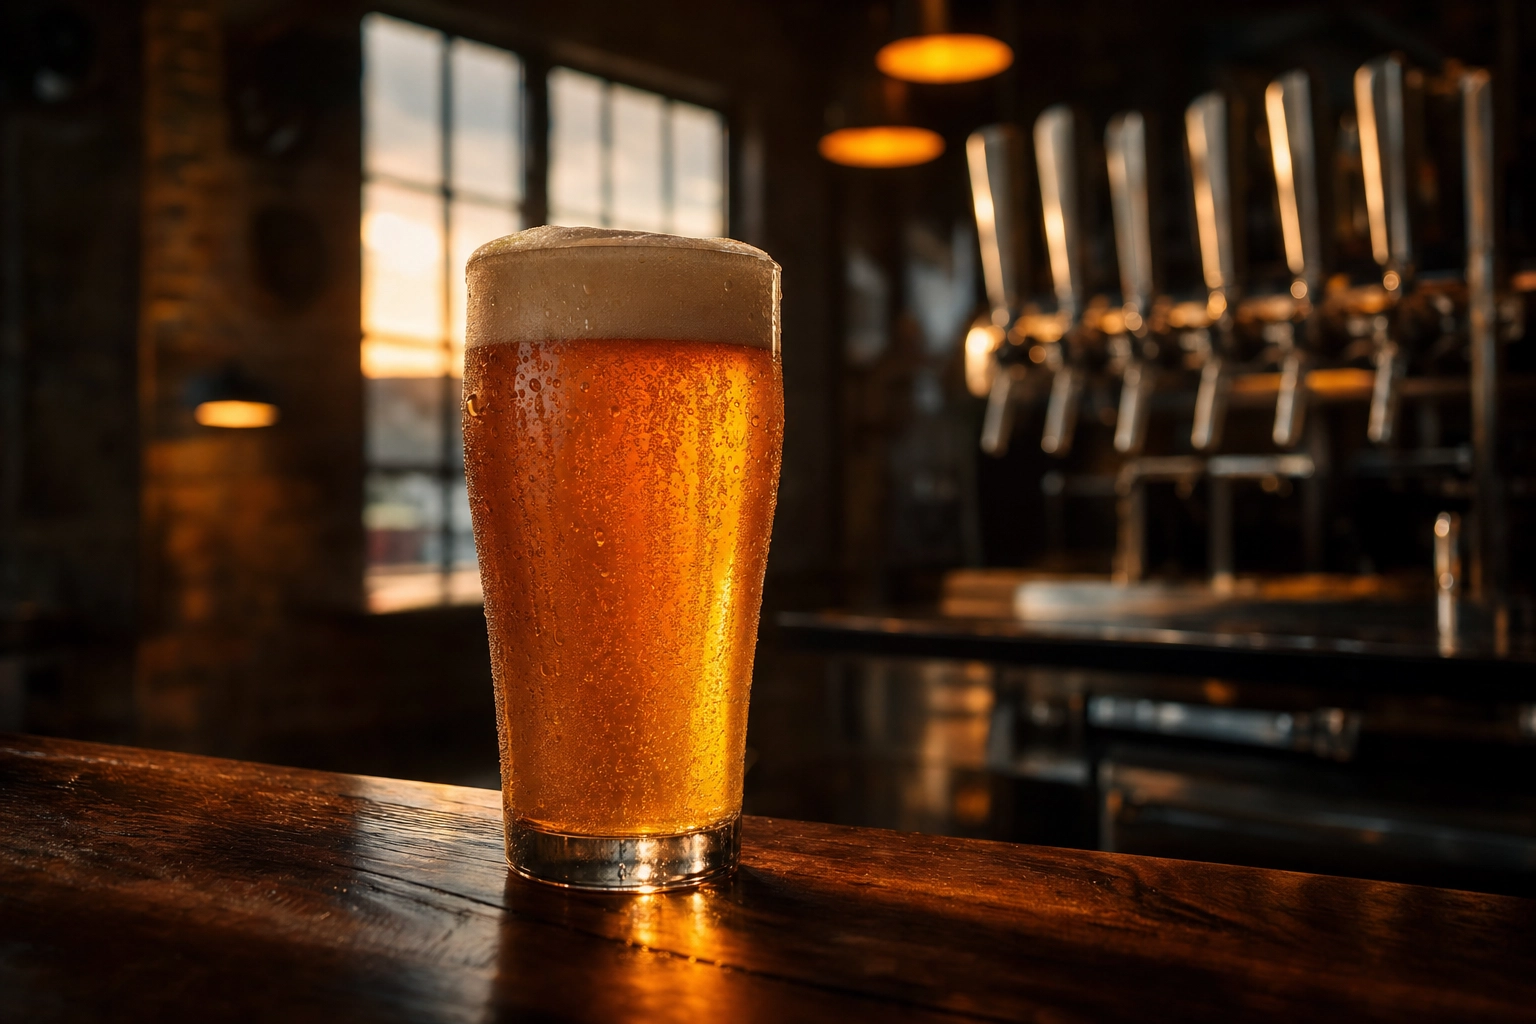
Lighting beer photography: backlit for translucency, side-lit for foam
This is the single most important decision you'll make. The wrong light makes a beautiful beer look like a flat brown rectangle. The right light makes a $4 phone photo look like a magazine spread.
Backlit (light directly behind the glass). Position your light source behind the beer, with diffusion (frosted plexiglass, white parchment paper, or a sheet from a $10 diffusion roll) between the light and the glass. Shoot toward the light. Result: amber translucency, glowing color, the magazine-ad look. Best for pilsners, IPAs, ambers, hazies — anything where color is the story.
Side lighting (45 to 90 degrees, diffused). Light comes from the side, foam catches highlights, the label stays readable. Best for stouts, product shots, and bottle-with-glass setups where you need both the liquid and the artwork to read.
Top lighting alone is the most common mistake in amateur beer photography — it kills foam shadow and flattens the head into a featureless blob. Use top lighting only in addition to a back or side light, never alone.
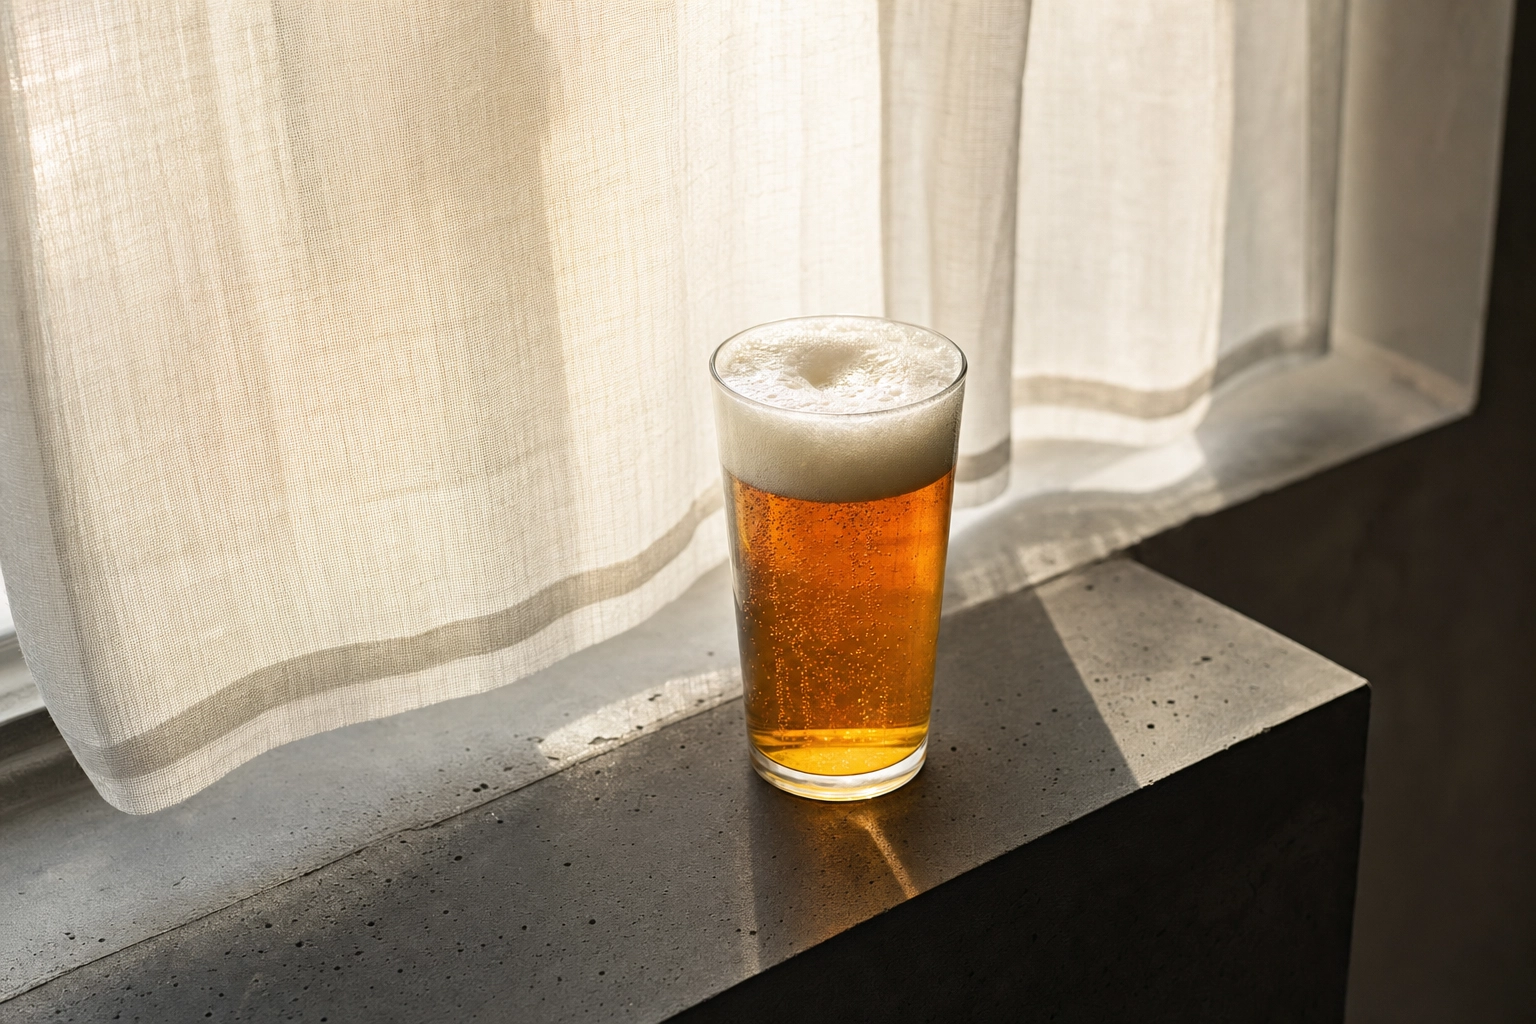 Backlit pint of amber lager on a windowsill glowing translucent gold through a sheer curtain — DIY beer photography lighting setup
The DIY backlit setup that costs nothing. A south-facing window plus a sheet of white parchment paper taped to the window equals professional-grade diffusion. Put the glass on the windowsill, shoot from the inside, and you'll get the same translucent glow that pros build with three strobes. Our food photography lighting guide goes deeper on the diffusion setups that work for every kind of food and drink.
Dark beers need backlight more than anything. Photograph a stout under top light and it looks like a hole — opaque black, no detail, no story. Backlight a stout and you'll see the truth: it's actually a deep red-brown with garnet highlights along the edges. That's the shot. The rim glow is what tells the eye "this is a beer," not "this is a glass of motor oil."
Condensation: real vs glycerin spray (and the corn syrup hack)
Real condensation lasts 60–90 seconds. It runs. It pools. It disappears the moment your strobes warm the glass. Useless for any real beer photography shoot.
Every professional beverage shot you've seen uses fake condensation. The standard mix:
50/50 vegetable glycerin + filtered water in a fine-mist spray bottle. Glycerin is the magic ingredient — it's viscous, hydrophilic, and pins water droplets in place for hours. A 4-ounce bottle costs around $8 at any pharmacy and lasts a full year of brewery photo shoots.
How to apply: chill the glass in a freezer for 10 minutes first so natural micro-droplets form. Then mist the glycerin mix from 12–18 inches away, building droplets gradually. For "hero" droplets in key spots (the curve of the glass, near the foam line), use a small syringe or the tip of a clean paintbrush to place individual large drops — the same trick food stylists use on a thousand-dollar magazine shoot.
The kitchen-cabinet alternative: light corn syrup thinned 1:3 with water. Heavier, stickier, harder to clean up — but works in a pinch. Some food stylists prefer corn syrup for ultra-large beaded droplets.
What to avoid: spraying directly onto exposed paper labels (this is why we sealed them with Krylon). And avoid water alone — droplets will always run within 30 seconds and you'll be wiping the glass between every shot.
Beer style cheat sheet: shoot each style how it deserves
Customers recognize style cues even if they couldn't name them. A stout in a pilsner glass looks wrong. A pilsner with a cloudy body looks broken. Get the visual signatures right and your beer photos read as authentic before anyone reads the caption. The Beer Judge Certification Program style guidelines are a useful reference if you want the official appearance specs for any style.
IPAs. Color ranges from straw gold (West Coast) to deep copper (English) to opaque hazy yellow (NEIPA). Foam is off-white and persistent. Props: fresh hop cones, citrus peel, pine sprigs. Lighting: backlit to show the haze or clarity, depending on the substyle.
Stouts. Body looks opaque black but is actually deep red-brown. Foam is tan to khaki, dense, and on nitro pours, cascades from top to bottom. Props: roasted coffee beans, dark chocolate squares, charred oak chips. Lighting: backlit, always. Side light shows the cascade.
Pilsners and pale lagers. Crystal clarity is the entire point. Pale straw to pale gold, pure white foam, fine bubbles rising. Props: pretzels, simple meat-and-cheese plate, or nothing at all. Lighting: backlit or side-lit, never busy. Let the bubbles be the prop.
Wheat beers (hefeweizen, witbier). Cloudy yellow-orange, towering pillowy white head, lemon or orange wheel garnish. Hefeweizens deserve the tall weizen vase glass — the height showcases the foam. Lighting: bright, summer mood, side-lit for foam texture.
Sour beers. Color is the hero — pink, red, purple for fruited sours; pale gold for goses and Berliners. Foam is minimal and shouldn't be forced. Props: fresh fruit matching the sour (raspberry, peach, cherry), or salt rim for a gose. Glassware: flute or wine glass to highlight color.
Belgian strong ales, quads, Trappists. Rich amber to deep mahogany, thick rocky head, served in a chalice. Props: monastery-aesthetic dark wood, old books, candlelight (if you're feeling dramatic). Lighting: warm, low-key, side-lit.
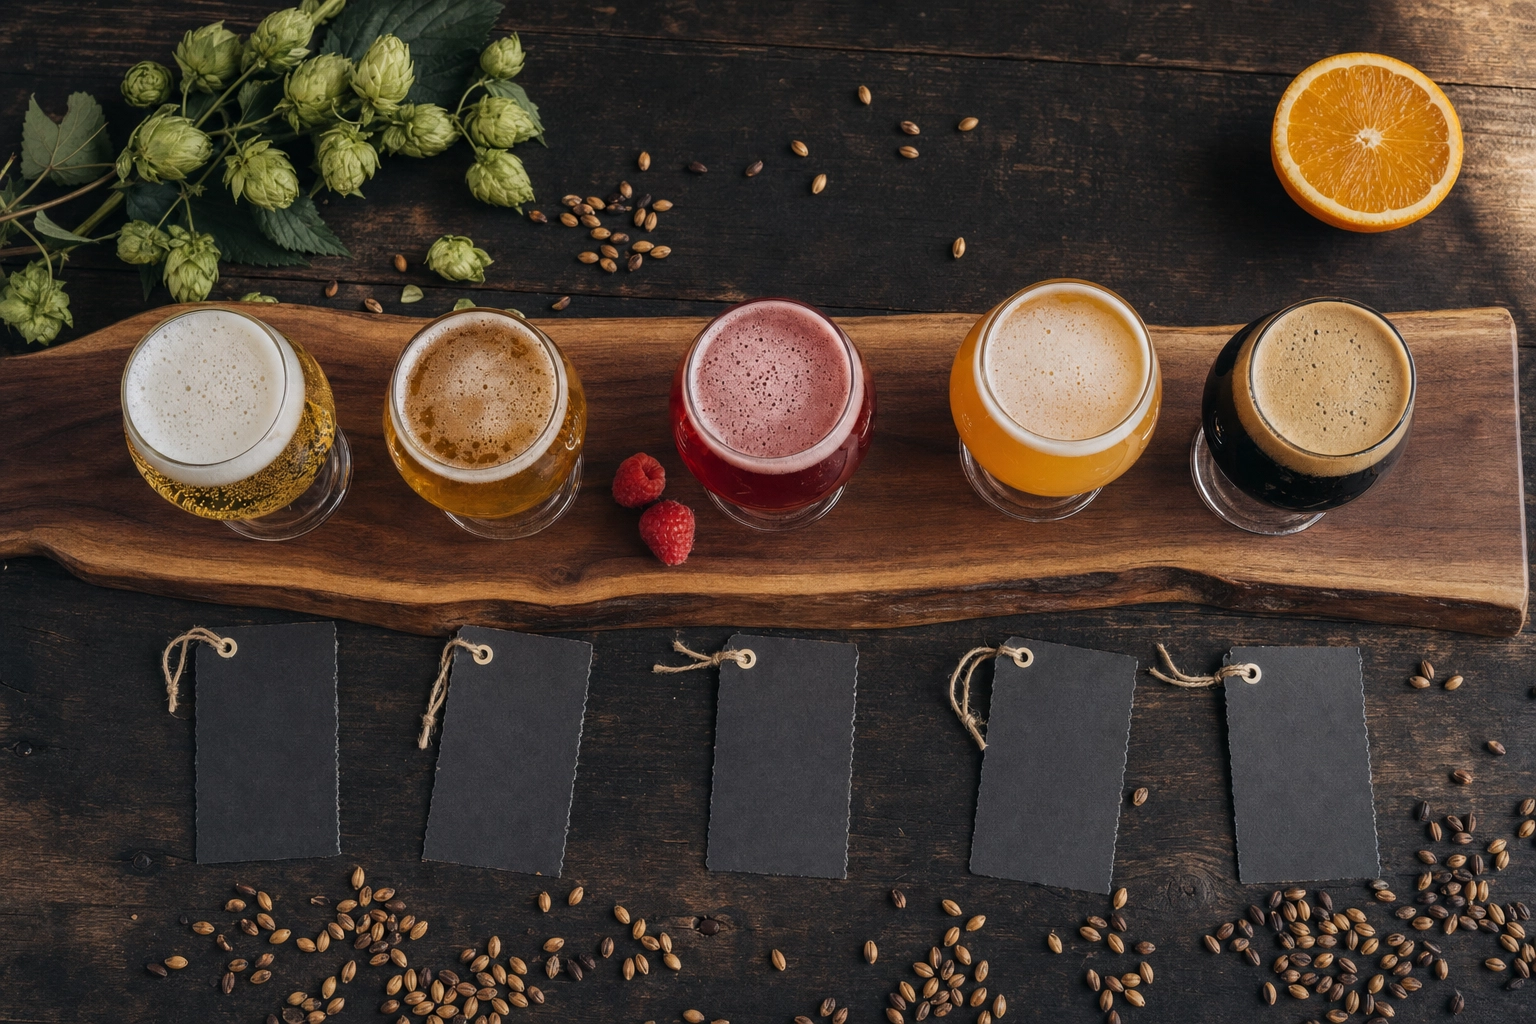 Overhead flight of five craft beer styles on walnut paddle — pilsner, IPA, fruited sour, NEIPA, stout with foam variations and tasting cards
Quick glassware match guide
- IPA / pale ale → Tulip or stemmed IPA glass
- NEIPA / hazy → Stemmed tulip or teku
- Stout / porter → Tulip pint or nonic; snifter for imperials and barrel-aged
- Pilsner / light lager → Tall slim pilsner glass or classic pint
- Wheat / hefeweizen → Weizen vase (no substitutions — the shape matters)
- Belgian strong / Trappist → Chalice or goblet
- Sour / lambic → Champagne flute or wine glass
- Barleywine / imperial stout → Snifter
- Saison → Tulip or wine glass
If you only buy three glasses for beer photography shoots: a tulip, a weizen vase, and a nonic pint. Those three cover 90% of beers you'll ever need to shoot.
Brewery context: tap walls, growlers, and lifestyle shots
Product shots tell you what. Context shots tell you where and why. A brewery feed full of nothing but glass-on-black gets boring fast. Mix in environment shots and your social engagement holds steady through the year.
The tap wall close-up. Shallow depth of field, three or four handles in focus, brewery softly blurred in the background. This is your "we're a real place" shot. Phone portrait mode handles this beautifully — no DSLR needed.
The growler fill. Stainless steel faucet, beer streaming into a glass growler, hands in frame, slight motion blur on the pour. Sells the freshness story like nothing else. Best shot at the actual fill station, not staged.
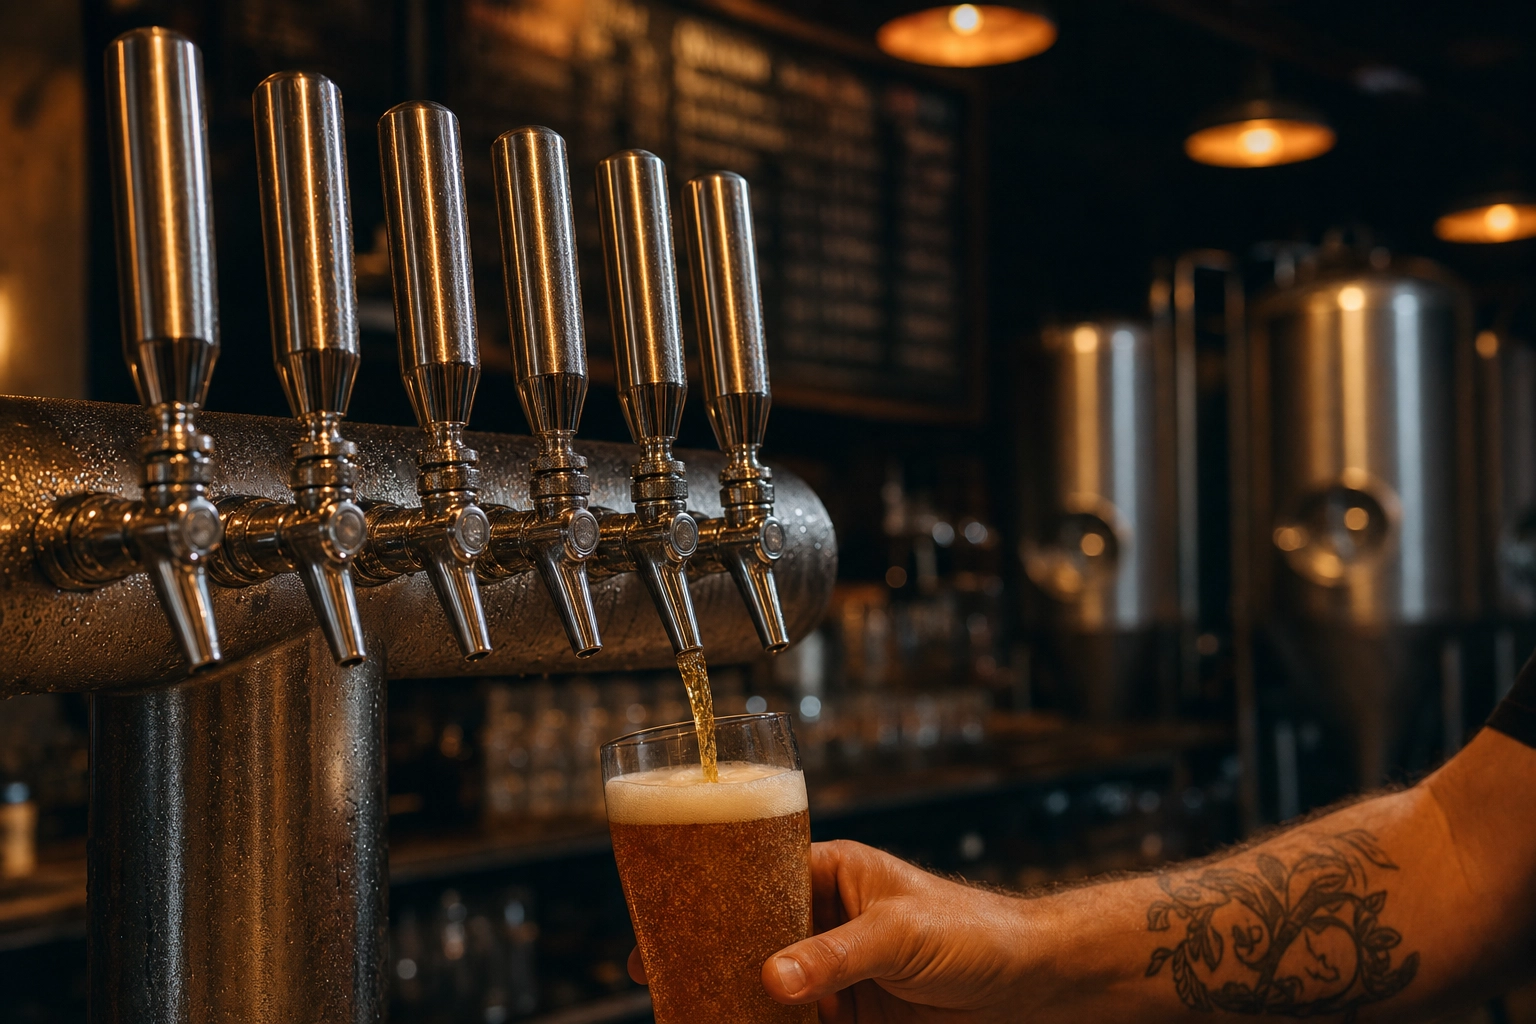 Brewery tap wall close-up with stainless tap handles in focus, fermenters and chalkboard blurred behind — taproom context beer photography
The bartender pour. Over-the-shoulder or eye-level perspective. Fire 3–4 quick frames during the pour. The shot you want is the one with the most active foam and the bartender's hand still on the tap handle.
Flight boards. Wood paddle, four or five small pours, chalkboard tasting cards. Overhead angle works best. This is one of the highest-engagement post types for breweries on Instagram — it shows range, encourages comments ("which would you try first?"), and works seasonally.
Brewhouse moody. Stainless fermenters as backdrop, a pint of finished beer in the foreground. Pulls back the curtain. Works for behind-the-scenes content, hiring posts, and origin storytelling.
Lifestyle scenes. Hands raising a pint on the patio, group cheers across a long communal table, a single pint on a windowsill at golden hour. Lifestyle shots build emotional connection — they're the "I want to be there" shot, not the "I want to drink that" shot. Both jobs matter, and both deserve a place in your beer photography rotation.
The 5-shot brewery starter kit under $100
You don't need a Sony A7 and three strobes to upgrade your brewery feed. Here's the entire beer photography kit, sourced from Amazon or a pharmacy, that will outperform 90% of brewery photos on Instagram:
- Vegetable glycerin, 4 oz — $8. Your condensation magic. Lasts a year.
- Fine-mist spray bottle, 2 oz — $5. Get the kind with an adjustable nozzle. Label it so nobody mistakes it for window cleaner.
- Bamboo chopsticks, 50-pack — $5. Foam revival, stir sticks, occasional prop.
- Krylon Crystal Clear sealant, matte — $10. Seals paper labels before any spray work touches them.
- Black acrylic sheet, 12x18 inches — $20. Use as a reflective base under the glass. Looks like premium black marble in the photo.
- Foamcore boards, white + black, 20x30 — $15 for a 2-pack. White = reflector to fill shadows. Black = flag to block unwanted light or create dark edges.
- Phone tripod with Bluetooth shutter — $20. Stability for low-light shots. Bluetooth shutter means you don't shake the camera tapping the screen.
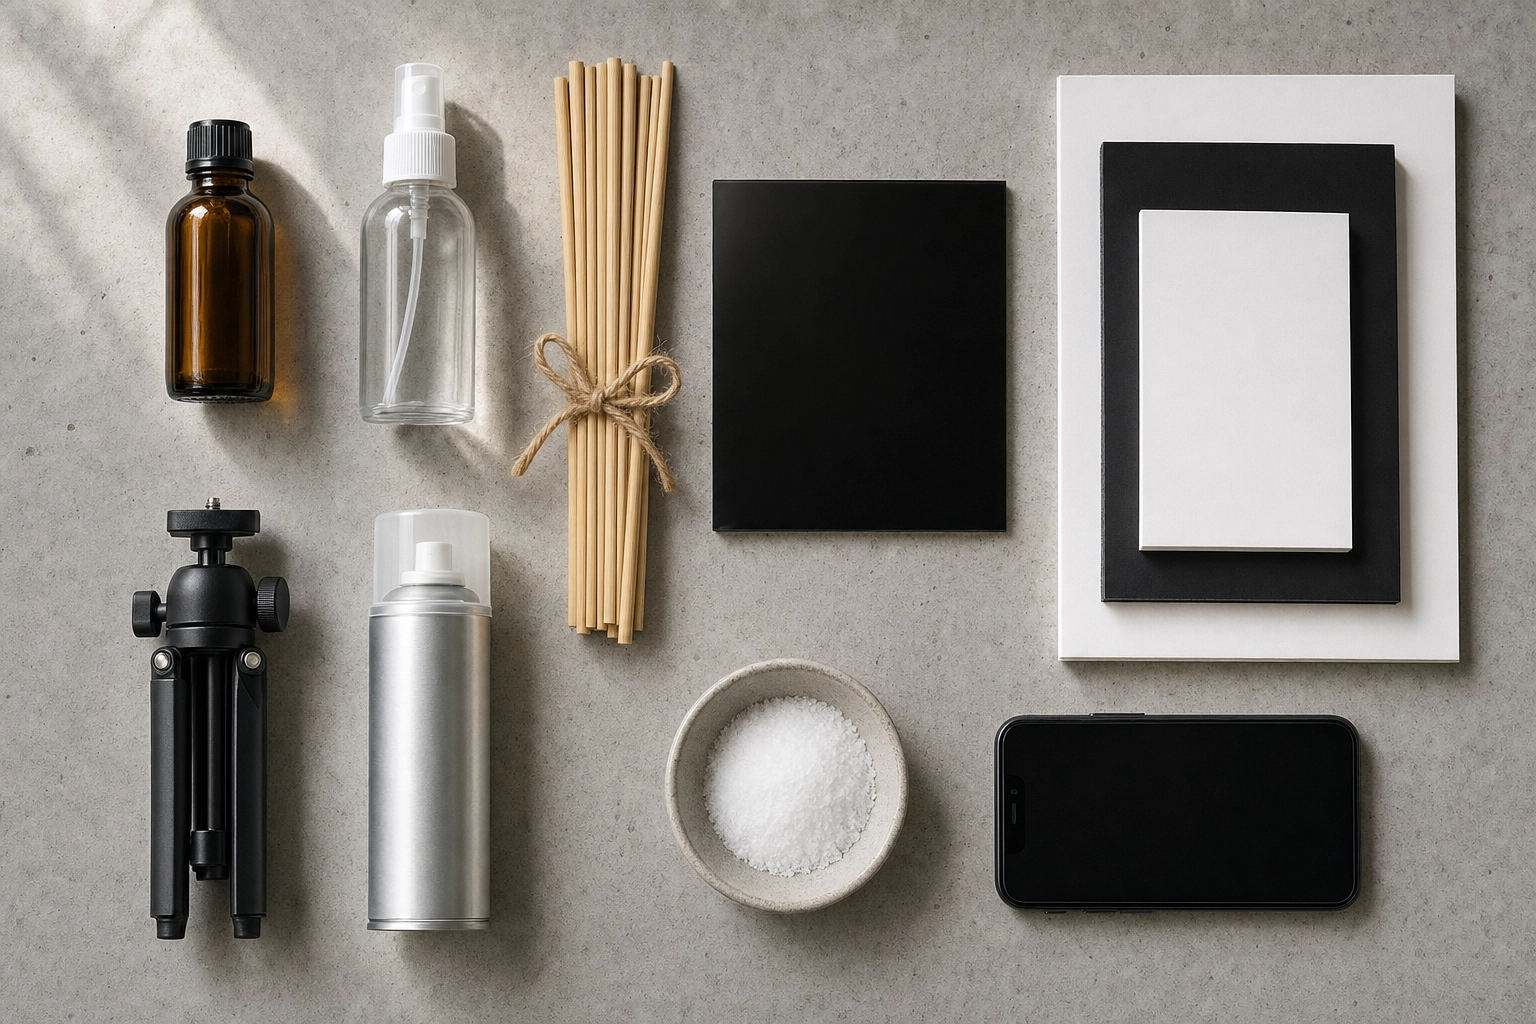 Beer photography starter kit flat lay — glycerin, spray bottle, chopsticks, foamcore, acrylic, tripod, sealant on concrete
Subtotal: roughly $83. Add table salt from your kitchen ($0) and one wooden chopstick from the pack you already bought, and you have a complete brewery beer photography kit for under $100.
Your phone is the camera. A window is the light. This kit is the difference between phone-snap mediocrity and shots that look intentional. The same setup works for pairing photos — beer-and-burger flat lays, charcuterie spreads, food-and-drink combinations — which is half the brewpub social calendar anyway.
The AI shortcut: when (and when not) to use FoodShot
The starter kit is great when you have an hour and want to do beer photography right. But most brewery operators don't have an hour — they have a tap menu changing twice a week, six social posts a week, a new release every month, and nobody on staff whose job is photography.
That's where AI fits in. Snap your beer with a phone (any phone), upload to FoodShot's AI food photo editor, pick a Beverage or Industrial style preset, and you get a studio-quality version in 90 seconds. The foam stays where it was, the label fidelity is preserved, and you get a 4K commercial-licensed file you can drop straight into a menu, an Instagram post, or a delivery app listing.
Builder Mode is where it gets interesting for breweries: combine a background (taproom, fermenters, dark wood bar, outdoor patio) + glassware shape + your actual beer photo. One phone shot becomes ten different scenes for ten different posts. Tap menu, anniversary release, food pairing, seasonal launch — all from one upload.
My Styles is for breweries with an established look. Upload three to five of your existing hero shots and FoodShot will match every future release to that exact aesthetic — same lighting tone, same surface, same mood. Brand consistency across a year of releases without re-briefing a photographer every time.
When AI is not the answer: flagship label hero shots for retail packaging, anything that needs pixel-perfect can-art fidelity for shelf marketing, or campaigns where a single image is the centerpiece of a six-figure spend. Those still deserve a human shoot.
The math. FoodShot's Starter plan is $9/month billed yearly (or $15 month-to-month), with 25 enhanced photos a month and a commercial license. The Business plan is $27/month yearly for 100 photos. The Scale plan adds bulk processing — five beers enhanced at once, useful for full tap menu refreshes. Compared to the $250–$2,500 a freelance beverage photographer typically charges per session, the cost per usable beer photo goes from triple-digit to single-digit dollars.
For most breweries, the workflow becomes: shoot the four or five flagship pours once a year with the starter kit (or a freelancer), and use AI for everything else — weekly tap updates, monthly releases, daily social. Real photography for hero moments. AI for the volume. Compare FoodShot's plans to see what fits your release cadence.
If you also run a kitchen, the same approach works for food shots. We cover the technique side in our food photography lighting guide, and pairing-night shots are covered in our fine dining photography techniques breakdown. Beverage-focused folks can also check our cocktail photography and wine photography guides, and brewpub operators may want the bars & lounges photography playbook.
Frequently Asked Questions
How do I get that golden glow in beer photos?
Backlight the glass. Always position your light source — a window, a softbox, or a cheap LED panel — directly behind the beer with a sheet of diffusion (frosted plexiglass or white parchment paper) between the light and the glass. Shoot toward the light. The amber liquid acts as a filter and glows. This is the single most impactful change you can make in beer photography, and it costs nothing.
Why does my beer foam disappear before I can take the photo?
Three culprits: cold beer (foams less), oily glassware (kills surface tension), and timing. Pull the bottle out of the fridge 5–10 minutes early, rinse the glass in hot water only (no dish soap residue), and revive the head between shots with a wooden chopstick stir or a few grains of table salt. With those three changes you can get six to eight perfect captures from a single pint.
How do I photograph dark beers like stouts without losing detail?
Backlight, always. A stout under top light alone reads as a black void with no shape and no character. Move the light behind the glass with diffusion and the stout reveals its true color — deep red-brown with garnet highlights along the edges. Add a small side light to bring out the tan foam texture. The rim of light around the glass is what tells the viewer "this is a beer," not "this is an empty cup."
Do I need a DSLR or can a phone really work for brewery beer photography?
A modern phone (iPhone 13 or newer, equivalent Android) shoots beer better than a $2,000 DSLR did ten years ago. Use the main rear camera (not the wide or telephoto), portrait mode for shallow depth of field on context shots, and a small tripod with Bluetooth shutter for low-light stability. The limitations show up only in high-end commercial work — packaging shoots, retail point-of-sale photography — where pros still earn their fee.
How often should breweries refresh their beer photos?
Hero shots (flagships) once or twice a year. Seasonal releases when each release drops. Tap menu shots whenever the lineup rotates — usually every 2–4 weeks for most craft breweries. Social posts daily or every other day. The math gets ugly fast if you're hiring a photographer for each rotation, which is exactly the workflow gap AI tools fill.
Can AI beer photography really match a professional shoot?
For 80% of brewery use cases — menus, social, delivery apps, release announcements — yes, comfortably. The remaining 20% (retail packaging, magazine spreads, large-format print) still benefits from a human shoot. The honest framing isn't "AI replaces photographers." It's "AI handles the volume so the photographer's budget goes toward the shots that actually need a photographer."
Brewery-ready beer photography in 90 seconds
You can't pour the perfect beer for every social post. You can pour one perfect beer, photograph it well, and let an AI tool turn it into a month of menu-ready content.
The five-shot kit, the foam tricks, and the glassware-by-style guide above will make every phone shot dramatically better than what's already on your feed. And when the calendar gets ahead of you — a new release, a tap rotation, three Tuesday socials — the AI beer photography page shows exactly what FoodShot can do with one quick upload. Brewery-ready beer photography in 90 seconds, no shoot day required.
