Coffee Photography: Latte Art, Bags & Cafe Shots Guide
Most coffee photography advice is written for someone with a tripod, a DSLR, and an afternoon to spare. That's not your reality. You're behind the bar, the espresso machine is hissing, three drinks are queued, and the marketing team wants a fresh menu shot by Friday.
This guide is for the actual humans pulling shots and pouring milk: baristas, cafe owners, and roasters who need beautiful coffee photos shot on a phone, in a working cafe, between rushes. No studio. No props you don't already have on the shelf. Just the techniques and timing that turn a 30-second window between customers into a menu-ready image.
Quick Summary: Great coffee photography on a phone comes down to three things — shoot the latte art within 30 seconds before it fades, find one good window seat and use it for everything, and polish the result with AI styles instead of fighting Lightroom on your break. The barista is the photographer, and the workflow has to match the shift.
Why coffee photography is different from food photography
Coffee is a moving target. A plated dish sits there. A latte does not.
The microfoam crown on a latte starts separating into liquid and foam the moment it lands in the cup. Espresso crema visibly dissipates within 30 seconds. Ice melts. Cold brew oxidizes. Steam from a pour-over disappears in two seconds. Every coffee photo is a race against entropy — which is why the standard food photography playbook fails behind the bar.
Four enemies ruin most coffee photos in real cafes:
- Mixed lighting — tungsten warm bulbs, daylight from windows, and green-tinted LED downlights all hitting the same cup at once
- Lost contrast — phones auto-expose to the white milk, blowing out the foam and crushing the brown
- The clock — every second the design is on the cup, it's degrading
- Fingerprints — your phone lens lives in an apron pocket, and you have not cleaned it today
Solve those four and you've solved most cafe photography. The rest is composition.
The 4 essential cafe shots every coffee shop needs
You don't need 50 hero images. You need four shots, done well, repeatable on any shift. These cover roughly 90% of menu, social, and packaging needs for a working cafe or roaster.
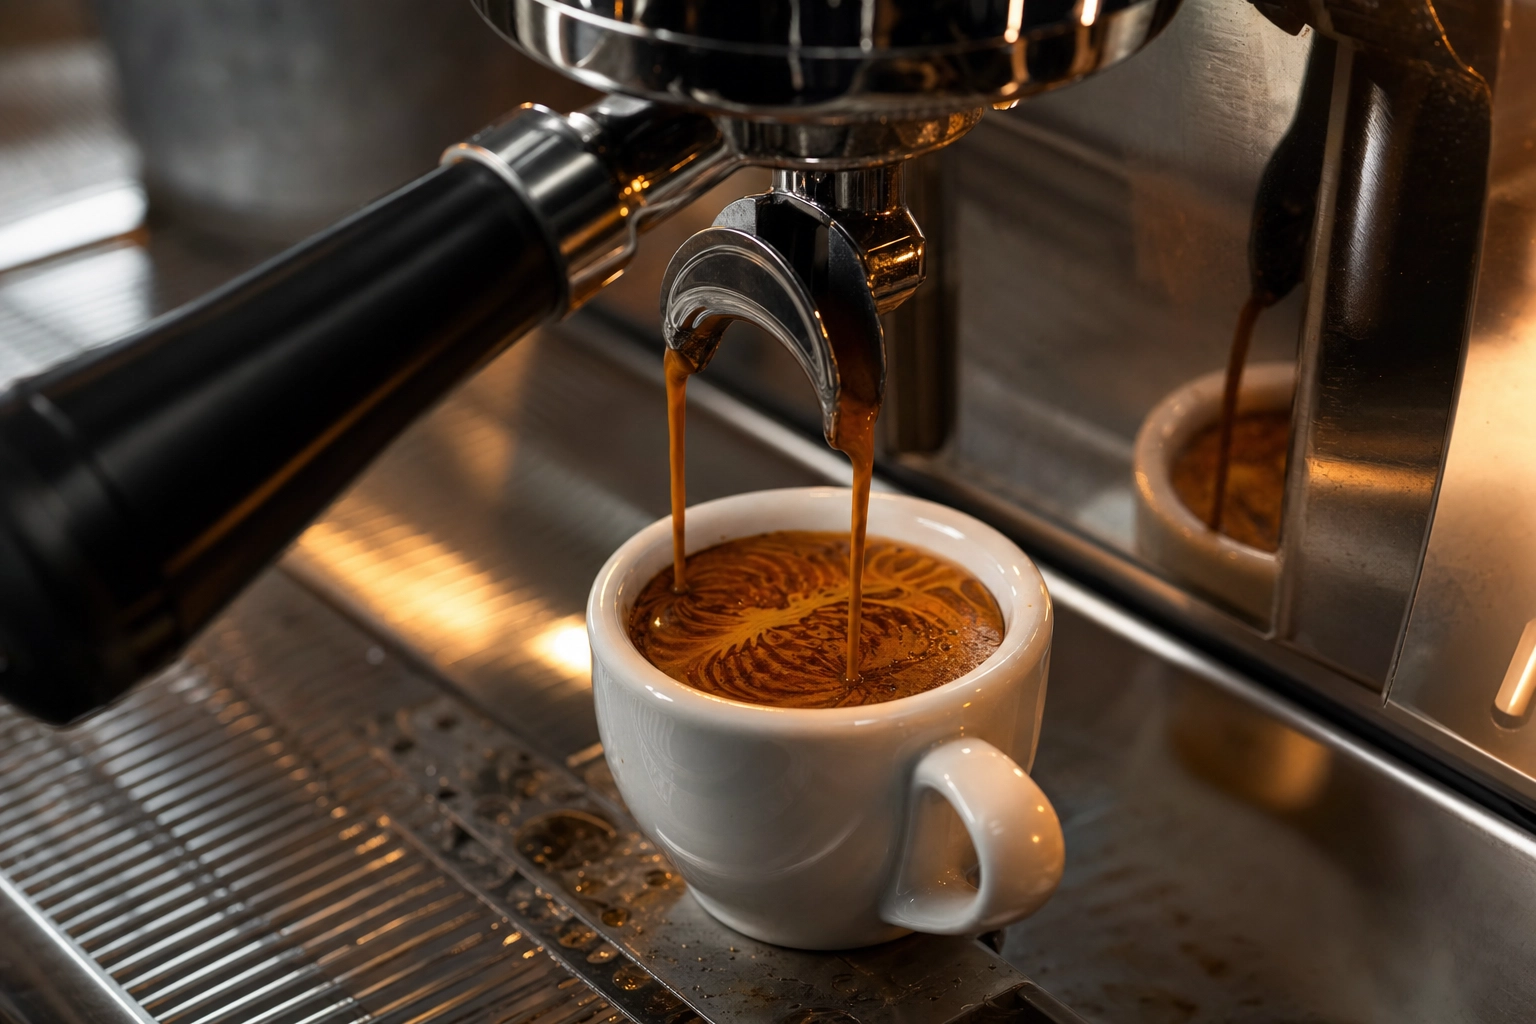
1. The espresso pour (sub-15 second window)
The espresso shot is the most time-sensitive image in your cafe. Crema is at its photogenic peak the moment the shot finishes pulling, and it visibly dies within 30 seconds. You have 10–15 seconds to land the frame.
Set up before you pull, not after:
- Pre-position your phone at the angle you want — a tight 45° hero, or a true top-down to show the crema swirl
- Lock focus on the cup rim by tapping and holding
- Lock exposure on the crema itself, not the white saucer (phones love to overexpose foam)
- Burst-shoot the last second of the pour using the volume key
The single best espresso angle is 45° looking down into the demitasse with the portafilter spout visible at the top of the frame. It tells the whole story: machine, crema, cup.
 Double espresso shot pulling from portafilter spouts into white demitasse cup showing thick crema and tiger-striping pattern
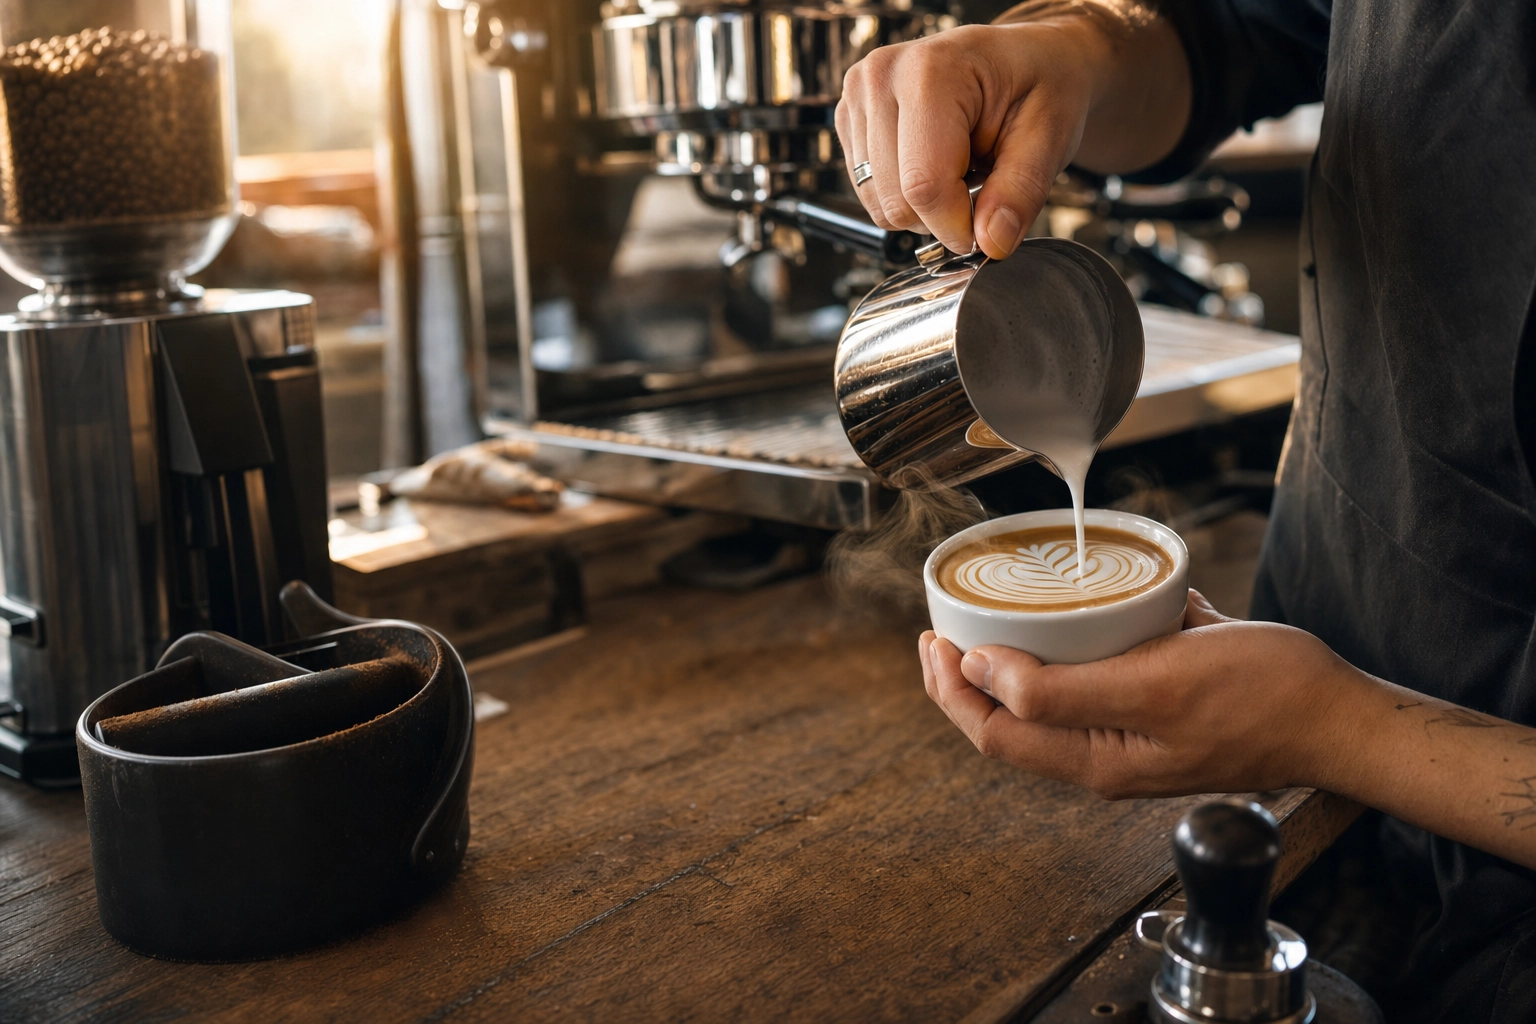
2. Latte art top-down
A latte art shot wants exactly one angle — 90° directly overhead, lens parallel to the surface of the drink. Anything else flattens the design and makes a rosetta look like a smudge.
Pour first, set the cup down on your shooting surface, then bring the phone over the top. Trying to pour and shoot simultaneously gives you a blurry hand and an art-less cup.
If you photograph latte art every day, mount your phone on a small overhead arm above your bar before service starts. A $15 clamp turns every drink into a potential menu photo, with zero added time per pour. White cups are the simplest contrast surface. Matte black ceramic adds a moodier feel — but avoid glossy black, which catches reflections of the ceiling.
 Top-down overhead view of rosetta latte art pattern in white cup showing perfect symmetric microfoam fern leaves
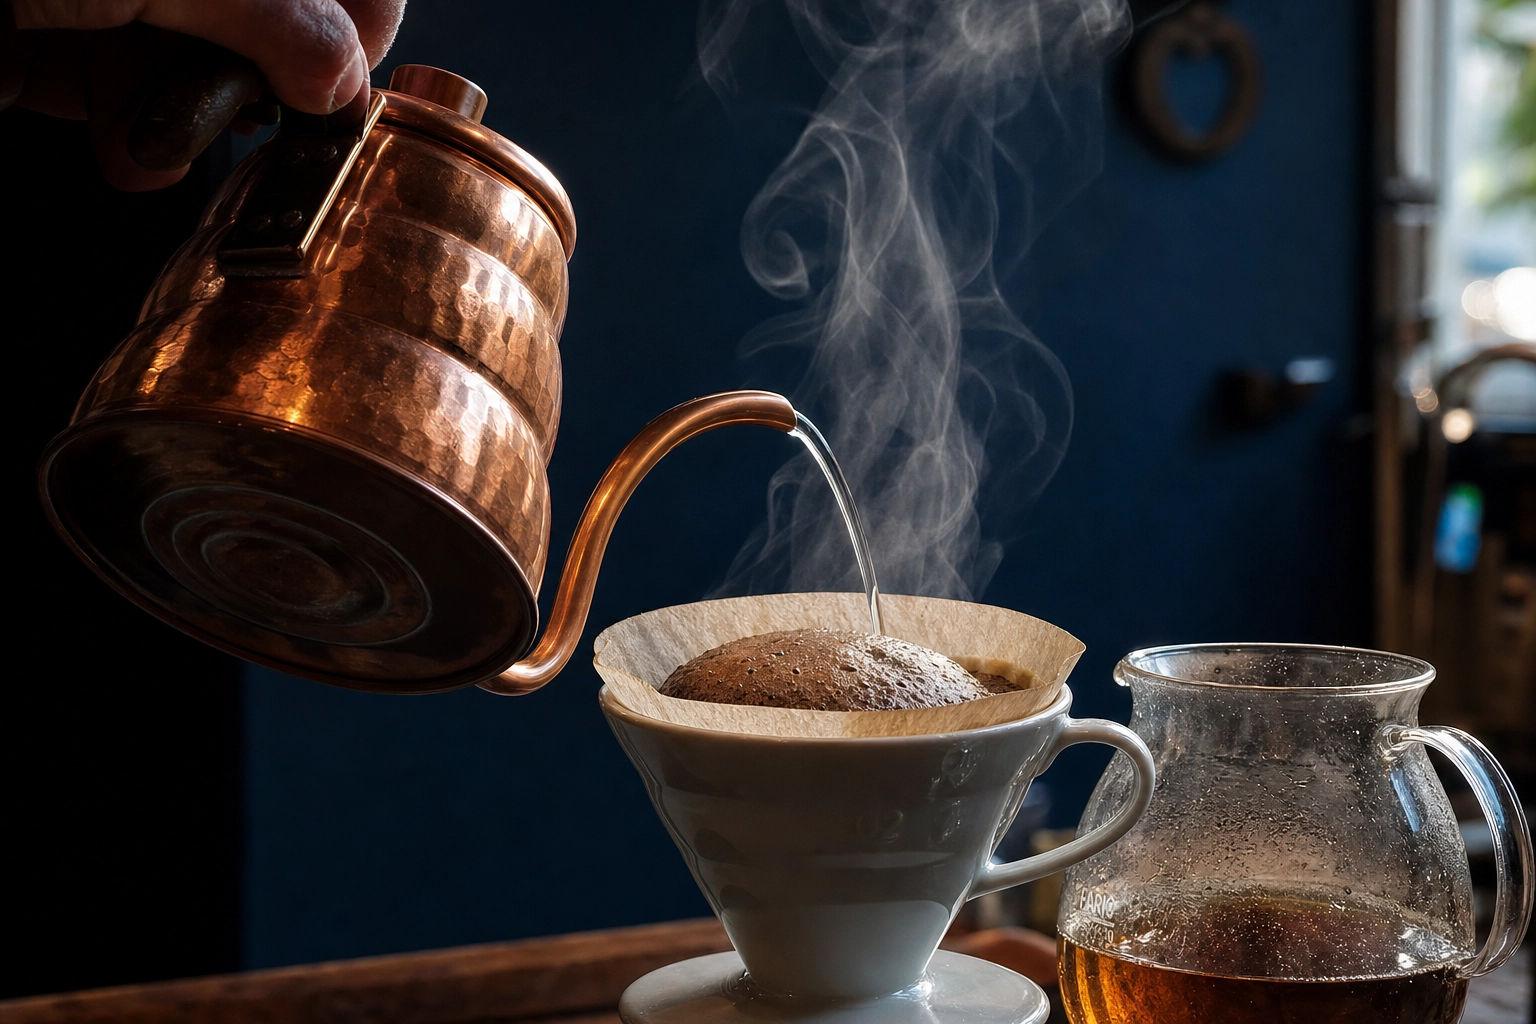
3. The pour-over process shot
Pour-over is one of the few coffee moments where you actually want eye-level or slightly low-angle. You're capturing motion — the gooseneck kettle stream, the bloom rising, steam against a darker background.
Three things make a great pour-over shot:
- Backlight the steam by positioning yourself with a darker wall or surface behind the dripper. Steam disappears against a white background.
- Shoot mid-bloom, about 10 seconds into the pour, when the bed is most active and the kettle hand is at its most natural angle.
- Burst the entire pour with the volume button, then pick one frame later. Trying to time a single shutter press to the perfect water stream is a losing game.
 Pour-over coffee brewing with copper gooseneck kettle pouring water onto blooming coffee bed in V60 dripper against navy background
4. The retail bag hero
For roasters and any cafe selling beans on the shelf, the bag photo is the e-commerce conversion driver. Packaging research consistently shows that bags photographed with the product (beans spilling out, a brewed cup nearby) outsell pure packshots, because they communicate freshness instead of just identity.
Two versions are worth shooting for every bag:
- E-commerce packshot — bag centered, front-of-label readable, clean neutral background, no glare on the foil
- Lifestyle hero — flat-lay with beans, a brewed cup, maybe a brew device in soft focus
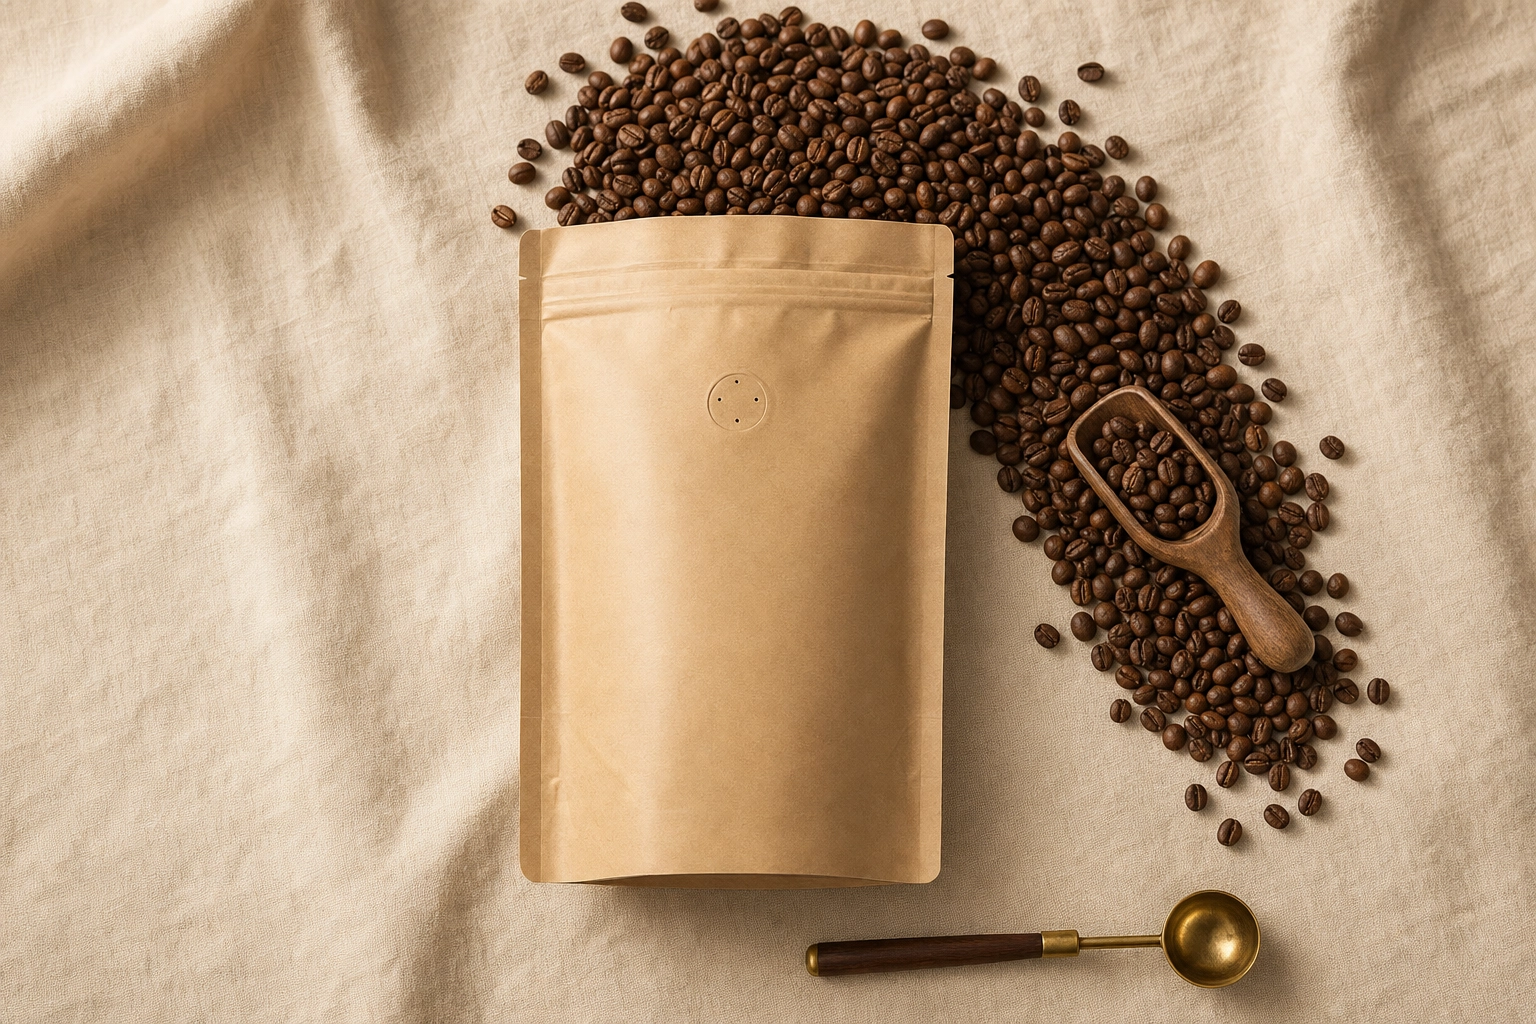 Flat-lay coffee bean bag photography with kraft paper bag and beans spilling onto linen surface beside wooden scoop
Foil bags love to catch glare. Angle the bag 15° off the light axis to keep the print readable and kill the hotspot. If you can see your reflection in the bag through the phone screen, your customers will too.
Lighting in a real working cafe
Lighting is the single biggest variable between an amateur and a professional coffee photo, and in a working cafe it's also the variable you have the least control over.
The mixed-lighting problem is universal: most cafes layer warm tungsten Edison bulbs (around 2700K), daylight from front windows (5500K+), and modern LED downlights (often green-tinted 4000K). Hit one drink with all three sources at once and your phone's auto white balance picks an unhappy average, leaving your latte looking jaundiced.
Three fixes that actually work mid-service:
-
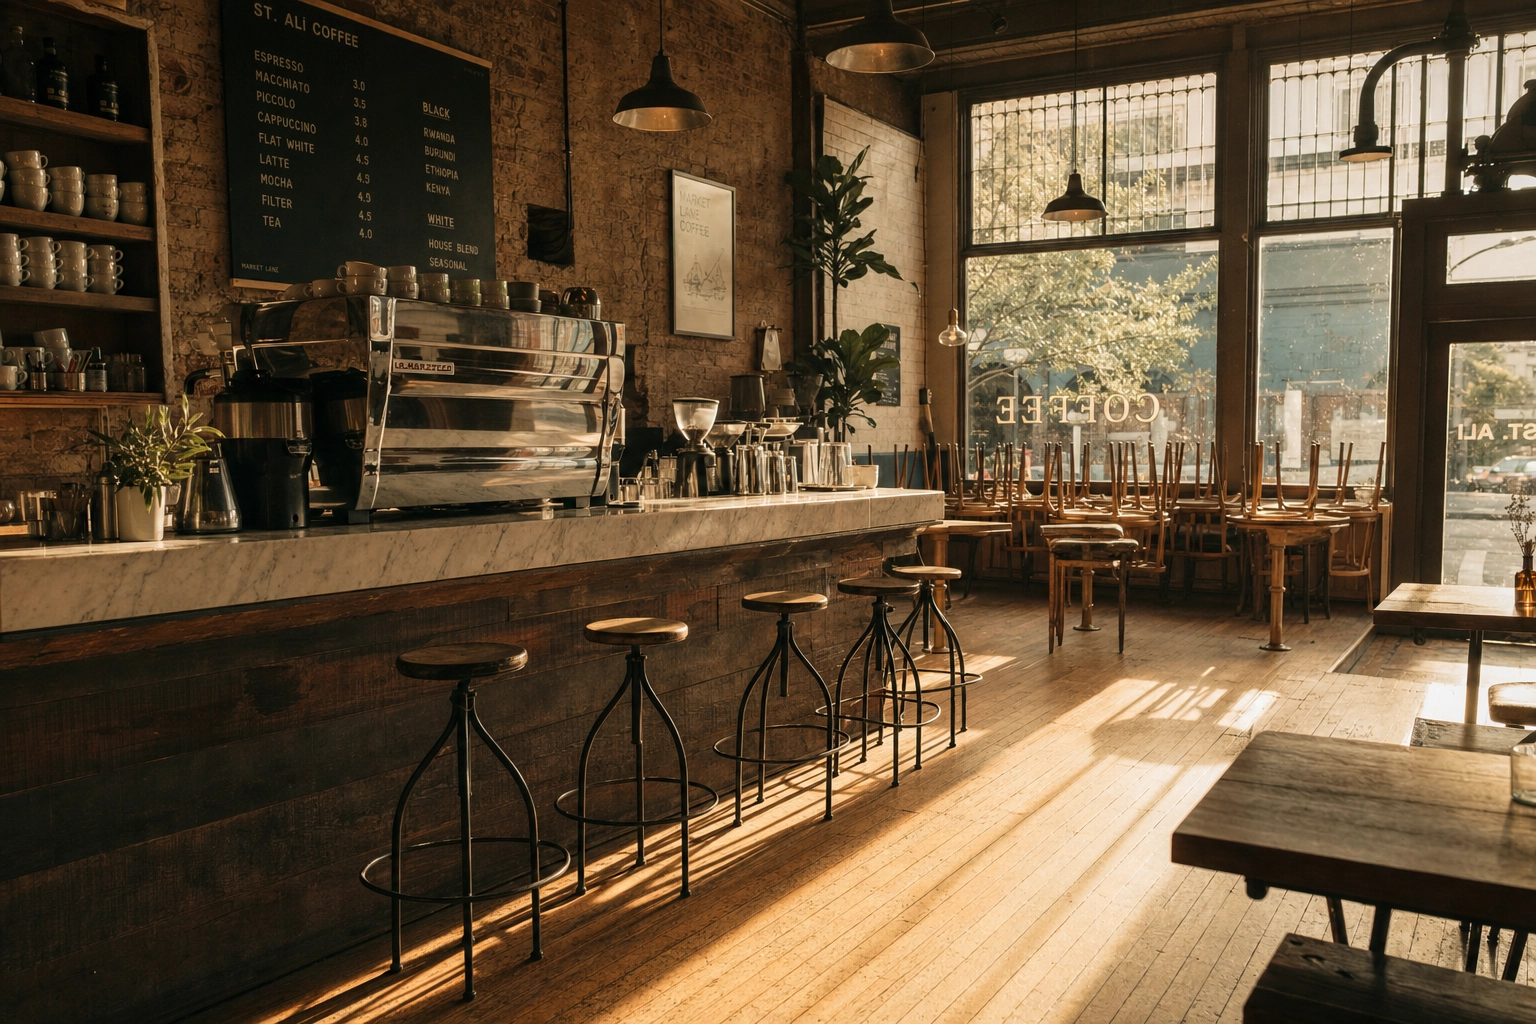
Find your window seat and shoot there only. Every cafe has one table — usually near the front, side-lit by a north or east window — that produces the best light in the building. Claim it for product shots, and shoot every menu image there for visual consistency.
-
Turn off the overhead lights closest to your shot. It feels weird mid-service, but flicking off one or two pendants directly above your shooting surface lets the window do its job without competing color casts. Flip them back on in five seconds.
-
Lock white balance manually on your phone. iPhone Pro and most flagship Android phones let you lock white balance by long-pressing the focus point. Once it's locked, every shot in the session will match. Auto shifts between frames and ruins consistency.
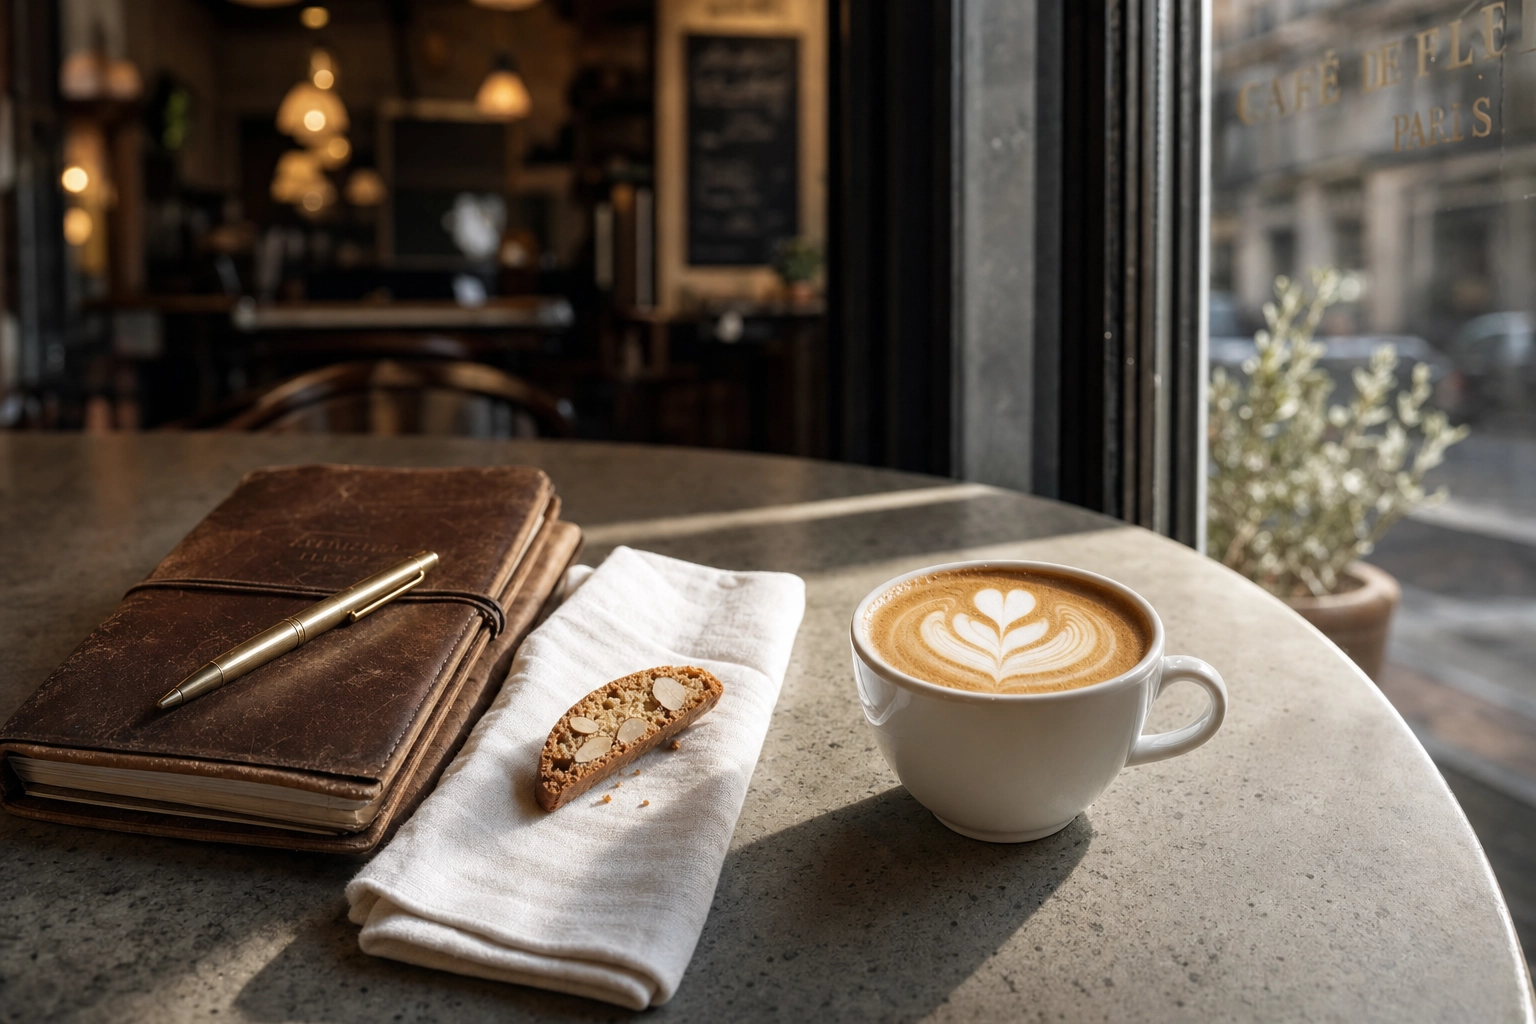 Flat white coffee with tulip latte art on concrete cafe table beside biscotti and leather notebook in soft morning window light
The golden hour windows in a cafe are the 30–60 minutes after opening and before closing. The sun is low, the cafe is calmer, and the light raking sideways through your front windows is the same flattering low-angle light fashion photographers chase outdoors. Schedule your hero shoots then.
For deeper technique on light direction, diffusion, and shadow control, our food photography lighting guide covers the same principles applied to plated dishes — almost all of it transfers to drinks.
Latte art photography — the 30-second rule
Latte art is the most photographed coffee subject on Instagram, and the most commonly butchered. Here's what's actually happening on the surface of that cup, and why timing decides everything.
Microfoam — the silk-textured milk that holds your design — is a colloid of milk fat and air bubbles suspended in liquid. According to the science of latte art on Wikipedia, neither crema nor microfoam are stable colloids: both degrade significantly within seconds. Designs visibly hold their shape for 3–5 minutes, but the sharpest contrast — the difference between a viral coffee photo and a forgettable one — exists in the first 30 seconds.
What this means in practice:
- Pour. Set down. Shoot. Three steps, under 10 seconds combined.
- Brace your elbows on the bar for a steady overhead frame.
- Exhale on the shutter like a sniper. Phone cameras are remarkably forgiving, but micro-shake from a held breath is the difference between sharp and almost-sharp.
Alternative milks behave differently. Oat, almond, and soy microfoam fades roughly 30–50% faster than whole dairy because the protein structures stabilizing the foam are less robust. If you're shooting an oat latte for a menu, treat the window as 15 seconds, not 30.
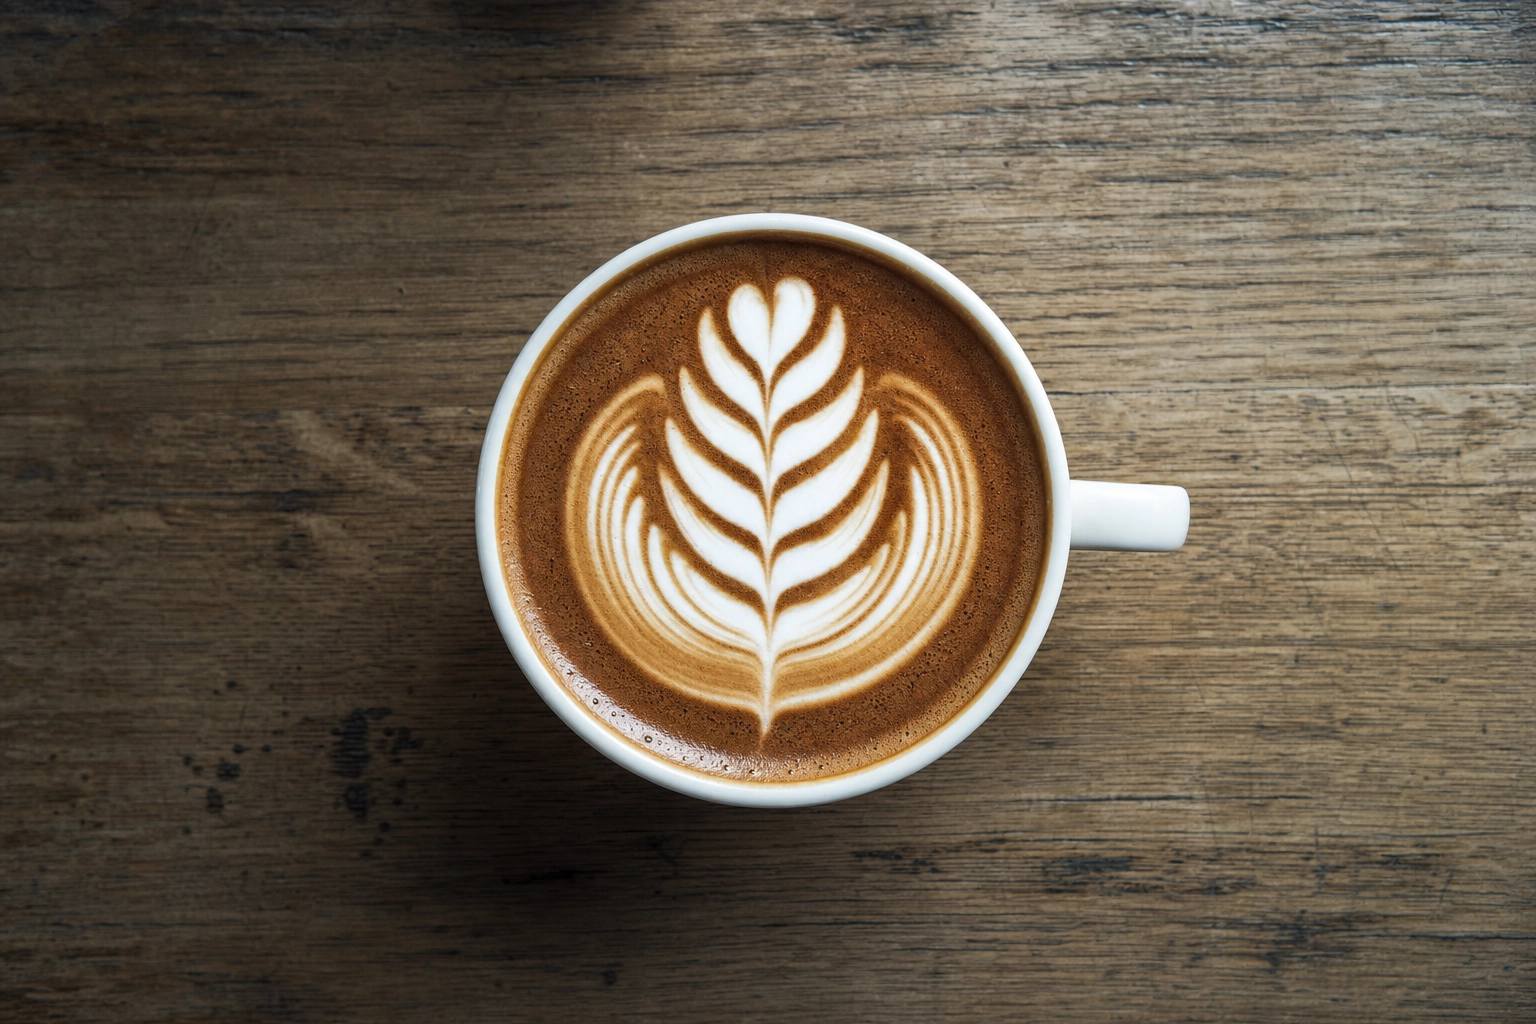
Knowing the design vocabulary helps you compose intentionally. The five most photographed latte art patterns:
- Heart — entry-level, symmetric, works at any cup size
- Rosetta — the fern-leaf pattern, the most "barista" of the standard designs
- Tulip — layered teardrops, photographs beautifully because of repetition
- Swan — advanced, requires an etching pick or a precision pour
- Monk's head — solid white circle with a thin crema ring, deceptively elegant
White cups maximize design contrast. If your cafe uses colored cups, dark navy or matte black still work — pastels visually compete with the foam and dull the effect.
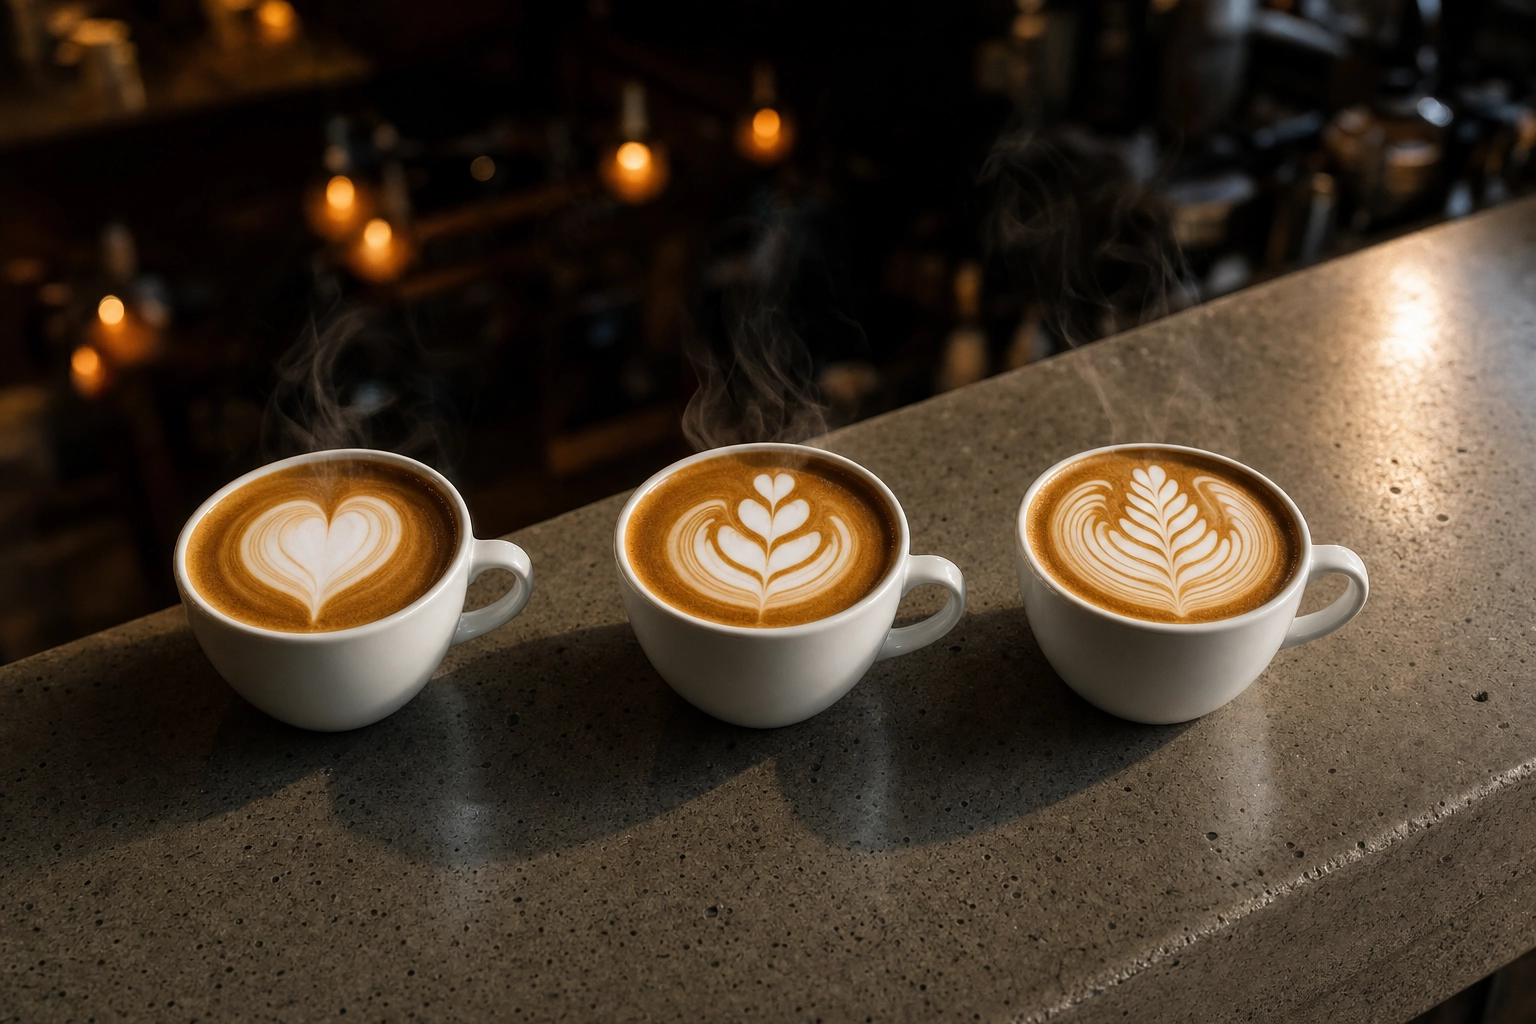 Three latte art patterns lined up on cafe bar showing heart tulip and rosetta designs with steam and warm pendant light background
Coffee bean and roast photography for bags & packaging
Beans sell beans. The visual cue for "fresh" is the oily sheen on recently roasted beans — that subtle gloss is the freshness signal customers respond to subconsciously. Stale beans look matte and dusty, and your camera picks that up whether you want it to or not.
Roasters shooting their own packaging should plan for three shot families per bag:
- Hero packshot — bag standing alone, clean simple background, readable label
- Beans + bag composition — beans spilling from an open bag onto a textured surface
- Brewed result — a finished cup beside the bag, completing the story from bean to drink
Lighting differs by roast level. Light roasts (Nordic, blonde city) need soft even light — high contrast crushes the subtle color variation. Dark roasts (full city, French, Italian) reward harder side-light that catches the oil sheen and makes the surface glow.
Most modern phones have a usable macro mode or a 2x optical zoom that works for tight bean shots. Avoid digital zoom — it's just cropping with extra steps. If you shoot beans often, a $20 clip-on macro lens for your phone produces sharper close-ups than any phone's built-in zoom.
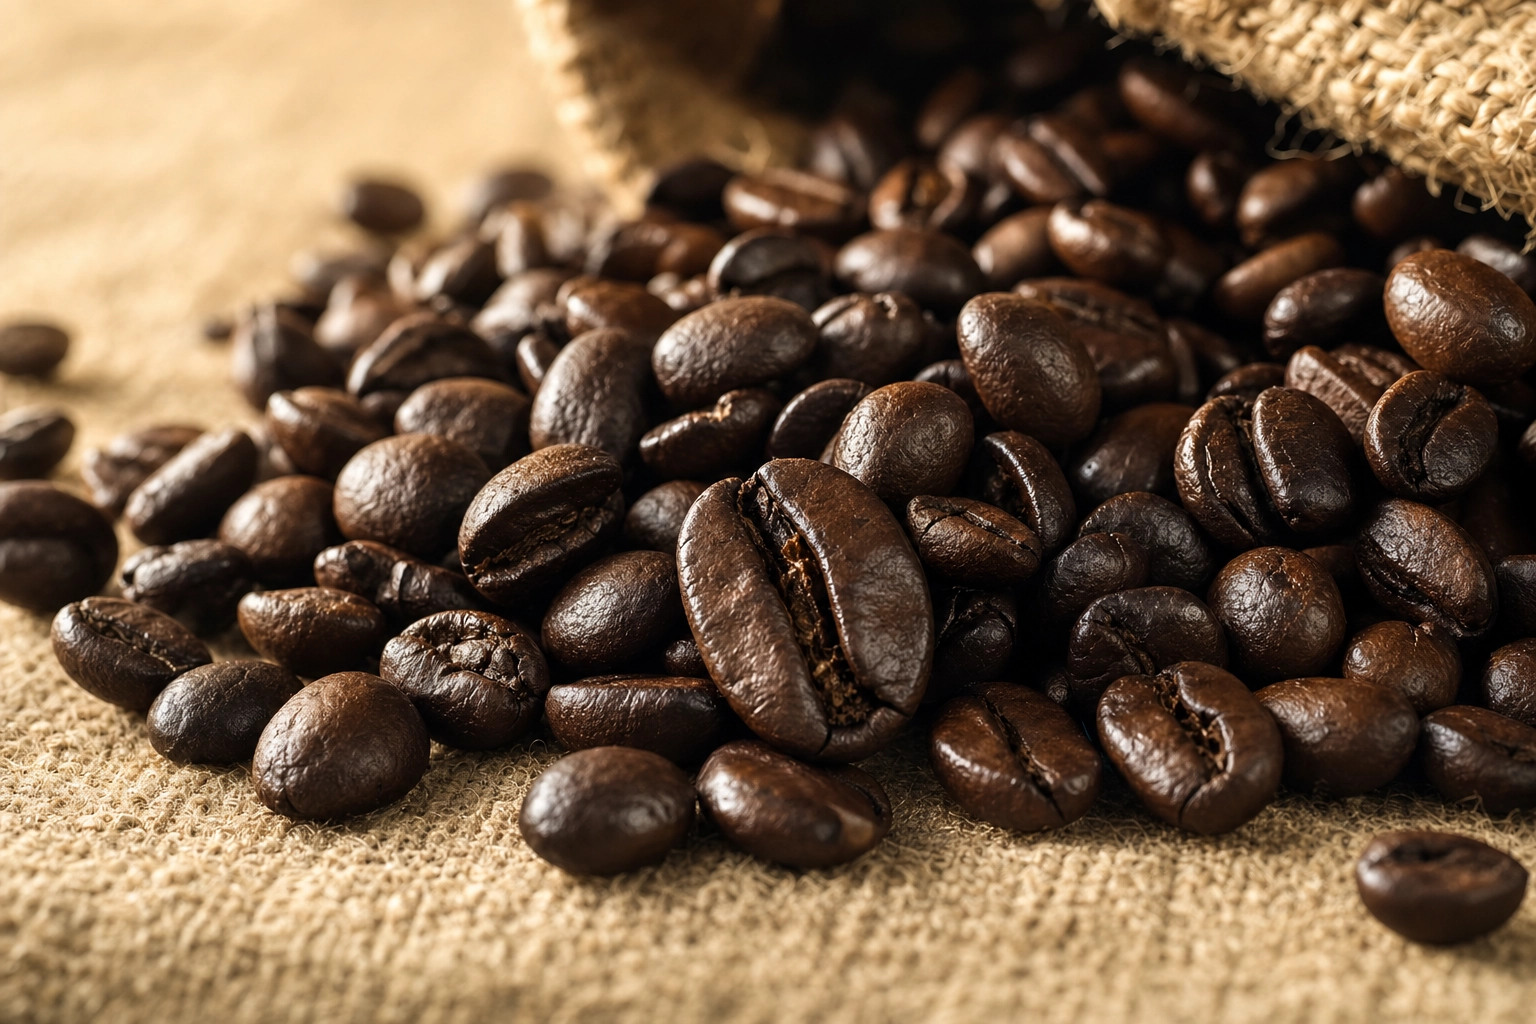 Macro close-up of freshly roasted dark coffee beans pile on linen surface showing oily sheen and color variation
The bag itself is the trickiest object in cafe photography. Foil bags reflect everything. Matte kraft bags reflect almost nothing but eat detail in shadow. Either way:
- Angle 15° off the light axis to kill direct glare on the foil
- Use a single primary light source — multiple lights create multiple reflections
- For e-commerce, shoot against off-white (#F5F5F2) instead of pure white — pure white blows out and removes the bag's edges
For the full packshot-to-menu workflow including cropping and consistent framing, see our menu photography guide.
Cold brew, iced lattes, and frappés without dilution
Iced drink photography has one enemy: time. The moment ice hits a glass, you're on a melting clock that visibly changes the drink every 15 seconds. By minute two, your espresso swirl has muddied, your milk-and-coffee separation has homogenized, and your perfectly clear drink has gone cloudy.
Three techniques buy you time:
-
Use large clear cubes. Small cubes have more surface area per volume and melt 2–3x faster. One large 2-inch cube also looks better in frame.
-
Use coffee ice cubes. Freeze leftover brew or cold brew into cubes. When they melt, they reinforce flavor and color instead of diluting it. This is the working barista's secret weapon for iced photo shoots.
-
Brew stronger. If you're staging iced coffee for a shoot, brew at a 1:13 or 1:14 ratio instead of 1:16. The coffee will hold its color and intensity even as the ice melts.
Sweating glass is good — it signals "cold" instantly, which is the entire emotional point of an iced drink photo. Don't wipe the condensation; just wipe the drip rings off the table before you shoot. A light spritz of water on the outside of the glass adds extra sheen if the room is dry.
Layered drinks (iced lattes, espresso tonics, dirty horchatas) live and die by the milk-coffee separation line. Pour the espresso over the back of a spoon onto the milk surface to keep the layers crisp. Shoot within 60 seconds before diffusion blurs the line.
Frappés and blended drinks are more forgiving — they won't melt visibly during your shot — but they oxidize. Whipped cream collapses, espresso drizzle absorbs, garnishes wilt. Shoot blended drinks immediately, and add fresh garnish after your first frame so you have a clean before-garnish version too.
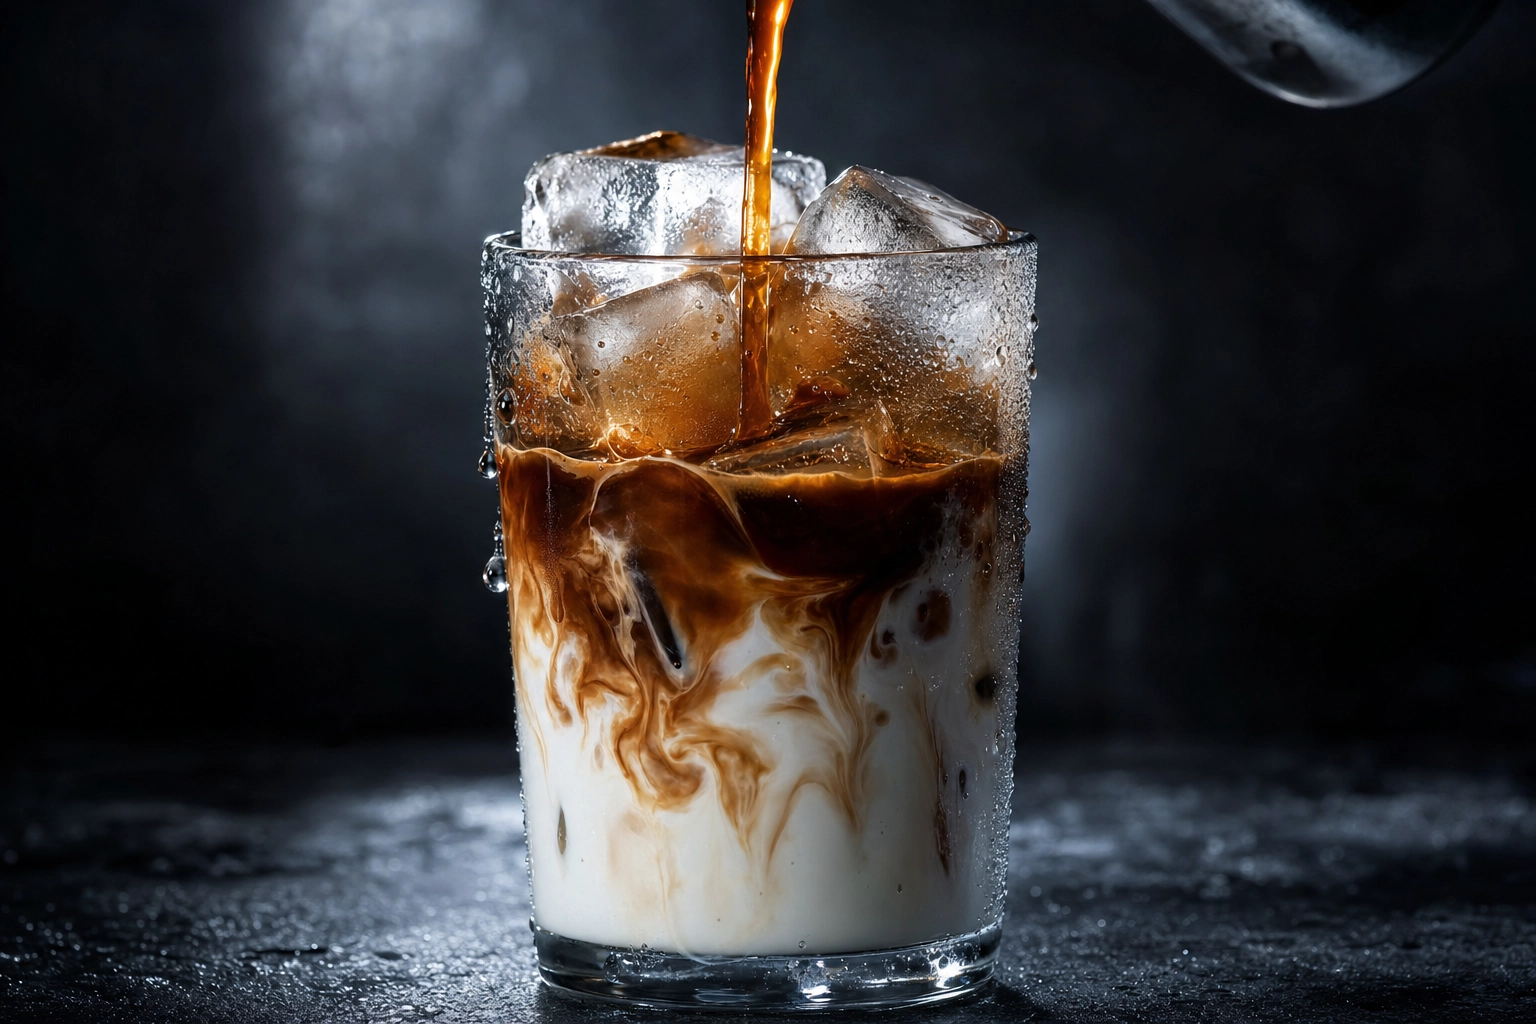 Iced latte close-up with espresso pouring over ice and milk in tall glass with condensation droplets on dark bar
Cafe ambience and lifestyle shots
Drinks sell the product. Ambience sells the cafe. Both belong in a coffee shop's content rotation, and they require completely different shooting modes.
Ambient shots tell customers what the experience feels like before they walk in. The shots that consistently perform on Instagram and Google Business profiles:
- The empty cafe at 6:45am, lights warming up, chairs still down
- Cropped storefront with the door slightly open and morning light spilling out
- Espresso machine details — the steam wand, the portafilter handle, the group head
- The chalkboard menu shot straight-on, no perspective distortion
- Hands and motion — a barista's hands tamping, pouring, polishing the bar
Customer shots are tricky. If you want people in frame for energy and life, shoot from behind, shoot blurred, or get explicit verbal permission. Faces in marketing content without consent is a legal and ethical minefield, and it never looks as natural as you hope.
The 15 minutes before opening is your daily lifestyle photo window. The light is good, no customers are present, and your team can stage a "moment" without disrupting service.
 Empty specialty cafe interior at dawn with morning window light streaming across wooden floor toward espresso machine on marble counter
If your cafe also serves cocktails in the evening, the same principles transfer — our cocktail photography styles page covers the moody, low-light side of beverage photography.
Phone settings every barista should lock in
The default camera app on a modern iPhone or flagship Android is genuinely good enough for cafe coffee photography. The settings, not the gear, separate a usable shot from a bad one.
Lock these in once and forget them:
- Use the main 1x lens. The ultrawide distorts cups into ovals at close range; the telephoto often has a smaller sensor and worse low-light performance. Main lens is your workhorse.
- Disable HDR for latte art. HDR averages exposures across the frame, flattening the contrast between white foam and dark crema. The whole point of a latte art photo is that contrast.
- Tap and hold to lock AE/AF. Once locked, exposure and focus stay put across multiple shots — critical for consistency in a series.
- Turn on the grid. It helps you align top-down latte shots dead center, and keeps a bag perfectly vertical.
- Use burst mode for any pour or motion shot. Volume button = burst on most phones.
- Clean the lens every shift. Wipe with the inside of your apron or a microfiber cloth. Fingerprints are responsible for more bad cafe photos than any other single factor.
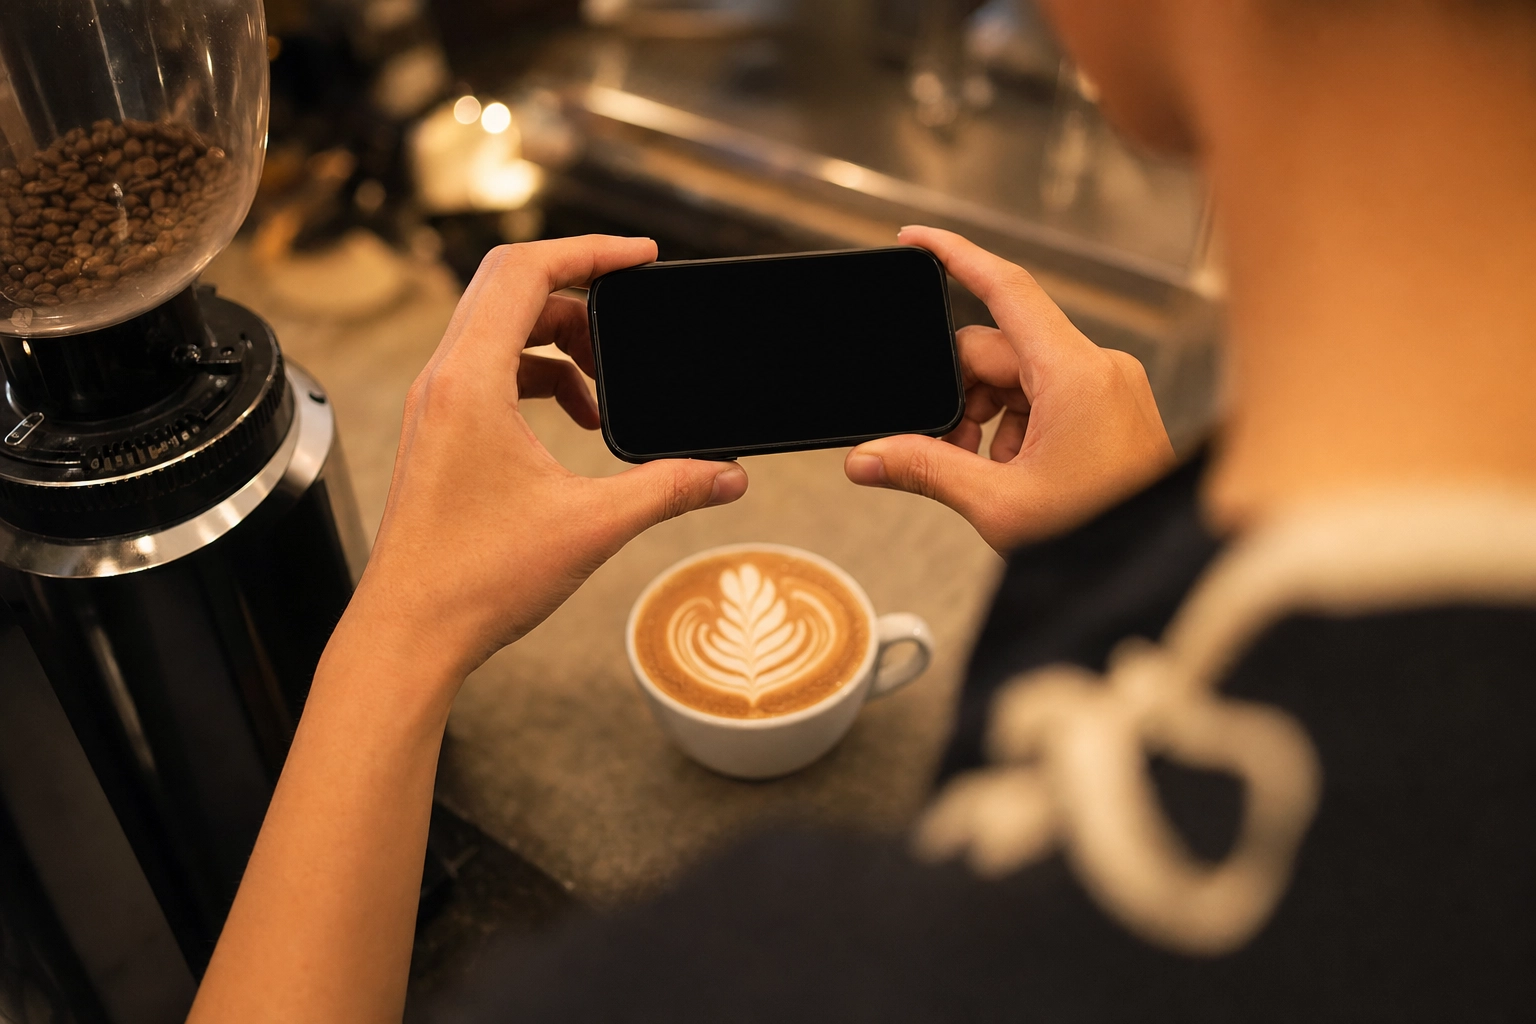 Barista shooting overhead phone photo of latte art rosetta on cafe bar showing real working photography workflow
For the deeper iPhone-specific settings — RAW capture, Photographic Styles, exposure compensation — our iPhone camera settings for food walks through the full configuration.
The AI workflow: rescue, polish, and scale with FoodShot
Even with perfect technique, a phone photo shot mid-shift is a starting point, not an ending. The cup is sharp but the background is your cluttered service area. The latte art is intact but the white balance is yellow from a tungsten bulb. The retail bag is well-lit but the surface is your scratched bar mat.
This is where AI editing earns its place in a cafe workflow.
The traditional alternative is hiring a food photographer — industry rates run roughly $700 to $1,400 per half-day session in major US cities, plus styling and props. For a cafe shooting one menu refresh per quarter, that's $3,000–$5,000 a year on imagery alone, and the photos are dated the moment you launch a seasonal drink.
The AI workflow with FoodShot looks different:
- Shoot your phone photo in real cafe conditions using the techniques above
- Upload to the AI food photo editor — one image at a time, or batch
- Pick a Cafe & Coffee style from the 200+ preset library, or apply your own brand reference photo using My Styles
- Get a menu-ready 4K image in roughly 90 seconds
The styles relevant to coffee shops live in the Cafe and Beverage categories — moody specialty roaster, bright airy brunch cafe, third-wave minimalist, warm pastry-case ambient. Each takes the same raw input and reskins it for a different brand vibe, so you can A/B test which feels most "you" before committing.
For roasters running e-commerce, the My Styles feature is the differentiator. Upload your existing brand photography as reference, and every subsequent bag photo, brewed-cup shot, or hero image inherits that same look — same background tone, same shadow style, same color grading. Brand consistency across 50 product images, without 50 separate shoots.
Bulk processing on the Scale plan handles 5 photos at once, so a full menu of 25 drinks takes one short session instead of an afternoon. Pricing starts at $9/month on the annual Starter plan with commercial license included — see our plans for the full breakdown.
For cafes that want the full landing-page treatment of the AI workflow specifically applied to coffee shops, our cafe menu photography page shows real before-and-after examples from working cafes.
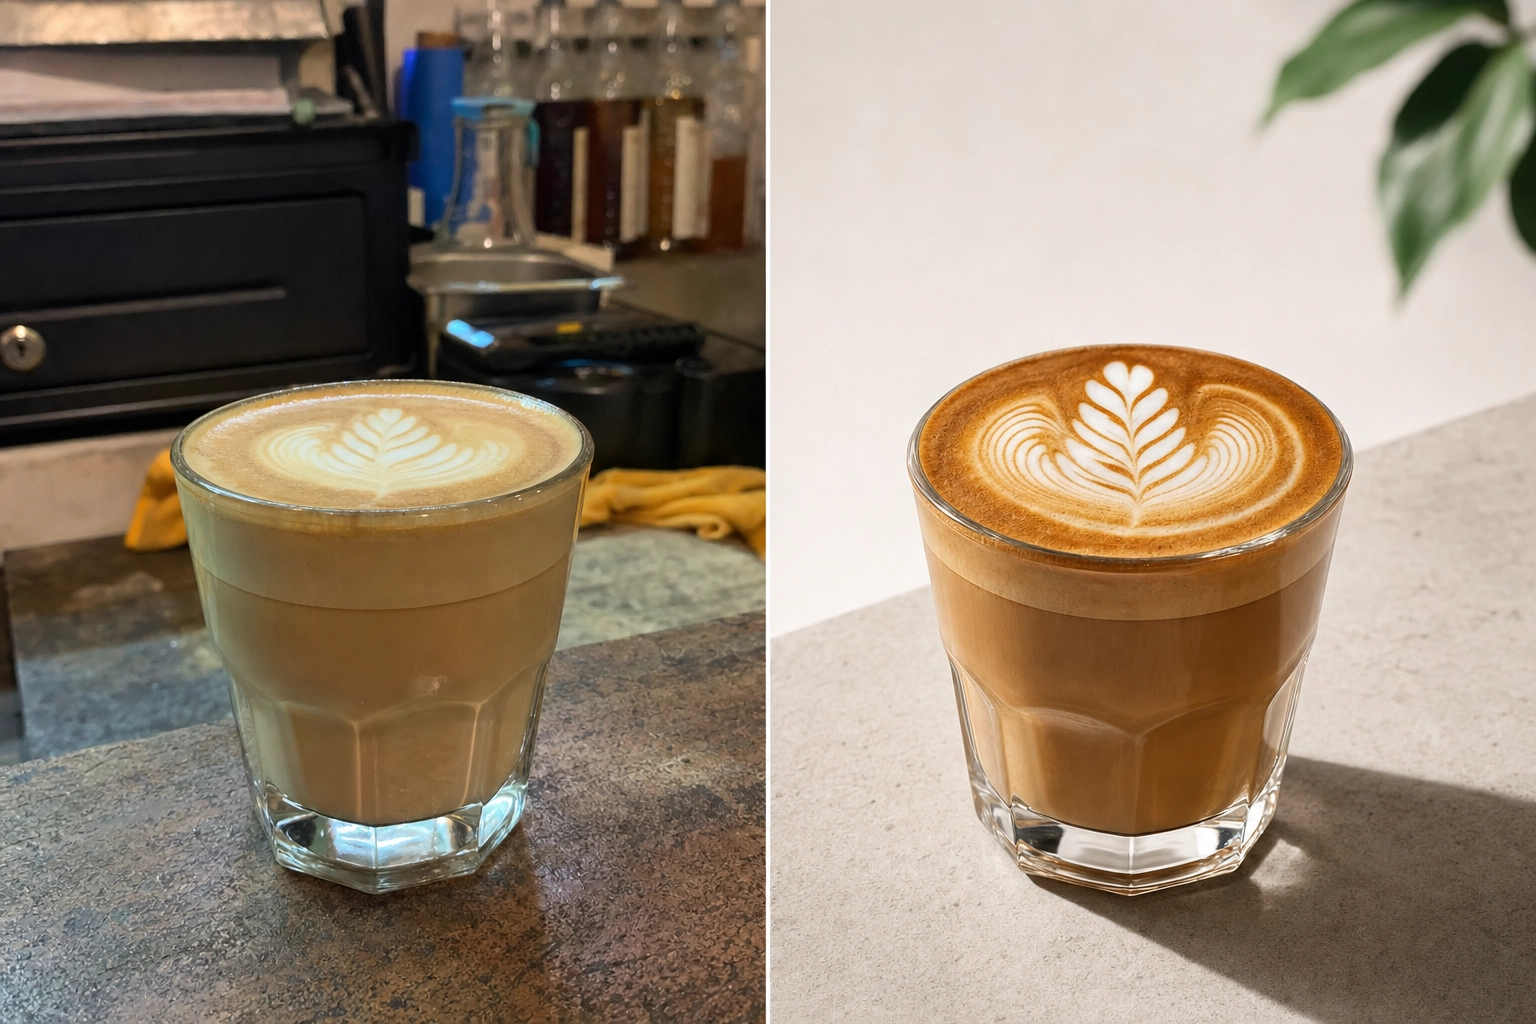 Side-by-side comparison of raw phone coffee photo versus polished menu-ready AI-enhanced version showing dramatic quality difference
Quick reference: what to shoot, when, and how
A working cafe's photo schedule should match its service rhythm, not fight it. The simple time-of-day playbook that produces the most usable content with the least disruption:
- 6:30–7:00am (pre-open): Empty cafe ambience, storefront, chalkboard menu, the bar polished and ready
- 7:00–9:30am (rush): Action shots only — pour-overs in motion, hands tamping, the morning queue from behind the bar
- 10:00–11:30am (slow window): Hero menu shots, retail bag photography, hero pastries, the workhorse 4 shots
- 2:00–4:00pm (afternoon lull): Iced and cold brew shoots, seasonal drinks, anything requiring time
- 15 min before close (golden hour): Warm-light hero shots, the "end of day" lifestyle frame
Batch your editing. Doing it per-shot kills your shift; running 20 photos through one 15-minute session at the end of the week is far more efficient. The same simple principle applies to AI editing — upload 5 at once, work the results in bulk.
Frequently Asked Questions
What's the best angle for coffee photography?
There isn't one universal best angle — there's a best angle per shot type. Top-down at 90° is correct for latte art, flat-lays, and anything where the surface design is the subject. 45° works best for menu hero shots, pastries beside drinks, and any image where you want to show the cup and what's in it. Eye-level (or slightly below) is right for tall drinks like iced lattes, pour-over kettles in action, and retail bags on a shelf. The simple rule: photograph the most interesting feature head-on.
Can I shoot good latte art photos with just my phone?
Yes. Every modern smartphone has the resolution, dynamic range, and lens quality needed to shoot menu-grade latte art. The professionals shooting cafe content for major coffee brands on Instagram are mostly using iPhones, not Hasselblads. The trick is technique, not gear: lock exposure manually before the pour, disable HDR so it doesn't flatten the contrast, shoot within 30 seconds of pouring, and brace your elbows on the bar for steadiness. If you photograph latte art every day, an overhead phone mount pays for itself in shot consistency within a week.
How do I make my coffee look glossy in photos?
Gloss comes from light reflection. A flat, evenly lit drink looks matte and lifeless; a drink with a single directional light source catches the surface and produces that wet sheen that signals "freshness." Position your shot so a window or single overhead source hits the drink at roughly 30–45° off-axis, not directly overhead. For iced drinks, a light spritz of water on the outside of the glass adds extra sheen. For hot drinks, the natural surface tension of the crema or microfoam already produces gloss — your job is to not flatten it with diffuse overhead lighting.
How long do I have to shoot latte art before it fades?
A visible latte art design holds its general shape for 3–5 minutes, but the photogenic window — when contrast is sharpest and detail crispest — is the first 30 seconds after pouring. Microfoam begins separating into bubbles and liquid the moment the pour ends. Espresso crema underneath dissipates even faster, fading within 30–60 seconds. Alternative milks (oat, almond, soy) fade 30–50% faster than whole dairy because their foam structures are less stable. Practically: pour, set the cup down, shoot. If you're not photographing within 15 seconds of finishing the pour, you're past the peak.
What lighting is best for cafe photography?
Soft, indirect natural light from a side window is the gold standard. The best window in your cafe is usually north- or east-facing, away from direct midday sun, with a sheer curtain or frosted glass that diffuses the light. Shoot 30–60 minutes after opening or before closing for the warmest, most flattering low-angle light. Avoid mixing light sources — if your cafe has both window light and tungsten pendants overhead, turn off the pendants closest to your shooting surface. On cloudy days, the entire cafe gets one soft even light source through the windows, which is actually the simplest lighting condition to shoot in.
Your next shift, better photos
Coffee photography in a working cafe isn't about gear or studio setups. It's about timing, light, and a workflow that fits between customers — shoot fast near the window, run it through an AI style, and post it before the espresso has cooled.
Tomorrow morning, try this: pull one espresso shot and shoot it top-down in the first 15 seconds. Pour one latte with a heart, set it down, shoot it overhead. Photograph one retail bag flat-lay with beans spilling. Three usable images in a 10-minute window, with zero new equipment.
Then upload them to FoodShot, apply a cafe style, and see what 90 seconds of AI polish does to your menu. The free plan gives you three credits to try it on your own shots — enough to know whether it fits your workflow before you commit to anything.
