
Donut Photography: Glaze, Sprinkles & Stacks That Sell
 Ali Tanis21 min read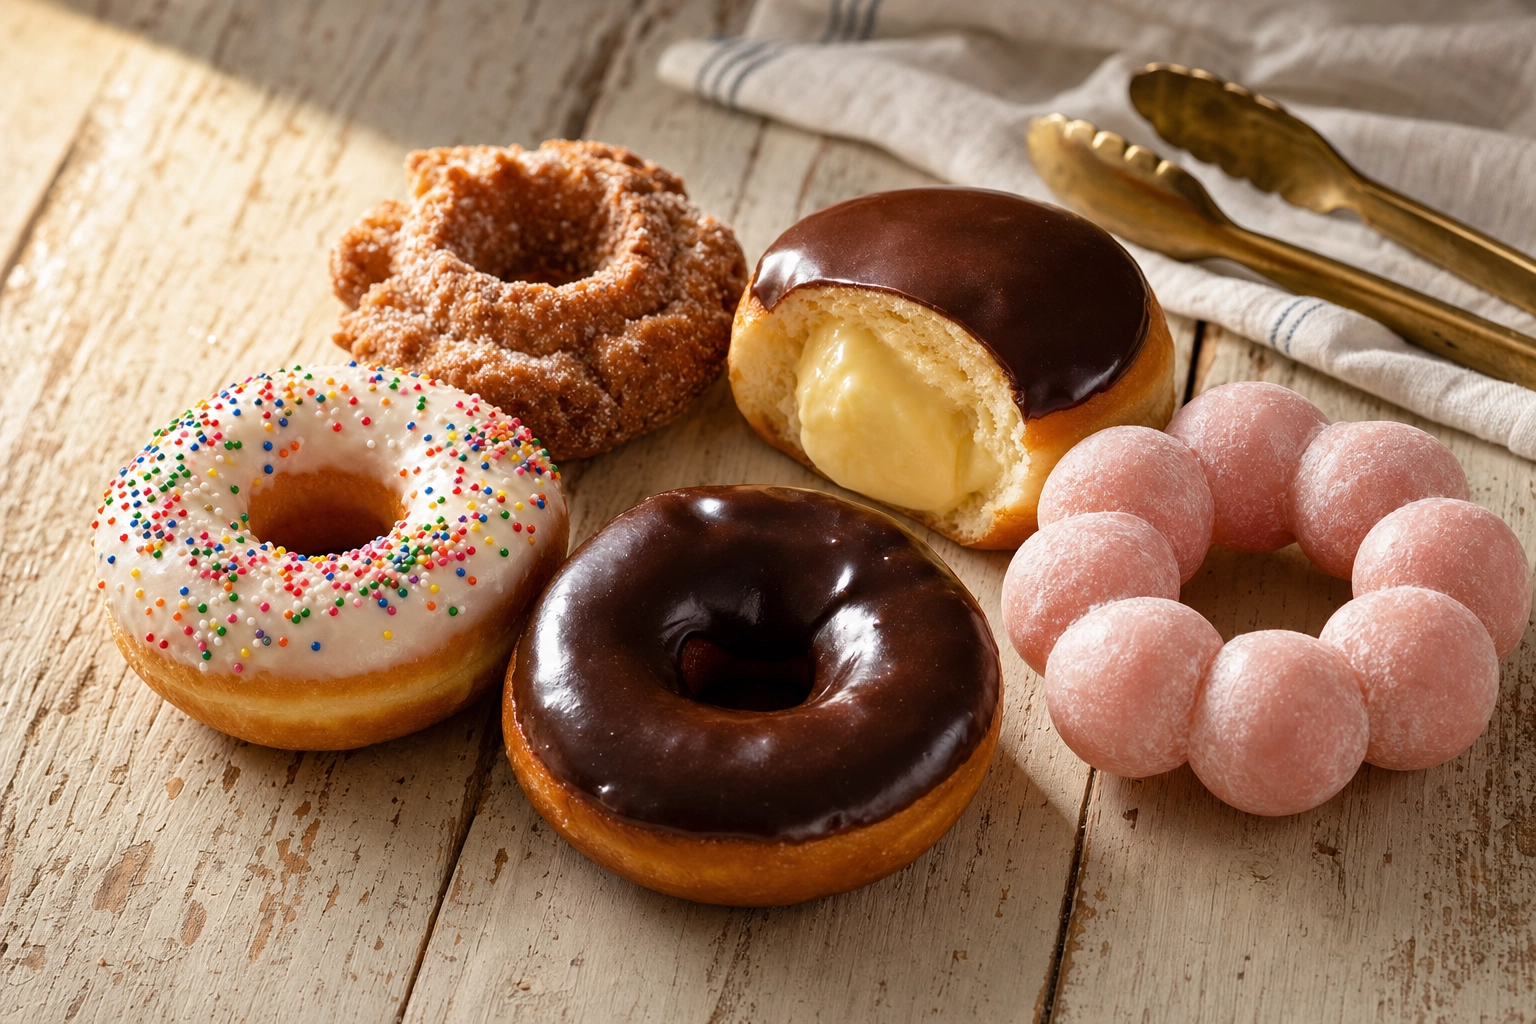
A donut looks irresistible on the counter. It looks dull, greasy, or oddly flat in the photo. That gap — between the doughnut in your hand and the donut on your screen — is what donut photography is really about. The good news: every problem (glaze that blows out white, sprinkles that turn into beige mush, the dreaded "black hole" in the middle) has a specific fix. Once you know which donut needs which light, which background, and which angle, your menu starts selling for you.
Quick Summary: Great donut photography comes down to five core shots (hero, cross-section, stack, dozen flat-lay, eating-action), one critical lighting trick (raking side light to reveal glaze and sugar texture), and matching the background to the donut's personality. Phone photos work — if you know what the camera is fighting against. When time and budget don't allow a full shoot, an AI workflow can turn a single phone snap into menu-ready imagery in under two minutes.
Why donuts are harder to photograph than they look
Donut photography has a deceptive visual problem. Donuts are round, glazed, often glossy — three things that reflect light unpredictably. A smartphone's auto-exposure averages the scene and tries to keep the bright glaze from clipping, which usually crushes the rich crumb and sprinkle colors into shadow. Or the opposite: it exposes for the donut and lets the glaze blow out to a featureless white ring.
Five specific problems show up over and over in donut shoots:
- Glaze shine. Wet glaze creates specular highlights — those mirror-bright spots that go pure white at the wrong exposure. Lose them entirely and the donut looks dry. Keep them too hot and you lose the swirl of the glaze itself.
- Sprinkle detail. Rainbow nonpareils and jimmies are tiny. They sit at slightly different depths on a curved surface. Shallow focus or sloppy lighting turns them into a soft beige smudge instead of dozens of crisp colored dots.
- Hole visibility. Shoot a ring donut from pure overhead and the hole is just a dark disc. Shoot from pure side and the hole disappears entirely. There's one sweet-spot angle for each donut shape.
- Stacking stability. Two donuts stacked is easy. Five donuts stacked want to slide, lean, and crush the bottom one's glaze where they touch.
- Eating-action moments. Hand-in-frame bite shots are gold for social media — and brutal to get right. Fingerprint smudges in the glaze, dominating hands, or a stiff "model" pose all kill the moment.
Solve those five problems and donut photography stops being a guessing game. The rest of this guide walks through each one with the specific gear and lighting that fixes it.
The 5 essential donut shots every shop and creator needs
Think of these as the menu lineup. Whether you run a single-location shop, a multi-store chain, or a content account, you need each of these five shots in your library before you photograph anything fancy.
1. The hero single (your menu's headliner)
One donut, center frame, the star of the shot. The hero single is what goes on your menu card, your delivery thumbnail, your homepage hero, and most paid ads.
Shoot at a 30–45° angle — not full overhead, not full side. This angle shows the top glaze and a slice of the donut's profile, which gives the eye a sense of dimension and lets you see the hole. Focus on the closest edge so the texture there is razor-sharp, then let the back of the donut fall gently soft. An aperture around f/4 to f/5.6 keeps the whole donut acceptably sharp while blurring the background into a clean wash.
This shot is best for glazed yeast donuts with a clear silhouette, single-color frosted donuts, and signature flavors that you want photographed as objects of desire rather than menu items in a grid.
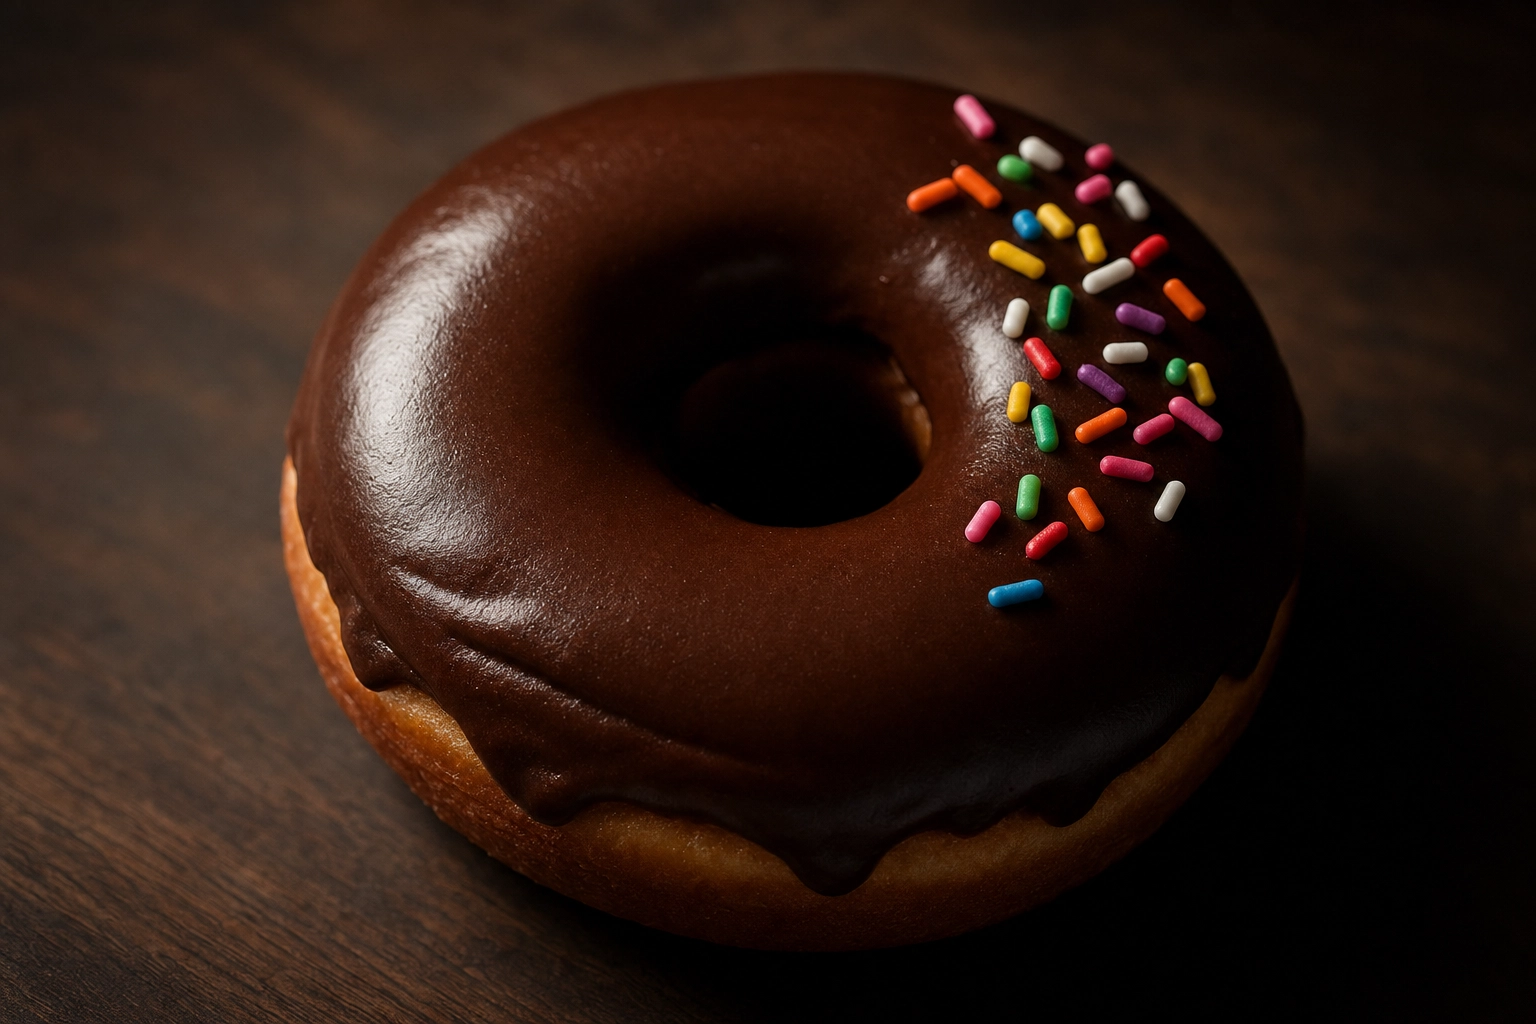 Single chocolate-frosted donut on dark walnut at 35-degree angle — hero single donut photography shot
2. The cross-section reveal (for filled donuts)
The cross-section is the money shot for any doughnut with a filling — Boston cream, jelly, Bavarian cream, lemon curd, custard. Without the cut, customers can't see what they're paying for.
Use a serrated knife warmed under hot water and dried; that combination gives the cleanest cut through both crumb and filling. Cut once, firmly, all the way through — sawing tears the donut and pushes filling around. Shoot the split halves immediately, before the filling skins over or absorbs into the crumb.
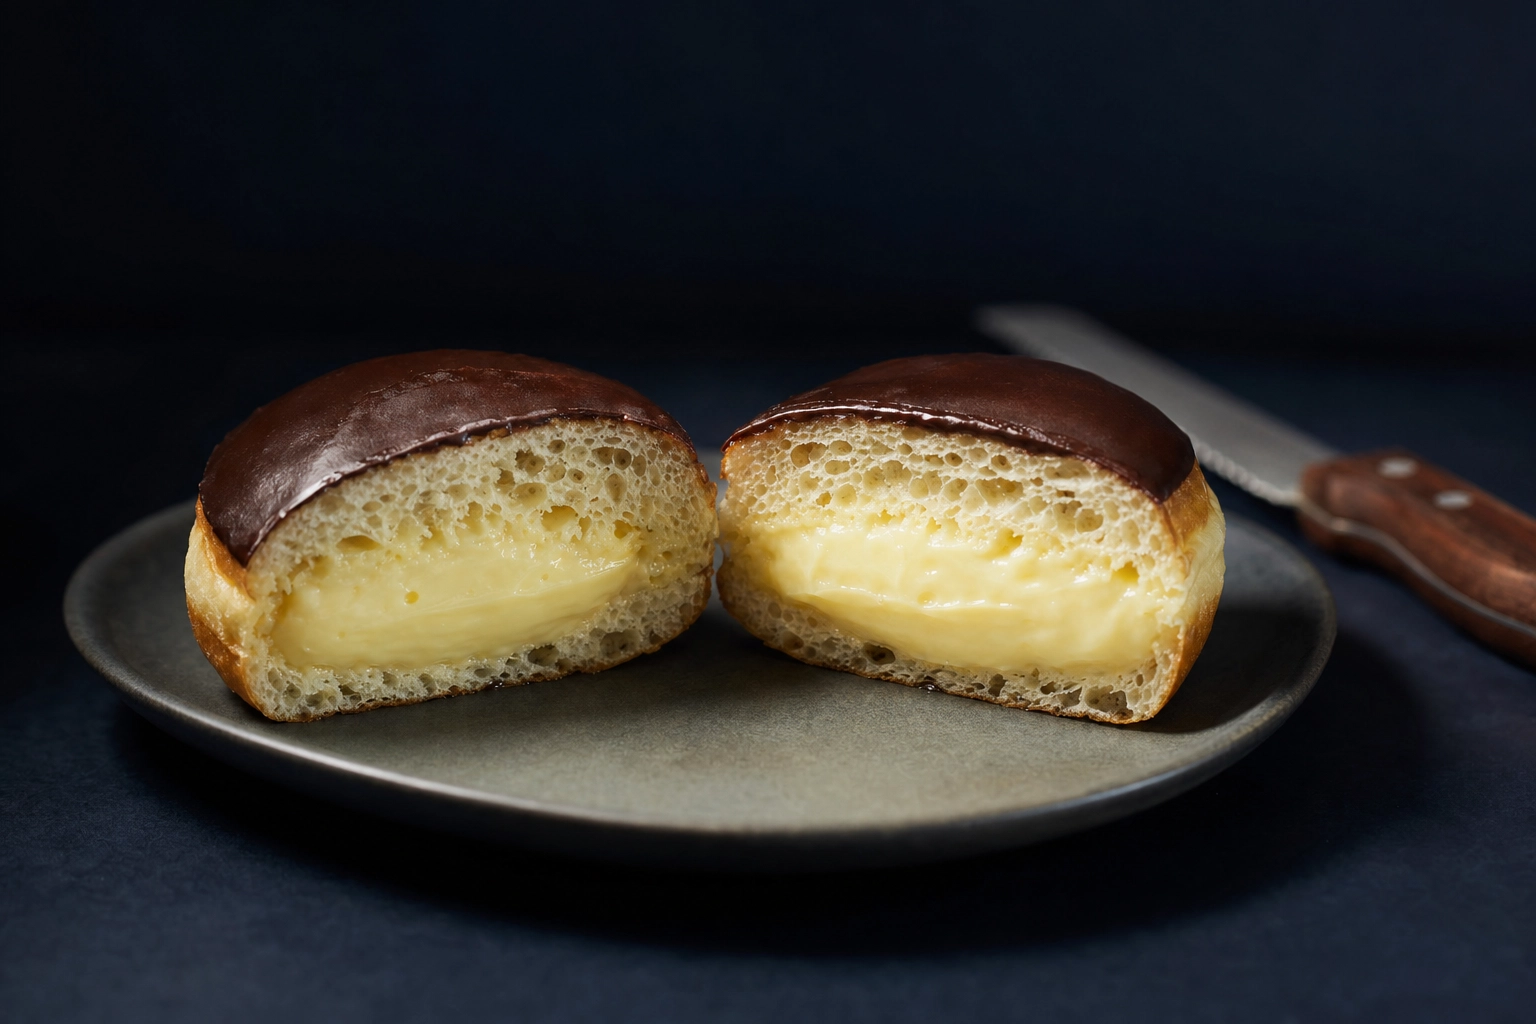 Boston cream filled donut split open showing custard cross-section — filled donut photography technique
Frame the cut face toward the light, with the camera at the donut's profile or just 10–15° above it. Light should rake across the cut so the cream catches a glossy highlight and the jelly looks slightly molten. A small white card on the shadow side keeps the filling color readable.
3. The stacked tower (variety in one frame)
Three to five donuts stacked vertically reads as abundance, variety, and indulgence. It's perfect for variety boxes, dozen highlights, holiday gift sets, and any shot where you want to feature multiple flavors without cluttering the composition.
The professional secret: a wooden bamboo skewer pushed through the centers of the bottom donuts works as a hidden internal armature. Bottom-up, alternate colors so the stack reads visually — a chocolate-glazed at the bottom, a sprinkled in the middle, a pastel-iced on top. Shoot at a slight upward angle (five to fifteen degrees below eye level) to make the stack feel taller and more dramatic than it really is.
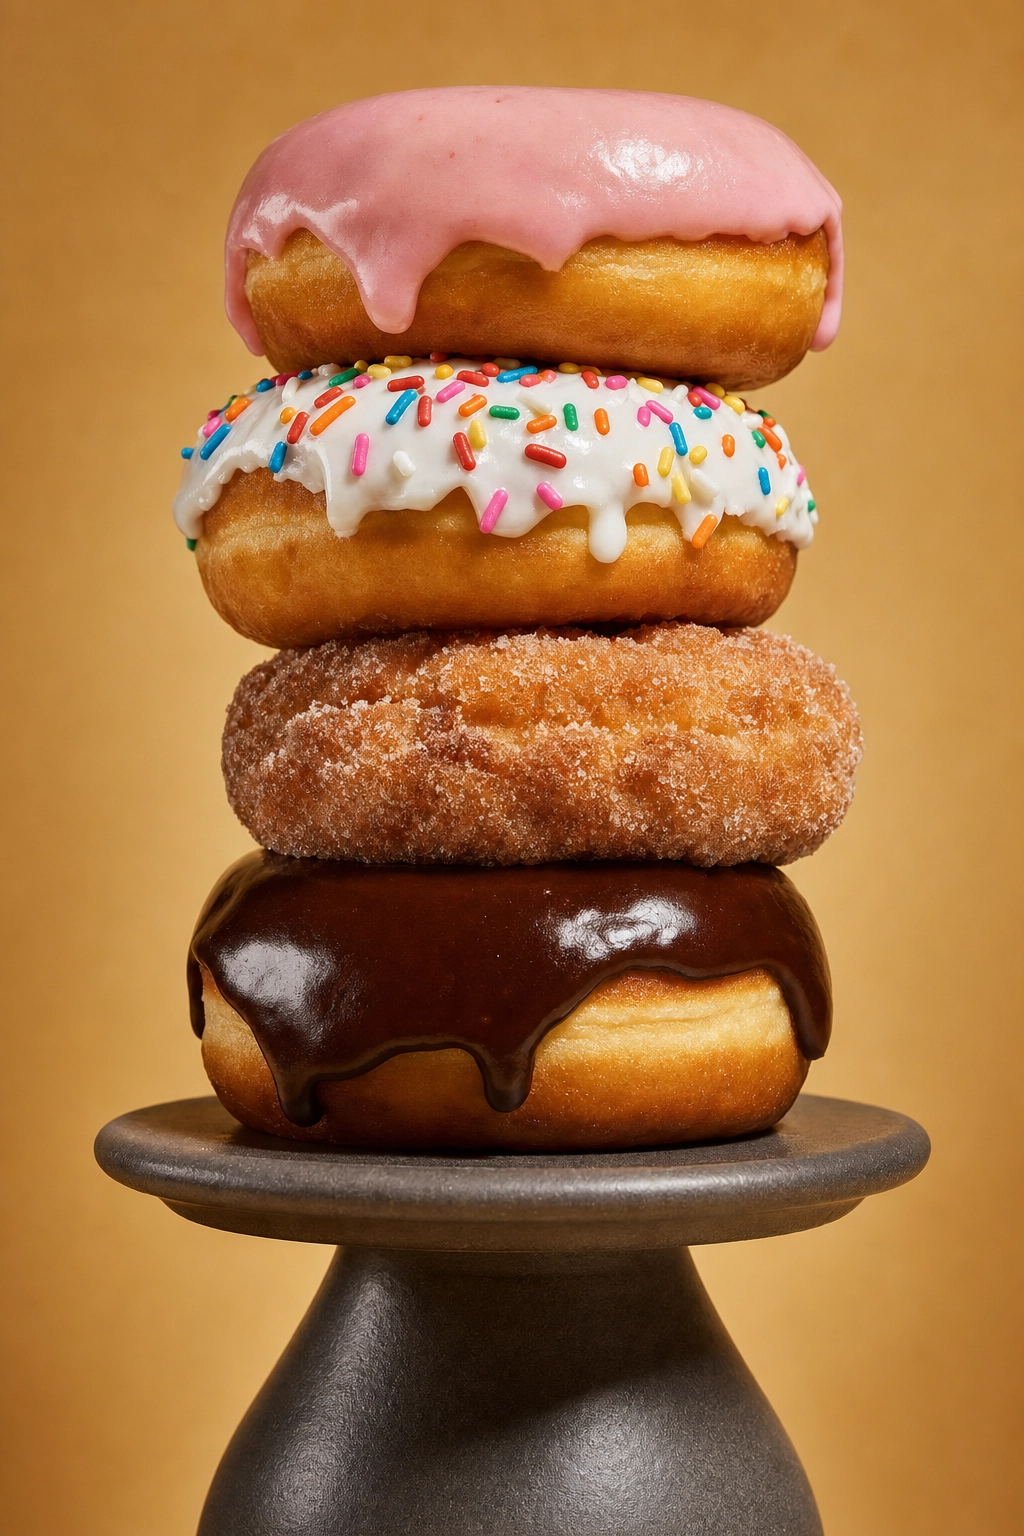 Stacked tower of four mixed donuts at slight upward angle — stacked donut photography composition
Watch for crumb shadows where the donuts touch. A tiny offset rotation between layers usually fixes it.
4. The dozen flat-lay (your menu in one image)
Pure overhead, 90° straight down. The dozen flat-lay is your menu shorthand — one photo that says "this is everything we make."
This shot demands stability. A tripod with an overhead arm, or even a phone clamped to a chair pulled close to the table, beats trying to hand-hold a perpendicular shot. Arrange the donuts in either a tight grid (three by four for a classic dozen) or a loose organic cluster, depending on whether you want a catalog feel or a casual lifestyle vibe.
Mix colors, glaze finishes, and toppings deliberately. Two glazed next to two chocolate next to two sprinkled reads as a curated dozen rather than a random pile. White or pastel paper backgrounds give you the cleanest catalog version; weathered wood gives you the artisan version.
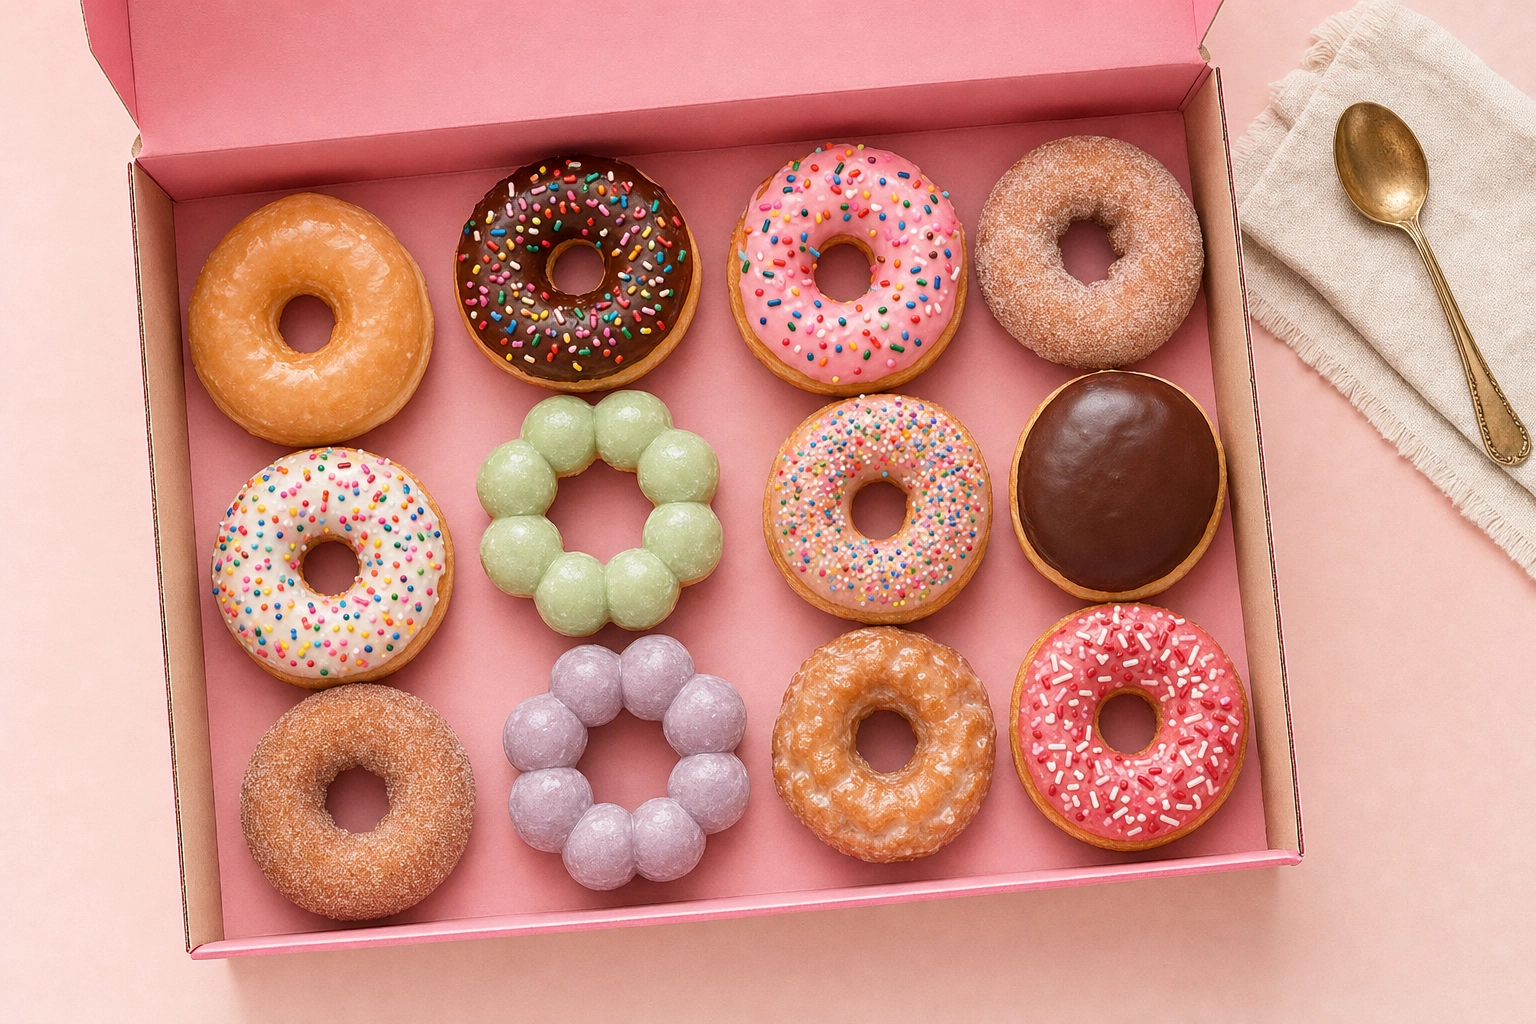 Overhead flat-lay of a dozen mixed donuts in pink box on pastel paper background — dozen donut photography shot
5. The eating-action shot (the human moment)
A hand entering frame with a bitten donut — or, even better, the moment a filled doughnut is split and the cream pulls into a strand — is the single highest-engagement shot type on social media. It implies craving, freshness, and a real person on the other side of the brand.
Use a clean hand with neutral or short nails, a simple sleeve (no busy patterns), and shoot in continuous burst as the donut is bitten or pulled apart. Glaze must still be glossy; once it crystallizes, the magic is gone. Position the camera side-on, zero to fifteen degrees above the donut so you can see both the face of the donut and the texture of its inside.
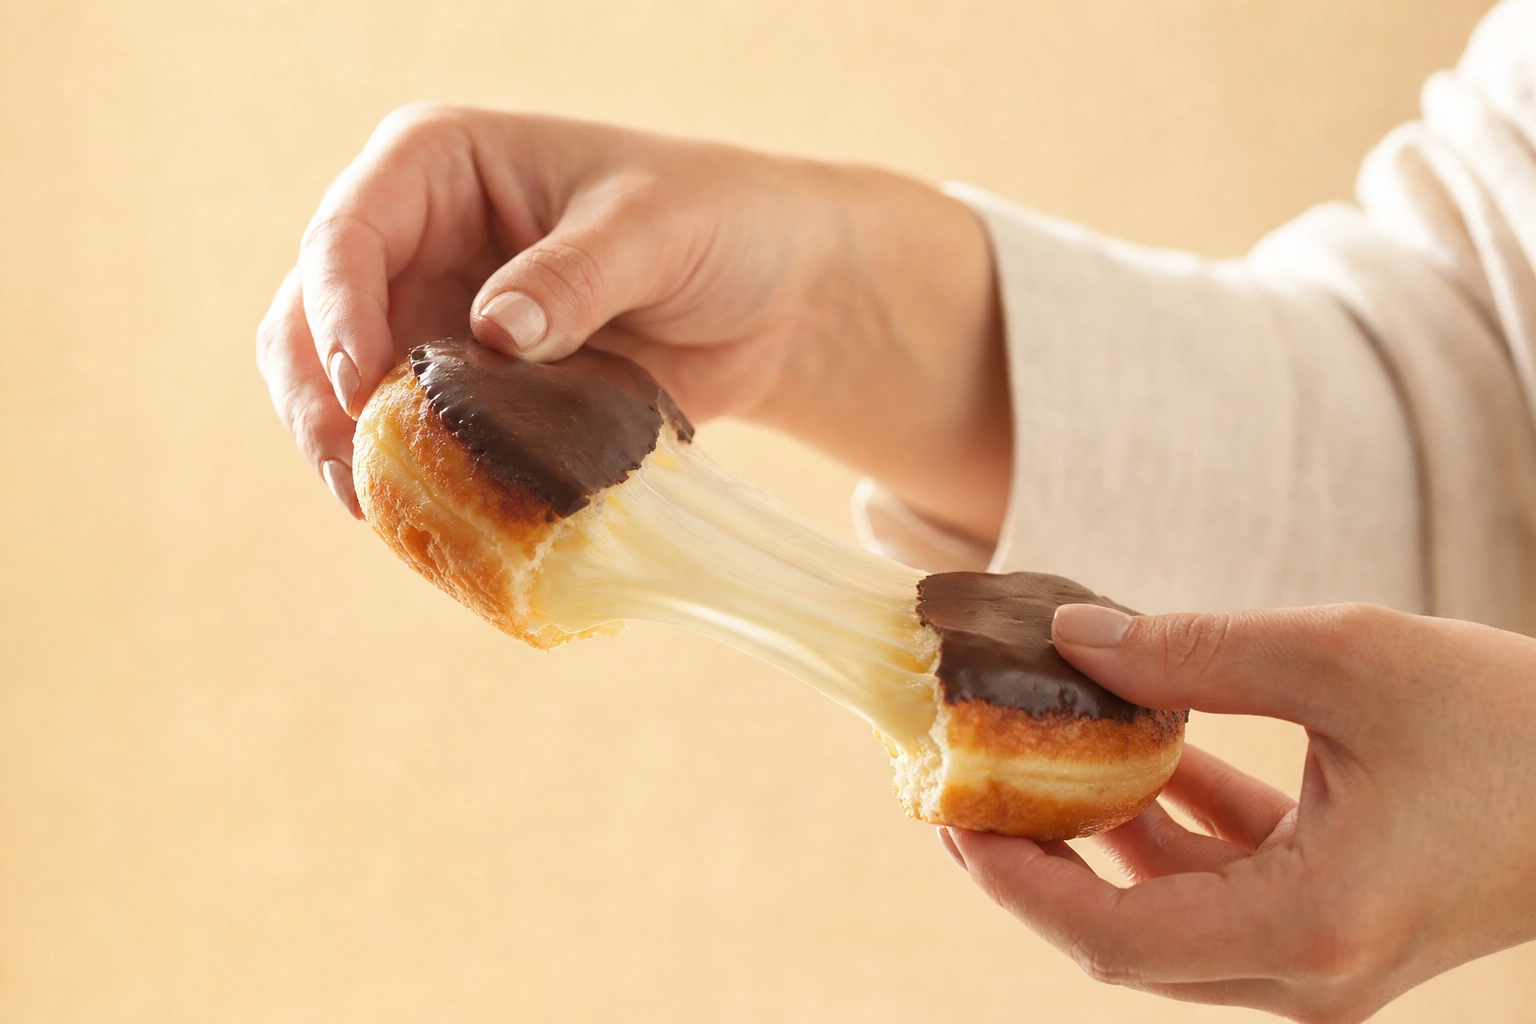 Hand pulling apart a filled donut with cream stretching between halves — eating-action donut photography moment
This shot is especially strong for Reels thumbnails, paid social, and anywhere you need a piece of content to stop a thumb mid-scroll.
Lighting glaze and frosting: the raking light trick
If you remember one technical idea from this whole guide on donut photography, remember raking light.
Raking light means positioning your light source at an extreme side angle — roughly 80 to 90 degrees off the lens axis, often slightly lower than the donut. Instead of hitting the donut from above and flattening everything, the light skims sideways across the surface. That side-skim is what reveals:
- The micro-ripple in a freshly dipped glaze
- The drip pattern frozen on the side
- The crackly fissure surface of an old-fashioned cake donut
- The granular sparkle of cinnamon-sugar and granulated coatings
- The edge of a chocolate icing where it pooled before setting
In practice, the easiest setup is a 24- to 36-inch softbox placed low and to the donut's side, or — even simpler — a large window with a sheer white curtain doing the same job. Add a white bounce card on the shadow side so the dark side of the donut doesn't fall into pure black.
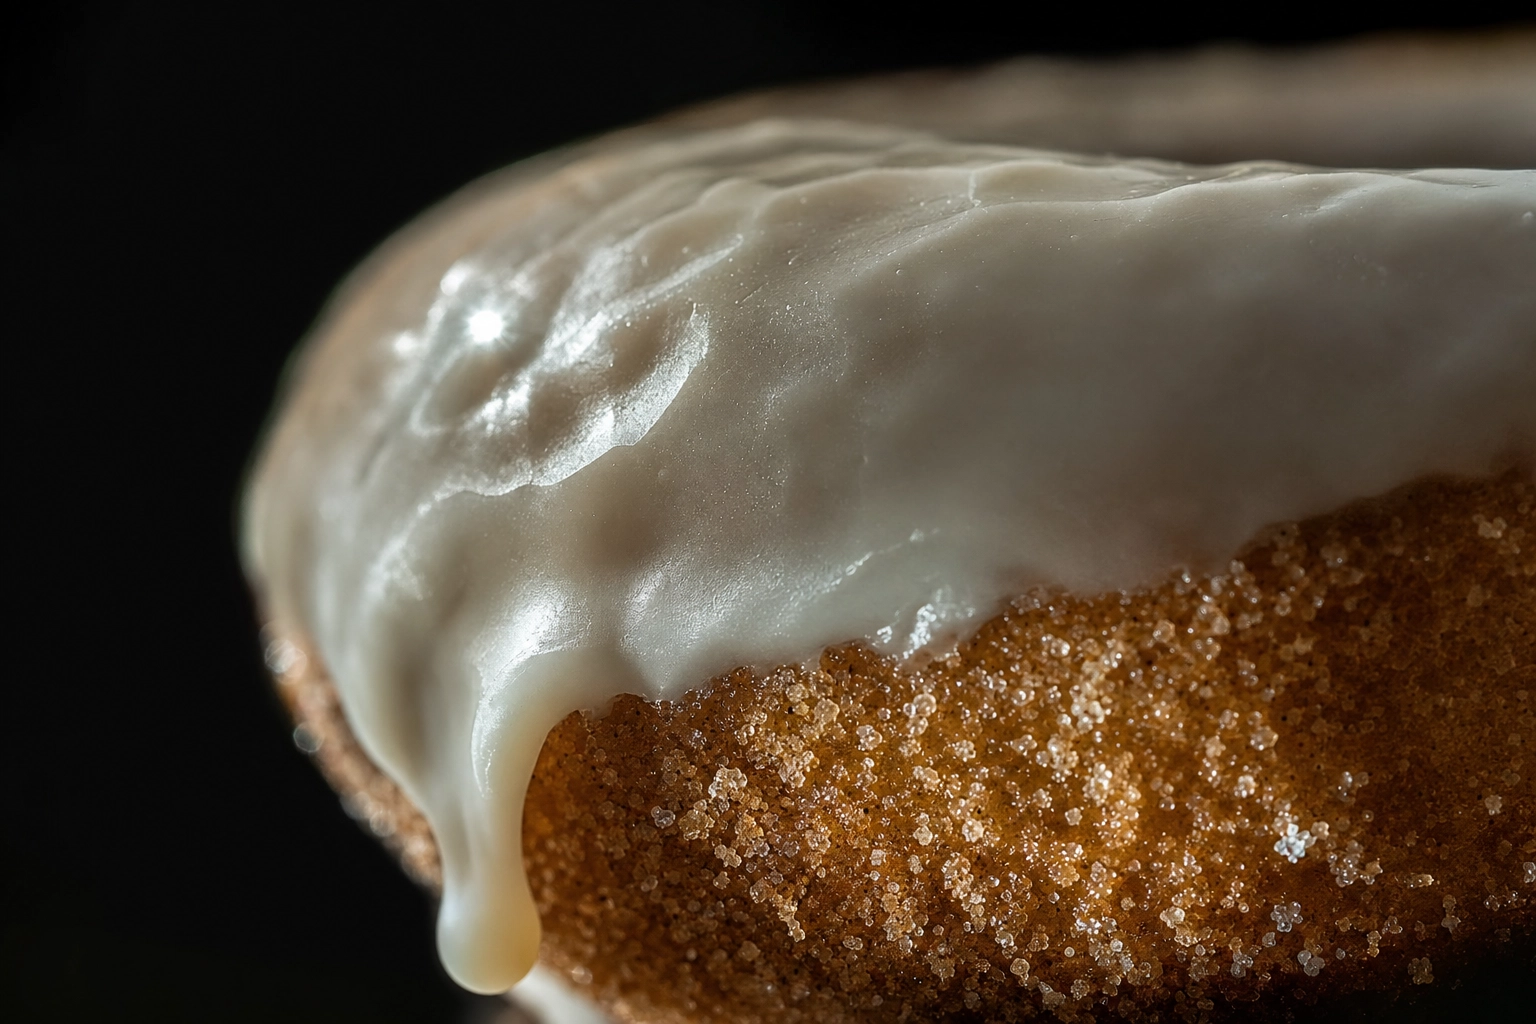 Macro close-up of donut glaze surface in raking side light showing ripple and drip detail
For exposure, start at ISO 100–200, f/5.6–f/8, and slightly underexpose by about a third of a stop. Underexposing protects the brightest glaze highlights from clipping, and the donut's interior tones easily recover in editing. If you're shooting commercial work and the specular highlights are still too aggressive, a polarizing filter on the lens (or in front of a continuous LED) tames them.
For chocolate-frosted donuts, the same raking-light principle applies, but feather your fill card a little closer. Chocolate eats light. Without that fill, the donut looks like a black blob against any background that isn't white.
Style tips by donut type
Every doughnut style has its own personality on camera. Treating them all the same is the fastest way to end up with a menu that looks generic. Match your approach to what each doughnut actually is.
Yeast / raised donuts (the classic glazed)
Yeast donuts are light, airy, and almost translucent at the edges where the glaze meets the puffed crumb. Backlight them gently — placing the key light slightly behind and to the side at about 135° — and you'll see that subtle glow at the rim that makes a glazed donut look fresh-out-of-the-fryer.
Shoot within thirty minutes of glazing. After that, the glaze loses its glassy shine, dulls toward matte, and the photo will read as "yesterday's batch."
Cake donuts (denser, more texture)
Cake donuts win on texture, not gloss. The crumb is tighter, the surface often has a craggy or crackled finish (especially old-fashioned styles), and a coating of cinnamon-sugar or powdered sugar emphasizes that ruggedness.
Push the raking light hard. Shoot at f/8 to keep the entire textured surface sharp. The goal is to make a viewer feel the crumb just by looking.
Filled donuts (Boston cream, jelly, Bavarian)
Always shoot a two-photo set: one whole doughnut so customers know what they're ordering, one split so they can see the filling. Style the cut so a small amount of filling is visible at the edge of the whole donut before you cut — a tiny ooze sells the whole concept.
For dark fillings (chocolate ganache, dulce de leche), light the cut face brightly so the gloss reads. For pale fillings (vanilla cream, lemon curd), use a slightly darker background so the filling pops as the lightest thing in frame.
Frosted donuts (chocolate, vanilla, maple)
Smooth thick frosting behaves like a mirror. Watch your camera's reflection, the ceiling lights, even your own face appearing on the surface. Either change the angle of your key light to push reflections off the frame, or use a polarizing filter to kill them.
Dark chocolate frosting needs more fill light than you'd think — a bigger white bounce, or a second small light at low power on the opposite side, prevents the frosting from looking flat or dirty.
Sugar-coated donuts (powdered, cinnamon, granulated)
These are the easiest donut style to light. The sugar coating is matte, so no specular highlights to manage. Raking light makes the sugar crystals sparkle individually. Shoot powdered-sugar donuts within a few minutes of dusting — body heat and moisture absorb the powder quickly, and "yesterday's" powdered doughnut looks damp.
Mochi donuts (pon-de-ring)
The eight-ball ring shape is the star. Shoot at a slight angle (around 25–35°) so the bumpy ring structure reads. Mochi glaze is thinner and more translucent than American donut glaze, so backlight slightly to bring out the color from within. Pastel pink, matcha green, and ube purple read beautifully against pale neutral backgrounds.
Cronuts and laminated hybrids
The laminated layers are everything. Shoot the cronut in profile, at eye level, so the camera sees the layer stack from the side. A light dusting of powdered sugar against a dark slate background makes the layers count themselves visually. For filled cronuts, a tiny drizzle leak at the layer edge is the visual cue customers respond to.
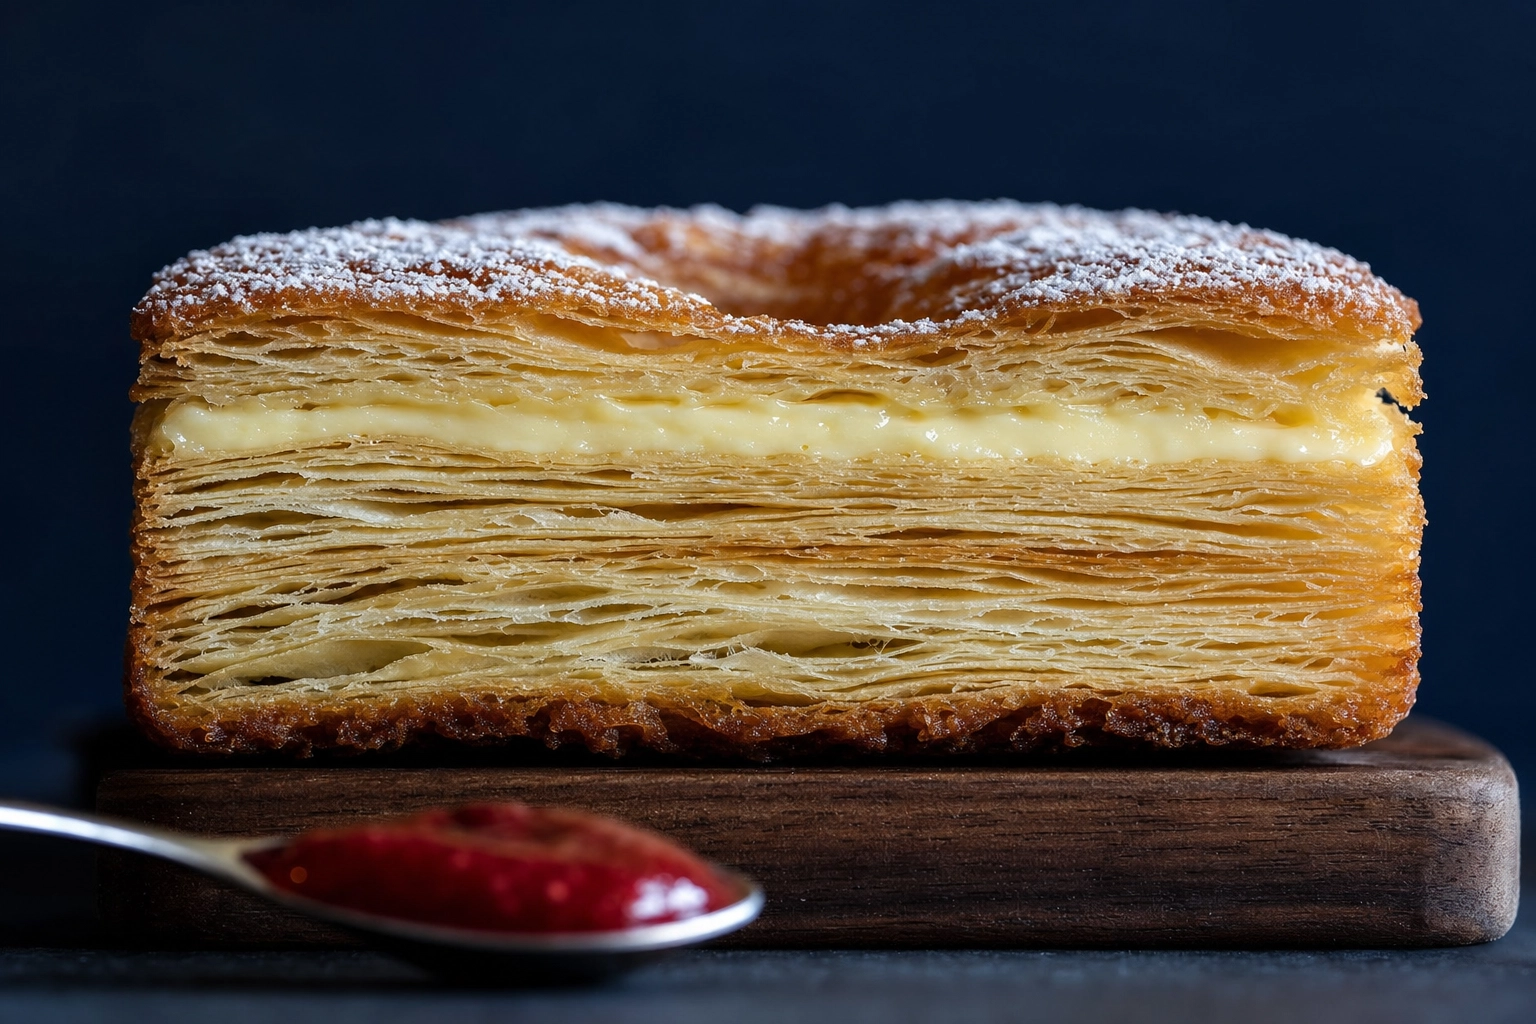 Side-profile cronut showing laminated dough layers and cream filling — laminated hybrid donut photography
Backgrounds: matching surface to donut style
The background isn't a passive choice in donut photography. It sets mood, communicates price point, and tells the customer who this donut is for.
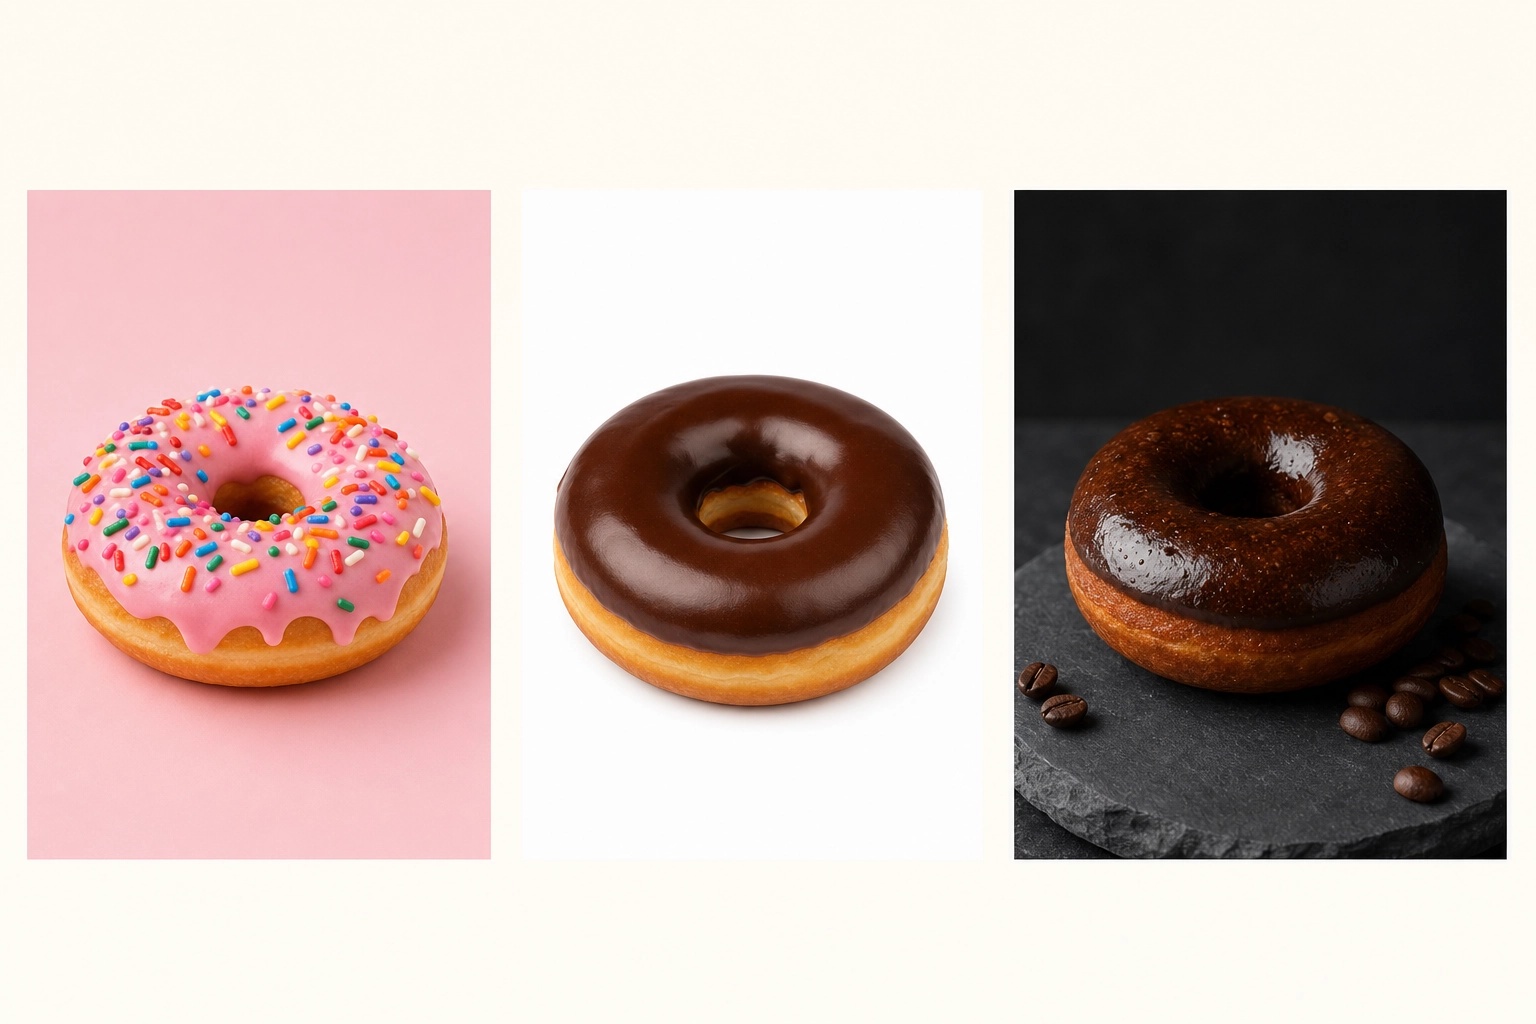 Three donut photography backgrounds compared side-by-side — pastel pink, white seamless, and dark moody slate
Pastel backgrounds for fun donuts
Pink, mint, butter yellow, and lavender backgrounds say: playful, social-friendly, indulgent, fun. They're the right choice for funfetti donuts, mochi donuts, kids' birthday boxes, brunch promos, and anything aimed at the Instagram-aware customer.
Use solid-color paper sweeps, matte painted boards, or even tinted fabric. The iconic pink Voodoo-box pink has become shorthand for indulgent donut culture — leaning into that visual language pays off for shops in that lane.
Dark and moody for chocolate and gourmet
Black slate, dark walnut wood, charcoal linen — these communicate craft, premium pricing, and adult-targeted gourmet. A single key light, minimal fill, and dramatic shadow falloff lets the donut glow out of the darkness.
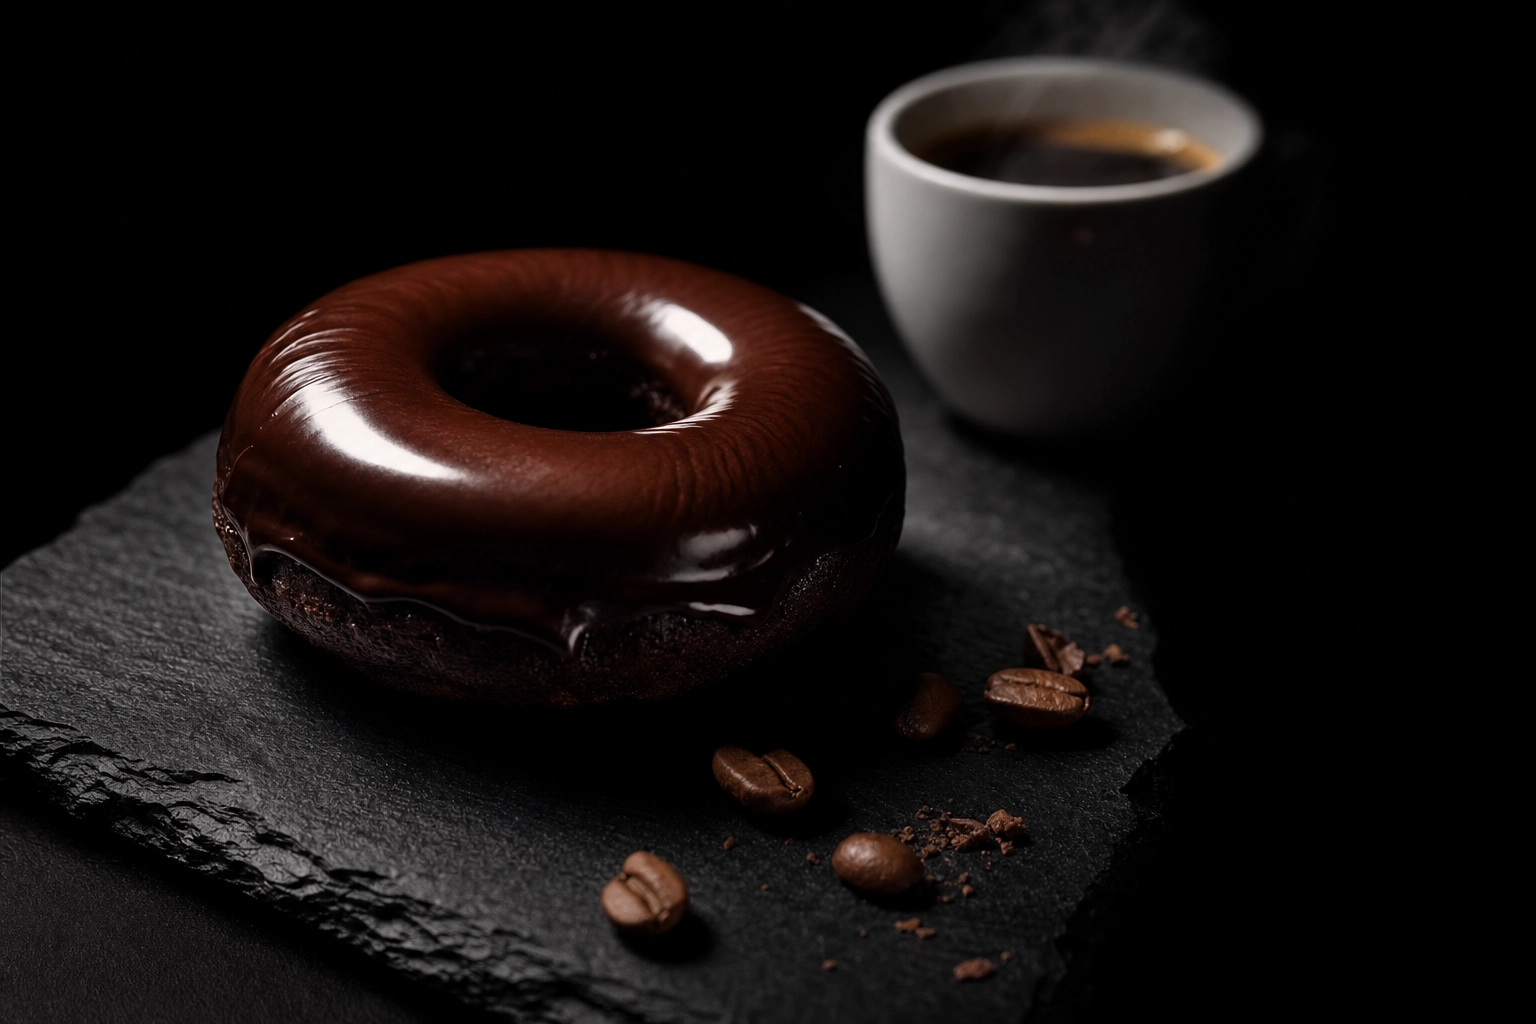 Moody chocolate-glazed donut on black slate with espresso coffee — dark moody donut photography background
This treatment is built for chocolate-glazed, espresso-flavored, bourbon-infused, and other adult-leaning donuts. The deep dark background paired with a single donut and a black coffee cup works almost every time. Use it sparingly: a full menu shot in dark moody style can read as joyless, but one or two hero shots in that mood elevate the rest of the lineup.
White seamless for catalog and delivery apps
Pure white seamless is what delivery platforms want. Uber Eats, DoorDash, and Grubhub all explicitly recommend or require clean white backgrounds for menu thumbnails because they isolate the product and remove visual noise.
Set up two lights at roughly 45° angles on either side, or one large overhead diffusion source, to eliminate shadows under the donut. The result is crisp, clean, conversion-optimized — the donut sells itself with zero distraction.
Sprinkle and topping macro photography
Sprinkles are tiny. They sit at slightly different depths on a curved surface. And they are usually the most-asked-about element of any donut photograph — customers want to see the sprinkle detail because that's what makes a sprinkle donut feel exciting.
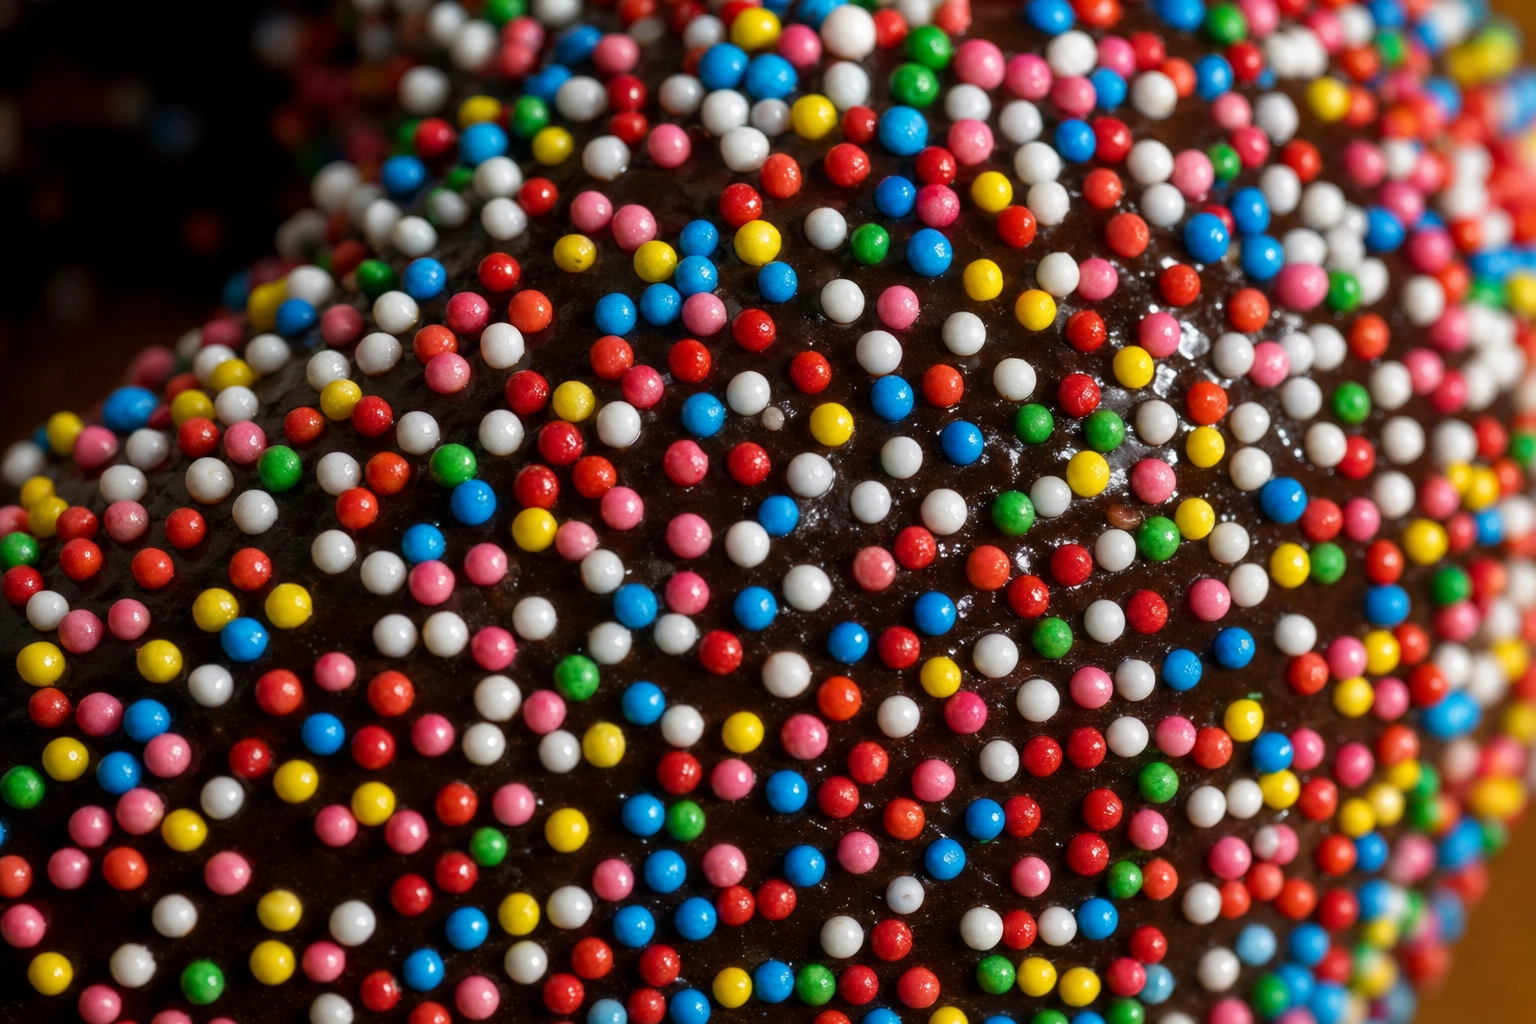 Extreme macro of rainbow nonpareil sprinkles on chocolate donut glaze — sprinkle detail photography
The macro setup looks like this. Use a 60mm or 100mm macro lens on a DSLR or mirrorless, or your phone's dedicated macro mode (modern iPhone Pro and Galaxy Ultra models have one). Shoot at f/8 to f/11. A deeper aperture pulls more sprinkles into the focal plane simultaneously — at f/2.8, only one sprinkle is sharp; at f/8, an entire sprinkle field reads.
Focus on the single sprinkle closest to the lens. The human eye reads the closest detail as "sharp" and forgives the soft edges further back.
Light from two sides at slightly different intensities. Rainbow nonpareils — the tiny spherical sprinkles — have a glossy curved surface; raking light from both sides makes each ball look three-dimensional rather than like a flat colored dot. Long thin jimmies need side light to show their cylindrical shape and separate the colors clearly. For chocolate sprinkles and chopped nuts, push the light harder on one side and use a polarizer to keep the chocolate from going muddy.
Finally, resist heavy noise reduction in editing. Aggressive noise reduction softens sprinkle edges and turns them into the exact "beige noise" you were trying to avoid.
Donut shop interior and lifestyle photography
Selling a doughnut isn't only about the donut itself. It's about the experience — the smell of fresh fry oil, the case glowing with options, the moment a tray comes out of the kitchen. Lifestyle donut photography of the shop itself converts hesitant scrollers into regulars.
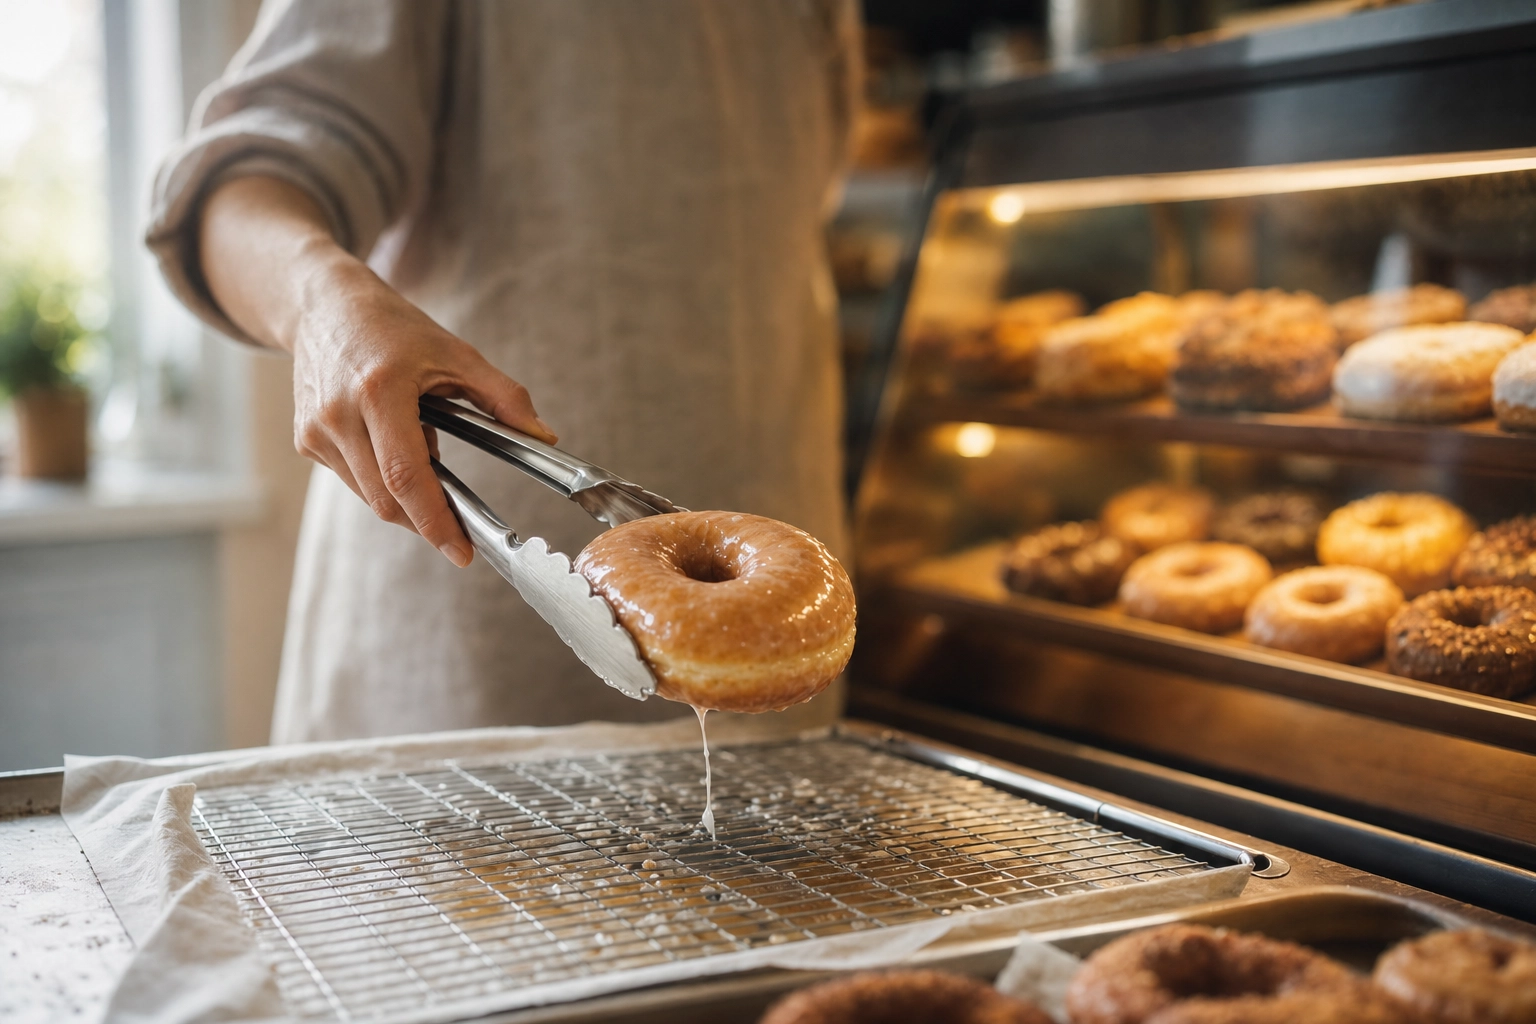 Baker's hand with tongs lifting fresh donut from cooling rack — donut shop interior lifestyle photography
A handful of shop interior shots earn their place in any donut brand's image library:
- Display case shots. Shoot through the glass at eye level — slightly tilt up to catch the case lights reflecting off the glaze. Use the case's interior light as your key, balanced with a flash bounced off the ceiling for fill. Watch for fingerprints on the glass.
- Tongs grabbing a donut from a tray. Hands of a baker or counter person reaching with metal tongs — this is the universal "fresh and abundant" shot.
- Coffee and donut together. The pairing nobody can refuse. A black coffee in a simple ceramic mug, steam still rising, next to a single hero donut. Side-angle, soft window light. The coffee adds a complementary brown tone and a sense of morning ritual.
- The fresh-fry moment. Oil bubbles around a donut, the wire rack catching the first drips, a baker's hand sliding a doughnut up onto draining paper. This is craft, and it's the most under-photographed shot in most donut shops.
- A customer or staff member in soft background blur. Donut in sharp focus on the counter, a person at f/2.8 falling into dreamy bokeh behind. A second coffee cup in the frame anchors the morning-ritual feeling. Sells the shop as a place, not just a product.
The AI workflow: from phone snap to studio shot
Even with all the techniques above, traditional donut photography runs into hard limits in a real donut shop. New flavors launch weekly. Menus change with the season. Most shops can't justify a $700–$2,500 photographer day for a four-donut Valentine's promo. And a half-day shoot delays the launch by a week.
This is exactly where an AI workflow earns its keep. Modern AI photo tools don't generate fictional donuts — they take a real phone photo of your real donut and restyle the lighting, background, finish, and framing into menu-ready imagery in roughly ninety seconds.
The workflow is short:
- Take the best phone photo you can. All the principles above still apply — soft window light, a clean background, a 30–45° angle, focus on the donut. A better input photo always produces a better output.
- Upload to FoodShot AI. The AI keeps your real doughnut (glaze, sprinkles, shape) and rebuilds the lighting and surroundings.
- Pick a style from the 200+ preset library: Delivery (white seamless), Menu (clean lifestyle), Fine Dining (moody dark), Pastel Bakery, and many more.
- Generate multiple variations. One phone snap becomes a delivery-app thumbnail, an Instagram hero, a moody Pinterest pin, and a catalog flat-lay — all from the same upload.
- Lock in brand consistency. Use My Styles to upload a reference donut photo and apply that exact look across every other doughnut on your menu, so the whole storefront feels visually unified.
The numbers tell the story. A traditional shoot is $700–$2,500 a day plus stylist, props, and studio rental. The AI food photo editor starts at $9/month on a yearly plan (Starter tier) with commercial license included on paid plans — effectively around $0.36 per image when you use the full credit allowance. For a donut shop launching a new flavor every two weeks, that's the difference between professional donut photography being a once-a-year event and being part of every menu change.
A few related guides go deeper on adjacent techniques: our cupcake photography and cookie photography walkthroughs cover the same problems for other pastry shapes, and our food styling guide gets into props, surfaces, and arrangement strategies that apply across the entire bakery counter. If you're outfitting a full bakery shoot, the bakery photography overview maps the AI workflow to the specific imagery a bake-shop business needs.
Frequently Asked Questions
How do I photograph filled donuts so the cross-section looks clean?
Run a serrated knife under hot water for about thirty seconds, dry it thoroughly, then make one firm slice all the way through. Don't saw — sawing tears the crumb and smears the filling. Cut just before shooting so the cream or jelly is still glossy and hasn't skinned over. Position the light so it rakes across the cut face at a 30–45° angle, which makes the filling catch a small highlight and look fresh. A white card on the shadow side keeps the filling color readable.
How do I keep sprinkles sharp instead of looking like noise?
Three changes solve this almost every time. First, narrow your aperture to f/8–f/11 so more of the curved donut surface falls inside the focal plane. Second, focus deliberately on the closest sprinkle to the lens — your eye treats that one as the "in focus" anchor for the whole sprinkle field. Third, light from two sides so each sprinkle color separates visually rather than blending into a beige average. And in editing, go easy on noise reduction — it softens sprinkle edges and undoes everything you just did.
What is the best background for a tray or dozen photograph?
It depends on the use case. White seamless is the right answer for catalog images, delivery-app menus, and anywhere you need maximum clarity and zero distraction. Pastel pink, mint, or butter yellow suits playful, kids', and birthday-market donuts. Weathered wood or matte cardboard sells the artisan, fresh-fried, farm-style story. Marble or slate elevates premium and wedding-event donut walls. When in doubt, white wins for delivery, and one tinted accent surface gives you Instagram variety.
Do I need a DSLR or will my phone work for donut photography?
A modern iPhone Pro, Galaxy Ultra, or Pixel Pro shoots menu-quality donut photography in good window light. For 90% of donut-shop social content and menu thumbnails, that's enough. A DSLR or mirrorless camera with a 60mm or 100mm macro lens wins for two specific cases: extreme sprinkle close-ups, and shots where you need very shallow depth of field with the background dissolving into beautiful bokeh. The bigger limit on phones isn't resolution — it's dynamic range, which is why ultra-glossy glaze sometimes blows out on a phone where a DSLR holds it. Use HDR mode or shoot in slightly softer light and you'll get most of that back.
How do I shoot donut trays without losing detail in the back row?
A tray photographed up close at a low angle will always have a back row that goes soft. Two fixes work in combination. First, step back and use a longer focal length (50mm or 85mm equivalent). The longer lens compresses the tray and makes the front and back rows look closer to the same focal plane. Second, shoot at f/8 to f/11 for the deepest practical depth of field. A slight overhead angle of 60–70° (not pure 90°) also reduces the visible depth difference between rows.
Donut-shop ready in seconds
The five-shot lineup — hero single, cross-section reveal, stacked tower, dozen flat-lay, eating-action — covers almost every menu and social need a donut business has. Light those shots with raking side light. Match each donut style to its right background. Get close enough on the sprinkles that customers can count them. That's the whole formula for donut photography that sells.
For shops without time for a full studio day, or content creators launching a new flavor on a Wednesday, the AI route turns a single window-lit phone photo into the same five-shot lineup in under two minutes. Try a few uploads on the free tier first to see how your donuts translate; from there, the pricing plans for AI donut photography scale with how often your menu changes.
Whatever path you choose, the gap between counter and screen closes the same way: with one or two specific decisions about light and angle. Now go open a box.