Pizza Photography: Cheese Pulls, Slices & Whole Pies
 Ali Tanis30 min read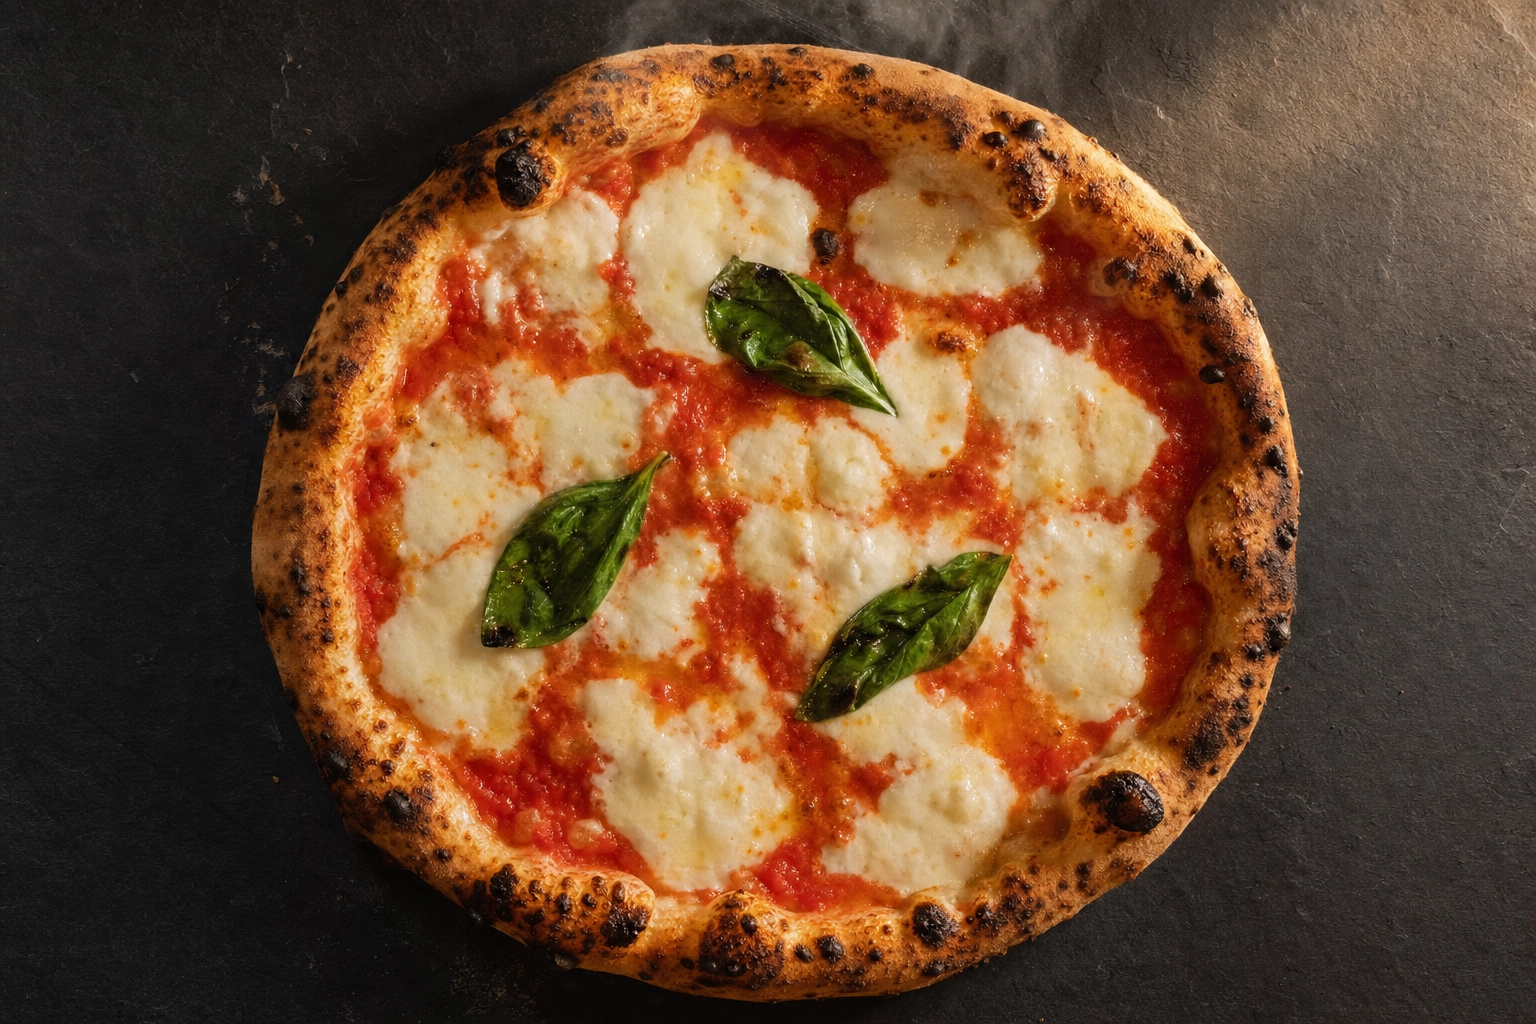
Pizza is the food the camera loves most and forgives least. The same melted cheese that makes a slice irresistible in person turns gray and rubbery within three minutes of leaving the oven. The same dark crust char that signals quality in real life vanishes under bad fluorescent light. The same cheese pull that stops your thumb mid-scroll on Instagram takes commercial photographers half a day to nail.
This guide is about the craft of pizza photography — what's actually happening when you press the shutter, why your phone shots look flat, and how to fix every problem one slice at a time. If you want the business-focused playbook on what to shoot and why it sells, our pizza shop photos guide is the companion piece. This one goes deeper into the technique.
Quick Summary: Great pizza photography comes down to five things — a 90° overhead for the whole pie, a slice pull for emotion, a slice hero for the menu, a slice-with-eater for scale, and an oven-action shot for story. Each demands its own lighting angle, timing window, and styling trick. Cheese pulls work in the first 30 seconds after the oven. Side-light at 45° beats top-light every time. And the AI shortcut at the end takes any decent phone shot to menu-grade in 90 seconds.
Why Pizza Is the Trickiest Food on the Photographer's Bench
Most foods give you a window. Pizza gives you a stopwatch.
Mozzarella stays photogenic for roughly two to three minutes after the oven before it dulls into a gray, congealed surface that no editing app can fully rescue. The first 30 seconds are gold — that's when cheese pulls actually pull, char marks read their darkest, natural steam is still rising, and the bubbling on a Neapolitan crust is still glossy. After that, you're losing detail with every breath.
That's only the first problem. Here are the others, all happening at once:
- Slice geometry vs. whole-pie identity. A whole pie reads instantly as "pizza" on a menu tile, but it can look flat and dimensionless. A single slice looks appetizing but can read as "leftover food" out of context. Choosing which to shoot — and when — is half the craft.
- Grease shine blowing out exposure. Melted cheese is intensely reflective. Direct top-light or on-camera flash will clip the highlights to pure white, and your phone's auto-exposure has no clue what to do.
- Crust vs. cheese, fighting for the same exposure. Dark leopard char wants more light; pale mozzarella wants less. Get one right and the other suffers.
- Sauce pooling at the tip. Excess tomato sauce dilutes cheese color and runs to the lowest point of a tilted slice, ruining clean compositions.
Every pro trick in this guide is a workaround for one of those four problems. Once you understand the enemy, the tactics make sense.
The 5 Pizza Shots Every Pizzeria Needs
Five frames, five jobs. Each one demands its own technical approach. Build your menu and social calendar around these and you'll never run out of content.
1. The Whole-Pie Top-Down
The whole-pie overhead is your menu workhorse — the shot that has to live on delivery app tiles, menu boards, and printed posters. It needs to be instantly readable from a thumbnail.
The rule is simple, and breaking it is the most common mistake in pizzeria photography: your camera lens has to be exactly parallel to the table. Not "close." Parallel. Five degrees of tilt and the back of the pizza looks larger than the front, the circle warps into an egg, and your shot looks amateur even if everything else is right.
Two cheap fixes:
- A $25 phone tripod with a horizontal arm and a phone clamp. This is the single best photography purchase a pizzeria owner can make.
- The chair-back trick: lay the pizza on a low table, brace your elbows on the back of a dining chair, hold the phone face-down level with the chair's top edge. Free, and it works.
Use your phone's 1x or 2x lens. The 0.5x ultrawide distorts a circle into a UFO every single time. Frame the whole pie with about 15-20% breathing room around the edge so you can crop later for Instagram squares, Uber Eats 1:1 tiles, and 5:4 DoorDash menu thumbnails from the same source frame.
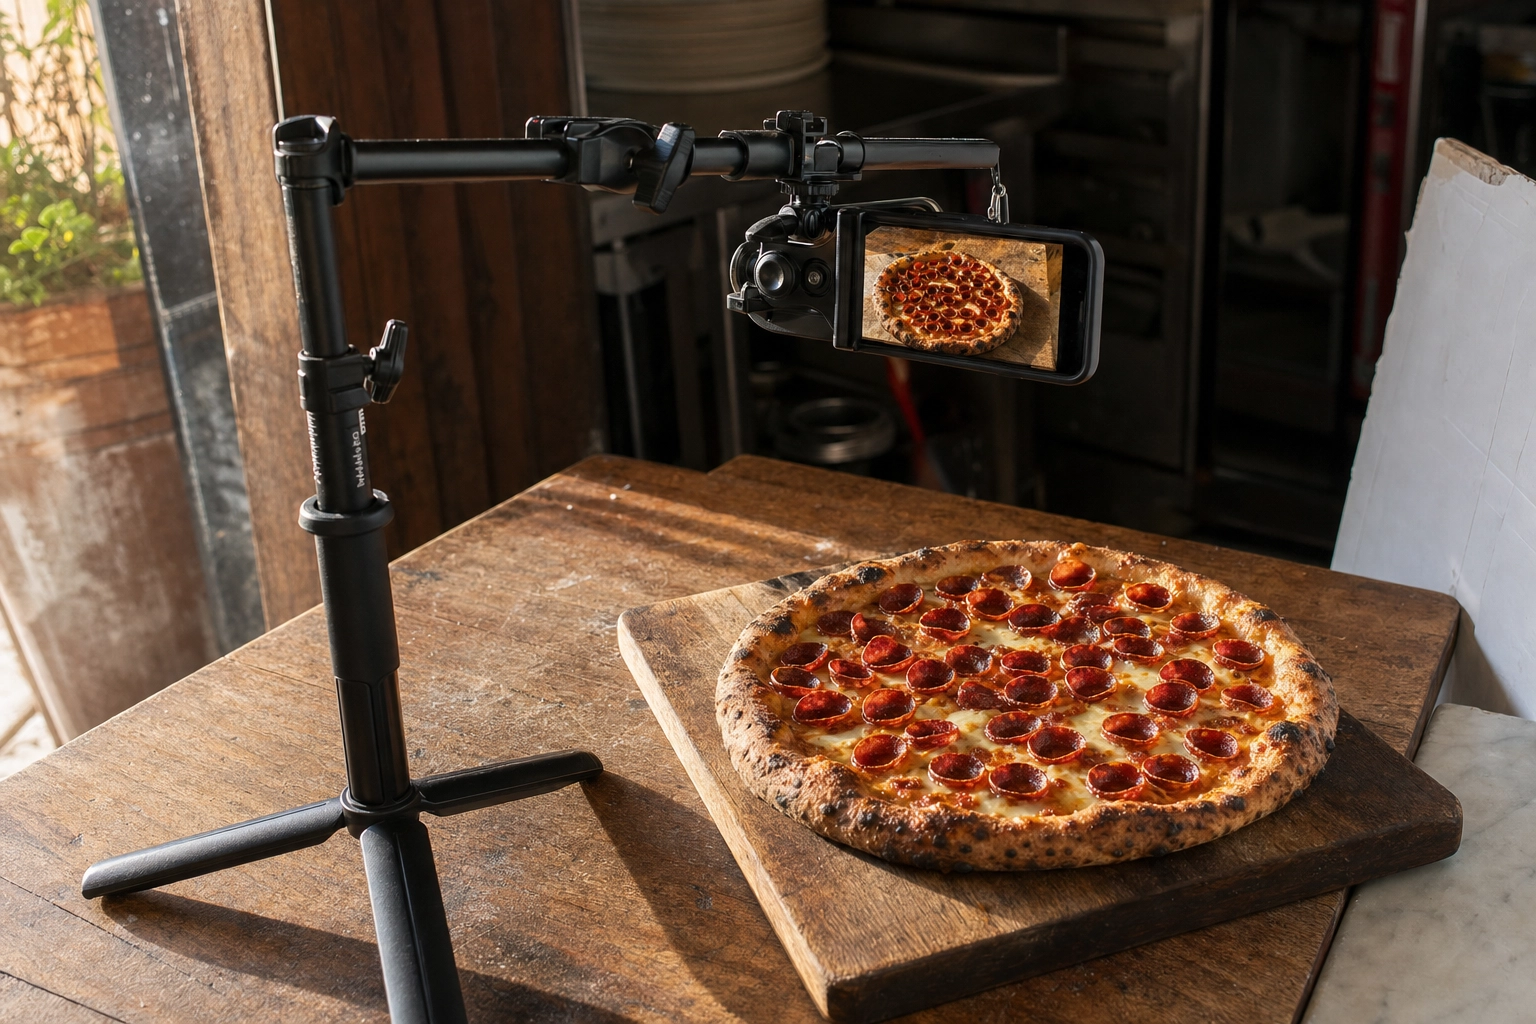 Phone tripod overhead arm setup capturing top-down pizza photography of pepperoni pie on wooden board
2. The Slice Pull (Cheese Stretch)
This is the money shot of pizza photography. It's also the hardest single frame in food photography, period. A Chicago commercial studio routinely spends half a day on one pizza pull frame, going through three or four whole pies and a dedicated food stylist for the privilege.
The mechanics, in order:
- Pre-cut the slice with kitchen scissors before the final bake. When the cheese melts during baking, it re-fuses across the cut. When you lift, it pulls cleanly along that seam.
- Slide a thin spatula under the slice. A second pair of hands here saves your shot.
- Lift in one-inch increments while shooting burst mode. Your phone's continuous shutter (hold the shutter button down on iPhone, or use burst mode on Android) is non-negotiable.
- Shoot from a low 10–20° angle above the table. This is what shows the longest possible stretch of cheese against the background. Shooting from above kills the pull.
- You have one or two usable pulls per pizza. Then the cheese goes gray and you're done.
Set up the shot completely before you bake the hero pie. Lights, camera angle, props, framing — everything dialed in on a stand-in pizza first. Pros don't reframe with a hot pizza on the table. They make the pizza walk into a pre-built set.
3. The Single Slice Hero
Where the whole-pie shot sells the product, the single slice hero sells the craft. One slice extracted from the pie, placed on a clean plate or sheet of parchment, photographed at a 45° hero angle that reveals topping distribution, crust thickness, and cheese melt all in one frame.
This is the shot that goes on menu detail pages — the larger image diners see after they click on a tile. It also makes a great Instagram carousel slide paired with the overhead.
A small piece of cardboard slid under a heavy NY-style slice keeps the tip from drooping. Cut the cardboard a quarter-inch shorter than the slice so it doesn't show in frame. For thinner Neapolitan slices, no support is needed — they'll hold their shape if you photograph them within the first minute.
Light from the side at 45° to render the crust texture. The plate or parchment under the slice should be matte, not glossy — glossy surfaces double the reflection problem you already have with the cheese.
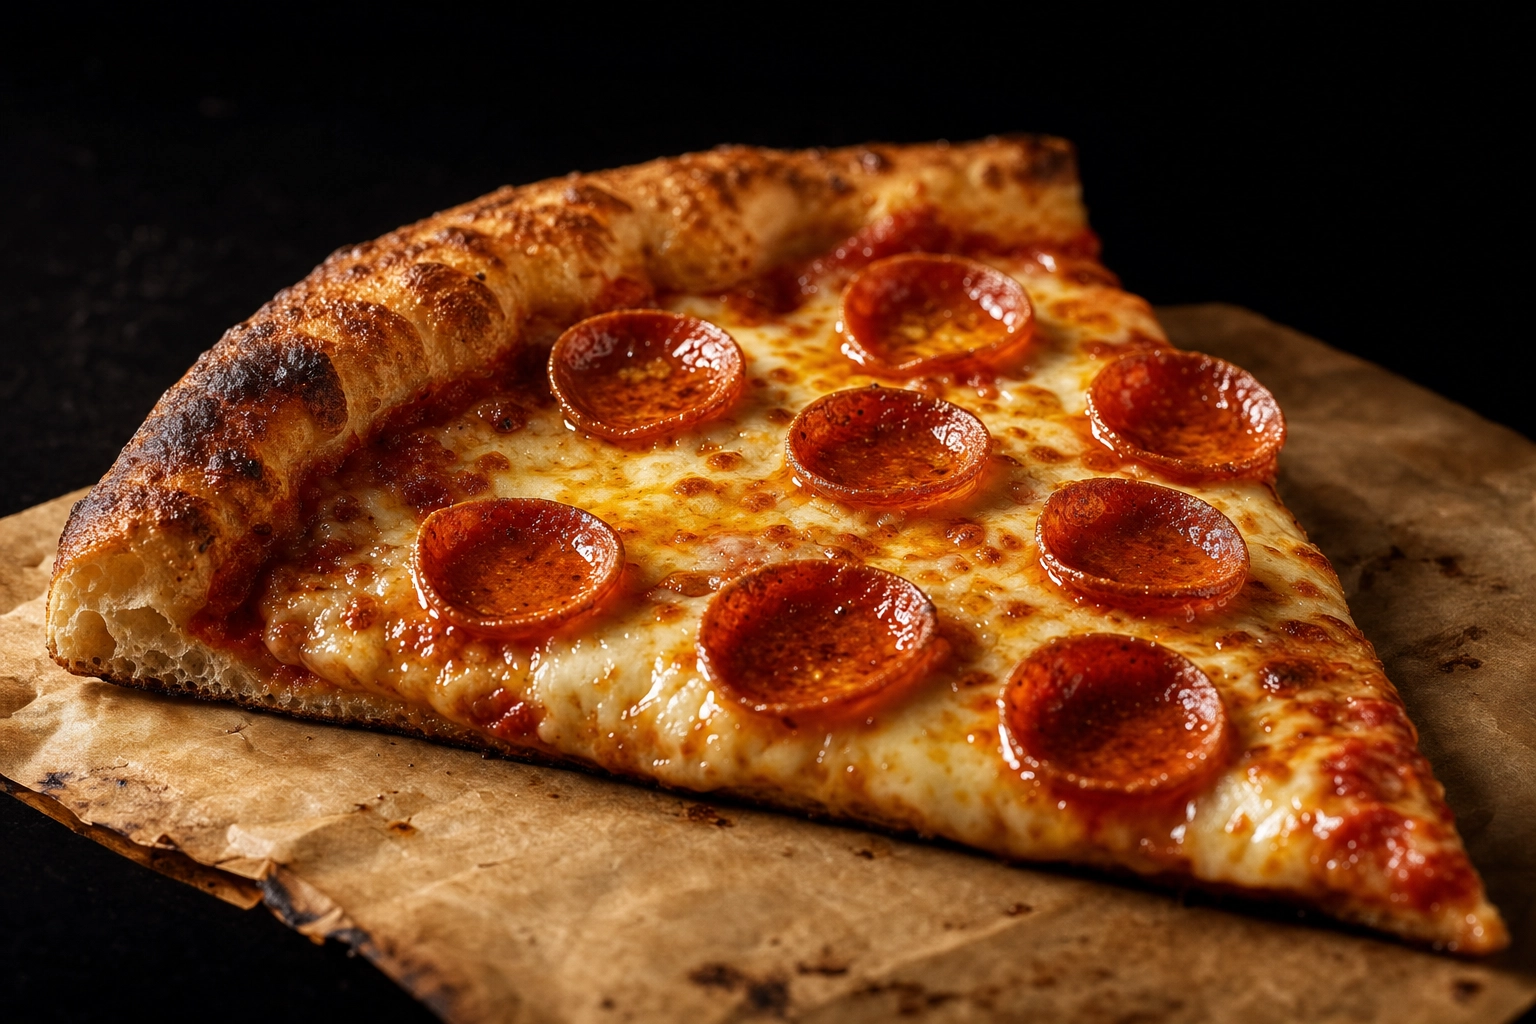 Side angle pizza photography of single New York slice hero on parchment paper with cup-and-char pepperoni
4. The Slice With Eater (The Human Element)
A hand emerging from frame, lifting a slice with cheese strings still tethered to the source pie. A diner across the table mid-laugh, slice in hand, blurred slightly behind the focused pizza. The over-the-shoulder shot from the diner's POV, looking down at the slice they're about to bite.
These slice-with-eater frames do something the other four shots can't: they tell the viewer "this is a real pizza, eaten by a real person, right now." They sell scale (a hand gives instant size context), atmosphere, and humanity.
The trick is to keep them feeling unstaged. Forced "eating pose" shots read as stock photography from a mile away. Three honest approaches that work:
- Hand-only crops — easier to direct, no model release issues. Frame the slice in the foreground with the rest of the pie soft in the background.
- Group table scenes — shoot during a real service, capture a real moment. Ask permission, of course.
- POV from the eater's eye-line — phone held just below face level, slice extended toward camera, pizza on the table behind.
Burst mode again. Most "candid" eating shots are one usable frame out of forty.
5. Pizza Oven Action
If you have a wood-fired oven, you have a brand asset most pizzerias would kill for. The orange glow, the curl of smoke, the pizzaiolo's silhouette against the flame, the peel sliding a raw pie into 900°F heat — this is theater, and it's the most under-shot opportunity in pizza photography.
Three frames worth grabbing:
- Pizzaiolo hands on the peel, mid-launch, just as the pie enters the oven mouth. Shoot from the side, slightly behind the operator's shoulder.
- The oven mouth glow alone, dome lit by flame, a pie inside puffing up. Long-exposure mode on your phone (most modern iPhones and Pixels have a Night mode that doubles as a low-shutter option) renders the fire as warm streaks.
- The pull-out, with the finished pizza halfway out on the peel and oven glow behind. The contrast between molten interior and the cooler shop ambient light gives this shot dramatic depth.
Safety: stay at least three feet from the oven mouth, never block pizzaiolo traffic, and don't let your phone overheat against the oven door (real risk near 900°F). For these shots, accept that the pizza on the peel is not going to be the focal point — the action is the focal point.
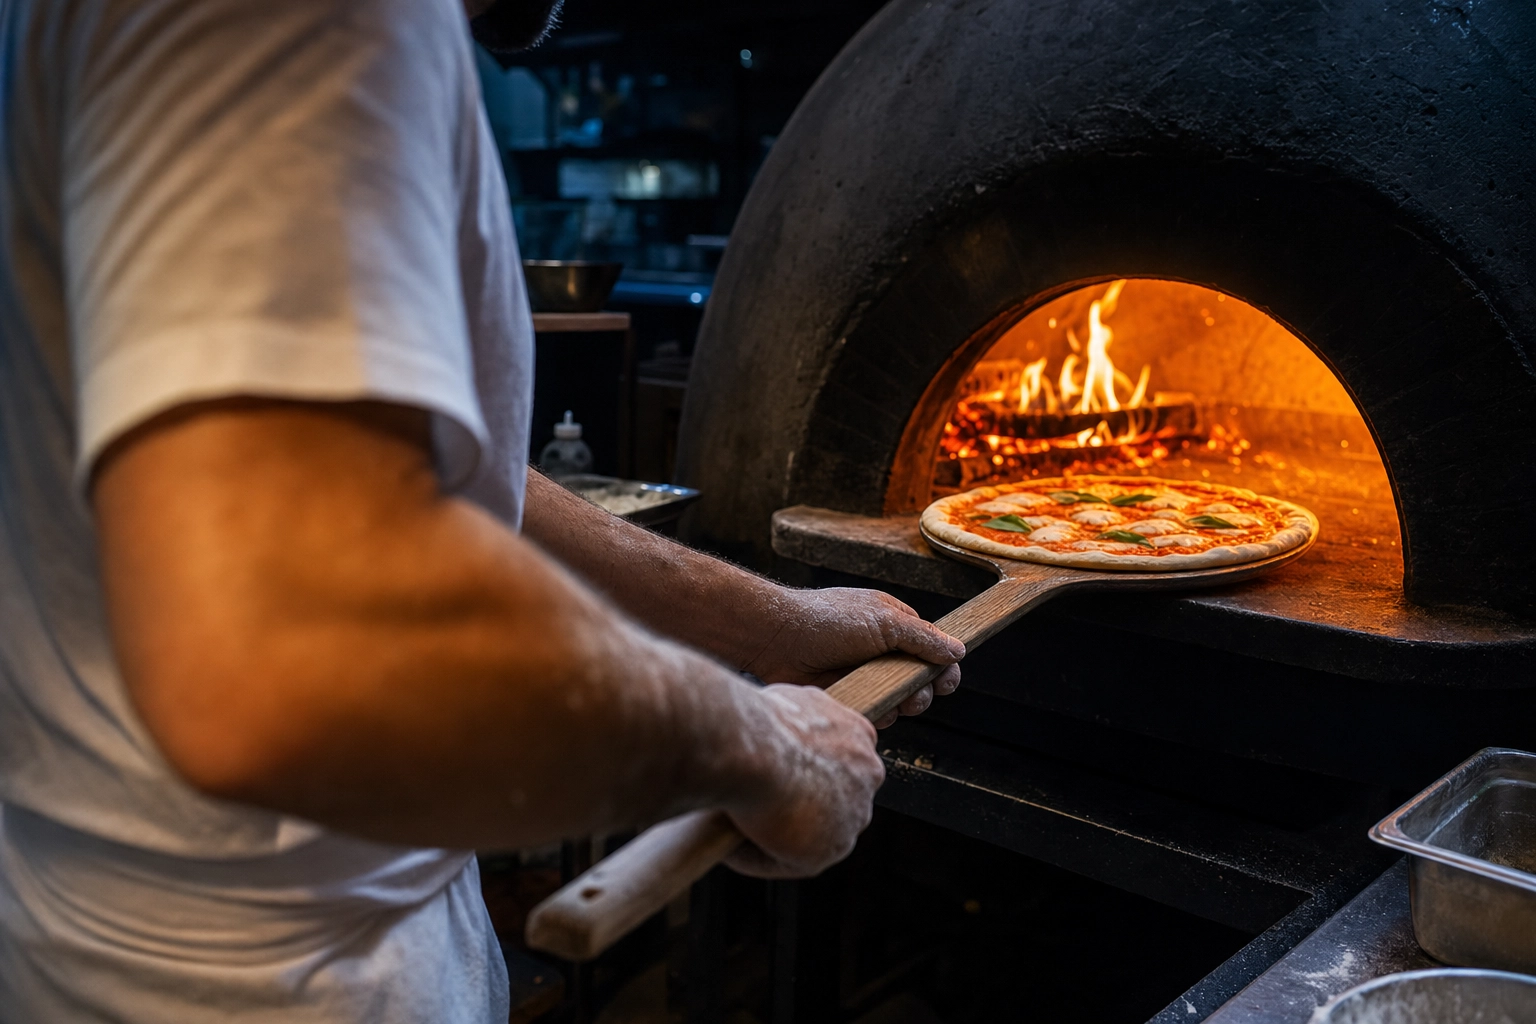 Pizza photography of pizzaiolo hands sliding pizza into wood-fired oven with orange flames and rim light
Lighting Pizza for Maximum Appetite Appeal
Most pizza pictures fail at lighting before they fail at anything else. The good news: pizza wants exactly one kind of light, and it's available in every restaurant on earth — a window.
Side-Light at 45° Is the Universal Pro Standard
Virtually every commercial pizza photographer lights the same way: a soft directional source positioned at roughly 45° from the side of the pizza, with a white fill card (a piece of foam board, a folded white napkin, even a sheet of printer paper) directly opposite to bounce a softer fill into the shadows. This setup does three things at once:
- Reveals crust texture — the leopard spots on a Neapolitan, the frico edge on a Detroit, the blistering on a NY slice — because side-light creates the micro-shadows that read as "texture" on camera.
- Cuts through cheese reflectivity without blowing out highlights, because the light isn't bouncing straight back into the lens.
- Adds dimensionality to a fundamentally flat subject — pizza is essentially a 2D object until light gives it depth.
Top-light alone (a ceiling fixture directly above the pizza) is the second-most-common pizza shot killer after wrong angle. It flattens the surface, blasts the cheese into glare, and turns the crust shadow into a hard dark line.
Use the Window You Already Have
For most pizzeria owners, the entire lighting toolkit is one south- or east-facing window and a piece of white poster board. Place the pizza two to three feet from the window with the light arriving at roughly the 10 o'clock or 2 o'clock position relative to your shot. If direct sun is hitting the pizza, diffuse it with a thin white sheet, a sheer curtain, or even a piece of parchment paper taped over the glass.
Our food photography lighting deep-dive covers natural-light setups for every dish type — bookmark it as a reference.
Color Temperature Matters More Than You Think
Standard pizzeria fluorescents kick out around 4500-5500K with a heavy green cast that makes mozzarella look gray and tomato sauce look dirty. Pizza loves warm light — 3000-4000K, the color of late afternoon sun. If you're shooting near a window, golden-hour and the hour after dawn are your friends. If you're shooting indoors and have to use artificial light, swap the kitchen fluorescents for warm LED bulbs in the photo zone, or carry a $30 portable LED panel that lets you dial in temperature.
On your phone: open the camera, tap to focus on the cheese (not the crust), then drag the exposure slider down one notch. This protects the cheese highlights from clipping to white. Check the result by zooming in on the brightest part of the cheese — if you can still see individual droplet detail, you're golden. If it's a flat white blob, drag the slider down another notch.
Backlight for Steam, Side-Light for Crust
Steam only reads on camera when it's backlit against a darker zone. If you want to capture that "fresh from the oven" wisp, position a light source slightly behind and to the side of the pizza, with a dark wall or backdrop directly behind it. The steam particles catch the rim light against the dark background and become visible. Front-lit steam is invisible. This is the same physics that makes car headlights look dramatic in fog at night and invisible in daylight.
The Cheese Pull, Decoded: A Technique Deep-Dive
The cheese pull deserves its own section because it's the one shot that separates "good pizzeria photographer" from "amateur with a phone." Every element matters.
Cheese Selection
Not all mozzarella pulls. Pre-shredded grocery store mozzarella is treated with anti-caking agents (cellulose, potato starch) that interfere with the smooth melt that creates a clean pull. Buy whole blocks and grate them yourself. Low-moisture, part-skim mozzarella stays whiter and pulls in cleaner strands than whole-milk fresh mozzarella, which gets too liquid for dramatic stretches (great for taste, harder to photograph).
Food stylists working on commercial cheese pull shoots often scatter strands of pulled string cheese across the pre-cut seam before baking — the string mozzarella melts into long, narrow strands that stretch dramatically for the camera. This is a styling trick, not a misrepresentation, and it's used in nearly every cheese pull ad you've ever seen.
Temperature Window
Bake at 475-500°F for a standard oven, hotter (700-900°F+) for Neapolitan in a wood-fired or deck oven. The cheese needs to be fully melted and bubbling, but not browned — once mozzarella starts to brown, it loses the smooth surface that catches light cleanly.
The photography window opens 15 seconds after the pie comes out (cheese needs to set just slightly so it stretches instead of dripping) and closes by about 90 seconds (cheese starts to seize and goes gray). You have about 75 seconds of prime time.
The Pre-Cut Trick
Score the slice with kitchen scissors before the final bake, cutting all the way through the crust but not separating the slice. Scatter a few extra strands of low-moisture mozzarella across the cut. When the pizza bakes, the cheese re-fuses over the cut so the slice still reads as part of the whole pie. When you lift, it pulls along the pre-cut seam cleanly.
Pulling Mechanics
Slide a thin offset spatula or pizza peel edge under the pre-cut slice. Lift in slow, controlled, one-inch increments, pausing for a half-second at each height. Slow lift = longer stretch. A fast yank breaks the strands early. Your assistant lifts while you shoot — never try to do both with one pair of hands.
Camera Settings
Shoot in burst mode (continuous shutter). On iPhone, hold the shutter button or slide it left into burst. On Android, settings vary but most modern Pixels and Samsungs default to burst when you hold the shutter. Shutter speed wants to be around 1/200 second or faster to freeze the strands at peak stretch — bright window light usually gets you there automatically. If your phone supports manual ISO (or a third-party Pro camera app), lock ISO at 100-200 for the cleanest file.
The Steamer Trick
Between takes, professional pizza photographers park a garment steamer just out of frame, aimed at the pizza. The hot moist air keeps the cheese soft and "alive" for two or three extra usable frames. A handheld facial steamer works too. This is the trick most often credited with the difference between "one shot per pizza" and "five shots per pizza" on commercial sets.
The Olive Oil Revival
When the cheese is starting to dull but you still want one more frame, a light brush of warm olive oil restores some shine. It won't bring back a fully congealed pie, but it'll buy you a few seconds. Use a clean pastry brush and a tiny amount — you want gloss, not pooling.
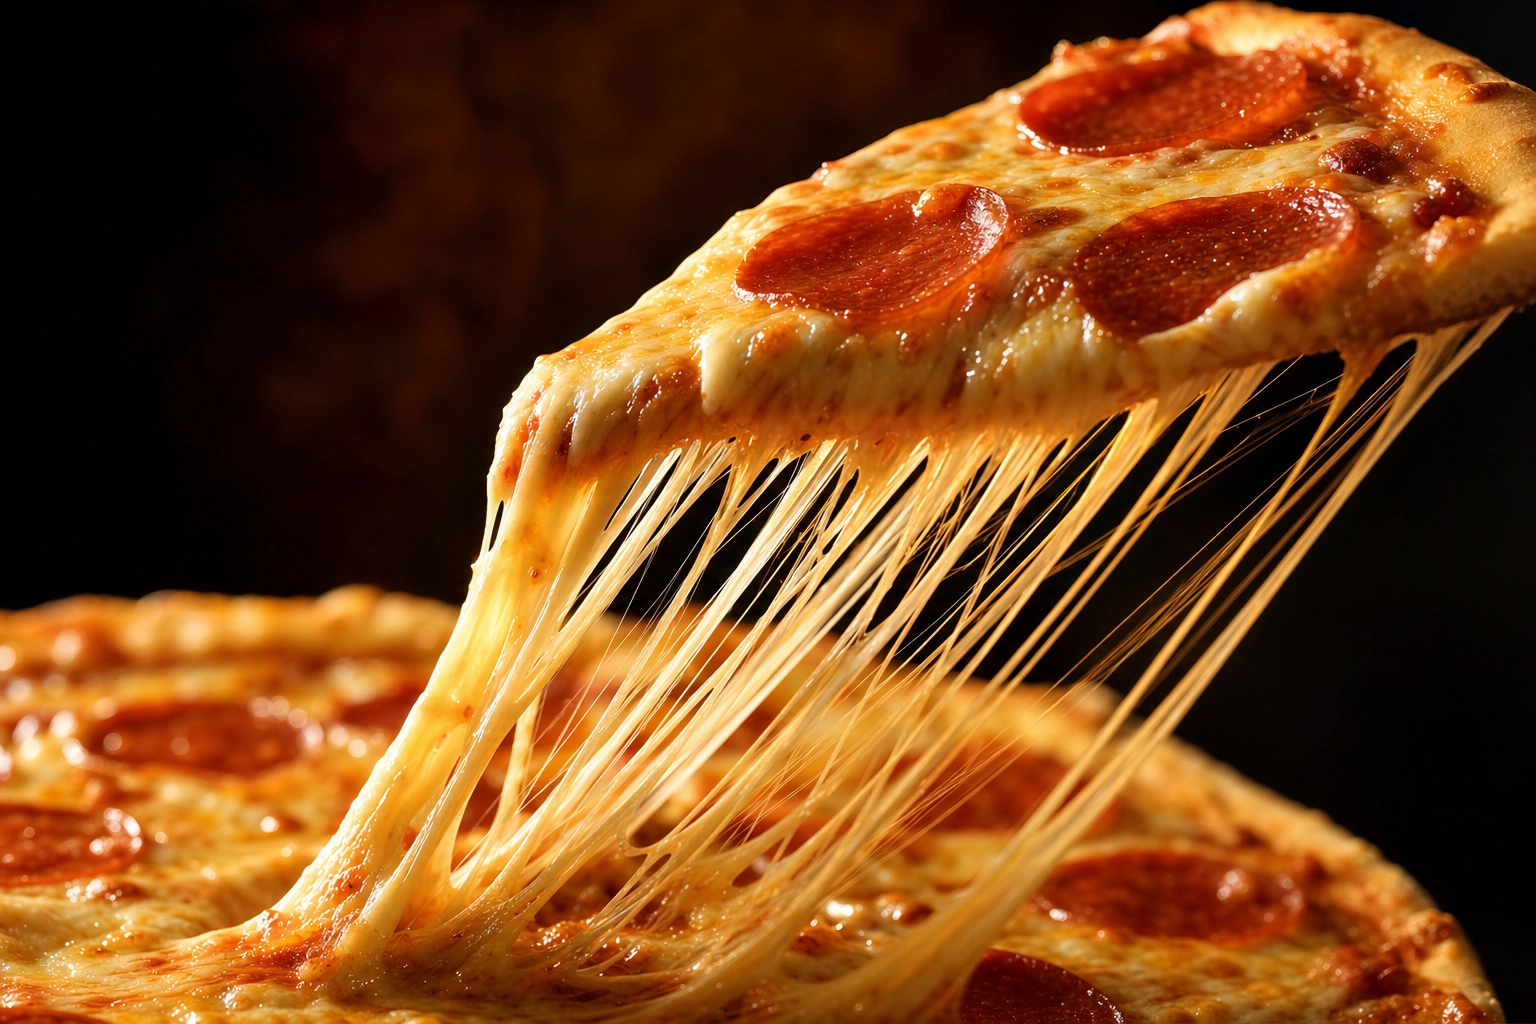 Macro pizza photography of cheese pull stretch with mozzarella strands between slice and pie
Style-Specific Photography: One Approach Doesn't Fit Every Pizza
Every regional pizza style has a defining feature. Your photography should honor it. Shooting a Chicago deep dish like a Neapolitan robs the deep dish of everything that makes it Chicago. Here's how each style wants to be shot.
Neapolitan: Leopard Char & Cornicione
The hero feature is the puffed, leopard-spotted cornicione (the puffy outer crust) baked in 60-90 seconds at 900°F+. Shoot 90° overhead to emphasize the round shape and the dark char spotting against pale cheese.
Don't overlight. The leopard char IS the visual identity. Pile too much fill light into the shadows and the spots disappear into uniform brown. Light from a low side at roughly 30° to texture the cornicione without flattening it.
Style with torn buffalo mozzarella pearls (not pre-sliced) and fresh basil leaves added after the bake. An 11-12 inch Neapolitan pie fills a phone frame beautifully without needing distance. This is the easiest pizza style to photograph for that exact reason — it's already designed at portrait scale.
For Neapolitan pizza photography specifically, the defining characteristic is the contrast between the dark blistered crust and the bright milky mozzarella pools. Light to preserve that contrast.
New York Thin: Embrace the Fold & Grease
NY-style pies are 18-22 inches across — too large for a tight overhead phone frame. Either step back six feet for the whole-pie shot, or skip the overhead entirely and lead with the slice-with-fold.
The fold itself is the defining gesture: a NY slice is built to fold lengthwise without breaking, and shooting a folded slice in someone's hand is the most New York thing you can photograph. Angle the camera low (15-25°), let the grease glisten, and don't try to eliminate the shine — the grease is what NY pizza fans are looking for.
Cardboard support under heavy slices is non-negotiable. The Sicilian-influenced pepperoni-and-cheese slices weigh enough to droop within five seconds of being lifted, and a drooping tip ruins the geometry.
Detroit-Style: The Frico Edge Is the Hero
Detroit pizza is a rectangle baked in a blue-steel pan with brick cheese pushed to the very edge, where it caramelizes into a crispy frico crust — a lattice of crunchy fried cheese around the entire perimeter. Photograph that edge or you've missed the point of the style.
Shoot 90° overhead to show the rectangular shape and the golden frico edge at the same time. Light from the side at 45° to render the frico in golden three-dimensional relief — flat top-light makes it disappear. Detroit-style sauce stripes go ON TOP after the bake; the bright red against pale cheese is one of the most photogenic combinations in pizza.
Bonus shot: pull a square and photograph the cross-section to show the airy focaccia-style crumb structure underneath.
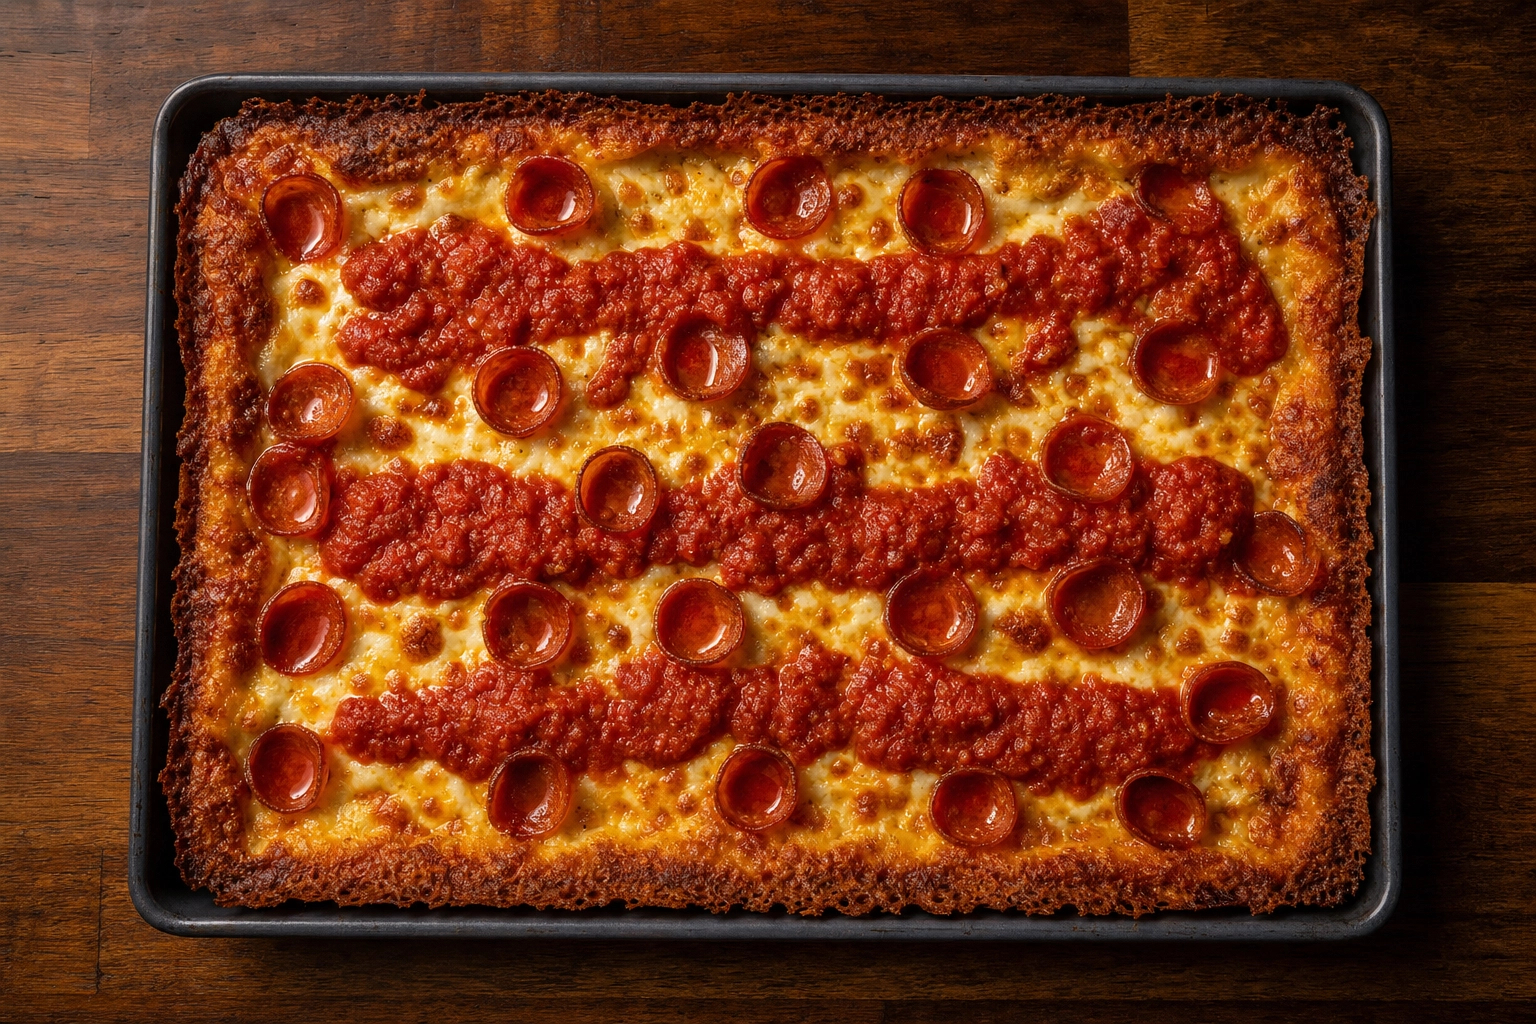 Overhead pizza photography of Detroit-style pizza in blue steel pan with golden frico edge and sauce stripes
Chicago Deep Dish: Cross-Section or Bust
Here's the rule: never shoot Chicago deep dish from overhead. A top-down shot of a deep dish reduces it to a circle of red sauce, robbing it of the architectural depth — the two-to-three-inch walls of dough — that defines the style.
Shoot from a 0-15° side angle, or pull out a slice and photograph it on a plate to expose the layered cross-section: dough wall, cheese, fillings, sauce on top. That cross-section is the money shot. Side-light highlights the strata; top-light hides them.
The bubbling sauce on top is the textural drama. Catch it within two minutes of the oven or it loses the glossy surface that makes it look fresh.
Sicilian, Pan, Flatbread & White Pizza
Sicilian and pan pizzas want an overhead for the rectangular shape, supplemented by a cross-section shot showing the airy crumb structure of the dough. The crumb is the selling point.
Flatbreads are typically oblong rectangles with sparse premium toppings. The styling rule is spacing — don't cluster ingredients, let empty crust be part of the composition. Shoot at a slight angle (15-25°) rather than full overhead to give the elongated shape some depth.
White pizza is the photography boss fight because there's no red sauce providing color contrast. The white-on-white problem kills more white pizza photos than any other factor. Solve it three ways:
- Background contrast: shoot on dark slate, walnut wood, or charred parchment — never a white plate.
- Topping color: prosciutto pink, arugula green, charred crust dark spots, hot honey amber drizzle, chili flake red specks.
- Lighting drama: deeper side shadows render the cheese and ricotta dollops in dimensional relief rather than uniform pale.
Topping Photography: Pepperoni Cups, Basil & Prosciutto Drape
Macro topping work is where amateur pizza pictures become editorial-grade pizza images. These close-up frames build the case for menu price and quality. They're also among the easiest shots to capture once you know the rules.
Cup-and-Char Pepperoni
The cup-and-char effect — pepperoni curling into little oil-filled bowls with crispy charred edges — has become the defining premium pepperoni look on Instagram and pizzeria menus. It doesn't happen with every pepperoni.
You need thick-cut natural-casing pepperoni. Brands like Hormel Rosa Grande, Ezzo, Bridgford, and Dietz & Watson stick pepperoni (sliced fresh) all cup reliably. The thin, pre-sliced pepperoni in most grocery deli sections is meant for sandwiches — it stays flat or barely curls. The cupping happens because the natural casing shrinks faster than the meat, pulling the edges up while the center stays anchored.
Each cup holds a small pool of rendered orange grease. To photograph the cup-and-char effect properly:
- Shoot at a 15-30° angle (not overhead) so the oil reflection inside each cup catches the light.
- Macro crop — fill the frame with three to five cups, not the whole pizza.
- Side-light from the direction that reflects oil back toward the camera.
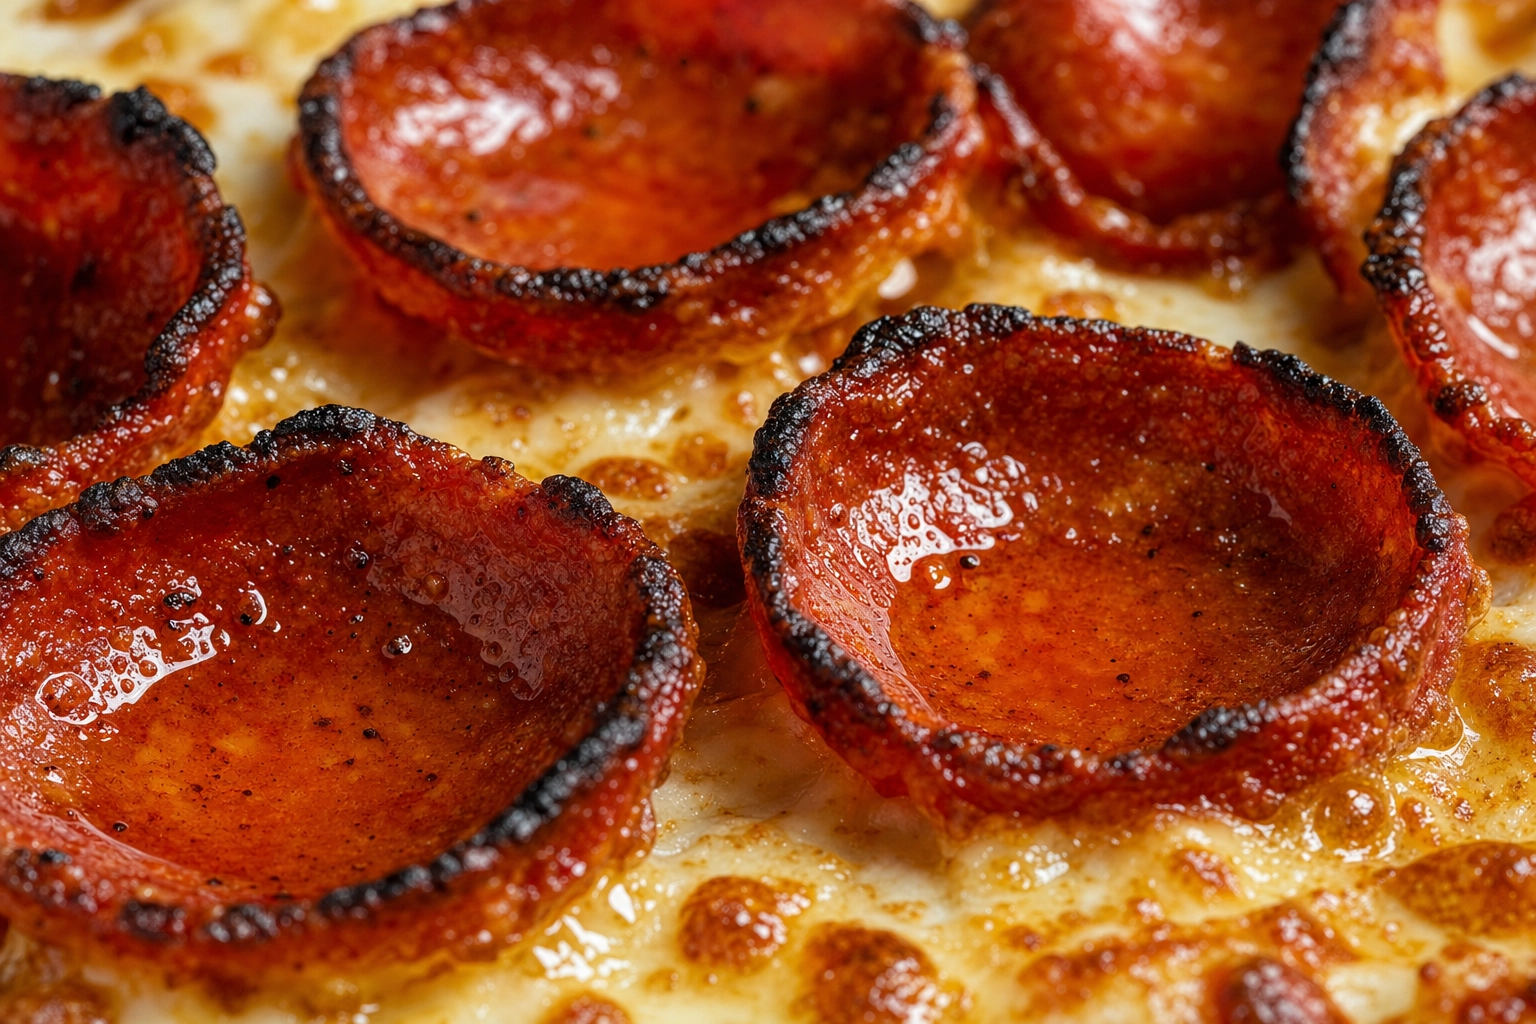 Macro pizza photography of cup-and-char pepperoni discs with rendered oil pools and crispy charred edges
Fresh Basil & Herbs
Fresh basil should never be photographed pre-bake. Baked basil turns black, shrivels, and looks burnt. Add whole leaves to the pizza after the bake — the residual heat will wilt them slightly so they conform to the cheese surface without losing color.
Pat the leaves dry with a paper towel before placing (water droplets photograph as weird white specks). Place larger leaves at the points where you want the eye to land — compositional anchors. A light brush of olive oil gives the leaves a sheen that reads as freshness.
Same rule applies to arugula, fresh oregano, and microgreens: post-bake placement, no exceptions.
Prosciutto, Salami & Cured Drape
Prosciutto turns leathery and dull when baked, the way good basil turns black. Drape it on after the pizza comes out of the oven. Tear sheets into 2-3 inch ribbons and arrange them in a casual wave across the pizza — never lay flat sheets. The wave creates micro-shadows and exposes the pink fat marbling that photographs beautifully against pale cheese.
Salami, soppressata, and 'nduja behave differently — they're meant to crisp during the bake. Salami and soppressata can be added before baking; 'nduja is best dolloped raw and allowed to half-melt into the cheese, leaving pools of bright orange chili oil.
Sauce, Cheese Dollops & Finishing Touches
For hero shots, fresh tomato sauce dotted on after the bake (with a small brush or eyedropper, drained first on a paper towel to remove excess water) reads more vibrantly than baked sauce, which goes muddy and matte. This is a styling cheat used in nearly every commercial pizza ad — and it's totally fine for menu work because the sauce is real, just freshly applied.
Buffalo mozzarella should be torn, not sliced. Torn edges expose the milky interior, which catches light. Sliced cheese has clean factory edges that look manufactured.
Hot honey is one of the most photogenic finishes in modern pizza. Tilt the pizza slightly so the honey drip pools at the lower edge of your frame, where the light will catch the amber surface. Drizzle with the bottle held about eight inches above the pizza for clean continuous strands.
A pile of fresh arugula adds height to an otherwise flat pizza — height is the dimension pizza photography fights for, and a tall arugula dome gives you a vertical anchor for the eye.
A Phone Workflow for Pizzeria Owners: Peak Rush vs Slow Times
Most pizzeria owners aren't hiring a studio or a food stylist. You're shooting between rushes, in your own shop, on the phone in your apron pocket. Here's the realistic workflow.
The principle: separate your shooting into two completely different modes. Batch the planned hero shots during slow hours. Grab opportunistic content during rush.
Slow Hours (2-4pm): Batch Shooting Day
The afternoon dip between lunch and dinner is the single most valuable photography window a pizzeria gets each day. Two hours of low foot traffic, a hot oven, a stocked station, and your full attention.
The 90-minute workflow:
- Pre-build the photo station at one corner of the shop. Wood board or marble slab on a small table, two to three feet from the best natural-light window, white foam board fill card propped against a chair on the opposite side. Phone on tripod, arm extended, framing pre-checked on a stand-in pie.
- Bake a stand-in pizza first. Use it to lock framing, exposure, and lighting. Don't waste a hero pie on setup.
- Bake hero pies in sequence, one menu item at a time. As each pie exits the oven, do the whole-pie overhead first (cheese still glossiest), then the slice pull, then the single slice hero, then any topping macros. You have about 90 seconds per pie.
- Reset, change props if needed, bake the next hero pie. Three to five menu items in a session is realistic.
- Review and select best frames at the end of the session — never during, you'll lose timing windows.
A disciplined 90-minute session can refresh five to seven menu items' worth of photos, which is typically enough hero content for a full month of social and a menu refresh.
Rush Hour: Opportunistic Capture
During Friday-night rush, you don't have time for cheese pull staging. You also have your most beautiful pizzas coming out of the oven, one every two minutes. Both things are true. The workflow:
- Permanent phone tripod near the pickup window with framing pre-locked on the pickup counter spot where pies land before they go in the box.
- One pre-saved camera setting dialed in (exposure compensation, focus point, no flash).
- Grab one burst shot per hero pie as it lands. 30 seconds, no setup, then the pie goes out the door.
- Don't attempt cheese pulls during rush. Save those for batch sessions.
- Review and edit in the evening after close.
Rush capture won't produce the kind of styled hero shots that batch sessions do. But it produces high volume of authentic, in-the-moment frames that read beautifully on social. Most of your Instagram stories should come from rush capture; most of your menu and delivery app hero images should come from batch sessions.
This same two-mode workflow applies across menu types — our restaurant menu photography guide breaks it down for non-pizza dishes too.
The AI Shortcut: When You Don't Have Time to Bake Three Test Pies
Here's the math most pizzeria owners eventually run into. A traditional commercial food shoot for a pizzeria costs $700-$1,400 per session and produces 15-25 hero images. A working pizzaiolo can produce equivalent menu-grade work with a phone and a window — but only with 90 minutes of focused practice per session, and only if cheese pulls don't fight back.
AI food photography fills the gap. The workflow that works for pizzeria owners:
- Shoot a decent phone photo of any pizza at any time. Doesn't need to be perfectly lit. Doesn't need a hero cheese pull. The crust is in focus, the framing is roughly right — that's enough.
- Upload to an AI food photo editor and pick a style preset. FoodShot AI has 200+ presets tuned for the contexts pizzeria photos actually live in: Menu, Delivery, Fine Dining, Social, Marketing Poster.
- The AI restores what time stole — revives gray cheese to glossy melt, deepens char marks on the cornicione, normalizes crust color across your menu so every pie looks like the same brand, adds steam wisps where they make sense, balances grease shine without flattening it.
- Output is menu-ready in 90 seconds at 4K resolution, exportable for food delivery apps, printed menus, social posts, and posters — all at consistent style across your whole menu.
This is the difference between "I'll get to it next month" and "my whole menu is shot by Saturday." For a pizzeria pulling 80-200 pies a day, the time savings compound fast.
The pricing math is worth checking too. A traditional pro shoot at $1,000 per session, run quarterly, runs $4,000/year for 60-100 hero images. The FoodShot AI Starter plan is $9/month billed yearly ($108/year) and produces 25 enhanced images per month — 300 per year, with full commercial license. That's roughly 95% lower cost for 3-5× more output.
Style consistency is the underrated benefit. Most pizzerias don't have brand-level visual consistency across their menu because every photo was taken in a different season under different light. With AI presets, your white pizza, your margherita, and your meat-lover's all share the same lighting, background palette, and color science, so they look like one brand on the delivery app tile grid.
Frequently Asked Questions
How do you get the perfect cheese pull in a pizza photo?
Use low-moisture mozzarella grated from a whole block (not pre-shredded), pre-cut the slice with scissors before the final bake, and scatter a few strands of string mozzarella across the cut. Bake at 475-500°F. After the pie comes out, wait 15-30 seconds for the cheese to set slightly, then lift in slow one-inch increments while shooting burst mode at a low 10-20° angle. Side-light at 45° to highlight the stretched strands. Most pizzas yield one or two usable pulls before the cheese congeals — set the shot up before you bake, not after.
Should I photograph a pizza whole or sliced?
Both, for different jobs. A whole pie reads instantly as "pizza" and works best for menu tiles, delivery app catalog images, posters, and any context where you need fast identification at thumbnail size. A single slice (or slice-pull) shows scale, layers, and emotion — better for social engagement, menu detail pages, and content that needs to communicate "fresh, hot, right now." Lead your menu with whole-pie overheads and use slice photography as supporting content.
How do you get the cross-section shot for Chicago deep dish?
Pre-cut and lift a slice straight up out of the pan to expose the layered strata: dough wall, cheese, fillings, sauce on top. Place the slice on a small matte plate at a 0-15° side angle — not overhead. Side-light the cut face from 45° to render the layers in dimensional relief. The sauce on top should still be glossy and bubbling, which means you have about two minutes from oven to shot. Shoot the cross-section as your hero deep dish image; supplement with a 15° side angle of the whole pie in its pan.
How can I photograph gluten-free pizza so it's recognizable on the menu?
Gluten-free crusts are typically thinner, paler, and don't develop the same leopard char as wheat-based dough. Three ways to make GF pizza clearly identifiable in your photography: add a subtle cornmeal dusting on the board (signals a different prep), include a small "GF" wood tag or marker prop in the corner of frame, or use a visually distinct plate or background reserved for gluten-free items across your menu. Tighter topping crops also work — when the crust is the less photogenic element, photograph less crust. Shoot at the same angles and lighting as your regular pizza so the GF option looks equally appetizing.
What's the best phone setting for pizza photography?
Use the 1x or 2x lens — never the 0.5x ultrawide, which distorts circular pies into UFOs. Tap to set focus on the cheese (not the crust), then drag the exposure slider down one notch to protect highlights. Burst mode for any motion shot (cheese pulls, slice lifts, eater shots). Turn HDR off if your phone tends to flatten contrast. If your phone supports RAW capture (iPhone Pro models, most flagship Android phones), shoot RAW for maximum editing latitude. Avoid digital zoom — get closer instead.
Do pizzerias really need professional pizza photos?
Yes, but "professional" doesn't always mean "hired a photographer." DoorDash's own data shows menu items with photos generate up to 44% more monthly sales, and header images alone lift listing sales by up to 50%. The question isn't whether to invest in photography — it's how. For brand launches, packaging, or major ad campaigns, a one-time pro shoot ($700-$1,400) makes sense. For everyday menu updates, seasonal items, and social content, a phone-plus-AI workflow produces comparable results at roughly 95% lower cost and faster turnaround.
Pizzeria-Ready in 90 Seconds
Pizza is the hardest food in the world to photograph, and the most rewarding when you get it right. Five shots — whole-pie top-down, slice pull, single slice hero, slice with eater, oven action — cover every menu and social need you'll ever have. Side-light at 45° beats every other lighting decision. Pre-cut your slice before the final bake. Shoot the cheese pull in burst mode in the first 30 seconds out of the oven. Light the frico, hide the deep dish from the overhead, and add the basil after.
And when you don't have 90 minutes for a batch session, FoodShot AI takes any decent phone shot to menu-grade in 90 seconds — gray cheese to glossy melt, dim crust to deep char, flat phone snap to delivery-app hero. Style consistency across your whole menu, $9/month, commercial license included.
Upload your first pizza shot, pick a preset, and have a menu-ready image before your next pie comes out of the oven. Start free at FoodShot AI pricing, then take a look at the pizza shop photos guide for the business strategy that makes all this craft work pay off.