Burger Photography: Stacking, Styling & Shots That Sell
 Ali Tanis23 min read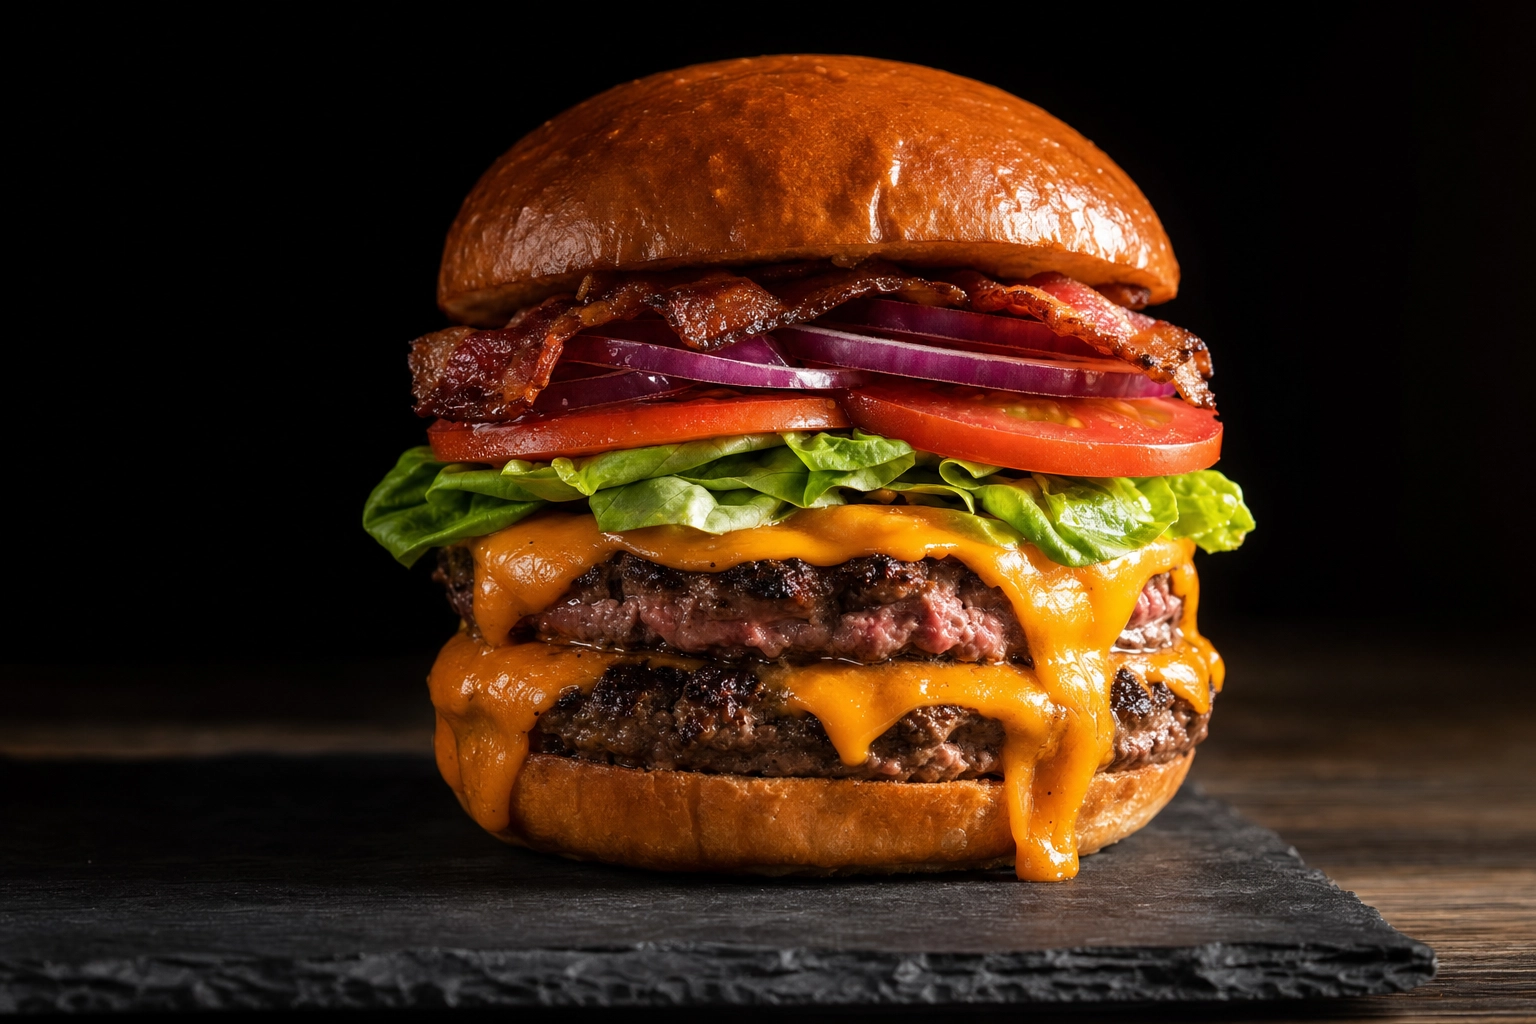
A great burger photo doesn't happen by accident. The towering, glistening, perfectly-stacked burger you see on a billboard or a fast-food ad is the product of toothpicks, cardboard discs, hot-water cheese, and about forty-five minutes of styling for a single frame. The bad news: your phone snap of the smashburger you just made will never look like that on its own. The good news: every single trick the pros use is learnable — and a lot of them work in your kitchen, your food truck, or beside the parking lot at 11 AM.
This burger photography guide breaks down the entire craft: the structural tricks that keep a stack from collapsing, the five shots every burger menu actually needs, the lighting setup that separates "menu hero" from "Tuesday dinner," and the AI workflow that gets you from raw phone photo to delivery-app-ready image in 90 seconds.
Quick Summary: Burger photography is hard because everything works against you — cheese hardens in 90 seconds, lettuce wilts, sesame seeds roll off, and overhead shots flatten the stack that makes a burger visually appetizing. Pros solve this with hidden scaffolding (toothpicks, cardboard discs), warm side lighting at 45–90°, and bun glaze tricks like oil brushes and milk washes. Every burger menu needs five core shots: the hero stack, the top-down build, the cross-section, the eat-action, and the cheese-pull. Most operators today skip the studio entirely — they shoot a phone snap and use AI to turn it into menu-ready burger photography in under two minutes.
Gourmet stacked double cheeseburger on dark slate with warm side lighting — burger photography hero shot
Why Burgers Are the Hardest Food to Photograph
Burgers behave terribly on camera. They're the food version of a toddler at a birthday photo shoot — every second you spend setting up, something is getting worse.
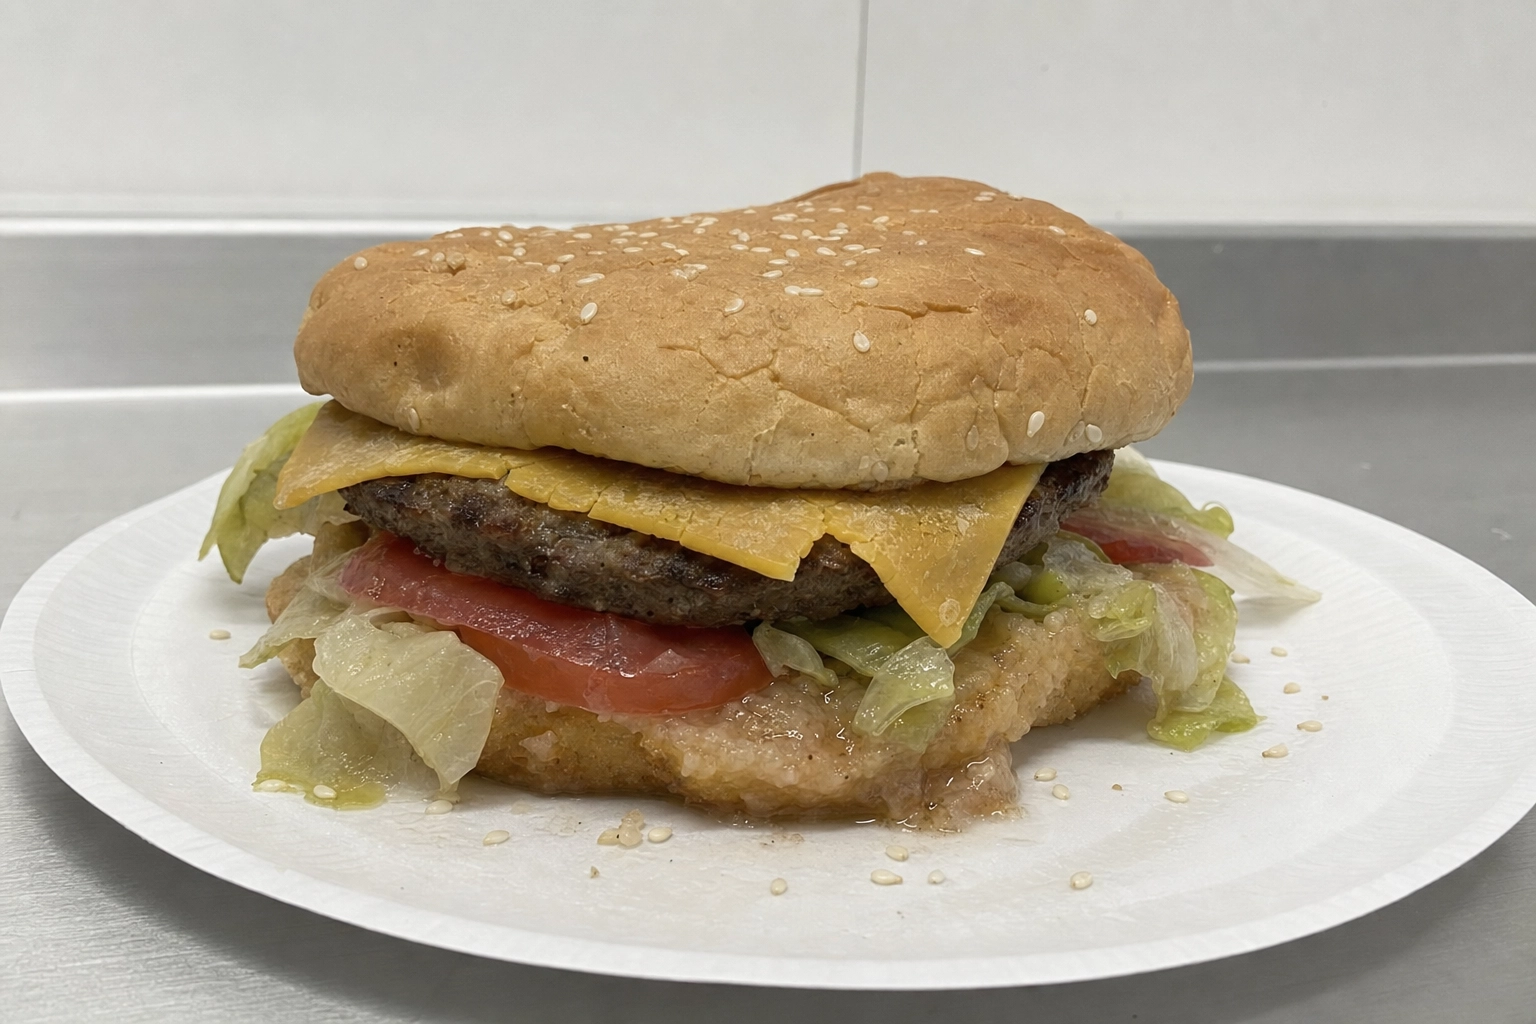 Unstyled sad burger with wilted lettuce, hardened cheese, soggy bun showing burger photography problems
Here's the working list of problems you fight on every burger photography shoot:
- The 90-second cheese window. A perfectly melted cheese slice hardens into a crusty film within about a minute and a half. Once it crusts, the surface looks dry and old, not gooey and fresh.
- Wilting lettuce. Warm patty + cold lettuce = wilted lettuce in 2–3 minutes. The crisp green you started with turns translucent and sad.
- Bleeding tomato. Tomato slices weep water that soaks into the bottom bun. A few minutes in and you've got a soggy puddle masquerading as a burger.
- Sliding sesame seeds. The instant you tilt a sesame bun for the camera, half the seeds roll off into the void.
- Compressing stacks. Gravity is your enemy. The taller you build, the faster the whole thing sinks under its own weight.
- Drying patty. Under lights — even gentle continuous LEDs — a patty's surface dries out within a few minutes, killing the just-grilled look.
- Overhead-angle flattening. Burgers are architecture. Shoot one from directly above and you've thrown away every reason it looks good.
Every technique and tip in this burger photography guide exists to solve one of those problems. Once you know which problem you're fixing in each shot, the craft makes sense.
The Burger Stacking Technique That Pros Use
This is the most important section of this guide, because the entire visual integrity of a burger photo depends on what's happening inside the stack — the stuff the camera never sees.
Cardboard discs are the secret weapon. Cut thin pieces of corrugated cardboard to roughly the diameter of your bun, and place them between the patty and the bottom bun. They prevent compression, they stop the bun from going soggy from patty juices, and they add a millimeter or two of height that adds up across a full stack. For tall doubles and triples, you'll use 2–3 discs.
Toothpicks lock the architecture. Insert one or two wooden toothpicks vertically down through the stack — into the bun, through the cheese, lettuce, patty, and into the base. They're invisible from the camera angle, and if a tip pokes out, you mask it in post in two clicks. Without toothpicks, anything taller than a single patty starts to lean within 30 seconds of shooting.
Triangular makeup sponges prop the back. Wedge a small foam wedge directly behind the burger, just out of frame. This stops the back side from sagging (which makes the front face look like it's leaning away from the camera). You can also use small pieces of rolled paper towel, but sponges are reusable.
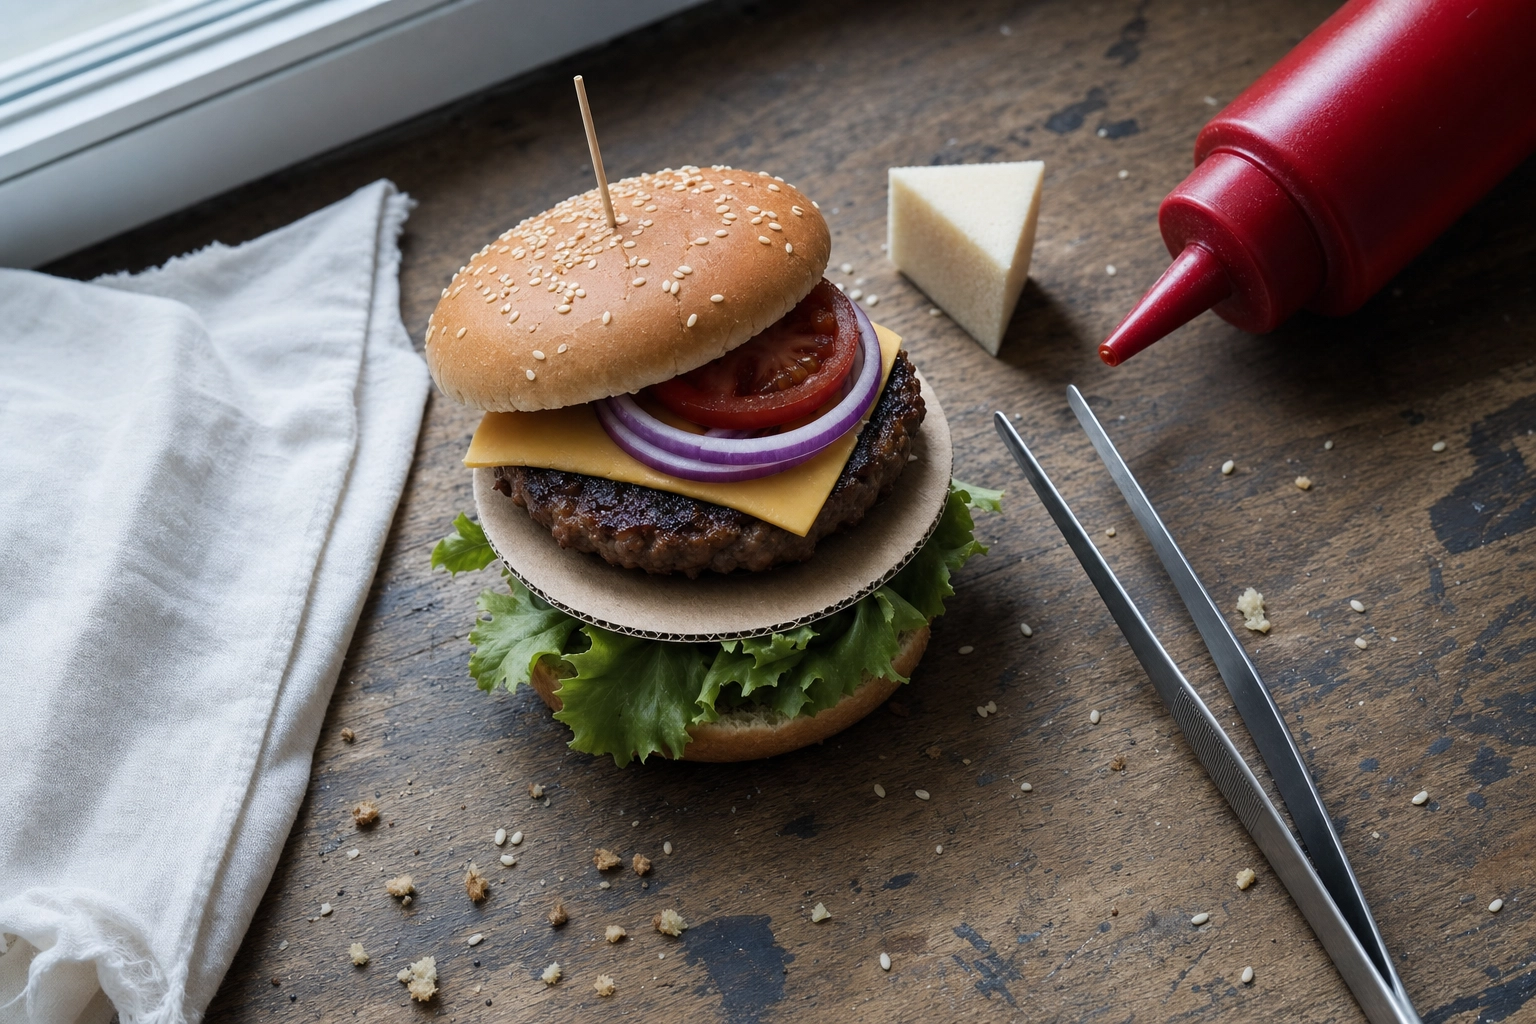 Food stylist's behind-the-scenes burger stacking with toothpicks, cardboard disc, and squeeze bottle visible
Build for the camera, not for the bite. A real burger is assembled to be eaten — all ingredients tucked neatly under a bun. A burger styled for the camera has every ingredient peeking out the front. Lettuce hangs over the edge by a centimeter. Tomato shows a clean cross-section. Cheese drapes over the patty edge by a few millimeters. Onions and pickles poke out where the camera will catch them. Pick your "hero side" before you start building, then style everything to face it.
The hot-water cheese trick. Skip melting the cheese in the pan. Instead, dip a slice of American or cheddar in boiling water for 2–3 seconds — it softens just enough to drape naturally over a cold patty without forming the crusty film that melted-on-the-griddle cheese always gets. Food stylists have used this technique for decades because it gives you that perfect "just melted" look that holds for 10–15 minutes instead of 90 seconds.
Sauce goes on with a squeeze bottle, not a spoon. Squeeze bottles give you a thin, controlled drizzle that catches the light. Spoons give you globs that read as careless. Apply sauce on the side facing the camera. Less is more — an uneven, slightly imperfect drizzle reads more authentic than a perfectly symmetrical line.
The intentional imperfection. Once the stack is built, mess it up just a little. A piece of lettuce that's slipped out of line. A tiny smudge of sauce on the bottom bun. A sesame seed that's fallen onto the plate. Real food is imperfect, and your photo should be too. For a deeper dive on these styling techniques across other dishes, our food styling guide covers the broader toolkit.
The 5 Essential Burger Shots Every Menu Needs
If you build out these five burger shots for your top-selling burger, you've covered 95% of every image you'll ever need — menu boards, delivery app thumbnails, Instagram grid, billboard, website hero, and press kit photos.
1. The Perfect Stack Hero (Straight-On Eye Level)
The headline shot. Camera at burger eye-level — somewhere between 0° (straight on) and 15° looking slightly down. This is the angle that lets every layer in the stack read across the frame, left to right.
Use heavy scaffolding for this one — cardboard, toothpicks, and a sponge behind the burger. Light from one side at 45–90°. Background can be simple (white seamless, dark slate) or contextual (wood board, parchment). The point is the stack itself.
This shot goes on your menu board, your homepage, and your "burgers" delivery-app category image. It's the burger photo customers remember.
2. The Top-Down Build (Overhead Flat-Lay)
The deconstructed shot. Place every ingredient in build order, spaced out so each one is clearly visible: bottom bun, sauce, lettuce, tomato slice, patty, cheese, onion, top bun. Shot from 90° directly overhead.
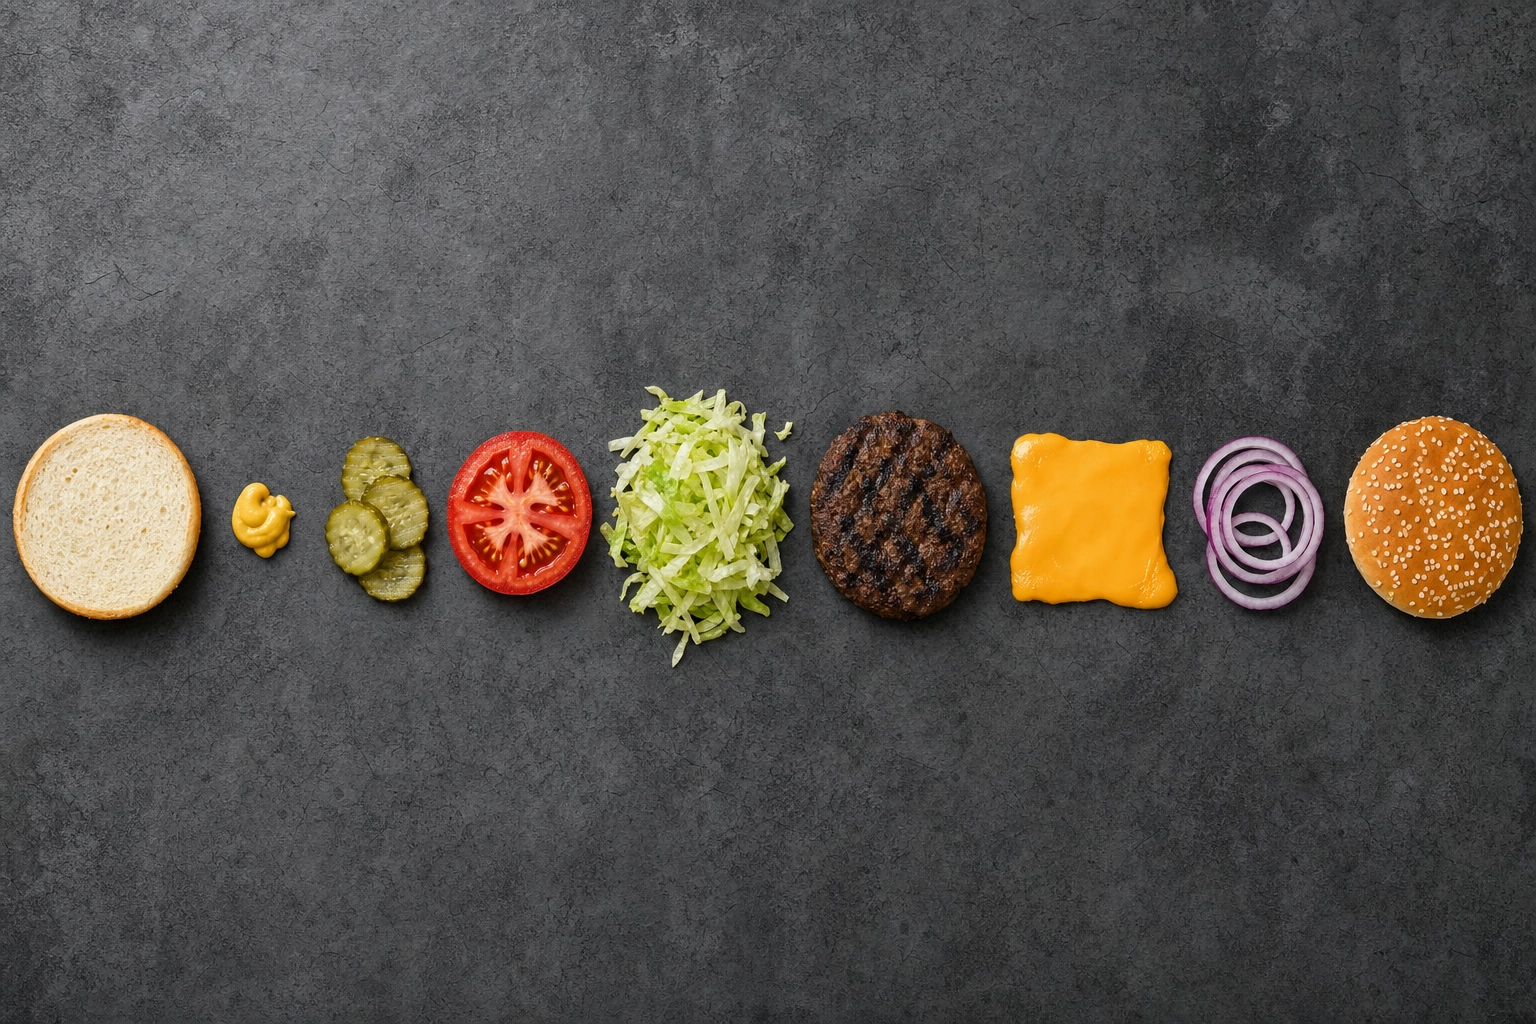 Overhead flat-lay deconstructed cheeseburger with ingredients spread in build order on concrete surface
This is the "look how much we put in this thing" shot. Works brilliantly for Instagram carousels, ingredient marketing ("real cheddar, real beef, real brioche"), and gourmet burger menus that want to show off premium components. It's also the easiest shot to set up because nothing has to stack.
3. The Bite Cross-Section (Side Profile, Sliced)
The juiciness shot. Take a long, thin, very sharp knife and cut the burger in half. Pull the two halves slightly apart so the camera can see every interior layer — molten cheese, pink patty interior, sauce, vegetables, the architecture of the bite.
This is the highest-converting burger photo on a delivery app or menu, because it answers the question every hungry customer is silently asking: what does this thing actually look like inside? Re-add a small sauce dribble in the cut area before shooting — knives cleave through sauce and leave the inside looking dry.
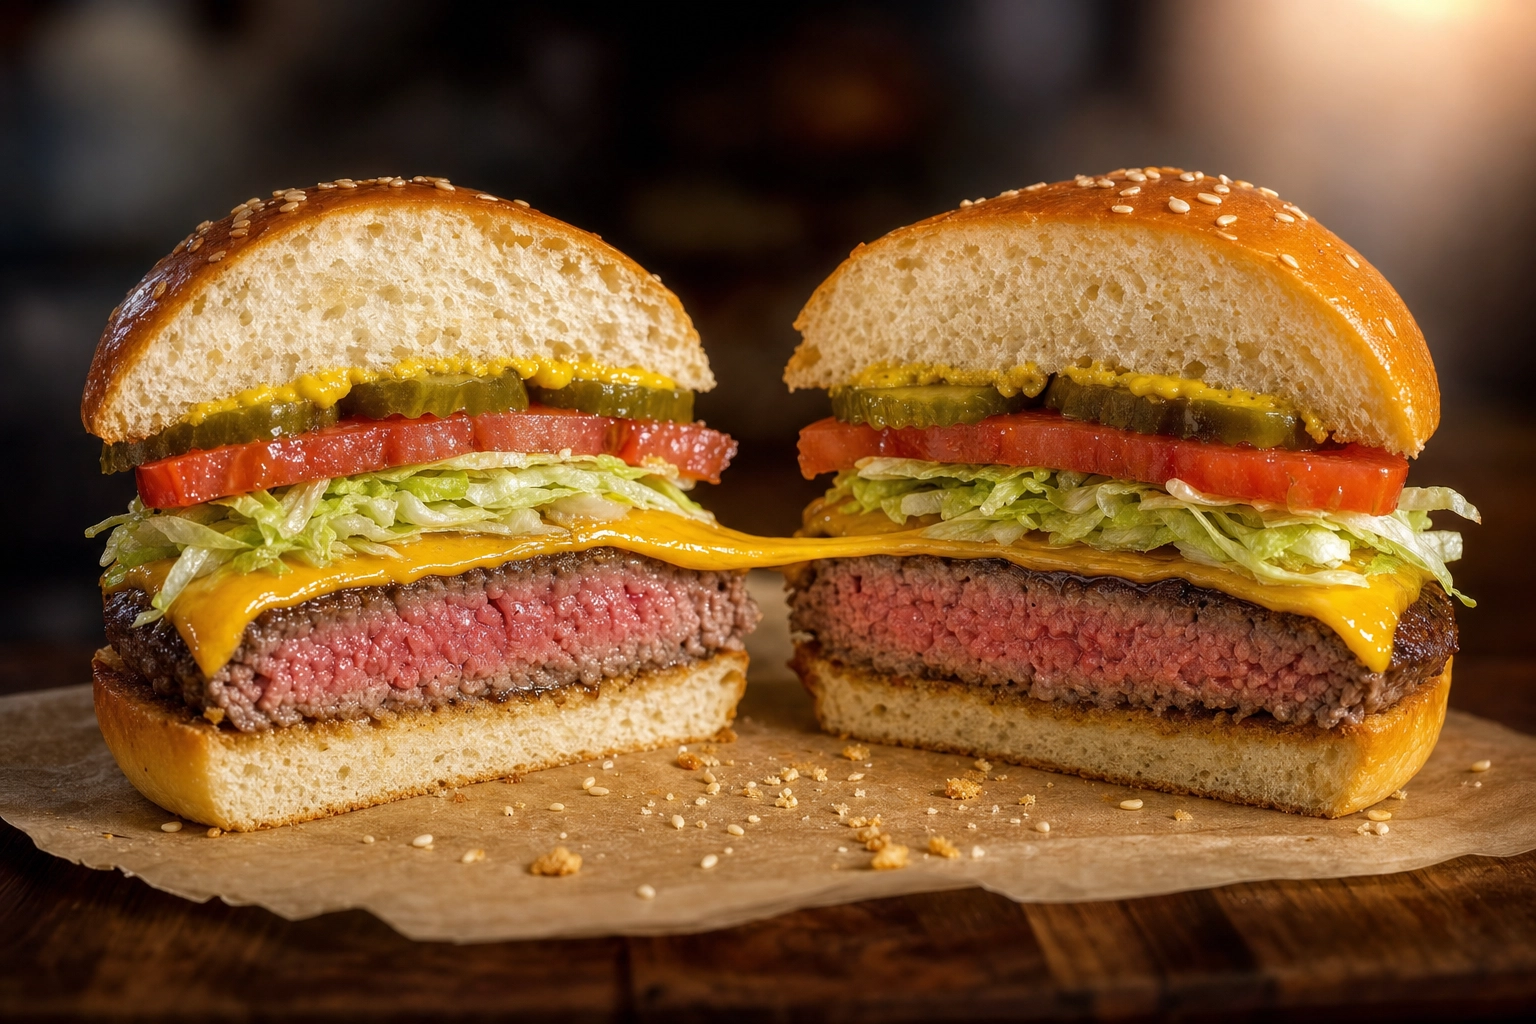 Burger cross-section showing layers of patty, melted cheese pull, lettuce, tomato, and pickles on parchment
4. The Eat-Action Hands Shot
The lifestyle moment. Two hands cradling the burger, fingers slightly indenting the bun, the burger held just off the plate. Camera at 45° or eye-level. Aim for a subtle cheese pull or a sauce drip mid-action.
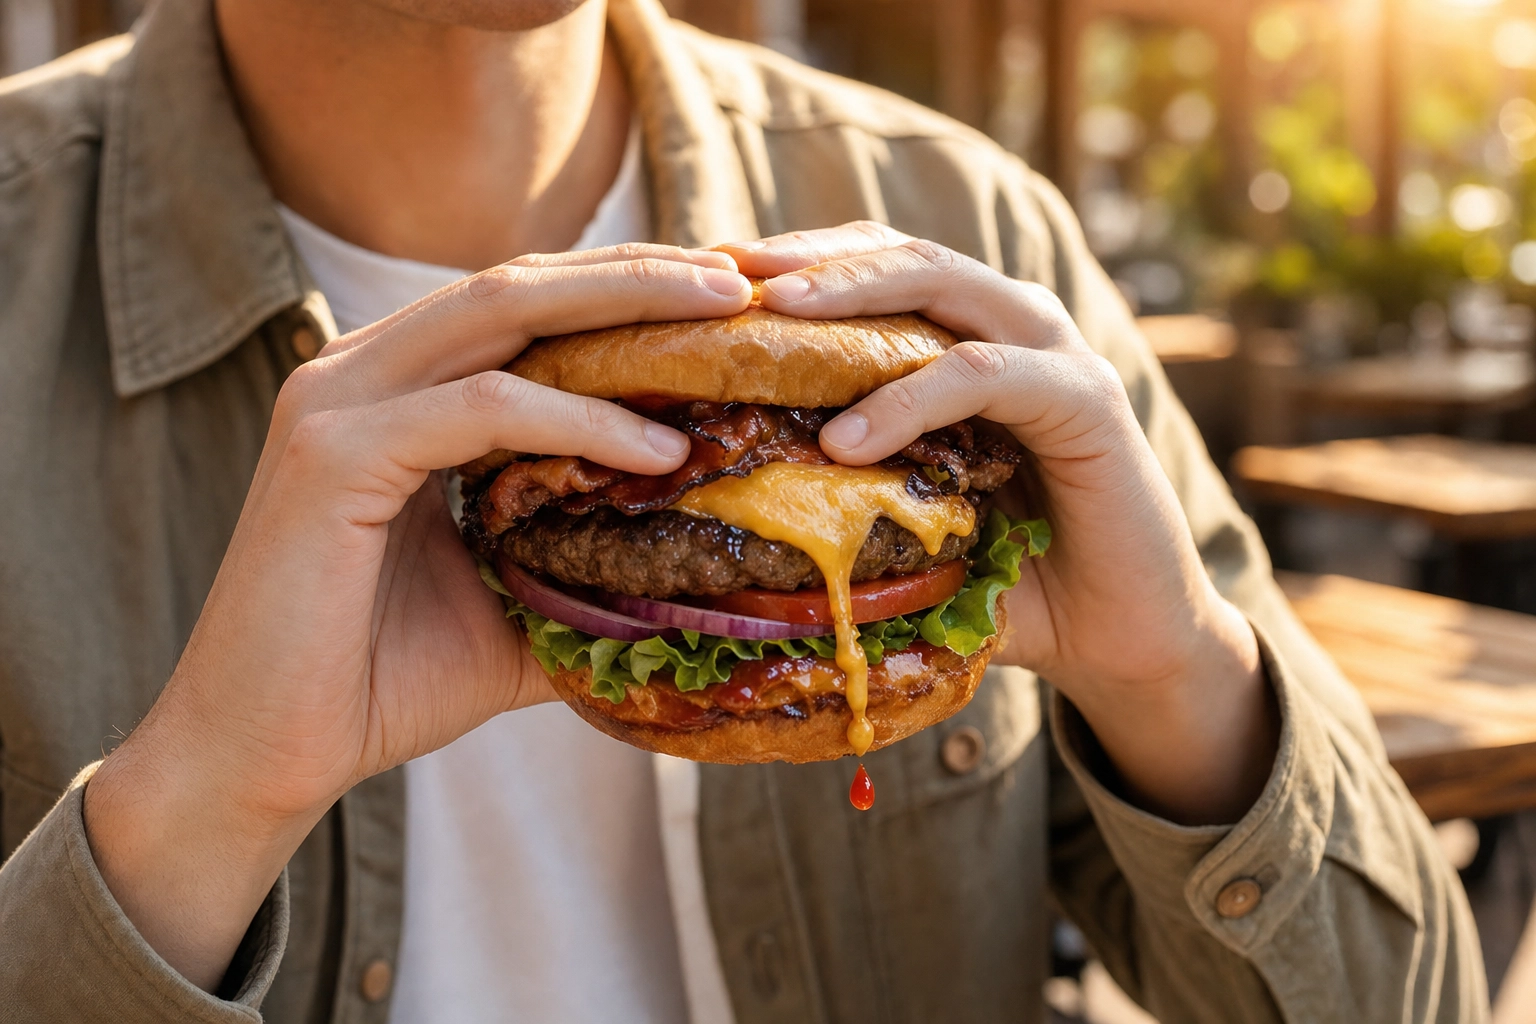 Eat-action hands holding cheeseburger with cheese drip and sauce drop mid-bite — lifestyle burger photography
This is your social-media engagement shot — it sells the experience, not the product. Hands matter: clean, dry, no rings, no nail polish unless it matches the brand, no harsh shadows on the hands. Shoot a quick burst of 8–10 frames to capture the right second.
5. The Beauty Pull-Apart (Cheese Pull Money Shot)
The video-still equivalent. Pull the top bun (or top patty in a double) upward and away from the bottom, with a strand of melted cheese stretching between them. Time the shot to the precise second the strand is taut but unbroken — usually 1–2 seconds after lifting.
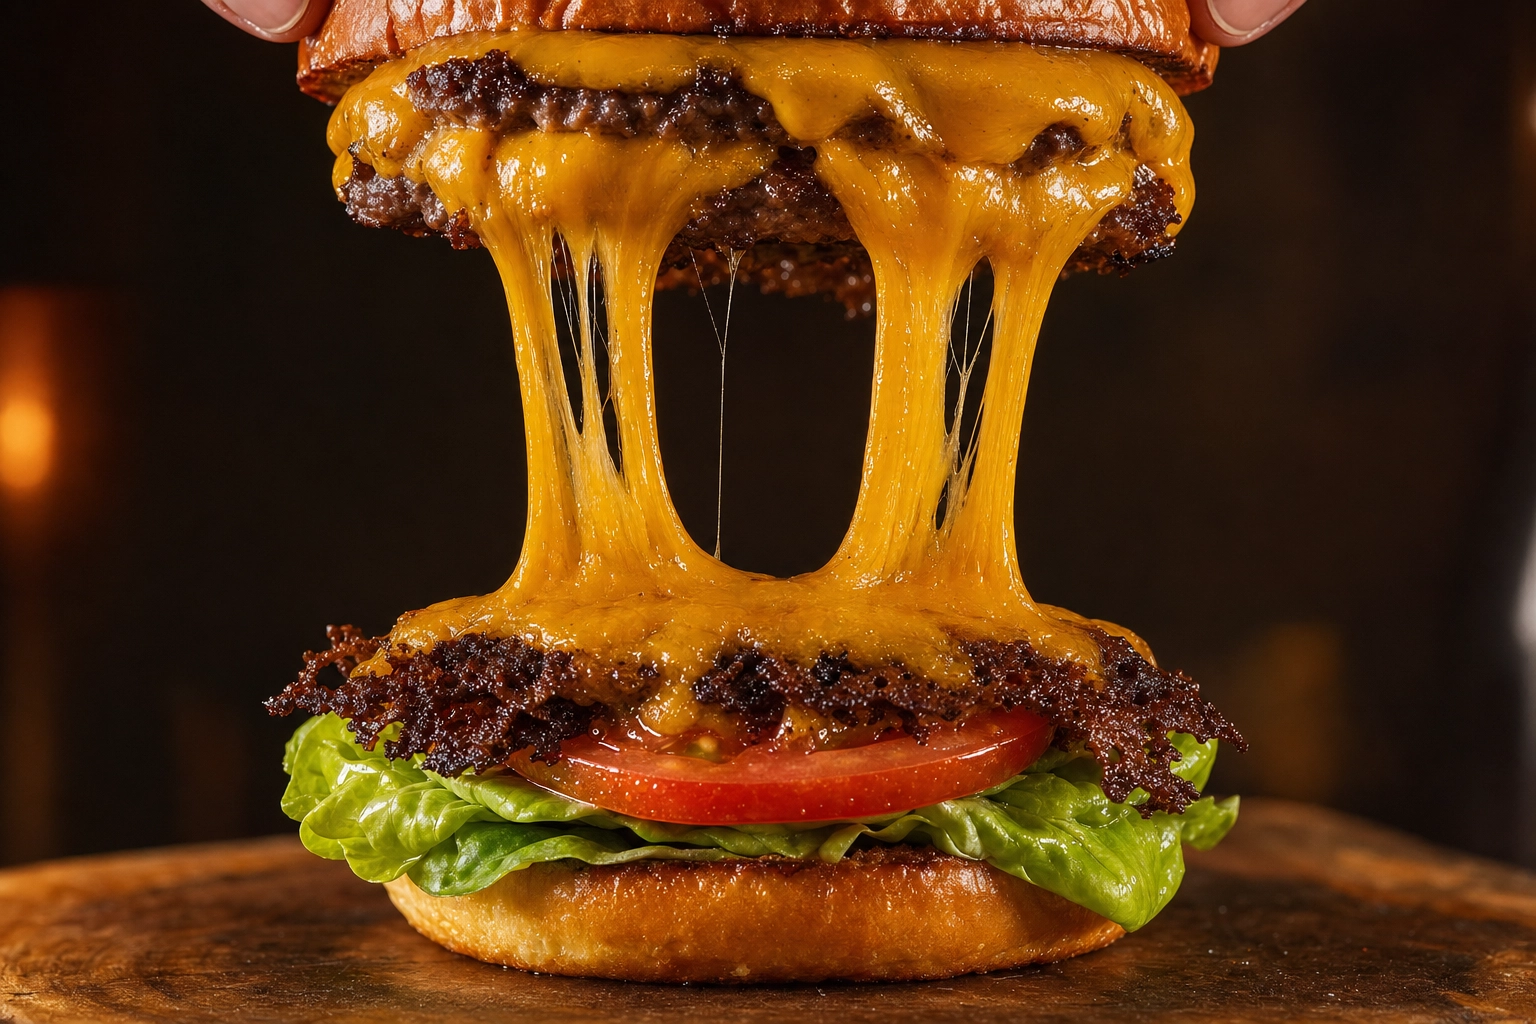 Beauty pull-apart cheese pull shot with two stretchy cheese strands between burger halves on wood board
If the cheese has hardened (and it will), pass a heat gun or hair dryer over it for 3–4 seconds to re-melt the surface. This shot is the cheeseburger photography classic — it converts on every social platform because the visual is instantly understood.
Lighting Burgers: Warm Side Light Wins
Lighting is where most burger photography falls apart. The wrong light makes the same burger look grey, flat, or weirdly clinical. The right light makes it look craveable enough to drive an order.
Side light at 45–90°, every time. Your main light source — window, LED panel, softbox — should sit roughly perpendicular to the burger, somewhere between 45° and 90° off-axis. This creates the shadow gradient that gives a 2D image a sense of depth. The bun catches a highlight, the cheese catches a highlight, the patty edge catches a highlight, and the opposite side falls into soft shadow. That gradient is what makes the burger look three-dimensional.
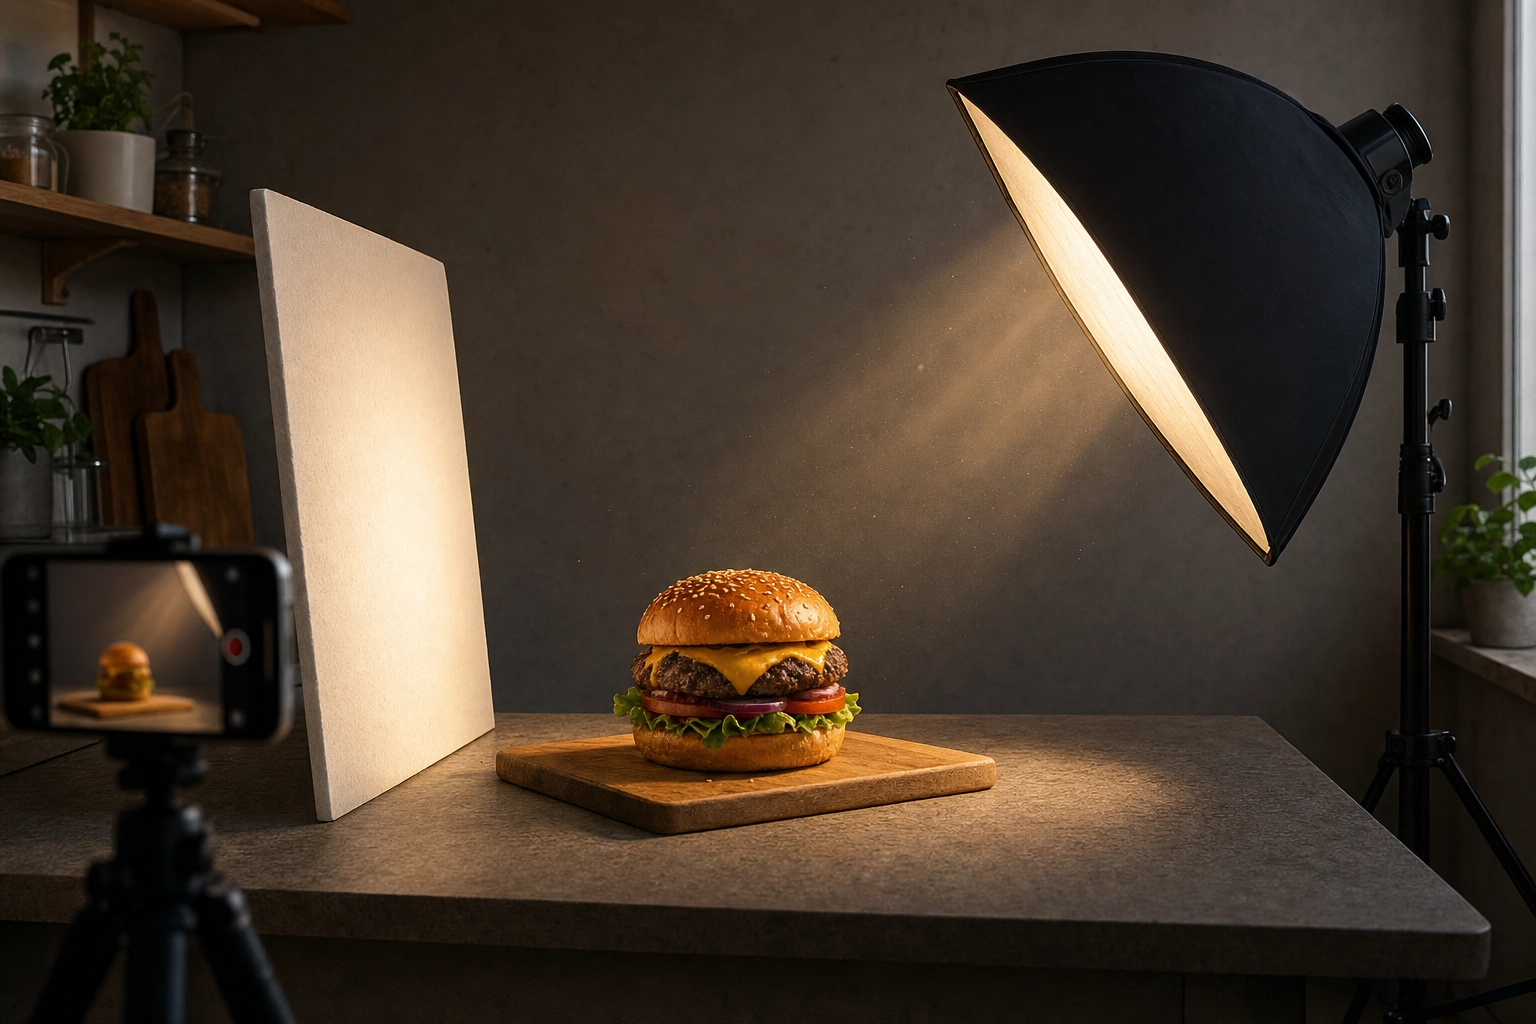 Burger photography lighting setup with softbox key light at 45 degrees and white foam reflector opposite
Never harsh overhead. Direct overhead light flattens everything. It also creates a hard shadow on top of the bun that reads as "this looks weird" without the viewer being able to articulate why. If your only light source is overhead — a kitchen ceiling light, harsh midday sun — diffuse it with parchment paper or a white sheet held above the food.
Warm color temperature for craveability. Aim for 3200–4500K (warm white to neutral) on the Kelvin color temperature scale. Cool light (5500K+) makes beef look grey and bun crust look dull. Warm light enhances the golden tones in the bun and the rich brown of the patty. If you're shooting with a phone, lock white balance in pro mode rather than letting it auto-correct shot to shot.
Bounce shadows with a white reflector. Place a piece of white foam board on the opposite side of the burger from your light source. It bounces light back into the shadow side, opening up detail without flattening the contrast. A $5 piece of white foam board is one of the highest-ROI tools in food photography.
Backlight for the halo. A second soft light behind the burger at roughly 135° creates a rim of light on the top of the bun, making it pop from the background. Optional but powerful for hero shots.
For food trucks shooting outside, the truck itself is your light modifier — its body blocks direct sun, and the open shade three to four feet from the truck edge gives you soft, indirect light that's essentially identical to a professional softbox.
Bun Glaze Tricks That Make Buns Look Bakery-Fresh
A great burger photo lives or dies by the bun. A dull, dry-looking bun kills the whole image. A glistening, golden bun sells the burger before the viewer even registers the patty. Here are the bun glaze tips pros actually use when shooting:
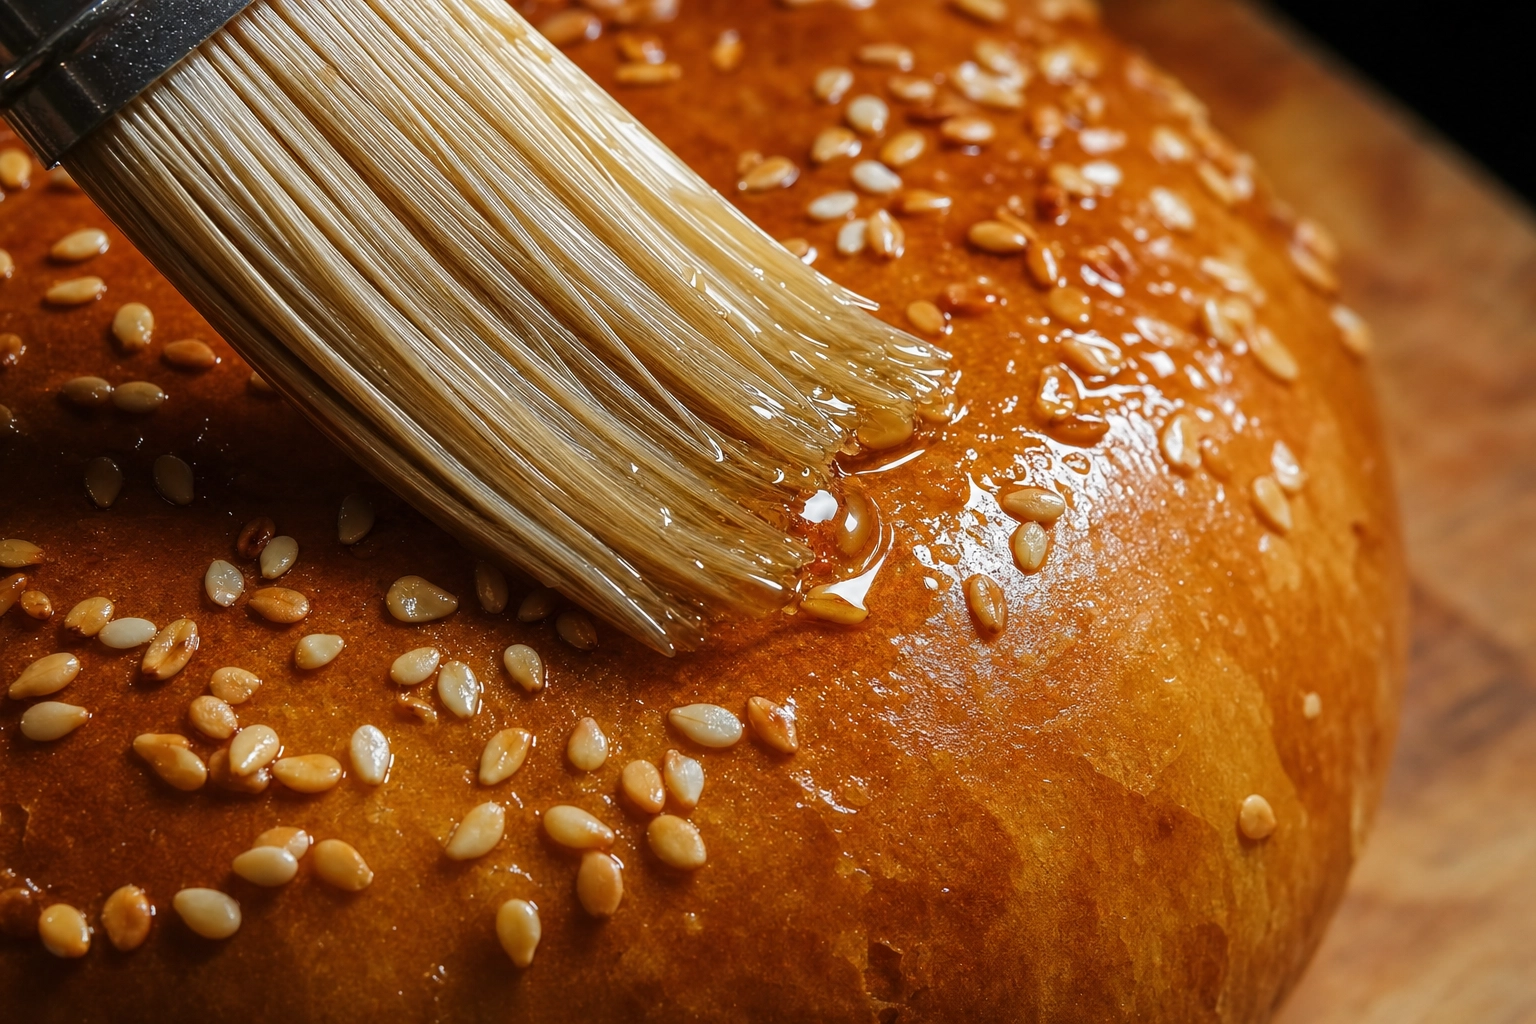 Close-up of pastry brush applying oil glaze to glistening sesame seed burger bun for photography sheen
Vegetable oil brush — the default. Brush a thin layer of neutral oil (canola, sunflower, light olive) onto the top bun with a small pastry brush. Subtle sheen, looks natural, food-grade so the burger is still edible after the shoot.
Cooking spray (Pam) — the speed move. A single quick mist from 8 inches away creates instant gloss. Perfect for on-set re-application when the bun starts to look dry between shots. Don't over-apply or it pools.
Milk wash — for color and sheen. Brush whole milk onto the bun before the final shot. It adds a slight golden tone and a soft sheen as it dries. Works especially well on brioche and challah-style buns where you want amber-warm color.
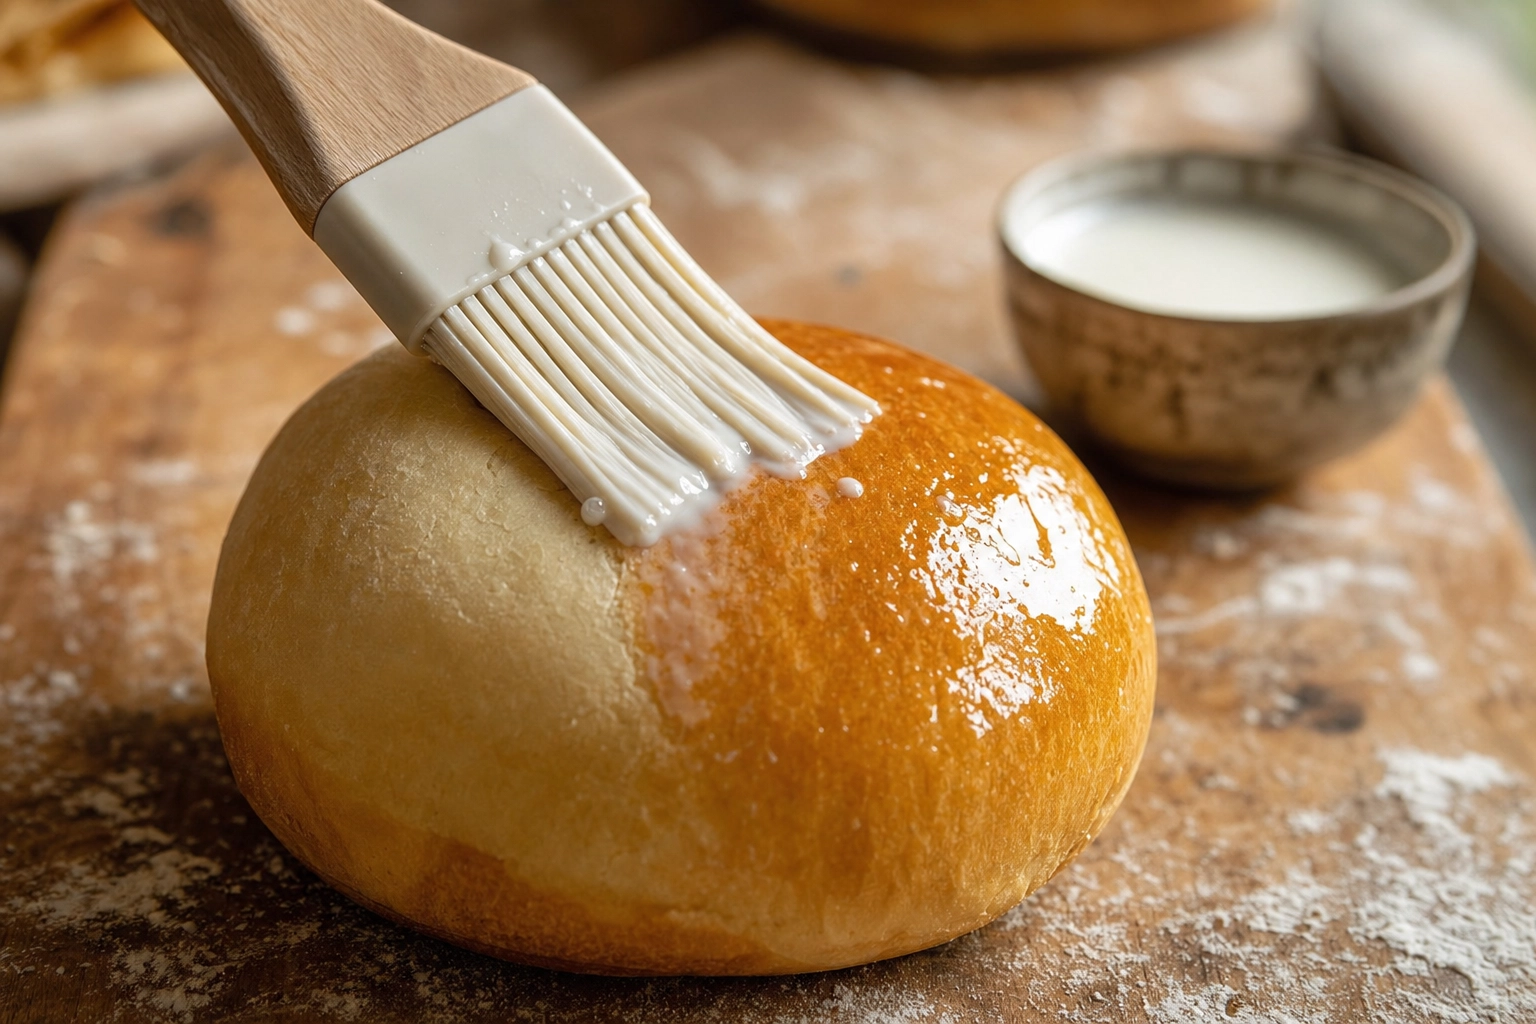 Pastry brush applying milk wash to brioche burger bun showing amber sheen transformation
Water spray — the bakery look. A fine mist of plain water on a sesame seed bun mimics the "just out of the oven" look. Lasts about 60 seconds before it evaporates, so this is your just before the shutter move.
Egg wash and torch — ad-style buns. Brush a beaten egg yolk on the bun, then pass a pastry torch over it briefly to caramelize. This is the technique that produces those impossibly golden ad buns you see in fast-food commercials. Pre-shoot only, not during.
Clear piping jelly on the patty. For a long shoot where real grease and juice disappear under lights, brush a thin layer of clear piping jelly onto the patty surface. It gives you that "just-flipped" wet-meat sheen that doesn't break down over time.
Pick your bun by hand. Pros go through a bag of 50 buns to find the 3 most photogenic ones. Look for: even seed distribution, no flat spots, no bald patches, deep golden color, no cracks. The right bun out of the bag matters more than any glaze technique.
Style-Specific Burger Photography Tips
Different burger styles need different photographic approaches. What works for a $4 smashburger ruins a $19 gourmet stack, and vice versa.
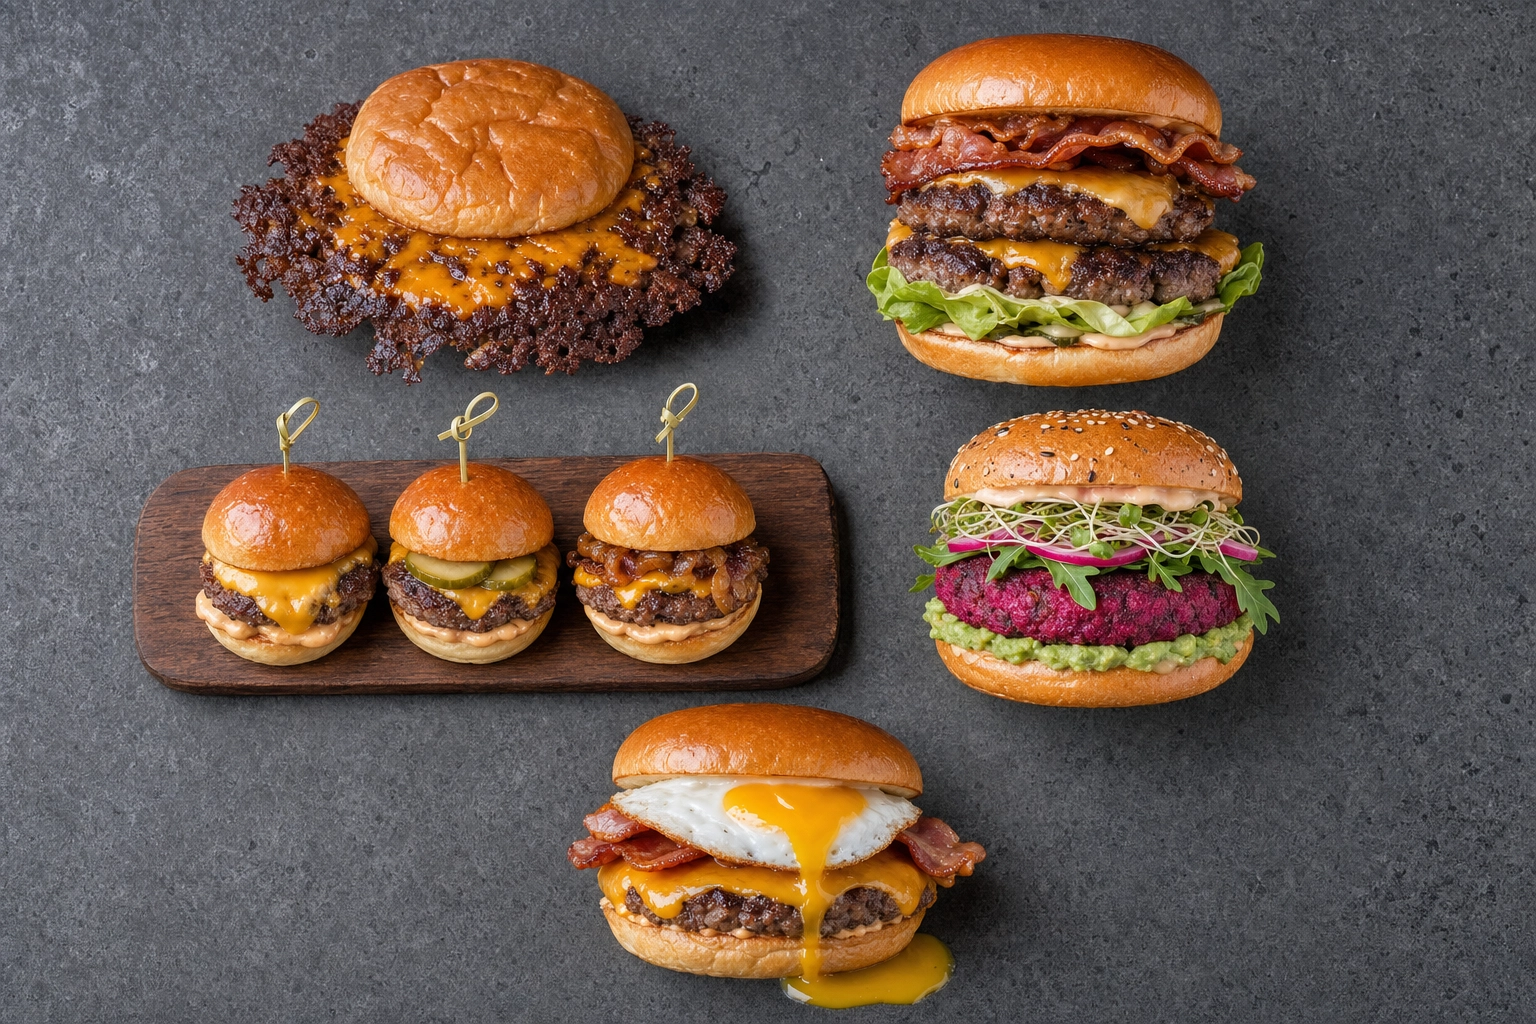 Overhead variety of burger styles: smashburger, gourmet stacked, sliders, plant-based, and breakfast burger
Smashburger photography. The lacy, caramelized edge — the visible product of the Maillard reaction — is the entire identity of a smashburger. Shoot tight, low, and with side light that grazes the edge to catch every crispy crater. Avoid stacking too tall; smashburgers are about width and crust, not height. A single or double on a paper-lined board with parchment grease spots reads as authentic.
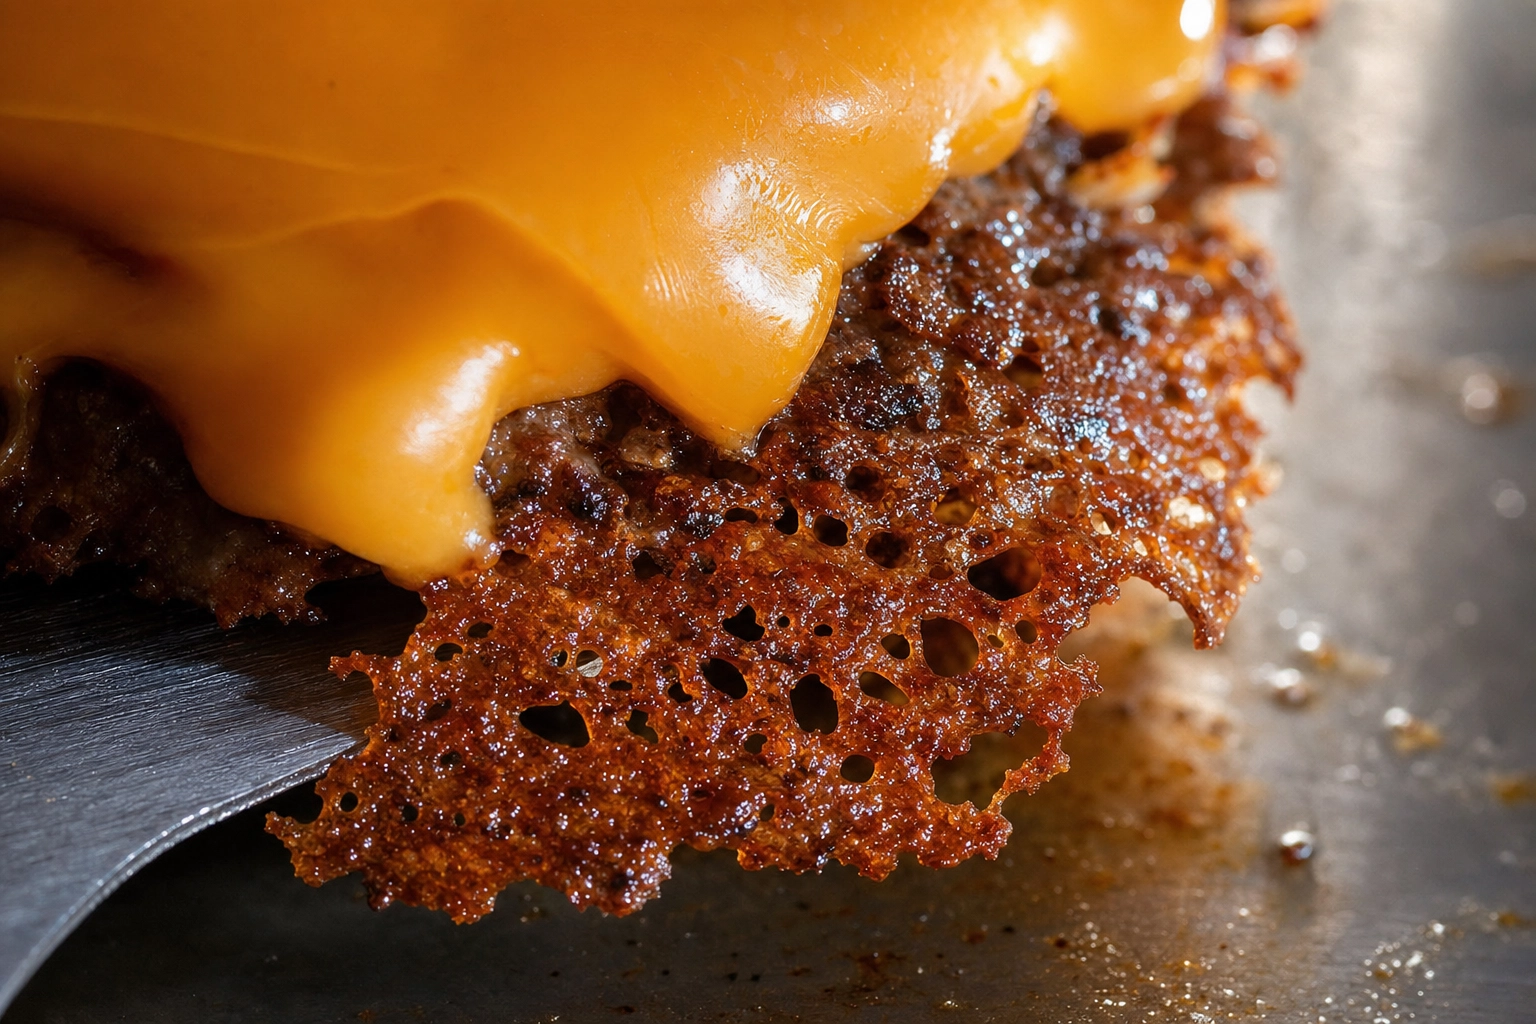 Close-up of smashburger lacy caramelized crispy crust edge with melting cheese — smashburger photography detail
Gourmet stacked burgers. Go vertical. Build tall (toothpicks mandatory), shoot at eye level, and use dramatic side lighting to create depth in the layers. Brioche bun, premium toppings, dark slate or marble plate. This is the burger photo that justifies a $19 price point.
Slider sets. Arrange three or four sliders in a slight diagonal across a wood board or slate plate. Vary the toppings slightly between them — one with melted cheese pull, one with onion ring, one with bacon — to create visual rhythm. Shoot 45° to show both height and arrangement.
Plant-based burger photography. The challenge is that plant-based patties don't have the natural visual cues of beef — no charred maillard, no pink interior. Compensate with rich color contrast: beet-juiced patty for natural pink, vivid lettuce, ripe tomato, vibrant bun. Shoot tight so the camera can read texture.
Breakfast burger. The runny yolk is the entire shot. Build the burger, position the egg on top, then break the yolk with the corner of a spatula the moment you're ready to shoot. You have about 8 seconds before the yolk pools out and ruins the composition.
Doubles and triples. Height is the brand. Shoot in vertical orientation, with strong side or back-side lighting to emphasize the layers. Use 2–3 cardboard discs and 2 toothpicks. The cross-section shot is mandatory for doubles — it's the proof of value.
Cheeseburger photography. Always angle the cheese drip toward the camera, never away. The cheese is the visual hero on a cheeseburger, and a drip pointing into the back of the frame is a wasted shot.
Plate vs Basket vs Board: Picking the Right Surface
The surface under your burger is the second most important visual decision in burger photography after the burger itself. It signals price, style, and brand instantly.
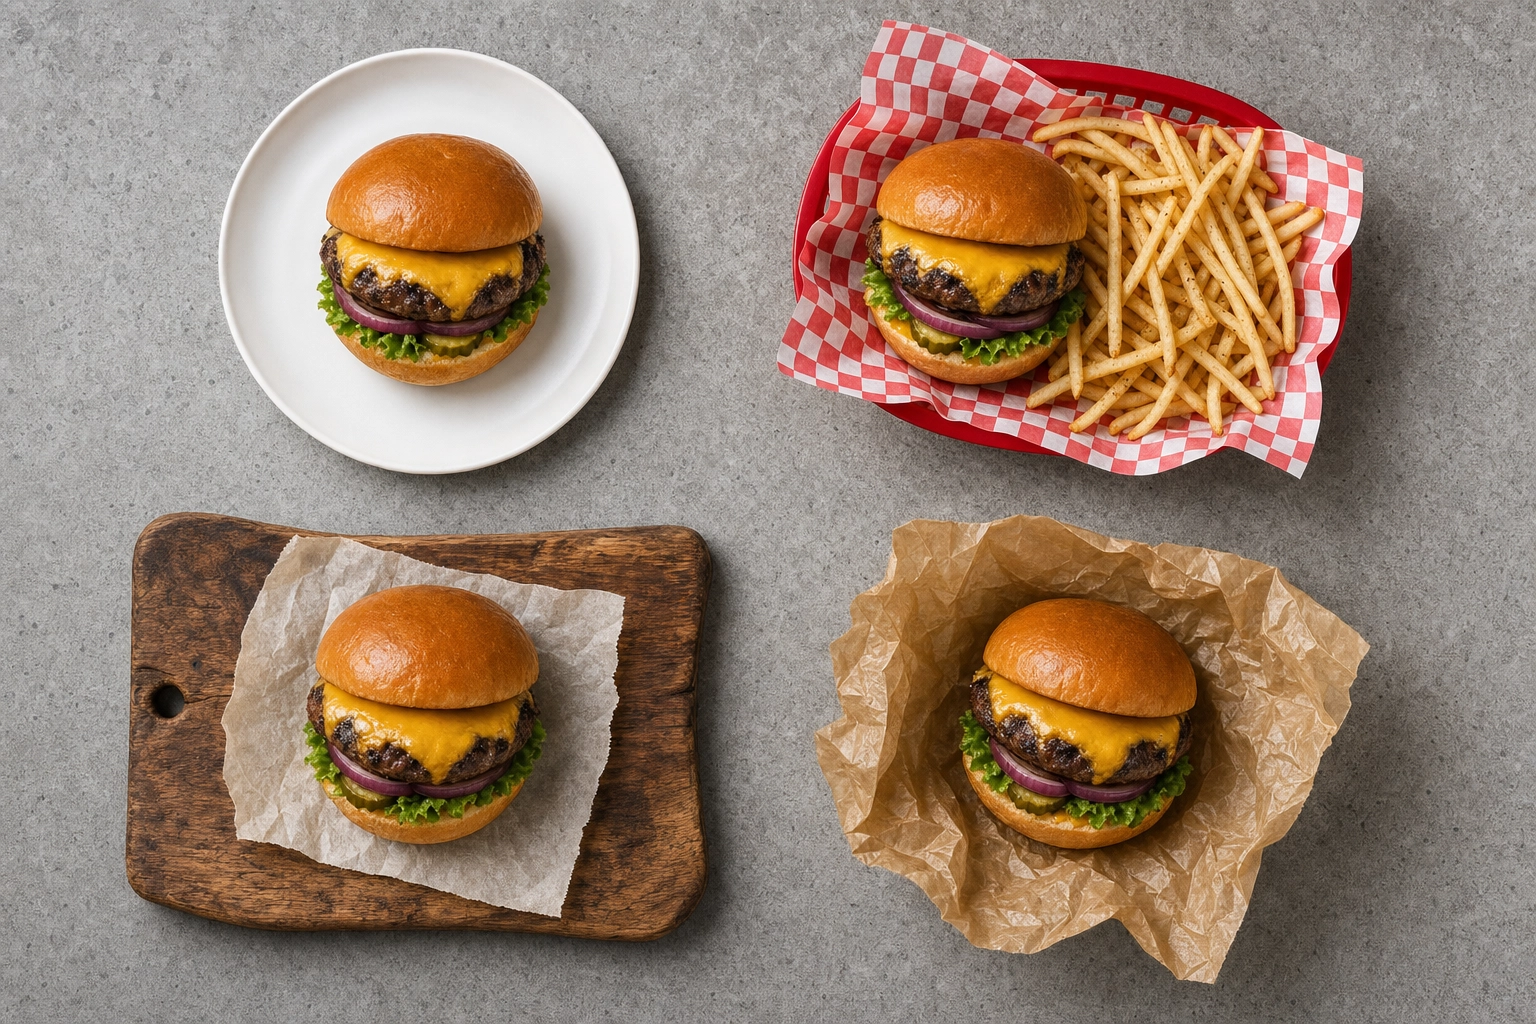 Same burger photographed on four serving surfaces: white plate, diner basket, wood board, wax paper wrap
White ceramic plate. Clean, modern, magazine-grade. Best for gourmet burgers and fine-dining contexts where the burger itself needs to be the entire star. Works in any lighting. Risk: feels sterile for casual burgers.
Dark slate or black ceramic. Moody, premium, lets golden bun tones and cheese pulls pop. Best for craft-burger and steakhouse-burger contexts. Risk: too dark for delivery-app thumbnails where contrast matters.
Red-checkered paper basket. Instant American diner energy. Best for classic cheeseburgers, smashburger shops, and casual brands. Add a side of fries or pickles for the full diner story. Risk: cliché if the styling is sloppy.
Wood board with parchment. Pub-burger, gastropub, smash-truck vibe. The parchment can show grease spots and crumbs, which reads as authentic. Best for craft burger bars and food trucks.
Wax paper wrap (half open). Smash burger, deli, and food-truck authenticity. Half-unwrap the burger so you see both the wrapped and unwrapped portions in frame. Risk: only works for casual brand voices.
Avoid. Shiny metallic plates (cause hot reflections that blow out highlights), busy patterned plates (compete with the burger visually), and clear glass plates (no contrast with shadows).
Test multiple surfaces for your hero burger and check the conversion lift on delivery apps. The right surface choice can move order volume more than the burger styling itself.
The Food Truck Quick-Shot Burger Photography Workflow
Burgers are the king of food truck menus — smash trucks, gourmet burger trucks, and slider operators make up a huge slice of the food truck economy. But burger trucks have the same problem every truck has: no time, no space, and no studio.
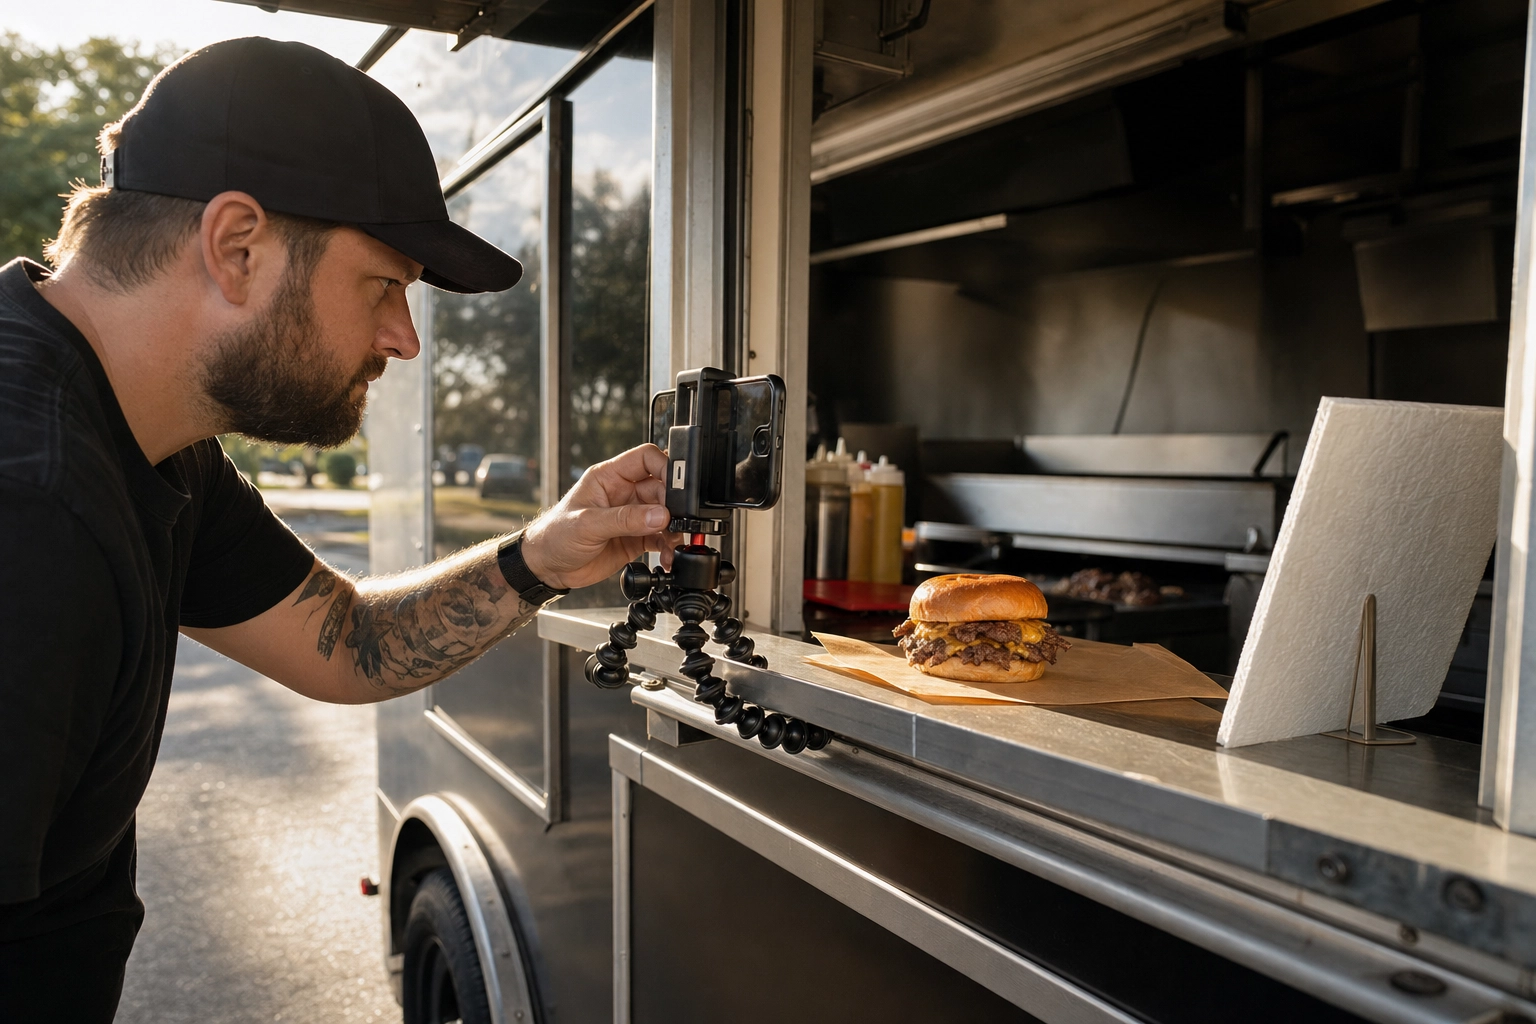 Food truck operator photographing smash burger on serving window ledge with phone tripod and reflector
Here's the burger photography workflow that works on a truck:
Shoot during prep, not service. The lunch rush is not your photo window. The first burger you cook between 10:30 and 11:00 — before the line forms — is your hero plate. Plate it for the camera, not the customer.
Use the serving window ledge. Best light on the truck, comfortable height, no extra footprint. Lay a piece of parchment or your foldable backdrop board on the ledge and shoot directly there.
Use the truck as your light modifier. Position the burger in the open shade three to four feet from the truck's edge — protected from direct sun, but catching plenty of indirect skylight. This gives you essentially the same soft, directional light as a $500 softbox.
The minimum kit. Phone (iPhone 12+, Pixel 6+, Galaxy S20+), a flexible phone tripod ($25), a piece of white foam board for bounce ($5), and a small reflector ($15). Total under $50. Optional: a clip-on LED panel ($30) for cloudy days.
Three angles per burger. Hero stack at eye level, cross-section side profile, top-down build. Three burger shots cover every channel — menu board, delivery app, Instagram, Google Business Profile. Five minutes per burger if you're moving efficiently.
Skip post-production. The reason most food truck burger photos look bad isn't shooting — it's that nobody on a truck has time to edit in Adobe Lightroom between flips. Use an AI editor to skip that step entirely. For a deeper food truck workflow, our food truck photography guide covers the full kit and 90-second AI editing flow, and the food truck menu design post shows how to plug those photos into menu boards that actually convert.
The AI Burger Photography Workflow
The economics of burger photography have changed fundamentally in the last two years. A traditional burger photo shoot — booking a professional photographer and food stylist, renting a studio, sourcing the ingredients, and getting final retouched files — runs $500 to $2,000+ for one or two hero images. Schedule out a week or more.
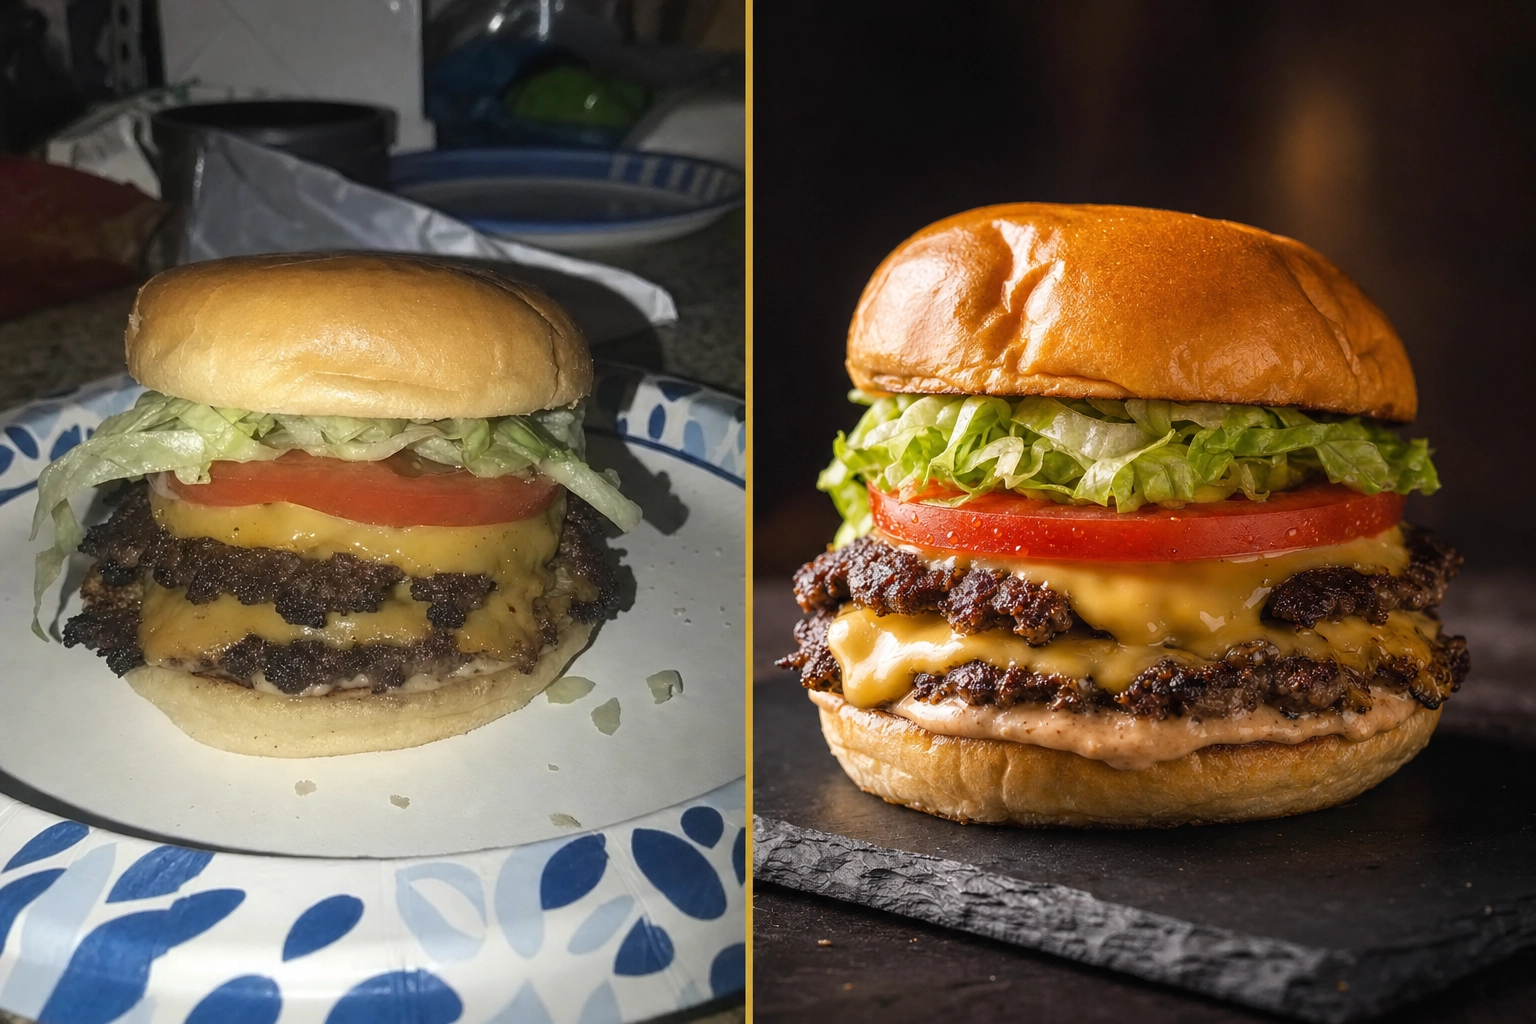 Before and after burger photography comparison: amateur phone snap versus studio-quality AI-enhanced image
The AI workflow looks different:
- Cook the burger. Same one you'd serve a customer.
- Snap a phone photo. Any modern phone in decent light. Side light, 45° angle.
- Upload to FoodShot. Pick a style (gourmet hero, smashburger ad, delivery app, lifestyle) or use Builder Mode to combine a specific plate, background, and lighting.
- Wait 90 seconds. Get a studio-quality 4K image, commercial license included.
- Generate variations. Same upload, 3–4 different burger photo styles. Pick the winner.
The cost difference is the headline: a single professional shoot covers maybe 1–3 final images for the same price as a year of unlimited AI burger photography. For a multi-location burger chain or a ghost kitchen with 40 dishes across 4 brands, that math is unanswerable.
The harder question for most operators is consistency. If you have a chain of 15 burger shops shooting on 15 different phones in 15 different lighting conditions, your menu board burger photos will look like 15 different brands. The fix is uploading your best brand reference photos so every new burger image inherits the same plating, lighting, and color story. That's the difference between random food photos and a coherent visual brand.
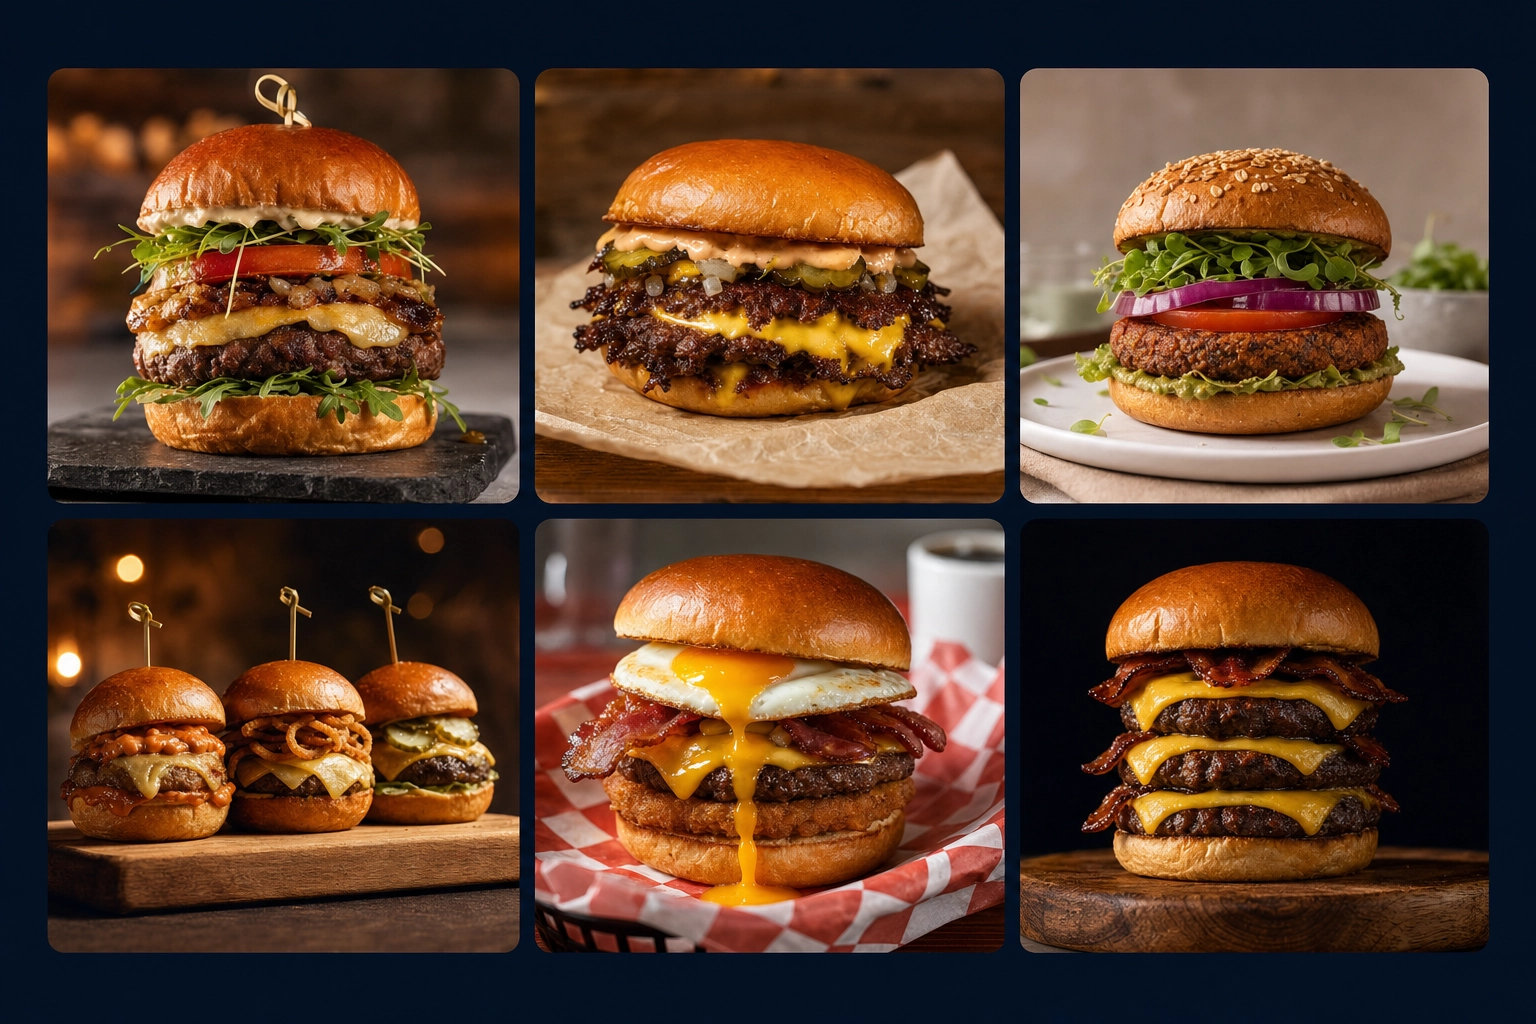 Six-photo burger menu library mockup showing consistent styling across gourmet, smash, plant-based, sliders, breakfast, and triple burger photos
For the full toolkit — including 200+ burger-specific styles, Builder Mode, and consistency controls — the AI food photo editor handles the entire workflow, and the burger-specific AI styles library covers smashburger, gourmet stacked, slider, plant-based, and double-stack hero looks built specifically for burger joints.
Frequently Asked Questions
How do you get cheese to melt perfectly for burger photos?
Skip melting the cheese in the pan. Dip a slice of cheese (American, cheddar, or any easy-melt variety) in boiling water for 2–3 seconds, then drape it over a cold patty. It softens just enough to look freshly melted without forming the dry crusty film you get from griddle melt. On set, a heat gun or pastry torch passed quickly over the surface re-melts the cheese back to gooey for retakes. For pull-apart shots, score the cheese with a knife before lifting so it tears cleanly into strands instead of breaking apart.
How do you create realistic drips, juice, and grease in burger photos?
Use clear piping jelly on the patty surface — a thin brush coats the meat and stays glossy for hours under lights, unlike real grease which absorbs into the bun within minutes. For sauce drips, always use a squeeze bottle with a fine tip, not a spoon — squeeze bottles give you control over the line width and where it lands. For "fresh juice" appearance, a tiny dab of vegetable glycerin mixed with water creates beads that hold their shape on lettuce or tomato slices for 20+ minutes.
How do you stop sesame seeds from rolling off the bun?
Brush the top of the bun with a thin layer of egg white or simple syrup before adding seeds. The sticky base locks them in place. For pre-baked seeded buns, hand-pick the most evenly seeded buns from the bag — pros go through 30–50 buns to find their hero. On set, use fine-tip tweezers to individually place a few extra seeds where the camera will catch them. Photograph from the angle where the seed distribution looks most natural — usually with the camera slightly elevated above the top of the bun.
How long does a professional burger photo shoot take?
A traditional studio shoot with a food stylist and photographer runs 4–8 hours of active shooting time per hero image. The full timeline including pre-production, sourcing ingredients, styling, shooting, and final retouching is typically 1–2 weeks. Per-image cost generally lands between $200 and $400 for editorial-quality results, with commercial advertising work running significantly higher. An AI burger photography workflow delivers comparable menu-ready quality in 90 seconds per image for a flat monthly fee — useful when you need 40 burger photos this week, not next month.
What's the best angle for burger photography?
Eye-level (0° to 15°) is the universal default for burger photography. It shows the full vertical architecture of the stack — bun, cheese, patty, vegetables, bottom bun — in the same way a customer would see it before taking a bite. A 45° angle works well for combo plates where you want to show the burger and the side (fries, onion rings) together. Top-down (90° overhead) only works for the build-shot or ingredient flat-lay; it kills the layered look that makes burgers visually appealing. Avoid the low-angle "looking up" shot — it emphasizes the bottom bun unnaturally and makes the patty look like it's floating.
Your Burger Photos Are Doing More Selling Than You Think
The photo on your menu board, your delivery-app listing, and your Instagram grid is the closest thing your customer has to actually tasting the burger before they order. A bad burger photo costs you orders every single shift, whether you can measure it or not.
The good news is that great burger photography is no longer locked behind a $2,000 studio shoot. The styling tips in this guide work in your kitchen. The lighting setup works on the side of your truck. And the AI workflow turns the snap you take at 10:45 AM into a hero image by 10:47 — burger-truck-ready in 90 seconds.
Start with one shot. Pick your bestselling burger, build it for the camera using cardboard, toothpicks, and a hot-water cheese melt, light it from the side at 45°, and shoot the hero stack at eye level. Upload it, run it through an AI style that matches your brand, and replace the worst photo on your menu board with the new one this week. Measure orders. Then do the next burger.