How to Take Food Photos with Your Phone (Step-by-Step)
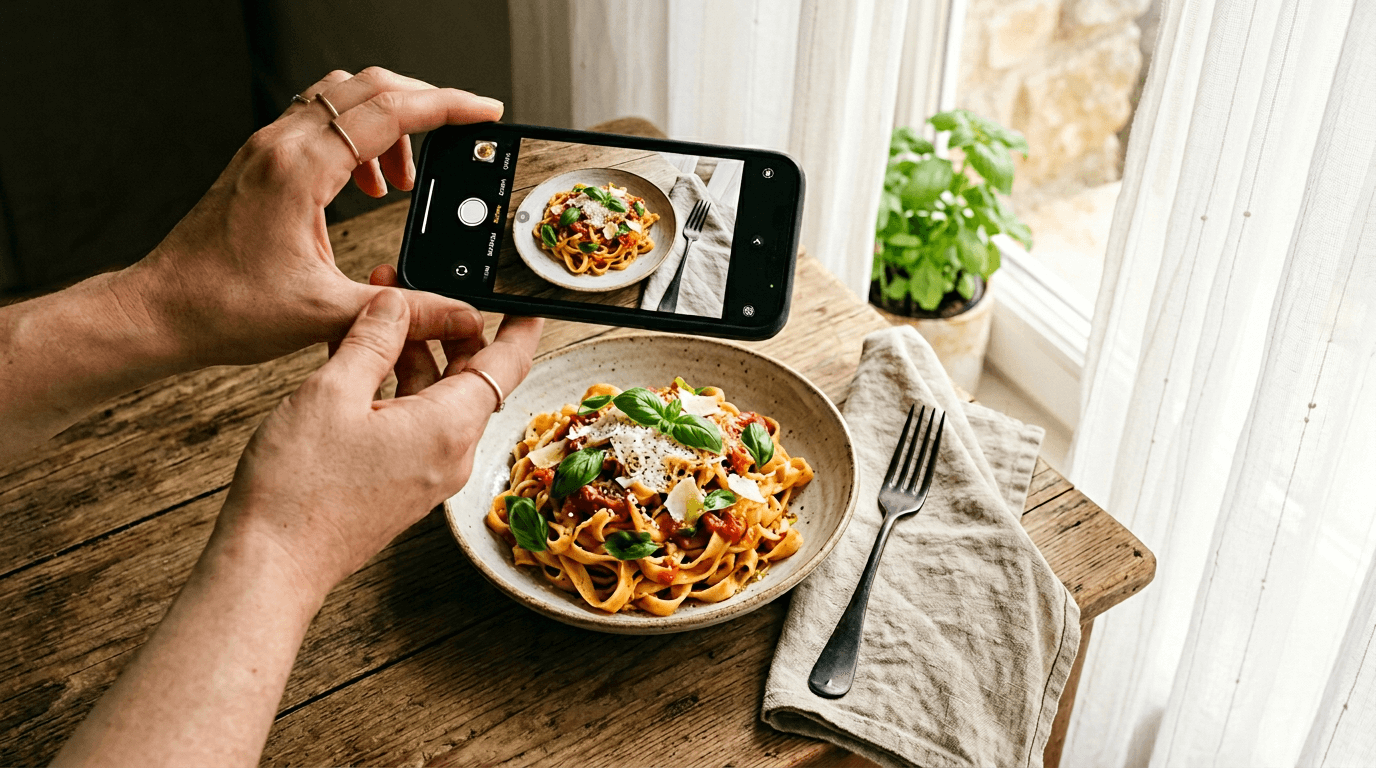
Want to learn how to take food photos with phone cameras that actually look professional? You don't need a DSLR camera, a photography studio, or expensive equipment. The iPhone or Android smartphone in your pocket already shoots incredible food photography — you just need to know a few key techniques.
This step-by-step guide walks you through 8 simple steps for shooting food photos with your phone that look genuinely polished. We'll cover finding the right light, choosing your camera angle, editing with your built-in photo editor, and using AI to take your images from good to menu-ready. No jargon. No gear. Just results.
Quick Summary: Great phone food photography comes down to three things: natural window light, the right camera angle for your dish, and clean composition. Master those basics, shoot lots of photos, do a quick edit, then let AI handle the polish. You'll go from amateur phone snaps to professional-looking images in minutes.
How to Take Food Photos with Phone: What You'll Need
Here's the full equipment list:
- Your smartphone camera. Any phone from the last 3–4 years works — iPhone, Samsung Galaxy, Google Pixel, whatever you've got.
- A window. This is your studio lighting. Seriously.
- A clean cloth. For wiping plate rims and surfaces before you shoot.
- A sheet of white paper (optional). Prop it up opposite the window to bounce light and fill shadows.
That's it. Let's start shooting.
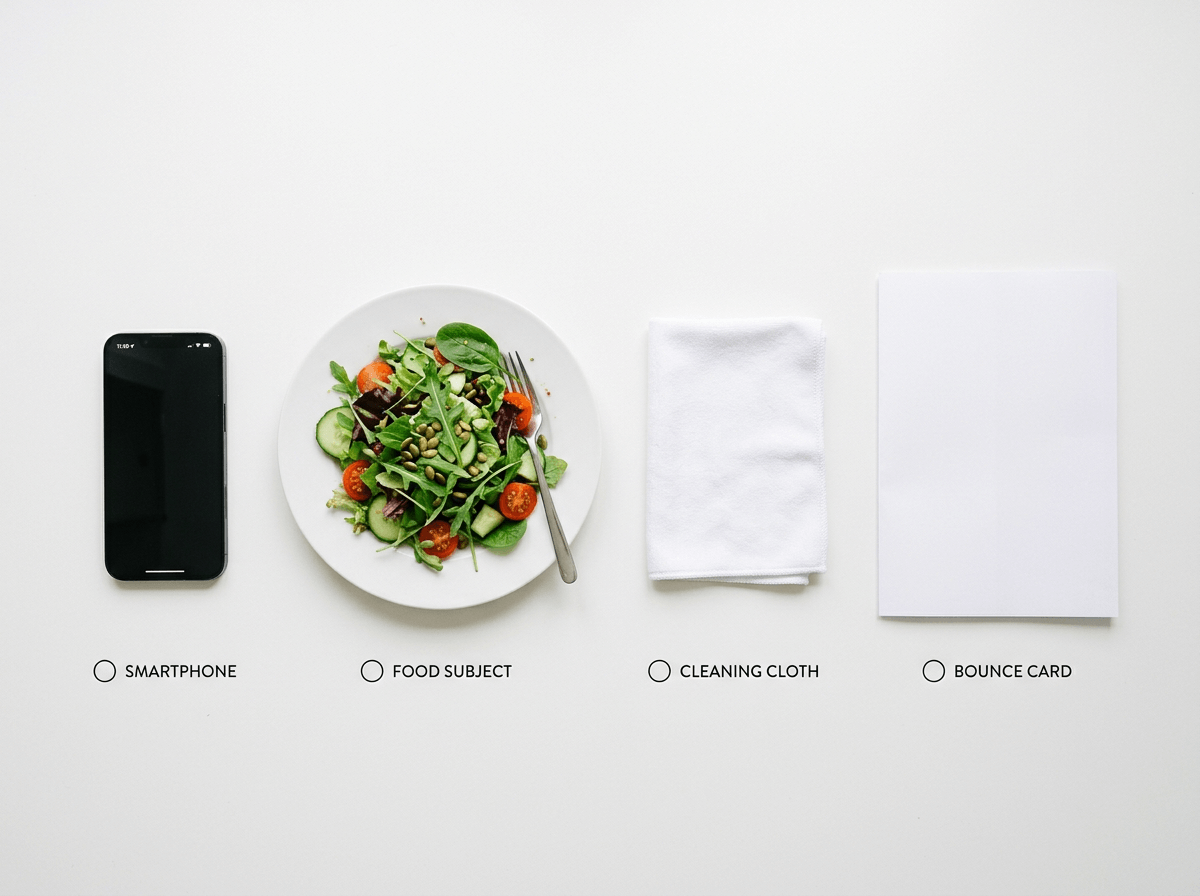 Flat-lay of minimal food photography equipment: smartphone, white cloth, paper reflector, and a plated salad on white surface
Step 1: Find the Best Light
Lighting makes or breaks food photography — more than the camera, more than food styling, more than anything else. The best light for shooting food photos is free: natural light coming through your window.
How to set up using window light:
- Find the largest window in your restaurant or kitchen that gets indirect light (not direct sun beaming in).
- Place your dish 2–3 feet from the window, with the light hitting from the side. Side lighting creates shadows and highlights that give food depth, texture, and dimension.
- Turn off overhead lights. Those fluorescent kitchen lights cast a flat, yellowish tint that makes everything look unappetizing. Natural window light alone is dramatically better.
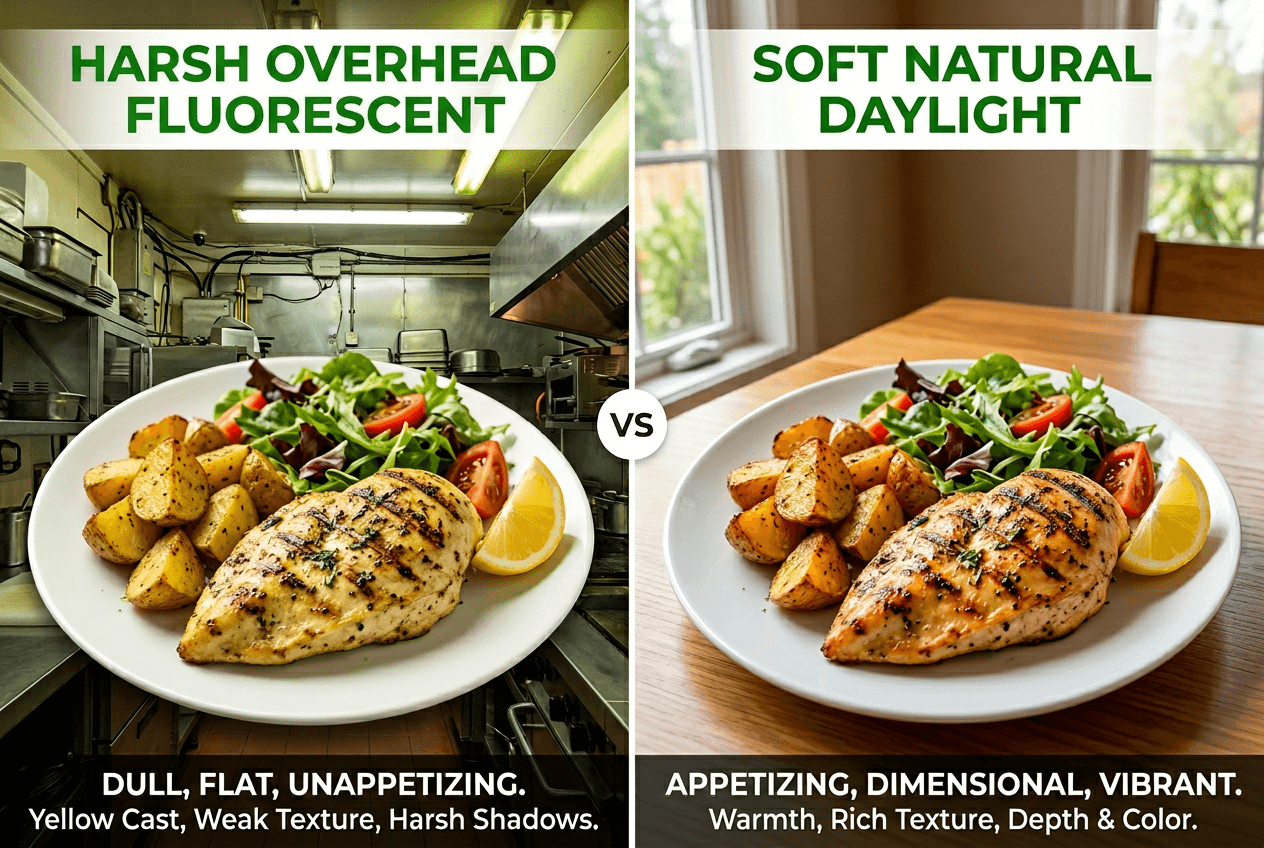 Comparison of food under overhead fluorescent light versus natural window light showing dramatic quality difference
Harsh sunlight? If direct sun is creating hard shadows, tape a sheet of white parchment paper over the window. This diffuses the light into that soft, even glow you see in professional food photography.
Cloudy days are your friend. Overcast skies are nature's softbox — the light is soft, even, and wraps around your food beautifully. As B&H Photo's lighting guide explains, clouds naturally diffuse sunlight to minimize harsh shadows.
The DIY reflector trick: If one side of your dish looks too dark, prop a white sheet of paper or white cutting board on the opposite side (away from the window). It bounces light back into the shadows and evens out the exposure. Professional photographers use this on every food shoot — and it costs nothing.
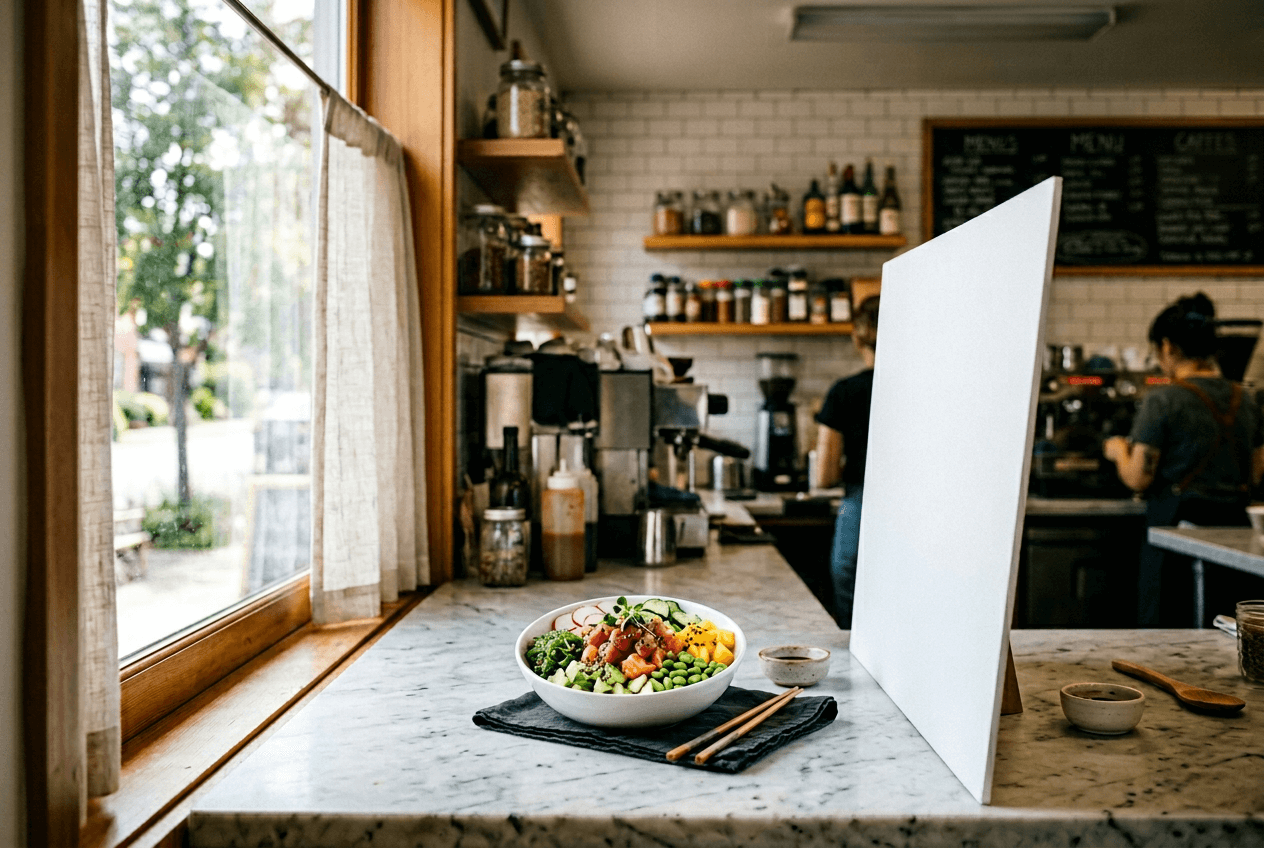 Natural window light food photography setup showing side lighting on a colorful poke bowl with a white reflector board
Step 2: Set Your Scene
Before you pick up your phone camera, spend 60 seconds setting the stage.
Clean everything. Wipe down the surface. Wipe the plate rim with a damp cloth — fingerprints and sauce splatters are magnified in photos. Remove anything that doesn't belong: receipts, bottles, random utensils.
Choose a simple background. The best surfaces for food photography:
- Clean wooden tables or cutting boards (warm, natural feel)
- White or neutral countertops (modern, clean)
- Dark slate or stone (dramatic, great for contrast with colorful food)
Add 1–2 intentional props. A fork, a linen napkin, or a scattered ingredient (basil leaves, chili flakes, lemon wedges) tells a story without competing with the food. The rule: if it doesn't add to the shot, take it out.
Beginners almost always over-style. When in doubt, remove a prop rather than add one. The food is the hero — everything else is a supporting actor.
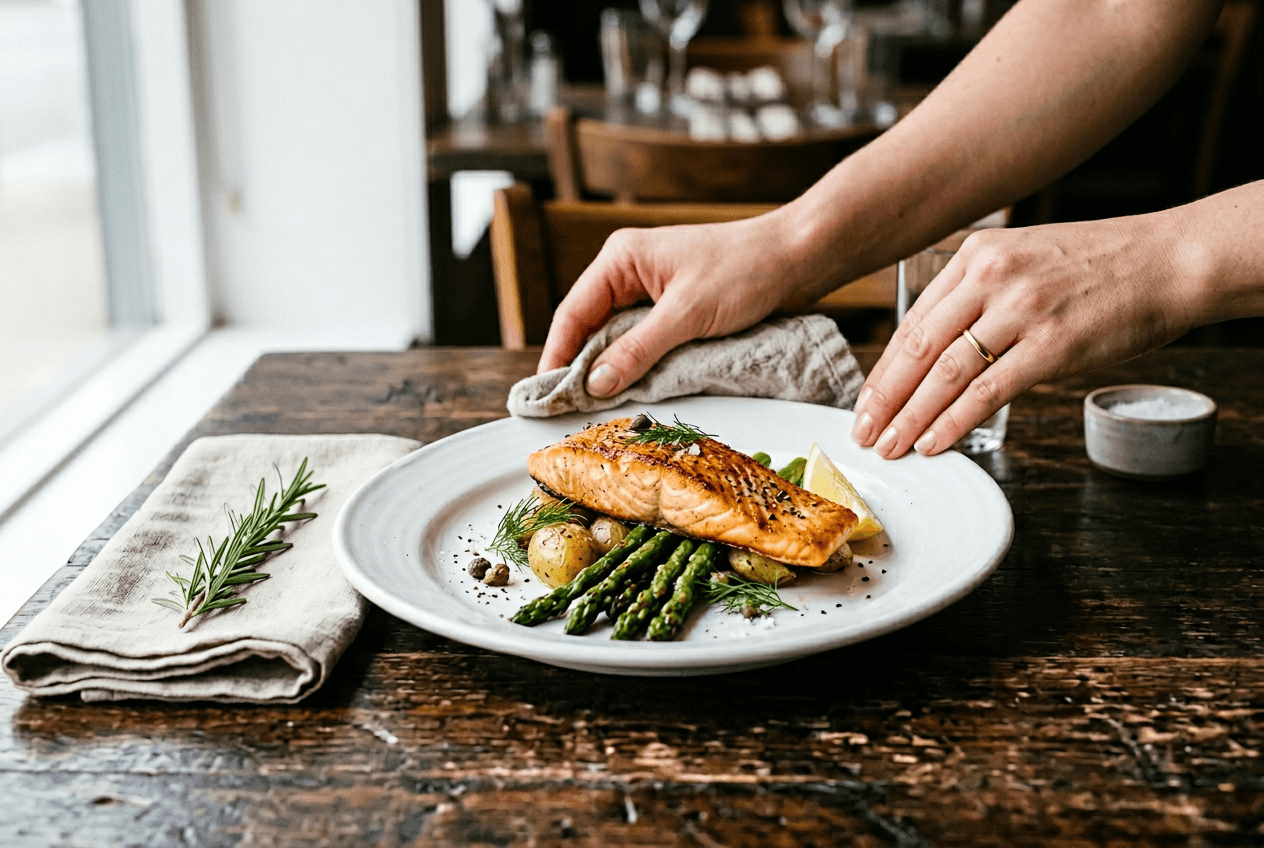 Hands wiping a plate rim before food photography with minimal styling props on a clean dark wood table
Step 3: Choose Your Camera Angle
This is where most food photos go from "meh" to great. There are only three angles you need when learning how to take food photos with phone cameras, and each works best for specific dishes:
Overhead (Flat-Lay) — Best for Flat Dishes
Hold your phone directly above the dish, pointing straight down. Lock your elbows for stability.
Best for: Pizza, salads, grain bowls, charcuterie boards, flatbreads, sushi platters — anything relatively flat where you want to show all ingredients from above.
Tip: Make sure your phone is truly level. Turn on your iPhone camera grid lines (Settings → Camera → Grid) to keep things straight.
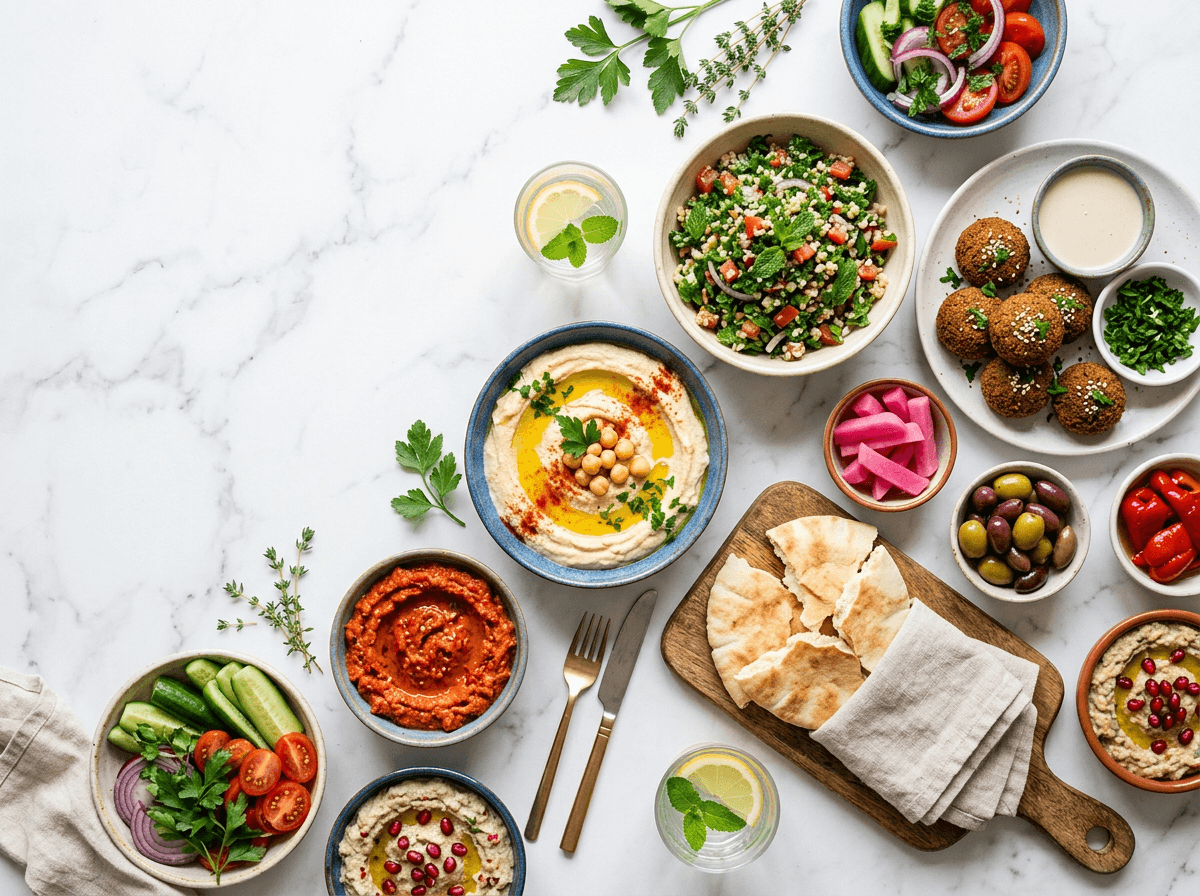 Overhead flat-lay food photo of a colorful Mediterranean mezze spread on white marble demonstrating perfect top-down angle
45-Degree Angle — The Most Versatile
This is how your eyes naturally see food at a table. Hold your camera at roughly 45 degrees.
Best for: Burgers, layered pasta, cakes, stacked pancakes, sandwiches — anything with height and layers to showcase.
This is the safest default angle when shooting food photography. When in doubt, start here.
Eye-Level (Straight On) — Best for Drinks and Tall Items
Get your phone camera down to the same level as the dish. For drinks, this means nearly touching the table.
Best for: Cocktails, milkshakes, tall desserts, beverages with garnishes.
Tip: Rest your phone on the table or a stack of books for stability. Even tiny hand movements create blur.
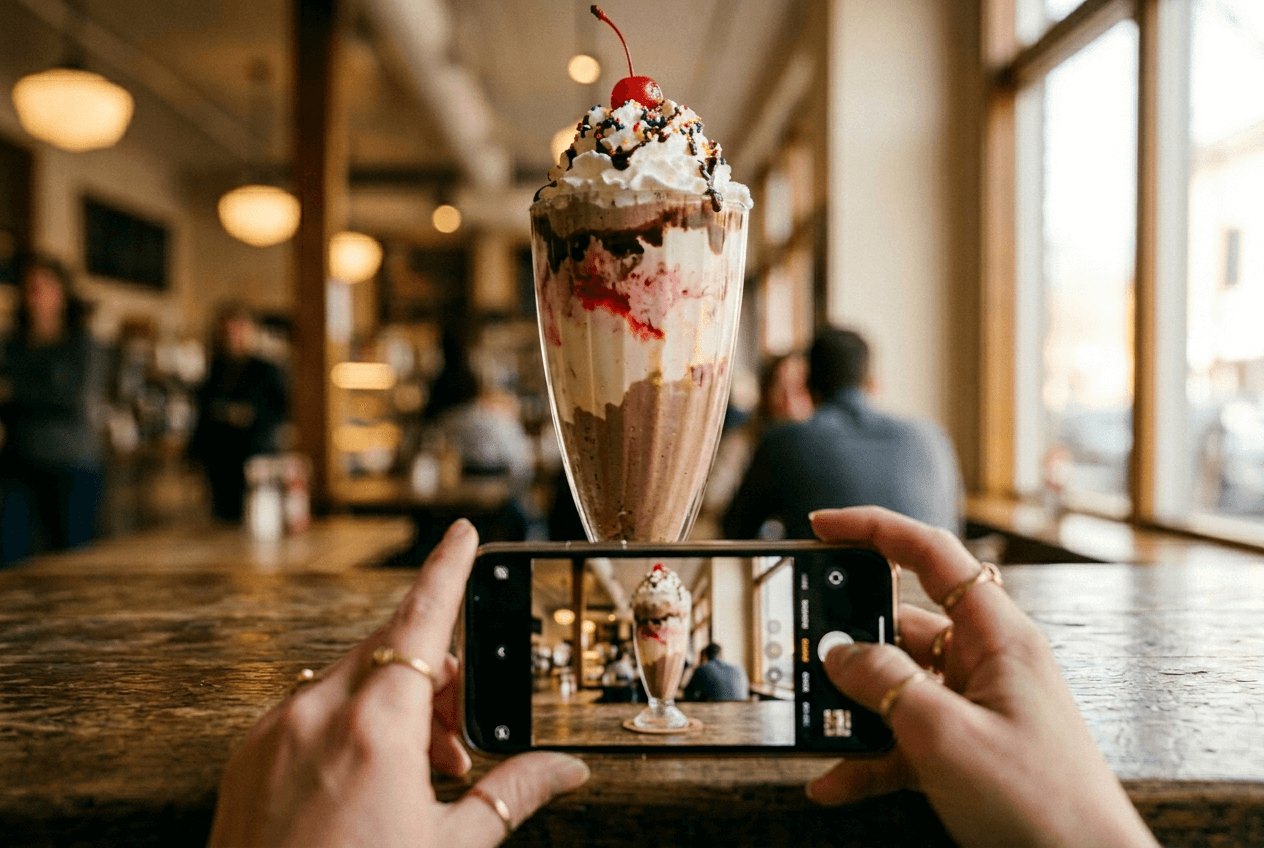 Hands holding phone at eye-level on a café counter to photograph a tall milkshake demonstrating the straight-on angle technique
For more iPhone-specific tips, check out our iPhone food photography tips.
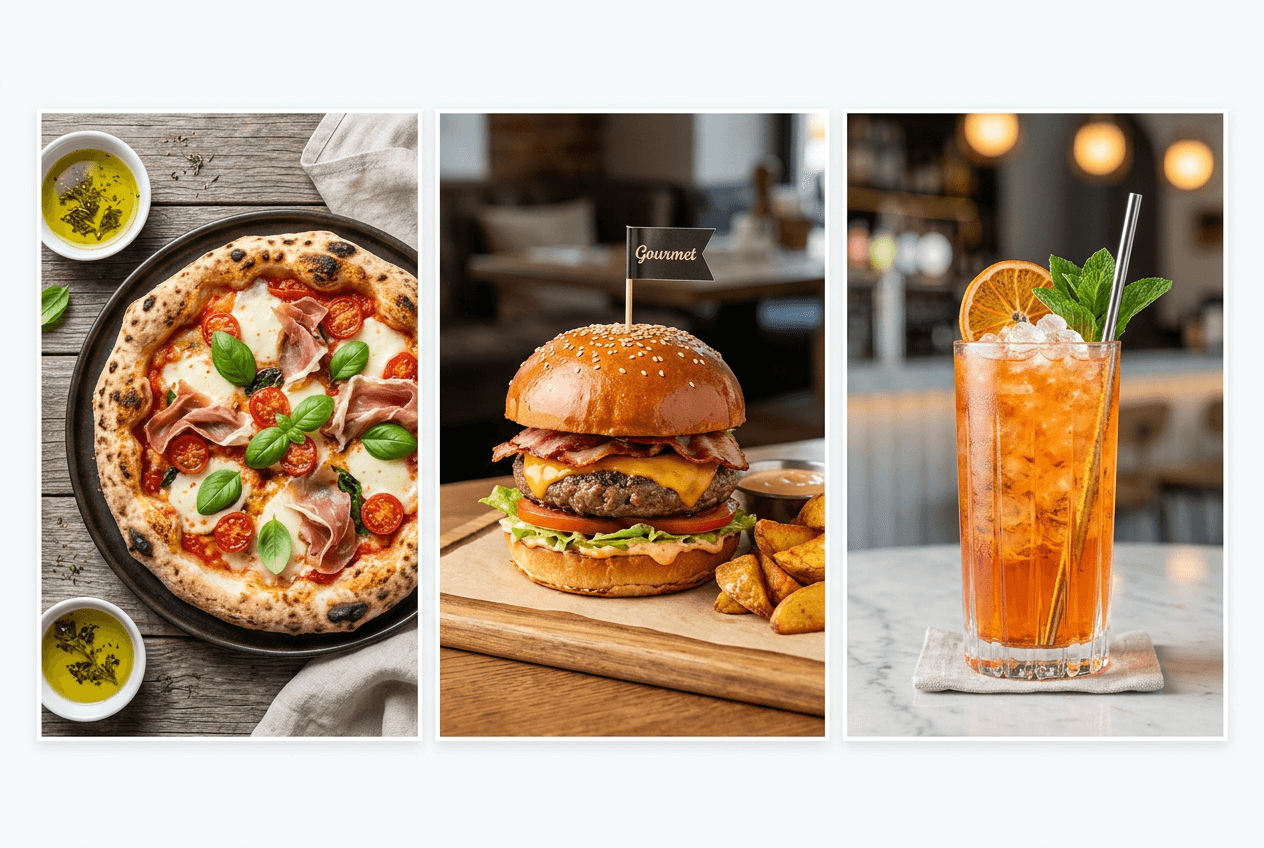 Three food photography angles compared: overhead pizza flat-lay, 45-degree burger, and eye-level cocktail shot
Step 4: Focus on the Hero
Your phone camera is smart, but it doesn't always focus on what matters. Take control:
- Tap to focus. Tap directly on the most appetizing part — the melted cheese, the garnish, the glistening sauce. Your phone locks focus there.
- Adjust exposure. On iPhone, after tapping, drag the sun icon up to brighten. Most food photos benefit from being 10–15% brighter than the camera default.
- Use Portrait mode carefully. It blurs the background beautifully, but sometimes blurs food edges on irregular shapes. Check closely before moving on.
- Turn on grid lines. The 3x3 grid overlay is essential for composition (next step). Enable it in camera settings.
Want to optimize your iPhone camera settings? Here's our guide to iPhone camera settings for food.
 Finger tapping smartphone screen to lock focus on a chocolate lava cake for phone food photography
Step 5: Nail Your Composition
Composition is how you arrange everything in the frame. These rules instantly make your food photos look more professional:
Rule of Thirds
Instead of centering the dish, place the main plate where the grid lines intersect. This off-center placement creates a dynamic, eye-catching image.
Negative Space
Don't fill every corner. Leave breathing room — especially above and beside the dish. This makes food photos feel clean and editorial. That empty space is also useful for text overlays on Instagram posts or delivery app images.
Leading Lines
Use natural lines — a fork pointing toward the dish, a napkin edge, a drizzle of sauce — to guide the viewer's eye. Small details, big impact.
The Odd Number Rule
Shooting multiple items? Group them in odd numbers — 3 or 5 looks more natural than 2 or 4. This is a styling trick used constantly by professional food photographers.
Avoid common mistakes — we detail them in our guide on food photography mistakes that kill online orders.
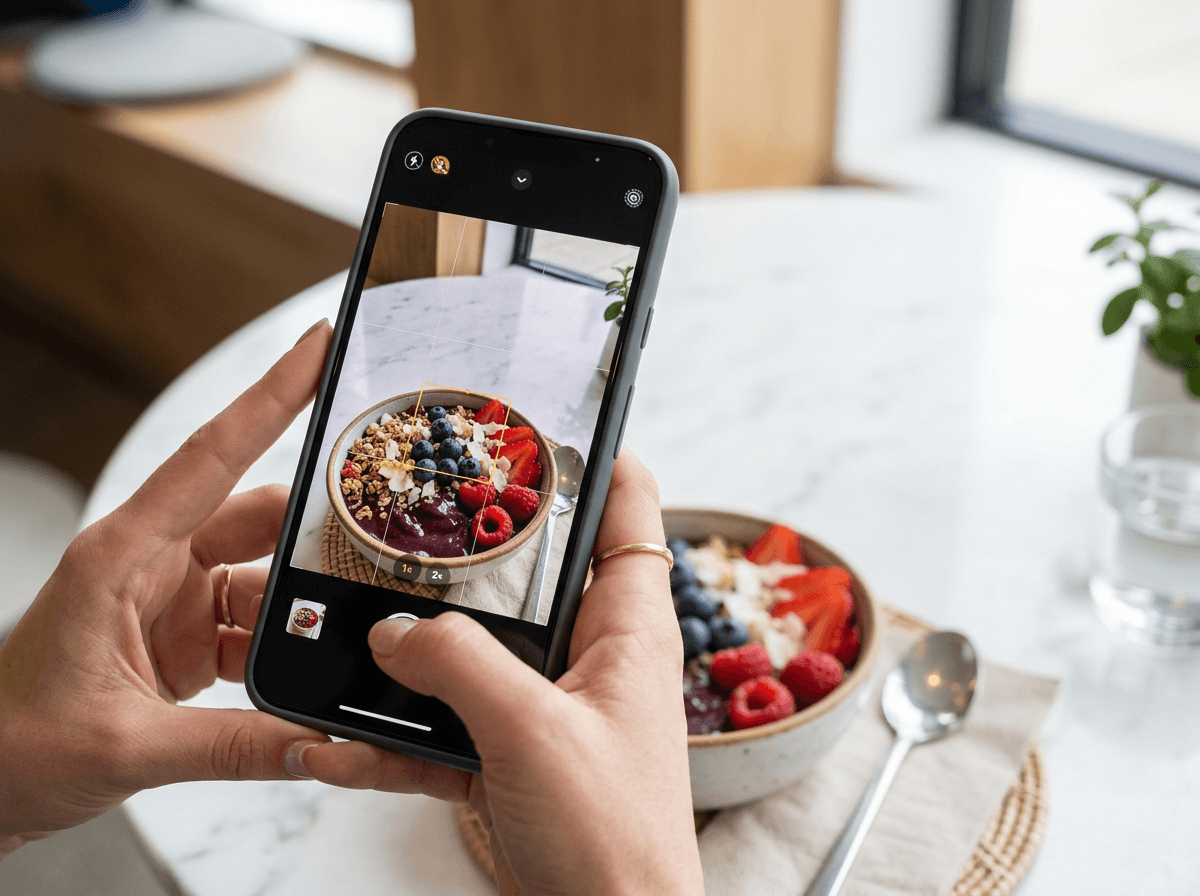 Smartphone camera viewfinder showing rule of thirds grid overlay for food photo composition of an acai bowl
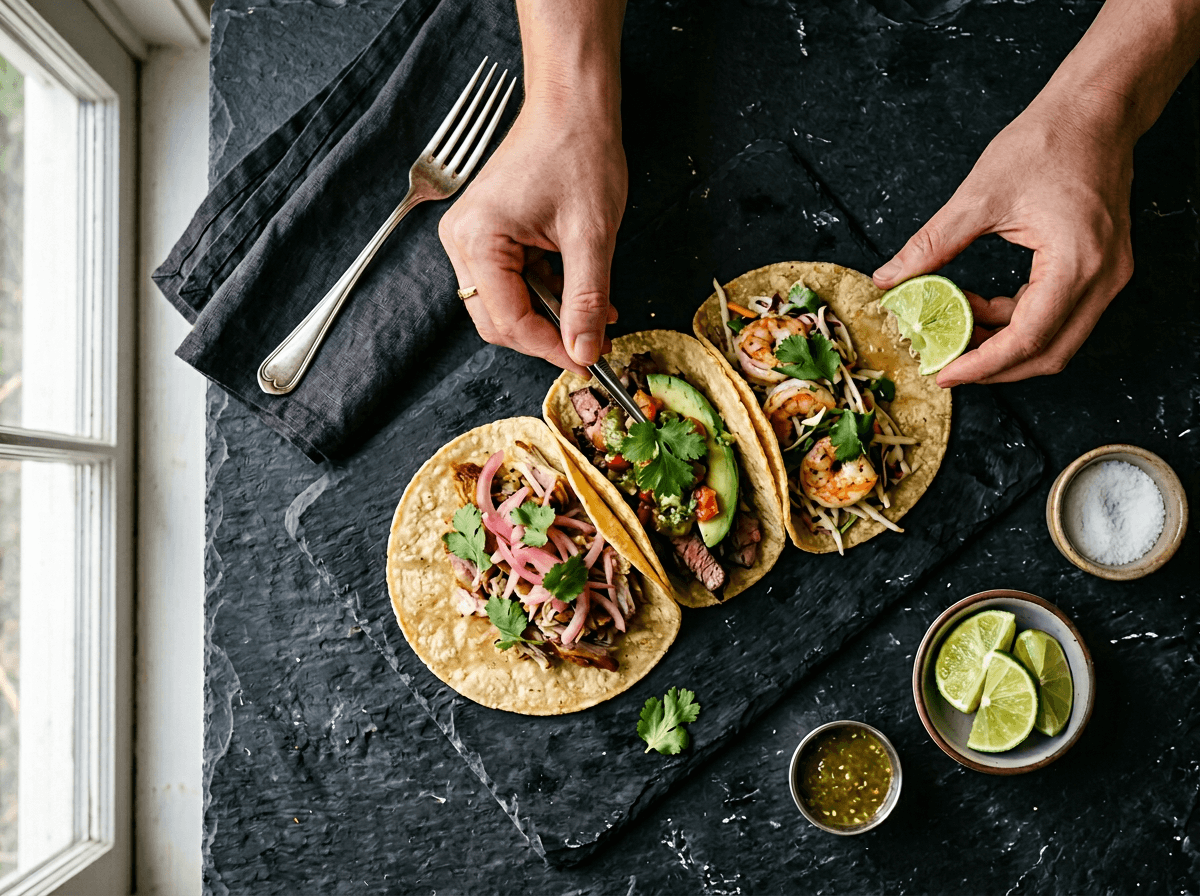 Hands arranging three tacos in odd-number grouping on dark slate showing food photography composition techniques
Step 6: Shoot Multiple Photos
The habit that separates amateurs from consistent food photographers: shoot way more than you think you need.
For every dish, take at least 10–15 photos:
- Bracket your angles: Shoot overhead, 45-degree, AND eye-level of the same dish. You'll be surprised which produces the best shot.
- Vary your distance: A wide establishing shot, a medium shot of just the plate, a tight close-up of the food's best feature (that cheese pull, that glaze, that crust).
- Use burst mode for action: Pouring sauce? Pulling cheese? Hold the camera shutter for a rapid burst. At least one frame nails it.
You can always delete photos later. You can't reshoot a dish that's been served to table 12.
 Multiple food photo angles of the same ramen bowl being compared and selected for best composition
Step 7: Quick Editing on Your Phone
A 60-second edit using your phone's built-in photo editor transforms a decent shot into a great one. No editing apps needed.
The 4-step quick edit:
- Crop. Tighten the frame. Cut distracting edges. Recompose using the rule of thirds.
- Brighten. Bump exposure up 10–20%. Food should look inviting, not dim.
- Boost colors. Increase saturation by 5–15%. Reds get richer, greens get fresher. If food starts looking neon, dial it back.
- Sharpen. A subtle pass brings out texture — crispy crust, grill marks, latte foam.
Skip heavy filters. That moody blue filter works on landscapes, but it makes food look cold. Keep colors natural when editing food photos.
For a deeper editing walkthrough, read our guide on how to edit food photos.
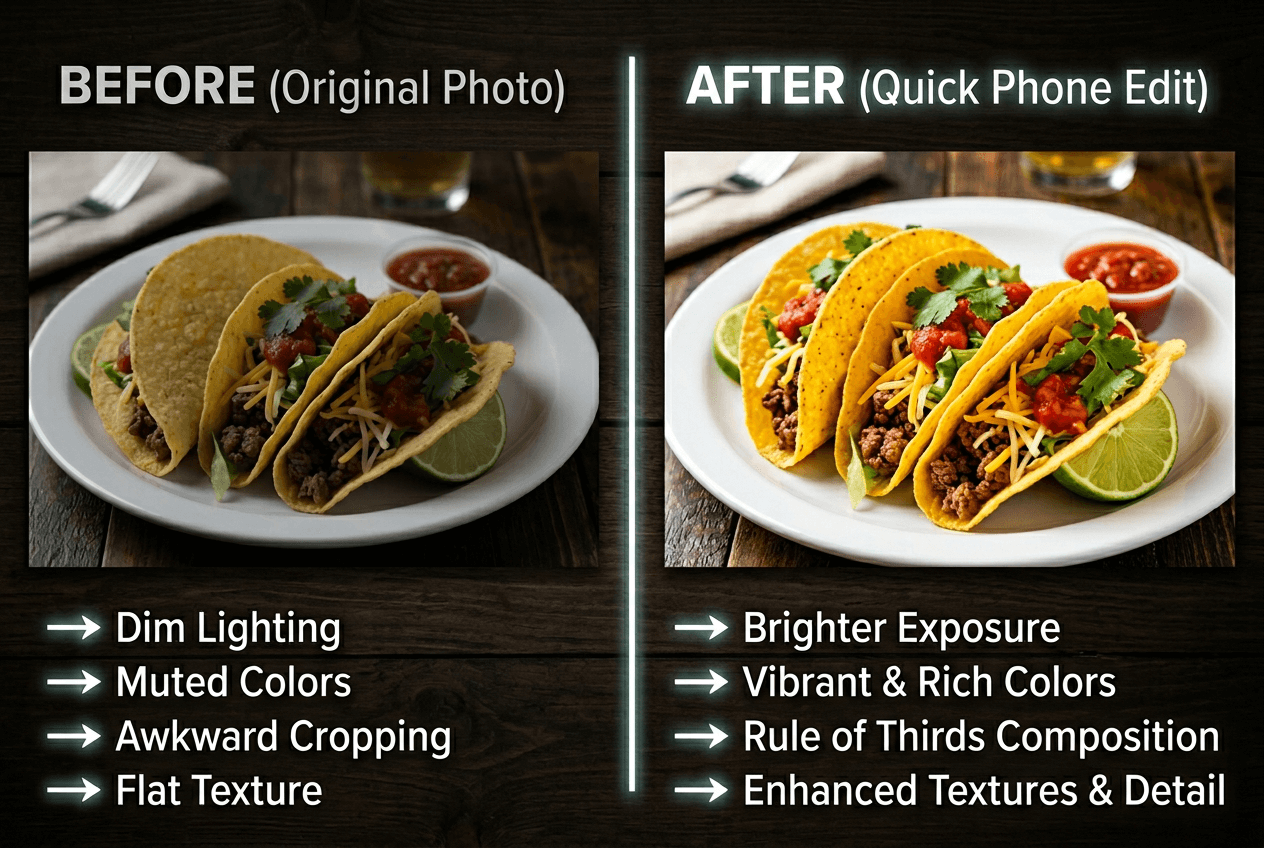 Before and after comparison of phone food photo editing showing improved brightness, colors, and cropping on tacos
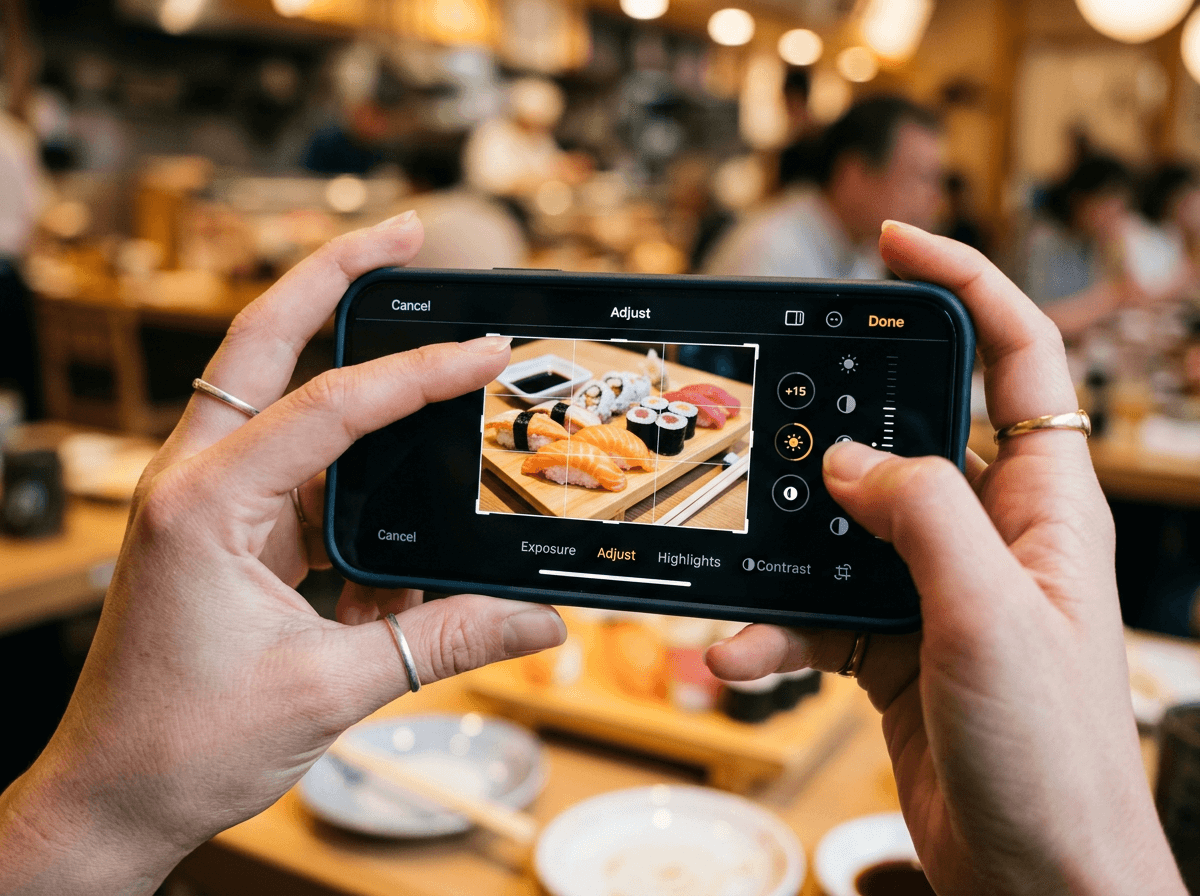 Hands using smartphone built-in photo editor to crop and brighten a food photo of sushi rolls
Step 8: The AI Boost — From Good to Professional
Steps 1–7 make your food photos with phone look dramatically better. But here's where restaurant owners get the biggest return.
Upload your best shot to FoodShot AI and watch it transform into a genuinely professional image — the kind you'd expect from a $500–$1,500 photoshoot. In about 90 seconds.
What AI food photography does that phone editing can't:
- 30+ style presets optimized for specific uses — Restaurant, Delivery, Fine Dining, Instagram. Each adjusts lighting, color grading, and presentation.
- Background replacement — swap your kitchen counter for a clean, branded setting. Consistent backdrops across your entire menu.
- Lighting correction — AI fixes uneven light, color casts, and shadows that manual editing can't resolve.
- Presentation polish — cleans up imperfections and optimizes how the food looks on the plate.
- Social media templates — generate Instagram posts, Pinterest pins, and delivery app banners from the same photo.
The cost math is striking. Professional food photography averages $500–$1,500 per session. FoodShot starts at $15/month for 25 image generations — roughly $0.60 per professional-quality photo.
If you're listing on Uber Eats, DoorDash, or Grubhub, professional photos directly impact order volume. As TechRadar reports, even professional photographers now prefer iPhone shots for certain food content. AI lets you produce delivery-ready images for your full menu in an afternoon. Learn more about AI food photography and how it works.
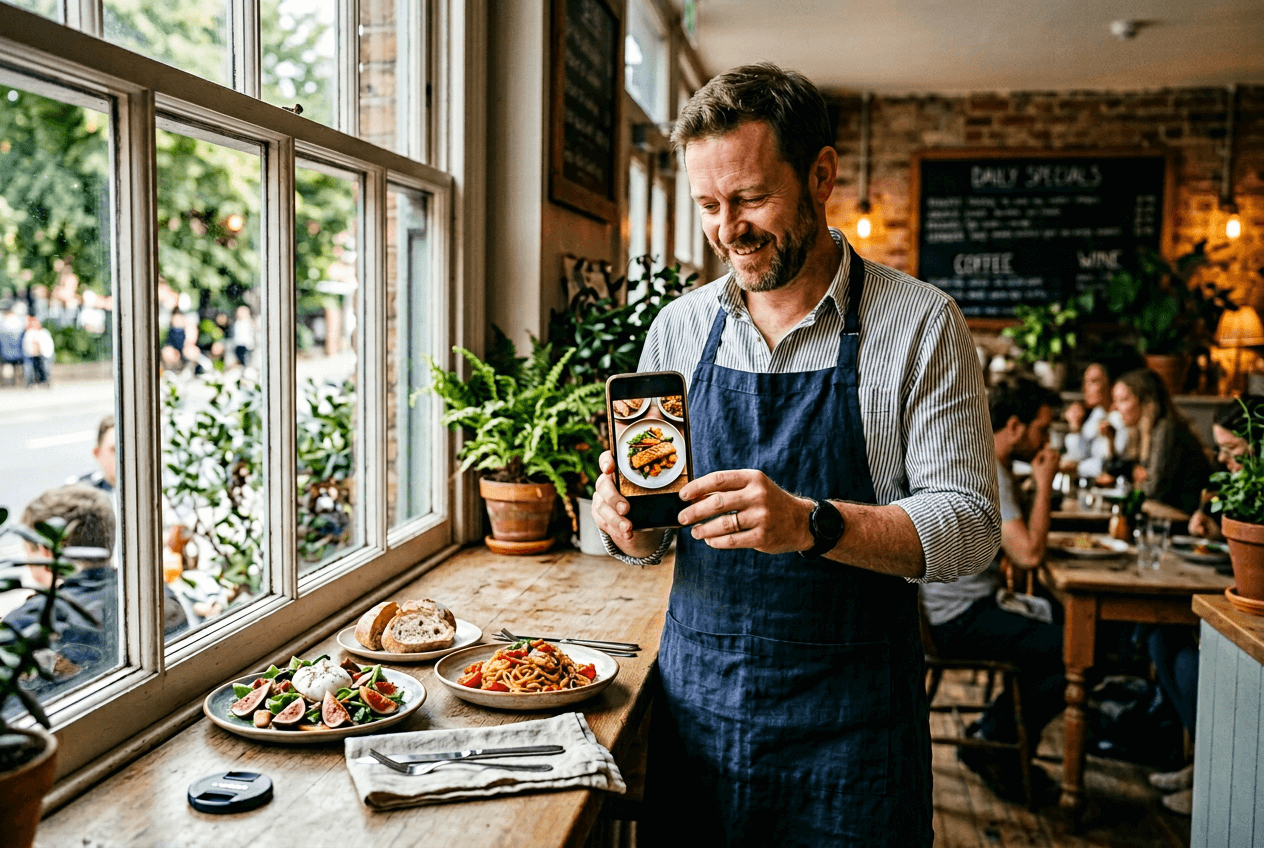 Restaurant owner reviewing food photos on phone near a window light setup in a café kitchen
Quick Reference: Which Angle for Which Dish?
| Dish Type | Best Angle | Pro Tip |
|---|---|---|
| Pizza, salads, grain bowls | Overhead (flat-lay) | Keep flat, shoot all ingredients from above |
| Burgers, pasta, cake, sandwiches | 45-degree | Show the layers and height |
| Cocktails, milkshakes, tall desserts | Eye-level (straight on) | Get phone camera down to table height |
| Soups, curries, noodles | 45-degree or overhead | Depends on garnish and bowl depth |
| Charcuterie, sushi platters | Overhead | Show the full spread |
Bookmark this table for your next food photography session.
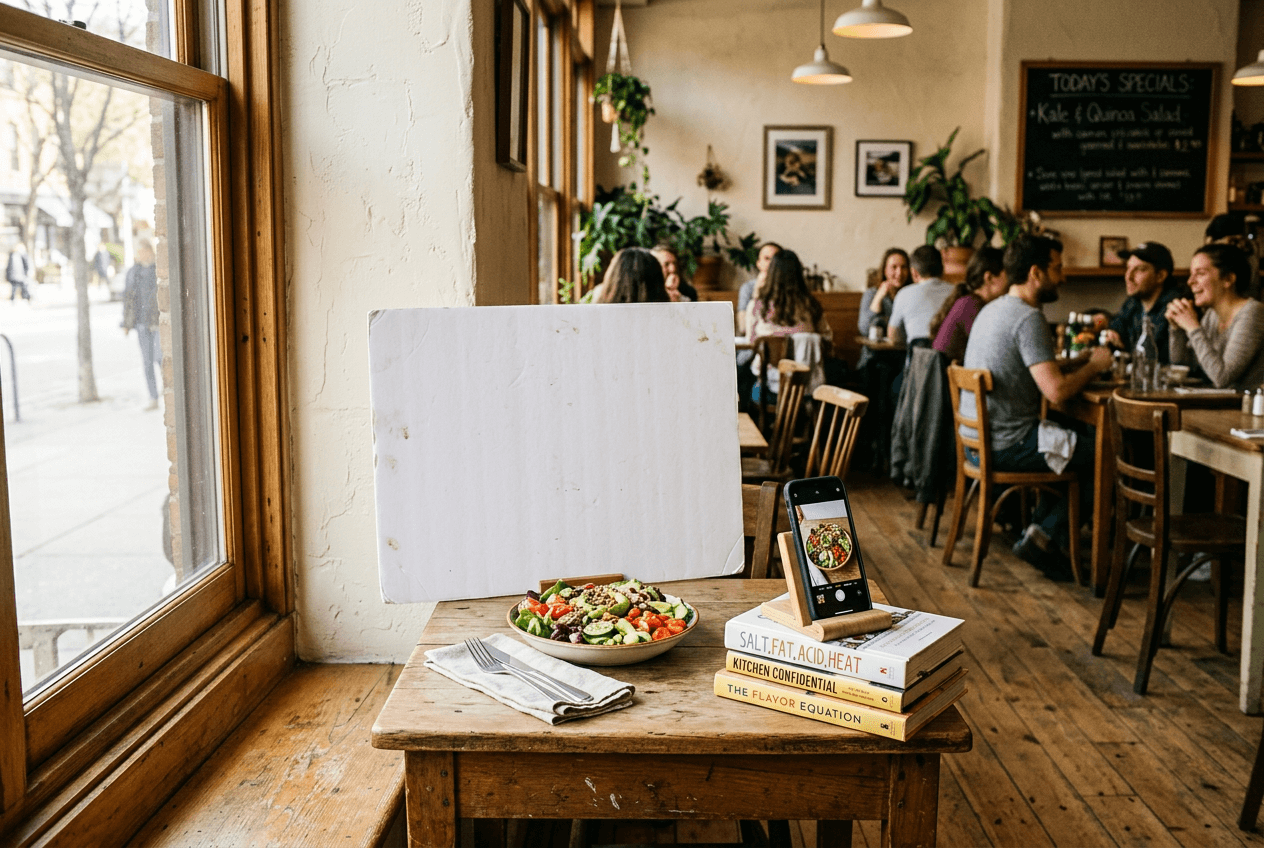 Restaurant photo station setup near a bright window with a plated salad, reflector board, and smartphone ready for food photography
Frequently Asked Questions
Do I need an expensive iPhone or phone for food photography?
No. Any smartphone from the last 3–4 years has a camera capable of shooting great food photos. The iPhone 14 and newer, Samsung Galaxy S23+, Google Pixel 7, and their successors all produce excellent images in good light. Technique — especially lighting and composition — matters far more than which phone model or camera you're using.
What's the best time of day to shoot food photos?
Whenever natural window light is strongest — typically mid-morning to early afternoon. Avoid shooting during dinner service when you're relying on artificial lighting. Set up a "photo station" near your best window and photograph new dishes during the daytime lull.
Should I use flash for food photography?
Never. The built-in phone flash creates harsh, flat light that washes out colors and makes food look clinical. Always use natural light. If you're stuck in a dim space, have someone hold a phone flashlight from the side (not above) as a supplementary light source.
How do I take food photos with phone in a dark restaurant?
This is the toughest challenge in phone food photography. If you can't move near a window: increase your camera exposure before shooting, have a friend shine a flashlight from the side, and brighten in editing. For best results, photograph new menu items during daylight and let FoodShot AI handle the lighting correction.
Can phone photos work for delivery app listings?
Absolutely. Uber Eats, DoorDash, and Grubhub accept smartphone photos. They care about image quality — sharp, well-lit, appetizing — not what camera captured it. Follow these 8 steps and your images will meet platform requirements. For extra polish, run them through FoodShot AI to match top-performing listings. See our food photography tips for more techniques.
