
Ice Cream Photography: Beat the Melt with Pro Tricks
 Ali Tanis22 min read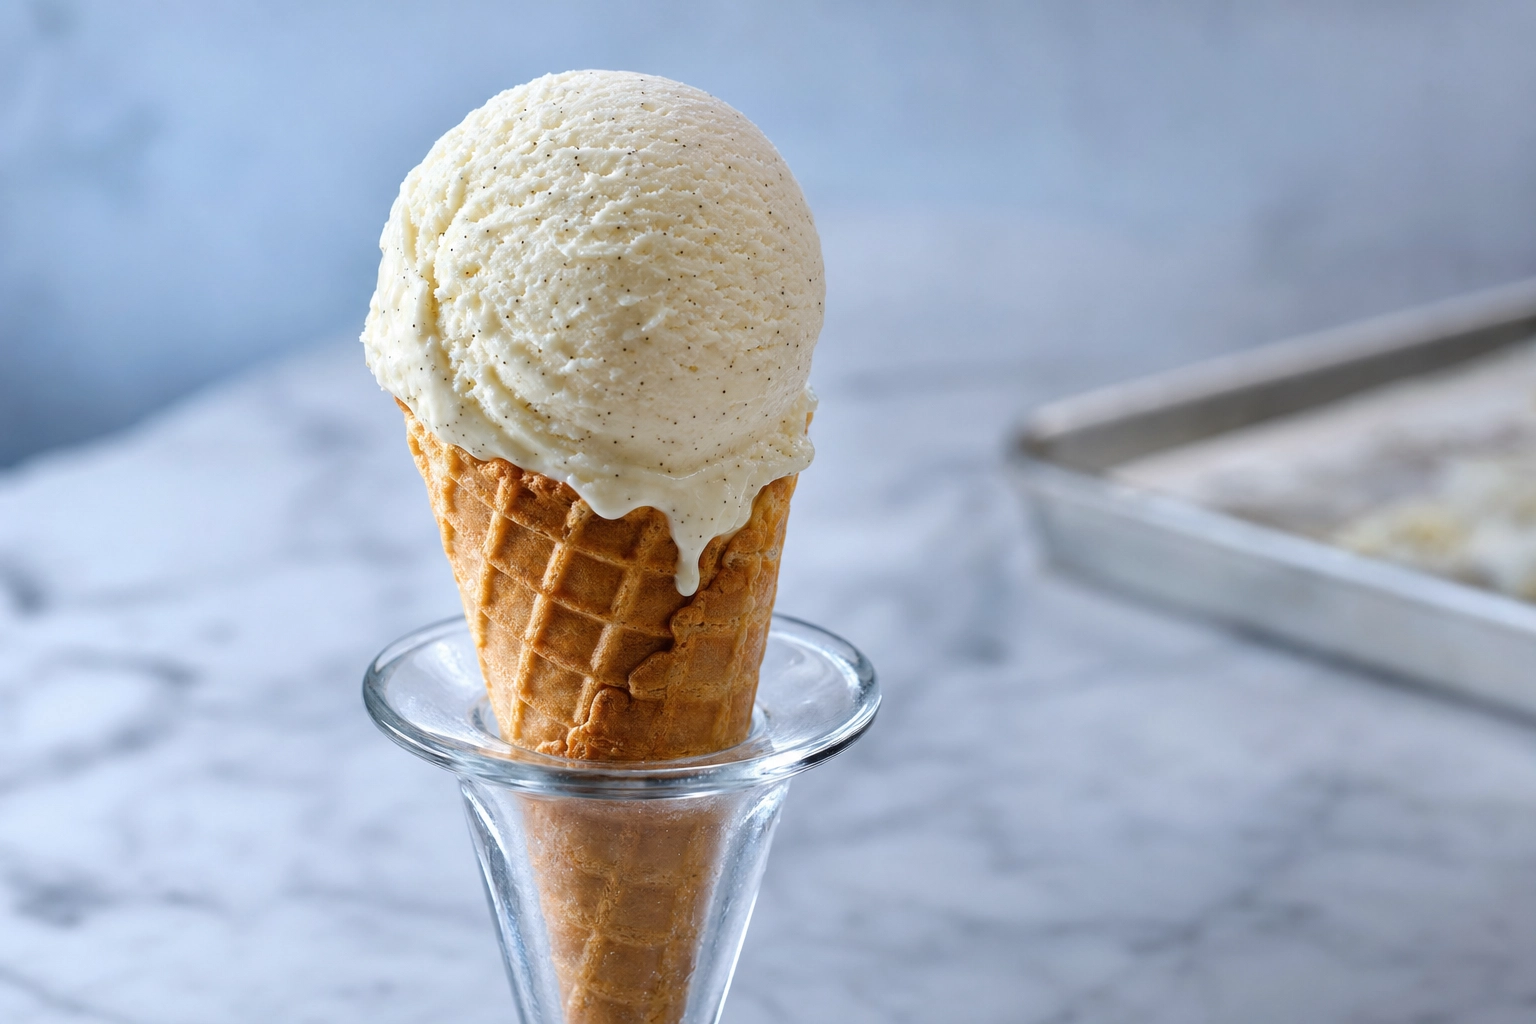
Ice cream photography is the most punishing job in the entire food photography world. Steak holds. Pasta holds. A burger will sit on a board for half an hour and still look great. A scoop of ice cream gives you about 90 seconds before the edges blur and the surface starts to glisten the wrong way — and another 60 seconds after that before it's a puddle.
That short window is why scoop shops, gelaterias, and frozen dessert brands either pay $2,400+ for a professional shoot or end up posting blurry phone shots that hurt their menu. Neither is the right answer.
This is the working ice cream shop guide to ice cream photography — the same tips and techniques food stylists use, adapted for a busy counter where you can't shut down for a day. You'll learn the pre-scoop trick, when fake ice cream is actually legal, how to light cold subjects without cooking them, and the AI workflow that lets a single phone snap become a full 40-flavor menu.
Quick Summary: Real ice cream gives you 2-5 minutes from freezer to puddle under normal indoor light, and as little as 30 seconds under hot studio lamps. The fix is workflow: pre-scoop dollops and refreeze, style the scene with a stand-in before the ice cream comes out, use cool indirect light or strobe, and capture the shot within 90 seconds. For multi-flavor menus, an AI food photo editor can transform one rough phone shot per flavor into a consistent set — without the melt race.
The 3-Minute Melt Window: Why Ice Cream Is the Hardest Food to Shoot
Most food photography problems are about styling. Ice cream photography is about physics.
A standard premium ice cream (around 14-16% butterfat) starts visibly softening at the surface within 60-90 seconds in a 70°F room. Add a couple of LED lights or a modeling lamp and that drops to 30-45 seconds. Sorbet and soft-serve, with higher water content and warmer serving temperatures, melt even faster — soft-serve falls in about 30 seconds the moment it leaves the machine.
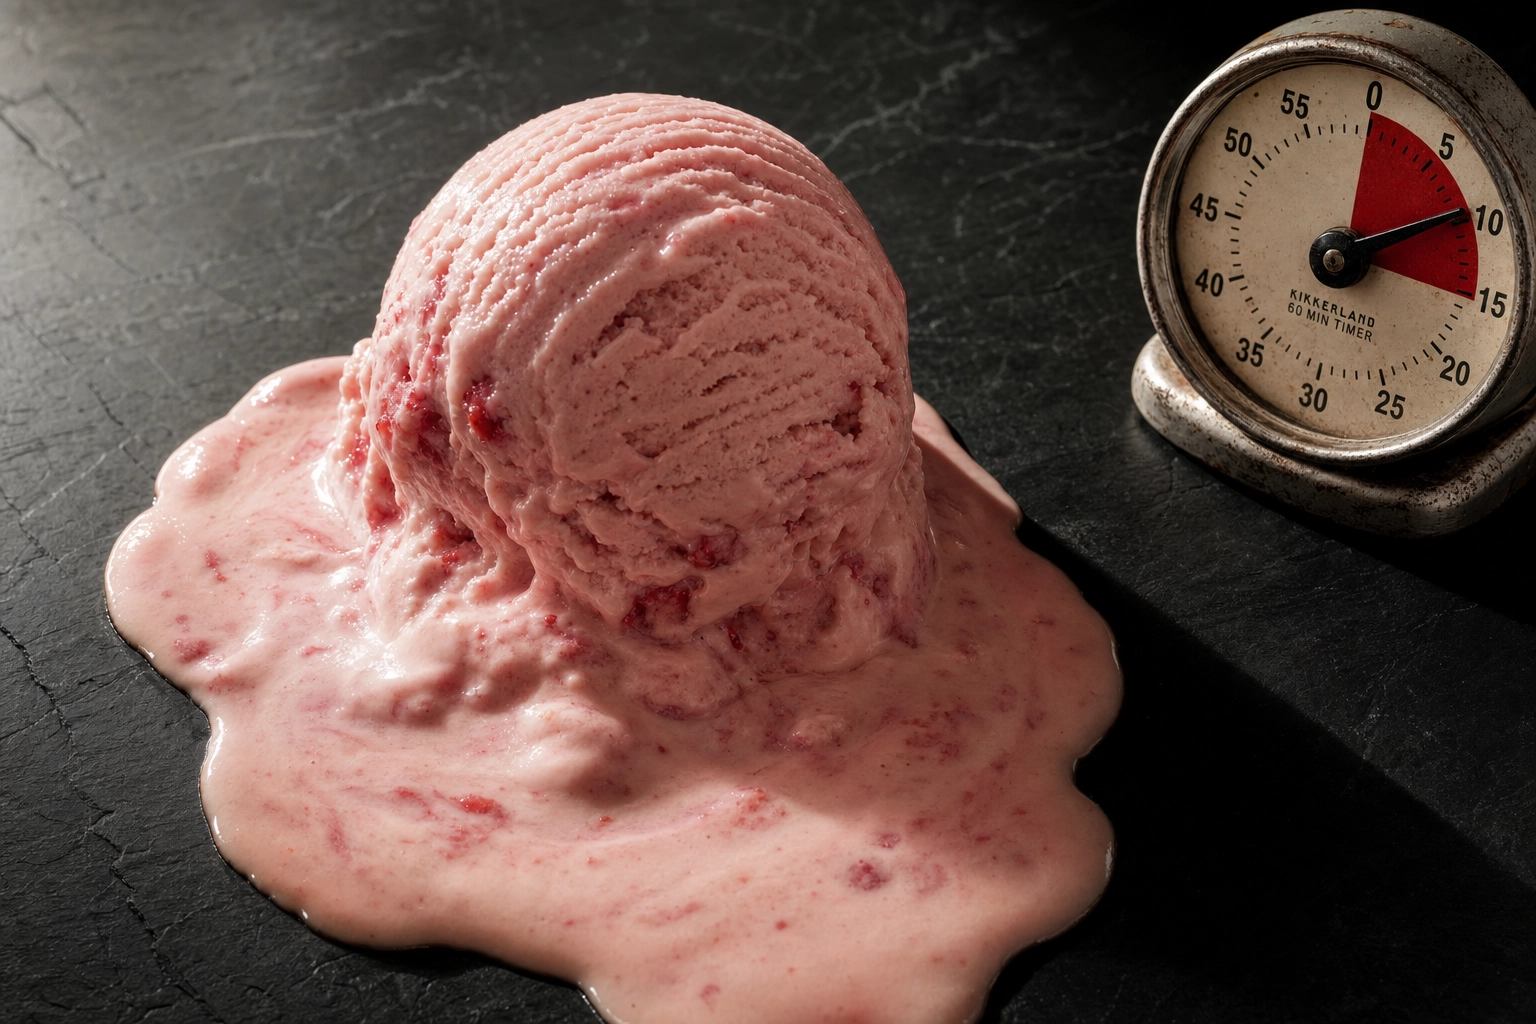 Melted strawberry ice cream scoop dissolving on dark slate with analog timer, the cost of missing the photography window
What that means in practice: by the time you've adjusted exposure, fixed a topping, and asked your assistant to move the reflector six inches, the shot is gone. Drips have formed. The scoop has lost its ridges. The colors have started to blend into each other.
Professional food stylists deal with this by spending 80% of the shoot prepping and 20% actually photographing. Reddit's r/productphotography threads are full of ice cream shop owners who got quoted $2,400-$10,000 for a single menu shoot — and that's the going rate precisely because the work happens before the perfect scoop ever appears on camera.
The good news: the same prep-first ice cream photography tips work on a small counter with a phone. You just need to know what to set up and in what order.
Build Your Scene Before the Ice Cream Comes Out
Every working food stylist follows the same rule for melt-prone subjects: style first, plate second. Get the entire scene — props, lighting, focus, exposure, composition — finished and locked using something that isn't ice cream. Only when everything is dialed in does the actual scoop go in.
The stand-in can be anything roughly the right shape and color:
- Scrunched-up tissue paper rolled into a ball, dusted with a little flour or sugar for highlights
- Paper towels wadded into a sphere
- A scoop of mashed potato (more on this later)
- Sour cream piped from a bag — surprisingly close to soft-serve in shape
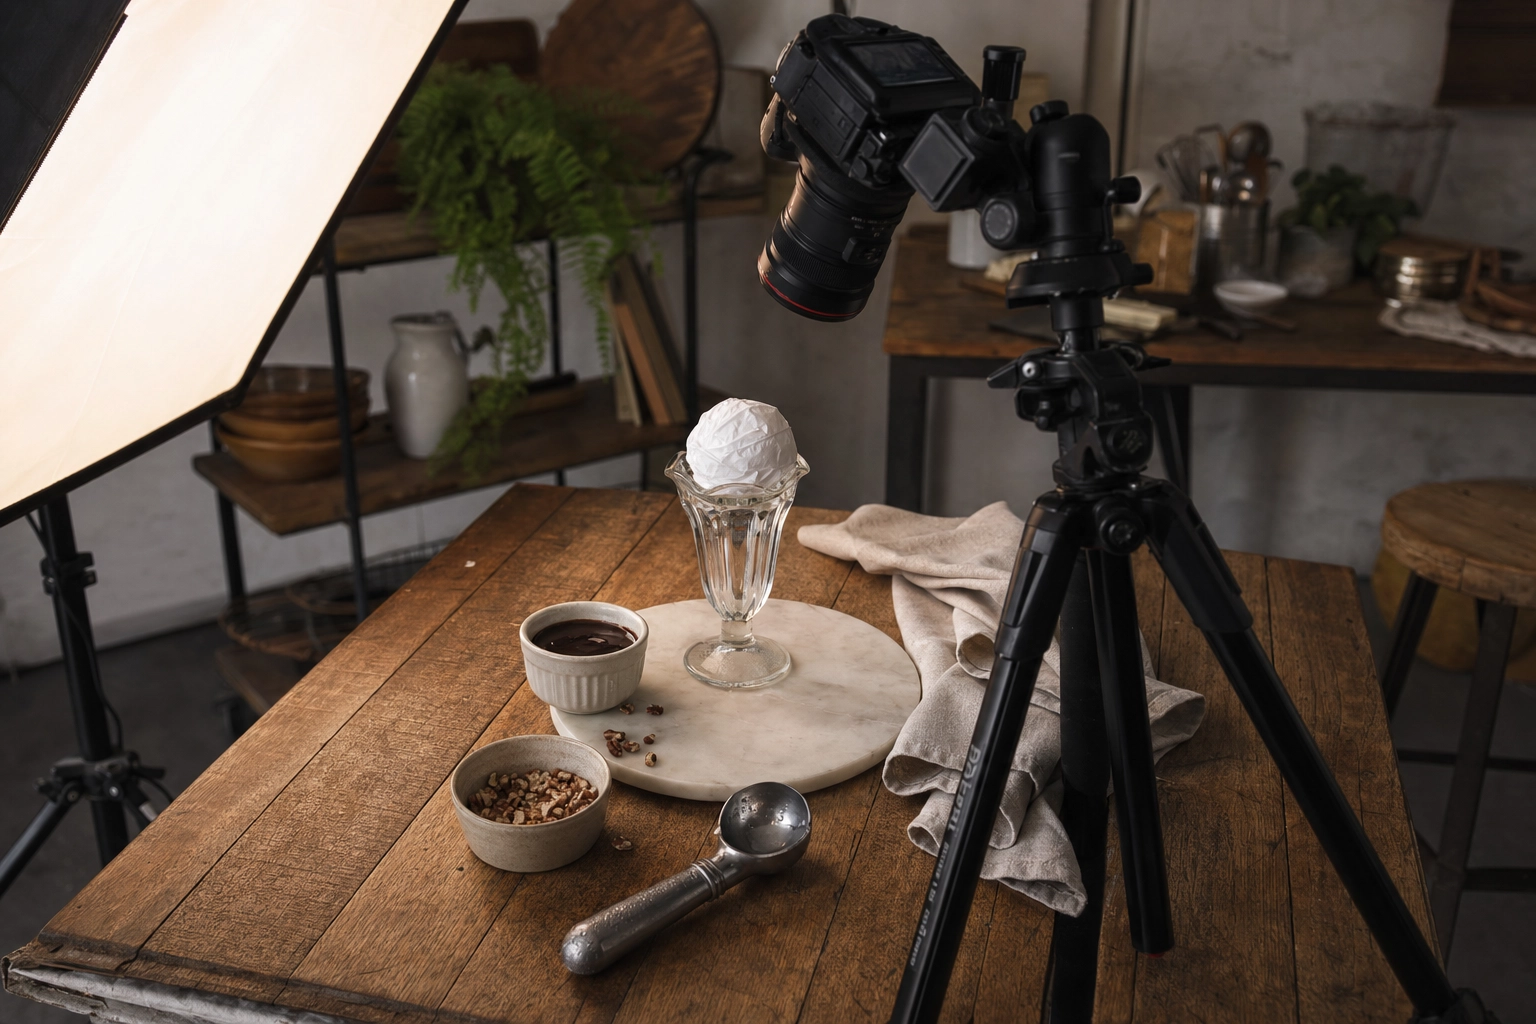 Behind-the-scenes food photography setup with paper towel stand-in in sundae glass before ice cream goes in
Use the stand-in to do three jobs: lock focus (especially important if you're shooting manual), nail the exposure, and confirm the composition works. When it does, leave the stand-in there until the literal second before you swap in the real scoop.
While the scene is being built, every prop that touches the ice cream needs to be cold:
- Bowls, glasses, sundae dishes — straight from the freezer, minimum 30 minutes
- The surface or board the scene sits on — pre-chill with an ice pack underneath if it's a non-porous surface
- Garnish ingredients (chocolate sauce, whipped cream) — keep them cold but pourable
- The cone, if you're shooting one — counterintuitively, cones are less prone to absorbing melt-water if they're chilled
Get the camera on a tripod. Lock focus on the stand-in. Set exposure. Have the shutter remote in one hand and the perfect scoop in the other. From here on, the goal is to spend zero time on settings once the real ice cream appears.
The Pre-Scoop Trick That Saves Every Shoot
This is the single biggest workflow shift between amateur and pro ice cream photography.
Instead of scooping into the scene live and praying for the perfect shape, you scoop ahead of time, freeze the scoops solid, and place a pre-formed dollop into the scene at shoot moment. It's the same logic as plating from a steam table versus cooking to order — you trade real-time pressure for prep.
Here's the method:
- Line a sheet pan with parchment paper.
- Let your ice cream temper at room temp for 8-10 minutes — rock-solid ice cream scoops poorly and the surface looks chewed up.
- Run your scoop (a cookie scoop or ice cream disher both work; cookie scoops give more uniform spheres) under 110°F water between every dollop. Wipe it dry.
- Drag the scoop across the surface in one long uninterrupted motion. Pack tight — air pockets cause sag and uneven melt.
- Place each scoop on the parchment-lined pan, leaving an inch of space between them.
- Freeze the tray, uncovered, for at least 30 minutes. An hour is better.
When shoot time arrives, you can audition scoops. Some will have a dent, a fingerprint, a chipped edge. Skip those. Photograph only the A+ ones.
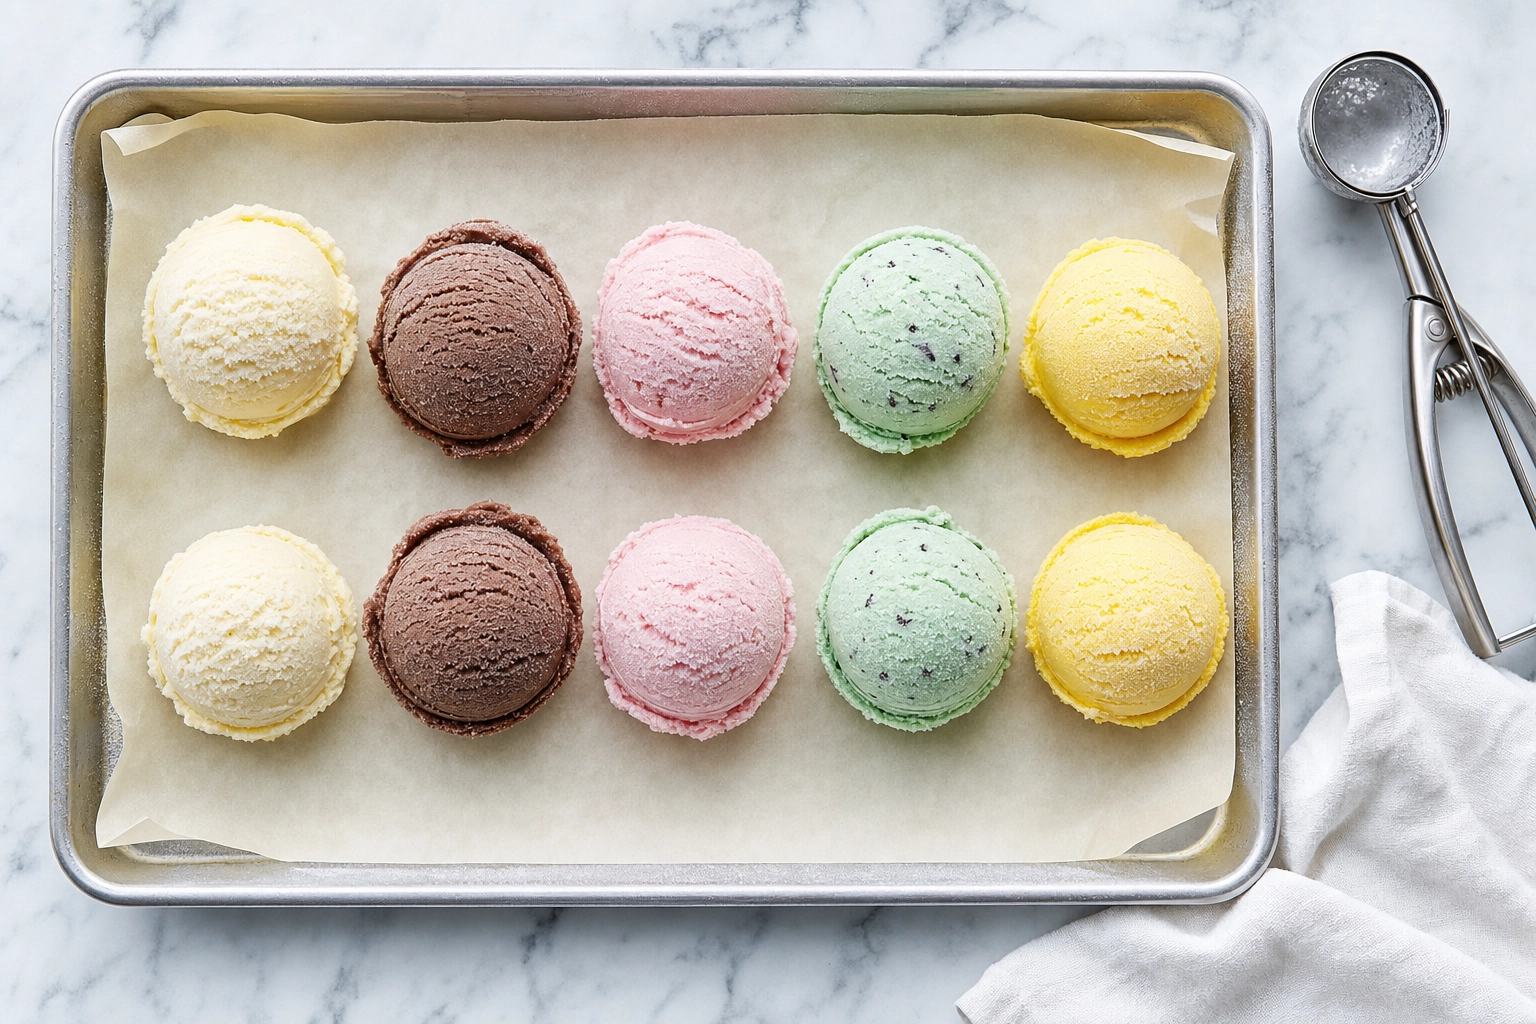 Overhead view of pre-scooped ice cream dollops in five flavors on parchment-lined sheet pan ready to refreeze
A long shallow vessel — a 9x5 loaf pan or a sheet cake pan — works better as a scooping container than a deli container or pint, because you get enough surface area for a clean dragging motion. Cookbook teams at Food52 noted exactly this: pints store well in retail but scoop badly for ice cream photography.
The other advantage of pre-scoops: you can stage them while the camera is being set up. By the time the lights are right, you've got 10 perfect dollops waiting in the freezer.
Editorial Alternatives: When (and When Not) to Fake It
The mashed-potato trick is the most famous ice cream photography hack on the internet. It's also the most misunderstood — because the legal line matters.
Truth-in-advertising rules state that any commercial photograph used to sell a specific brand of ice cream must show that actual brand's actual product. You can't run a Häagen-Dazs ad with a mashed-potato scoop. You can't sell your shop's "Madagascar Vanilla" with a frosting stand-in. If a customer can prove the photo misrepresents what they're buying, you have a problem.
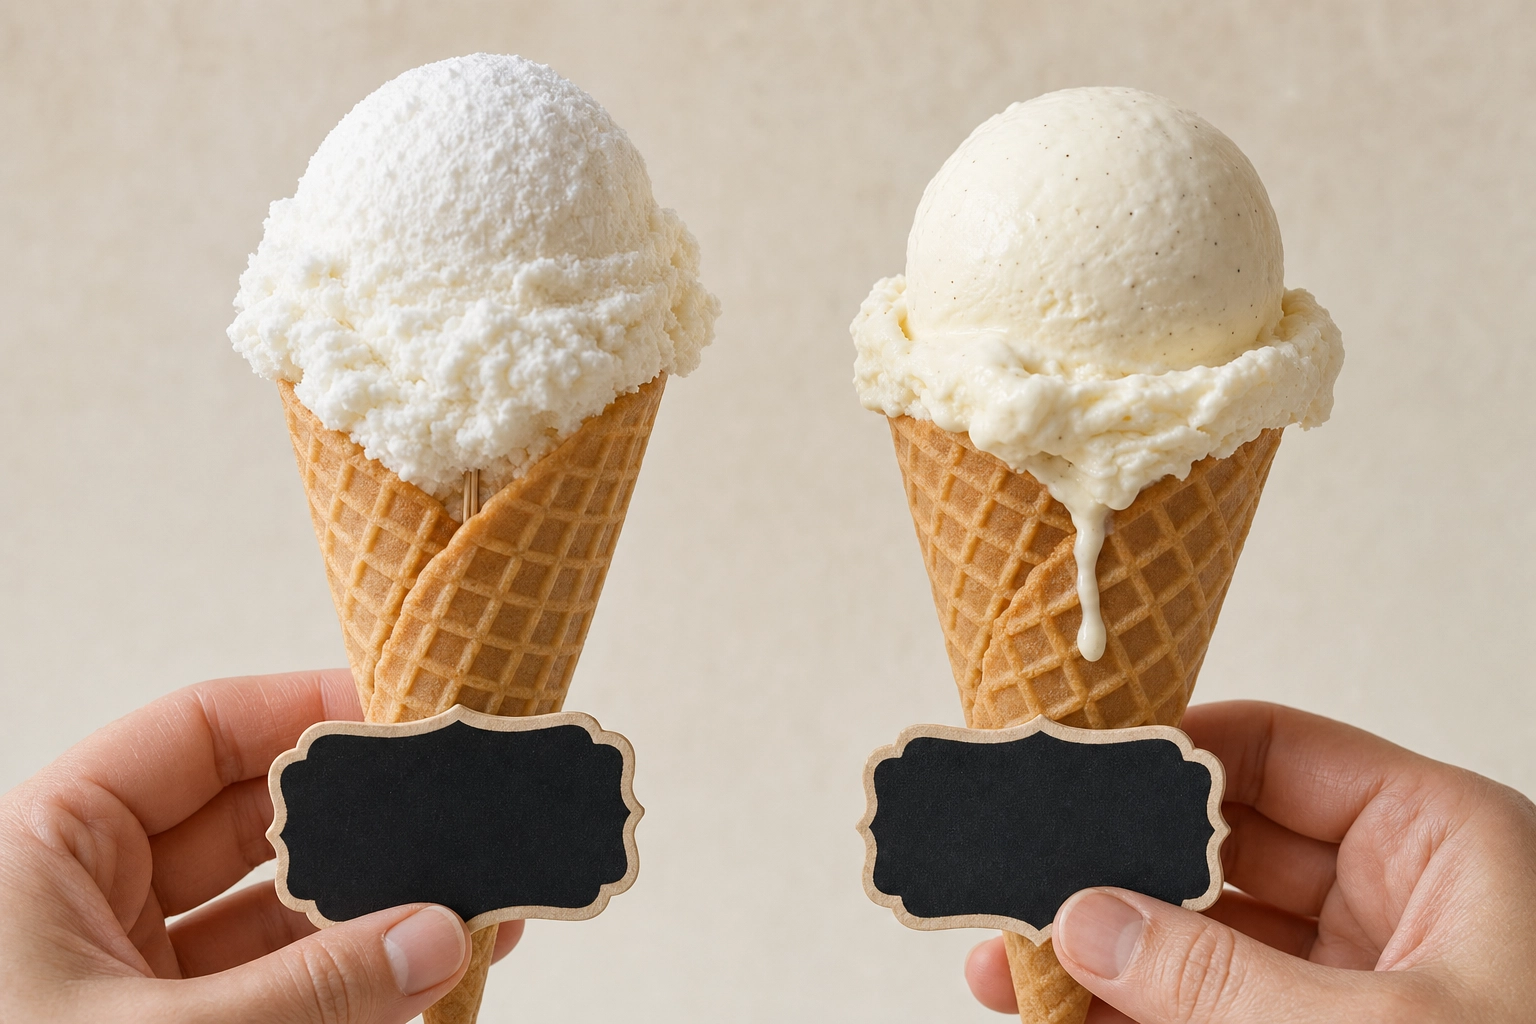 Side-by-side comparison of mashed potato fake scoop versus real ice cream on waffle cones, food styling trick reveal
What is fair game:
- Editorial content (your food blog, a magazine, a cookbook) — fake ice cream is standard practice
- Your own restaurant or shop menu — generally treated as illustrative, though check your local jurisdiction; some food authorities (UK Trading Standards, FTC in the US) take a strict view of "materially misleading" menu imagery
- Concept and mood shoots — abstract, artistic, or thematic content where the product isn't the literal sale subject
For those cases, here are the two stand-in recipes professional stylists actually use.
The mashed-potato method (per Canon Asia's commercial guide): Mix instant mashed potato flakes with cold water until they reach a thick, scoop-able consistency. Add a tablespoon of softened butter per cup of potato to give it a slight "starting to melt" sheen. Tint with gel food coloring (gel, not liquid — liquid breaks the structure). Dip the scoop in cool water between each dollop to get a more realistic scooped texture. A toothpick run vertically through the scoop stabilizes it on a cone.
The frosting method: Mix one can of pre-made frosting with about 2.5 cups of powdered sugar. The result is dense, holds peaks and "bark" texture, and reads as ice cream even at close range. Heavy cream brushed around the edge mimics melt drip. The frosting method is popular for hot-climate shoots — it's what stylists use in Costa Rica, Singapore, and Texas summer.
But here's the honest truth for scoop shop owners reading this: if your shop sells real ice cream, fake it on your menu and a single eagle-eyed customer with a TikTok account becomes a problem. This is exactly where AI-edited photos of real ice cream sit in a useful middle ground — it's your actual scoop, just professionally lit and styled after the fact.
Lighting Cold Subjects Without Cooking Them
Lighting is where most DIY ice cream photography falls apart. Hot lights radiate heat. Heat melts ice cream. The faster you can light a subject without warming it, the longer your shooting window.
Use flash or strobe whenever possible. A single strobe pop is 1/1000th of a second of light exposure — effectively zero thermal load on the subject. This is the single biggest reason commercial ice cream photography uses strobes. Modeling lamps (the continuous bulb inside a strobe that lets you preview the light) should be set to minimum or switched off entirely between exposures.
Avoid hot continuous lights. Old-school tungsten and high-wattage LEDs throw real heat. A simple test: if you can't comfortably hold your hand where the ice cream will sit for 60 seconds, that lamp is melting your shot.
North-facing window light is the cheapest professional-grade lighting available. It's cool (around 6000K), diffuse, and has zero thermal load. If you can shoot near a window without direct sun, you have a built-in studio.
Color temperature matters. Aim for daylight balance (5500-6500K). Warm tungsten-balanced light (3200K) gives ice cream a yellow cast that reads as "old" or "freezer-burned." Cool-to-neutral light makes scoops look fresh and just-served. If you're using mixed light sources, set a custom white balance using a gray card before the shoot.
Direction shapes the scoop. A 45-degree side light from above carves the ridges and curls of the scoop into visible texture — the difference between a flat white sphere and a tactile, dimensional dessert. Direct overhead light flattens everything. Direct front light kills depth.
Backlight is magic for translucent treats. Popsicles, sorbets, and Italian ice are partially see-through. A light source behind the subject (with a diffuser between light and subject) reveals the fruit chunks, crystal structure, and color saturation that defines them. A simple homemade trick: hold a white sheet of paper or thin acrylic behind the popsicle and bounce a bare strobe into it.
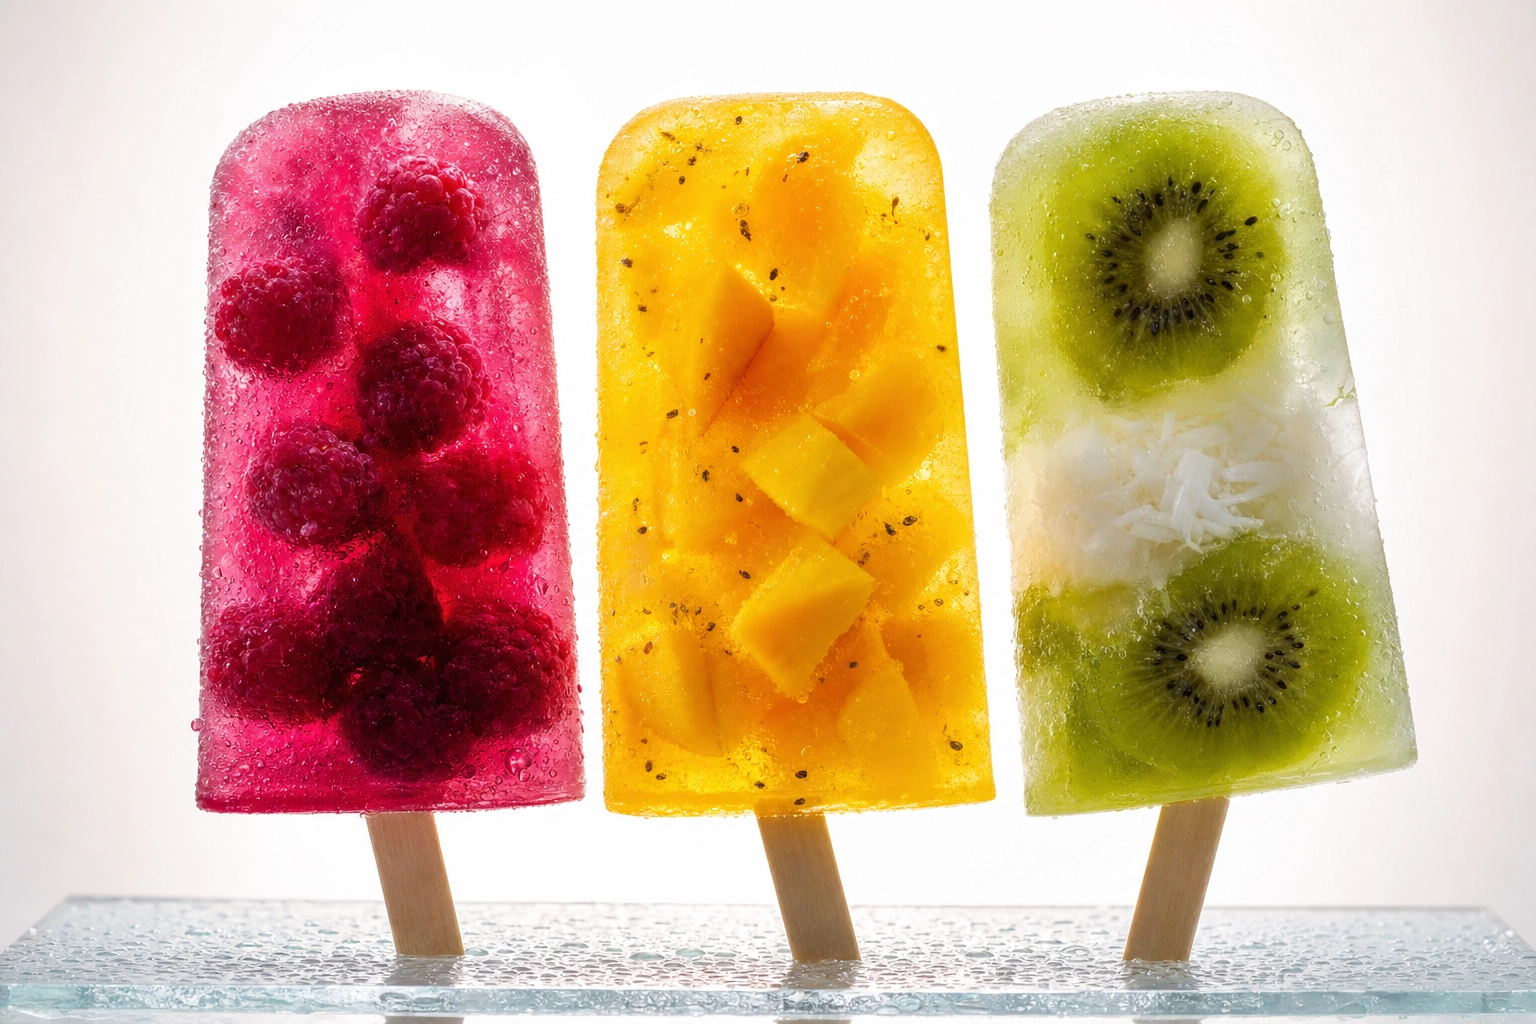 Three backlit fruit popsicles showing translucent berries mango and kiwi inclusions, backlighting technique
The Essential Ice Cream Shots Every Shop Needs
For a scoop shop or gelateria, you only need eight shot types to cover 95% of menu, social, and delivery app use cases. Plan for these, capture them in order from "easiest to hold" to "hardest to hold," and you'll never need to do this twice.
1. Single-scoop cone (the hero). The bread-and-butter shot. One scoop, one cone, one clean background. Eye-level or 15° above. This is what goes on the menu, the delivery thumbnail, the storefront sign. Shoot every flavor in this format first.
2. Sundae glass. Tall vertical composition. Toppings (sauce, nuts, cherry, whipped cream) cascading over the lip. Cherry on top last because gravity. Use a chilled coupe or footed sundae glass — visible glass walls add depth.
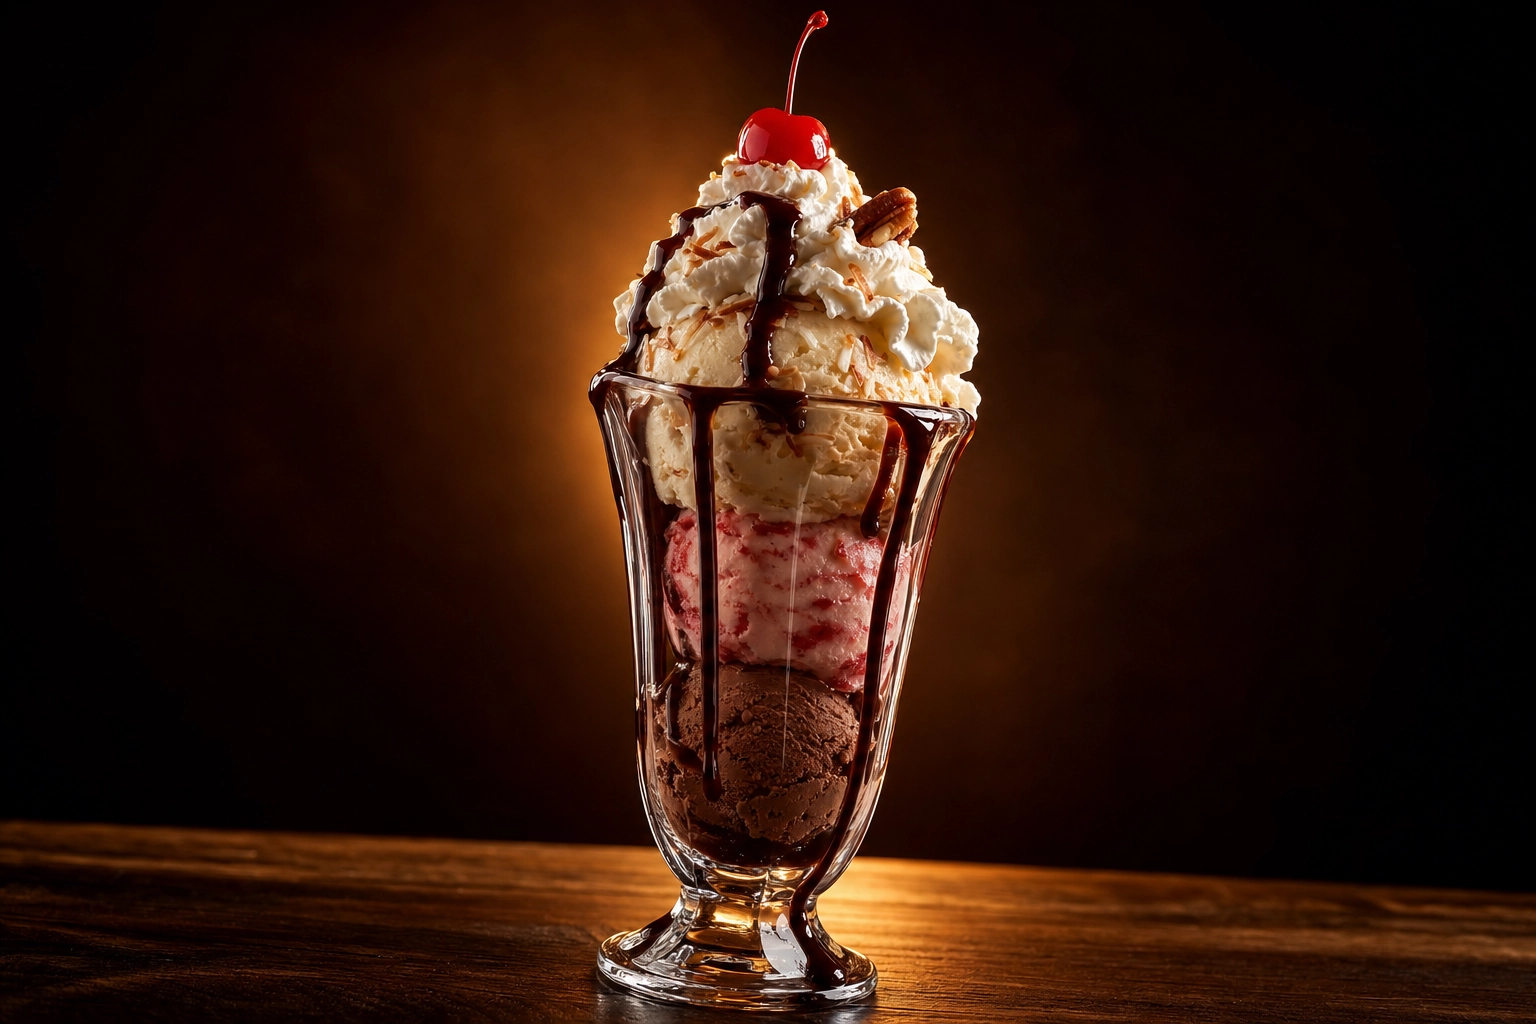 Tall sundae glass with three stacked scoops hot fudge cherry pecan and whipped cream, dramatic low angle ice cream photography
3. Pint hero with dipped scoop. Lid off, branded label facing camera, one perfect dollop sitting on top. This is your retail product shot, even if you don't sell pints — it works for "available to-go" social posts.
4. Scoop-in-action. The dynamic shot. Ice cream mid-pour into a sundae glass, or a scoop being transferred from disher to cone. Burst mode helps. This is your hero motion shot for video stills or Instagram reels.
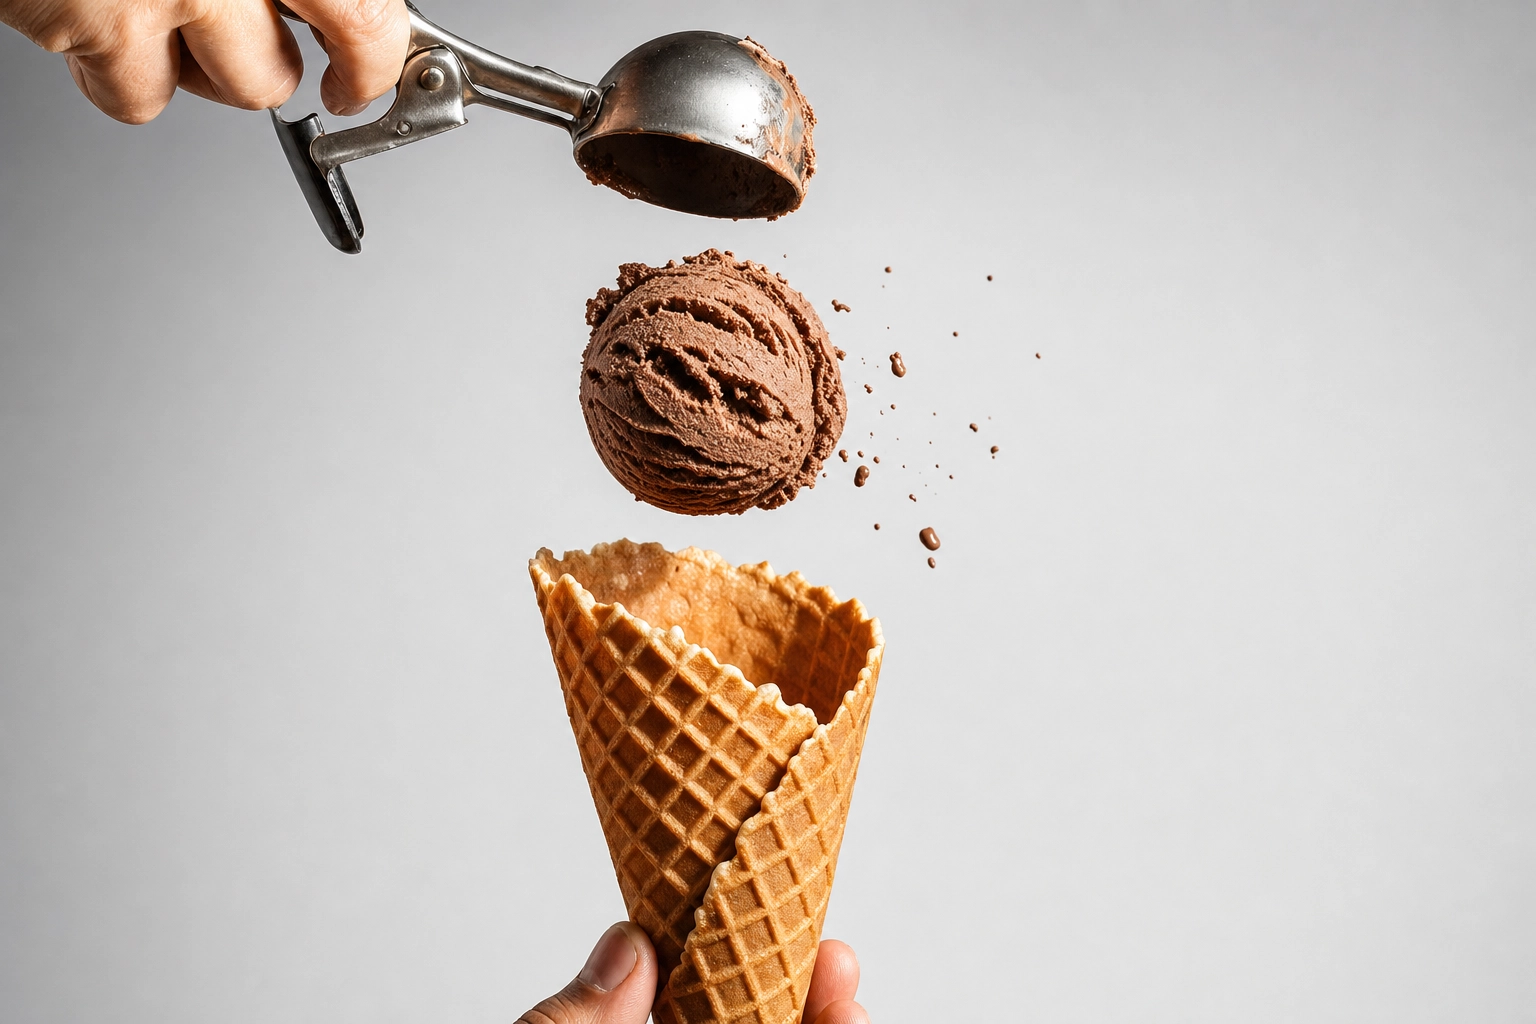 Chocolate ice cream scoop frozen mid-air falling toward waffle cone, action food photography motion shot
5. Melt-peak drip. The intentional artistic shot. Wait 60-90 seconds into the melt cycle until the very top of the scoop just starts to soften but the body still holds shape. One drip down the cone. This shot is taken last, on purpose, after you've banked the clean ones.
6. Multi-scoop tower. Two, three, or four scoops on one cone or in a bowl, showing flavor variety. Stack the densest scoop on bottom (chocolate, peanut butter), softest on top (sorbet). Otherwise gravity wins.
7. Display case wide shot. The customer-eye view of the pan-style gelato case or scoop shop bins. Shoot through the glass from a 30° downward angle. This is your storefront marketing asset — abundance sells.
8. Tasting flight. A row of small cups or mini-cones, each a different flavor. Sampler menus and flight specials need this. Keep cups in a perfectly straight line and use shallow depth of field so back cups blur into bokeh.
Ice Cream Type-Specific Tips
Not all frozen desserts behave the same. The workflow shifts by category, and so do the best ice cream photography tips for each one.
Gelato. Counterintuitively melts faster than ice cream, not slower. Gelato is served at 10-15°F warmer than American ice cream (around 10°F vs 0°F), so it's softer at serving temp. Shoot gelato in two ways: either inside the display case at -5°F (use a clean glass front, photograph through it with no flash bounce-back), or as ribbons and curls pulled from the pan with a spatula in a single elegant swoop. The spatula-curl shape is what makes a gelato photo look like gelato instead of ice cream.
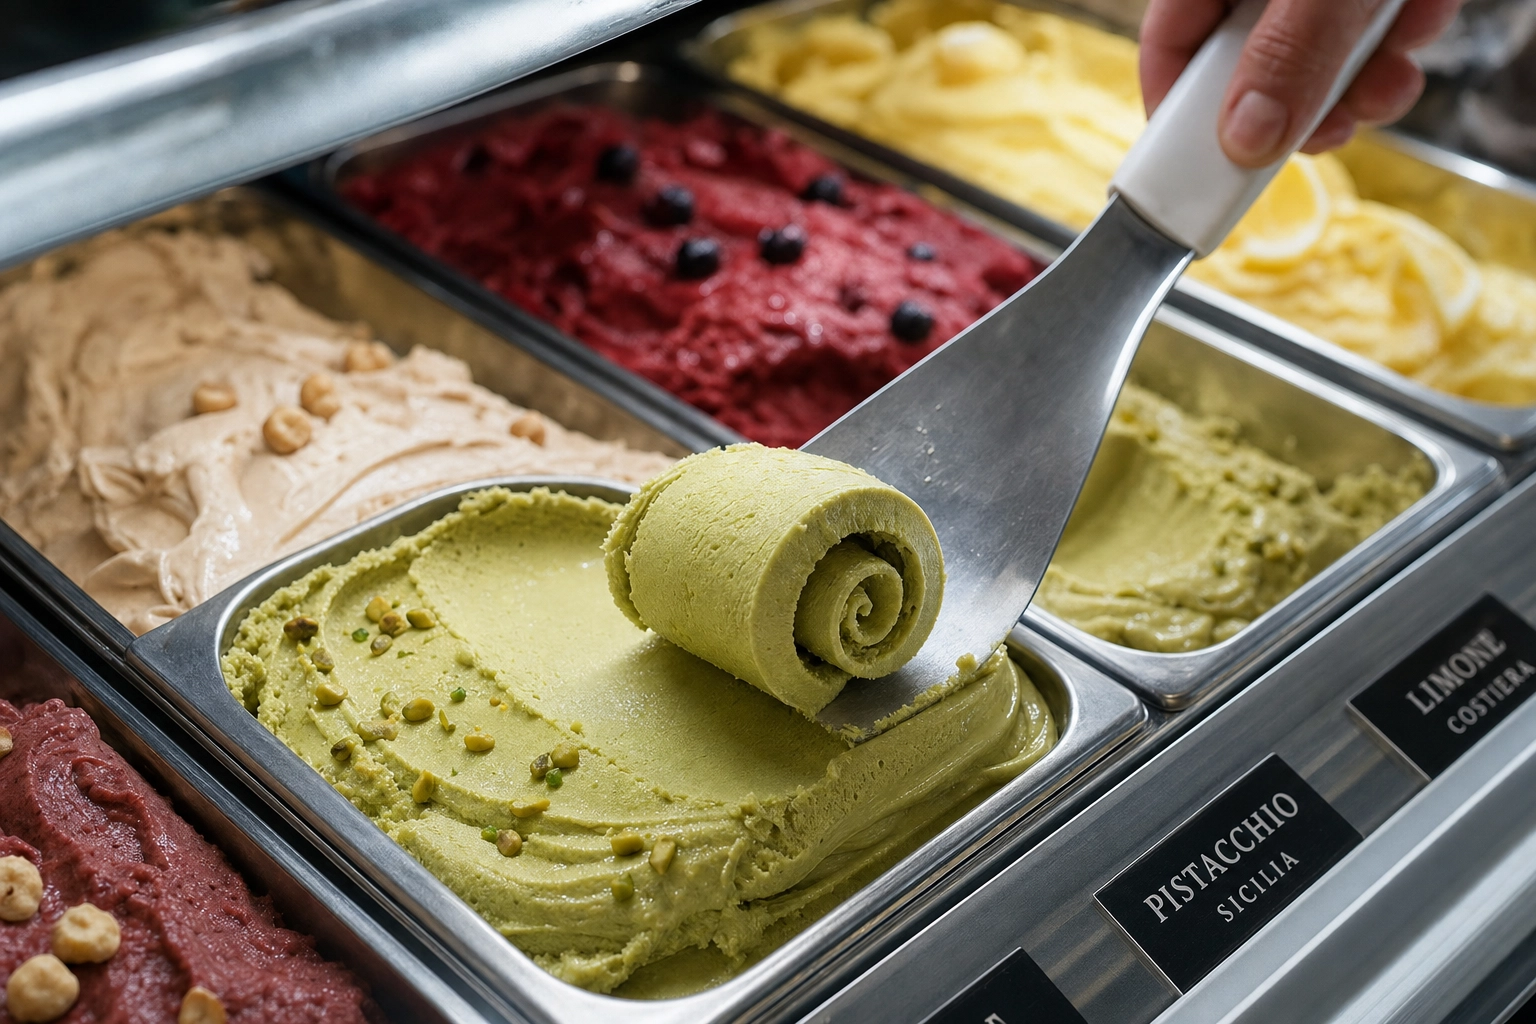 Pistachio gelato curl pulled by spatula from rectangular pan in Italian gelato display case, professional gelateria shot
Soft-serve. The 30-second nightmare of ice cream photography. Pipe it directly into a pre-frozen holder and shoot immediately. Backup: a piping bag loaded with stiff white frosting holds the perfect swirl shape indefinitely if you're staging editorial content. The signature swirl peak should curl forward toward camera, not away from it.
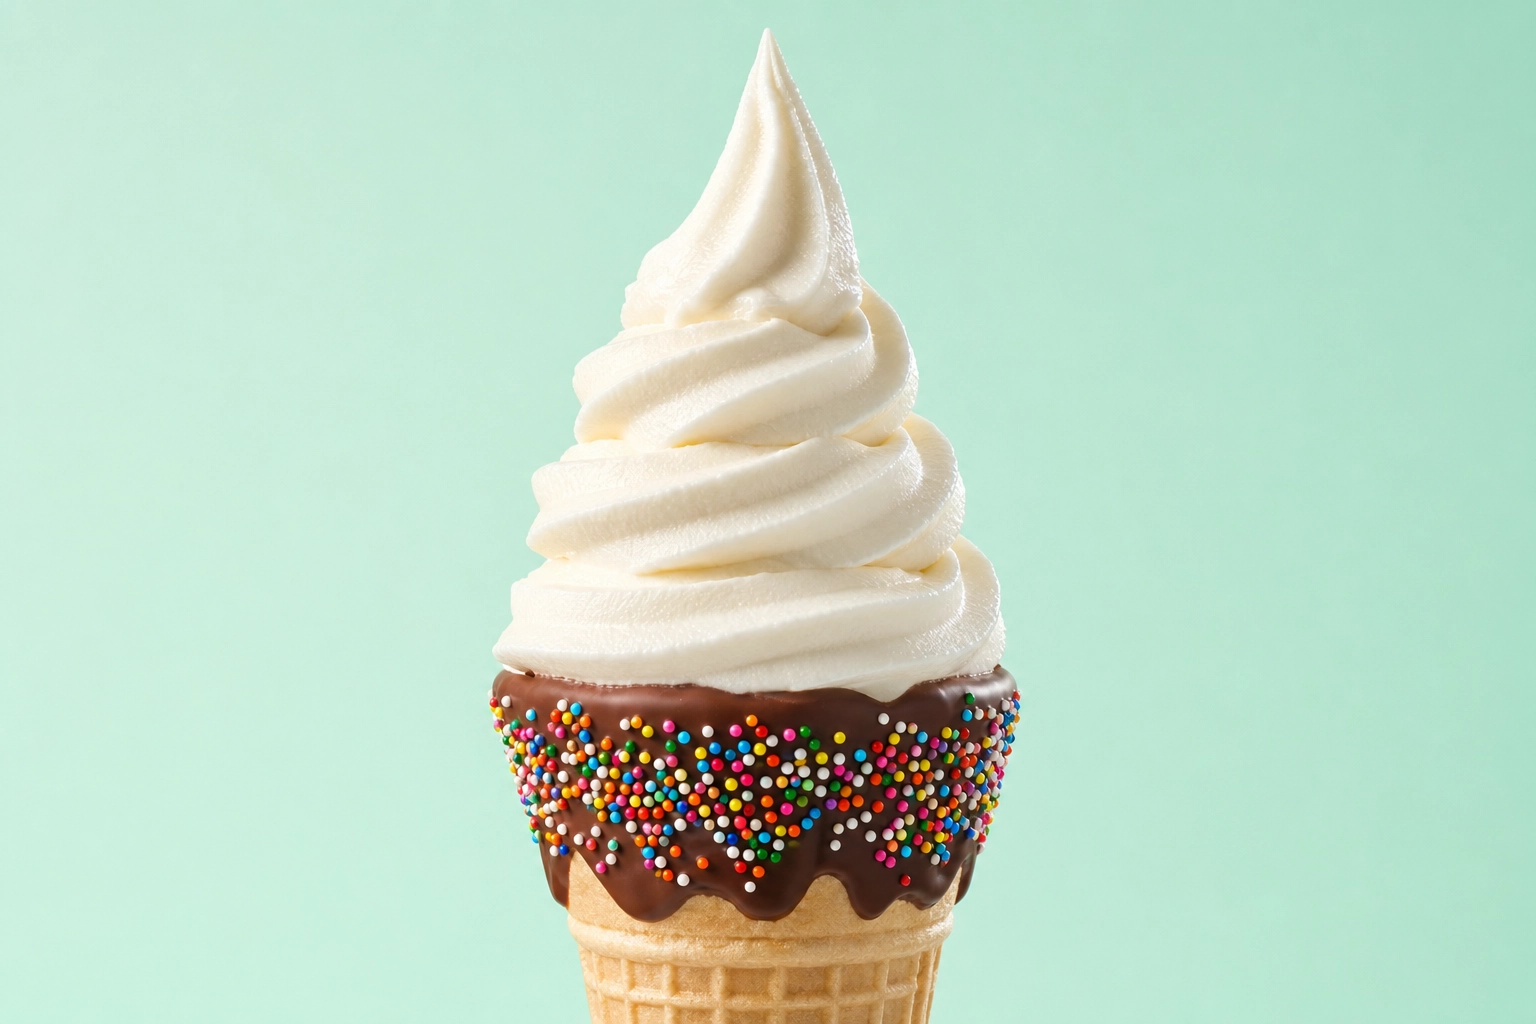 Vanilla soft-serve swirl with chocolate dip and rainbow sprinkles in sugar cone, retro ice cream parlor shot
Italian ice. Granular crystalline texture makes it more forgiving — it holds shape three to four times longer than soft cream-based dessert. Serve in fluted paper cups for color contrast. Photograph the surface from a 60° angle to catch the crystal facets.
Frozen yogurt. Workflow identical to soft-serve, but the yellow-cream undertone needs cooler light to read as fresh rather than dingy. Bump your white balance 200K cooler than you would for ice cream.
Sorbet. Highest water content of any frozen dessert, so it melts the fastest. Always shoot in a chilled glass coupe with a mint garnish (the mint covers the inevitable surface gloss within 60 seconds). Backlight reveals the color and gives sorbet its characteristic jewel-tone glow.
Popsicles. The most photo-friendly frozen format. The stick acts as a handle so you can reposition without touching the surface. Pre-freeze popsicles individually flat on a baking sheet. Backlit on a white acrylic sheet, the fruit inclusions and color gradients become the photo. The stick can be propped vertically or laid horizontally on a chilled tile.
Ice cream sandwiches. The structurally easiest of all. The two cookies compress the ice cream and hold it in shape mechanically. Pre-freeze the assembled sandwich for 30+ minutes before shoot. Stand vertically with the long edge facing camera so you see the layered cross-section. A slight gap between cookie and ice cream is fine — it reads as freshly bitten.
For deeper dives into related categories, see our donut photography guide and dessert photography guide.
The AI Workflow: How Scoop Shops Get 40 Consistent Menu Photos
Here's the part nobody else writes about.
A real scoop shop has 20-40 active flavors. A traditional commercial shoot to photograph all of them runs $2,400-$10,000 once you add a food stylist ($650-$1,200/day per The Bite Shot), a photo assistant ($500/day), studio rental, and props. And you have to redo it every time you change the seasonal menu.
The numbers don't work for an independent ice cream shop. They barely work for a small chain.
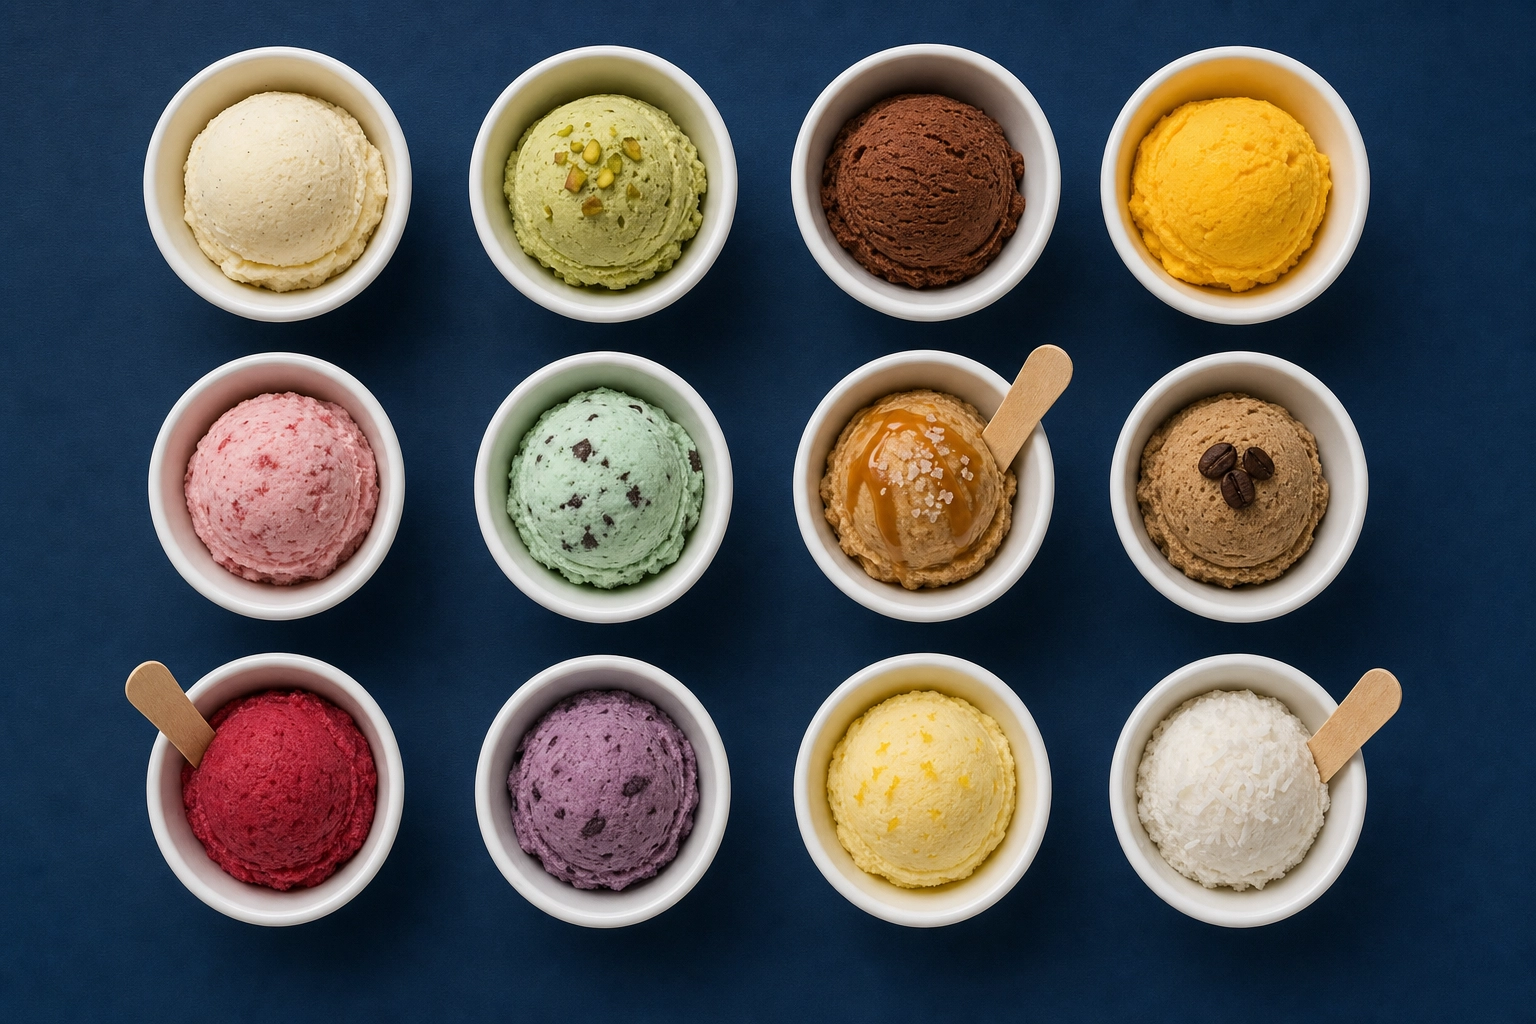 Overhead flat-lay of twelve ice cream flavors in white ramekins on navy background, multi-flavor menu workflow
The alternative is the AI ice cream photography workflow that's become standard for delivery-app-first food businesses over the last two years:
-
Shoot one rough phone photo per flavor. Pre-scoop, place on a simple plate or in a small bowl, snap from above with phone flash off. Aim for color accuracy and a recognizable shape — that's it. Each photo takes about 30 seconds, including the pre-scoop.
-
Upload to an AI food photo editor. A tool like FoodShot AI for scoop shops transforms the input photo into a professionally styled, consistently lit, menu-ready visual. Same background, same lighting, same plate, same angle — across every flavor.
-
Pick a style preset that matches your brand. Delivery thumbnail, fine-dining moody, bright social-media, vintage parlor — the same input photo can become any of those looks. For multi-location chains and franchises, a single uploaded reference photo locks the visual identity across all menu items.
-
Bulk process seasonal flavors when you launch them. Strawberry-rhubarb in May, pumpkin spice in October — each new flavor is one phone snap and one minute of processing away from being on the menu.
The economics: a $9-$59/month subscription replaces a $2,400-$10,000 shoot. The time: 40 flavors in about an hour versus a 1-2 day professional production. The consistency: every flavor looks like it came from the same studio, because in software terms, it did.
This is the same workflow used by bakeries, cafes, and dessert brands. For a deeper look at how to keep brand consistency across a menu of similar items, see our food styling guide. Bakery operators photographing pastries alongside their scoops will also want the AI food photography for bakeries walkthrough.
Pre-Shoot Checklist: Your 10-Minute Setup
Print this. Tape it to the freezer. Run it every time you shoot.
30 minutes before:
- All glassware, bowls, cones, props into the freezer
- Sheet pan lined with parchment, into the freezer
- Ice cream out of deep freeze (-10°F) onto regular freezer shelf (0°F) — too cold scoops badly
- AC on, fans positioned so cold air blows across the set
- Toppings, sauces, garnishes pre-portioned in chilled ramekins
15 minutes before:
- Pre-scoop 8-12 dollops, refreeze on the sheet pan
- Stand-in (paper towel ball or mashed potato scoop) placed in the scene
- Camera on tripod, focus locked on stand-in, exposure metered
- Tether to laptop or iPad if available — saves time inspecting each frame
Shoot moment:
- Hot scoop water (110°F) on the counter
- Towels and paper towels within reach
- Remote shutter or self-timer ready
- Backup batch of ice cream in freezer (3x what you think you need)
- Watch on the counter — capture the perfect shot within 60-90 seconds
Frequently Asked Questions
How do you photograph ice cream without it melting?
You don't outrun the melt — you outprep it. Build and light the entire scene first using a paper-towel stand-in, lock focus and exposure, then swap in a pre-scooped dollop you've already frozen on a tray. Use flash or cool window light (not hot continuous lamps), keep all props and glassware in the freezer until the moment of the shot, and aim to capture the photo within 60-90 seconds of the real ice cream appearing on set. The professional ice cream photography rule: 80% prep, 20% shooting.
When is the perfect moment for a drip shot?
The sweet spot is 60-90 seconds after the scoop enters the warm scene. Watch for the very top edges of the scoop to lose their hard ridge and just start to soften — the body of the scoop should still hold its spherical shape. That's when one slow drip begins to form. Angle the drip toward the camera, not away, and use side or backlight to make the drip catch a highlight. Past 90 seconds you've moved from "artistic drip" to "ice cream soup," so capture this shot last, after you've already banked all the clean scoops.
How do you get the perfect scoop shape?
Three tricks stack to make this consistent. First, use a cookie scoop or disher rather than a traditional ice cream scoop — they release in a more uniform sphere. Second, run the scoop under 110°F water between every dollop and wipe dry; warm metal cuts through ice cream cleanly without dragging. Third, scoop from a long shallow vessel (a 9x5 loaf pan, sheet pan, or 8x8 baking dish) instead of a pint container — you get the run-up distance for one long uninterrupted motion. Pack the ice cream tight before scooping, pre-scoop 8-12 dollops onto a parchment-lined tray, refreeze for 30+ minutes, then audition and pick only the perfect A+ ones for the actual photo.
Can I use my iPhone for ice cream photography?
Yes — and modern smartphones are now good enough for menu, delivery app, and social use cases. Lock the exposure before the ice cream goes in (long-press the focus point in the iOS camera app until "AE/AF LOCK" appears). Shoot in ProRAW or as a 4K still frame for editing latitude. Use a clip-on phone tripod and the volume-up button on a connected earbud cable as a remote shutter so you don't have to touch the phone with sticky hands. For multi-flavor menus, AI editors can transform smartphone ice cream photography into studio-quality images at a fraction of the cost of a traditional shoot.
Is it legal to use mashed potatoes instead of ice cream in photos?
It depends on use. Editorial content (your blog, magazine spreads, cookbooks) and your own restaurant or shop menu generally allow stand-ins — though some jurisdictions take a strict view of menu imagery, so check local food advertising rules. Commercial advertising for a specific ice cream brand legally requires that brand's actual product under truth-in-advertising law in most countries. The cleanest path for an ice cream shop owner is to photograph real ice cream and use AI editing to polish the result — you stay legal, you build trust, and you don't risk a customer noticing the menu shows something they can't actually buy.
What lighting is best for ice cream photography?
Cool, daylight-balanced light in the 5500-6500K range — that's what makes scoops look fresh rather than dingy or freezer-burned. North-facing window light is the cheapest professional-grade option (cool, diffuse, no thermal load). Strobe and flash beat continuous lights because the burst is so brief it adds no heat to the subject. Avoid hot tungsten lamps and high-power LEDs within a foot of the ice cream. Direction matters too: 45° side light from above carves visible texture into scoop ridges; backlight from behind reveals the translucent fruit chunks in popsicles, sorbets, and Italian ices.
Beat the Melt With AI
Every trick in this guide buys you seconds. The pre-scoop saves you 30 seconds of shape recovery. The stand-in saves you 60 seconds of focus and exposure tweaking. Cool light saves you another 30 seconds of melt time. Add them up and you've doubled your shooting window from 90 seconds to 3 minutes.
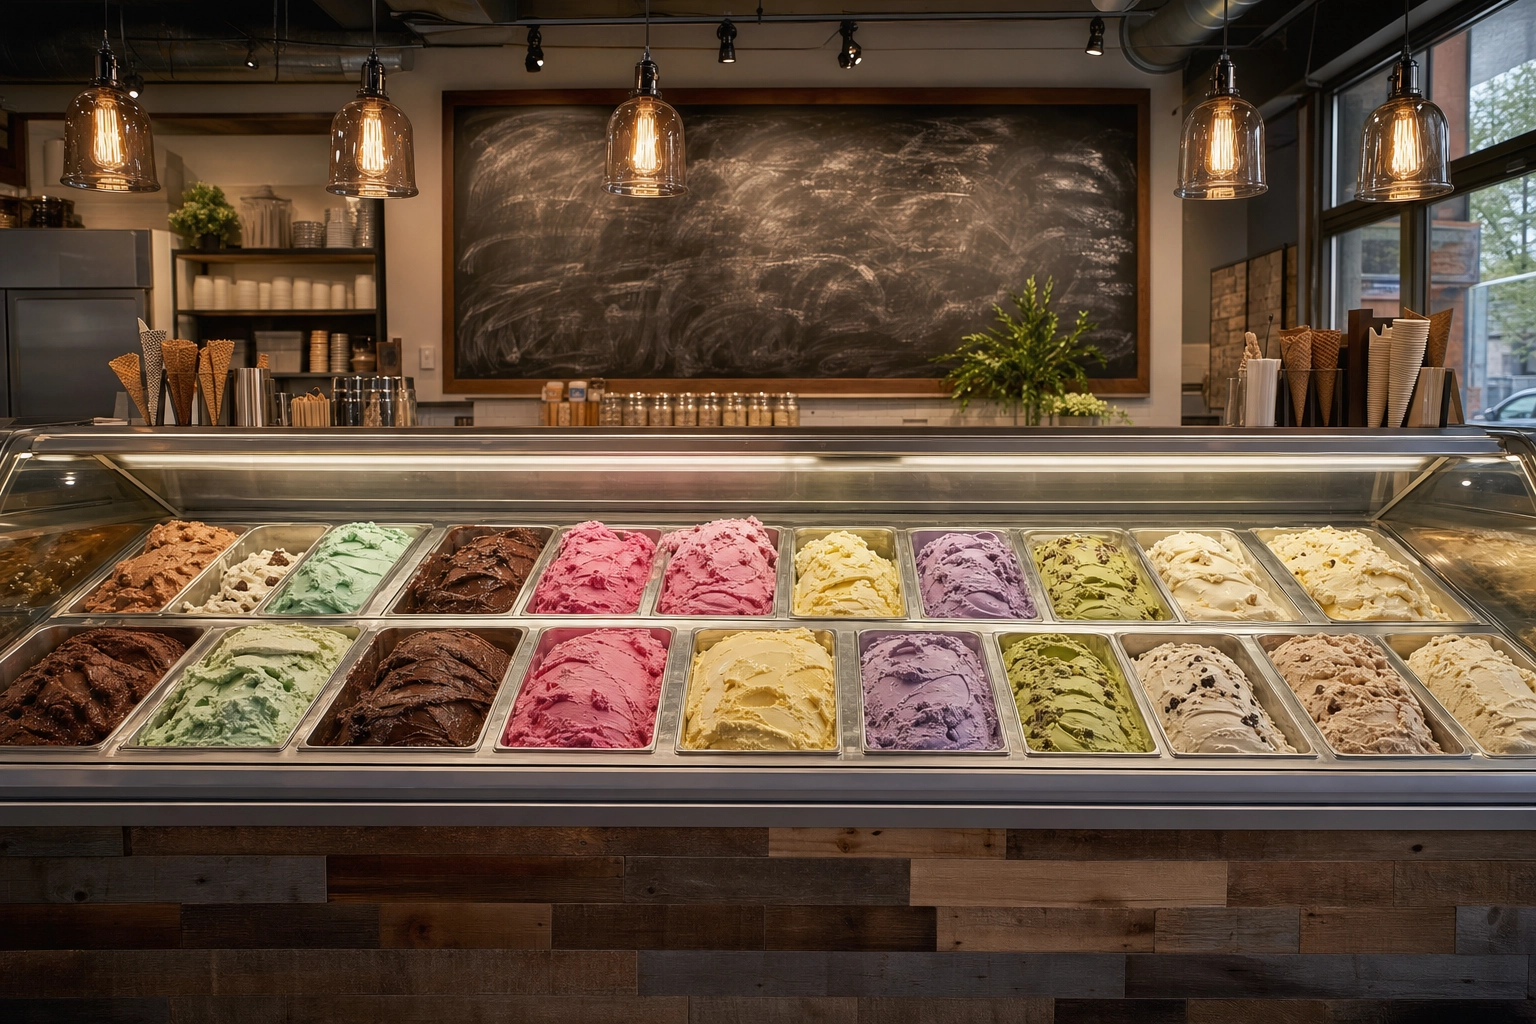 Wide view of independent ice cream parlor display case with multiple colorful flavors and warm pendant lighting
For a one-off hero shot, that's enough. For a 40-flavor menu refresh, it isn't. The math of doing 40 careful, prepped, melt-managed ice cream photography sessions in a working scoop shop just doesn't work — that's 6+ hours of focused effort on top of running the counter.
The AI workflow rebuilds the math. One rough phone shot per flavor (30 seconds, no styling required) becomes a fully styled menu-ready image in 90 seconds of processing. Forty flavors take an hour. The output is consistent across every flavor because the styling happens after the fact in software, not in real time at the counter.
If you're already taking phone shots of every new flavor anyway, you're 90% of the way there. Upload your worst phone scoop photo, pick a style, and see what comes out the other side — the free FoodShot AI plan gives you three credits to try it without committing to anything.
Then, with the melt no longer the bottleneck, you can spend your time on the part of running an ice cream shop that actually pays — selling the next perfect scoop.