Food Truck Menu Board: Digital, Physical & DIY Ideas (2026)
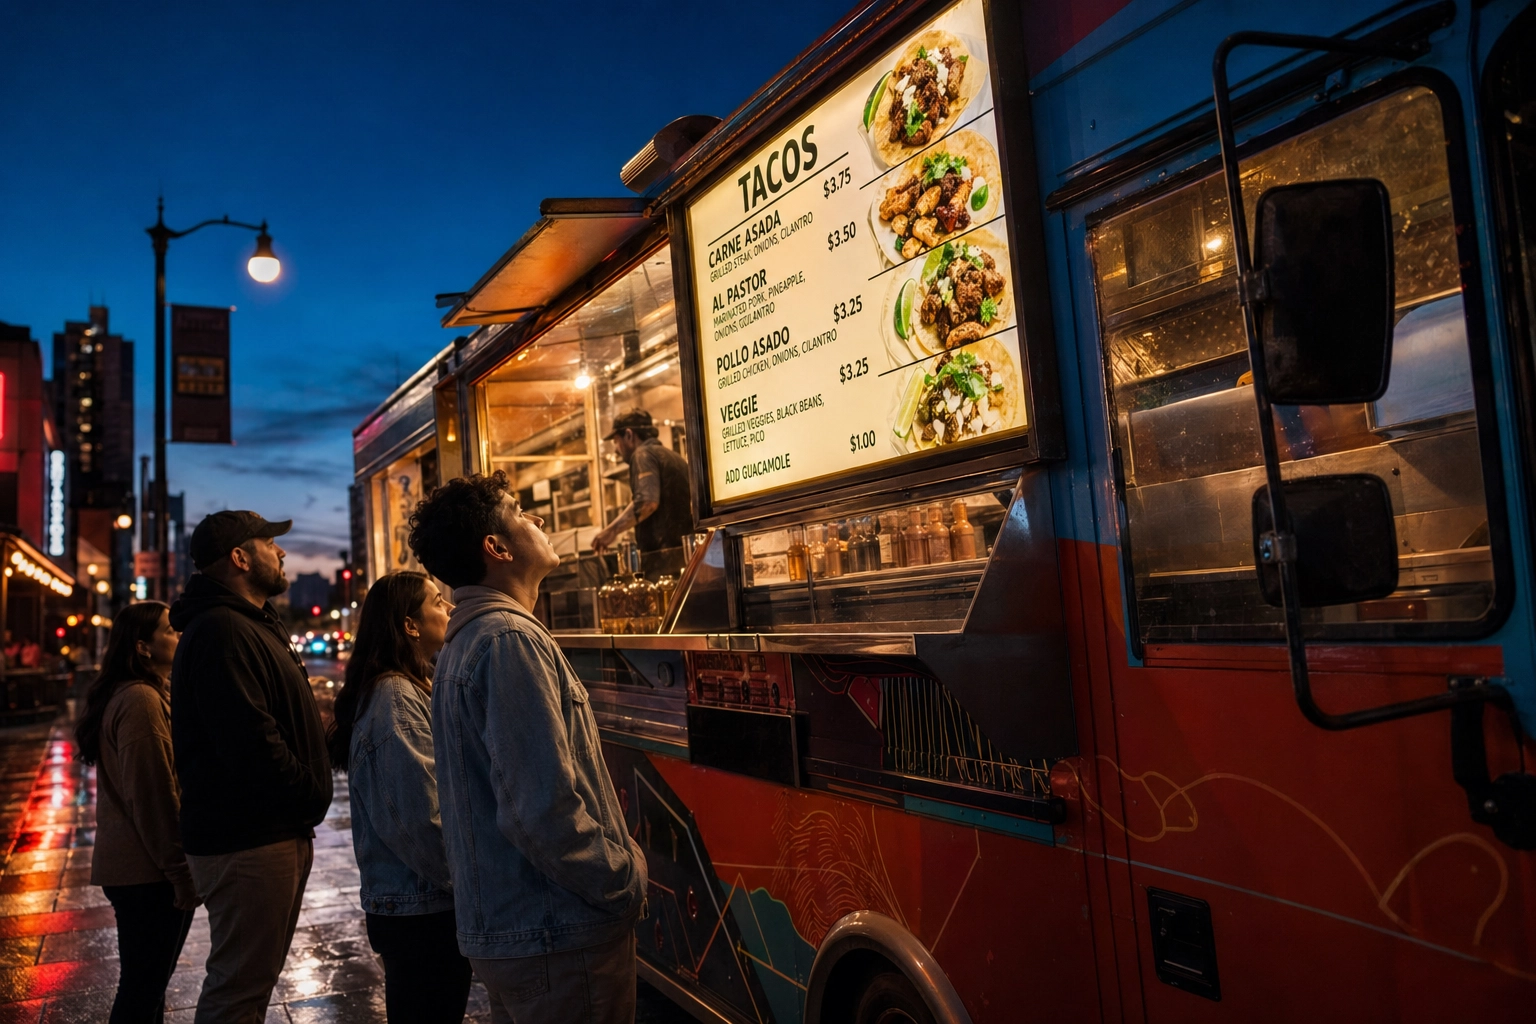
A customer walking up to your food truck makes a stay-or-walk decision in about five seconds. They're not reading your wrap. They're not Googling reviews. They're scanning your menu board — and if it doesn't tell them what to order, fast, they're at the truck next door.
Your food truck menu board is the single highest-ROI piece of marketing on the entire truck. And yet most search results for "food truck menu board" point you straight to Amazon listings or one-sided digital signage pitches. This guide is different. It walks through every option — digital, physical, and DIY — with real prices, honest tradeoffs, and the design rules that separate a menu board that sells from one that confuses.
Quick Summary: A great food truck menu board does three jobs: stop people, communicate fast, and drive the order. Digital boards ($300–2,500) win for rotating specials and photo-heavy menus. Physical boards ($30–300) win for stable menus and rustic brands. DIY menu board ideas under $50 work great when paired with strong design. Across all formats, food photos can lift orders by 30%, and AI tools have made menu-ready photography genuinely affordable for small trucks in 2026.
Why Your Menu Board Is Your #1 Sales Tool
The U.S. food truck industry hit roughly $2.8 billion in 2026, with more than 92,000 trucks fighting for sidewalk attention, according to IBISWorld. The average truck pulls in around $346,000 a year. That number matters because it sets the stakes for every customer who walks past your truck without stopping.
Your menu board has three jobs, in order:
- Stop people. It has to be visible from across the street and clear enough to register at a glance.
- Communicate fast. Customers should understand what you sell within 5–10 seconds of looking at your menu board.
- Drive the order. It should guide eyes toward your hero items — the dishes that are popular, photogenic, and high-margin.
The data on how much your menu board affects revenue is striking. According to GrubHub, menus that include food photography see a sales lift of about 30%, and individual menu items with photos receive up to 70% more orders than text-only listings. DoorDash reports a 15% increase in delivery volume when restaurant and food truck menus include quality photos. Research from Grand View Research shows that bright digital displays alone can boost foot traffic by up to 30%.
Run those numbers against an average food truck. A 10% lift on $346,000 is $34,600 a year — money that doesn't require new equipment, more staff, or a longer service window. It just requires a menu board that does its job.
That's the math. Now let's talk about the menu board options that actually deliver it.
Digital vs. Physical Menu Boards: The Honest Comparison
There's no universal "best" menu board for a food truck. The right choice depends on how often your menu changes, how harsh your environment is, and how much capital you can put into signage. Most food truck blogs lean hard toward digital because the companies running them sell digital signage. The truth is more balanced.
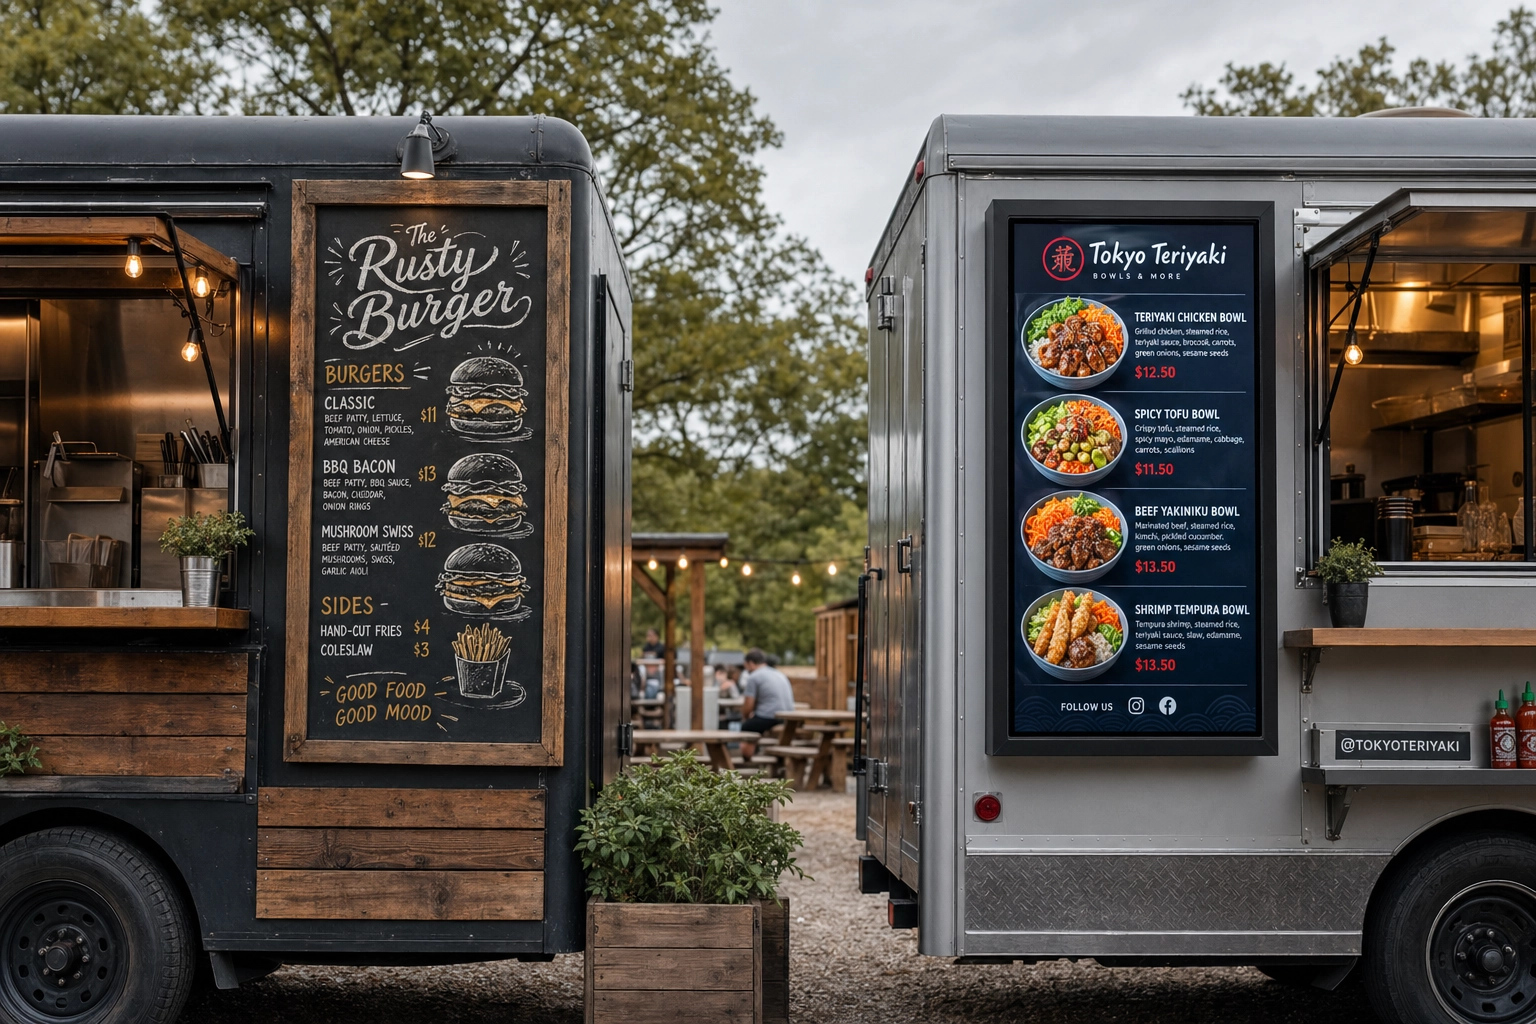 Two food trucks side by side comparing chalkboard menu and digital LCD menu board at outdoor food truck park
Here's how the two approaches actually stack up:
| Factor | Physical | Digital |
|---|---|---|
| Upfront cost | $30–300 | $300–2,500 |
| Update speed | Minutes to days | Seconds |
| Power needs | None | Generator or battery |
| Weather durability | Excellent (PVC/Dibond) | Good with IP65/66 rating |
| Learning curve | None | Low to moderate |
| Photo support | Limited | Excellent |
| Theft risk | Low | Moderate |
| Lifespan | 2–10 years | 3–7 years |
A simple decision framework:
- Rotating specials and photo-heavy menu? Digital wins.
- Stable menu, rustic brand, tight budget? Physical wins.
- Multiple trucks needing identical brand look? Digital wins for centralized updates.
- Evening-only operation in shade or covered markets? Either works.
- Just launching, need to keep costs lean? Start physical, upgrade later.
The most successful trucks in 2026 don't actually pick one format. They run a hybrid menu board setup: a permanent printed board (or vinyl decal on the truck body) for core items, plus a small chalkboard or digital screen for daily specials. This costs less than a fully digital setup and updates faster than a fully printed one.
For a deeper dive into the underlying design strategy, our guide on food truck menu design covers principles, templates, and pricing psychology that apply to whichever board format you pick.
Digital Menu Board Options for Food Trucks
If you're going digital, three paths exist: purpose-built outdoor LCD displays, mounted tablets, and (with caution) repurposed TV monitors. The most important spec to understand before spending a dollar is brightness, measured in nits.
A standard indoor TV is 200–400 nits. That's bright enough for a living room. It is not bright enough for a food truck window in afternoon sun. Outdoor ambient light at midday can exceed 10,000 lux, and your screen needs to fight back. The threshold rule of thumb:
- Under 700 nits: Indoor or shaded use only. Direct sun makes the screen unreadable.
- 1,000–1,500 nits: Visible in shade, partial sun, and overcast conditions.
- 1,500–2,500 nits: Daylight readable in most outdoor environments, including direct sun.
- 2,500+ nits: Premium outdoor signage, readable even in worst-case afternoon glare.
Weatherproofing matters just as much. Look for an IP65 rating minimum (dust-tight and protected against water jets) or IP66 if your truck operates in heavy rain.
Outdoor-Rated LCD Displays ($300–2,500)
These digital menu board screens are specifically engineered for the outdoors — high brightness, sealed enclosures, vibration-rated for moving vehicles, and often with internal cooling.
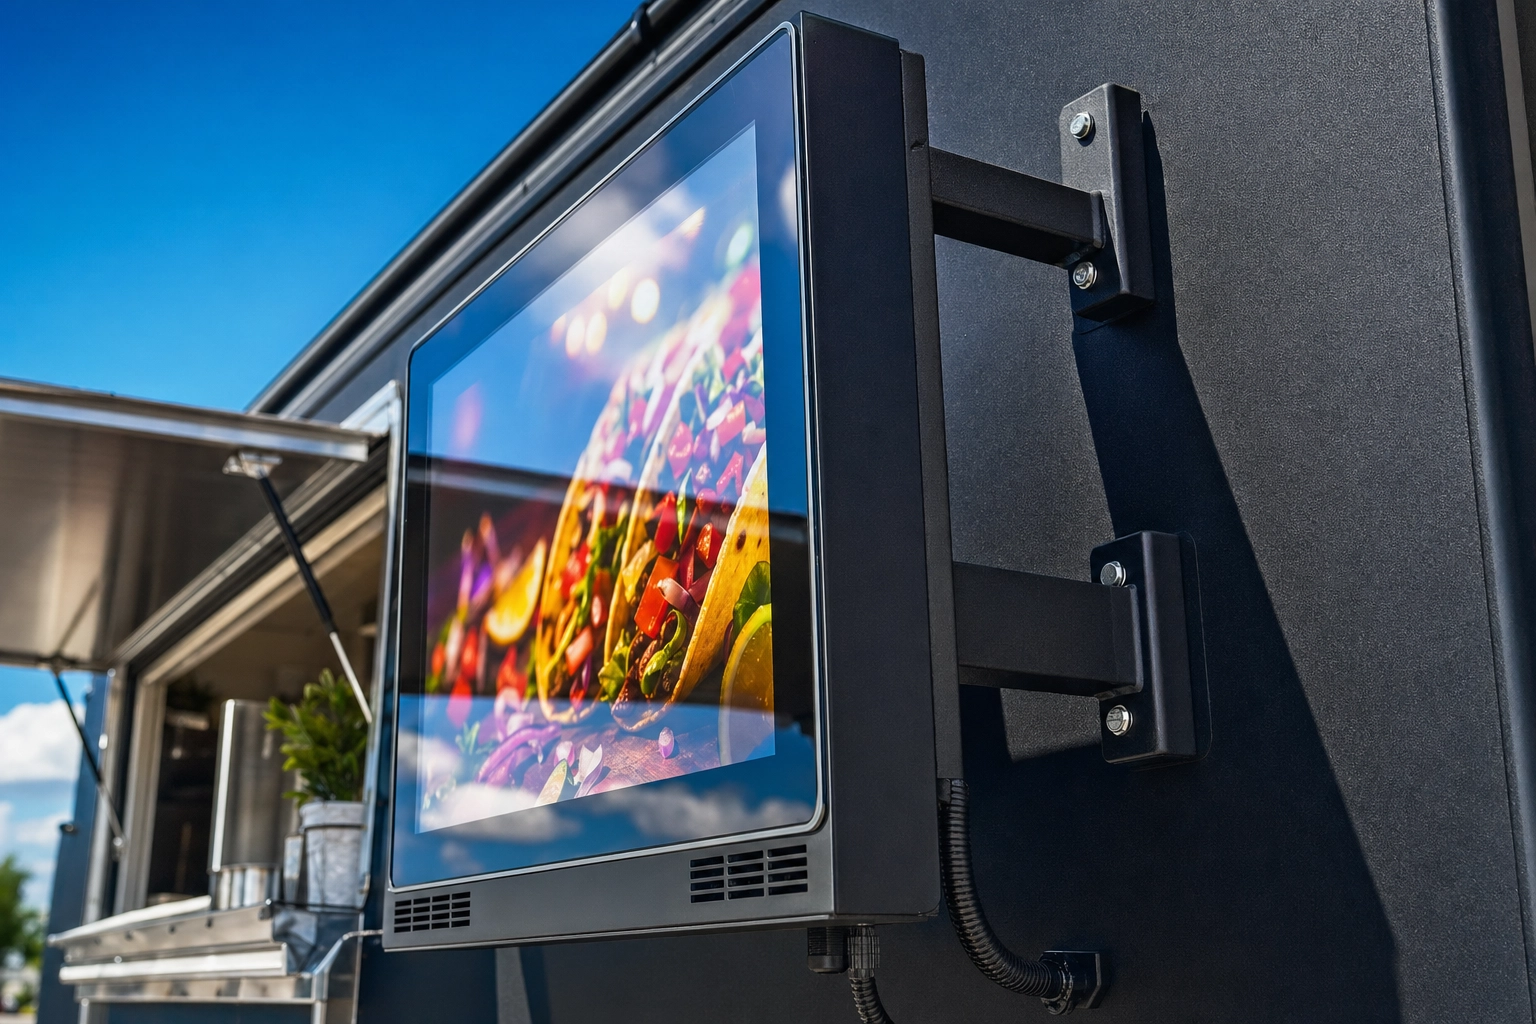 Close-up of outdoor LCD digital menu board mounted on food truck exterior showing weatherproof bracket and bright screen
Entry tier ($300–800): 18–32 inch displays at 700–1,000 nits with IP54–IP65 ratings. Work well in shaded serving windows or covered markets, struggle in direct afternoon sun. Good fit for evening trucks, indoor food halls, and trucks that mostly park in shade.
Mid tier ($800–1,500): 32–43 inch displays at around 1,500 nits with full IP65 ratings and vibration-rated mounts. Handle direct sun in most conditions and survive moderate rain. This is where the sweet spot lives for most food trucks.
Premium ($1,500–2,500+): 43–55 inch screens at 2,000–2,500 nits with IP66 ratings, anti-glare tempered glass, and built-in cooling fans. These are the screens you see on quick-service drive-thrus and major event circuit trucks. Some come with internal batteries that run 8–10 hours per charge — useful when you're at festivals without reliable power.
When shopping for a digital menu board, also check: ambient brightness sensors (auto-adjust to conditions), content scheduling software (so you can pre-program breakfast vs. lunch menus), and operating temperature range (look for at least -4°F to 122°F for year-round trucks).
Tablet Menus ($200–400 Setup)
A used iPad or Android tablet ($150–300) plus a weatherproof enclosure ($50–100) and a free-tier digital signage app gets you running for under $400. It's the cheapest path to "digital."
The honest tradeoff: Tablets are not bright enough for direct sun. They top out around 600 nits, which means they wash out on bright days. They also have theft risk and need charging. Where they shine: shaded serving windows, indoor festivals, food halls, and trucks that operate primarily evenings and nights when ambient light is low.
A tablet menu also pairs well as a secondary digital menu display — for example, a printed menu on the truck exterior plus a tablet at the order window showing photo-rich detail of each item.
Repurposed TV Monitors (Caution Required)
Mounting a $400 consumer TV on the side of your truck looks tempting. It rarely works long term. Standard TVs are rated to operate between 32°F and 104°F, have unsealed ports, and are not built to survive the vibration of driving 200 miles a week. One rainstorm or one heat wave kills the warranty.
The workaround: a weatherproof TV enclosure ($200–500) plus a commercial-grade TV. By the time you add it up, you're at the price of a purpose-built outdoor digital menu board — and you've lost the weatherproof advantages of a properly engineered unit. The only place a repurposed TV genuinely makes sense is fully indoor settings: food halls, covered markets, or evening-only operations protected from weather.
Physical Menu Board Options That Last
Physical menu boards have a built-in advantage: they need no power, no software, and no learning curve. They survive rough handling, bad weather, and dead generators. For many food trucks, they're not the "lower-tech" option — they're the right option.
Chalkboard Menu Boards ($30–100)
The classic. A 24×36 inch framed chalkboard runs $40–80 at most office supply or restaurant supply stores. A bigger board with a wood frame and rope hanger runs closer to $80–150.
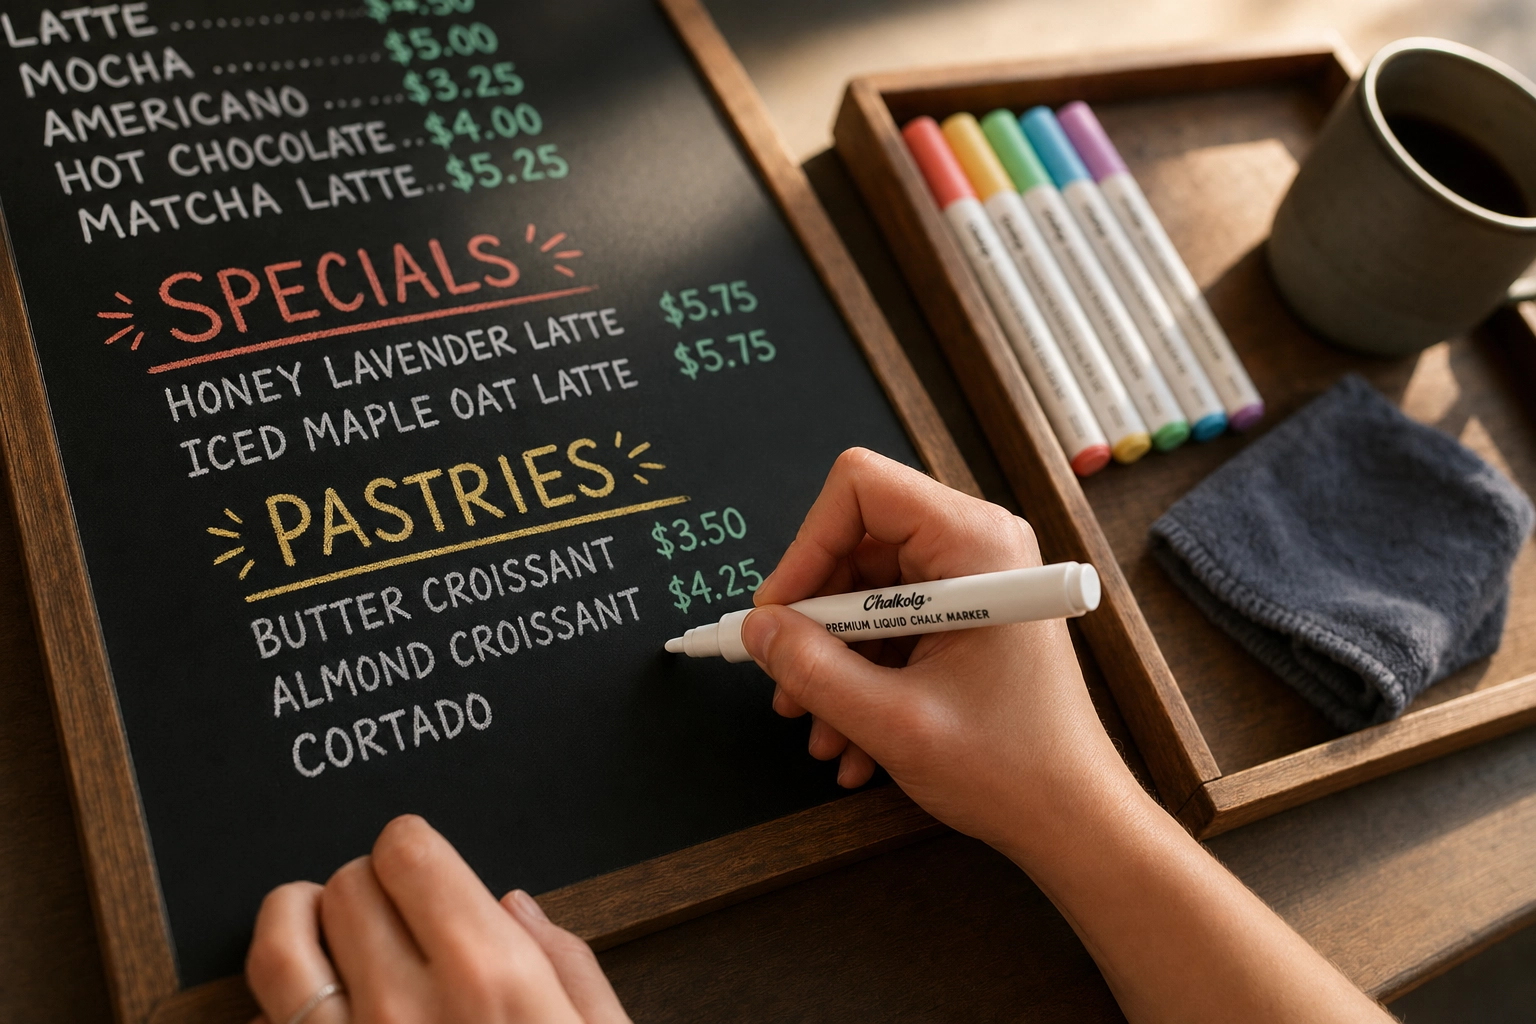 Food truck operator hands writing daily specials on chalkboard menu with white liquid chalk marker during morning prep
One critical upgrade most owners miss: swap traditional chalk for liquid chalk markers ($5–15 for a six-pack). They're weather-resistant, don't smudge in humid air, photograph cleanly, and produce sharper lines than dust chalk. Wipe with a damp cloth to update.
A pro tip from food truck operators on Reddit: keep a pre-lettered laminated paper backup of your chalkboard menu for rainy days when chalk wipes off. Tape it over the chalkboard in 30 seconds when the weather turns.
Best for: BBQ trucks, coffee trucks, breakfast trucks, artisan bakers, and any brand where rustic = on-brand.
Printed PVC and Dibond Boards ($50–300)
A custom-printed laminated PVC board is the workhorse of food truck menu signage. Companies print full-color, photo-rich, weatherproof menu boards in any size, and the result lasts 2–3 years before fading.
- PVC ($50–200): Lightweight, waterproof, easy to mount with screws or velcro. The standard choice for most trucks.
- Dibond / aluminum composite ($150–300): Rigid panel with aluminum facing on both sides. More premium feel, lasts 5+ years outdoors, holds up to wind better than PVC.
Physical menu boards force you to commit to your menu, which sounds restrictive but is actually a feature. It pushes you to nail down the 6–12 items you actually want to sell instead of constantly adding and changing.
Update strategy: Pair a permanent printed board with a small chalkboard for daily specials. You get a polished base + flexible flair without reprinting anything.
Magnetic Menu Boards ($60–200)
A magnetic menu board is steel backing with printed magnetic item-and-price strips. Update specials in seconds, swap sold-out items, change prices without reprinting the whole board.
The clever hack from r/foodtrucks operators: paint a section of your truck's metal exterior with magnetic primer (or skip it entirely if your truck's panel is already steel) and stick magnetic menu strips directly to the truck. Zero mounting hardware, integrated with the truck's design, and you can rearrange the menu in 30 seconds.
Best for: trucks with frequently changing prices (hello, ingredient inflation), seasonal menus, and operators who want printed quality with chalkboard flexibility.
A-Frame Sidewalk Signs ($70–400)
The most underrated food truck menu board hack is a second menu placed away from the truck. A double-sided A-frame sandwich board, positioned at the line entry or 10–15 feet ahead of the order window, lets people read the menu before they reach you. The result: faster decisions, shorter lines, less "what's good?" at the window.
Two formats:
- Chalk A-frames ($70–150): Write-on surface, change daily.
- Insert A-frames ($150–400): Slide-in printed posters, professional look.
If you do nothing else, add a single A-frame with your top 6 items and a small hero photo. It's the cheapest way to capture customers who would otherwise walk past.
For the photography that fills these boards (digital and physical alike), our food truck photography guide covers the 5-shot library every truck needs.
DIY Food Truck Menu Board Ideas Under $50
Bootstrapped trucks can build great-looking menu boards for the cost of a few lattes. The key: DIY doesn't have to mean amateurish. Match the build to your brand, and the result can look more authentic than a generic printed board. Here are four food truck menu board ideas you can build this weekend.
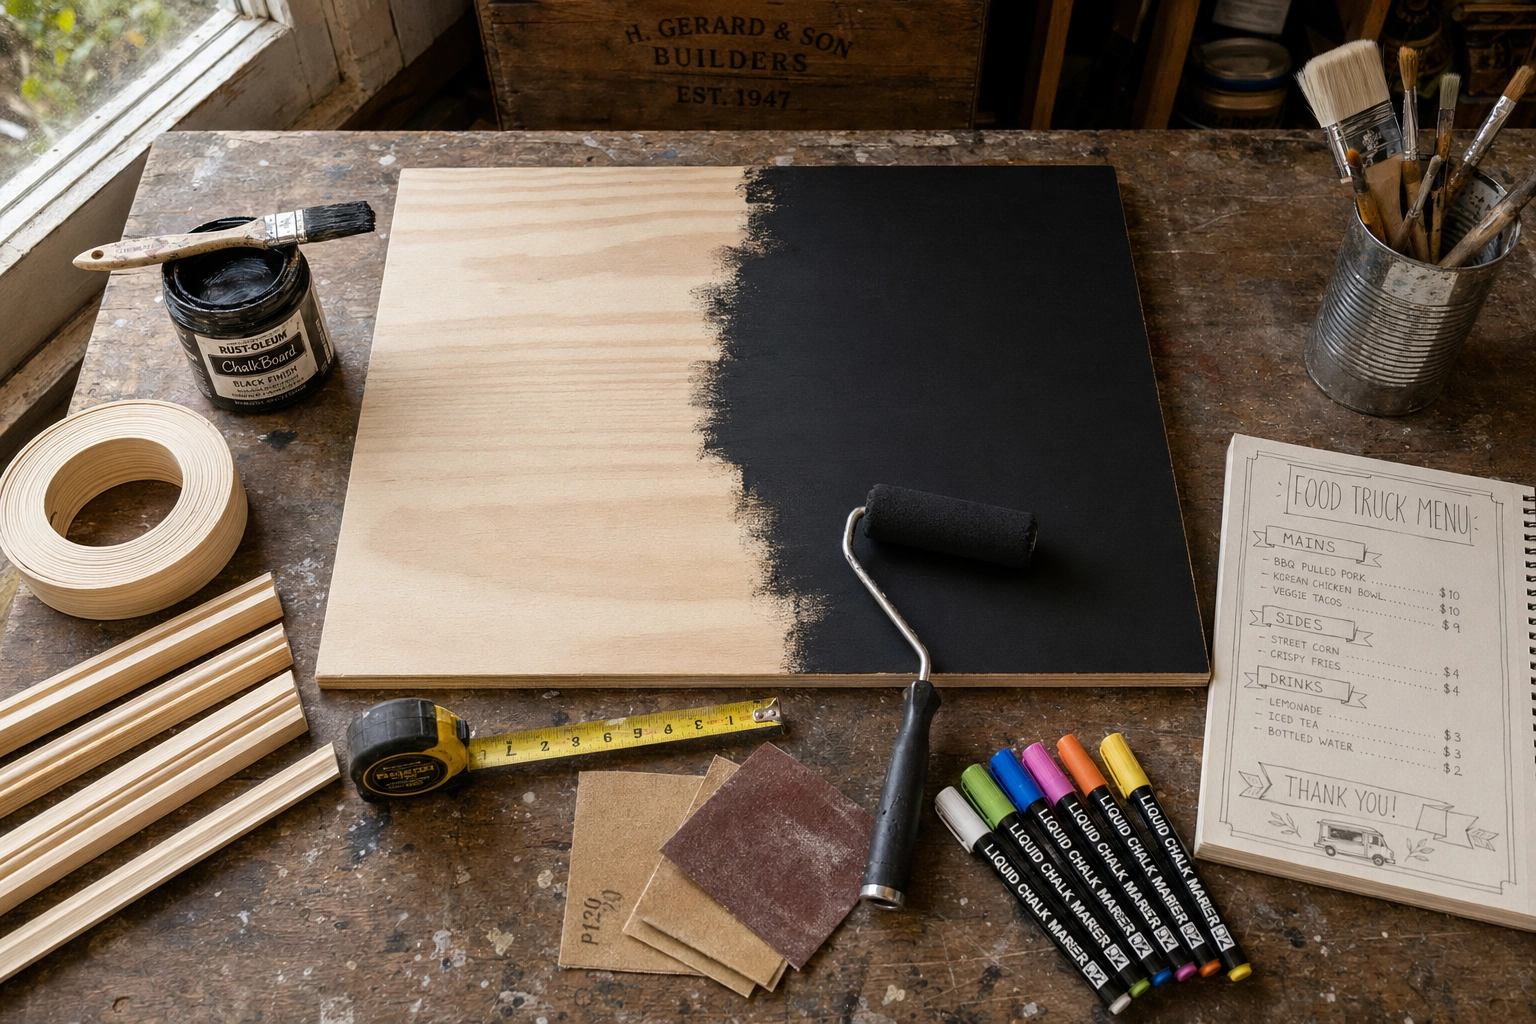 DIY food truck menu board project flat-lay with chalkboard paint, plywood panel, wood frame, and liquid chalk markers on workshop bench
Reclaimed Wood Pallet Board ($0–30)
Sand 4–6 pallet boards, screw them together into a 24×36 panel, stain or seal them, and hand-letter the menu with a paint pen or mount printed vinyl letters. Free pallets are available behind most warehouses and grocery stores. Total cost: under $30 for sandpaper, stain, and vinyl. Brand fit: BBQ, smokehouse, farm-to-truck, artisan bread.
Clipboard Wall Display ($15–30)
Buy 6–12 dollar-store clipboards, mount them in a grid on a backing board. Print each menu item as an 8.5×11 card. When you sell out or rotate, swap one card. Customers love the modular look, and updating takes 30 seconds. Brand fit: cafés, breakfast trucks, anything quirky and friendly.
Felt Letter Board ($30–60)
Pre-made 24×36 letter boards come with hundreds of plastic letters. Highly Instagrammable — customers will photograph and tag them. The constraint of fixed letter sizing actually helps with consistent design. Brand fit: vegan trucks, modern minimal brands, dessert and ice cream trucks.
Chalkboard Paint Hack ($25–50)
A quart of chalkboard paint is about $15. A 24×36 plywood or MDF panel is around $10. A few feet of pine for a frame is another $10. Total: under $35 for a custom-sized chalkboard menu board.
Critical pro tip: Before writing on a fresh chalkboard-painted surface, rub chalk all over it and wipe it clean. This "primes" the surface and prevents permanent ghosting from the first thing you write. Skip this step and your menu will haunt the board forever.
Menu Board Design Best Practices (That Actually Work Outdoors)
Most menu board failures are design failures, not material failures. A $2,500 outdoor LCD with a bad layout still loses customers. A $30 chalkboard with great design can outsell a generic printed board. These five rules apply across digital, physical, and DIY food truck menu boards.
Font Size: 1 Inch Per 10 Feet
The classic signage rule of thumb: every 10 feet of viewing distance equals 1 inch of letter height for legibility.
Food truck customers typically stand 3–15 feet from the menu board. That means:
- Category headers (BURGERS, TACOS, DRINKS): 2–3 inches tall
- Item names: 1–1.5 inches tall (minimum)
- Descriptions and prices: 0.75 inch minimum
On digital menu boards, that translates to roughly 35–42 pt for item names and 50+ pt for category headers, in a sans-serif font like Helvetica, Arial, or Montserrat.
Test it the analog way: print or display your menu at full size, stand 10 feet back, and try to read it. If you have to squint at anything, scale up. Cramming 16 items onto a board so they all fit is the most common (and fixable) menu design mistake on the road.
Contrast: Aim for 7:1, Not Just "Pretty"
Outdoor light kills low-contrast designs. Pastels, muted tones, and gradients that look cool in your design tool wash out completely under afternoon sun.
The accessibility benchmark for digital text (WCAG 2.1 from W3C) is a 4.5:1 contrast ratio for AA compliance and 7:1 for AAA. For outdoor menu boards facing direct sun, aim for 7:1 or higher. Safe combos:
- Black on white (the highest contrast available)
- White on black (almost as good, slightly lower)
- Deep navy on cream (warm and high-contrast)
- Dark forest green on warm white (works for natural brands)
Avoid: pastel-on-pastel, busy photo backgrounds behind text, gradient backgrounds, and red on green (color-blind unfriendly and hard to read at distance).
Layout: The Z-Pattern Customers Actually Read
Eyes don't read menu boards top-to-bottom like a book. They follow a Z-pattern: top-left → top-right → diagonal to bottom-left → bottom-right.
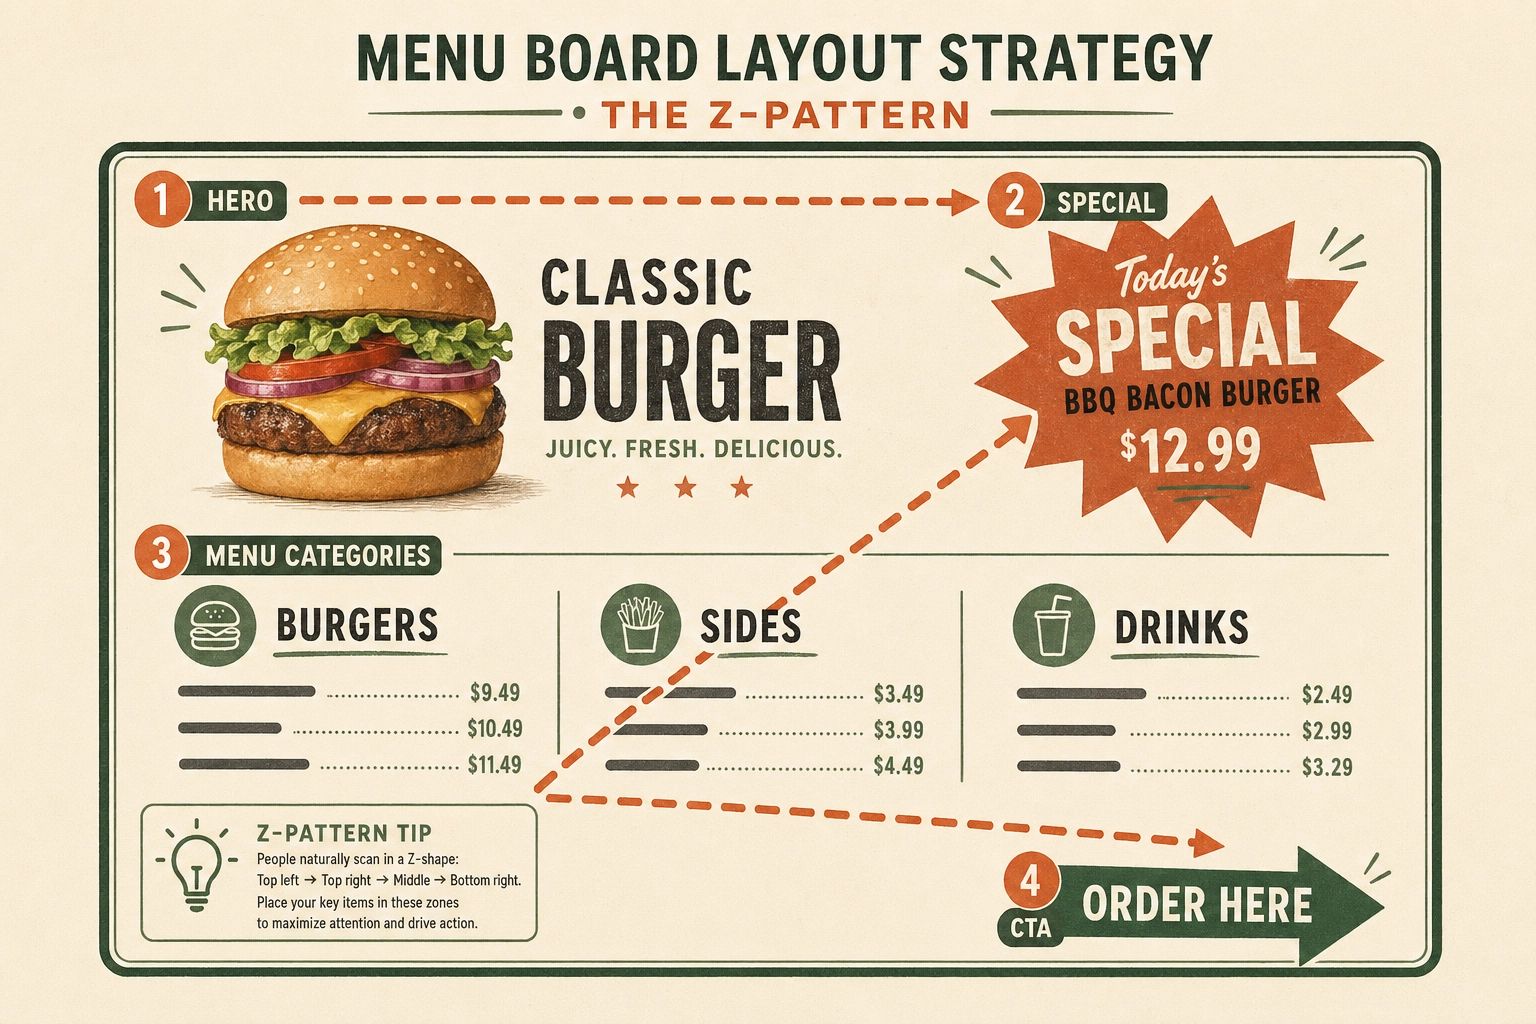 Menu board layout diagram showing Z-pattern reading flow with hero photo, special callout, items grid, and order CTA zones
Use this:
- Top-left: Logo, brand name, or hero photo of your best-seller.
- Top-right: Featured special or your most profitable callout (this is prime real estate).
- Middle: Items grouped into 2–3 clear categories. Maximum 6–12 items total.
- Bottom-right: Order instruction or CTA — "Order at the window," "Cash + Card," your Instagram handle.
Mount the menu board between 36 and 48 inches off the ground for accessibility. Per ADA guidance from the U.S. Access Board, this range covers the eye-level for most adults, wheelchair users, and kids. Mount your menu board too high and you've made it invisible to a chunk of your customer base.
For more on the principles of menu board layout including pricing psychology and category ordering, our restaurant menu board design guide goes deeper into the cognitive side.
Why Food Photos on Your Menu Board Increase Orders by 30%+
If you remember one thing from this guide, make it this: adding food photos to your menu board is the single most effective revenue lever a food truck can pull.
The data lines up across multiple sources:
- GrubHub reports menus with food photography increase sales by about 30%, and individual items with photos get up to 70% more orders than text-only listings.
- DoorDash reports a 15% lift in delivery volume for restaurants with quality menu photos.
- Square found that menus with photos and descriptions can increase sales by up to 65%, as reported in their analysis on food photography.
- 46% of Gen Z customers say food photos directly influence what they order.
Why it works comes down to three things:
- It reduces ordering anxiety. Customers who can see what "kogi taco" or "loco moco" actually looks like don't have to ask, hesitate, or guess. They order faster, which speeds up your line, which serves more people per hour.
- It guides eyes to high-margin items. A photo is a visual signpost. Whichever items you photograph become the items most customers order. Use this strategically — photograph your most profitable dishes, not your most expensive ingredients.
- It creates appetite appeal. A great shot of a melting cheese pull, a glossy sauce drip, or a steaming bowl triggers hunger in a way text never can.
The strategic approach: don't photograph every menu item. Photograph 3–5 hero items — the ones that are most popular, most photogenic, and highest-margin. Cluttering a menu board with 12 small photos creates visual noise that's worse than no photos at all. A few large, high-quality images at strategic Z-pattern positions does more work than a wall of thumbnails.
Getting Menu Board-Ready Photos: Photographer vs. Phone vs. AI
The catch with food photos is that they need to look professional. Bad photos do worse than no photos — they signal a careless brand. Three paths to professional menu board imagery exist, each with real tradeoffs.
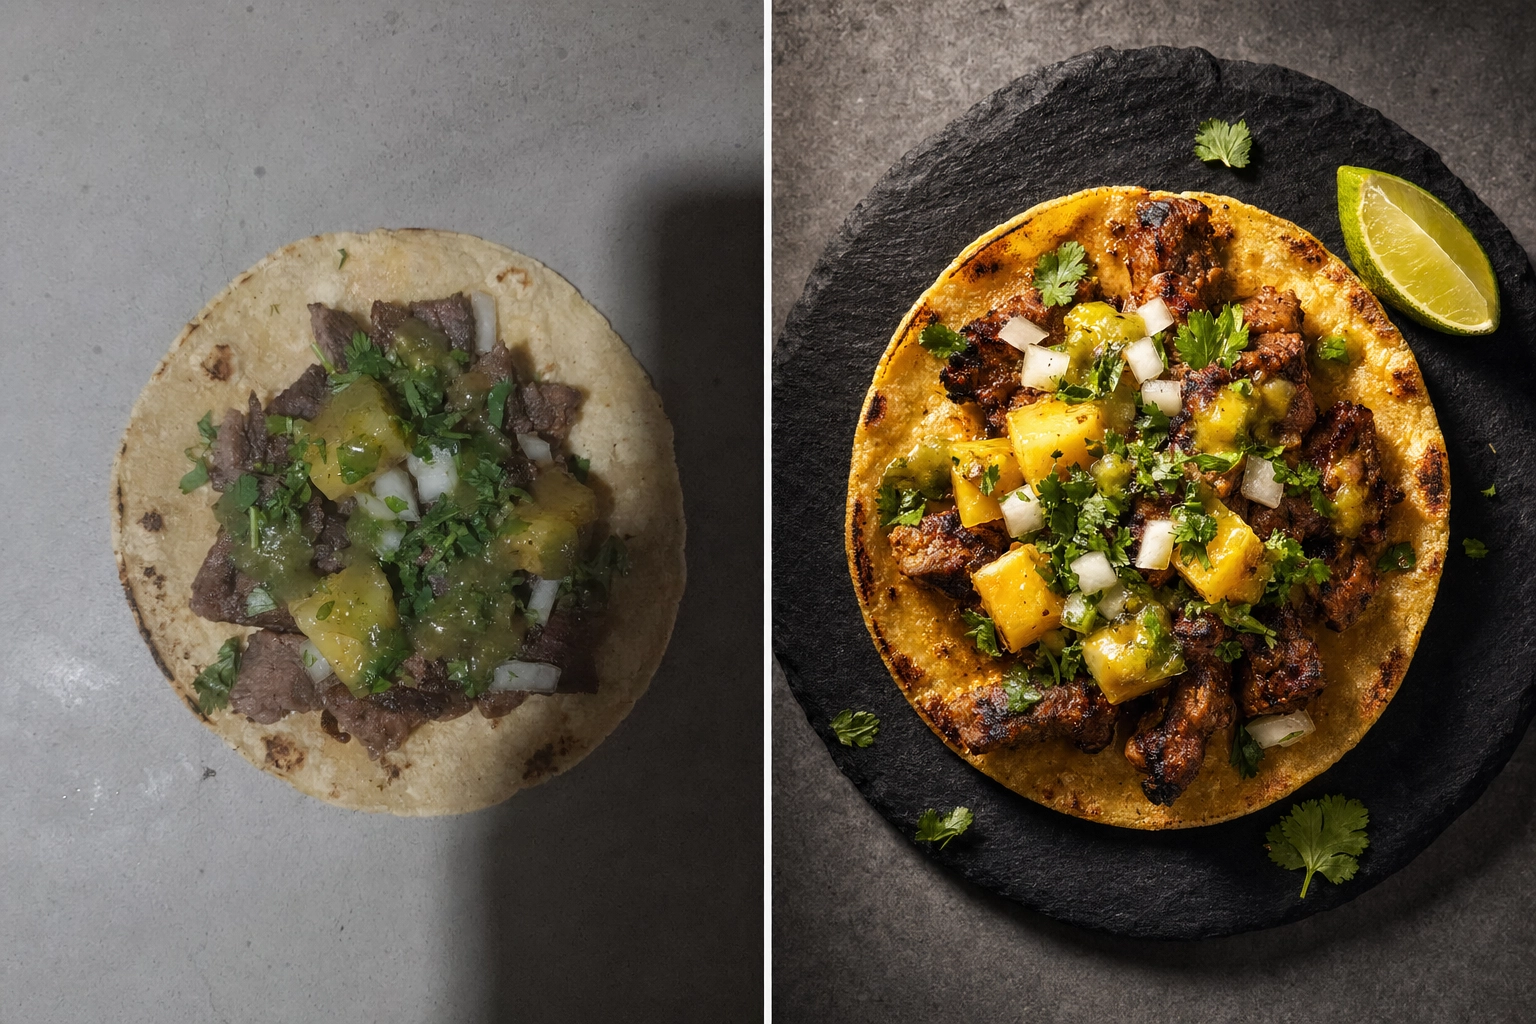 Side-by-side comparison of raw phone food photo versus AI-enhanced menu-ready taco image for food truck menu board
Hiring a Food Photographer ($500–2,500 Per Session)
Pros: Top-tier image quality. The photographer handles styling, lighting, editing, and delivers retouched files. One session can yield 10–20 hero shots for your menu board.
Cons: Expensive for small or frequent menu changes. Scheduling friction — you need to coordinate prep, photographer availability, and a usable shoot location. Doesn't help with seasonal menu rotations unless you book multiple sessions a year.
Watch for hidden costs: studio rental, food and styling fees (sometimes $200–500 separately), prop fees, and per-image retouching at $25–50 each.
Best for: New truck launches, premium brands, and trucks that genuinely refresh once or twice a year and never in between.
DIY Phone Photography (Free, but Time-Consuming)
A modern phone (iPhone 12+, Pixel 6+, Galaxy S20+) shoots good enough resolution and dynamic range for menu boards. With a $25 flexible tripod, a $15 reflector, and golden-hour or open-shade lighting, you can get serviceable phone shots.
The hard part isn't shooting — it's editing. Lightroom, Snapseed, or VSCO take real time to learn. Getting consistent looks across 10 menu items (so they all match on the same board) is genuinely difficult without training. And on a food truck, where prep starts at 10 AM and service starts at 11:30, finding that editing time is its own challenge.
Best for: Trucks where someone on the team genuinely enjoys photography and is willing to invest 5–10 hours a month learning and editing. For everyone else, see the next option.
For specifics on the phone-only path, our guide on how to take good food photos walks through camera settings, lighting, and styling without requiring pro gear.
Phone + AI Enhancement (Fastest, Most Consistent)
This is the path that's reshaped food truck photography in 2026. Snap a phone photo of the dish during prep, upload it to an AI food photo editor, and get a styled, menu-ready 4K image in about 90 seconds. No editing skills, no studio, no scheduling friction.
FoodShot AI is purpose-built for this workflow. Three features matter most for food truck menu board photos:
- 200+ curated styles, including clean-background "menu board" presets that match the look you need for printed boards or digital displays.
- Builder Mode, which lets you pick a background surface, plate style, and food composition so every item on your menu matches.
- My Styles, where you upload a single reference photo of your favorite shot and every new dish you photograph automatically matches its lighting, angle, and feel.
The pricing math works out to under $0.40 per styled image on the Starter plan ($9/mo billed yearly, 25 credits). For a truck doing 6–10 menu items, that's under $5 to refresh the entire menu's photography. For a comparison of all three paths in detail, see our DIY vs pro vs AI food photography breakdown.
The free tier (3 credits) is enough to test whether the workflow fits your truck before committing.
Seasonal Menu Updates Without the Photo Shoot Stress
Most food trucks rotate the menu 3–6 times a year. Summer specials. Pumpkin spice in September. Holiday limited-runs. Ingredient seasonality. Every rotation traditionally meant another photographer booking or another DIY edit session. Either way, friction.
The AI workflow flattens this:
- Tuesday morning, prep cook makes the new fall pumpkin curry for the first time.
- Snap a phone photo on the serving window ledge.
- Upload to FoodShot, apply the same style your other menu photos use.
- Receive a 4K menu-ready image in 90 seconds.
- Export to your digital menu signage app, print onto your magnetic menu board strip, or hand-letter the chalkboard caption.
- New item is live before lunch service.
The brand-consistency lever here is My Styles. Upload your best summer menu shot once, and every fall, winter, or spring item you generate automatically matches its mood. Your Instagram grid, DoorDash listing, and physical menu board all stay visually unified across seasons without rebooking a photographer.
For trucks running multiple locations, this gets even more powerful. One photo session per dish, then matched imagery generated for every location's menu board. Five trucks, one consistent visual identity, zero coordinated photo shoots. The AI food photography for food trucks page covers more on that workflow.
Frequently Asked Questions
What size menu board do I need for a food truck?
For a 14–20 ft truck: minimum 24"×24", ideal 24"×36" or 30"×40" for clear visibility. For a 20–26 ft truck: 36"×48" or larger. Reddit consensus among food truck operators is that 2'×2' works fine for a 20-foot truck if the design is clean and uncluttered. Cramming a 12-item menu onto a 24"×24" board is a recipe for unreadable text — if your menu is bigger, your menu board needs to be bigger.
How much should I budget for a food truck menu board?
DIY menu board ideas: $25–50 for chalkboard paint, letter board, or clipboard arrays. Mid-range physical: $100–300 for printed PVC, magnetic boards, or Dibond panels. Entry-level digital: $300–800 for a small outdoor LCD or tablet setup. Premium digital menu boards: $1,500–2,500+ for 43"+ outdoor LCDs with photos and dayparting. Most successful trucks spend $200–600 total on a hybrid setup — a permanent printed board for core items plus a chalkboard or small digital display for daily specials.
Are digital menu boards worth it for a food truck?
A digital menu board is worth it if you rotate specials weekly, run multiple dayparts (breakfast vs. lunch), or sell photo-friendly food where visuals drive orders. Skip it if you have a stable menu, run mostly evening events, or your brand aesthetic leans rustic. The ROI math: a $1,500 outdoor display pays for itself in roughly 3 months if it lifts orders by 10%, which is realistic for trucks that lean into photos and daily specials.
What font should I use for a food truck menu board?
Sans-serif fonts like Helvetica, Arial, Montserrat, or Roboto for item names and prices — they're readable from a distance and survive outdoor light. Save script or display fonts for the truck name or logo only, never for menu items. On chalkboards, bold, blocky hand-lettering reads better than flowing script. The test: stand 10 feet back. If you squint at anything, the font is wrong — either too small, too thin, or too decorative.
How do I update my menu board for daily specials?
Digital menu board: edit in your signage app from your phone, push the update — about 30 seconds. Magnetic board: pre-print magnetic strips for your most likely specials (10–15 templates) and swap them in. Chalkboard: dedicate a "Today's Special" section, refresh with liquid chalk markers each morning. The hybrid setup most trucks land on: a permanent printed menu board for core items plus a small chalkboard or letter board for daily specials. You get a polished base and flexible flair without reprinting anything.
A great food truck menu board isn't about picking digital or physical or DIY. It's about matching your format to your menu, your weather, your brand, and your budget — and then nailing the design fundamentals (font size, contrast, layout) that work across every format. Add hero photos of your best 3–5 items, and you've built a menu board that actually does its job: stop people, communicate fast, and drive the order.
