How to Take Good Food Photos (No Pro Gear Required)
You know the feeling — the pasta you made looked incredible on the plate, but the photo looks like sad beige mush. Learning how to take good food photos doesn't require a professional camera or expensive equipment. It requires understanding a few tips that work with any device — smartphone, DSLR, point-and-shoot camera, or tablet.
Quick Summary: Taking good food photos comes down to light, angle, and simplicity — not gear. This guide covers four levels: a 5-second fix (natural light + clean plate + 45° angle), a 5-minute upgrade (backgrounds, food styling, garnish), pro-level techniques (diffused lighting, composition rules, manual camera settings), and an AI-powered editing step that transforms decent photos into professional images in 90 seconds.
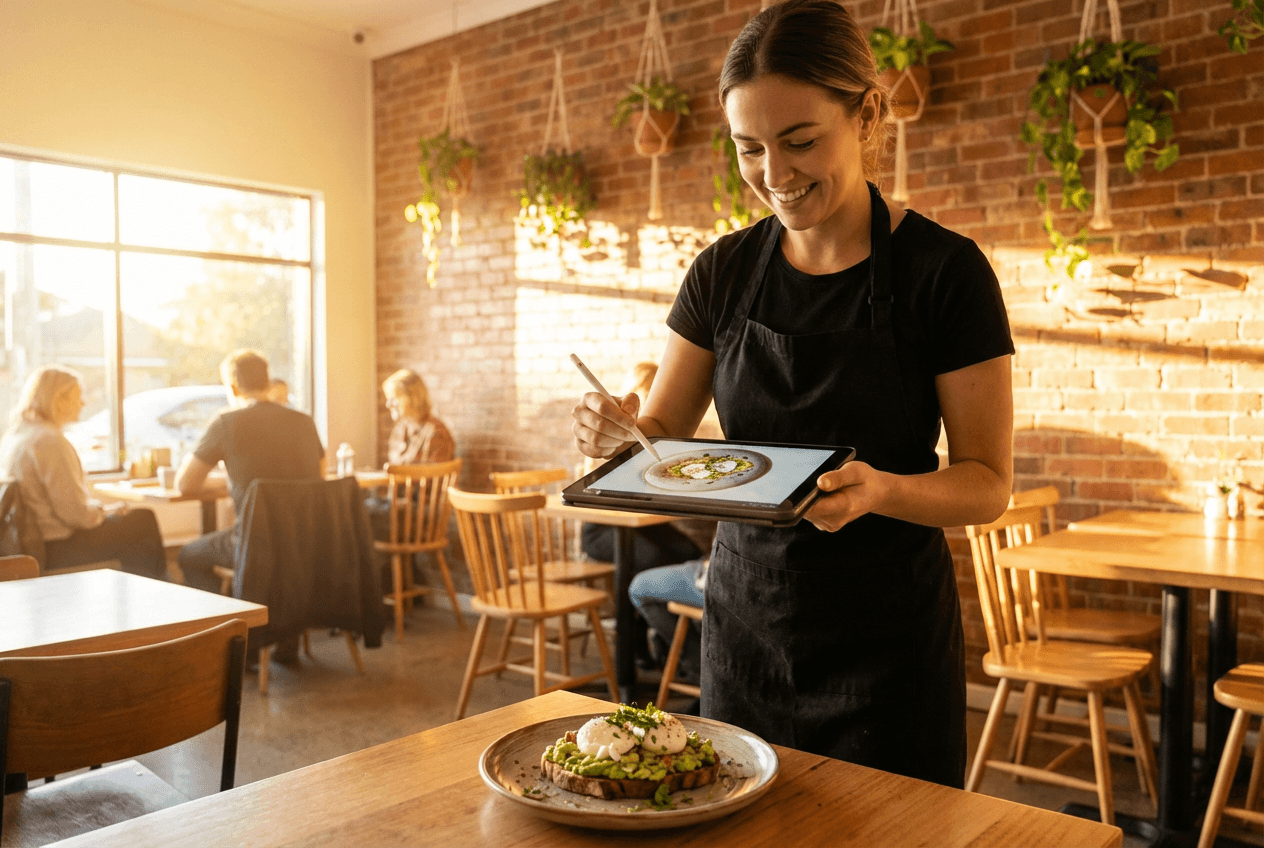 Restaurant owner taking food photos with a tablet near a window demonstrating that any device can capture good food photography
The gap between how food looks in person and how it shows up in photos is wildly frustrating. But the problem is almost never your camera. A five-year-old smartphone, a borrowed DSLR, even a tablet — any device can produce beautiful food photos once you learn what actually matters. This guide is structured as a progression from beginner to professional. Each level builds on the last, so stop wherever your needs are met.
If you shoot primarily on a phone, our phone food photography guide goes deeper into mobile-specific features and apps.
How to Take Good Food Photos: 5 Mistakes to Fix First
Before we upgrade your food photography, let's kill the common mistakes making your pictures look terrible. These apply whether you're shooting on a mirrorless camera or a budget smartphone.
Using the Built-In Flash
Flash is the fastest way to ruin a food photo. The built-in flash on your camera or phone creates harsh, flat light that washes out colors, eliminates texture, and makes everything look greasy. That beautifully caramelized crust? Under flash, it becomes a shiny, featureless brown surface.
According to the Institute of Culinary Education, professional food photographers build their entire shoots around avoiding direct light — and your built-in flash is the harshest direct light source possible. Turn it off. Always.
Shooting Under Overhead Fluorescent or Tungsten Lights
Ceiling lights cast an ugly yellowish or greenish color tint over everything. Worse, overhead lighting creates unflattering downward shadows that pool under plate rims and inside bowls, hiding the details that make food look appetizing.
Mixed lighting — fluorescent overhead plus daylight from a window — is even worse. Your camera's white balance can't compensate for two different color temperatures at once, and your food photos end up with an unnatural cast that no amount of editing can fully fix.
Cluttered Backgrounds
That half-empty soda bottle, the crumpled napkin, someone's elbow, the salt shaker — every object in your frame that isn't the food is visual noise. The dish gets lost.
Better food photos start with subtraction. Remove everything that doesn't serve the image. Photography is as much about what you take out of the frame as what you put in.
Using Digital Zoom
Digital zoom doesn't actually zoom — it crops and enlarges your image, destroying photo quality. The result is a grainy, blurry mess.
Move the camera closer instead. If you need to crop, do it afterward in an editing app — the quality loss is far less severe. This tip applies to every camera type.
Dead-Center Framing with No Thought to Angle
Pointing your camera straight at the center of the plate from whatever angle your hand happens to be at — that's a snapshot, not food photography. It rarely produces good food photos.
Different dishes have different best angles. Pizza from eye-level shows mostly plate edge. A stacked burger from overhead hides the juicy cross-section. As ICE's food photography experts explain, asking "what do I want to highlight?" before you raise the camera is what separates amateur snapshots from compelling photos.
Level 1: The 5-Second Upgrade
These three tips take seconds. Combined, they'll improve your food photos more than any expensive lens or camera upgrade ever could.
Move to Natural Light
This is the single most impactful tip for learning how to take good food photos. Turn off your flash. Turn off overhead lights. Pick up the plate and move it near a window.
Indirect natural light — from a window that's not in direct sunlight, or on an overcast day — is soft, even, and renders food colors accurately. Side lighting from a window creates gentle shadows that add depth, dimension, and texture to every dish you photograph.
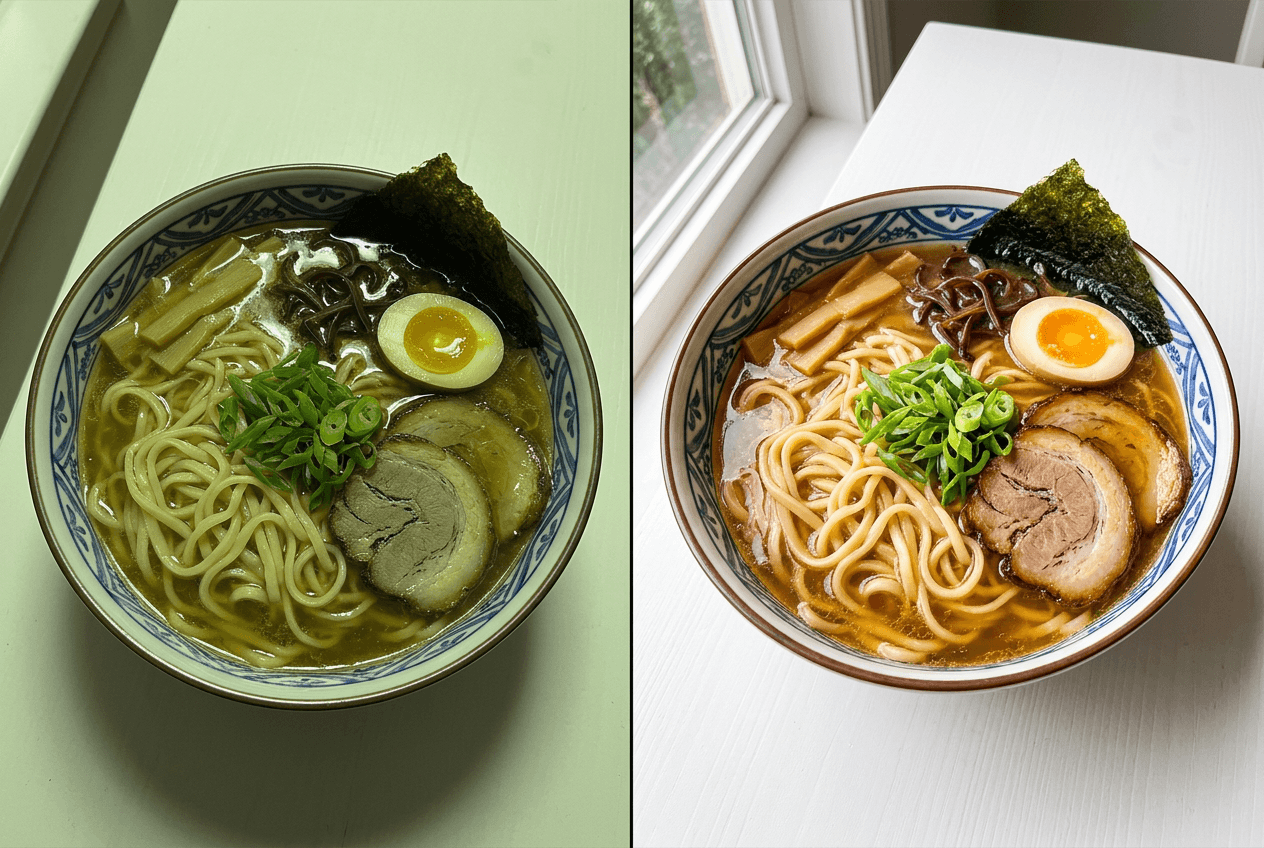 Side-by-side comparison of food under flash versus natural window light showing dramatic quality difference in food photos
Even cloudy daylight beats any overhead ceiling fixture. As BBC Good Food's photographer Stuart Ovenden notes, you don't need a super-wow camera — you need good light. For more on lighting setups, see our food photography lighting guide.
Clean the Plate Edges
Grab a napkin and wipe the rim of the plate. Three seconds, zero cost, massive visual improvement.
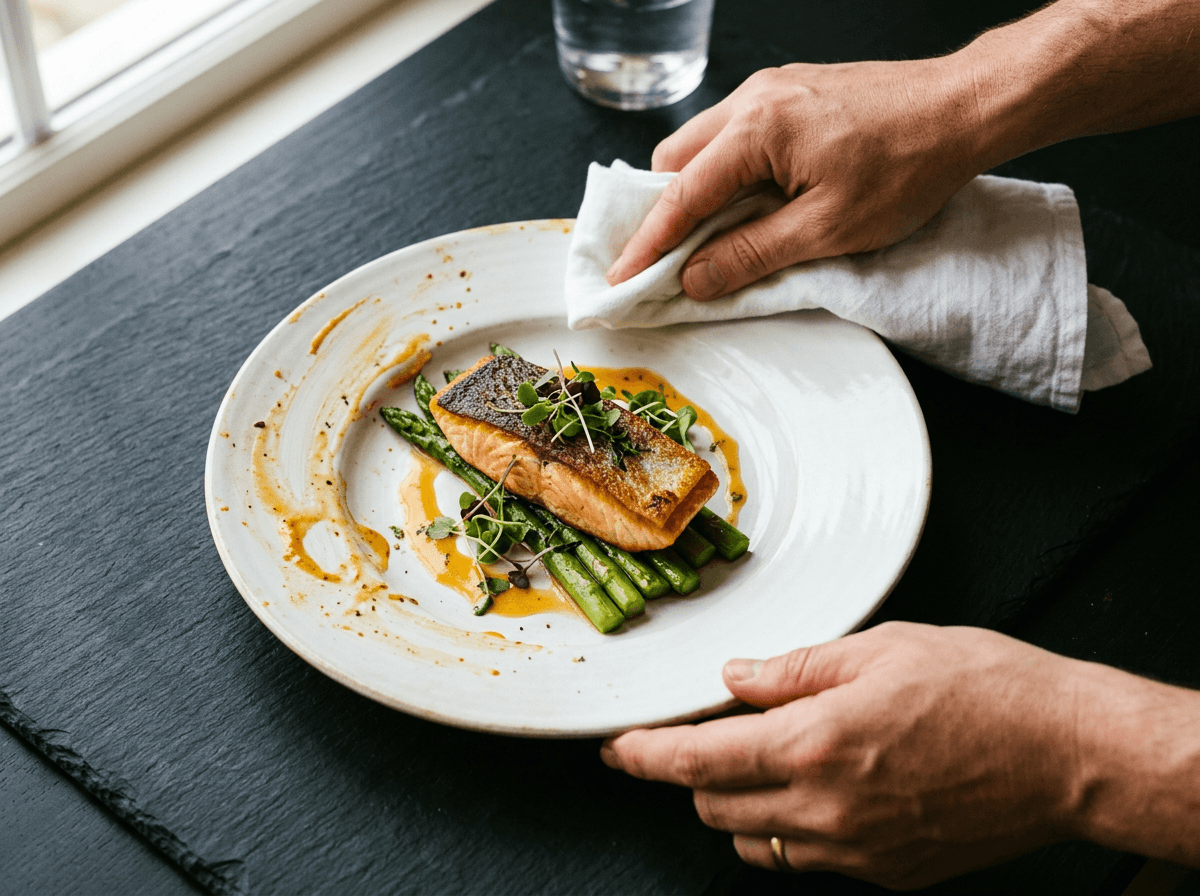 Hands cleaning plate edges before food photography showing the simple improvement of wiping sauce drips for cleaner photos
Sauce drips, fingerprints, and food debris around plate edges scream "amateur." Professional chefs and photographers obsess over plate presentation because it affects how the final photo reads. This tiny habit signals quality in every image you take.
Shoot from 45 Degrees
The 45-degree angle is the most versatile camera angle in food photography. It mimics how you see food sitting at a table — showing both the top surface and the sides, capturing depth that a straight-down shot misses.
Hold your camera roughly 45 degrees to the plate — halfway between directly overhead and eye-level. According to Expert Photography, this is the most common angle in commercial food photography because it works for about 70% of dishes.
Level 2: The 5-Minute Upgrade
Now we're adding food styling and background setup. Still no special equipment needed — just a few minutes of intentional preparation before you take your photos.
Simplify Your Background
Replace the cluttered surface with something clean. A wooden cutting board, plain linen, clean countertop, or poster board all work beautifully as food photography backgrounds.
Classic background options:
- Dark wood — warm, rustic, complements almost any dish
- White marble (or a marble-look tile for $3) — clean, modern, great for bright food
- Dark slate or matte black — dramatic, makes vibrant colors pop
- Simple textured linen — adds visual interest without distraction
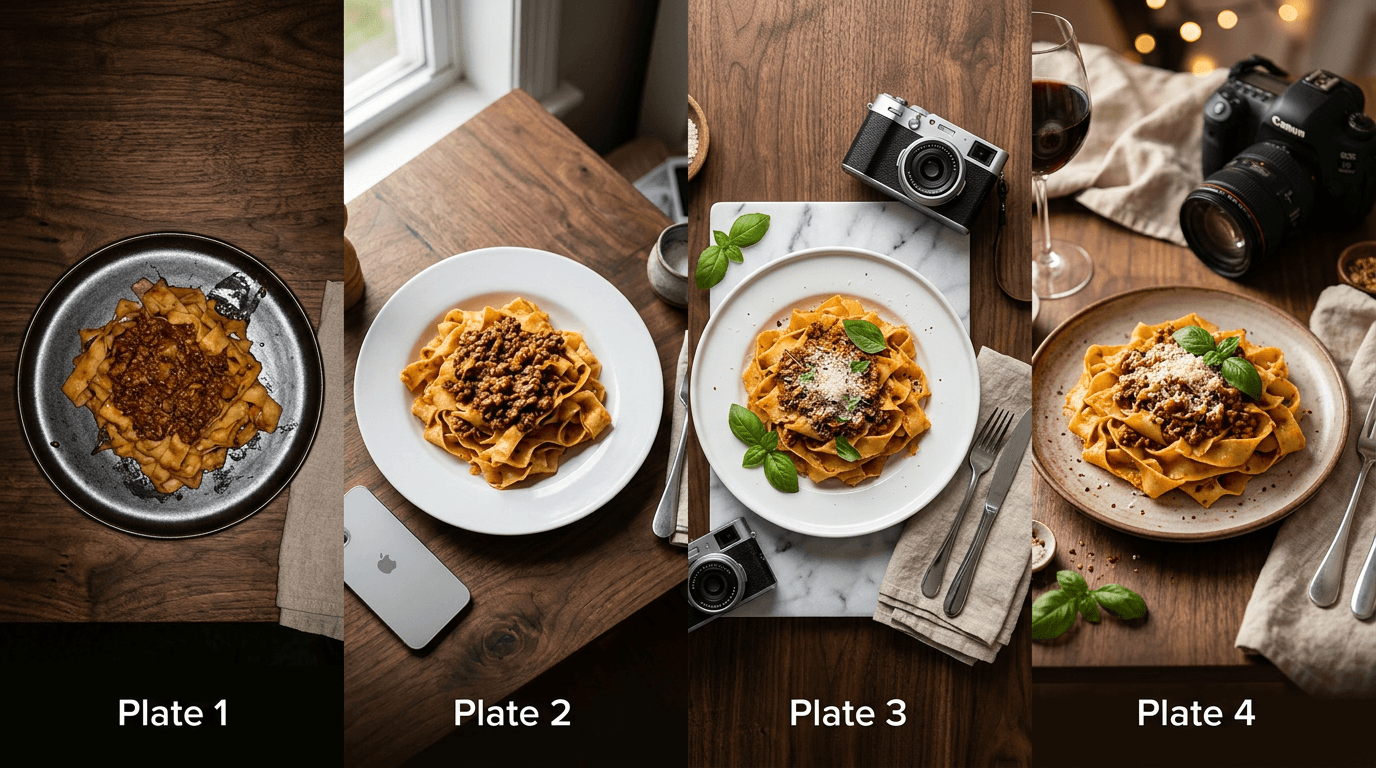
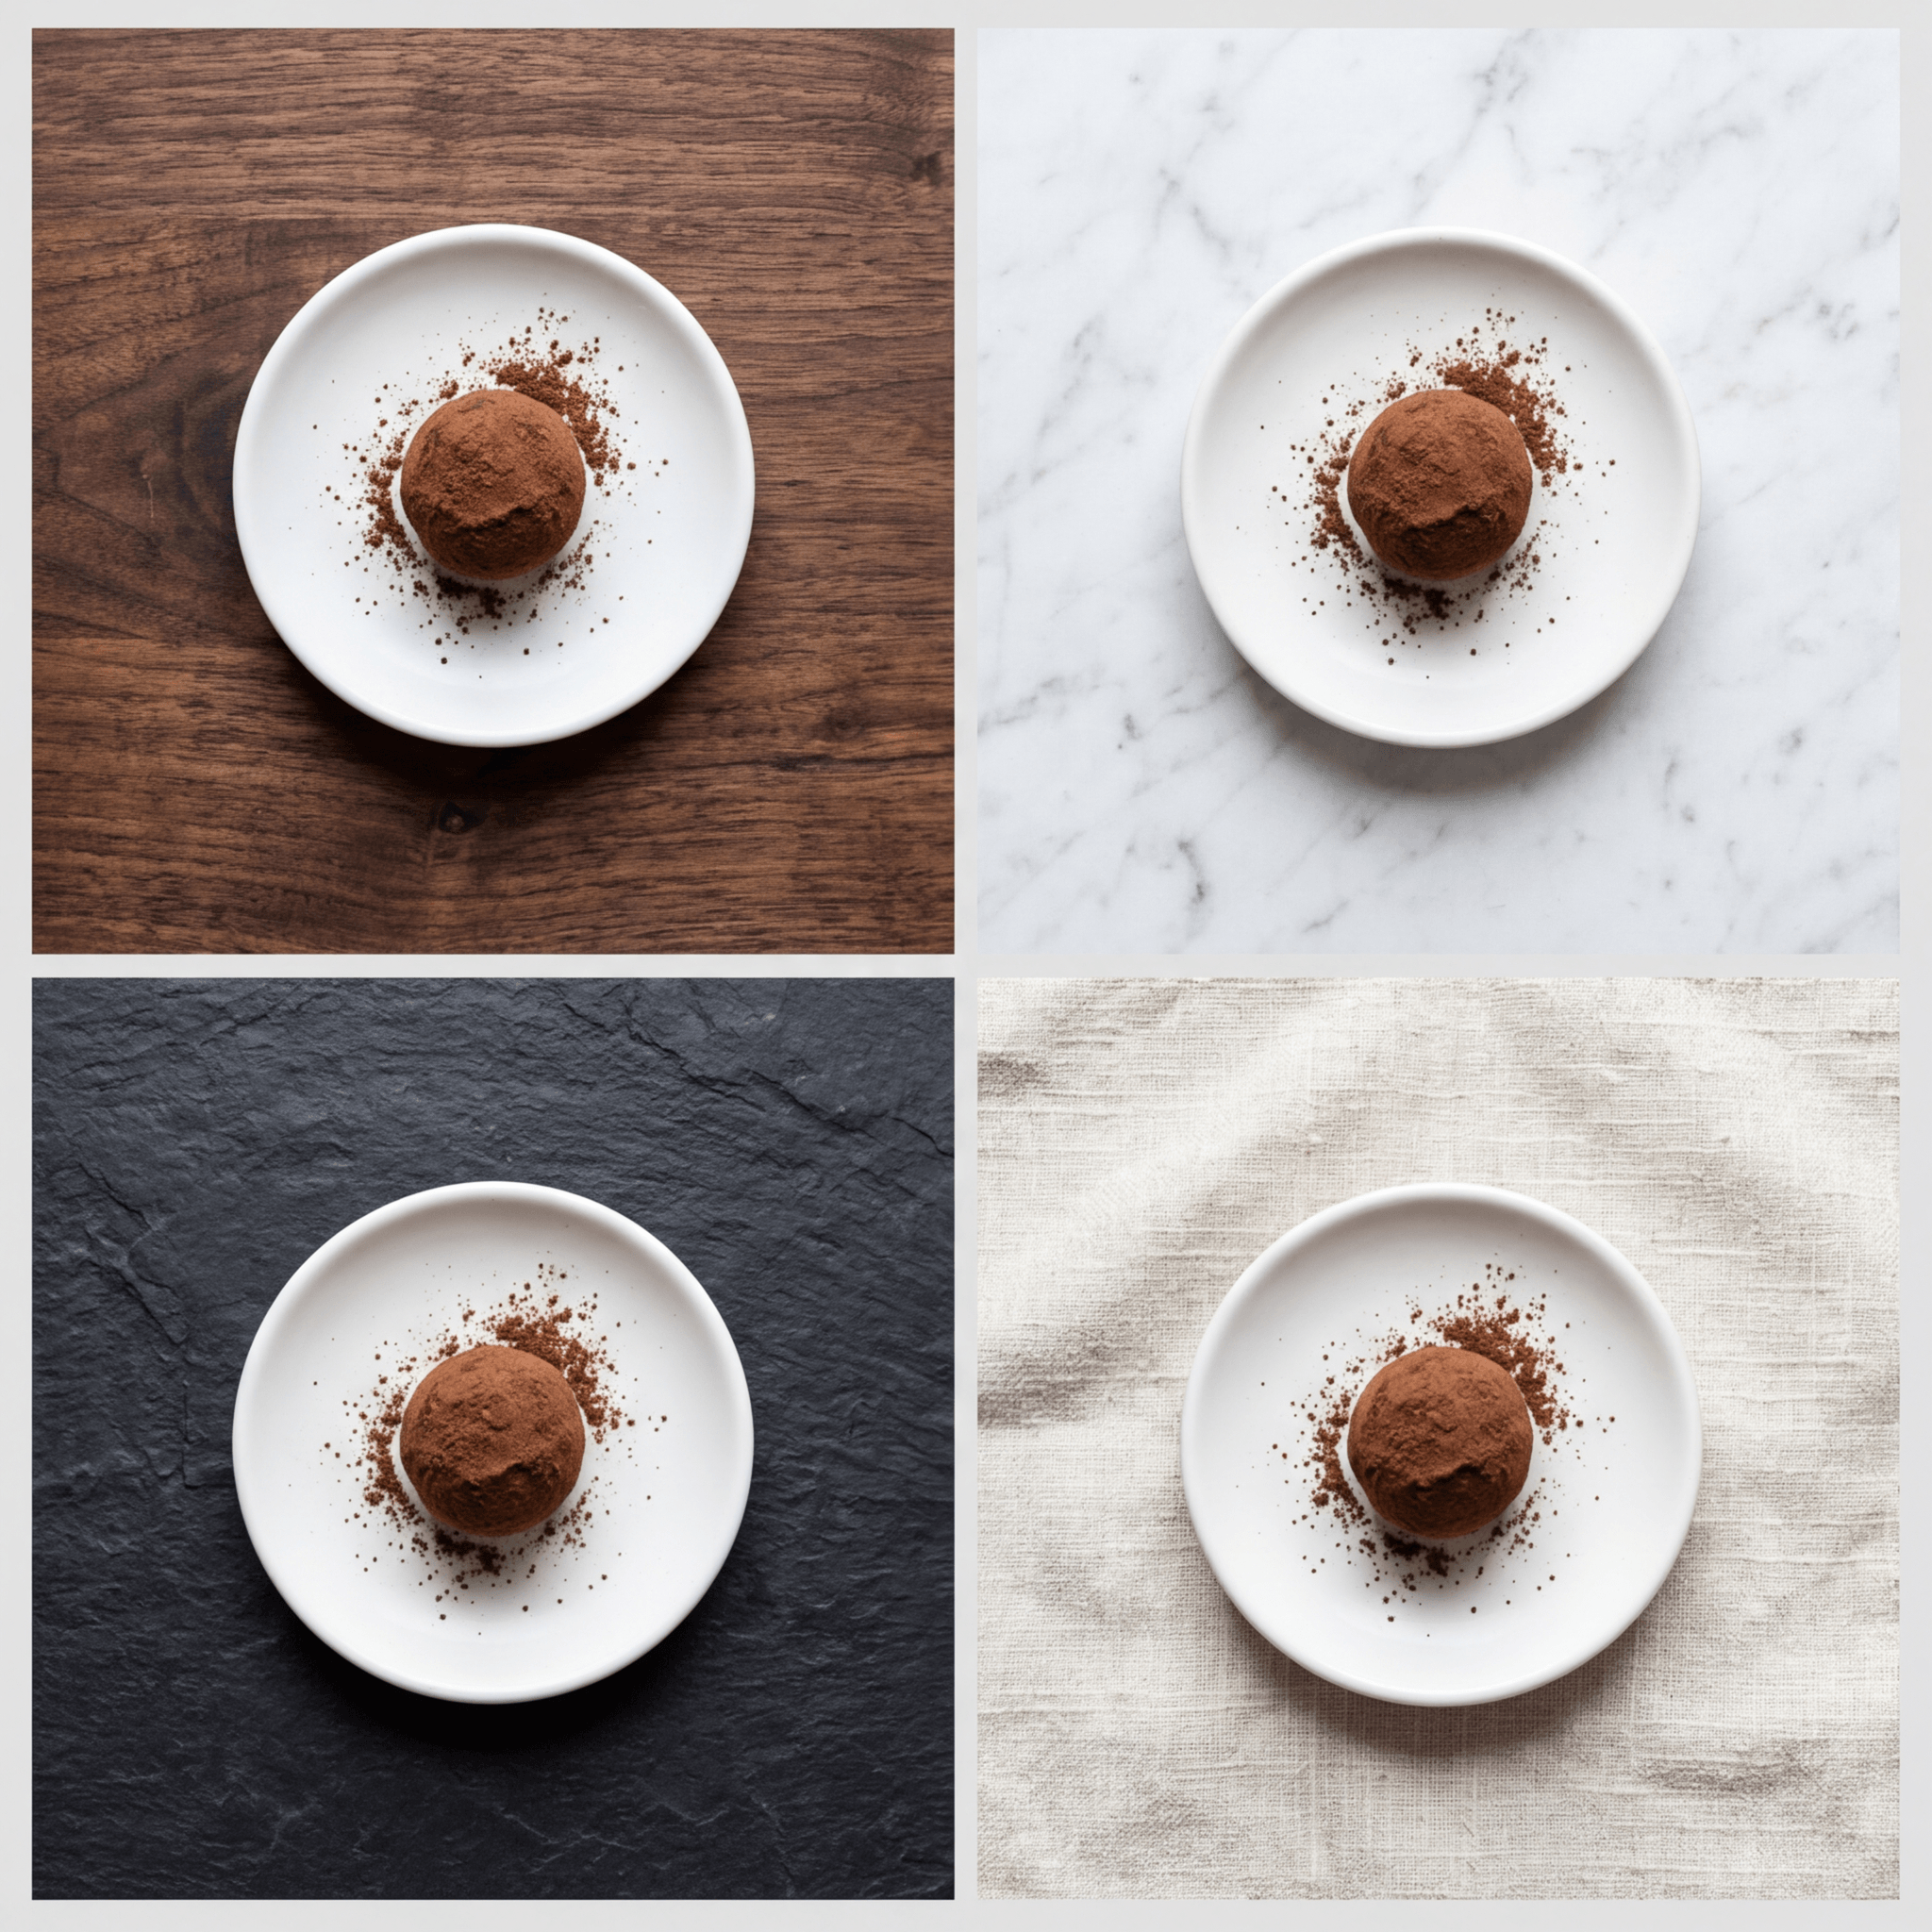 Four different food photography backgrounds compared: dark wood, white marble, slate, and linen each changing the mood of the same dish
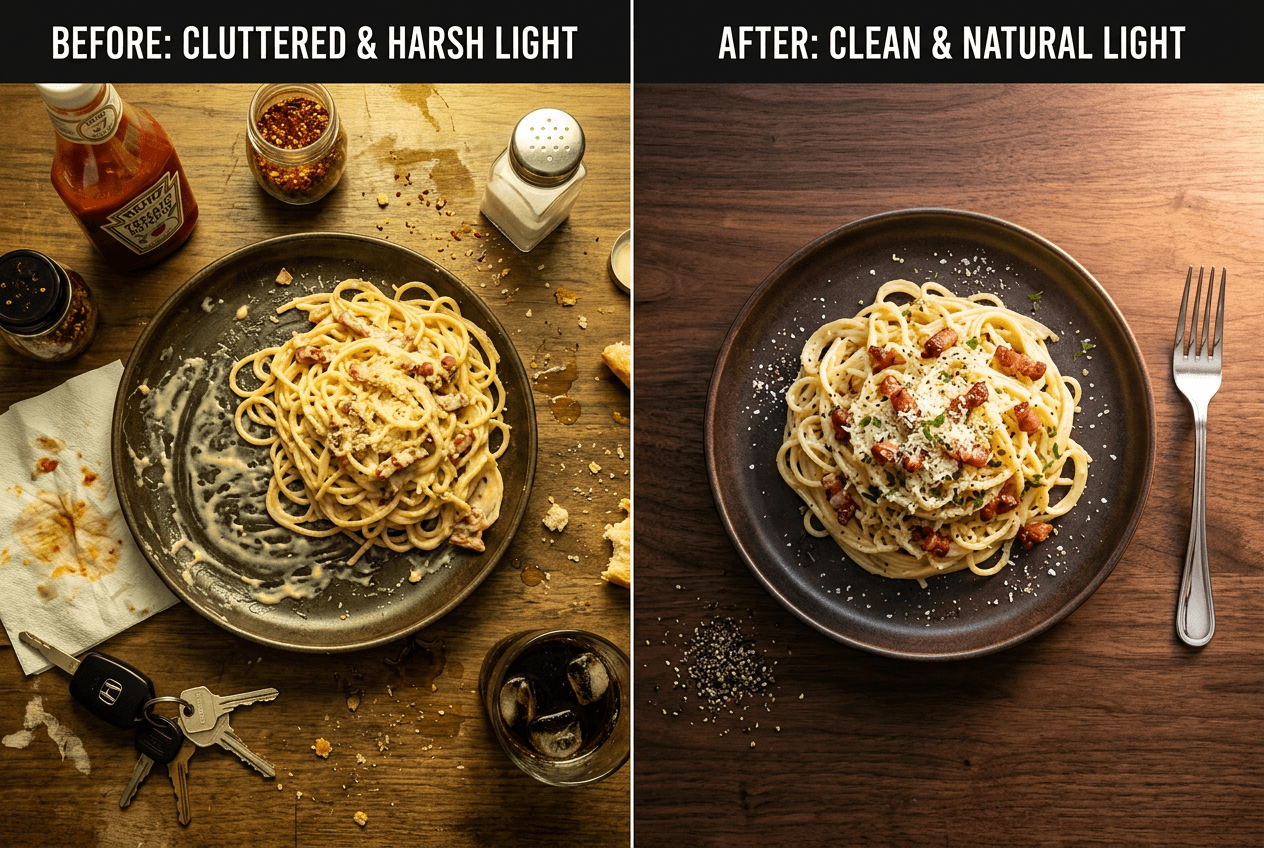 Before and after food photography showing cluttered background versus clean styled setup with simple props
Remove everything from the frame that doesn't serve a purpose. For more background and prop ideas, see our food photography props guide.
Style with Purpose
Add intentional props — one or two elements that tell a story about the dish:
- A small bowl of a raw ingredient from the recipe
- A fork or spoon angled toward the plate
- A torn piece of bread or scattered herb sprigs
- A cloth napkin with interesting texture
Use odd numbers — groups of 1, 3, or 5 elements look more natural in food photos. Leave negative space so the dish breathes and the viewer's eye finds the food. Our food styling guide covers plating and prop selection techniques in detail.
Add a Pop of Color with Garnish
A monochrome dish — brown curry on brown rice, beige pasta on a white plate — photographs flat without a color accent. Fresh garnish is the fastest food photography fix:
- Green on brown: Basil, cilantro, or parsley on stew, curry, or meat
- Red on white: Chili flakes, cherry tomato halves, or sriracha drizzle
- Yellow on dark: Lemon wedges or zest on seafood
- White on dark: Crème fraîche, shaved parmesan, or sesame seeds
One or two garnishes maximum. You're creating a color pop, not burying the dish.
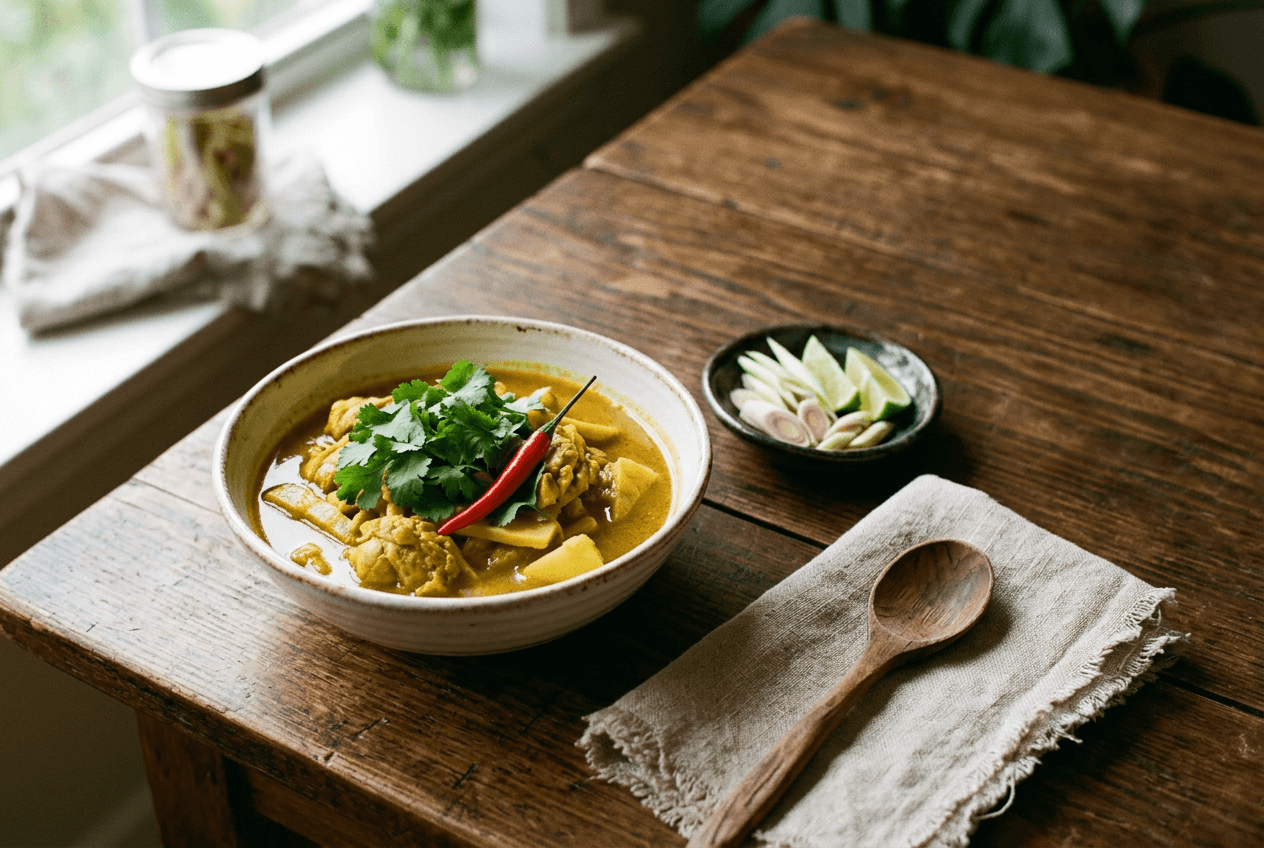 Intentional food styling with color-contrast garnish and odd-number prop arrangement for better food photography
Match Your Camera Angle to the Dish
Not every dish photographs best at 45 degrees. Use this reference for choosing the right angle:
| Dish Type | Best Angle | Why |
|---|---|---|
| Pizza, charcuterie, flat-lays | Overhead (90°) | Shows the full surface layout |
| Pasta, curry, bowls, salads | 45 degrees | Reveals toppings with depth |
| Burgers, sandwiches, layer cakes | Straight-on (0°) | Showcases layers and height |
| Soups, ramen, stews | 45 degrees | Surface detail with depth |
| Cocktails, tall drinks | Straight-on or slight angle | Color gradients and garnishes |
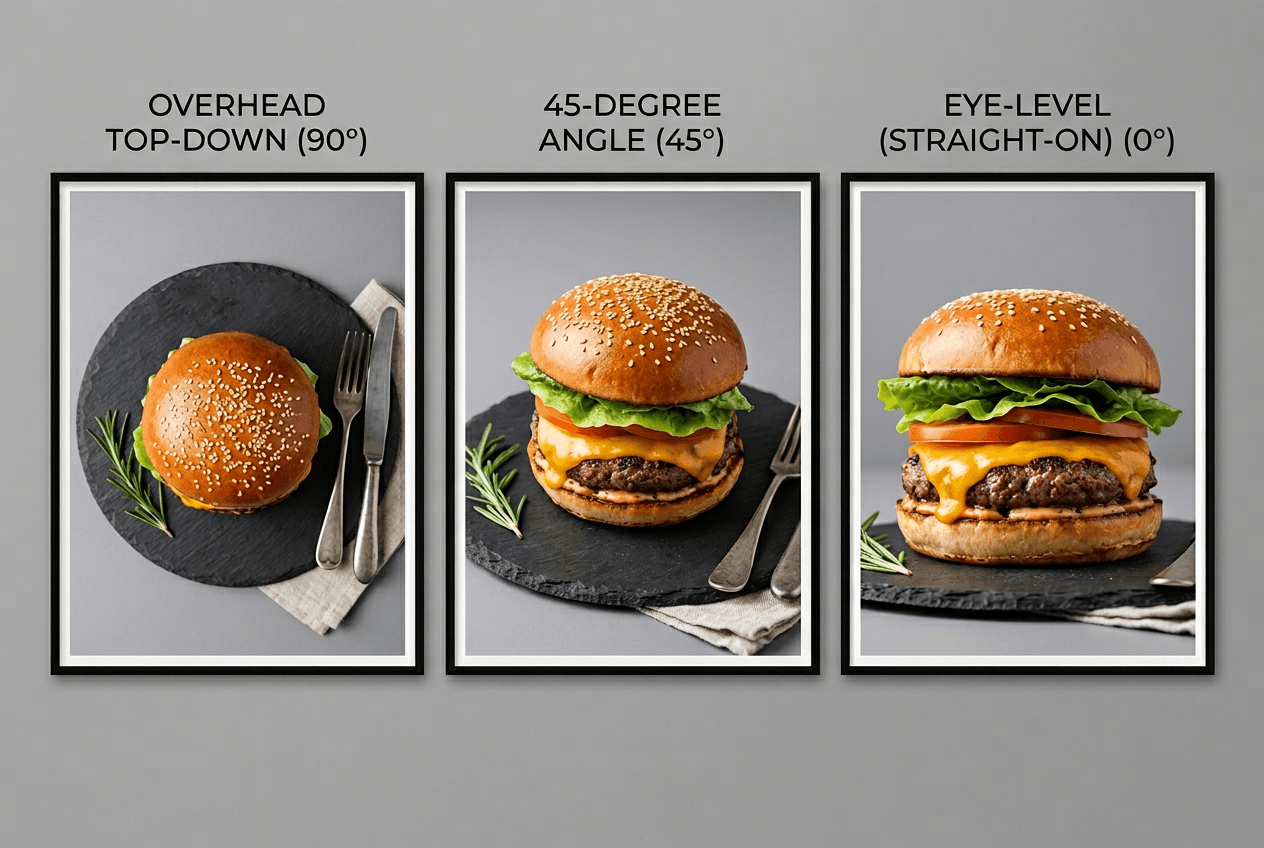 Three food photography angles compared: overhead, 45-degree, and straight-on views of the same gourmet burger
When in doubt, 45 degrees is safest. For more advanced food photography techniques, try shooting each dish from all three angles and comparing.
Level 3: The Pro-Level Upgrade
These food photography tips require more time or knowledge — but they separate "decent snapshot" from images that belong on a restaurant menu or food blog.
Diffuse and Bounce Your Light
Raw window light can be too harsh on sunny days. Two cheap tools fix this:
Diffusion: Hang a white bedsheet, parchment paper, or shower curtain between the window and your food. This softens lighting, creating the even, flattering glow you see in professional food photography.
Bounce/fill: On the opposite side from the window, prop up a white foam board ($1 at a dollar store), foil-wrapped baking sheet, or white cardboard. This bounces light into shadows, revealing texture and detail in your food photos.
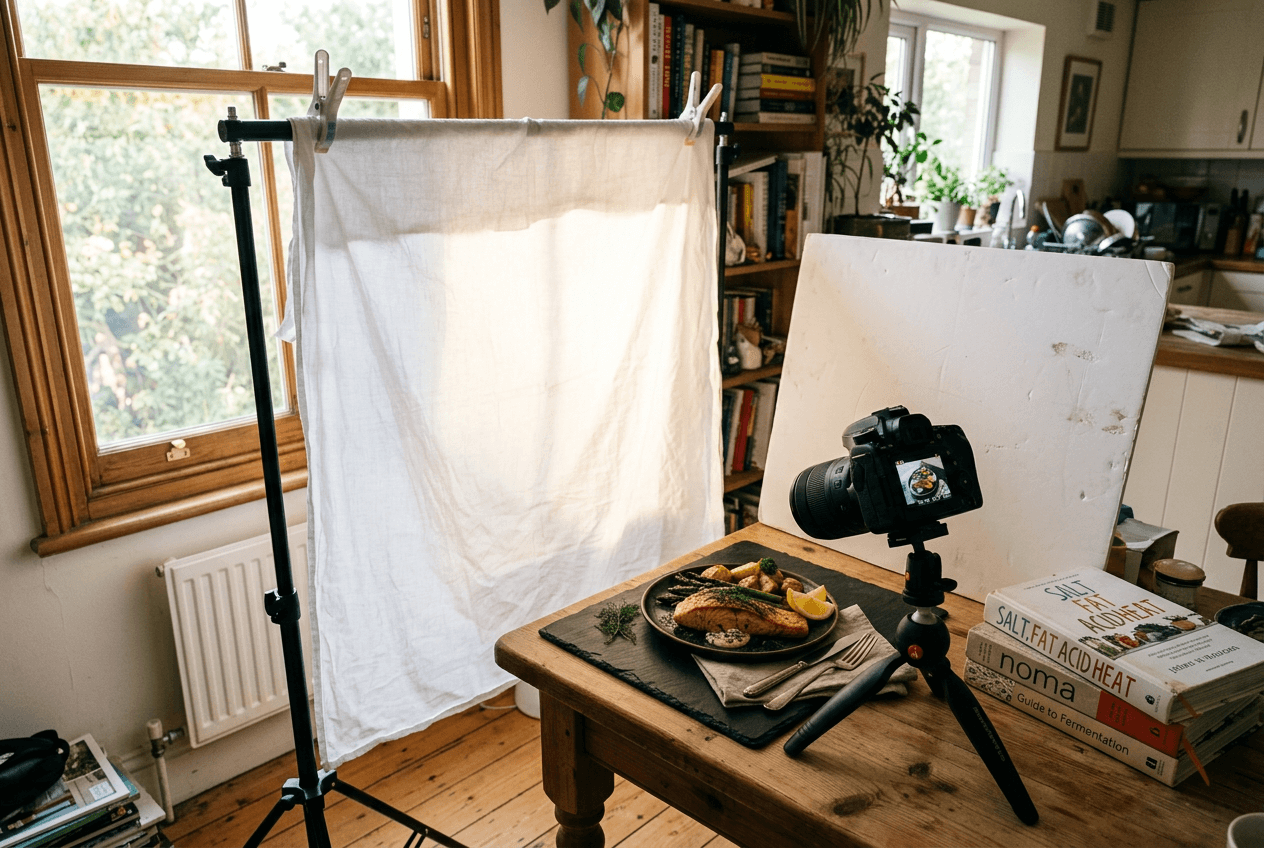 DIY food photography lighting setup with window diffusion sheet and foam board bounce reflector for professional results
Under $5 total for studio-quality lighting. Many professional food bloggers shoot exactly this way — a window, diffuser, and bounce board. Our food photography lighting guide covers more setups.
Master the Rule of Thirds
Enable the grid overlay on your camera or phone. You'll see a 3×3 grid dividing the frame into nine sections.
Place the dish at one of the four intersection points instead of dead center. This creates dynamic, compelling compositions. Use props like a fork angled toward the food, a sauce drizzle, or scattered ingredients as leading lines — these composition tips transform casual snapshots into food photos worth sharing on Instagram or Pinterest.
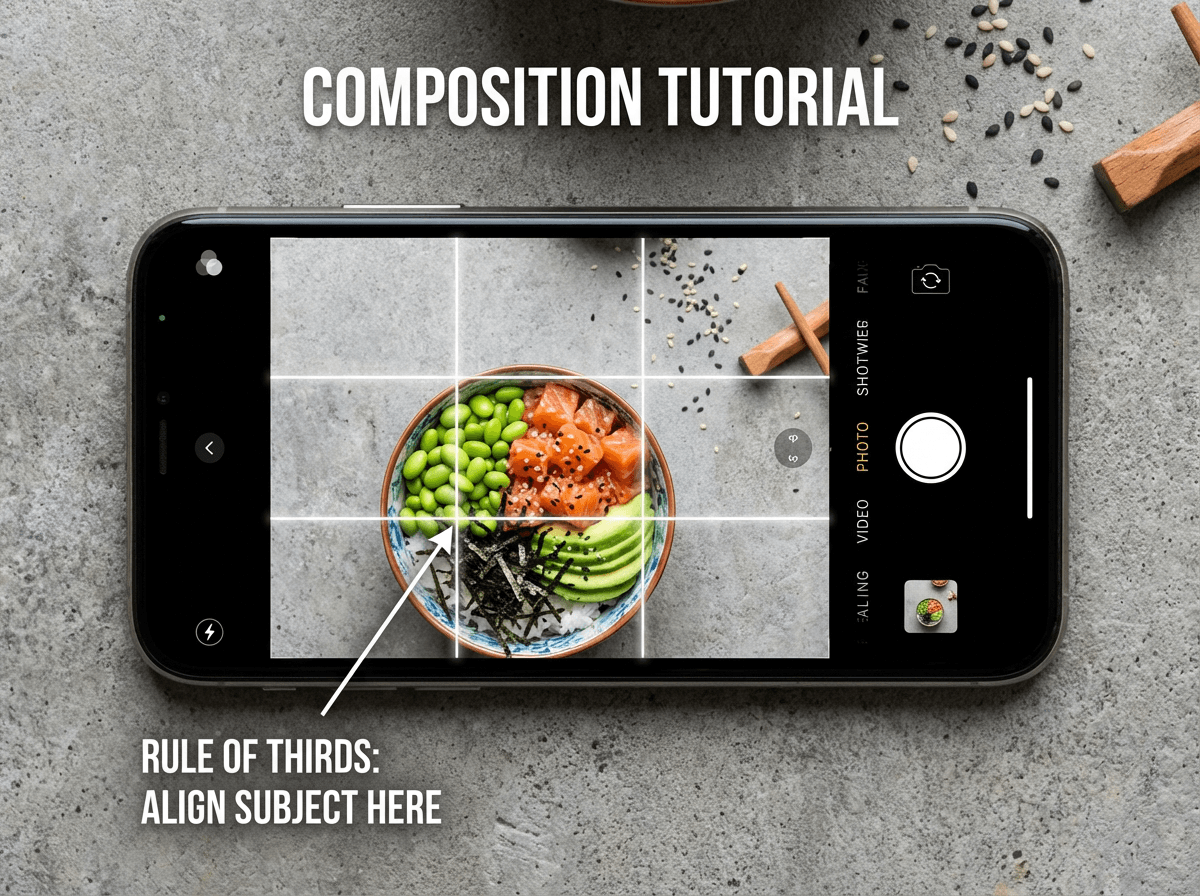 Smartphone camera showing rule of thirds grid overlay for food photography composition with poke bowl positioned at intersection
Use Manual Camera Settings
If you're taking food photos with a DSLR, mirrorless camera, or phone app with manual controls, three settings make a huge difference:
Aperture (f-stop):
- f/2.8–f/4 — Shallow depth of field. The dish stays sharp while background blurs. Ideal for single-plate close-ups.
- f/5.6–f/8 — More in focus. Better for flat-lays and overhead food photography.
ISO:
- Keep it low — 100 to 400. Higher ISO adds grain. Near a window, ISO 100–200 produces clean images.
Shutter speed:
- Handheld: stay above 1/60 second. For slower settings, use a tripod or stable surface.
White balance:
- Set to "Daylight" near windows, or use custom white balance for accurate food colors. Auto white balance often skews warm tones cooler.
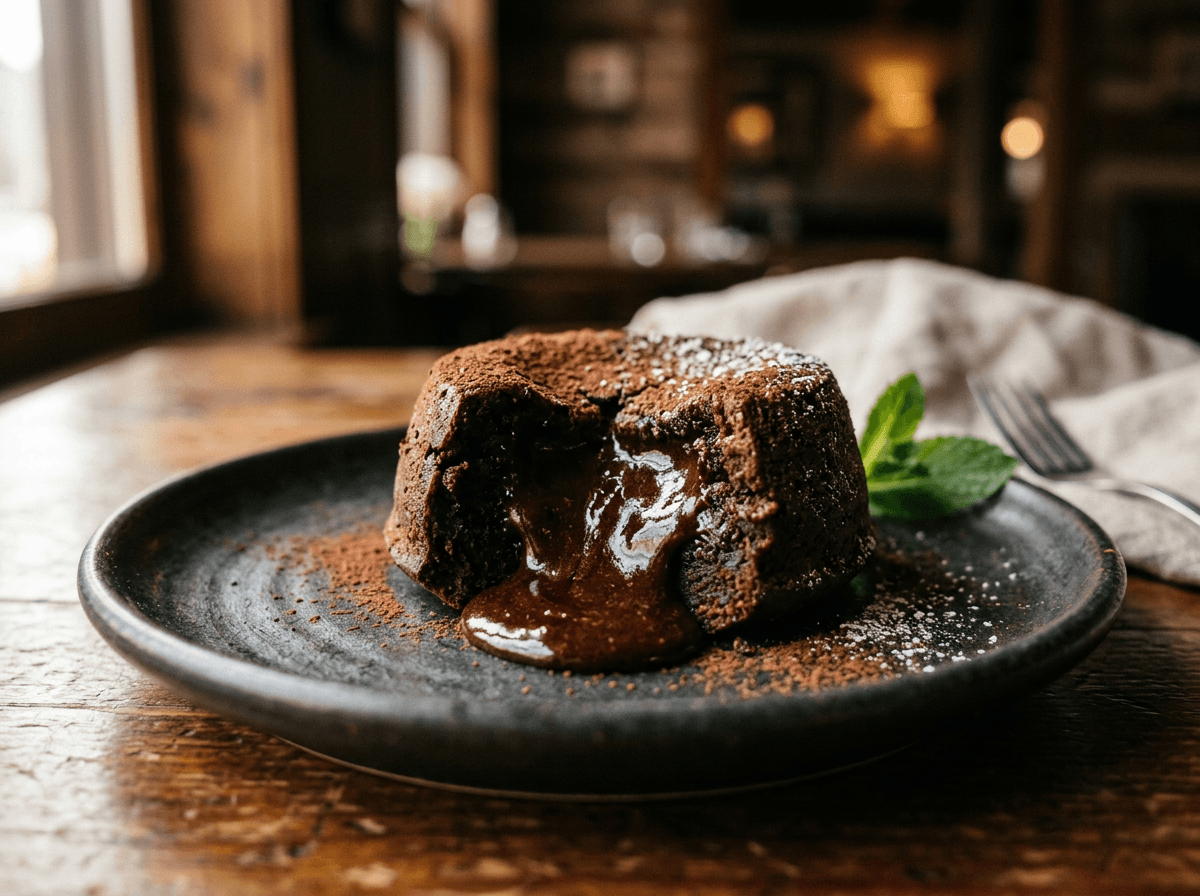 Chocolate lava cake photographed with shallow depth of field showing the power of manual aperture settings in food photography
Phone users can get manual controls through apps like Halide (iOS) or ProCamera. For full equipment and lens tips, see our food photography equipment guide.
Level 4: The AI Upgrade — Take Good Food Photos, Then Make Them Great
Here's where everything comes together. You've taken a solid photo with the tips above — good natural light, clean background, proper angle. It looks decent. What if you could make it look professional through AI editing?
FoodShot AI is purpose-built for food photography. Upload a photo from any camera and in about 90 seconds the AI transforms it:
- 30+ style presets optimized for delivery apps, restaurant menus, social media, fine dining, and more
- Background replacement — swap your kitchen counter for marble, rustic wood, or any setting
- Lighting correction — AI evens out shadows, boosts exposure, enhances natural food colors
- Camera angle adjustment — perspective refinements for more polished composition
The tips in this guide help you capture a strong source photo. AI editing takes that and polishes it into professional food photography — at a fraction of traditional photography costs.
Try it free with 3 image generations to test on your own dishes. Paid plans start at $9/month (billed annually) with 25 generations, watermark removal, and a commercial license.
This isn't about skipping fundamentals — a badly lit, cluttered photo still looks off after editing. But a decent photo with good light and a clean background? AI turns that into a menu-ready image. Combining solid photography tips with smart editing tools delivers the best food photos possible.
For more, see our guide on how to edit food photos and our full food photography tips collection.
Quick Reference: Best Angles for Common Dishes
Bookmark this for your next food photography session:
| Dish | Angle | Pro Tip |
|---|---|---|
| Pizza | Overhead (90°) | Show full shape and topping spread |
| Burger | Straight-on (0°) | Cut in half to reveal layers |
| Pasta | 45° | Twirl a forkful prominently |
| Soup/ramen | 45° | Arrange toppings before shooting |
| Salad bowl | 45–60° | Show colorful top with depth |
| Layer cake | Straight-on (0°) | Slice and pull one piece forward |
| Cocktails | Straight-on | Capture gradient and garnish |
| Charcuterie | Overhead (90°) | Fill the frame edge to edge |
| Sushi | 45° | Diagonal arrangement for flow |
Frequently Asked Questions
Do I need an expensive camera to take good food photos?
No. Any smartphone from the last five years can take good food photos. Lighting, composition, and styling matter far more than megapixels or lens quality. DSLRs and mirrorless cameras offer manual controls for more creative freedom — useful for food bloggers or restaurant menu photography. Our food photography equipment guide has recommendations at every budget.
What's the single biggest improvement I can make right now?
Move to natural light. This one change outweighs every other food photography tip combined. Find a window, turn off ceiling lights, and place your dish where side light hits it. The improvement in color, texture, and photo quality is immediate.
Should I edit my food photos?
Yes — even light editing helps. Boost brightness, add contrast, adjust color warmth, and crop tighter. These editing tips take under a minute in any photo app. AI tools like FoodShot handle editing automatically for professional results without complex software.
How do I take food photos in a dark restaurant?
Request a window table if possible. Without natural light, have a friend hold their phone flashlight above and to the side of the dish (not directly at it). Take the best photo you can, then use AI editing to fix lighting and color afterward. Never use your camera's flash for food — it makes food photos worse every time.
What's the difference between this guide and the phone photography guide?
This guide covers universal food photography tips for any camera — phones, DSLRs, mirrorless cameras, point-and-shoots, and tablets. Our phone food photography guide goes deeper on phone-specific features like tap-to-focus, HDR, portrait mode, and mobile editing apps. Both guides complement each other if you shoot on a smartphone.
