How to Stage Food for Photography: Complete Styling Guide
Knowing how to stage food for photography is the single biggest difference between an amateur snapshot and a scroll-stopping image. It's not about the camera or even the food itself. It's about everything around the food — the surfaces, props, plates, and garnishes that frame your dish as the hero.
Quick Summary: Staging food for photography means building the entire scene before your food arrives: choosing surfaces, selecting the right plate, arranging supporting elements for visual flow, and adding finishing touches like garnishes and intentional "mess." This guide walks through each step so you can stage any dish for flat-lays, 45-degree angles, or hero shots — whether you have a full studio setup or 60 seconds in a restaurant kitchen.
This isn't about food styling techniques like the perfect pasta twirl or the burger stack architecture. Staging is the theater around the food — the set design that makes everything else in your food photography work.
Set the Scene Before the Food Arrives
The biggest staging mistake in food photography? Waiting for the food.
Hot food starts losing its appeal the moment it leaves the kitchen. Steam fades in under two minutes. Sauces congeal. Ice cream melts. Herbs wilt. If you're scrambling to arrange your backdrop and position your camera while your beautifully plated dish deteriorates, you've already lost the shot.
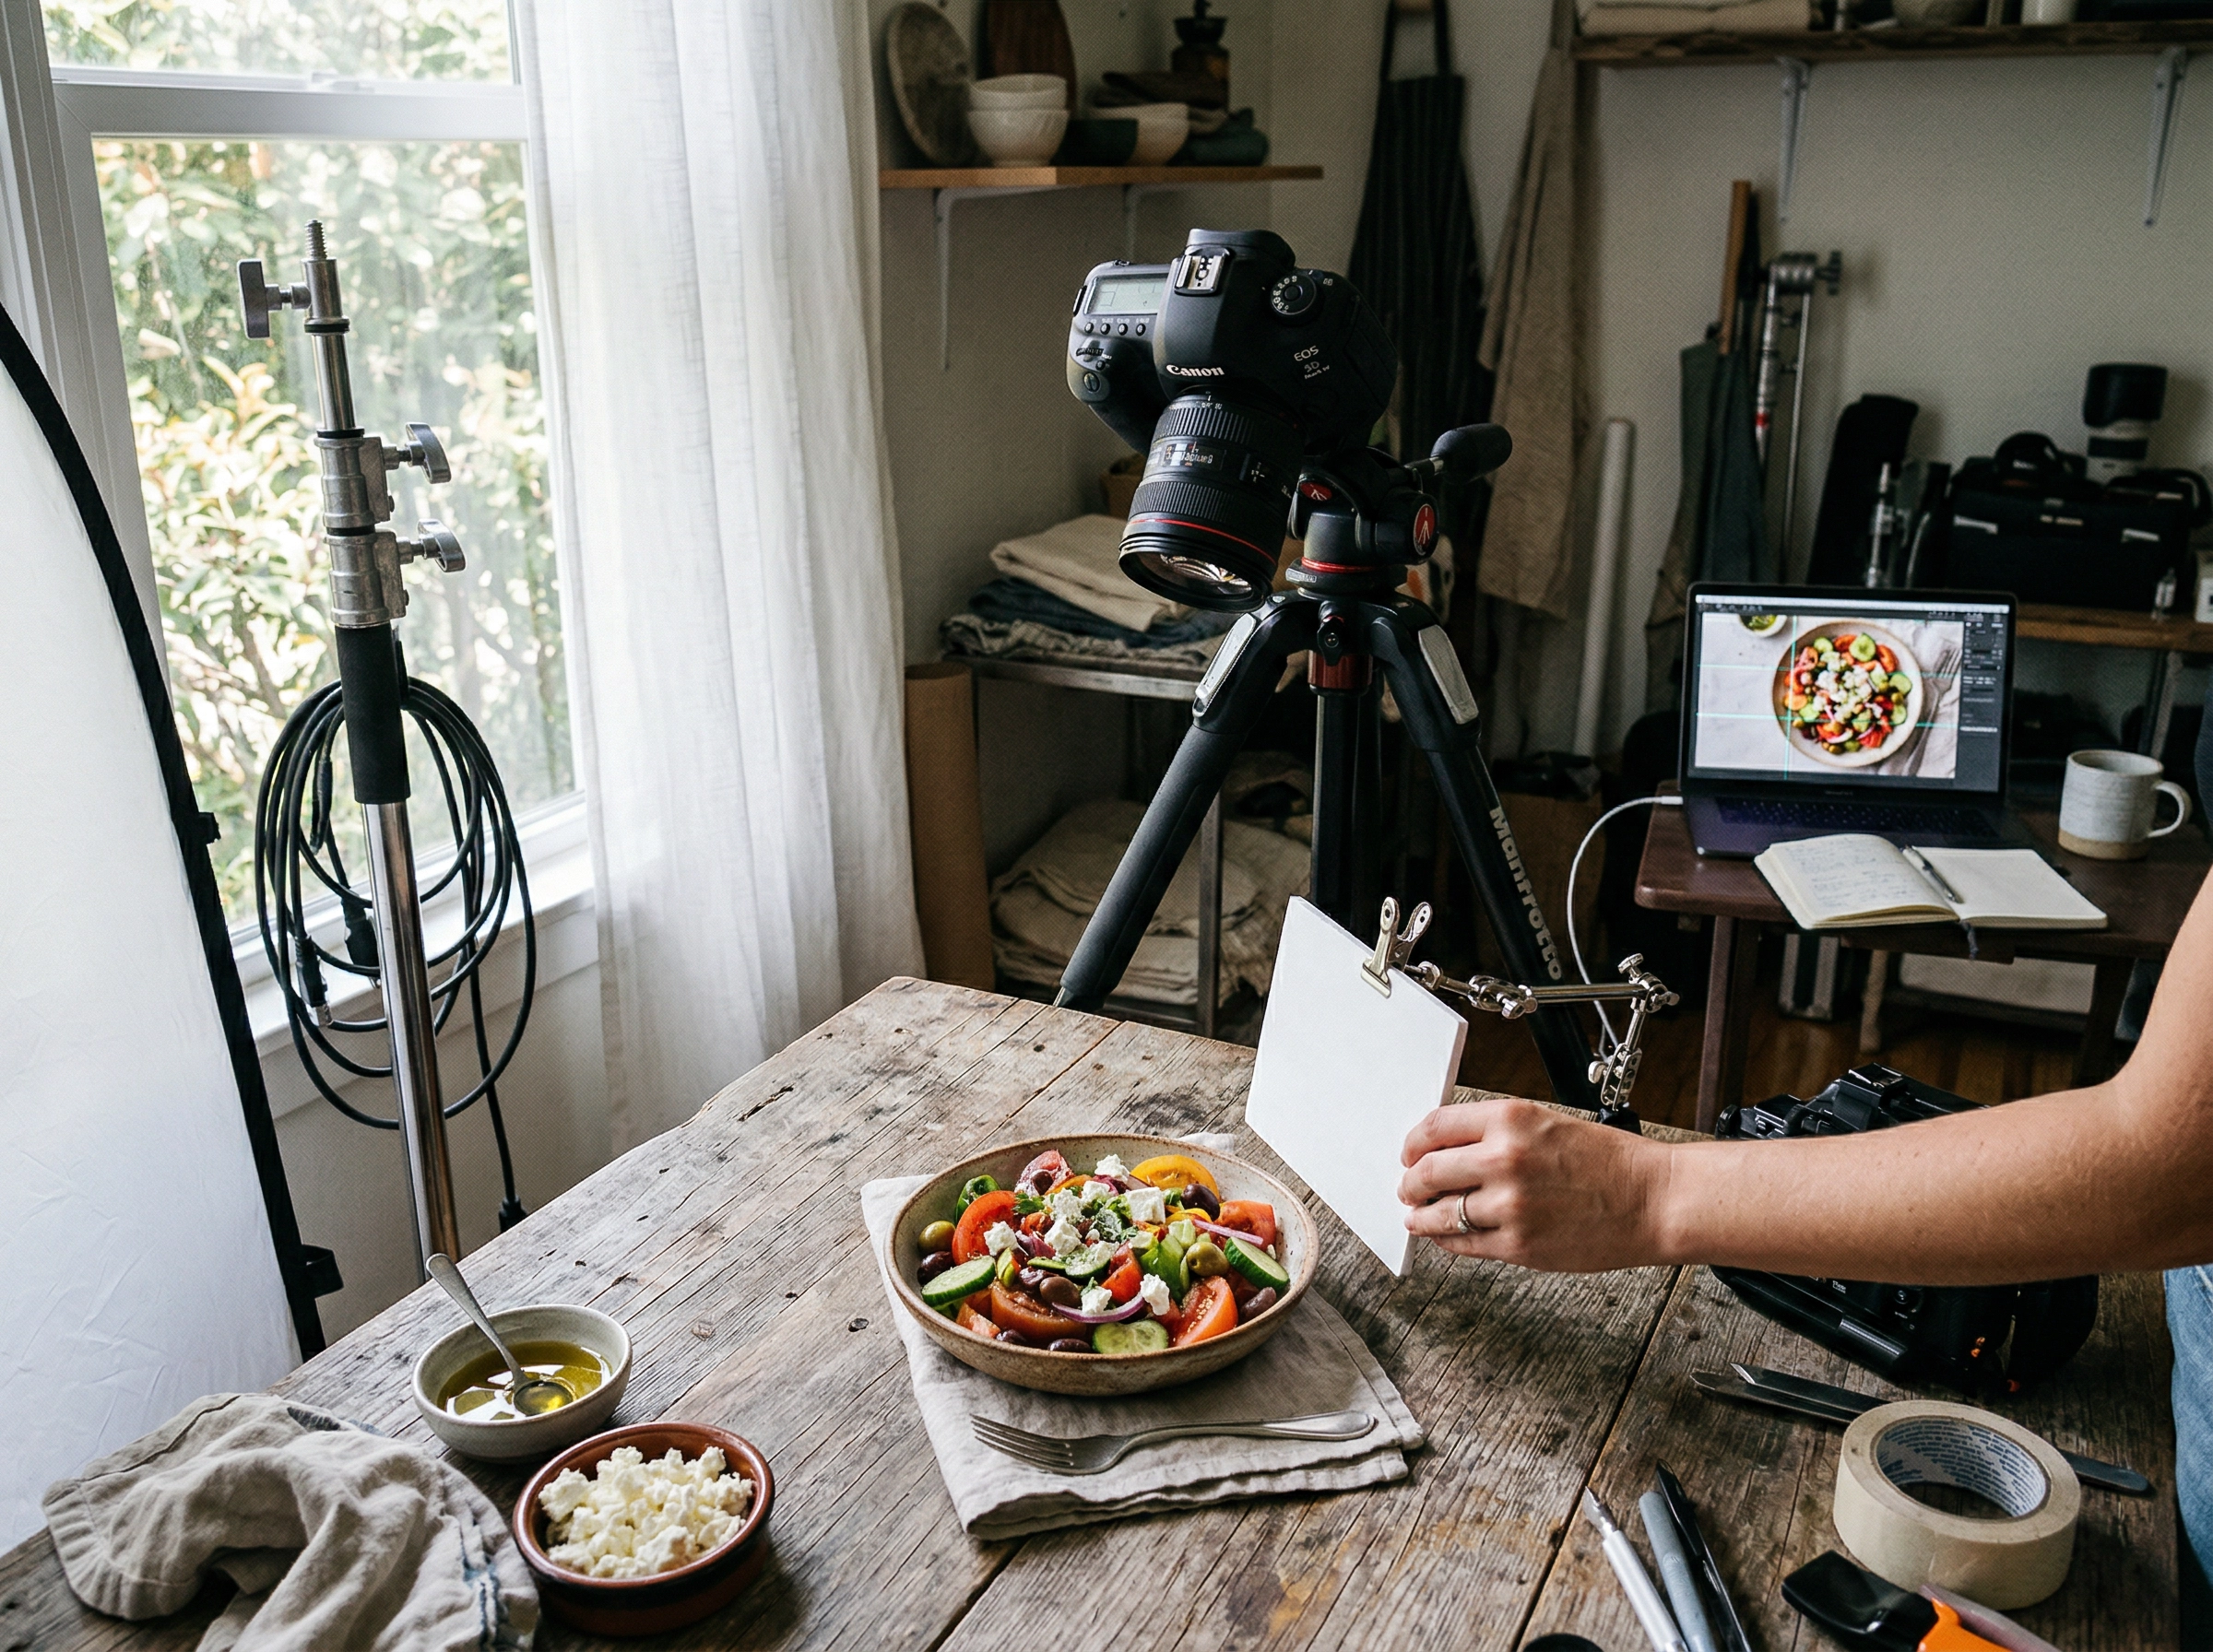 Behind-the-scenes food photography staging setup with natural window light, reflector, and tripod positioning
Here's the staging order that professional food photographers follow:
- Choose your surface and background. Wood, marble, dark slate, linen — pick a surface that contrasts with your food without competing for attention. A dark, moody surface under a bright pasta? Great. A busy patterned tablecloth under a colorful salad? Disaster. (Need inspiration? Check our food photography props guide for surfaces and backdrops that work.)
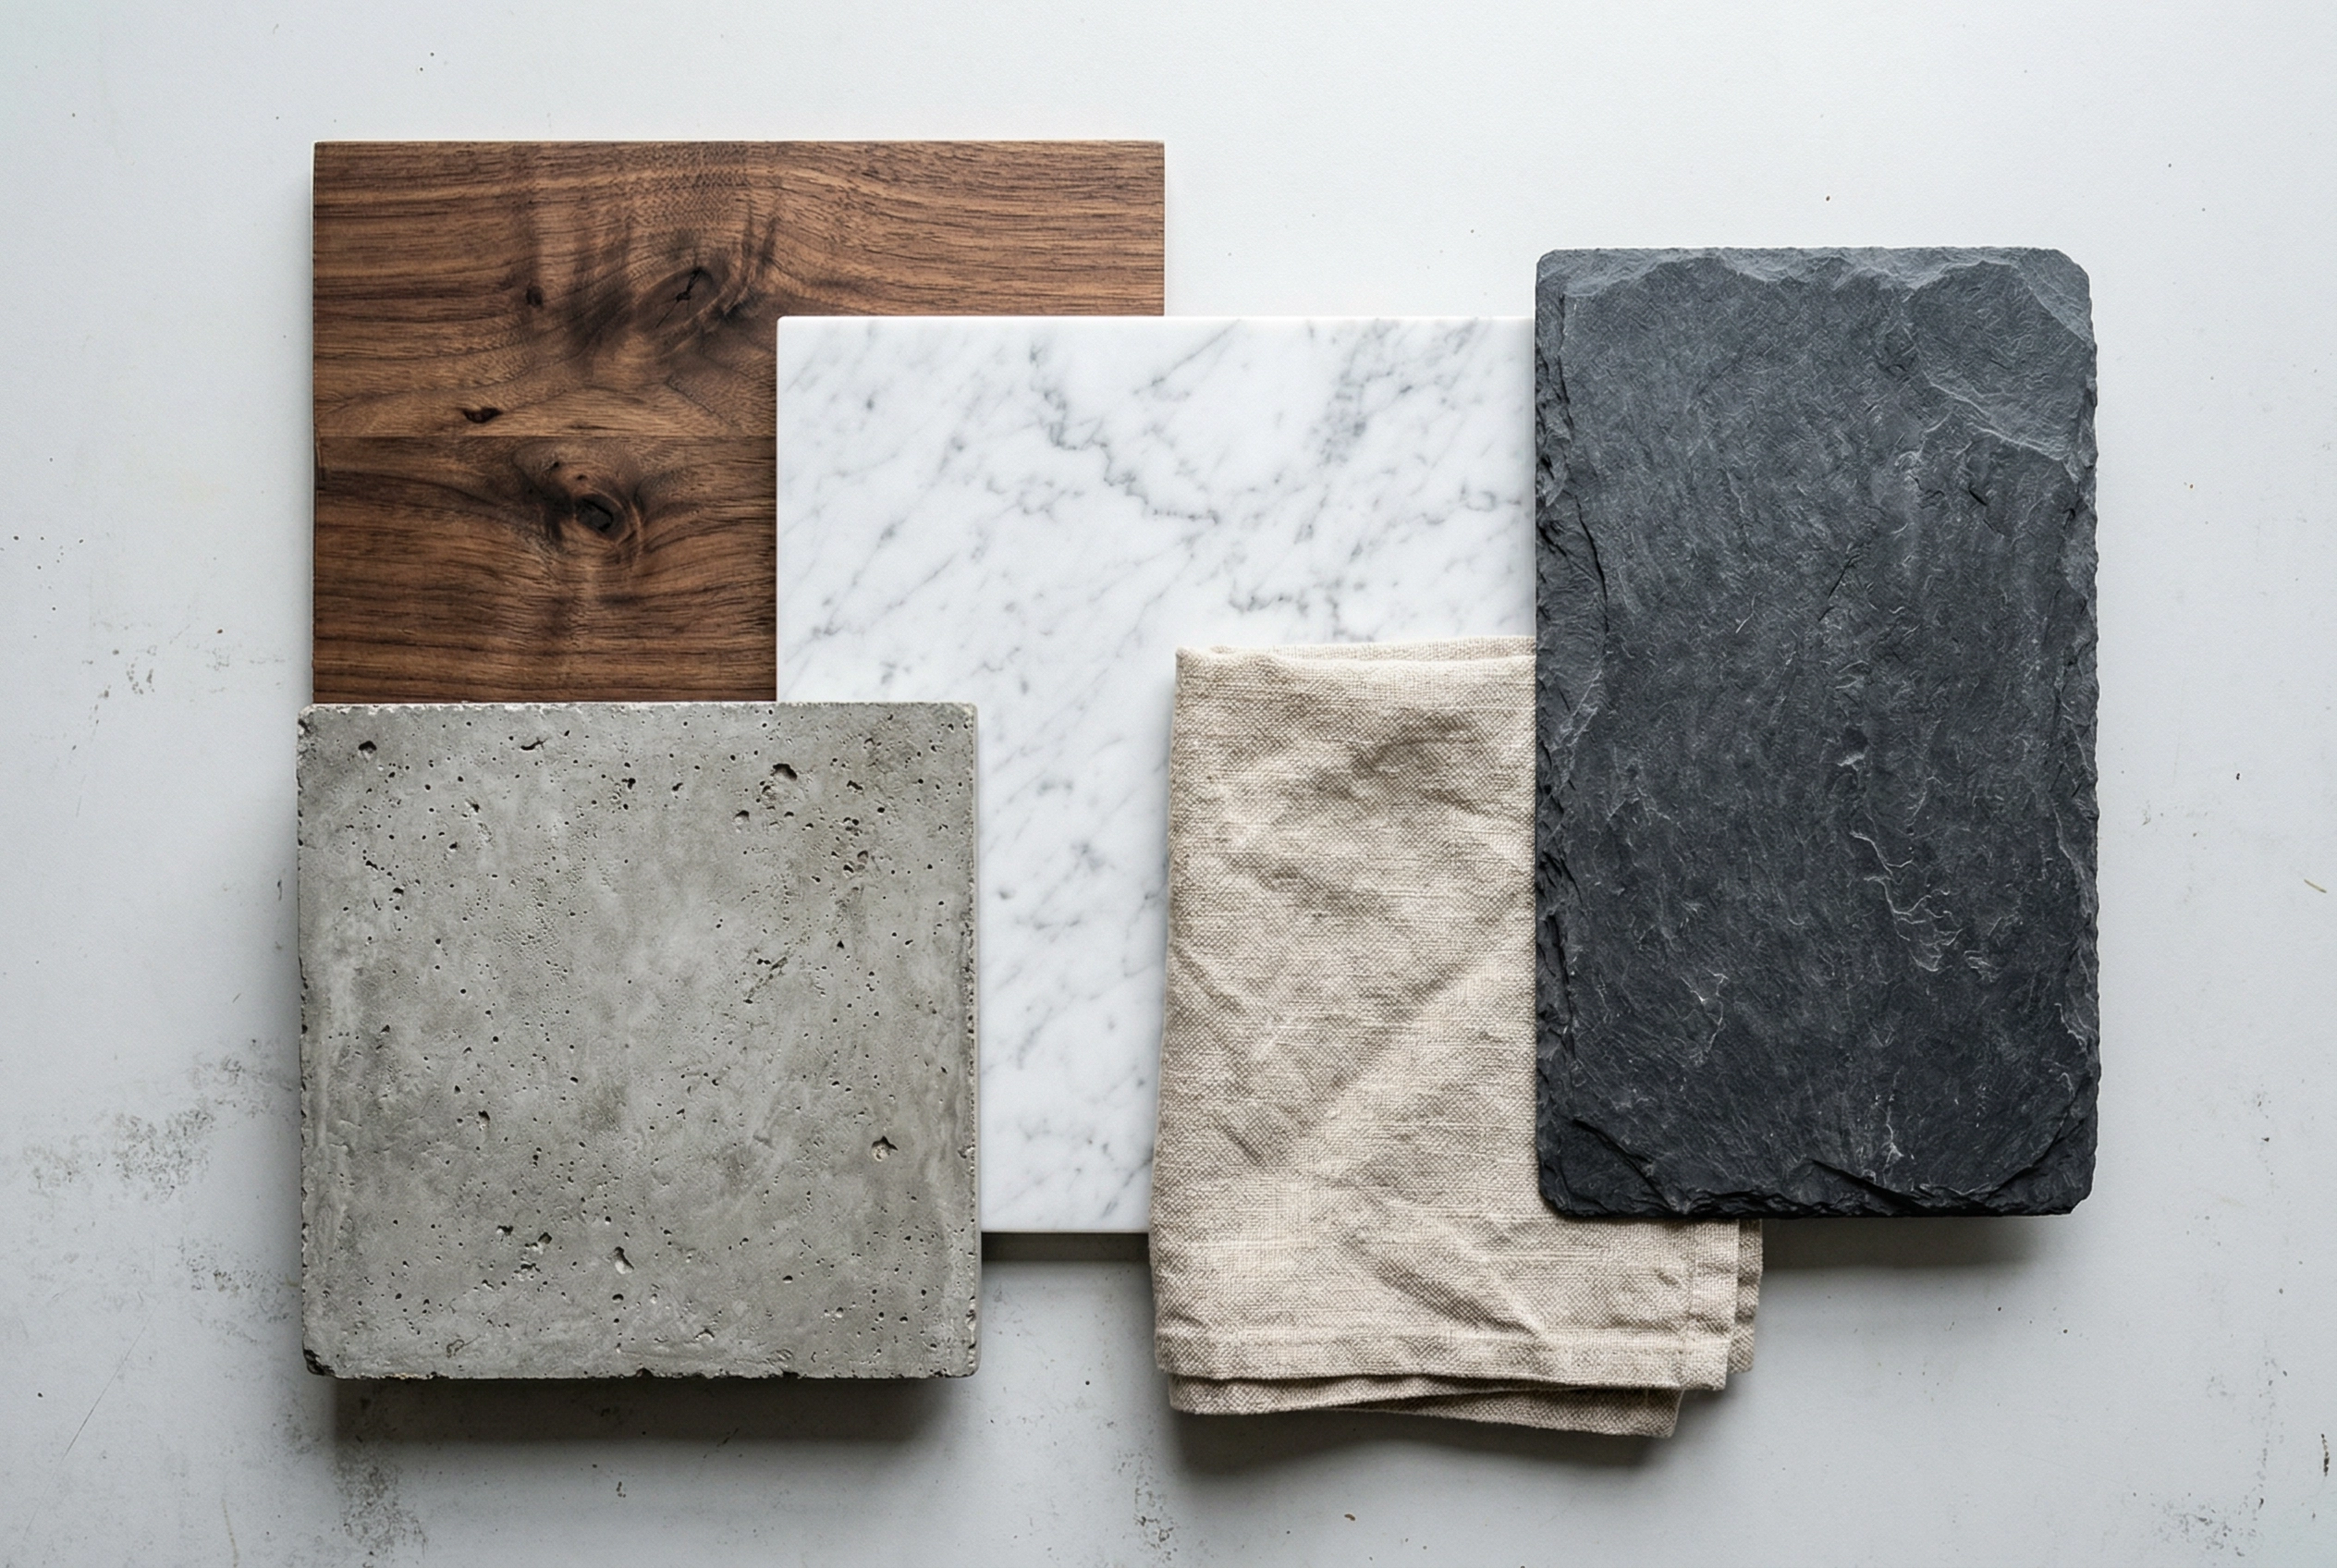 Food photography surface options including dark wood, white marble, concrete, linen, and slate for staging
-
Set your angle and lock the camera. Decide if you're shooting overhead, at 45 degrees, or eye-level before the food arrives. Mount your camera on a tripod — this eliminates the panic of finding the right angle while your dish wilts. A tripod also lets you style to the lens, checking your composition in real time. For camera and equipment guidance, we've got you covered.
-
Pre-light the scene. Position your light source — ideally natural window light coming from the side or behind the set. Side lighting and backlighting create the shadows and highlights that give food photos dimension and depth. Use a reflector (even a piece of white foam board) on the opposite side to fill harsh shadows. According to BBC Good Food's photography guide, the choice of surface, plate, and cutlery all subtly contribute to the mood and success of your shot — even if viewers only notice them subconsciously.
-
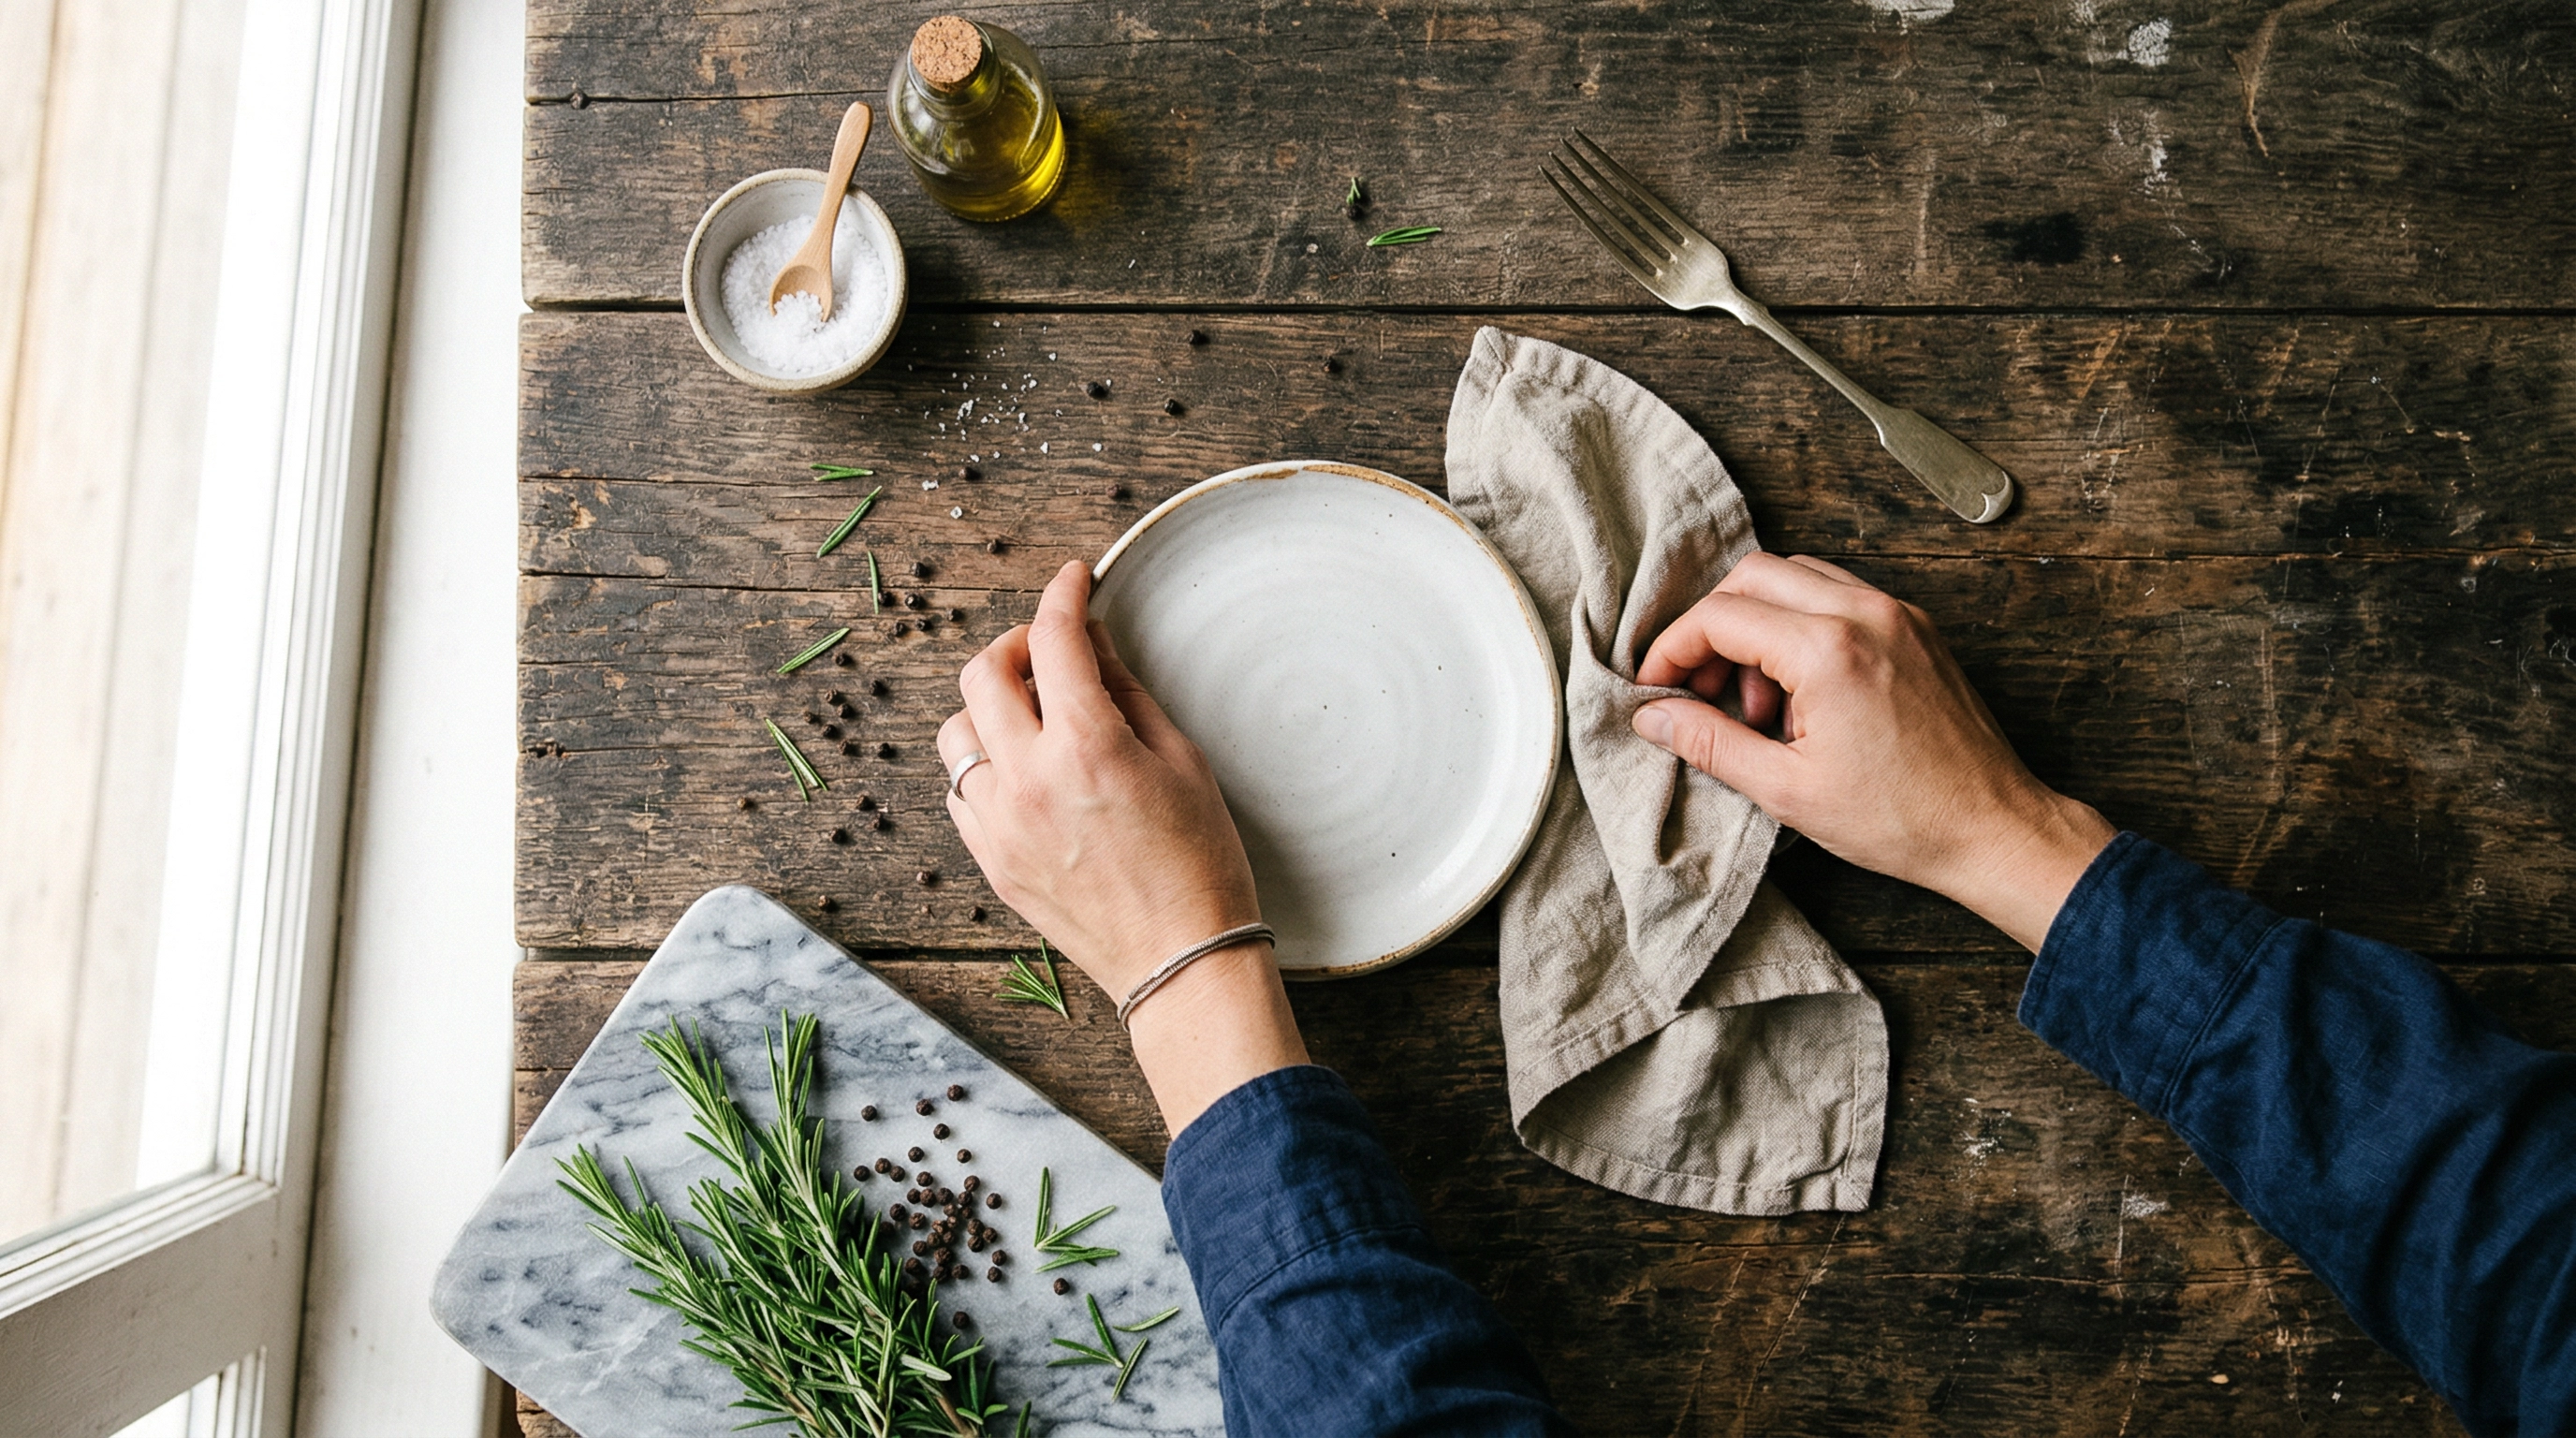
Place your props. Utensils, napkins, small bowls of raw ingredients, a glass of wine — arrange these around where the food will sit. Don't fill every inch of the composition. Leave breathing room so the subject stands out clearly in the frame.
When the food arrives, you place it, make a few micro-adjustments, and start shooting immediately.
How Plate Size, Color, and Shape Affect Your Food Photos
The plate is the food's frame. Choose the wrong one, and even a stunning dish looks underwhelming in the final image.
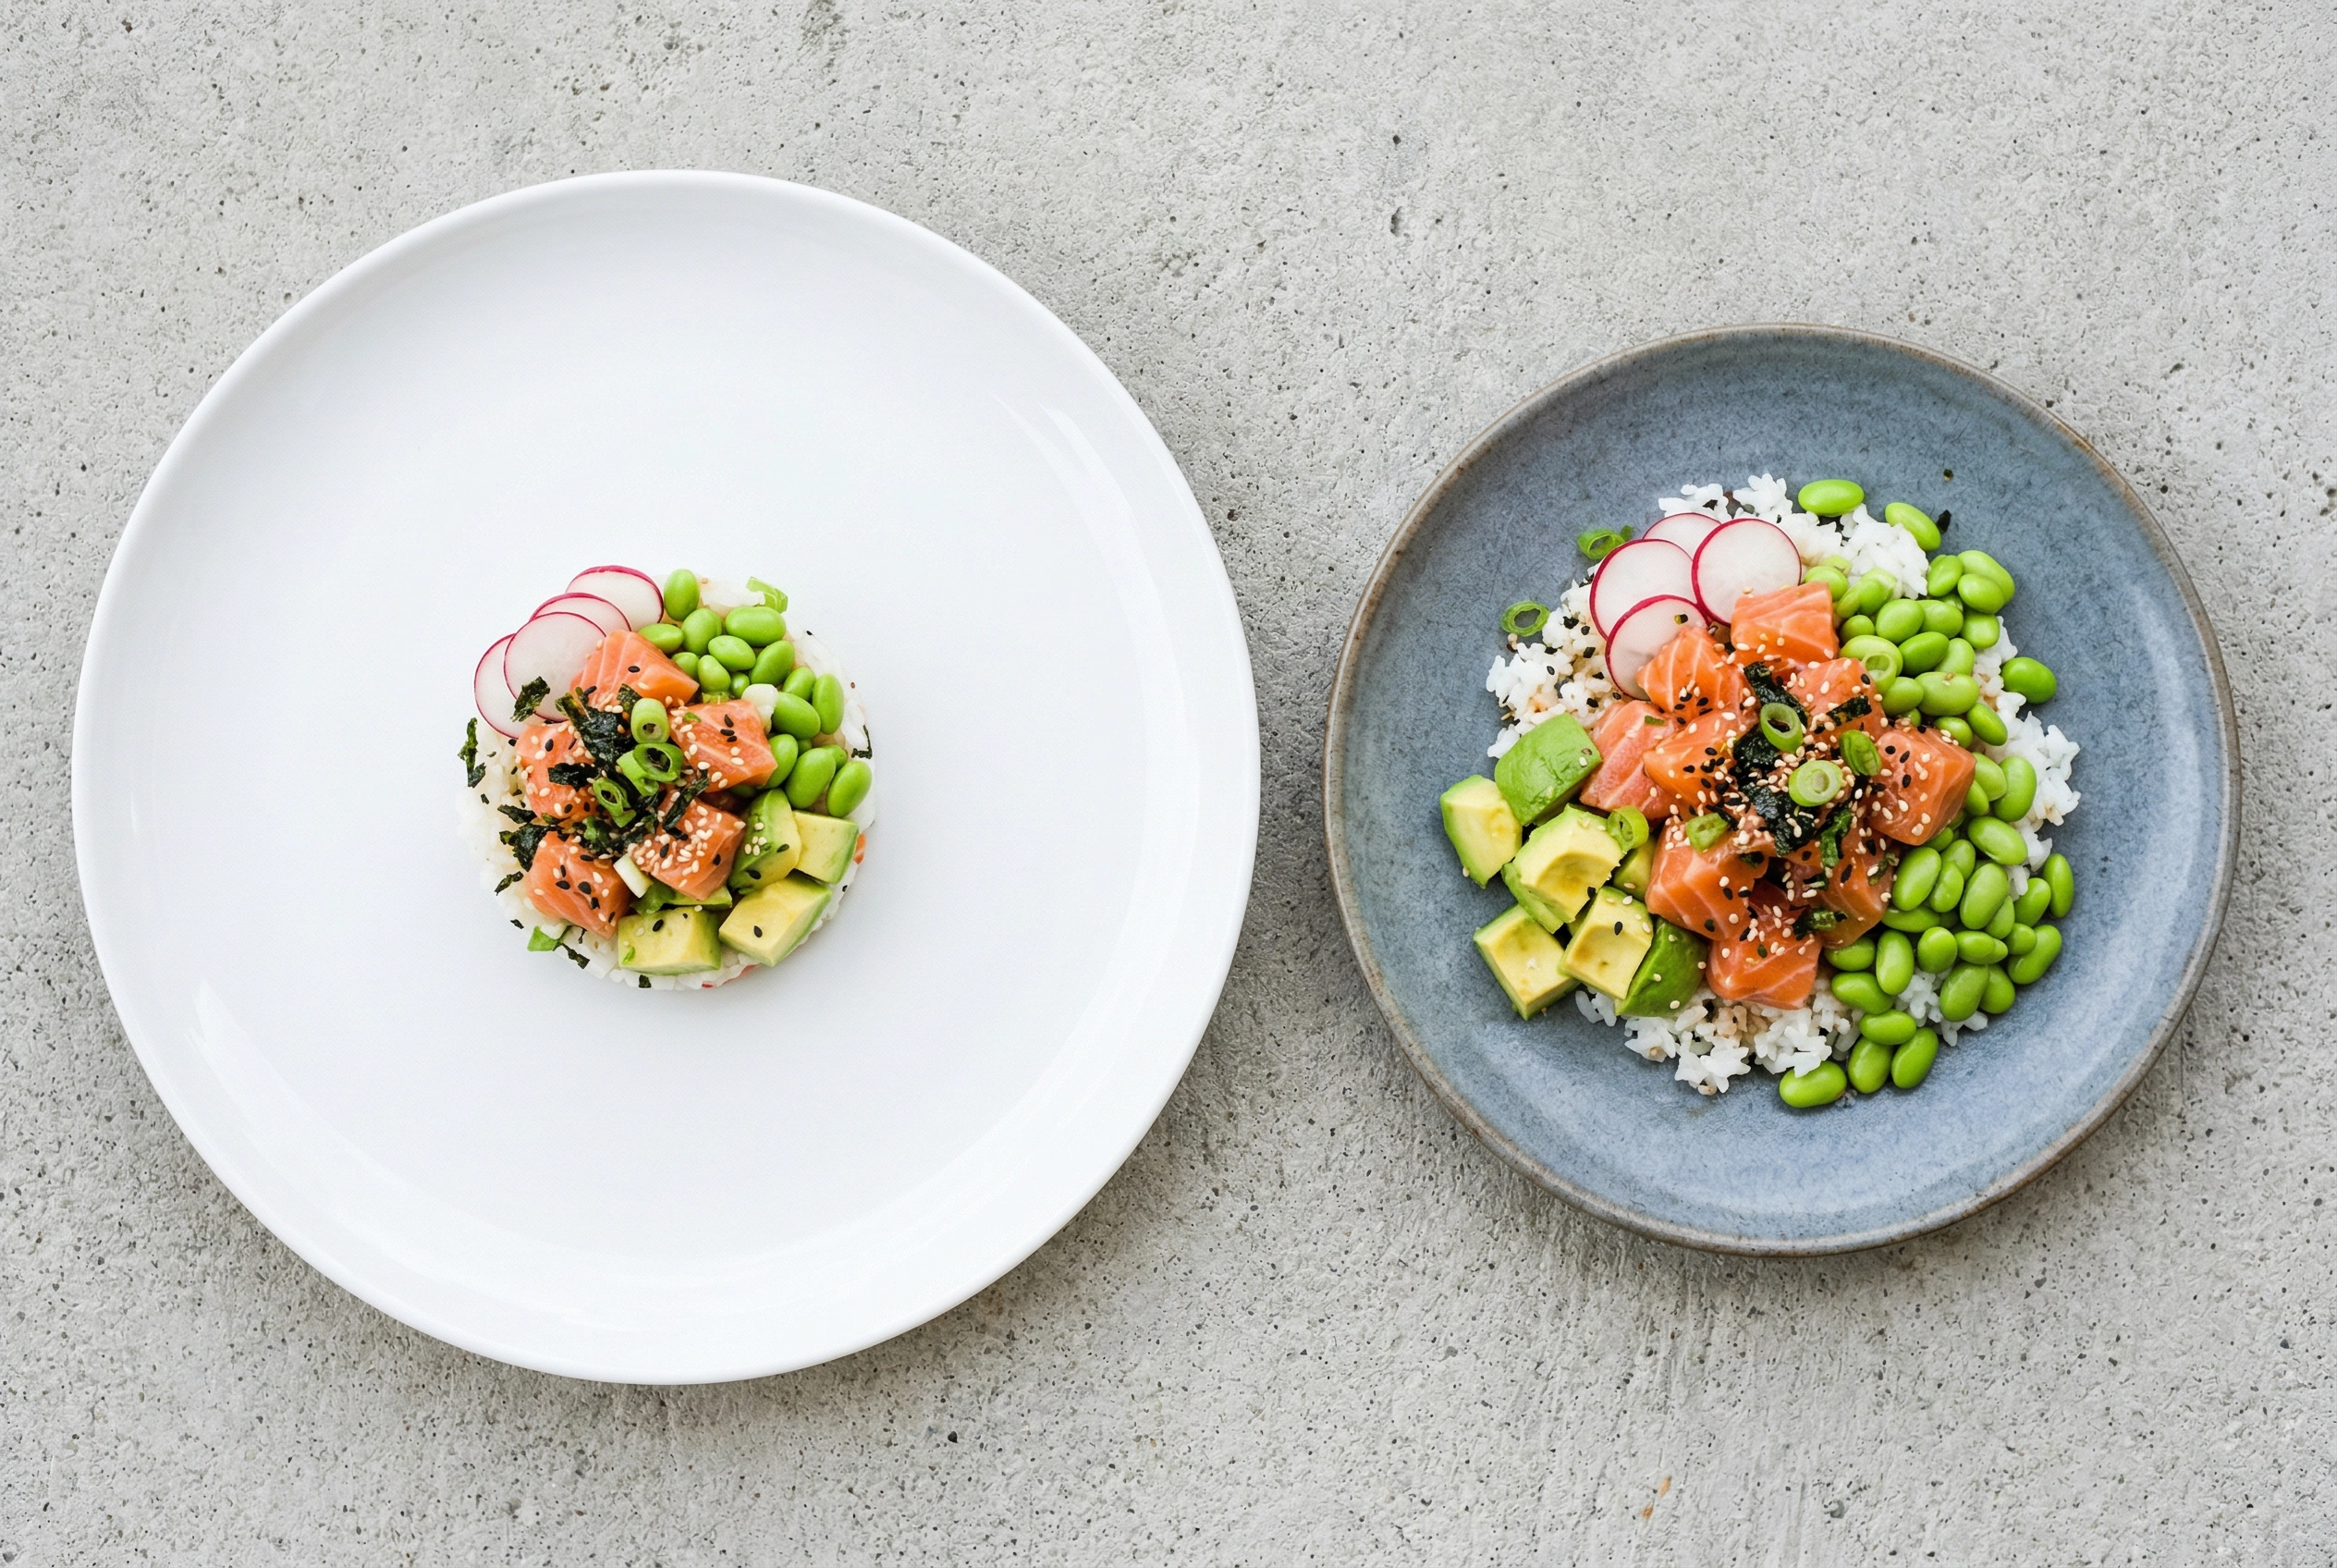 Plate size comparison in food photography showing same portion on large vs small plates
Size matters more than you think. Professional prop stylists almost never use dinner plates (10–12 inches). They reach for salad plates — 7 to 9 inches — because smaller plates make the food fill the frame and look more substantial. An 8-ounce portion on a 12-inch plate looks skimpy. The same portion on a 7-inch plate looks generous and photo-ready.
Color sets the mood. White plates are the universal safe choice for food photography — they reflect light, don't compete with the food, and work with almost any dish. But they're not always the best choice. Dark or black plates make colorful foods (berries, salads, sushi) pop dramatically. A study published in the journal Foods found that plate color and shape measurably affect how consumers perceive food quality, portion size, and even expected price.
Matte vs. glossy finish. Matte stoneware reduces unwanted reflections and photographs beautifully in natural light. Glossy ceramics create specular highlights — stunning when intentional, distracting when not controlled.
Shape and rim depend on your shooting angle:
- Flat plates or low rims for lower camera angles (45-degree and eye-level shots) — tall rims block the food from side views
- Rimmed plates or shallow bowls for overhead flat-lay photos — the rim adds a natural frame around the composition
Quick test: Before you plate, hold the empty dish at your shooting angle and look through the camera lens or phone screen. Does the plate complement or compete? You'll know in two seconds.
Arranging Elements for Visual Flow
Knowing how to stage food for photography means understanding visual flow — directing the viewer's eye exactly where you want it to focus.
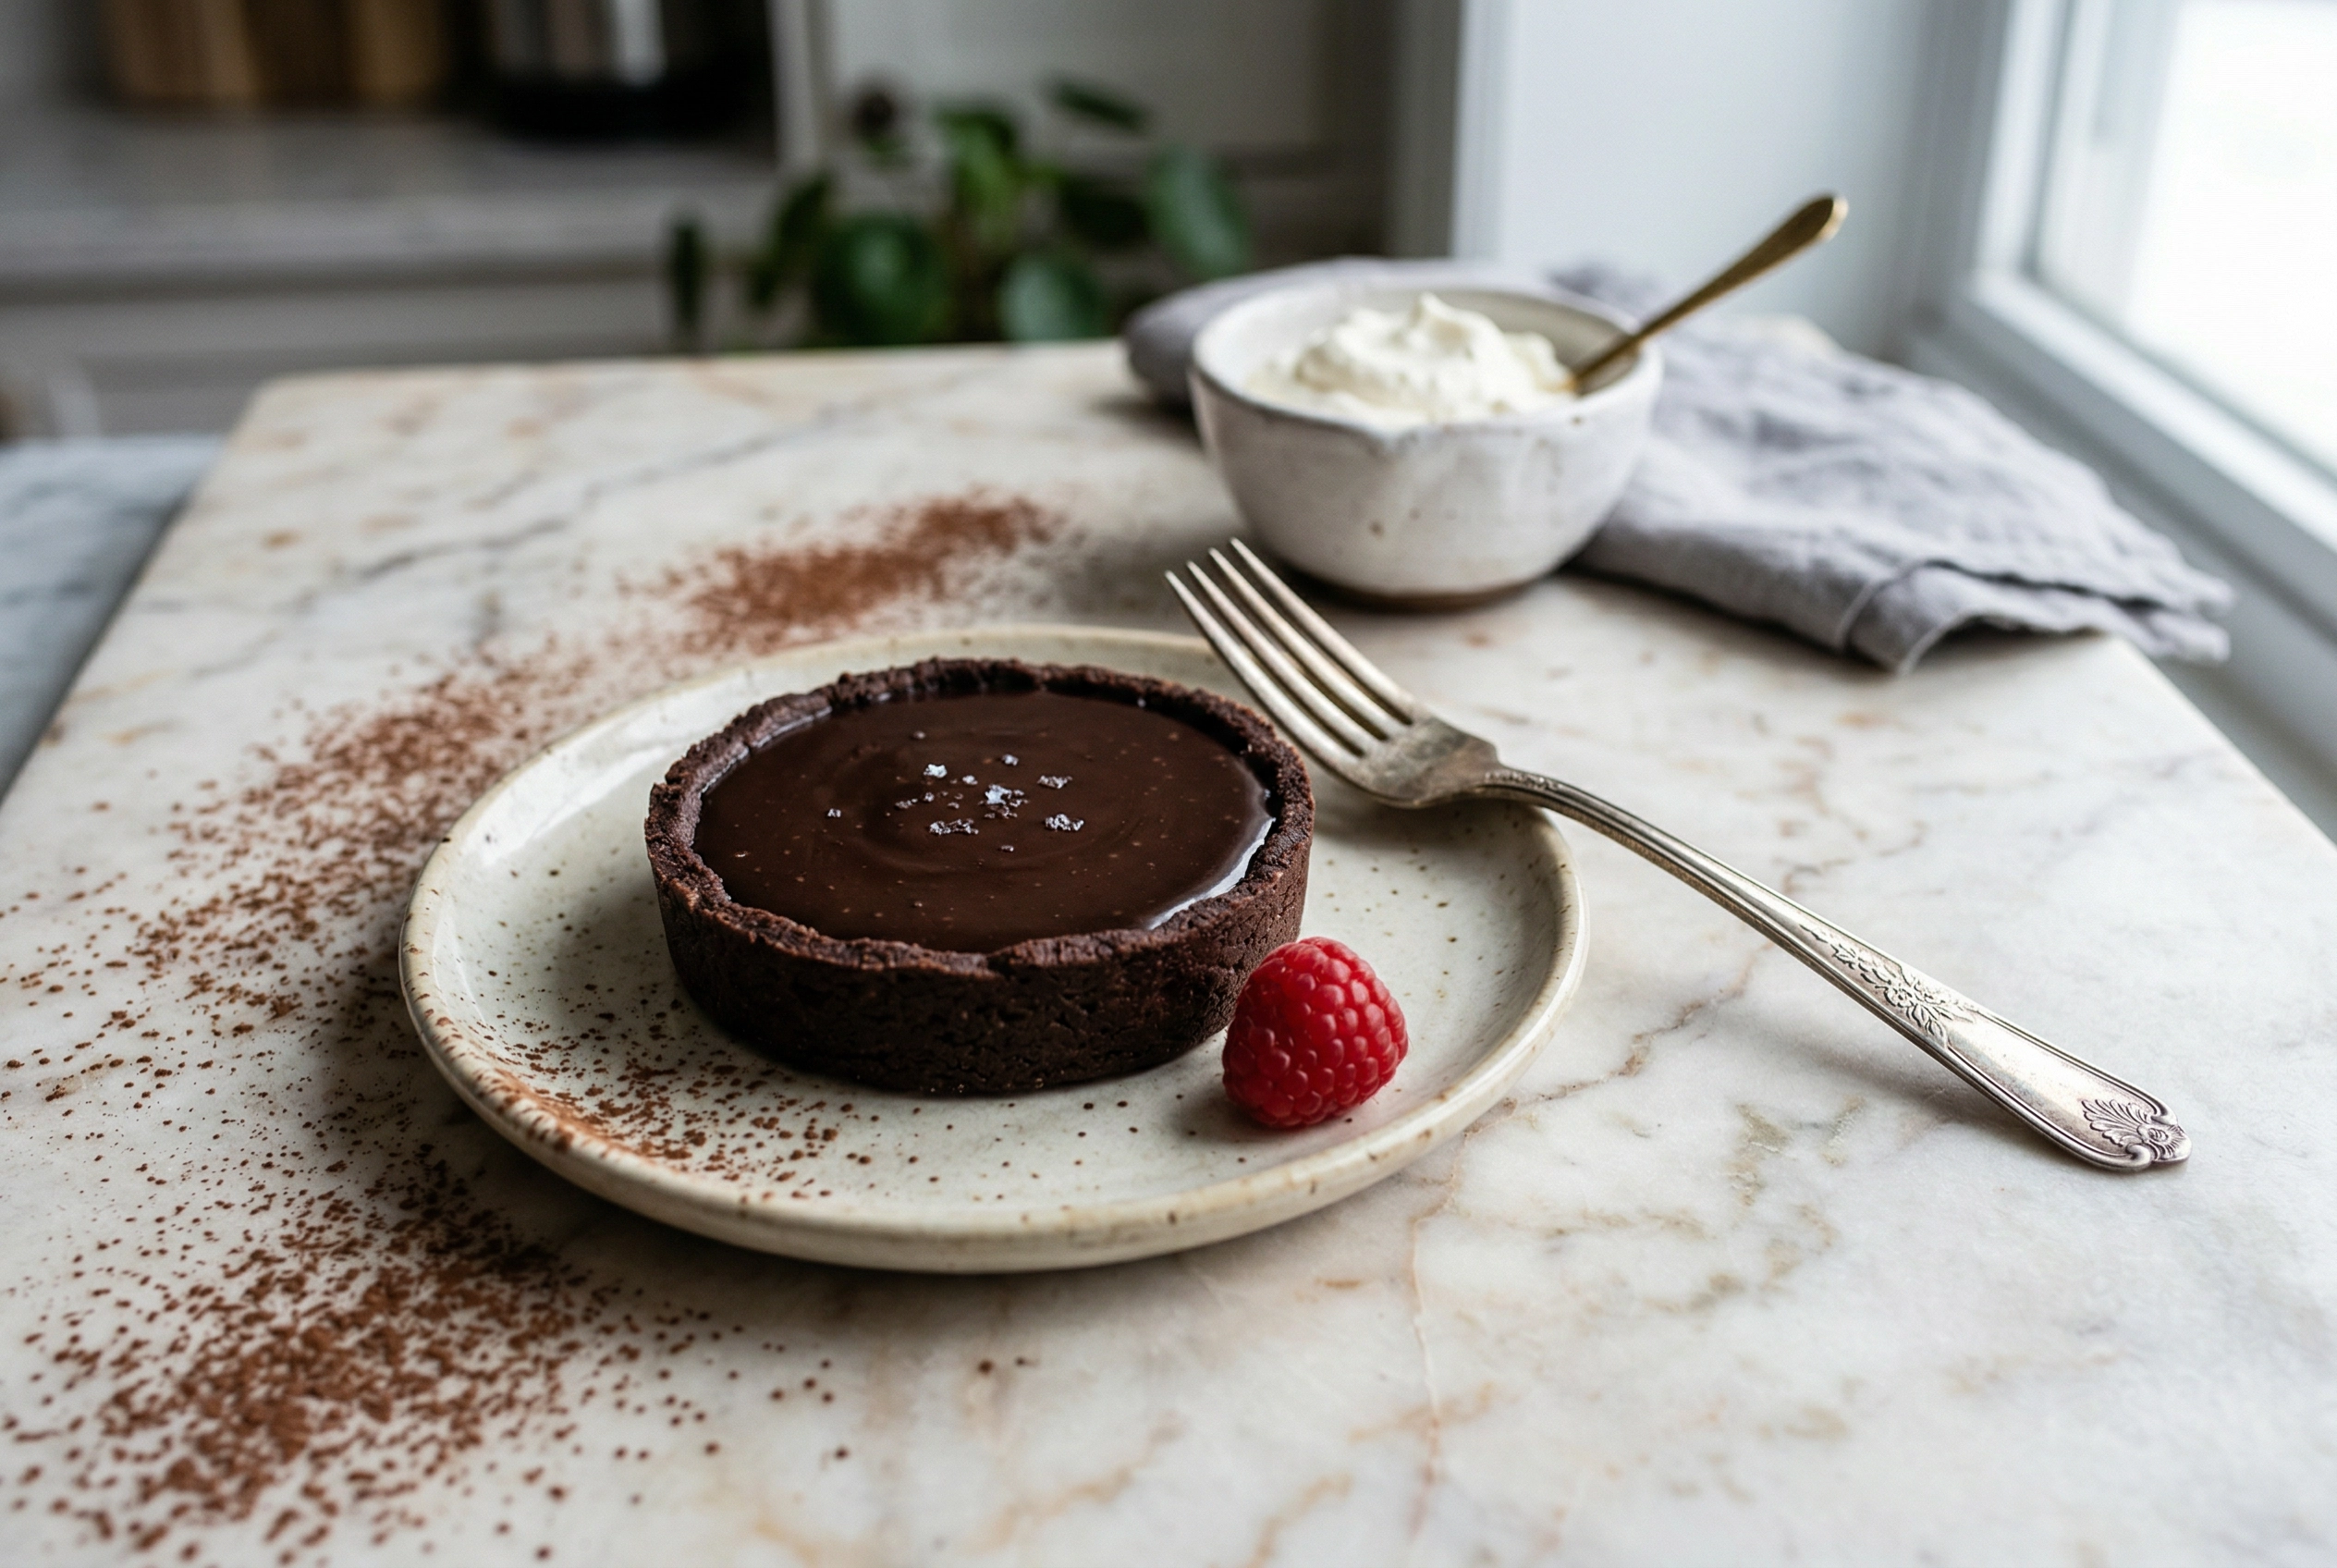 Rule of thirds composition in food photography staging with chocolate tart and diagonal leading lines
Build height for depth. Layering creates dimension in your image: a linen napkin beneath a wooden board beneath the plate. For side-angle food shots, stack elements within the dish — pile that salad, fan those sliced avocados, let the burger ingredients tower.
Use the rule of thirds. Position your hero dish at one of the four intersection points on an imaginary 3×3 grid, not dead center. This creates tension and visual interest that centered compositions lack. Most cameras and phone apps include a grid overlay to help with this composition technique.
Create leading lines. A fork angled toward the food, a trail of scattered ingredients, a drizzle of sauce arcing across the plate — these lines guide the viewer's eye to your focal point. Diagonal lines feel dynamic; horizontal lines feel calm.
Stick to odd numbers. Three cookies beat two. Five scattered raspberries beat four. Odd groupings feel organic and effortless, even when they're completely deliberate. This isn't superstition — it's how human visual perception processes groups of objects naturally.
Leave negative space. Resist the urge to fill every gap in the frame. Breathing room around your subject draws the eye to the food, not away from it. A plate surrounded by clean, uncluttered surface looks more intentional than one crammed between six competing props.
The Controlled Spill: Intentional Messiness That Looks Natural
Pristine, symmetrical plating can look sterile in food photography — more textbook than restaurant. A little chaos makes food images feel alive.
This is the "controlled spill" — intentional messiness that tells the viewer someone was just here, and they should be next. It's a major food and beverage photography trend heading into 2026, with messy, relatable styling replacing the over-produced look of years past.
 Controlled spill technique in food photography with artfully scattered bread crumbs and torn sourdough
Here's how to stage the controlled spill in your food photos:
- Crumb scatter: After slicing bread or cake, leave a few crumbs where they naturally fall. Don't arrange them. Just don't clean them up.
- Sauce drip: Let a thin line of sauce trail off the plate onto the surface. One drip, not five.
- The bite taken: A missing slice of pie, a half-eaten cookie, a burger with one bite gone — this instantly tells a story and triggers appetite.
- Sprinkle drift: When dusting powdered sugar or cocoa, let some land on the surface around the plate.
The rule: one intentional element of mess per scene. Two feels accidental. Three feels sloppy. One feels like you captured a moment.
Always add the spill after the hero dish is perfectly styled and positioned. Build the order first, then break it slightly.
Garnish Strategy: Finishing Touches for Better Food Photos
Garnish is the difference between a food photo that looks "done" and one that looks alive. But more garnish is almost never better — restraint is essential when you stage food for photography.
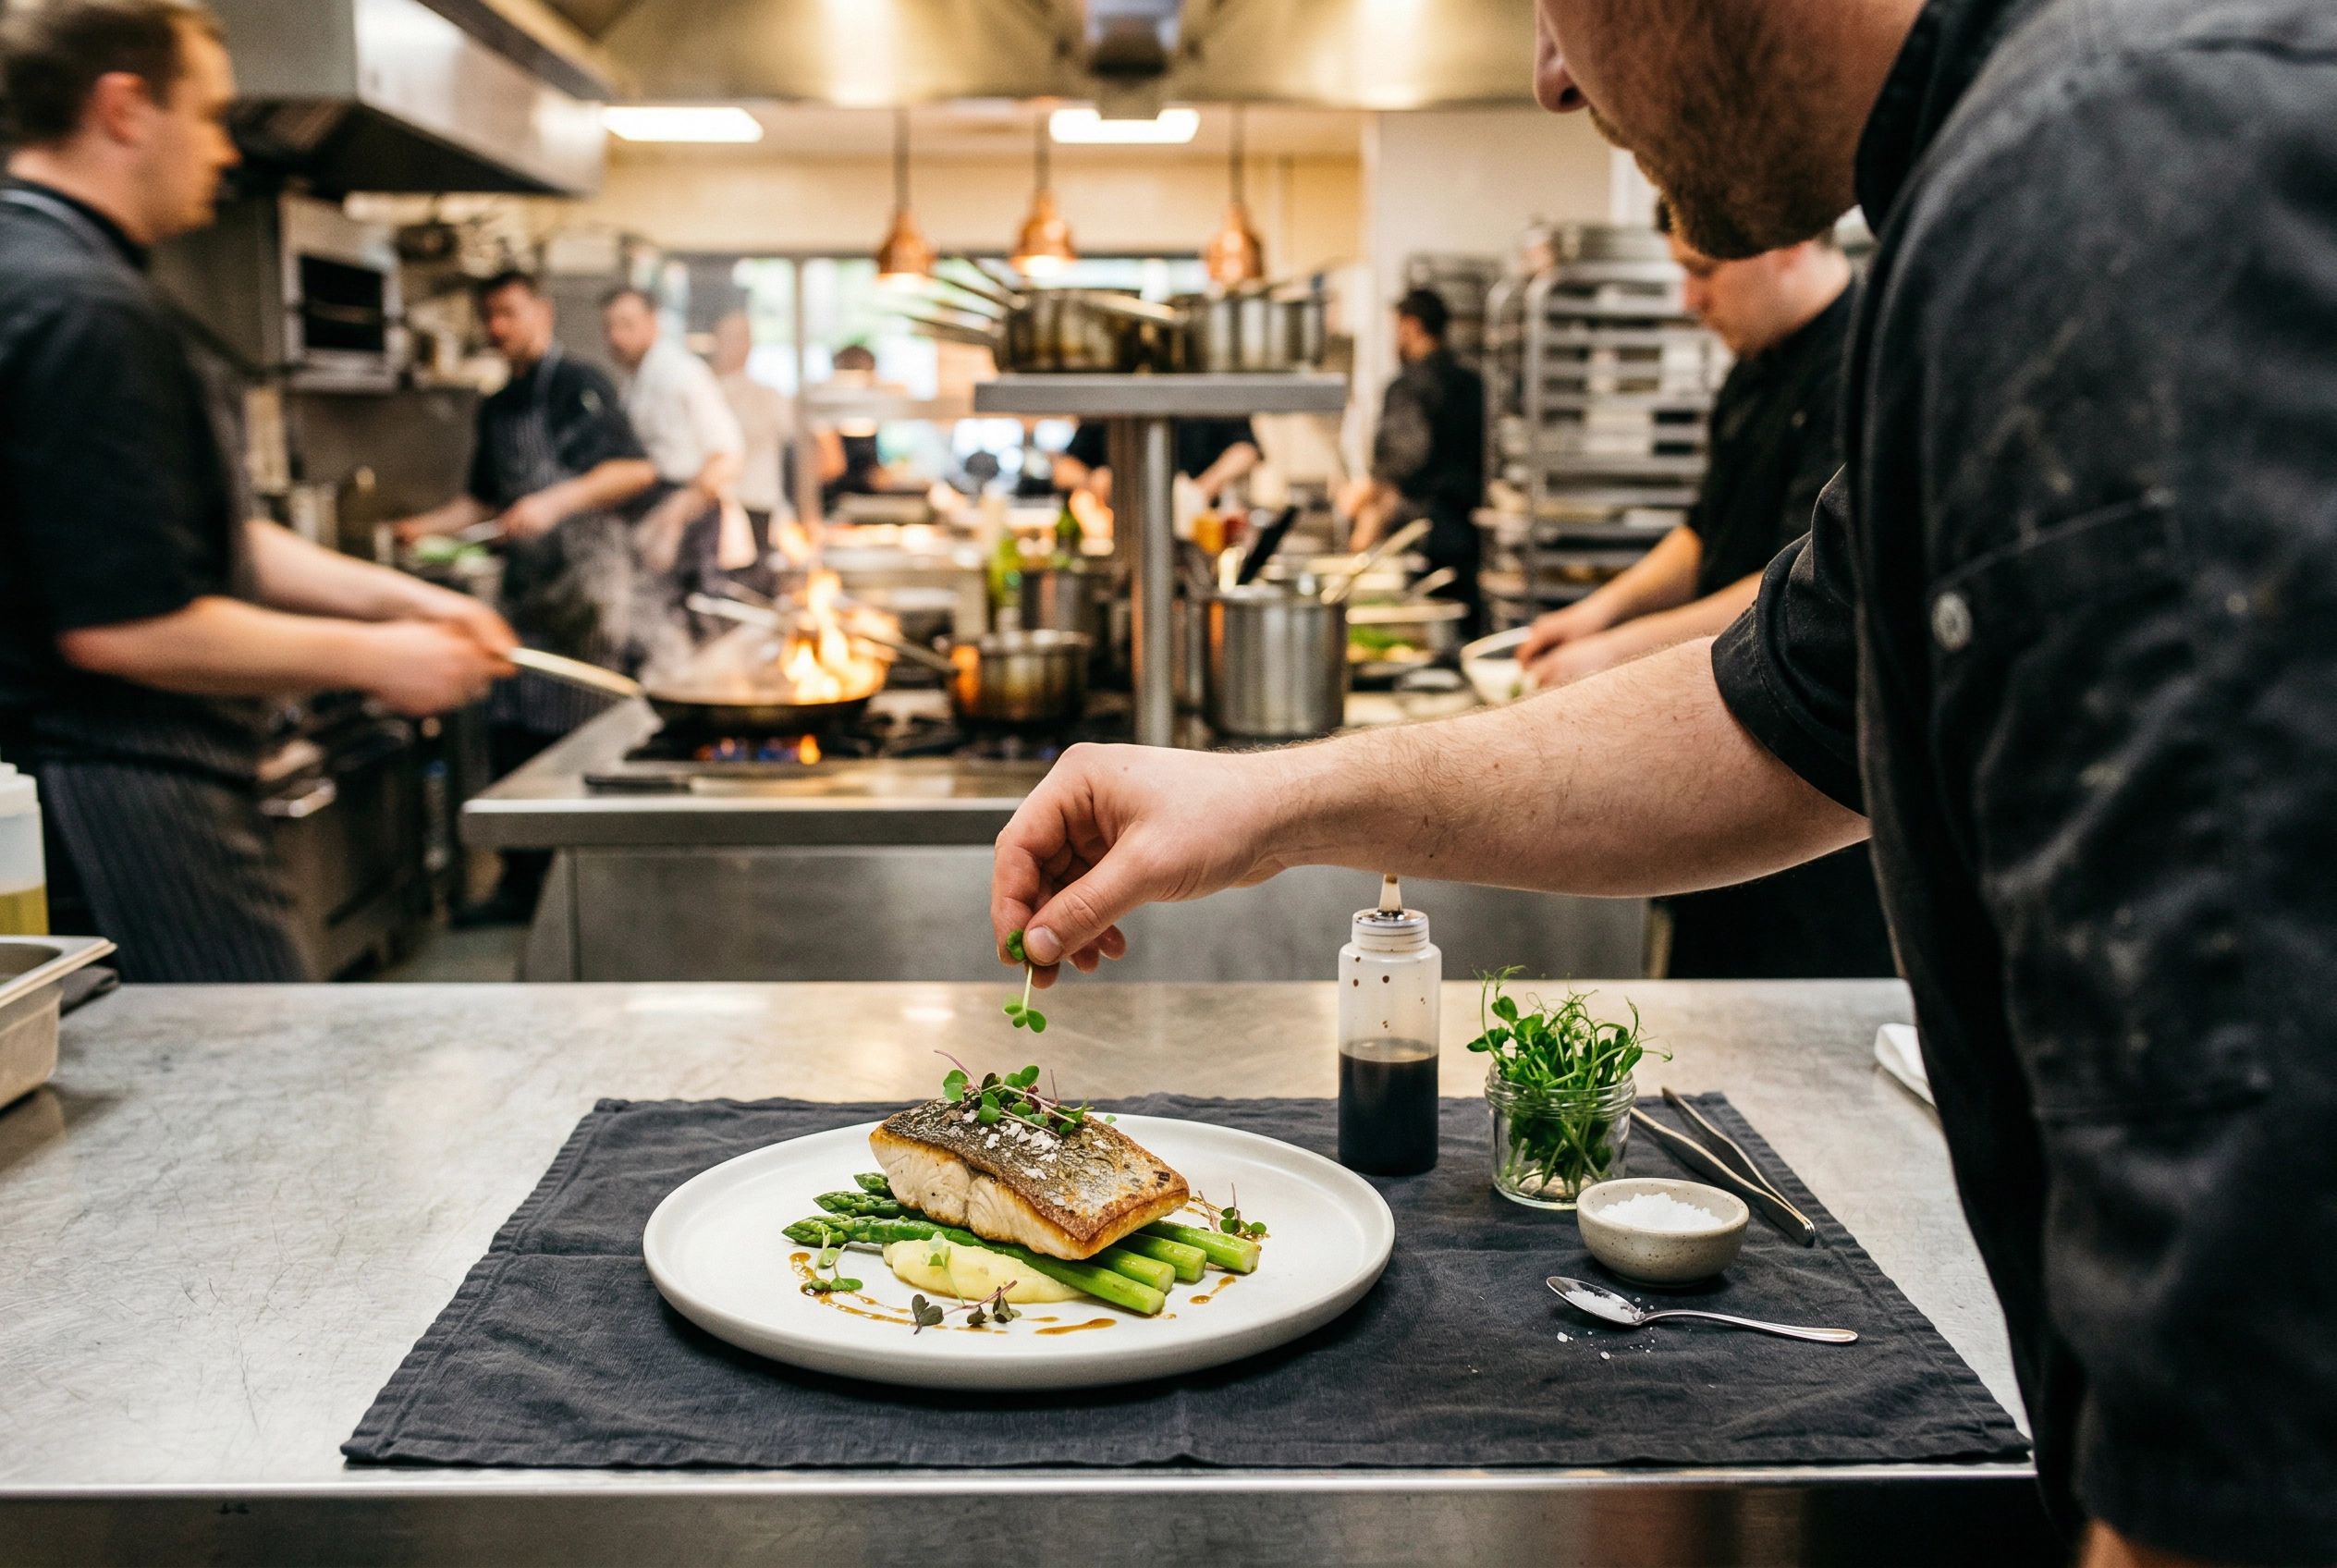
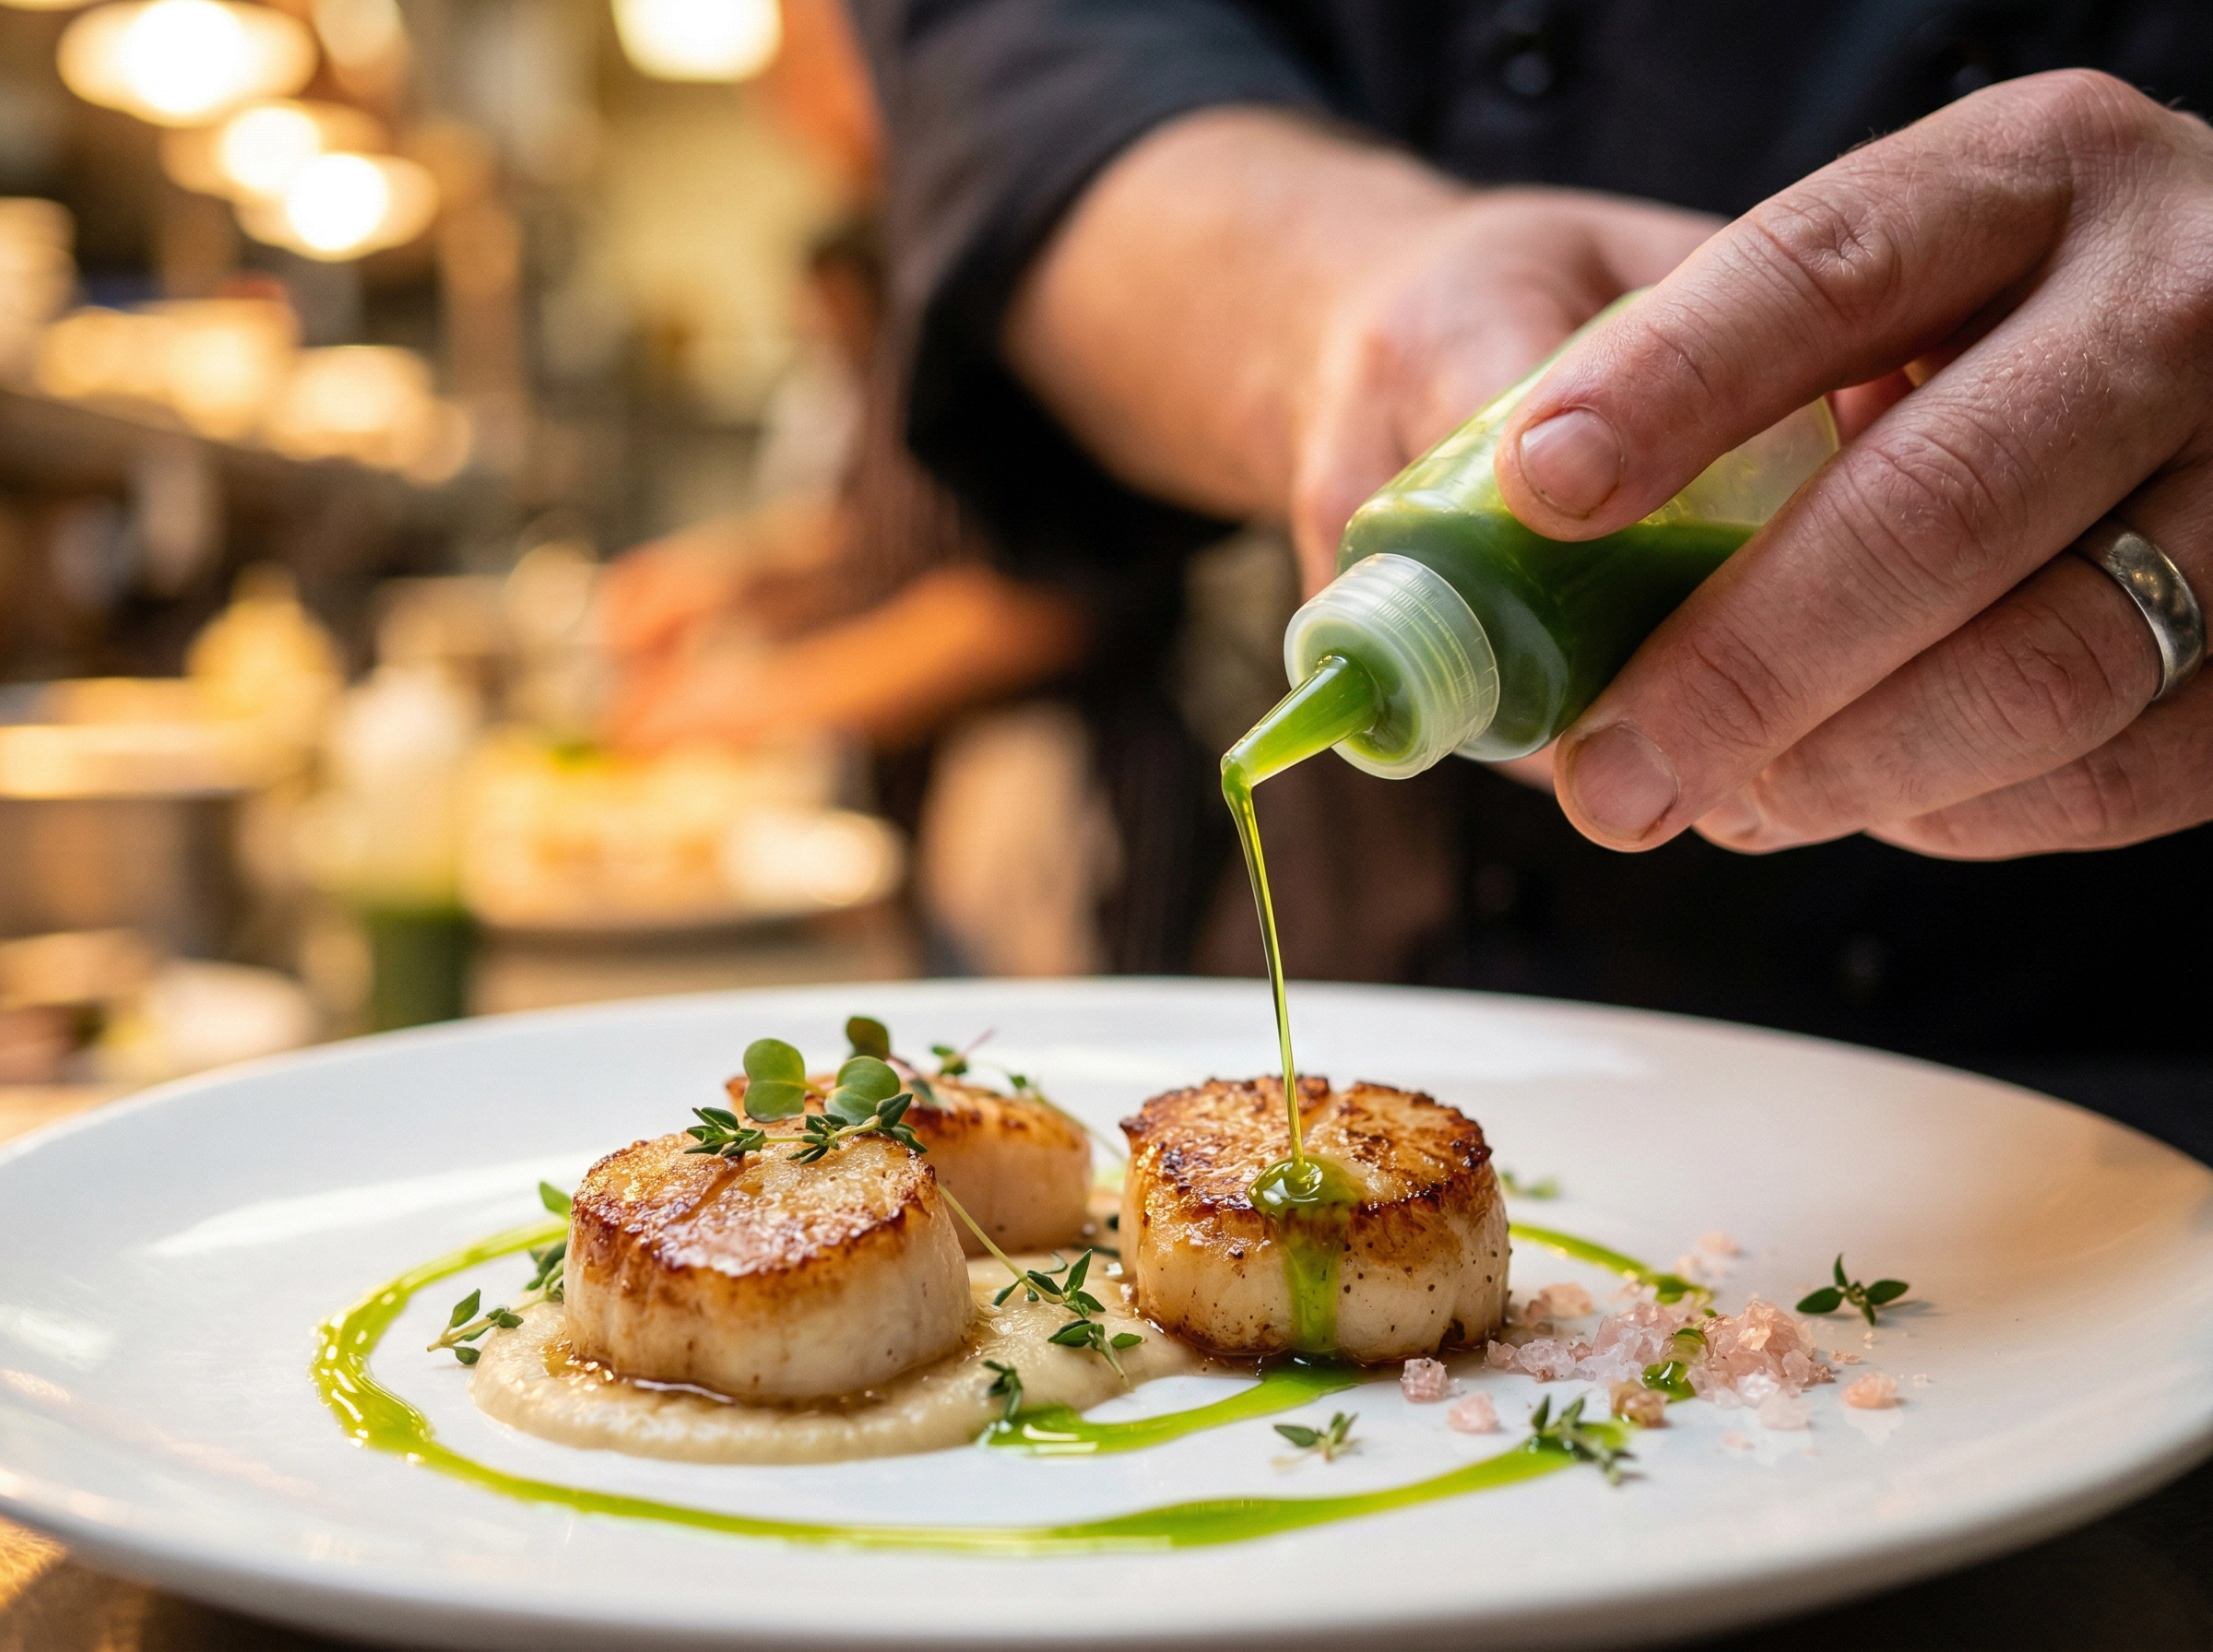 Chef applying finishing garnish drizzle of basil oil and sea salt flakes on seared scallops for food photography
Fresh herbs are your most versatile finishing tool. Basil leaves, rosemary sprigs, and thyme clusters add color, signal freshness, and make viewers imagine the aroma. Place them asymmetrically — a small cluster at 2 o'clock on the plate, not scattered everywhere.
Sauces and drizzles should come from a squeeze bottle, never a spoon. A thin, controlled arc of balsamic reduction or chocolate sauce catches the light beautifully. Apply where your primary light source hits — usually the side of the dish facing the window.
Textural finishers like flaky sea salt, cracked black pepper, or a light dusting of powdered sugar add that "just made" quality. These details photograph incredibly well in close-up and macro shots because they catch light at tiny angles, creating sparkling detail in the image.
Citrus — thin slices, wedges, or even just a curl of zest — adds brightness and pattern interest to your composition.
The golden rule: Every garnish should make sense for the dish. A sprig of rosemary on rosemary-roasted chicken? Perfect. Random microgreens on chocolate cake? Confusing. If a diner would question why it's there, take it out.
For deeper techniques on styling specific food types, see our full food styling guide.
How to Stage Food for Photography by Shot Format
How you stage food changes completely based on the camera angle. Here's what to prioritize for each shooting format.
Overhead Flat-Lay
Flat-lays expose everything in the frame — you can't hide behind a shallow depth of field when the camera lens points straight down.
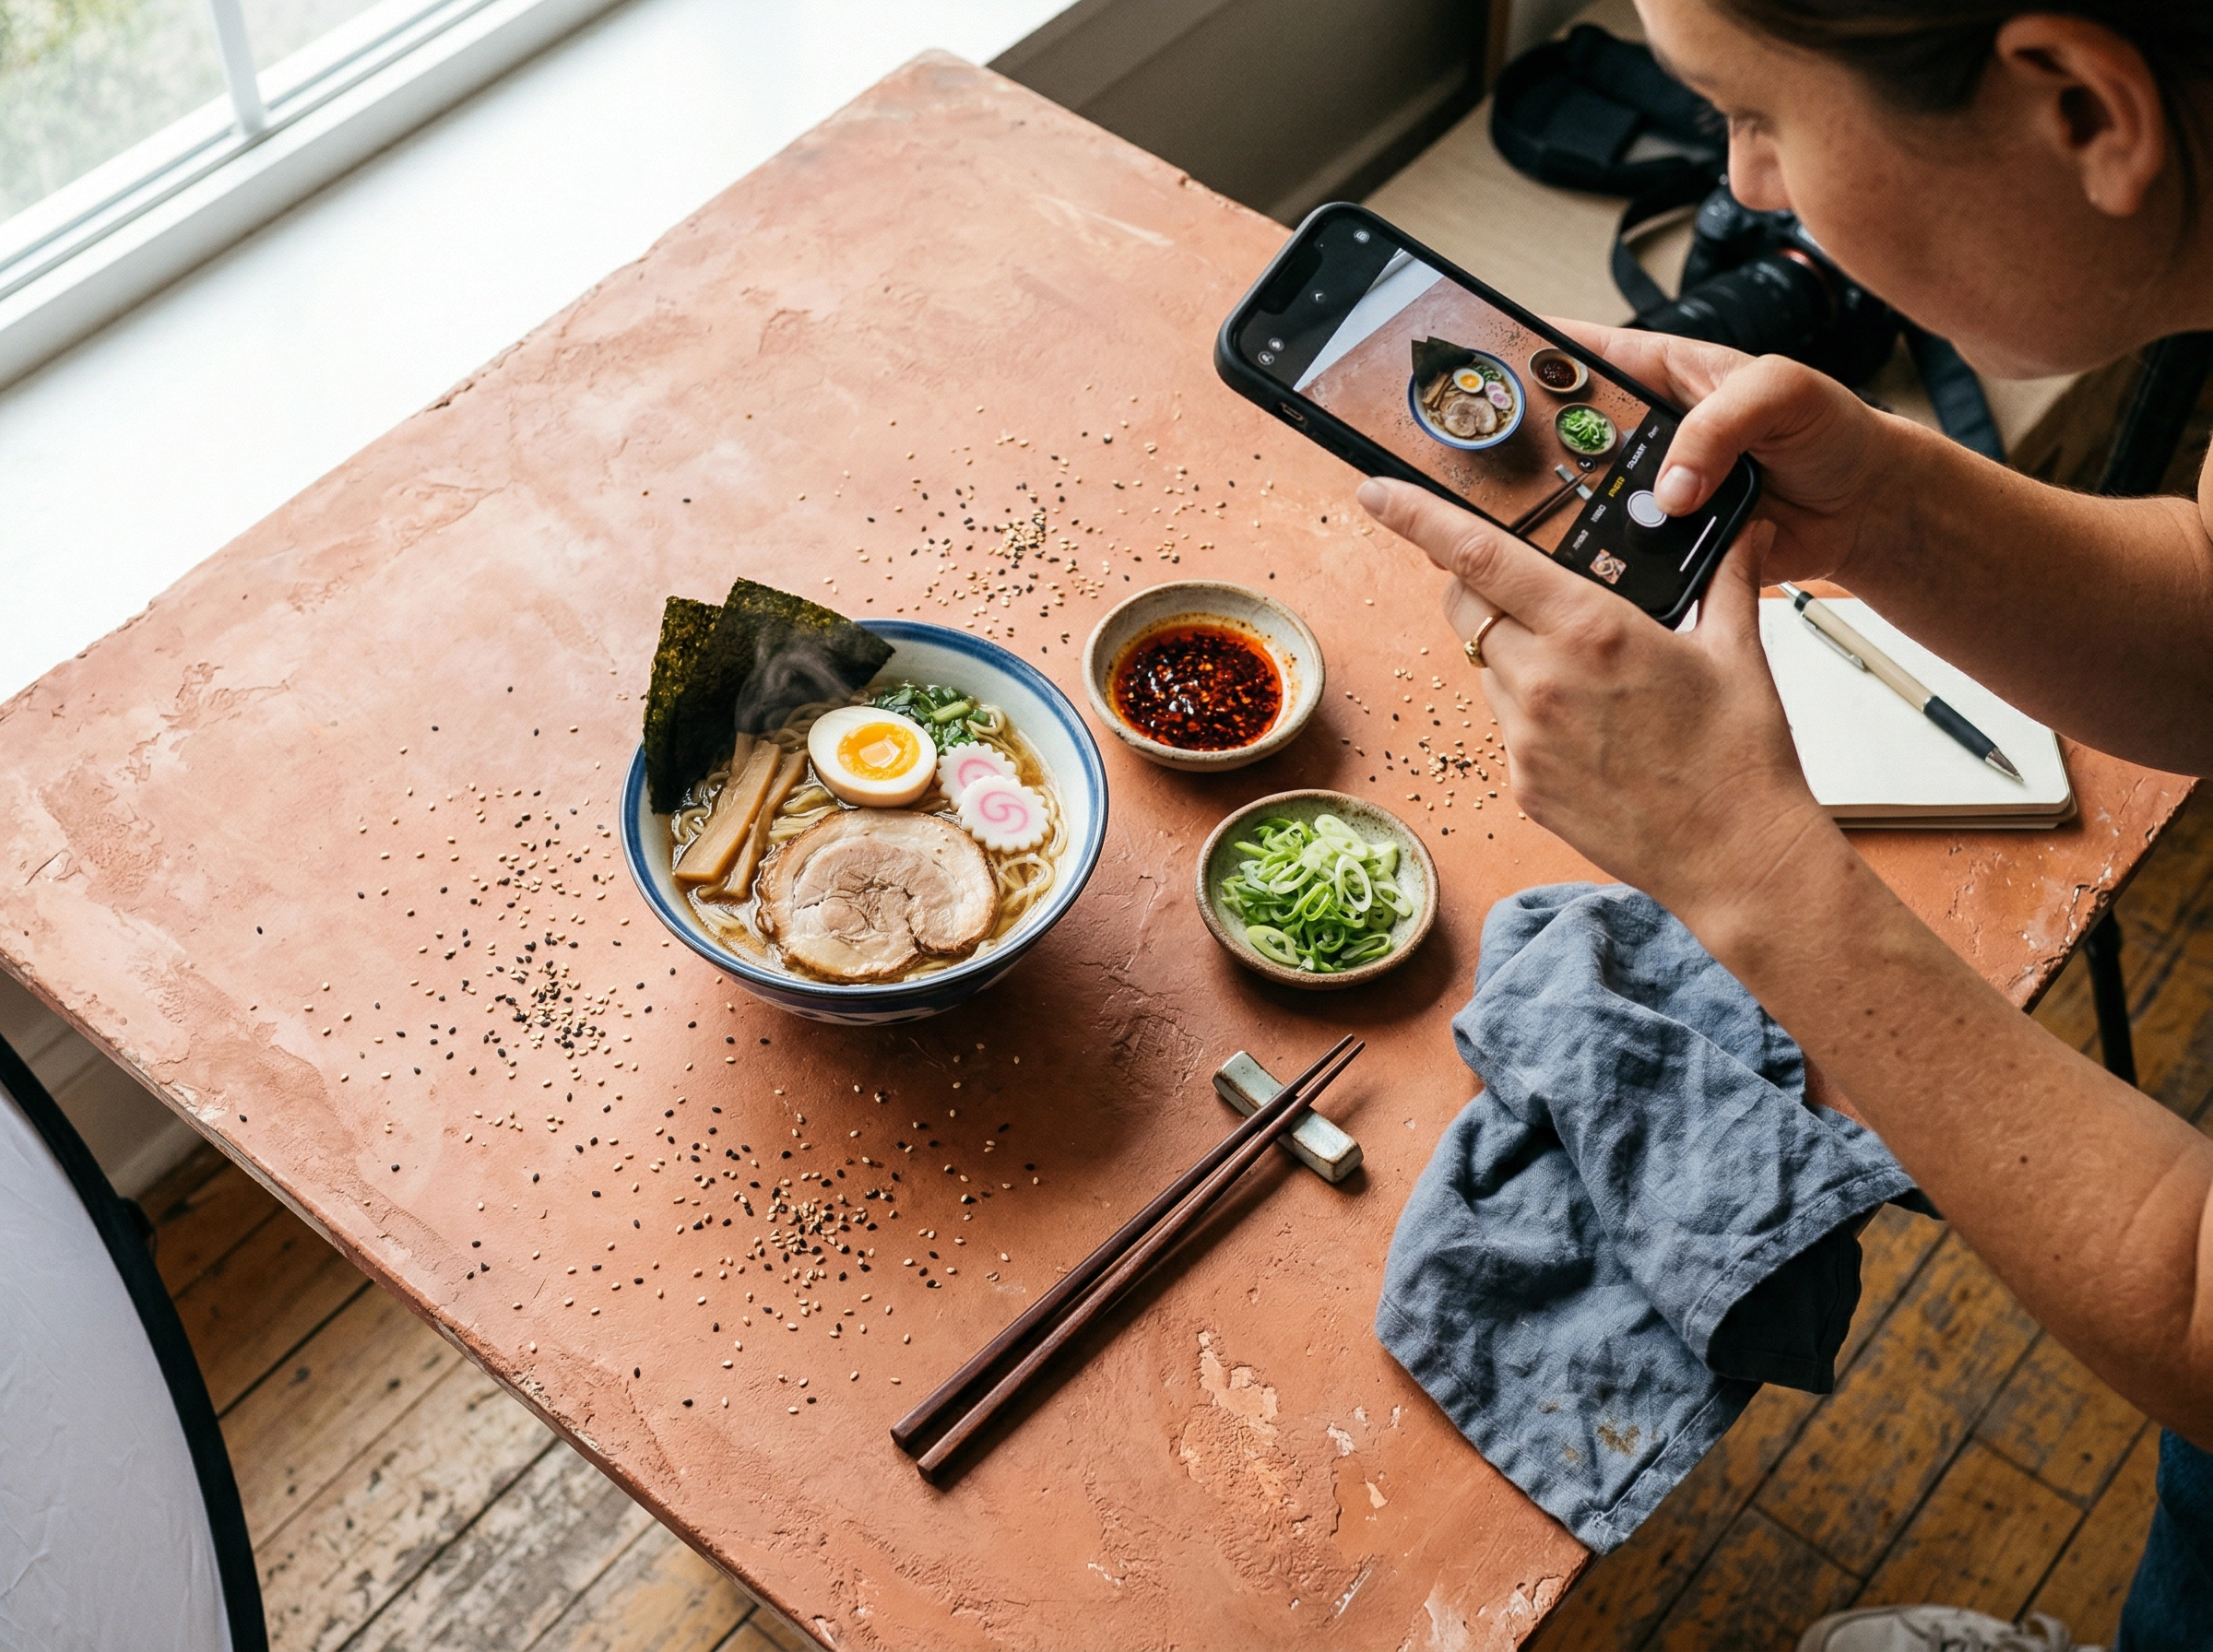 Overhead flat-lay food photography staging with ramen bowl and props arranged for an Instagram-ready shot
- Fill the frame with purpose: the hero plate, supporting ingredients in small bowls, utensils, a linen napkin, a hand reaching in
- Layer textures beneath the plate (board on linen on surface) to create depth in a flat perspective
- Style and check every element from directly above — flip props to inspect their "top view" before the shoot
- Best for: pizza, bowls, salads, tablescapes, and Instagram food photography
45-Degree Angle
The most forgiving and versatile angle — it mirrors how you naturally see food at a table.
- Shows both the top plating and the side profile — ideal for dishes with height and surface detail
- Background is partially visible, so manage it: a clean wall, a subtle backdrop, or negative space
- Keep supporting props low so they don't block the main subject at this angle
- Best for: plated entrées, pasta, most restaurant menu photos, and delivery app photography
Eye-Level Hero Shot
The dramatic angle in food photography. Used for tall, layered foods where height tells the story.
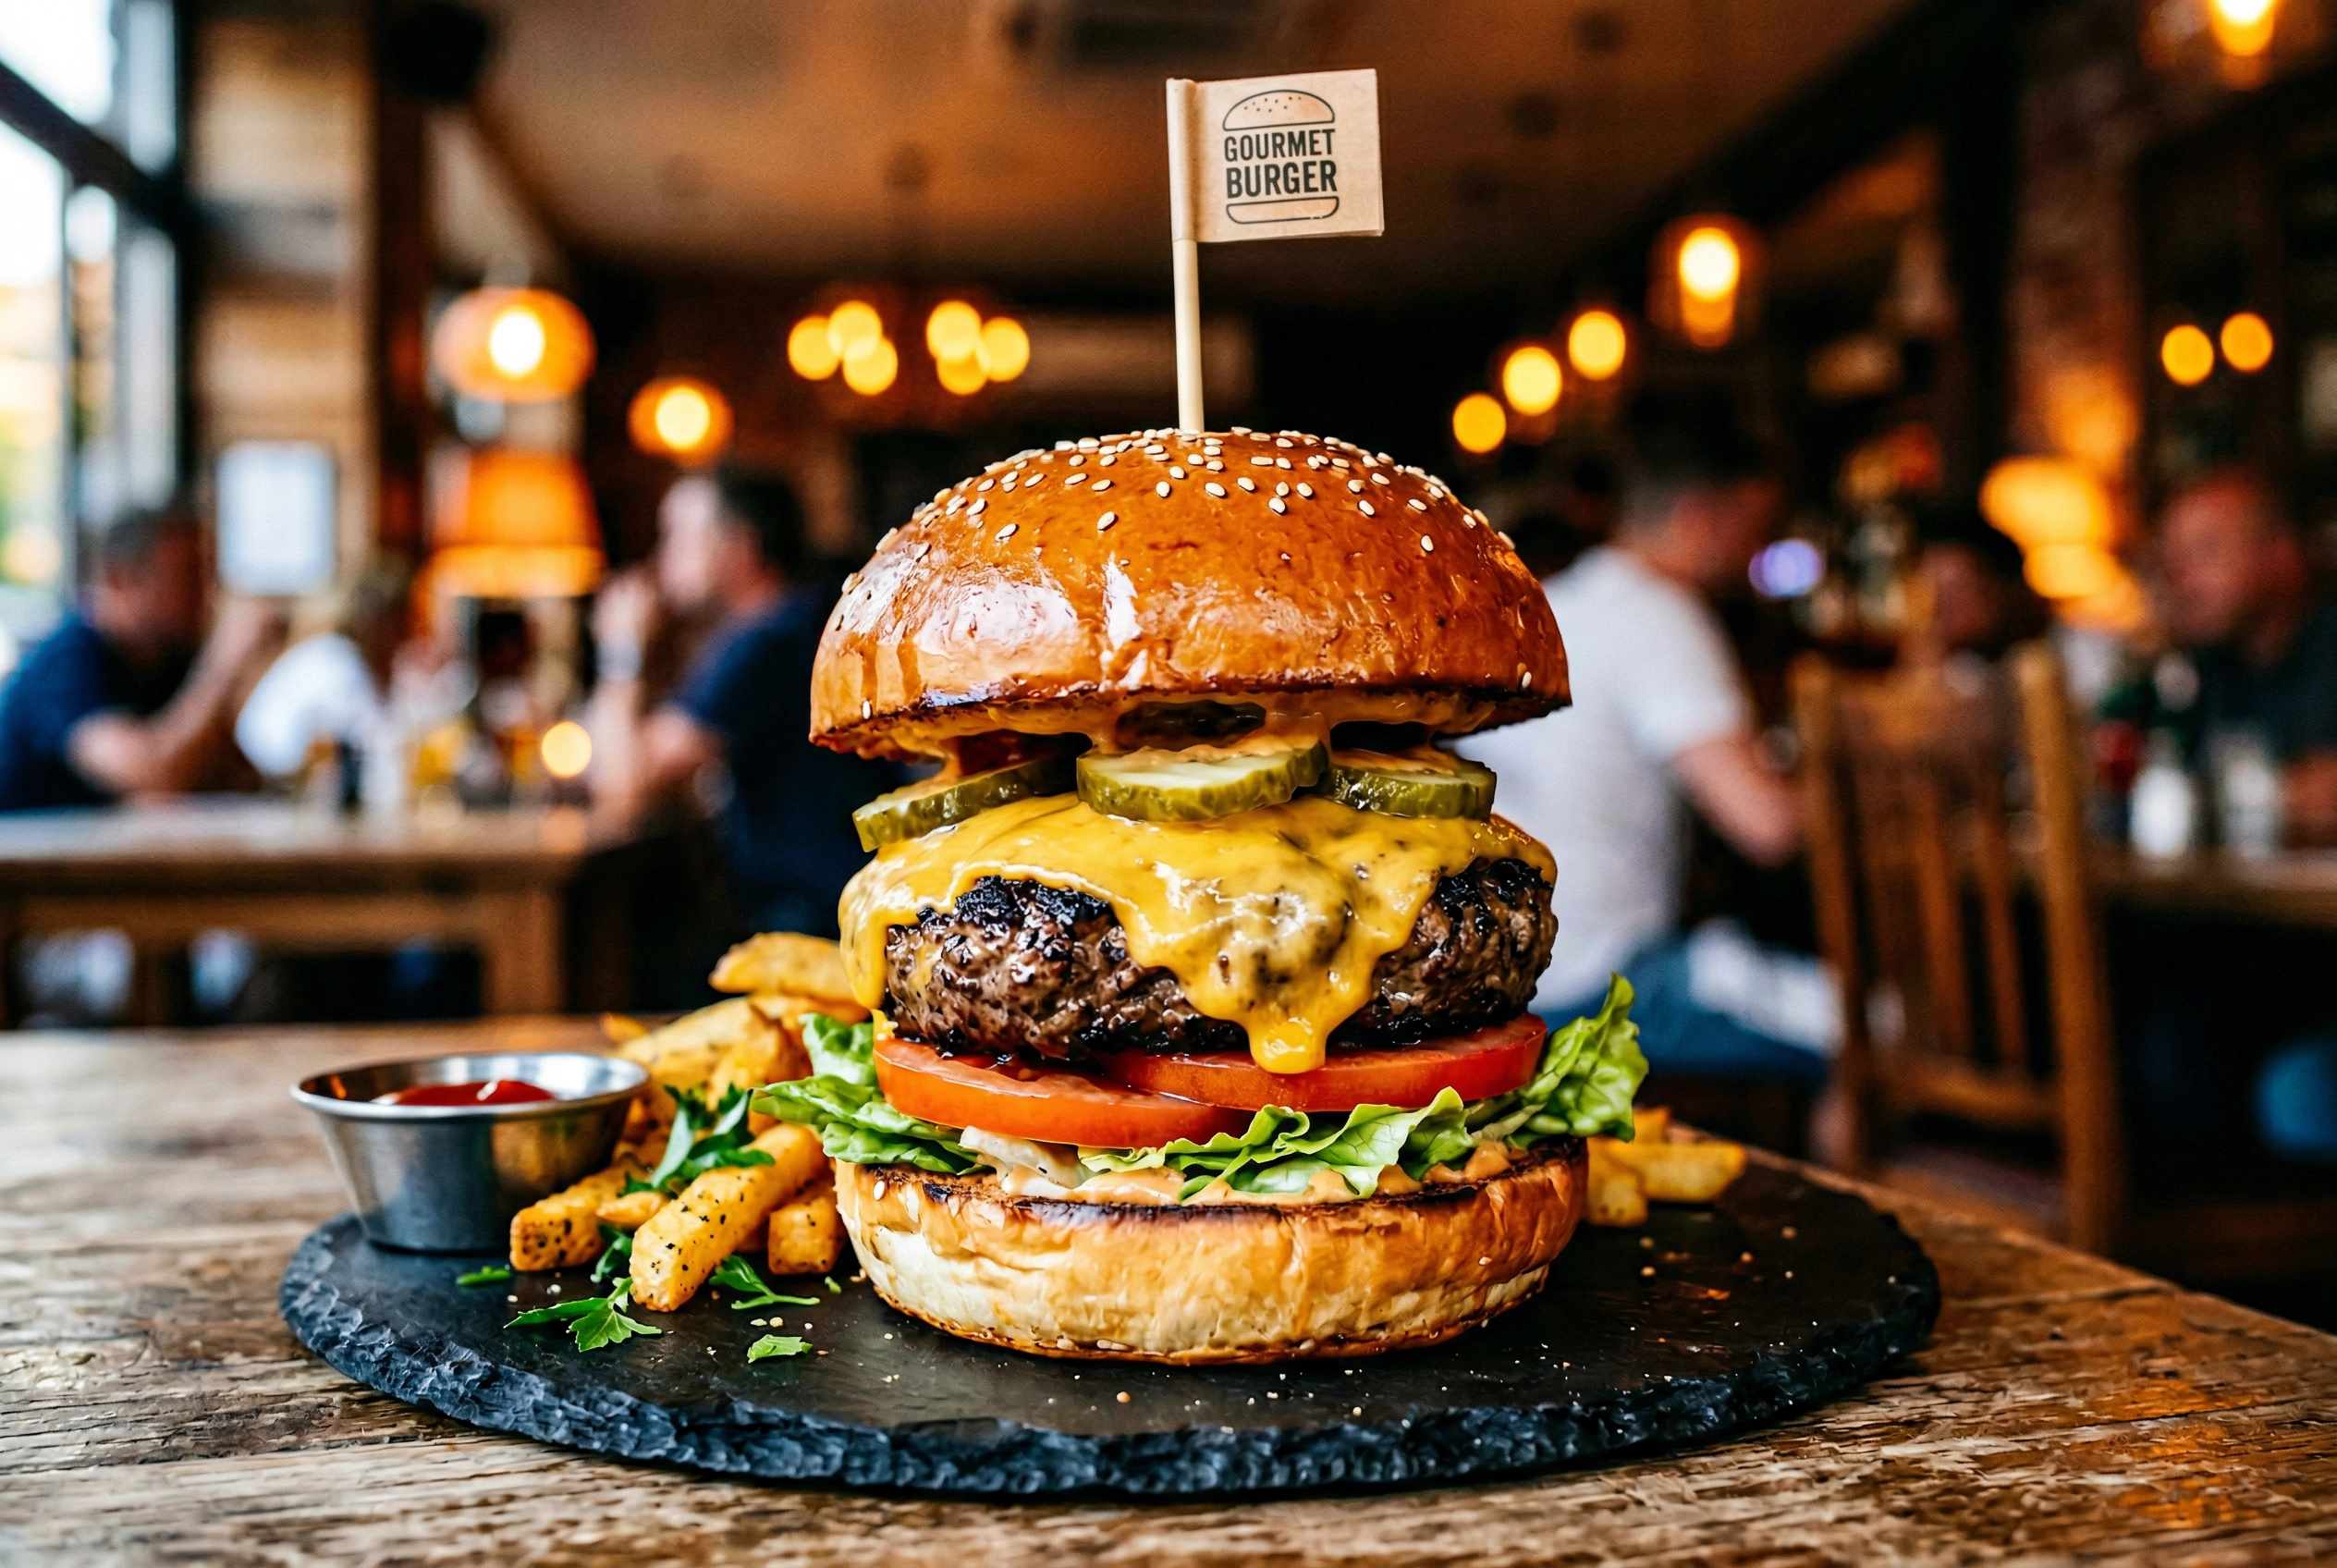 Eye-level hero shot of a stacked gourmet burger showing dramatic height staging for food photography
- Maximum height wins: stack that burger, tower those pancakes, pile the toppings
- Toothpicks and wooden skewers hidden inside tall stacks are a professional trick for keeping everything upright during the shoot
- Background is fully visible at eye-level — use an intentional backdrop or shoot with a wide aperture (low f-number like f/2.8) for shallow depth of field to blur distractions
- Best for: burgers, stacked sandwiches, layer cakes, cocktails, and tall desserts
Not sure which angle to use? Start with 45 degrees. It works for roughly 80% of dishes and forgives most staging imperfections.
Quick Staging for Restaurants: The 60-Second Setup
Restaurant food photography is a different game. The kitchen has tickets to fire, the chef needs the plate back, and you've got maybe 60 seconds before that perfectly seared steak loses its shine.
 Quick 60-second food photography staging setup in a busy restaurant kitchen with minimal props
Here's the speed-staging kit and process for real restaurant conditions:
Your staging kit (keep it in a small bag by your shooting station):
- One clean, versatile plate (white matte, 8-inch)
- A linen napkin in a neutral tone
- A squeeze bottle with a drizzle sauce
- A small container of fresh herbs
- Flaky sea salt in a pinch bowl
- A fork and knife
The 60-second process:
- Pre-set (before the food comes out): Camera on tripod, light positioned, surface clean, props placed. Non-negotiable.
- Plate and position (0–15 seconds): Place the food. Rotate the plate to show its best side to the camera.
- Garnish (15–30 seconds): One garnish move — a herb sprig, a pinch of salt, a sauce drizzle.
- Shoot (30–60 seconds): Take 10–15 frames. Adjust focus slightly between each shot.
Don't try to shoot every dish on the menu. Choose your 3–5 hero dishes, stage those properly, and photograph them fast. For the rest, snap quick smartphone photos and enhance them afterward — our food photography tips cover efficient workflows for busy restaurants.
AI-Assisted Staging: Add, Remove, and Replace Elements Digitally
Sometimes the staging doesn't come together during the shoot — and that's exactly where digital tools change the game for food photography.
FoodShot AI lets you adjust your staging after the photo is taken:
- Add garnishes digitally: Forgot the fresh herbs? Add basil, rosemary, or microgreens to the image
- Remove distracting elements: A stray crumb in the wrong spot, a utensil that doesn't fit, a logo on a napkin — gone in seconds
- Swap backgrounds entirely: Shot on a scratched kitchen counter? Replace it with marble, rustic wood, or a professional restaurant setting
- Clone a reference style: Found a stunning food photo on Pinterest? Upload it and FoodShot's style cloning replicates its lighting, composition, and styling onto your dish
- Adjust the camera angle: Wish you'd shot at 45 degrees instead of overhead? The AI shifts the perspective digitally
This isn't a replacement for good staging. A well-staged photo always produces better AI results than a careless one. Think of digital editing as a safety net — stage the best you can, then use AI food photography to fix what didn't work and add what you didn't have time for.
For busy restaurants running daily social media, combining quick physical staging with AI enhancement cuts photo production from hours to minutes. Stage and shoot a dish in 60 seconds, then enhance it in 90 more with FoodShot.
Frequently Asked Questions
What is the difference between food styling and food staging?
Food styling is hands-on manipulation of the food itself — the pasta twirl, the sauce drizzle, making the cheese pull perfect. Food staging is everything around the food: the surface, backdrop, props, plate selection, and overall scene composition. Think of styling as dressing the actor and staging as building the set. Both matter for food photography, but staging comes first.
What surface works best for staging food photos?
There's no single best surface — it depends on the food and the mood of the image you're creating. Dark wood and slate create moody, rustic vibes. White marble feels clean and modern. Concrete reads as industrial chic. Linen adds warmth and texture. A good starting set: one light surface (marble or light wood) and one dark surface (dark wood or slate). Our food photography props guide covers the full range.
How do you stage food for a flat-lay photo?
Flat-lays require staging the entire frame since the overhead camera captures everything. Place your hero dish slightly off-center using the rule of thirds, then build outward with ingredient bowls, utensils angled toward the food, a napkin for texture, and a hand for scale. Layer textures vertically (board on linen on surface) to create depth in a flat composition.
Can you fix bad food staging in post-production?
To a degree. AI tools like FoodShot can add or remove elements, swap backgrounds, and adjust lighting after the shoot. But solid staging always produces better results — the AI has more visual information to work with. Post-production editing is a 20% improvement tool, not a 100% replacement for learning how to stage food for photography well.
What props do you need to stage food for photography?
Start with the essentials: 2–3 plates in different sizes (salad plates, not dinner plates), neutral linen napkins, basic utensils, a wooden cutting board, a squeeze bottle for sauces, and fresh herbs. Build from there with vintage silverware, pinch bowls, and textured surfaces. The full list is in our 30 best food photography props guide — but you can stage beautiful food photos with under $30 worth of props from a thrift store.
