
Steak Photography: Capture Sear, Sizzle & Marbling
 Ali Tanis25 min read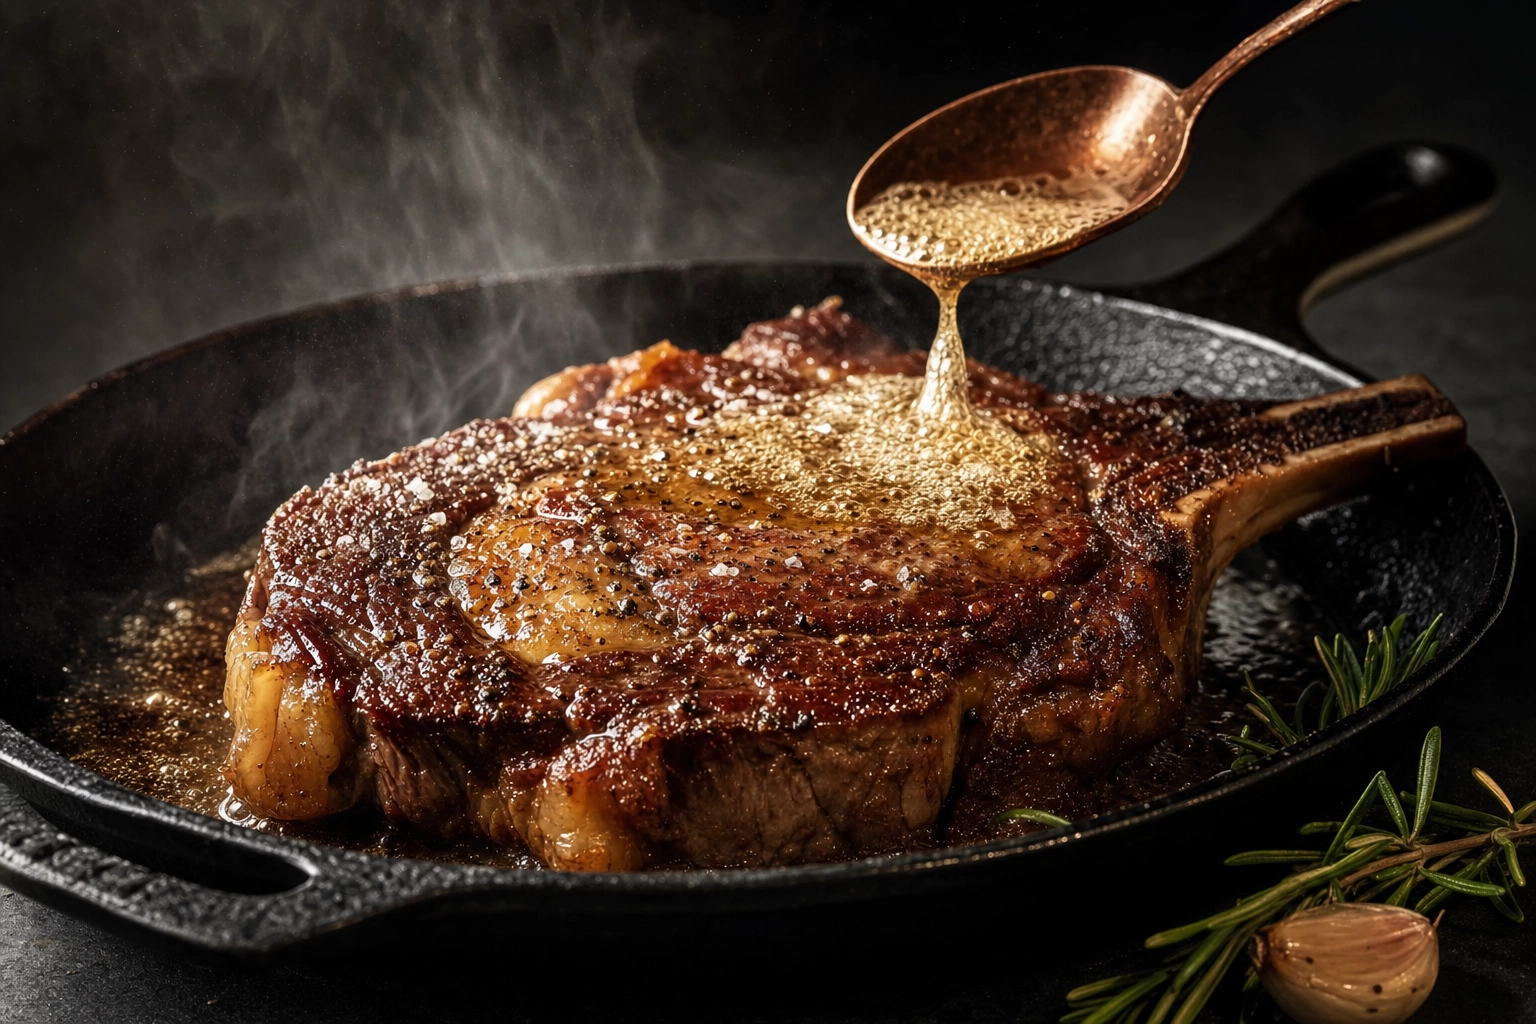
A $4 burger photographed badly still looks like a burger. A $90 dry-aged ribeye photographed badly looks like a $14 piece of meat. Steak is the most punishing subject in food photography — and good steak photos are the most expensive ones to get wrong, because the price gap between "looks expensive" and "looks cheap" comes down entirely to how you capture the crust, the cross-section, and the glisten.
This guide is the playbook we'd hand a steakhouse owner who needs steak photos by Friday. Every section is built around one job: making real beef look the way premium steak deserves to look — without a $2,500 photographer day rate.
Quick Summary: Great steak photos rely on four things: cut selection, doneness control (medium-rare 130–135°F is the photographic sweet spot for beef), side-back lighting at the 10–11 o'clock position, and a 60–120 second shooting window after resting. Get those right and your phone steak photos can rival editorial work — especially when paired with AI enhancement for the final menu finish.
The Steak Photography Challenge: Why Beef Is the Hardest Food to Shoot
Most food bounces light back at the camera in friendly ways. Pancakes glow under any window. Pasta glistens with almost no effort. Steak doesn't cooperate, and steak photos punish every shortcut.
Three problems sabotage almost every amateur attempt at steak photos:
The muddy crust problem. A perfect mahogany sear on a grilled steak has thousands of micro-textures — Maillard browning, grill marks, salt crystals, pepper crack. Bad lighting flattens all of that into a dark brown smudge. Worse, if you overexpose to compensate, the crust blows out to a flat black and you lose the texture entirely.
The grey-cooked-meat problem. Cooked beef muscle fibers contract and shed pigment as they hit higher internal temperatures. A well-done ribeye reads grey-brown on camera even when it tastes fine. There is no styling trick that makes well-done meat look as juicy as medium-rare. The fix has to happen at the grill.
The greasy vs glistening problem. Both look similar in real life but very different in photos. Juicy beef steak has small, scattered specular highlights — little points of light winking off the cross-section. Greasy meat has large pooled highlights that read as oil on a plate. The line between "I want to eat this" and "this is going to give me heartburn" is about three pixels of highlight size.
The good news: every one of these problems is solvable with technique that doesn't require new gear. The bad news: if you ignore even one of them, the $90 ribeye looks like a $14 sirloin and your menu loses money. That's the whole challenge of beef steak photos — they punish shortcuts harder than any other food category.
The 5 Essential Steak Photos Every Steakhouse Needs
Before we get into lighting and angles, decide what you're actually shooting. A steakhouse, butcher, or BBQ joint needs five distinct steak photos to cover a complete visual menu. Each one solves a different customer question.
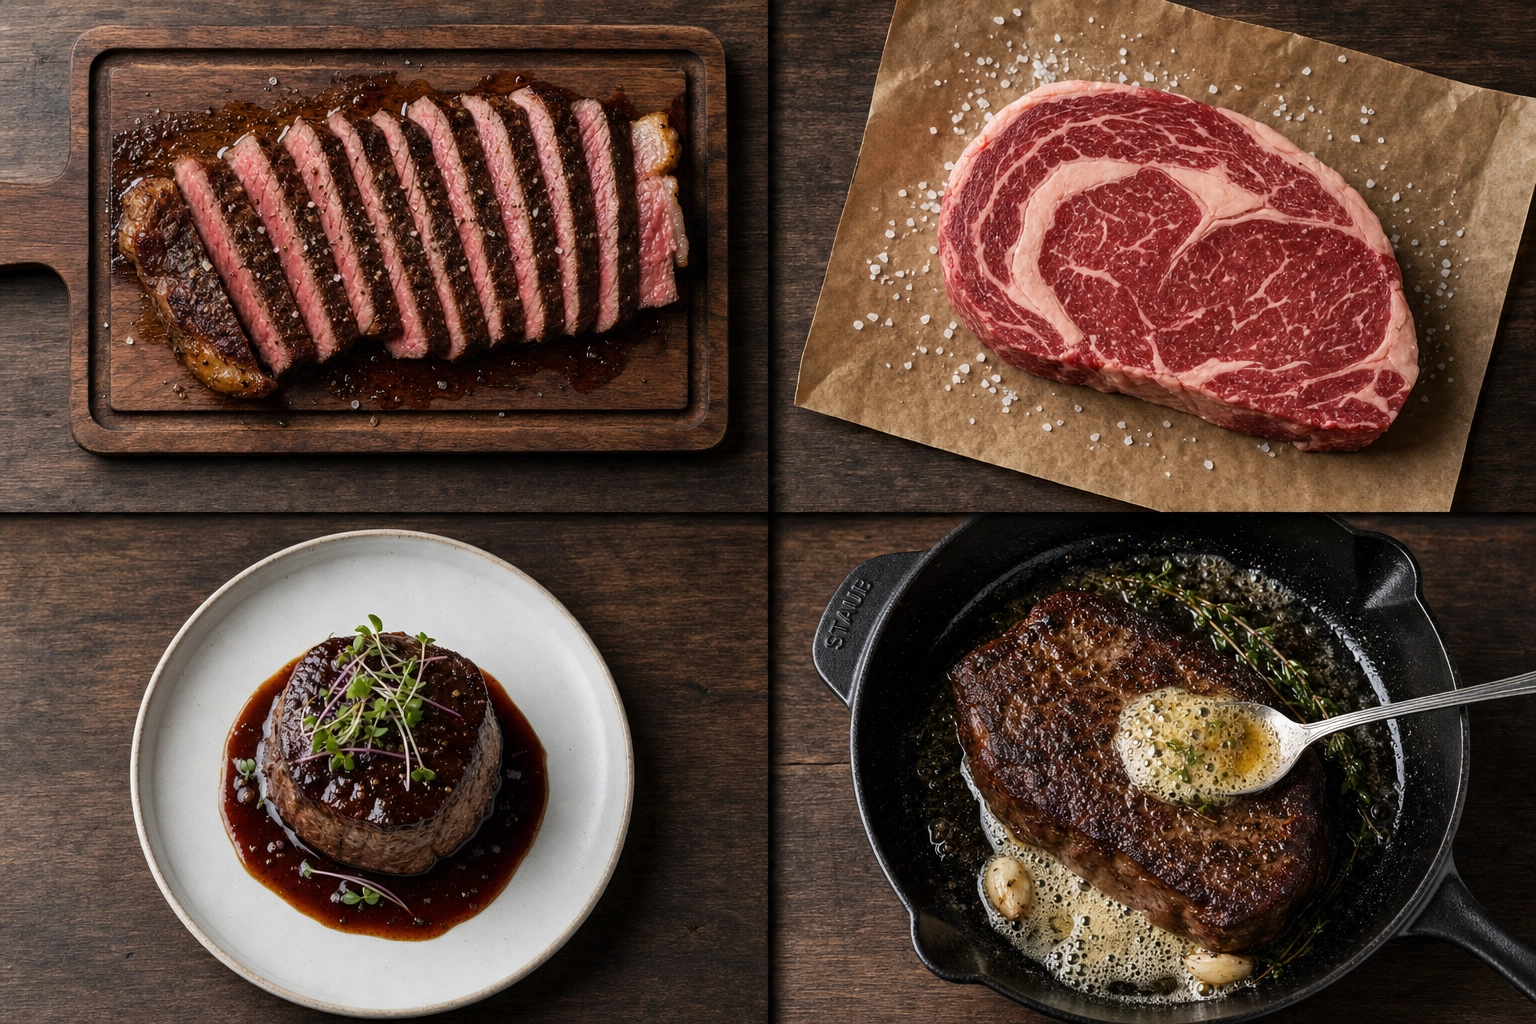 Four essential steak photography styles arranged overhead: sliced cross-section, raw marbled ribeye, plated filet, and butter-baste action
Shot 1: The Whole Steak Hero
A single steak photographed from a 30–45° angle, full plate or board context, the beef filling roughly 60% of the frame. This is the workhorse — the steak photo that goes at the top of the menu page, the homepage hero, and the lead delivery-app thumbnail.
Why it matters: Customers scan menus in under two seconds. The hero shot tells them "this is a real, finished plate that I will receive." It needs to read clearly even at thumbnail size.
Shot 2: The Sliced Cross-Section
Three to five slices of grilled meat fanned across a cutting board or plate, exposing the doneness gradient. Pink juices visible. This is the steak photo that sells doneness — the customer can see exactly what medium-rare looks like at your steakhouse.
Why it matters: It builds trust. Stock steak photos can't show your kitchen's actual doneness execution. A cross-section shot says "this is what you get."
Shot 3: The Butcher-Shop Raw
Raw beef, untrimmed, on butcher paper, marble slab, or wooden board. Marbling close-up, fat cap intact, often with a sprinkle of coarse salt. Dark moody background. Among all steak photos, raw cuts are the hardest to shoot because raw meat oxidizes fast and can read brown rather than ruby-red.
Why it matters: This is your provenance story. It works for butchers selling raw beef cuts, steakhouses promoting dry-aging programs, and BBQ joints showing off prime beef. It signals quality before the cook even starts.
Shot 4: The Plated Steakhouse Scene
A wide composition with the grilled steak surrounded by sides — creamed spinach, mashed potatoes, asparagus, a glass of red wine partially in frame, a steak knife angled across the plate. The full restaurant experience in one image.
Why it matters: This sells the occasion, not just the dish. Use these steak photos for booking pages, special occasion menus, and seasonal campaigns.
Shot 5: The Butter-Baste Action
A cast iron pan, steak mid-sizzle, a spoon tipping foaming butter over the surface. Steam or rising vapor visible. This is movement and craft — the only one of the five steak photos that captures the cook itself.
Why it matters: Action shots stop the scroll on social media. They also work as supporting visuals on landing pages and email headers.
These five steak photos cover roughly 90% of the visual real estate a beef-focused restaurant needs. Most of the work after this is matching style across them. For multi-location chains or beef CPG brands, see our AI steak photography workflow for keeping a consistent look across SKUs.
Lighting Steak: Sear Marks, Char, and Marbling
If you only fix one thing in your steak photography, fix the lighting. A $300 phone with good light beats a $3,000 camera with bad light every single time.
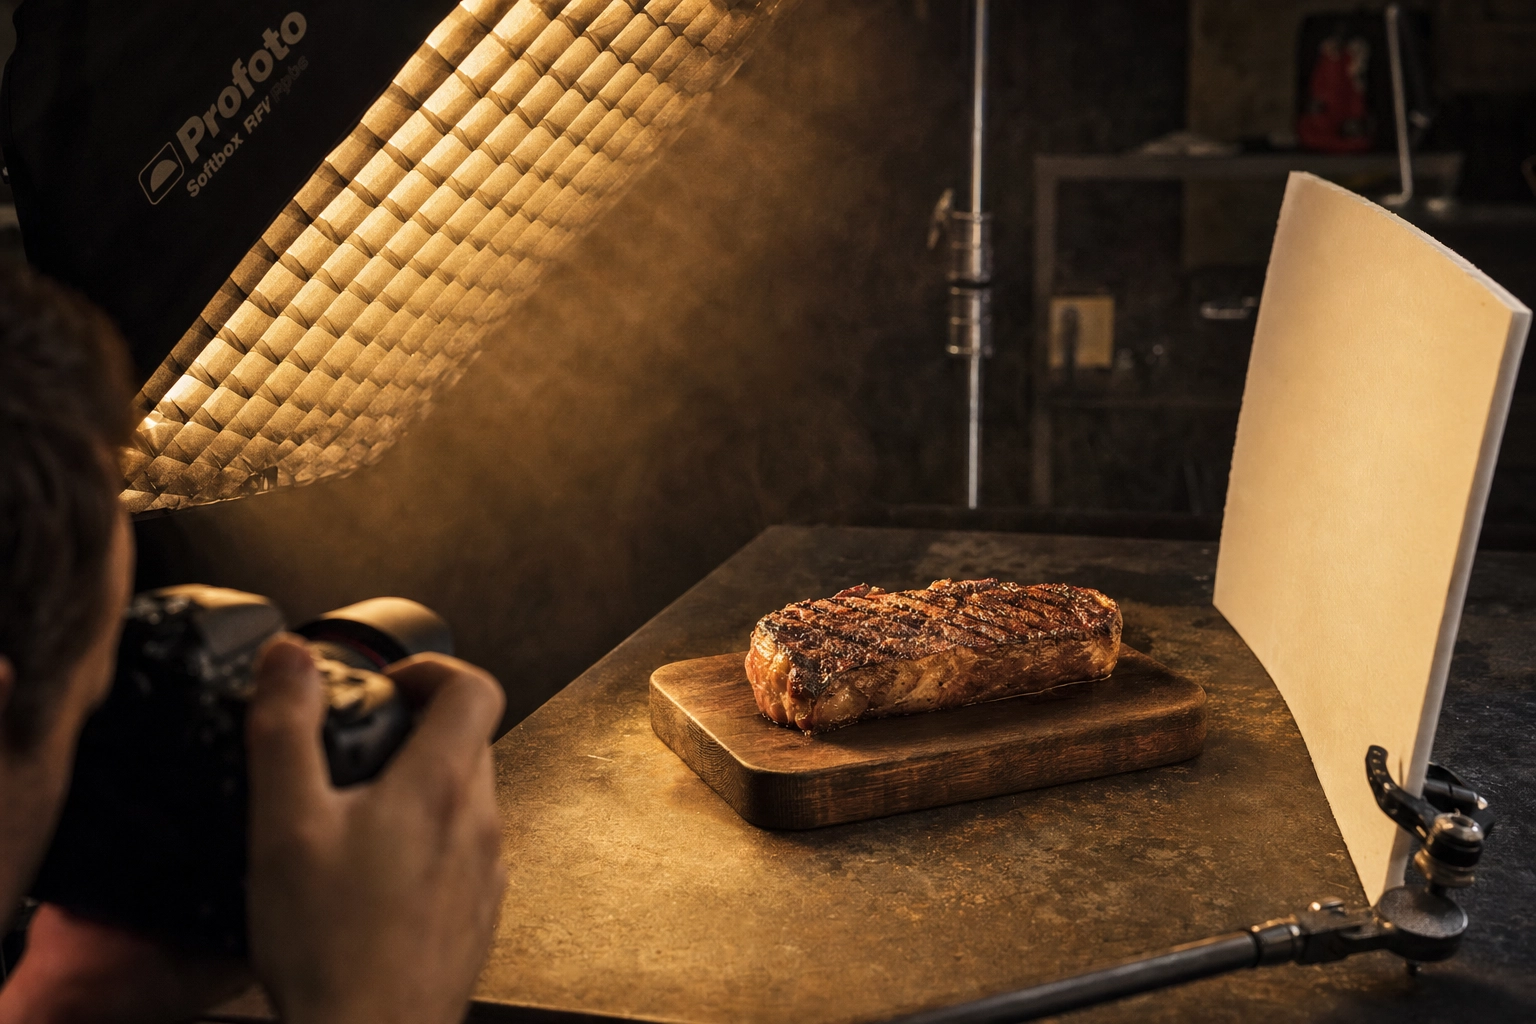 Side-back lighting setup at 10 o'clock position with softbox and white reflector card creating rim light on a NY strip steak
The Default Setup: Side-Back Light at 10–11 O'Clock
Imagine your steak at the center of a clock face. Your camera is at 6 o'clock. Place your light source — window, LED panel, or softbox — at the 10 or 11 o'clock position, slightly above the steak. This is the default for almost every steakhouse photo because it does two things at once:
- Side light rakes across the surface of the beef, revealing crust texture, grill marks, and fat cap detail
- Back component creates rim light along the upper edge of the steak, separating it from the background and outlining the crust crisply
For deeper lighting theory across food types, our full food photography lighting guide breaks down the clock method, diffusers, and DIY modifiers.
The Sear-to-Light Ratio
This is the single most important concept in steak photography and almost nobody talks about it. The "sear-to-light ratio" is how bright your scene is relative to how dark your crust is. Get it wrong in either direction and your steak photos fail.
Too bright: The crust blows out to flat dark blobs. You lose the mahogany color and texture. Surface looks waxy.
Too dark: The whole steak disappears into shadow. Cross-section reads as black, not pink.
The fix: Underexpose your overall scene by roughly 1/3 to 2/3 of a stop relative to where your phone's auto-exposure wants to settle. On iPhone, tap the steak, then slide the sun icon down. On Android, look for exposure compensation in pro mode. The crust will deepen, the highlights on the glistening beef surface will sparkle, and the whole image will gain editorial weight.
Color Temperature: Warm Beats Neutral
Meat looks best under warm light, around 3000–3500K. Cool blue light (5500K+) drains the reds and pinks, making medium-rare beef look grey and raw cuts look anemic. If you're using LED panels, dial in warmth. If you're shooting near a window, late afternoon golden hour is your friend.
Reflector on the Opposite Side
The unlit side of your steak will go almost black under side-back lighting. Place a white foam-core board, a piece of printer paper, or even a folded napkin on the 2–3 o'clock side, 6–12 inches away. This bounces a soft fill into the shadows without flattening the contrast. Aluminum foil (dull side) works for a punchier fill if you want more drama.
Rim Light for the Show-Cut Hero
For tomahawks, porterhouse, and dry-aged display pieces, push your light source further behind the steak — toward the 1 o'clock or 12 o'clock position. The result is a glowing halo around the edges of the meat and bone. It's the lighting steakhouses like Peter Luger and the major chophouses lean on for their hero steak photos. Pair it with a dark background to maximize contrast.
Doneness Photography: Making Medium-Rare Look Perfect
Doneness is half the battle. Here's the cooking temperature chart every steak photographer should know by heart:
| Doneness | Internal Temp | Visual | Photographable? |
|---|---|---|---|
| Rare | 120–130°F (49–54°C) | Cool red center | Yes — but reads "raw" to some viewers |
| Medium-rare | 130–135°F (54–57°C) | Warm red, fat begins rendering at 130°F | Yes — the sweet spot |
| Medium | 135–145°F (57–63°C) | Warm pink center | Yes |
| Medium-well | 145–155°F (63–68°C) | Slight pink, mostly brown | Difficult |
| Well-done | 155°F+ (68°C+) | Fully grey-brown | Avoid for photography |
Source: USDA recommends 145°F minimum for whole cuts of beef; 160°F for ground beef.
Medium-rare is the photographic sweet spot for a reason. At 130°F+ intramuscular fat starts to render, which makes the marbling visibly translucent. The pink color is saturated but not raw-red. The cross-section reads as juicy without looking bloody. If you're shooting beef for a menu and the customer chooses the doneness — always cook your photo sample to medium-rare.
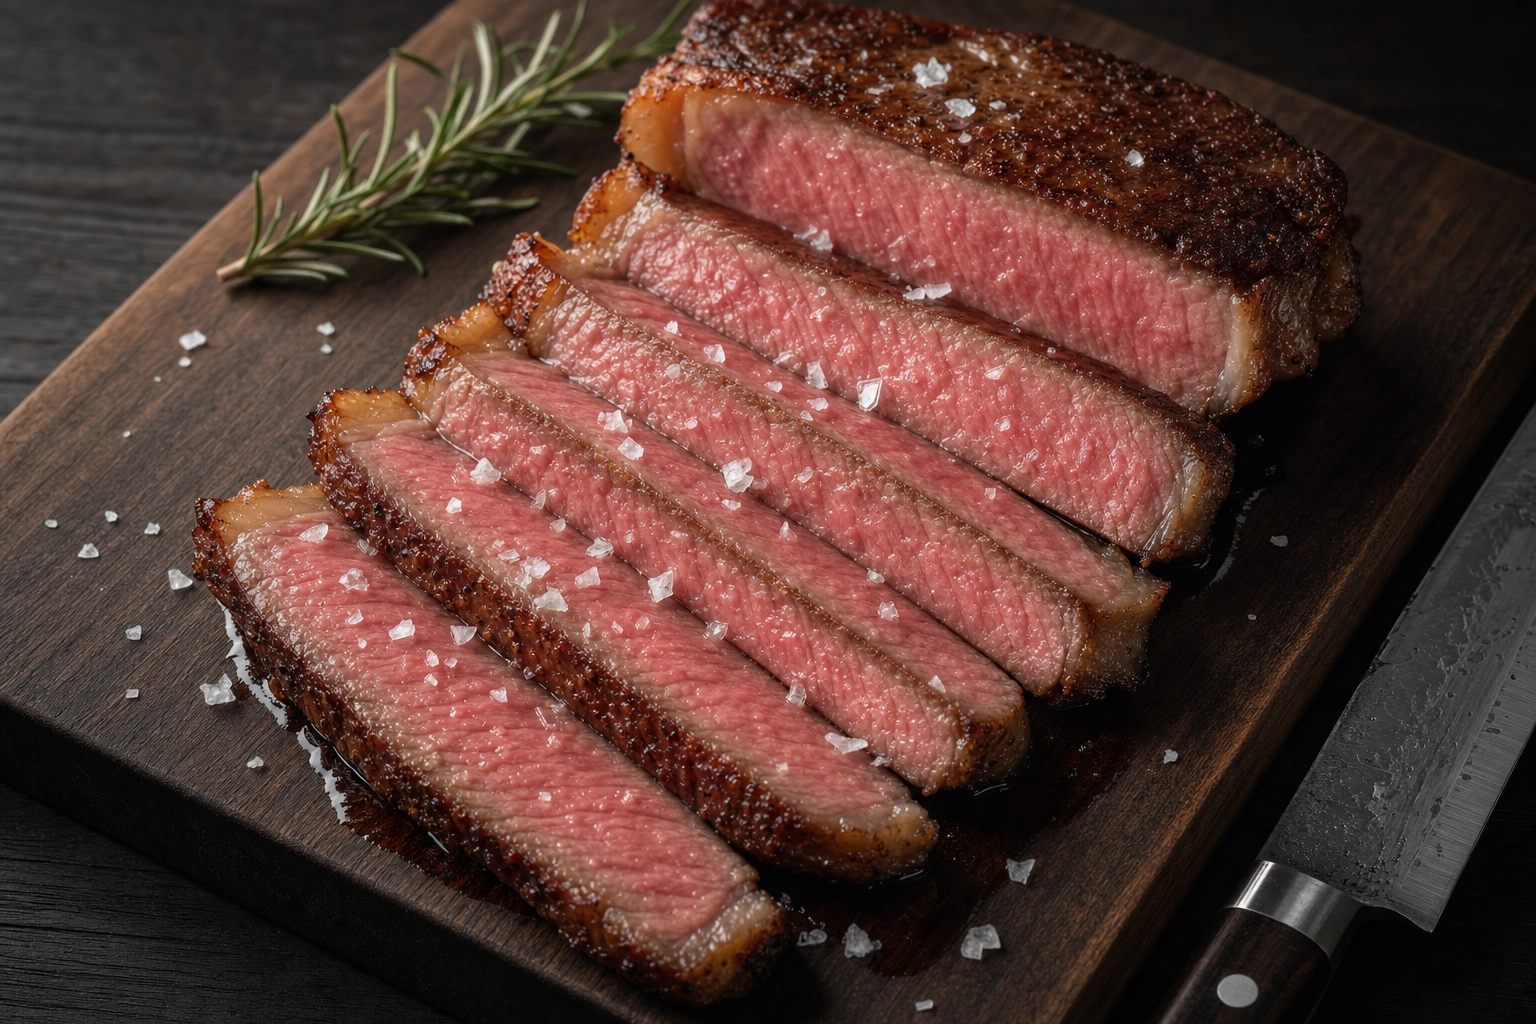 Medium-rare NY strip sliced cross-section showing perfect edge-to-edge pink doneness gradient from reverse sear method with beaded juices
The Cross-Section Reveal: How to Slice for the Shot
How you cut into the steak determines whether your slice-shot looks expensive or amateur.
-
Rest first. Pull the steak 5°F before target temperature. Rest on a warm board (not a cold plate) for 5 minutes for steaks under 1.5 inches, 8 minutes for thicker cuts. Internal temperature continues to rise during rest — this is how you nail the bullseye.
-
Use a sharp, clean knife. A dull knife tears fibers and releases too much liquid at once, creating a "blood puddle" effect that looks unappetizing in steak photos. A sharp slicing knife cuts clean and lets juices bead naturally.
-
Slice against the grain. For NY strip and skirt, this is critical. For ribeye it matters less but still helps the cross-section read uniformly pink.
-
Slice thickness: 3/8 to 1/2 inch slices fan beautifully. Thinner slices look like deli meat. Thicker slices hide the doneness gradient.
-
Shoot within 90 seconds. Cross-sections oxidize and the bright pink fades to brown within minutes. Have your camera framed before you slice.
Reverse-Sear for Edge-to-Edge Pink
Traditional pan-searing produces a thin grey band of overcooked meat right under the crust. The reverse-sear method (low oven at 225°F until 115°F internal, then hard sear in cast iron) gives an almost perfectly uniform pink from edge to edge. For menu steak photos this is the technique to use — the cross-section is dramatically more photogenic. J. Kenji López-Alt's reverse-seared steak recipe at Serious Eats is the definitive reference on the science behind cooking grilled steak this way.
Cut-Specific Photography Tips
Every beef cut has a "good side" that the camera should find. Here's the playbook for the five cuts that account for 95% of steakhouse menus.
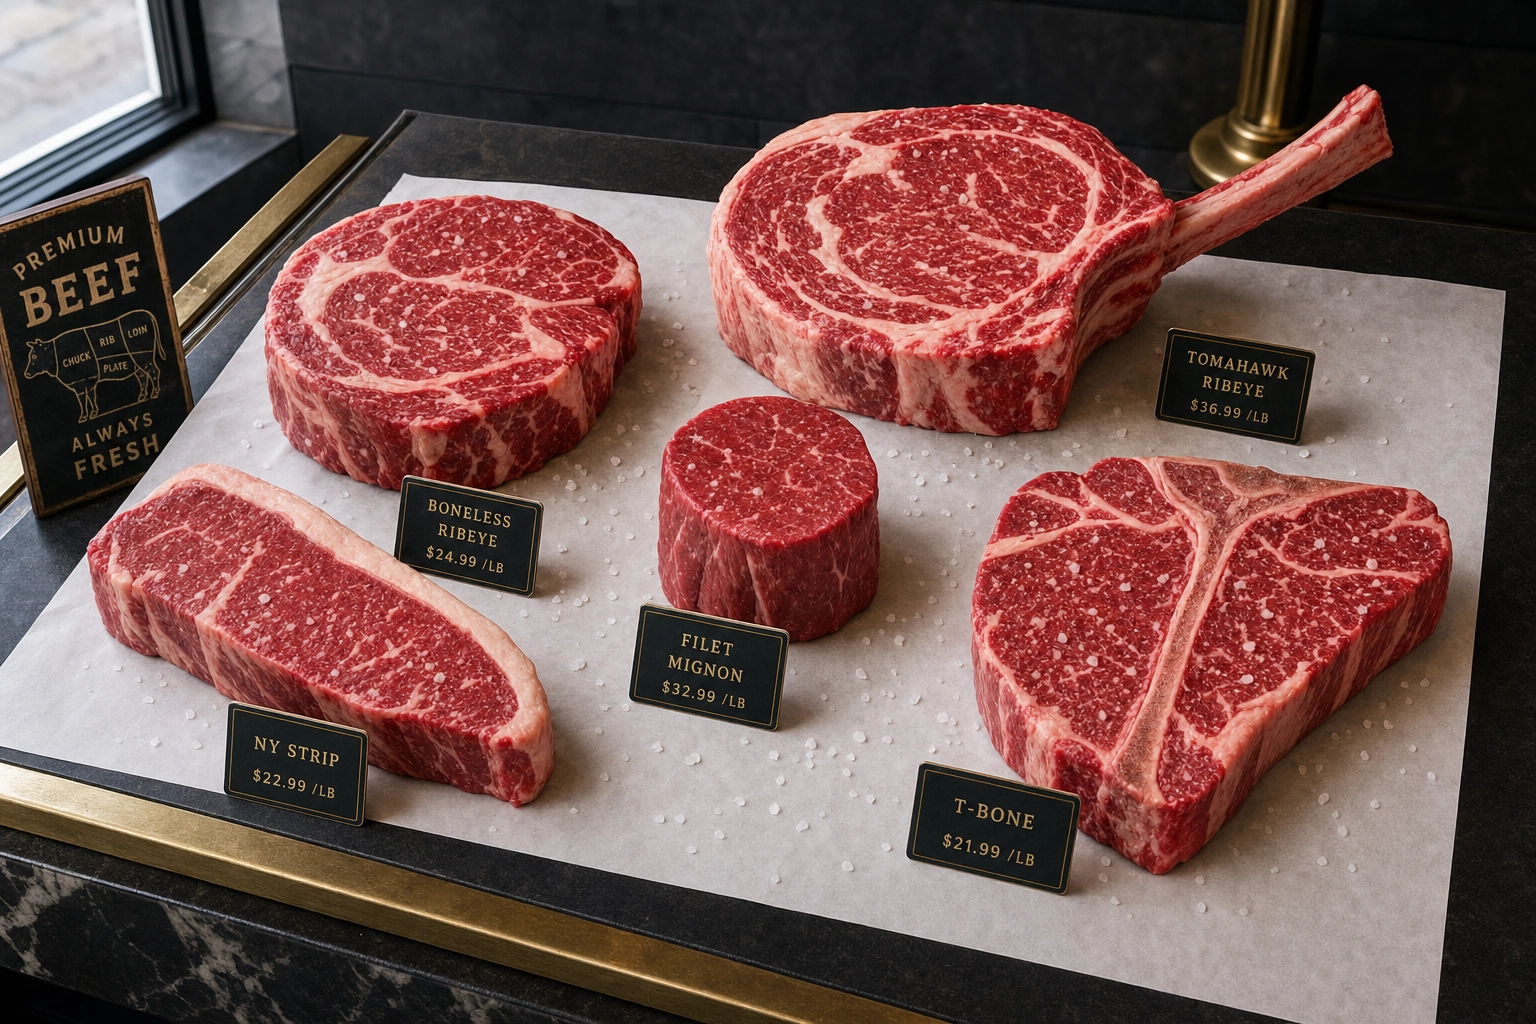 Five raw beef cuts arranged on butcher paper showing tomahawk, ribeye, filet mignon, NY strip and T-bone with visible marbling
Ribeye: Top-Down or 30° to Show the Marbling
The ribeye's defining feature is the spider-web marbling pattern across the cap muscle and central eye. Shoot it from directly overhead (90° top-down) or at a 30° angle so the marbling lattice is the dominant texture. A macro close-up of raw ribeye marbling alone is one of the most powerful butcher-shop steak photos you can make. For bone-in versions, angle the bone diagonally to add geometric interest.
Cooking note: Ribeye loves char. Don't be afraid to push the crust dark on a grilled ribeye — the fat will render and protect the interior. Aim for medium-rare with aggressive sear marks.
Filet Mignon: Eye-Level to Glorify Height
Filets are tall, not wide. Most are cut as 1.75–2 inch medallions. Shooting filet from above flattens the meat into a brown disk — boring. Drop your camera to eye level (or slightly below) with the steak and frame it as a tall cylinder. The vertical shape becomes the photograph.
Because filet has low marbling and minimal fat cap, the surface looks dry in photos compared to ribeye. The fix is butter — a real, visible pat melting on top. Many fine-dining presentations wrap filet in bacon or pour bordelaise over it specifically because plain filet is photographically thin.
NY Strip: 45° to Capture the Fat Cap
The strip's defining feature is its long, defined fat cap along one edge — that white strip that renders to crispy gold when grilled properly. Shoot at a 45° angle with the fat cap closest to the light source, so it catches a rim of golden brown. The cross-section, if sliced, should show a slightly denser texture than ribeye with less marbling and more linear muscle fiber.
T-Bone and Porterhouse: Overhead for the T
The T-bone's drama is the T-shape itself. Shoot grilled T-bones straight overhead (90°) on a wooden board. Position the T so the strip side and tenderloin side are clearly differentiated — usually with the strip toward the bottom of the frame and the tenderloin toward the top. Add a sprig of rosemary and a finishing salt scatter to complete the editorial look.
Porterhouse is the same shot but with a larger tenderloin section — point this out in alt text and captions if you're SEO-targeting "porterhouse" specifically.
Tomahawk: Wide Low Angle, Bone as Diagonal
The tomahawk is a show cut — it exists 80% for visual impact and 20% for eating. Photograph it accordingly. Drop low, angle the frenched bone diagonally across the composition (bottom-left to upper-right is a classic), and let the bone exit the frame. This makes the bone feel impossibly long and dramatic. Add coarse salt, rosemary, and a butcher's twine wrap if the cooking style allows. Background should be dark and uncluttered — nothing should compete with the bone.
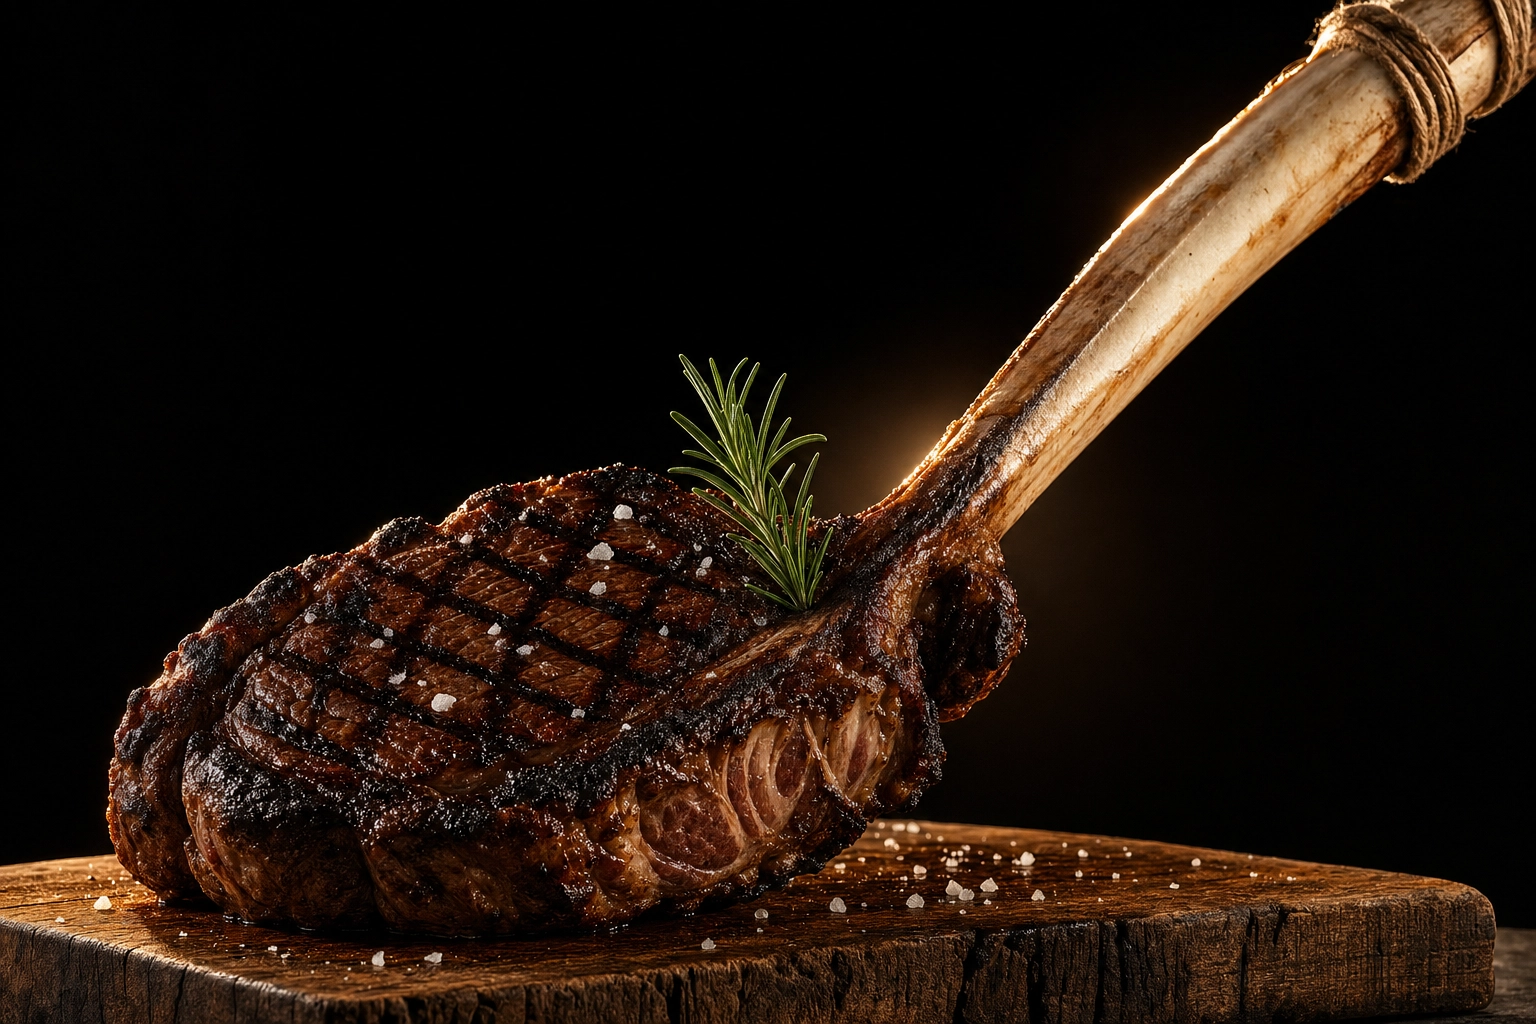 Massive 40-ounce tomahawk steak photographed from low angle with frenched bone diagonally across frame on rustic cutting board
For more on cut presentation across grill and smokehouse contexts, see our grilling and BBQ photography guide and the dedicated BBQ photography workflow for smoked beef and grilled meat scenes.
Plating and Context: Steakhouse vs Butcher vs Fine Dining
Same steak. Three completely different stories. Match the context to the channel:
Steakhouse Classic
Dark walnut or mahogany surface. Brass or burnished steel cutlery. Sides arranged with intention: creamed spinach in a small white ramekin, mashed potatoes piled high in a copper pot, a single bunch of grilled asparagus or charred broccolini. A glass of deep red Bordeaux or Cabernet, two-thirds in frame and partially cropped. A weighty steak knife angled into the composition. Lighting is low-key — moody, dramatic, with deep shadows.
This is the visual language of fine dining photography and traditional chophouses. It signals occasion, expense, and ceremony.
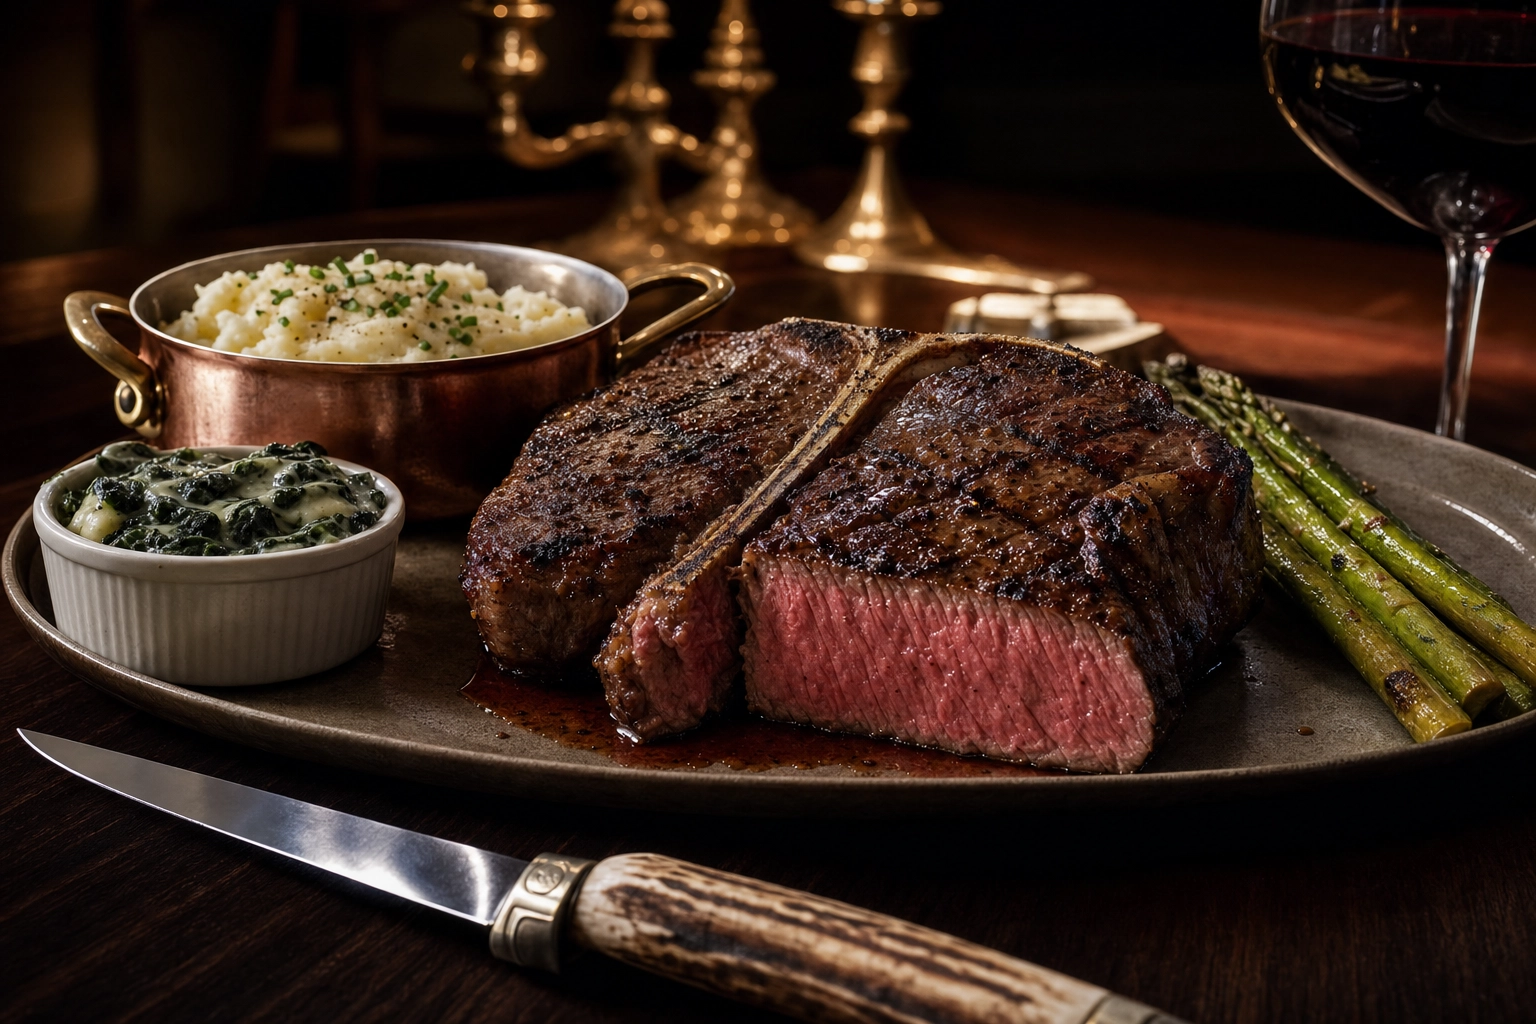 Plated porterhouse steakhouse scene with creamed spinach, mashed potatoes, asparagus and Bordeaux wine glass in moody chophouse lighting
Butcher Minimalist
Butcher paper or a thick wooden cutting board. Nothing on the surface except raw beef, coarse sea salt, fresh rosemary or thyme, and maybe a wedge of butter. Dark backdrop — black painted wood, slate, or deep charcoal linen. Lighting is high contrast: bright key light, deep shadows, dramatic rim.
This works for butcher shops, dry-aged programs, premium beef CPG packaging, and BBQ joints leaning into provenance. These steak photos say: this is the meat itself, before anyone touched it.
Fine Dining Composed
White or matte black plate. Significant negative space. Sauce placed geometrically (a swoosh, three dots, a quenelle smear). Microgreens, edible flowers, or bone marrow placed as accents. The steak is often a single component on a larger artistic plate. Lighting is bright and clean — closer to overhead with subtle directional fill.
Use this for Michelin-aspirational restaurants, tasting menus, and chef-driven concepts. The steak shares the plate with art.
A few rules that apply across all three contexts:
- Sides should complement, not compete. Dark greens (spinach, asparagus, kale) work. Bright orange (carrots, sweet potato) fights the steak's mahogany.
- Wine glass placement: two-thirds in frame, partially cropped at the top. A full glass in the center of the frame steals attention.
- Wood grain direction: if you're shooting on a board, orient the grain to lead the eye to the steak, not away from it.
- Avoid the "tasting menu" trap on a menu page. Customers want to see the food they'll eat. Save extreme negative space for landing pages, not order screens.
For broader plating principles, our food styling guide breaks down composition, props, and surface choice in depth. For the wider menu strategy around steak photos and other restaurant dishes, the restaurant food photography guide covers the full visual menu workflow.
Juices, Glisten, and the Sear: Timing for Moisture
Capturing moisture is where steak photos either win or fail entirely. Too dry: leather. Too wet: bath. The window between is narrow and you have to time it.
The Maillard Crust: How It Forms
The dark mahogany crust on a great grilled steak isn't just "cooking" — it's the Maillard reaction, a chemical browning between amino acids and reducing sugars that requires surface temperatures of 280–330°F or higher. Two things prevent it: surface moisture (because water must evaporate before browning) and overcrowded pans (because the temperature drops).
Practical implications for steak photos:
- Pat the raw steak dry with paper towels right before searing. Visibly dry surface = better crust = better photograph.
- Use a heavy cast iron or carbon steel pan preheated until just smoking (around 450–500°F).
- Don't move the steak for 2–3 minutes once it hits the pan. Movement breaks the Maillard contact patch.
The 60–120 Second Shooting Window
This is the most important timing rule in steak photography. After resting, the meat has roughly 60–120 seconds of peak visual appeal before things start going wrong:
- 0–60 seconds: juices redistribute, surface glistens naturally, cross-section is bright pink
- 60–120 seconds: ideal shooting window, everything looks the way you want it
- 120+ seconds: surface starts to oxidize, juices pool unattractively, color dulls
Set up your shot completely before you slice. Camera framed, lighting on, props placed. Slice the steak, then immediately shoot. Don't slice and then start adjusting lighting — by the time you're done, the steak has dried out.
Brushing Oil: The Pro Trick
A neutral oil — vegetable, canola, or melted butter — brushed lightly across the steak right before the shot adds a wet sheen that reads as fresh juice. Less is more. A heavy hand creates the greasy look. A light brush, then a wipe with a clean paper towel, leaves just enough shine.
Some food stylists use glycerin for non-edible promotional shots because it doesn't pool or absorb. For menu steak photos you'll actually eat, stick with oil or butter.
Real Butter Baste: The Gloss AI Can't Fake
If you only do one styling move on a cooked steak, do a real butter baste in the pan and shoot it mid-action. Foamy butter on a hot steak creates a gloss that looks impossible to replicate. The bubbles, the steam, the spoon mid-tilt — this is the steak photo that stops scrolls. Action shots also have the side benefit of forgiving minor flaws in the steak itself because the eye goes to the motion.
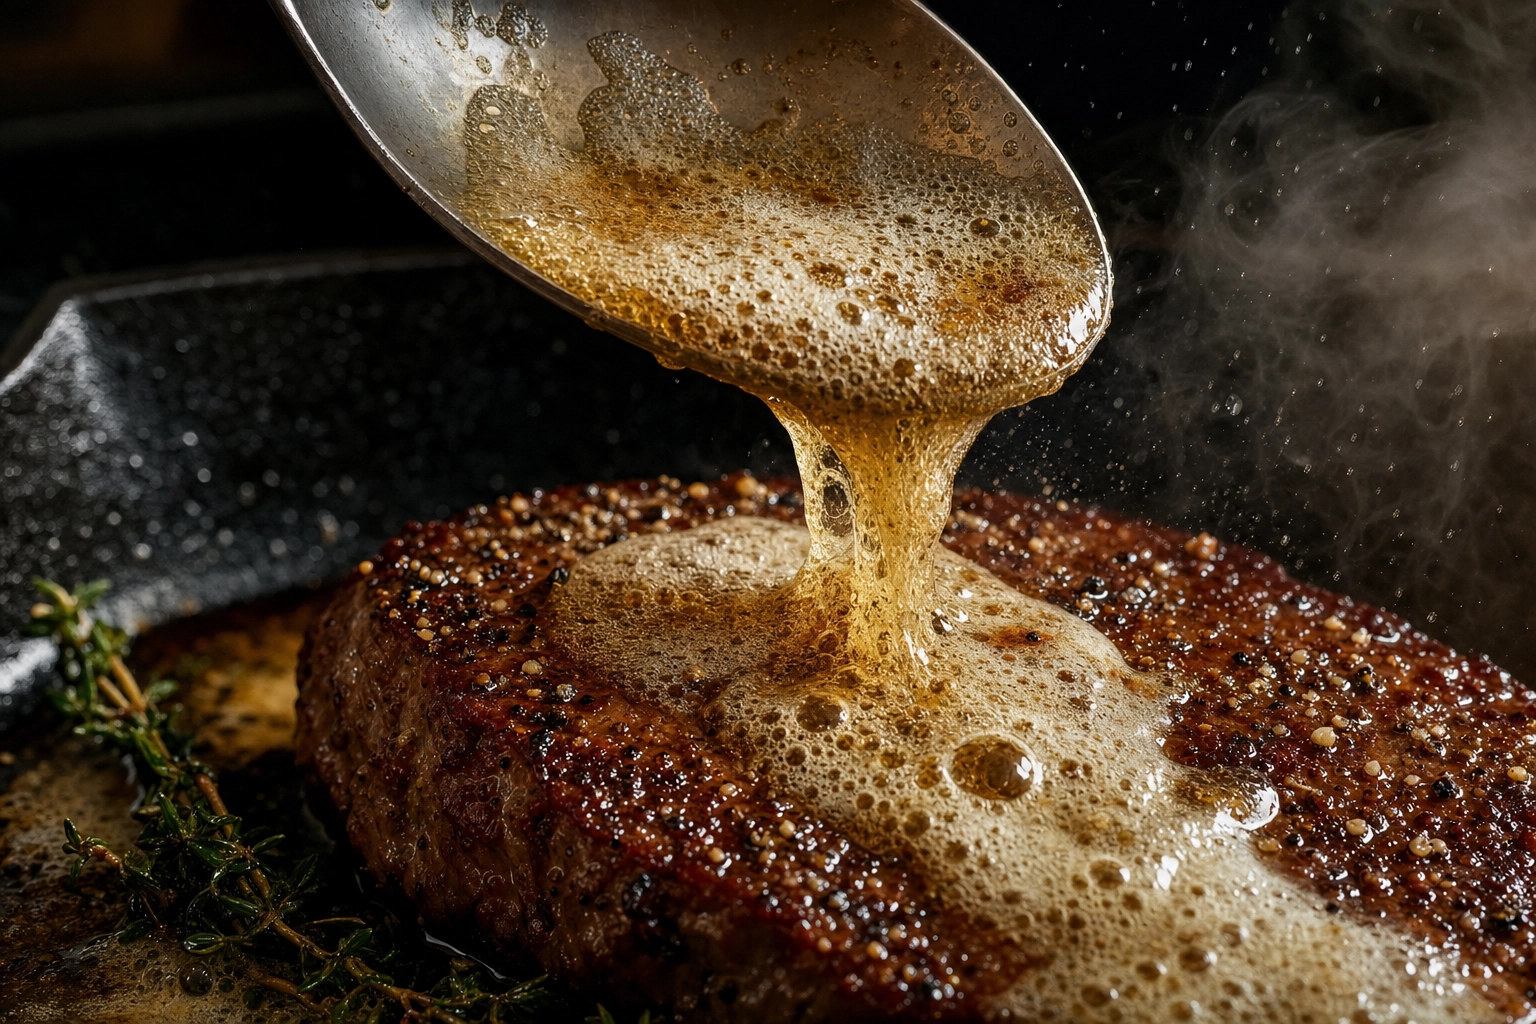 Macro close-up of foaming brown butter being basted from a silver spoon over a sizzling steak crust with visible thyme and pepper
Greasy vs Juicy: The Highlight Test
When you review your shot, zoom in on the surface highlights. Ask:
- Are the highlights small and scattered? Juicy.
- Are they large pools or streaks? Greasy.
- Is there a puddle of liquid around the steak? Greasy.
- Are juices beading on the cross-section like tiny droplets? Juicy.
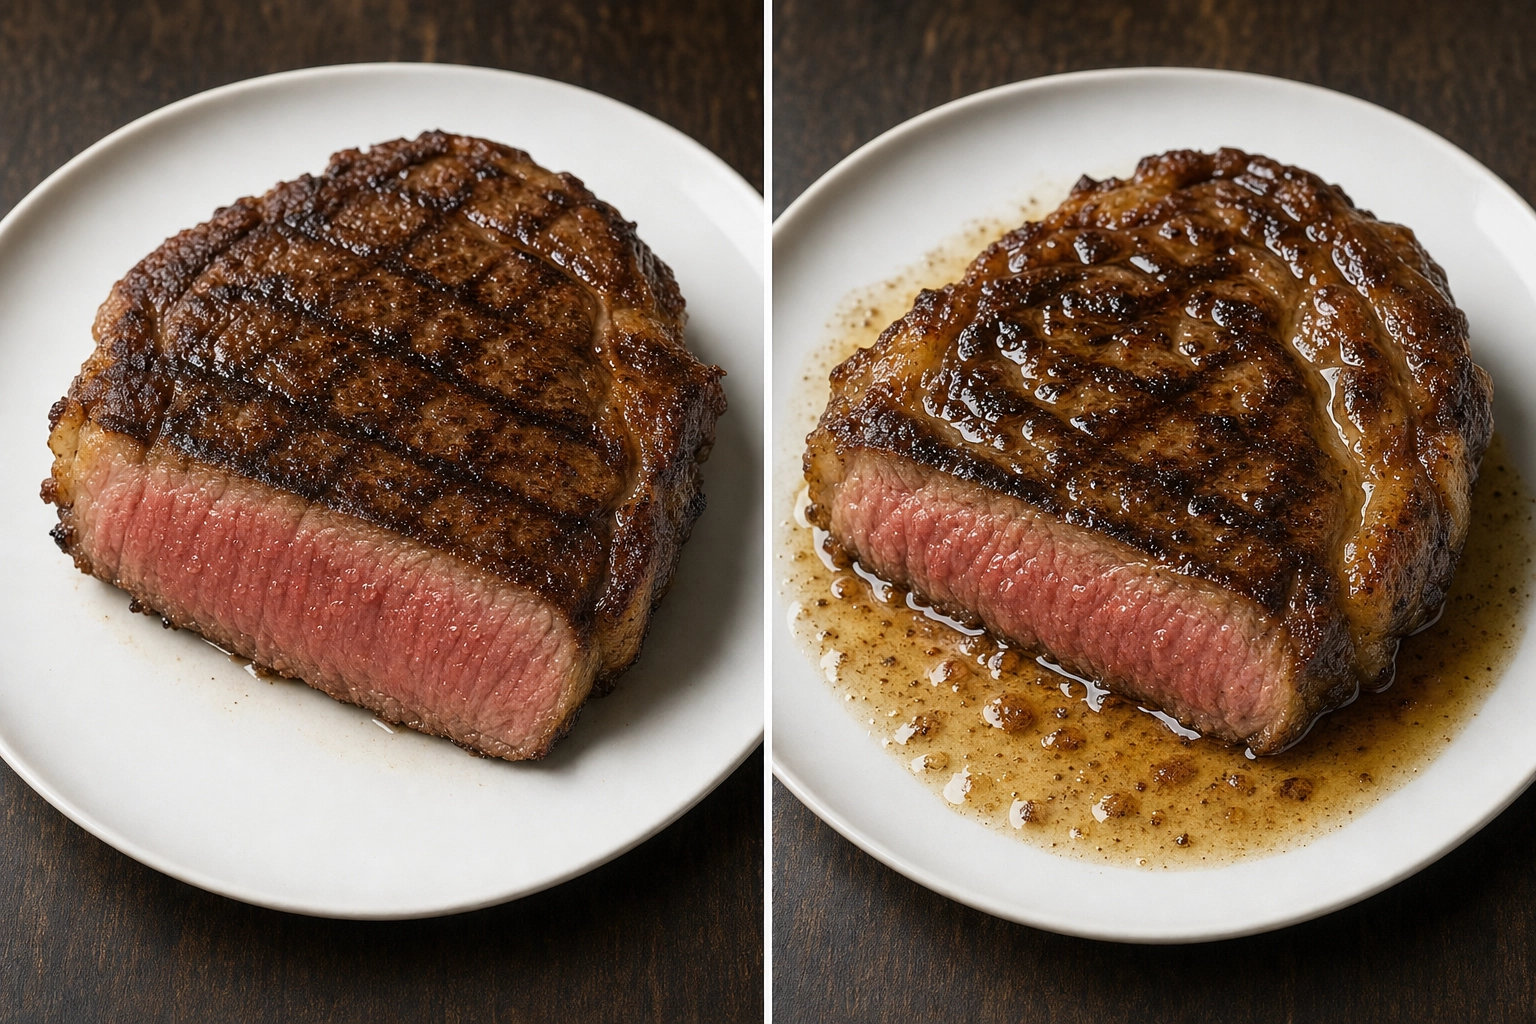 Side-by-side comparison of juicy versus greasy steak showing the difference between small scattered highlights and large pooled oil
If the photo reads as greasy, retake with less oil — or accept the take and have AI clean up the highlights in post.
The AI Enhancement Shortcut for Restaurant Operators
Here's the operator reality: a single professional food photography session costs $700–$2,500, takes 5–7 days to deliver, and only covers one or two menu items at a time. Steakhouses, butchers, and BBQ joints don't update their restaurant menus once a year — they refresh weekly. The economics of traditional steak photos don't work for most operators.
This is the gap FoodShot AI was built for. Take a phone photo of the actual steak, upload it, choose a style (Steakhouse, Butcher, Fine Dining, BBQ), and 90 seconds later you have a 4K menu-ready image. Roughly 95% cheaper than a photographer session.
What AI Does Well for Steak Photos
- Crust contrast cleanup — pushing mahogany browns deeper without blowing out highlights
- Glisten and juice enhancement — adding the wet sheen that bad lighting failed to capture
- Background replacement — swap cluttered kitchen counter for dark wood, butcher paper, or steakhouse table
- Lighting correction — re-light a flat overhead phone snap to side-back lighting style
- Steam and atmosphere — add subtle steam rising off a hot grilled steak
- Sides and props — generate creamed spinach, mashed potatoes, wine glasses to complete a scene
- Consistency across SKUs — match every steak on your menu to the same visual language with reference styles
What Still Requires a Good Source Photo
- Doneness level — AI can't change a well-done steak to medium-rare. It can lift the color slightly, but the fundamental cook level is locked in by the photo you upload.
- Cut accuracy — a ribeye stays a ribeye. AI won't reshape your strip into a tomahawk.
- Marbling pattern — the actual marbling in your beef is what shows up. Photograph well-marbled cuts for best results.
- Slice geometry — how you cut into the steak determines the cross-section that AI will then enhance.
Get the cook right, get the slice right, get a reasonable phone snap. Let the AI food photo editor handle the studio polish.
Multi-Location and Multi-SKU Consistency
For chains, hotel groups, and beef CPG brands, the harder problem isn't making one steak look good — it's making 40 steaks look like they belong to the same brand. FoodShot's My Styles feature lets you upload 1–3 reference photos that define your brand's visual language (lighting style, plate type, background, mood), then apply that style across every steak photo you process. The result is menu-wide consistency without re-shooting anything.
When to Use AI vs Hire a Photographer
Use AI for steak photos when:
- You update your restaurant menu weekly or seasonally
- You manage multiple locations with rotating specials
- You need volume (5+ photos per week)
- You're a butcher or beef CPG brand with constantly changing inventory
- You're testing menu items before committing to a full shoot
Hire a photographer when:
- You're building a once-a-decade restaurant brand identity package
- You need video content (steak sizzle reels, table-side carving)
- You need a specific creative direction that requires a human director on set
- The shoot is a launch event with PR and editorial coverage
Both can co-exist in a healthy marketing budget. Use a photographer for hero campaigns; use AI for the 90% of menu work that doesn't justify a shoot day.
Frequently Asked Questions
What doneness photographs best for a steakhouse menu?
Medium-rare (130–135°F internal) is the universal answer for steak photos. At 130°F+ intramuscular fat begins rendering, which makes marbling visibly translucent and gives the beef that distinctive glisten. The color is warm pink — saturated enough to look juicy without reading "raw" to a wider audience. Rare can work for upscale chophouse imagery, but some customers see it as undercooked. Avoid well-done unless that's specifically your USP — well-done steak photographs as flat grey-brown and no amount of styling will fix it.
How do I get a deep sear crust to show up in photos?
Lighting matters more than the sear itself. Position your light at the 10–11 o'clock side-back position so it rakes across the surface, revealing every micro-texture in the crust. Underexpose your overall scene by 1/3 to 2/3 of a stop so the crust stays deep mahogany instead of blowing out to flat black. Get close — a macro crop or tight close-up lets grill marks and Maillard browning fill the frame. The reverse-sear cooking method (low oven, then hard sear) produces the most uniform, photographable crust on grilled beef steak because the surface isn't fighting for heat against a cold center.
How do I make steak look juicy without looking greasy?
Specular highlights should be small and scattered, not large pooled streaks. Brush the meat with a tiny amount of neutral oil and immediately wipe with a clean paper towel — you want sheen, not a coating. Avoid any liquid pooling around the steak on the plate (that's the greasy signal). Backlighting works better than direct front light because it catches edge moisture without flattening the surface. If the steak has been sitting for more than two minutes, mist the cross-section with a single spritz of water from a fine mister — it refreshes the glisten without adding oil. The cleanest visual rule: juices should bead, not flow.
What's the best camera angle for a tomahawk steak?
A wide low angle, with the camera slightly below eye level relative to the steak, glorifies the long bone in a way no other angle can. Position the bone diagonally across the frame — bottom-left to upper-right is the classic compositional move — and let it exit the frame. This makes the bone feel dramatically long. Avoid straight overhead, which collapses the bone into a thin line and loses the show factor. A 45° angle with negative space behind the bone also works well for menu cards. Add a sprig of rosemary, scattered coarse sea salt, and a dark uncluttered background. The bone should be the dominant visual element in tomahawk steak photos — nothing else in the frame should compete with it.
Can I just use stock photos of steak for my menu?
Legally yes, strategically no. Generic stock steak photos don't show your beef — they show a generic ribeye that's already on 4,000 other menus. Customers increasingly spot reused imagery, and the feedback is negative. Delivery platforms like DoorDash and Uber Eats also penalize generic or misleading photography in their visibility algorithms, and some are moving toward AI-assisted detection of stock images. The bigger issue is trust: when the customer's actual steak arrives looking different from the menu photo, that's a one-star review waiting to happen. AI enhancement of your own phone steak photos solves both problems — real food, studio-grade output, no licensing issues, and no expectation mismatch.
Your Next Steak Photo
Steak photography rewards specificity. Hit the medium-rare temperature, place your light at the 10 o'clock side-back position, time your slice for the 60–120 second window, and underexpose by a third of a stop to keep the crust mahogany. That's the recipe.
If you're a steakhouse, butcher shop, BBQ joint, or beef brand updating menus and social content faster than a photographer can keep up — try FoodShot AI free. Three credits on the free plan, $9/month on the Starter plan (yearly billing) gets you 25 menu-ready steak photos, 200+ steakhouse-tuned styles, Builder Mode for custom scene composition, and 4K commercial-licensed output.
Phone snap to steakhouse-grade in 90 seconds. Tomahawks, ribeyes, dry-aged butcher shots, doneness cross-sections, raw beef cuts, sliced grilled meat — every cut, every plating context, every cook method. See the full steak photography use case, or jump straight into the AI food photo editor and try one steak photo on us.