Restaurant Food Photography: The Definitive Guide (2026)
Your menu photos are doing more selling than your waitstaff. In 2026, 93% of diners check food photos online before deciding where to eat, and 62% say those images are the primary factor in their choice. Whether those photos drive customers through your door — or to your competitor's — depends entirely on what they see.
This guide covers everything a restaurant owner needs to know about food photography in 2026: the business case, the five types of photos you need, three approaches to getting them (DIY, professional, and AI), platform-specific requirements, and a quick-start checklist.
Quick Summary: Restaurant food photography directly impacts your revenue: menus with professional photos increase sales 20–45%, and delivery app listings with images generate up to 70% more orders. Below you'll find the five types of photos every restaurant needs, three shooting approaches compared, exact specs for Uber Eats, DoorDash, and Instagram, and a step-by-step checklist to get your first photo shoot done this week.
Why Restaurant Food Photography Matters More Than Ever
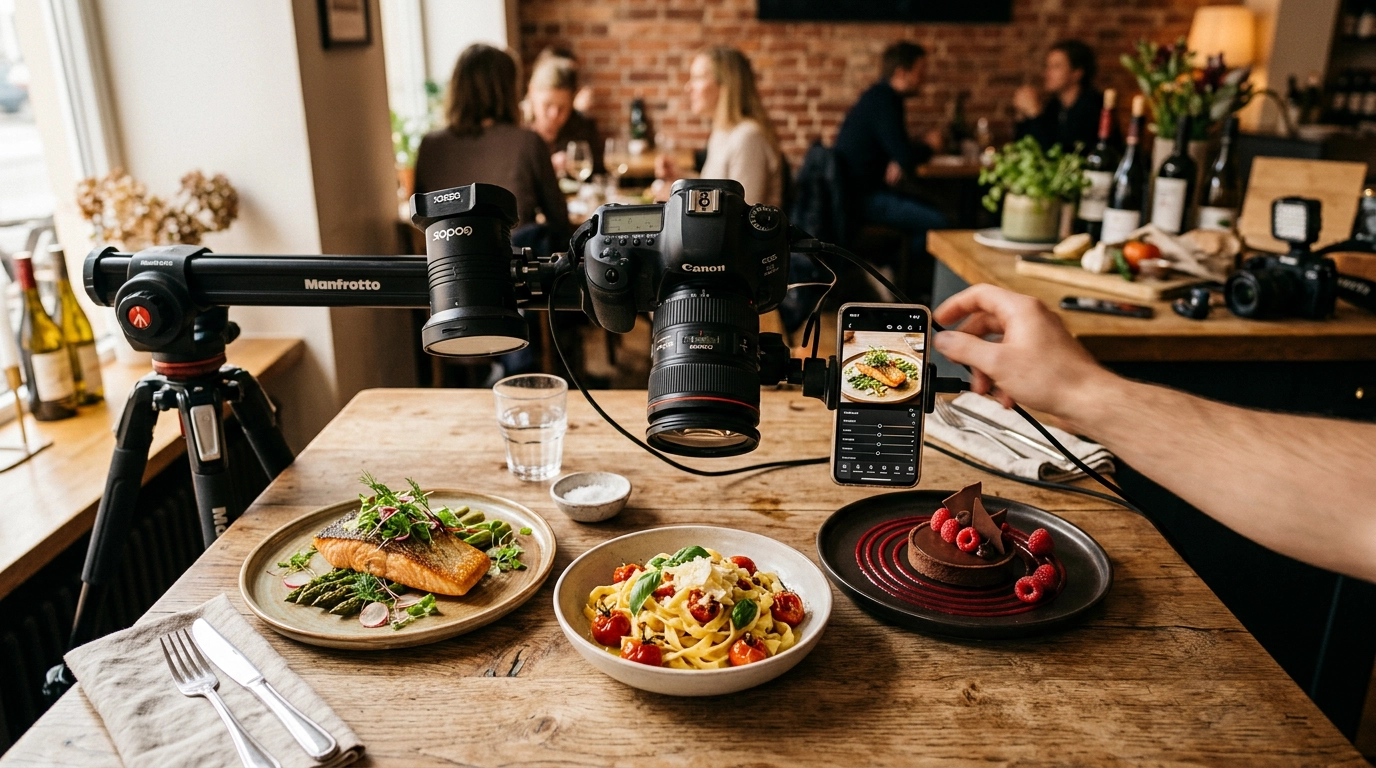
 Diner scrolling food delivery app on smartphone choosing restaurant based on food photos
Let's talk numbers, because the case for investing in restaurant food photography isn't subjective — it's mathematical.
The sales impact is massive. Menus with professional photography increase sales by 20–45%, according to industry research. On delivery platforms specifically, the results are even more dramatic:
- DoorDash found that menu items with photos generate up to 44% more monthly sales than items without. Header images alone boost sales by up to 50%.
- GrubHub reports that restaurants with menu photos see up to 70% more orders compared to text-only listings and a 30% direct sales increase.
- Snappr's enterprise research confirms that high-quality food photos increase total delivery orders by over 35%.
Social media compounds the effect. 74% of diners now choose where to eat based on social media content. Food-related posts get 30% higher engagement than non-food content, according to University of Michigan research, and 43% of Instagram users list food and drink as a top interest. Your restaurant photos don't just sell one meal — they build a pipeline of future customers.
Here's what this means practically: a restaurant doing $30,000/month in delivery orders that upgrades from no-photo listings to professional images could realistically see an additional $9,000–$15,000 in monthly revenue. The ROI on food photography isn't good — it's absurd.
For a deeper look at what photography actually costs, read our food photography cost breakdown.
The Five Types of Restaurant Photography You Need
Most restaurant owners think "food photography" means pointing a camera at a plate. In reality, you need five distinct types of visual content — each serving a different purpose across different channels. Here are the essential food photography tips for each one.
1. Menu Photography
This is your foundation: clean, consistent photos of individual dishes for your printed menus, website, and ordering systems. Menu photography prioritizes clarity and accuracy — the customer needs to know exactly what they're ordering.
The goal is simple: every dish on your table looks appetizing, the portions look generous, and the presentation matches what actually arrives. Consistency matters here more than creativity. If your appetizers are shot on a dark wood table and your desserts are on white marble, the menu looks disjointed.
We wrote an entire guide on food photography for restaurant menus that covers prioritization, the shooting workflow, and a step-by-step process for photographing a 50-item menu.
2. Delivery App Photography
Delivery app photos aren't the same as menu photos. Each platform has different dimensions, aspect ratios, and content rules (more on that in the platform specs section below). The photo also needs to work harder — on a delivery app, your image is competing directly against dozens of other restaurants in a scrollable feed.
The stakes are high: DoorDash's own data shows items with photos generate 44% more sales. A blurry phone shot can actually hurt conversion compared to no photo at all. For the full playbook, see our delivery app photography guide.
3. Social Media Content
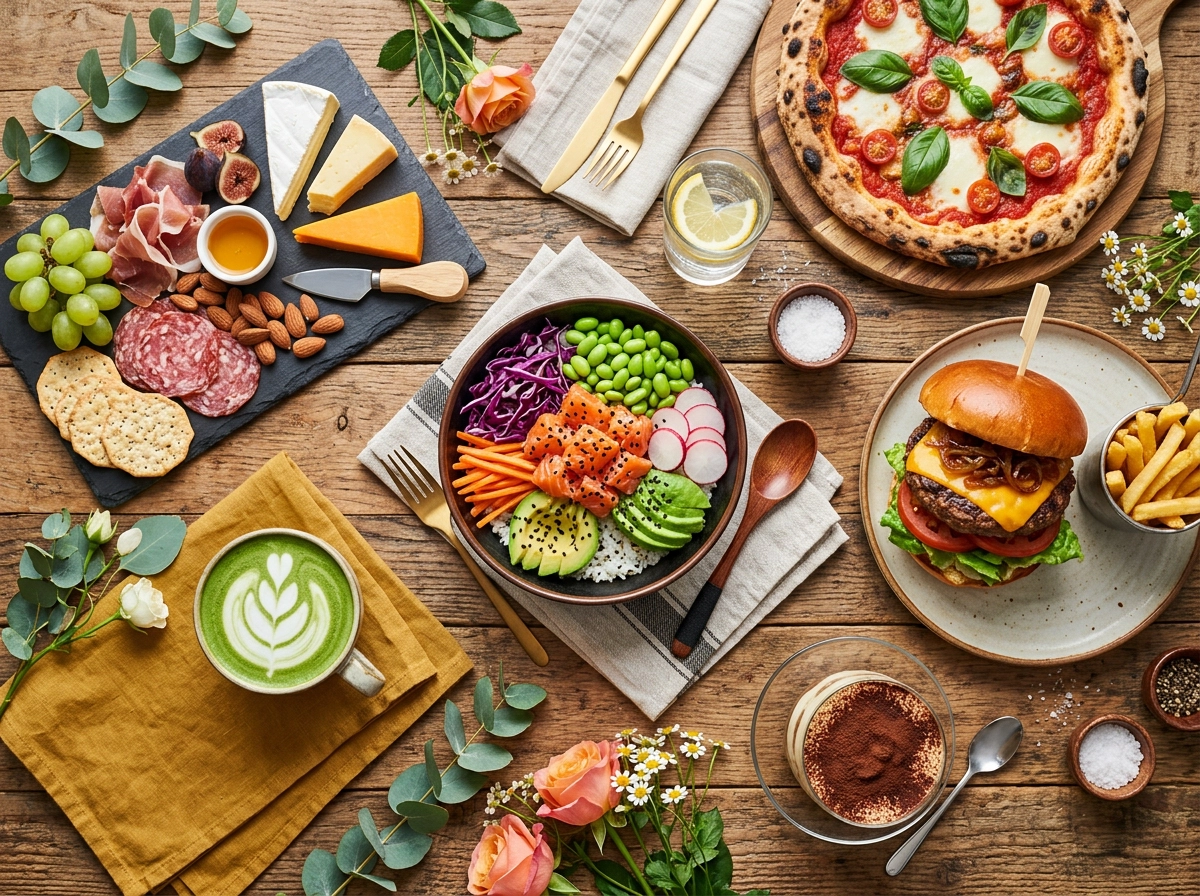 Overhead flat-lay of colorful restaurant dishes arranged for Instagram social media food photography
Instagram, TikTok, Pinterest — each platform rewards different formats and aesthetics. Unlike menu photos (which you shoot once and update periodically), social media content is a hungry beast that needs feeding daily or weekly.
This is where variety matters. Flat-lays of table spreads, close-up texture shots, Reels of sizzling pans, Stories of plating processes. The restaurants winning on social media in 2026 aren't posting the same static dish photo over and over — they're telling visual stories.
Our Instagram food photography guide covers dimensions, hashtag strategies, and editing workflows. For broader strategy, check out our social media marketing for restaurants guide.
4. Ambiance and Interior Photography
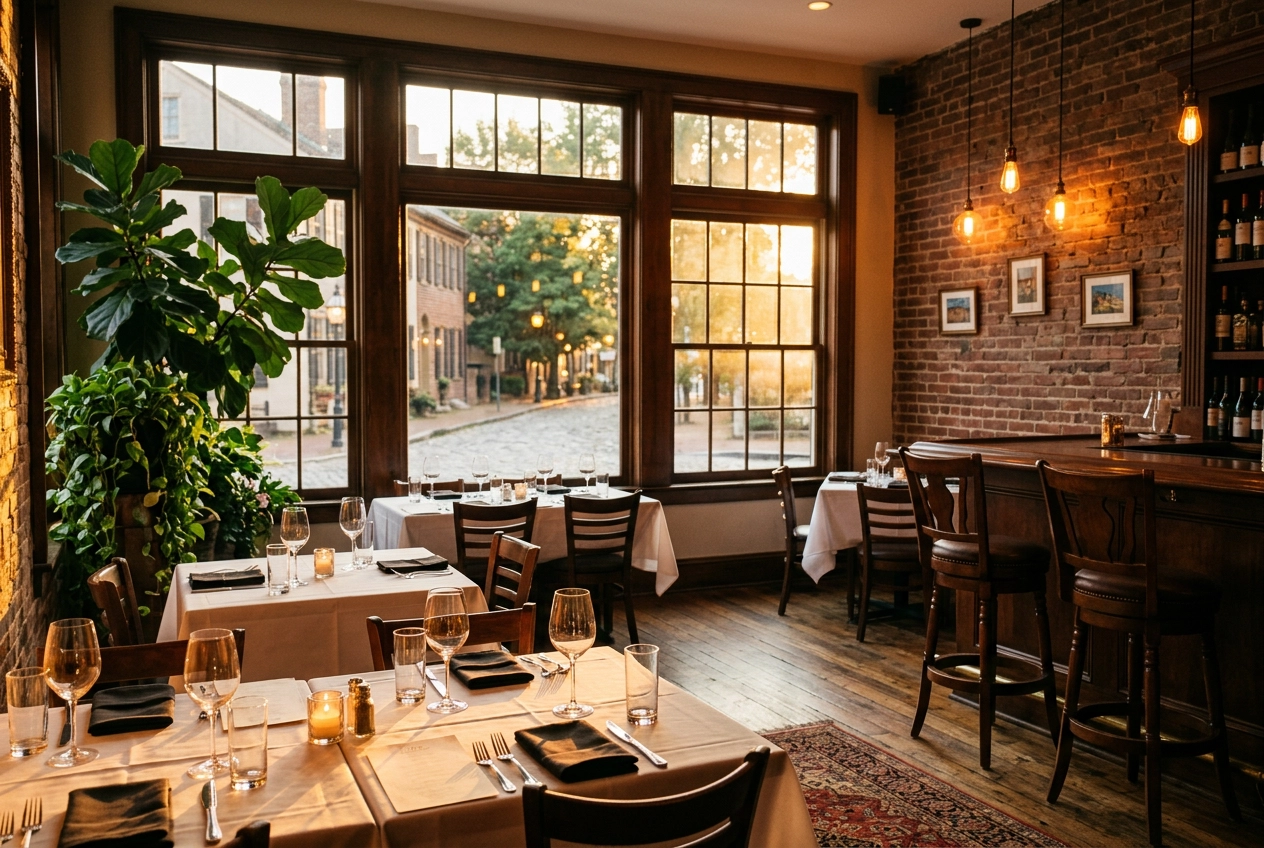 Warm golden hour restaurant interior photography showing cozy dining ambiance with window light and Edison bulbs
Food gets people interested. Atmosphere gets them to commit. Interior shots — your dining room bathed in warm light, your outdoor patio at golden hour, your bar lined with craft cocktails — sell the experience, not just the meal.
These photos appear on your Google Business Profile, website homepage, and reservation platforms. They answer the question every diner asks before booking a table: "What's the vibe like?"
Good ambiance photography doesn't need a professional photographer. Shoot during golden hour (the hour before sunset) when natural light is warmest. Turn on your restaurant's accent lighting but avoid harsh overhead fluorescents. Capture wide shots that show the full space and detail shots of design elements — your custom tile work, your hand-lettered menu board, your open kitchen.
5. Action and Behind-the-Scenes Photography
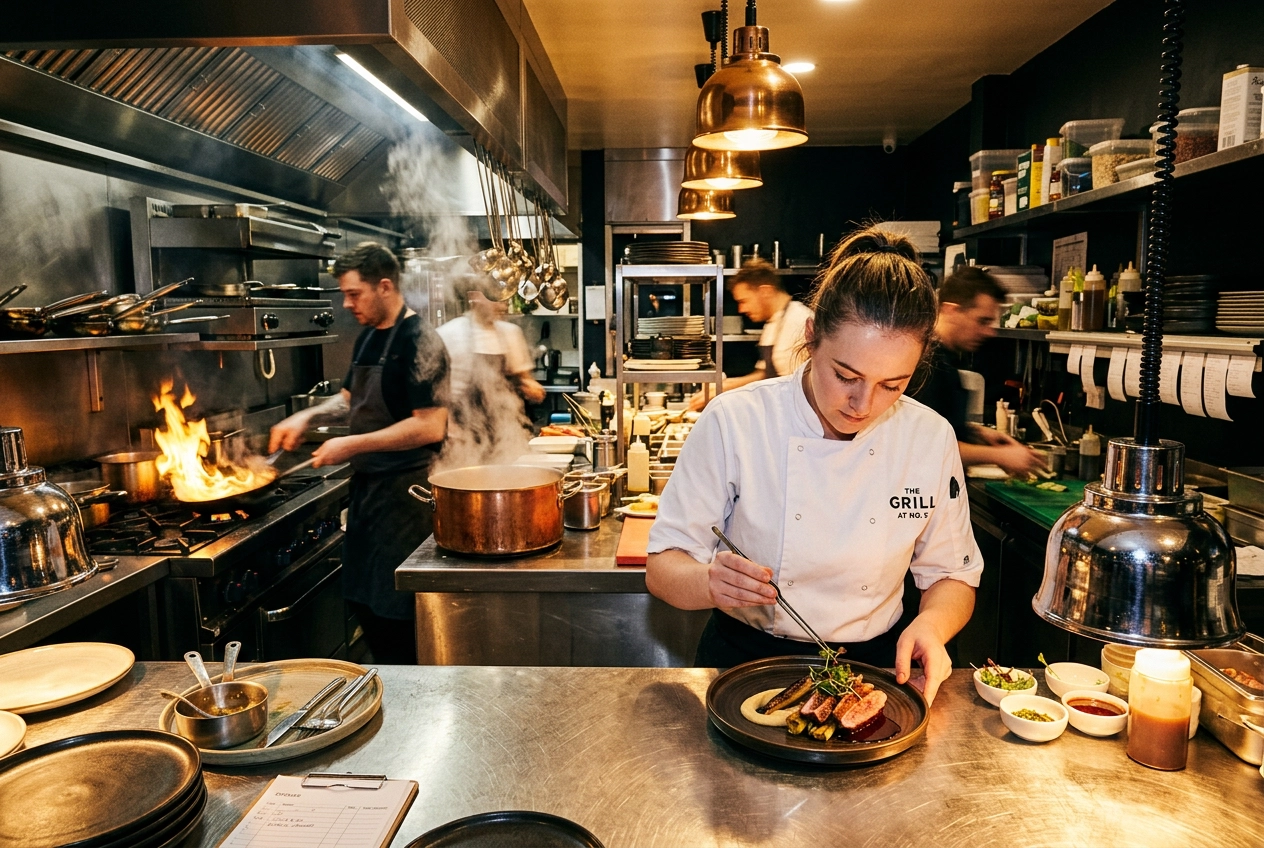 Chef plating a dish at the restaurant kitchen pass with steam and dynamic action during service
A chef tossing a pan over an open flame. Pasta being hand-cut. A bartender torching a rosemary sprig. These action shots humanize your brand and build the kind of authenticity that static food photos can't.
Behind-the-scenes content consistently outperforms polished images on social media because it feels real. It shows the craft, the people, and the passion behind the food. Tips for shooting action: use burst mode on your phone camera, shoot in well-lit areas of the kitchen, and don't overthink composition — authenticity beats perfection here.
For inspiration, browse our roundup of restaurant social media campaigns that nailed this approach.
Three Approaches to Restaurant Food Photography
You've got three paths to professional-quality restaurant photos: doing it yourself, hiring a food photographer, or using AI. Here's an honest look at each — including when to use them and when not to.
| DIY (Phone) | Professional | AI-Enhanced | |
|---|---|---|---|
| Cost per image | $0 (your time) | $25–$200+ | $0.45–$0.60 |
| Time per dish | 10–20 min | 15–40 min | ~90 seconds |
| Quality | Good (with practice) | Excellent | Professional |
| Scalability | Low | Low | High |
| Best for | Daily social content | Hero shots, brand campaigns | Menu updates, delivery apps, ongoing content |
DIY: Shooting with Your Phone
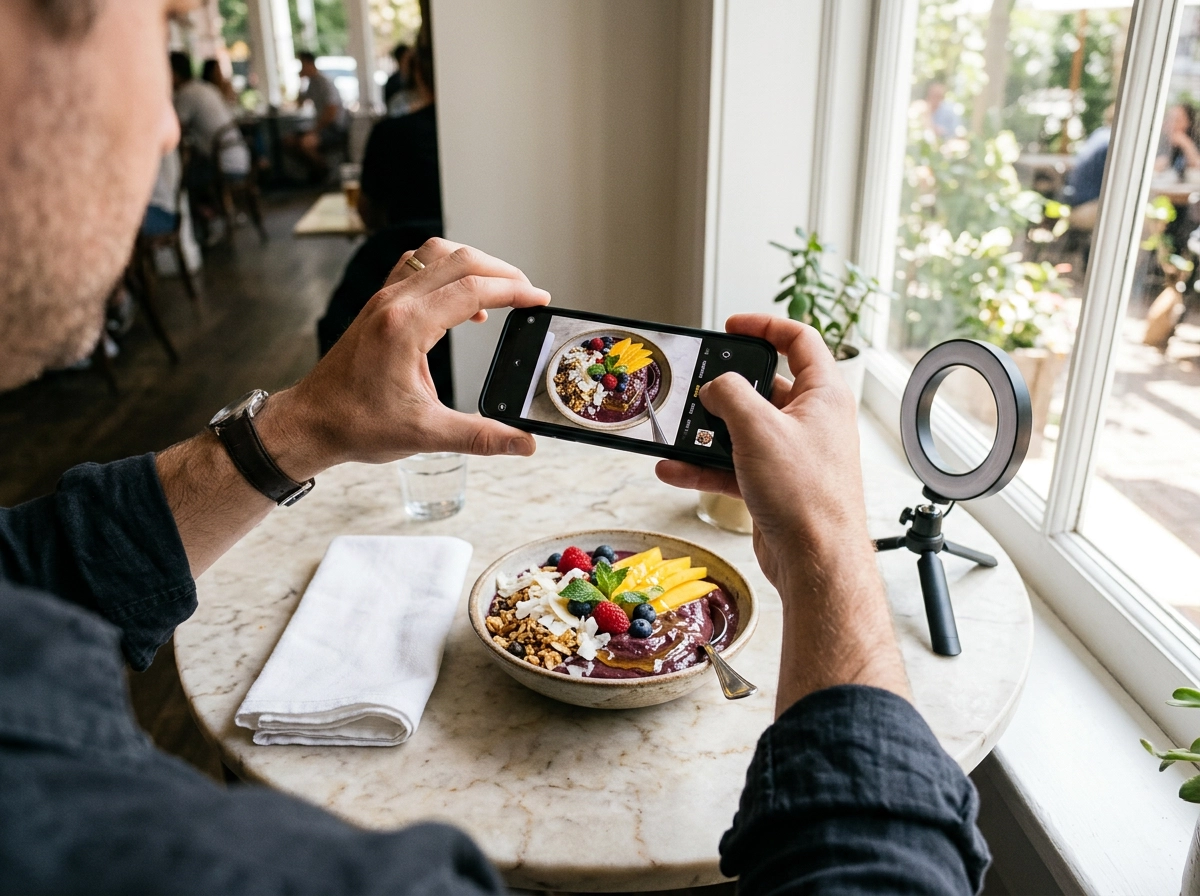 Restaurant owner photographing colorful acai bowl with smartphone near window with natural light
Modern smartphone cameras — especially the iPhone 16 Pro and Samsung Galaxy S25 Ultra — are genuinely capable of restaurant-quality food photography. The limiting factor isn't your camera; it's your lighting, styling, and composition.
Light is everything. Shoot near the largest window in your restaurant during daylight hours. Place the dish so the light comes from the side or slightly behind it (called "backlighting"). This creates depth, makes textures pop, and gives the food that natural glow you see in magazines. Avoid direct overhead fluorescents — they flatten everything and cast ugly shadows.
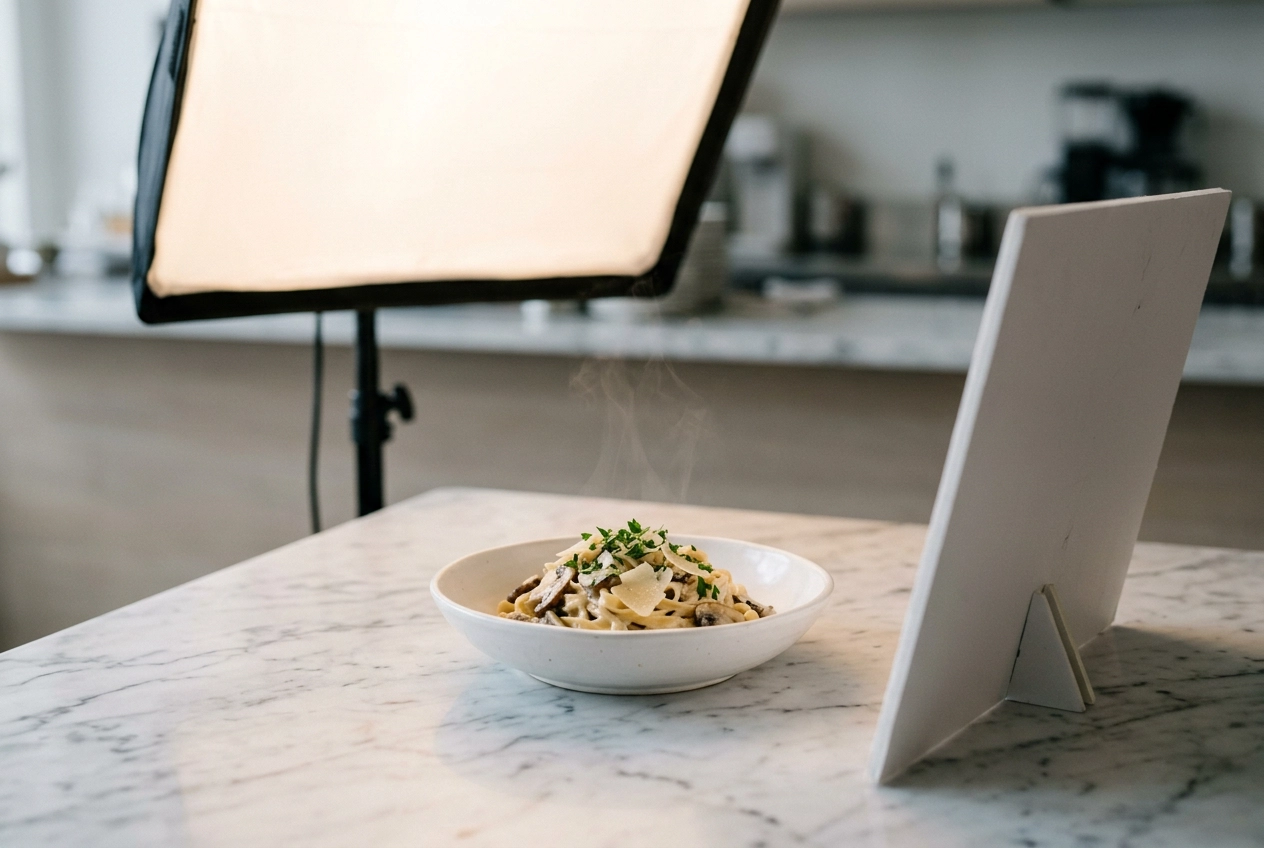 Professional food photography lighting setup with softbox and bounce reflector illuminating pasta dish on marble surface
If your restaurant doesn't have great natural light, a basic $30–$50 LED panel makes a huge difference. Check our food photography lighting guide for specific setups that work in restaurant environments.
The two angles that work for almost everything:
- 45-degree angle — mimics how a diner sees the plate on the table. Works for burgers, bowls, steaks, sandwiches — anything with height.
- Overhead (flat-lay) — perfect for pizza, sushi platters, table spreads, and symmetrical dishes. Lock your phone on a tripod arm to avoid shake.
Styling basics for the shoot:
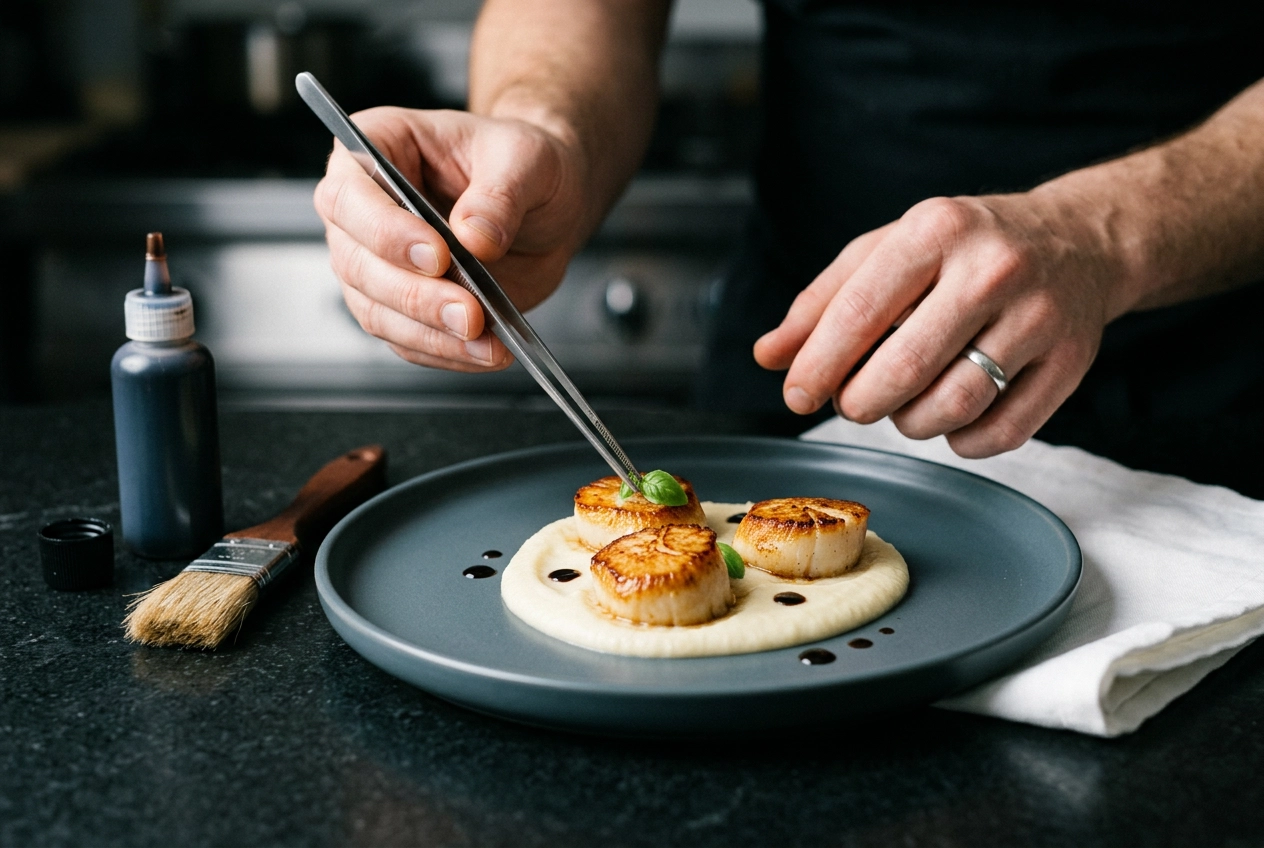 Close-up of food styling with tweezers placing micro herbs on plated scallop dish for restaurant photography
- Wipe plate edges clean. Every time.
- Remove everything from the table that isn't part of the shot — salt shakers, menus, napkin dispensers.
- Add a garnish or drizzle just before shooting. Fresh herbs and sauce streaks make a $12 pasta look like a $35 one.
- Use your best plating, not your everyday plates.
For the complete step-by-step walkthrough, read how to take food photos with your phone. We also have guides on food styling techniques, iPhone camera settings for food, and choosing the right food photography props.
Cost: $0–$150 for a basic phone tripod and LED panel. Add a few hours of your time.
Best for: Daily social media posts, quick specials, practice shoots. Not ideal for menus that need a polished, consistent look across 40+ dishes.
Professional: Hiring a Food Photographer
When you need hero-caliber images — the ones going on your website homepage, in a magazine feature, or on a billboard — a skilled food photographer delivers results that DIY and AI can't match.
What it costs in 2026:
- Per-session rates: $250–$7,500+ depending on experience and city
- Per-dish average: $25–$200
- Major cities: LA runs $700–$1,400 per session; NYC can hit $1,200–$6,000+
- Hidden extras: Food stylist ($500–$1,200/day), prop stylist ($300–$800/day), studio rental
A 40-item menu shoot with a mid-range photographer, food stylist, and basic post-production typically runs $2,000–$5,000 in most cities. Our restaurant photography pricing guide breaks this down in granular detail.
When it's worth it: Grand openings, rebrandings, flagship dish promotion, PR and press kit photos, print advertising. These are "invest once, use everywhere" situations where the quality ceiling matters.
When it's not: Weekly social media content, seasonal menu rotations, delivery app updates. Hiring a photographer every time you change a menu item is like hiring a moving company every time you rearrange your living room.
For an honest side-by-side, read our comparison of AI vs hiring a food photographer.
AI-Enhanced: The Modern Approach
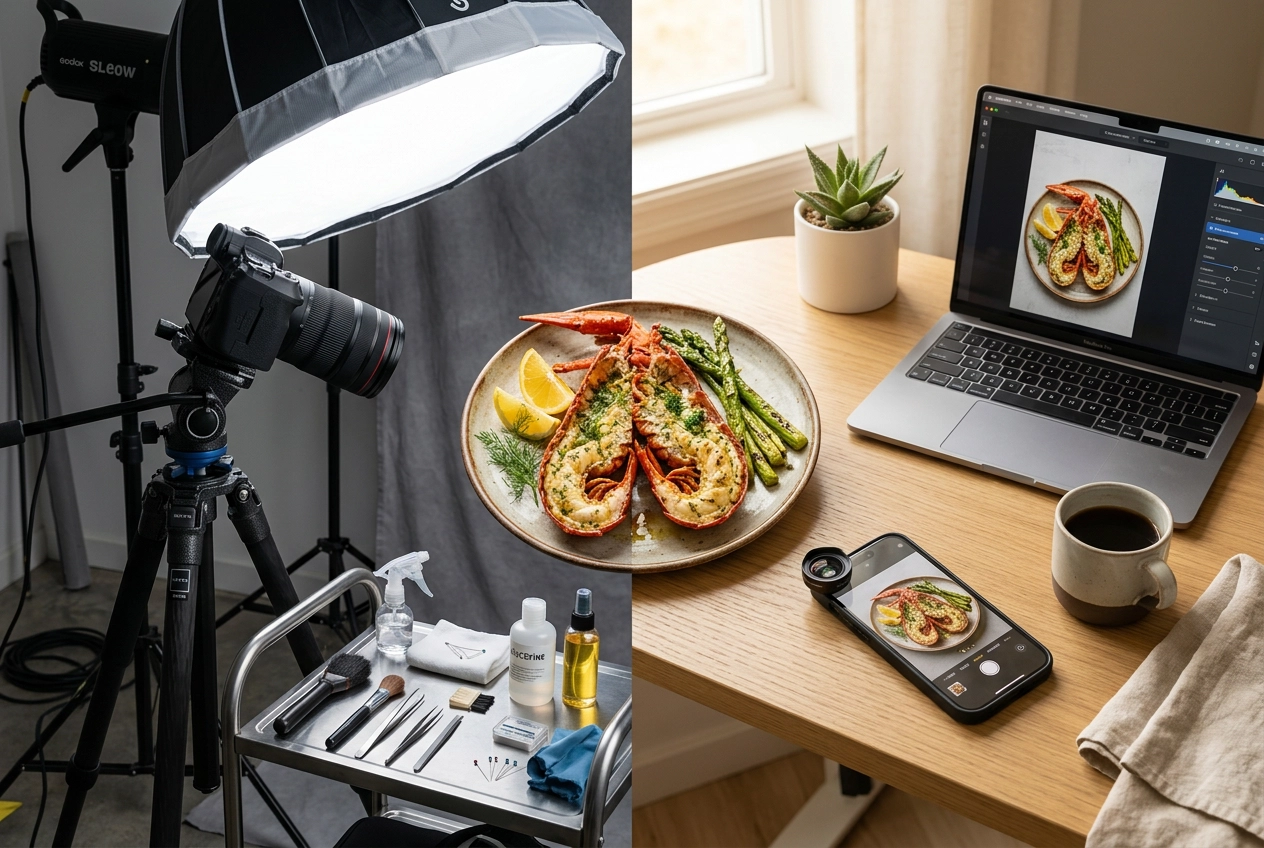 Professional food photography studio setup versus minimalist AI-enhanced smartphone approach side by side
This is the approach that's changed the economics of restaurant food photography since 2024. Tools like FoodShot AI let you upload any smartphone photo of your dish, pick a style, and get a professionally transformed image in about 90 seconds.
Here's how it works:
- Snap a photo of your dish with your phone (even under mediocre restaurant lighting)
- Upload it to FoodShot's food photo editor
- Choose from 30+ style presets — Delivery, Restaurant, Fine Dining, Instagram, and more
- Get a professionally styled result with corrected lighting, enhanced colors, and clean composition
What you can do beyond basic enhancement:
- Remove and replace backgrounds (swap your kitchen counter for a marble table or rustic wood surface)
- Adjust camera angle and lighting style after the fact
- Add or remove elements — drizzle sauce, add garnishes, swap plates
- Upload reference photos from Pinterest and clone that exact styling onto your dish
- Create social media posters and delivery app banners from 50+ templates
The cost math: FoodShot's Starter plan runs $15/month for 25 images ($0.60/image). The Business plan is $45/month for 100 images ($0.45/image). Compare that to $25–$200 per image from a professional photographer.
Best for: Ongoing content needs — menu updates, delivery platform images, social media content, seasonal refreshes. For a real-world workflow, see how cafes use the 90-second cafe menu refresh approach to update their entire visual menu without closing for a day.
The smart hybrid approach: Many restaurants in 2026 use a professional photographer once or twice a year for hero shots and brand-defining images, then use AI for everything else — daily social content, delivery app listings, menu updates, and promotional materials. This gives you top-tier quality where it matters most and scalable efficiency everywhere else. Our traditional vs AI food photography comparison lays out the tradeoffs in detail.
Platform-by-Platform Photo Requirements
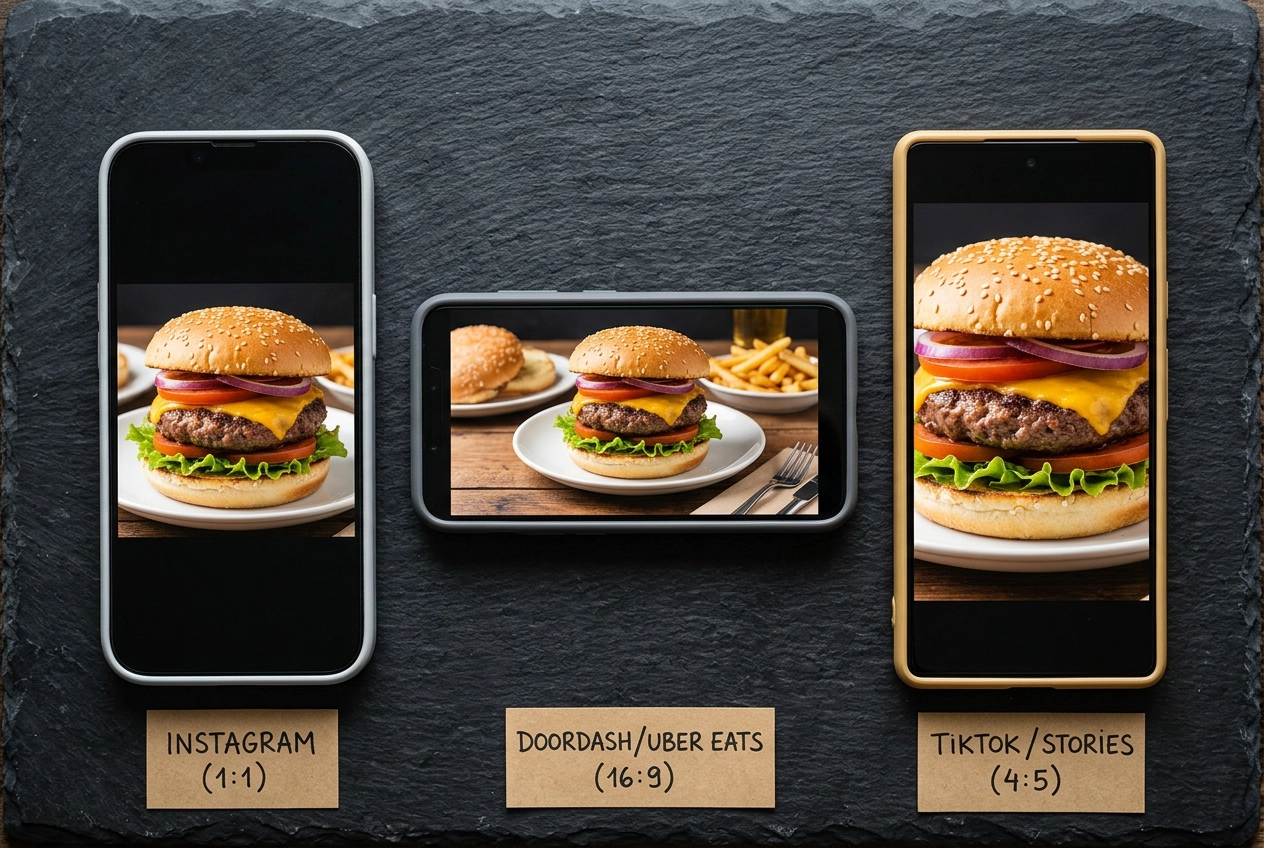 Same gourmet burger photo cropped for different platforms showing delivery app and social media aspect ratios
You can't use one photo everywhere. Uber Eats, DoorDash, and Instagram each have different dimensions, aspect ratios, and content rules. Here's the quick-reference table for your next shoot:
| Platform | Minimum Size | Aspect Ratio | Format | Key Rules |
|---|---|---|---|---|
| Uber Eats | 1,200 × 800 px | 5:4 | JPG, PNG | One dish per photo, no text, no collages |
| DoorDash | 1,400 × 800 px | 16:9 | JPG, PNG | No faces, no text overlays, 14 rejection categories |
| Instagram Feed | 1,080 × 1,350 px | 4:5 (or 3:4 in 2026) | JPG | New 3:4 grid format launched late 2025 |
| Instagram Stories/Reels | 1,080 × 1,920 px | 9:16 | JPG, MP4 | Full-screen vertical format |
Uber Eats
Uber Eats uses a 5:4 aspect ratio for menu items. The minimum resolution is 1,200 × 800 pixels, but their cover images need 2,880 × 2,304 pixels. Files can go up to 10MB. You can review the official Uber Eats photography guidelines for the complete rules.
The most common rejection reasons: dark or shadowy lighting, text overlays on images, and photos showing multiple items when the listing is for a single dish. Reviews typically take up to 3 business days.
For our detailed spec sheet with upload tips and workarounds, read our Uber Eats photo requirements guide.
DoorDash
DoorDash uses a wider 16:9 aspect ratio — completely different from Uber Eats. Minimum size is 1,400 × 800 pixels, under 16MB. Check DoorDash's official photo rejection guidelines for the full list of requirements.
An important note for 2026: DoorDash specifically flags photos that appear "artificial, generated using AI or other technologies, or heavily modified" in a way that doesn't represent the actual dish. This means your AI-enhanced photos need to look realistic and accurately represent what customers will receive.
DoorDash has 14 rejection categories including wrong dimensions, blurry images, bad lighting, visible faces, and text overlays. Plan ahead — reviews can take 1–5 business days. For strategies to improve your DoorDash presence beyond photos, see how to get more orders on DoorDash.
Instagram shifted to a 3:4 grid format in late 2025, which means portrait-oriented images (1,080 × 1,440 px) now get the most real estate in the feed. The old 4:5 ratio (1,080 × 1,350 px) still works but may be cropped in the grid view.
For Stories and Reels, shoot vertically at 1,080 × 1,920 pixels (9:16). Instagram's algorithm in 2026 uses image quality as a ranking signal — blurry, poorly lit uploads get less reach.
Our Instagram food photography guide covers everything from optimal posting times to hashtag strategy. For broader tips on building your restaurant's social presence, explore our guide on how to promote your restaurant on social media.
Pro tip: Shoot your base photo with enough space around the dish to crop for any platform. A single well-lit image at high resolution can be cropped to 5:4 for Uber Eats, 16:9 for DoorDash, and 4:5 for Instagram. This saves you from reshooting for every platform.
Quick-Start Checklist: Your First Restaurant Photo Shoot
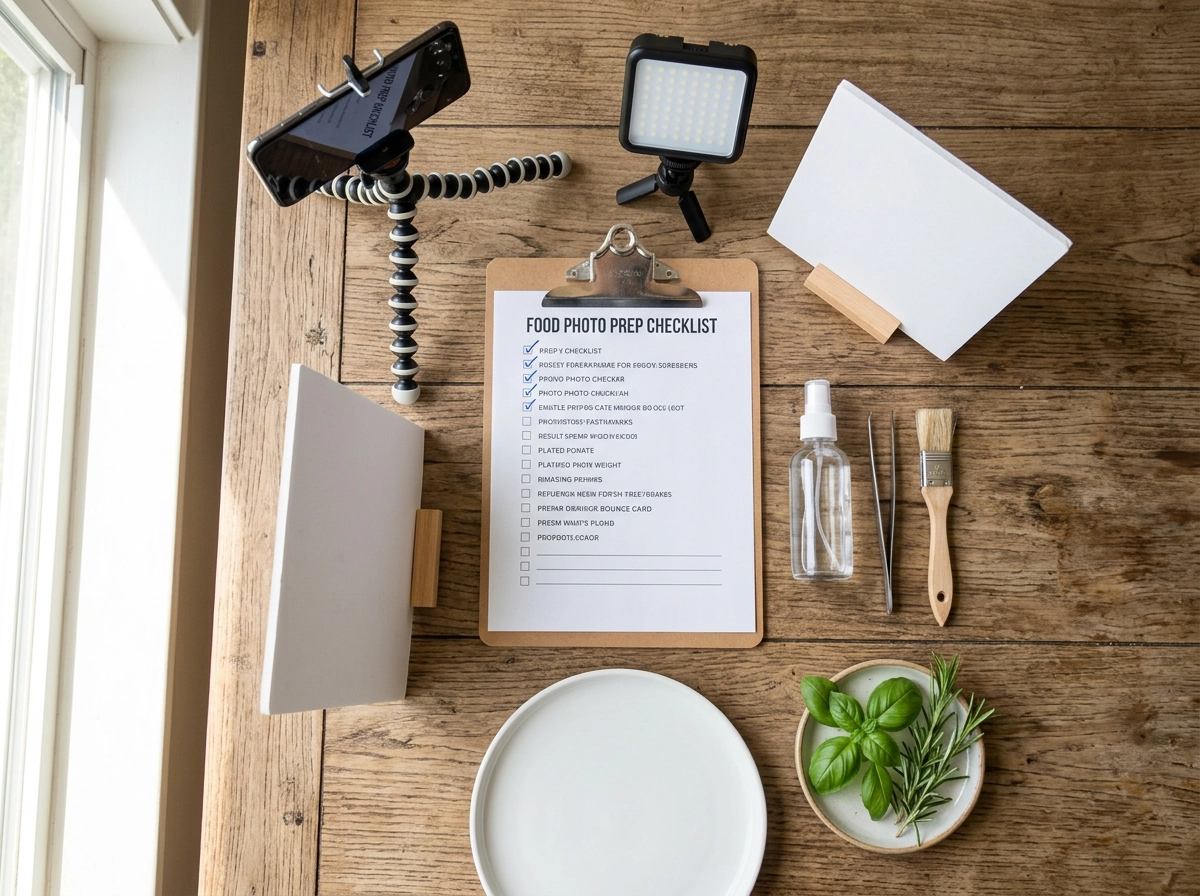 Organized restaurant food photography checklist and essential tools laid out on wooden table for photoshoot preparation
Ready to get started? Here's a practical, no-fluff checklist you can execute this week:
- Pick your top 10 dishes — Start with bestsellers and the most visually photogenic items. Don't try to shoot the entire menu at once.
- Find your light source — Identify the best window in your restaurant. Schedule your shoot during peak daylight (10 AM–2 PM works for most).
- Gather basic equipment — Your smartphone, a $25 phone tripod with overhead arm, and a white napkin for bounce light. That's the minimum. (Our food photography equipment guide covers upgrades worth considering.)
- Prep your plates — Use your best dinnerware. Clean each plate edge before every shot. Have fresh garnishes ready on the table.
- Set up a shooting station — Clear a table near your light source. Use a clean, simple surface — dark wood, white marble, or a plain tablecloth.
- Shoot each dish twice — Once at a 45-degree angle, once overhead. This gives you options for different platforms.
- Review immediately — Check sharpness and lighting on your phone screen after each dish. It's easier to reshoot now than to fix later.
- Edit or enhance — Use FoodShot AI to transform your shots into professional-quality images, or follow our how to edit food photos guide for manual editing tips.
- Export platform-specific crops — Create separate files for your menu, Uber Eats (5:4), DoorDash (16:9), and Instagram (4:5).
- Upload and measure — Track your delivery app order volume and social engagement before and after updating your photos. Most restaurants see measurable improvement within 2–4 weeks.
Avoid the most common pitfalls by reading about the food photography mistakes that kill orders. And if you want to understand the bigger picture of your restaurant's visual identity, our restaurant branding guide ties photography into your broader brand strategy.
Frequently Asked Questions
How much does restaurant food photography cost?
It depends entirely on your approach. DIY with a phone costs $0–$150 in basic equipment plus your time. A professional food photographer charges $250–$7,500+ per session ($25–$200 per dish), plus potential food stylist fees of $500–$1,200/day. AI tools like FoodShot run $15–$99/month for 25–250 images, bringing per-image costs down to $0.40–$0.60. Our food photography cost breakdown has exact numbers for every approach and city.
Can I use my phone for restaurant food photography?
Yes — and many successful restaurants do exactly this. The iPhone 16 Pro and Samsung Galaxy S25 Ultra produce images sharp enough for delivery apps, social media, and even printed menus when you get the lighting right. The key factors are natural light, clean styling on the table, and steady hands (or a tripod). Read our phone food photography guide for the step-by-step process.
How often should I update my restaurant photos?
At minimum, update your photos whenever you change your menu — seasonal rotations, new dishes, or recipe updates. Beyond that, delivery app photos should be refreshed every 6–12 months (platform algorithms favor fresh content), and social media obviously needs new content weekly or daily. Restaurants using AI tools often update more frequently because the cost per image is so low.
What's the best angle for food photography?
The 45-degree angle works for the widest range of dishes — it's how diners naturally see their plate on the table. Use overhead (flat-lay) for flat items like pizza, sushi, and table spreads. Use a straight-on (eye-level) angle for tall dishes like burgers, layer cakes, and cocktails that have interesting side profiles. Our food photography tips guide covers angle selection in detail with visual examples.
Do I need different photos for each delivery app?
Yes. Uber Eats requires a 5:4 aspect ratio while DoorDash uses 16:9 — if you upload the same uncropped photo, it'll either get rejected or display poorly. The best practice is to shoot one high-resolution master photo with extra space around the dish, then crop platform-specific versions. FoodShot AI's delivery presets handle this automatically for each platform.
Is AI food photography good enough for menus?
For the vast majority of restaurants, absolutely. AI-enhanced food photography in 2026 produces results that are visually indistinguishable from professional shoots for menu and delivery app purposes. Where AI won't replace a pro: highly stylized editorial shoots, magazine features, and brand campaigns that require creative direction and custom set design on a table. For everything else — menus, delivery apps, social media, and marketing materials — AI is more than good enough, and dramatically faster and cheaper. If you're curious about the fundamentals, our what is food photography guide explains the craft from the ground up.
Need to level up your restaurant's food photography without the hassle or expense of traditional photoshoots? Try FoodShot AI — upload any phone photo and get professional results in 90 seconds. Plans start at $9/month billed annually.
