Food Product Photography for CPG Brands: Complete Guide
On Amazon, a shopper decides whether to tap your jar of pasta sauce in about a second. On a supermarket shelf, you get even less. In both moments, one thing does the selling: the photo. For packaged brands, food product photography isn't decoration — it's the difference between a sale and a scroll.
This guide is built specifically for consumer packaged goods (CPG) food brands: the jars, bottles, boxes, pouches, and tubs that live on marketplaces, DTC sites, and retail shelves. You'll get the four shots every SKU needs, the exact Amazon specs, lighting tricks for shiny packaging, a category-by-category playbook, and an honest cost comparison between hiring a photographer, commissioning CGI, and using AI.
Quick Summary: Food product photography sells packaged food on Amazon, retail shelves, and DTC sites. Every CPG brand needs four core shots — a label-readable packaging hero, an in-use lifestyle shot, an ingredient story, and a beauty detail of the food itself. You can hire a photographer ($500–$3,000/day), commission CGI, or transform real phone photos with AI from about $15/month. Most brands win with a hybrid.
What is food product photography?
Food product photography is the craft of photographing packaged, branded food products — and the food inside them — so they sell on shelves and screens. Think jars of sauce, bottles of cold brew, boxes of crackers, pouches of granola, tubs of protein powder. Your audience isn't a diner choosing a dish; it's a shopper deciding whether to add your SKU to a cart on Amazon, Shopify, Instacart, or a grocery shelf.
Great packaged food photography has to do three jobs at once:
- Make the product instantly recognizable. A shopper should read the brand, flavor, and variant in a fraction of a second — at thumbnail size, on a phone.
- Make the food look appetizing and fresh — without misleading. Appetite sells, but the photo has to match what's in the box. Overselling drives returns and review damage.
- Work across every channel at consistent quality. The same product needs a white-background shot for marketplaces, a branded lifestyle scene for your site, and cropped versions for ads and email.
That third job is why people often search for "food and product photography" as one phrase. CPG sits right at the overlap of two crafts: food photography, which is about appetite, freshness, and styling, and product photography, which is about accuracy, legibility, and consistency across a whole catalog. Nail both and your images are mouthwatering and trustworthy.
Packaged food vs prepared-dish photography
It helps to separate two things people lump together. Prepared-dish photography — the kind you see on restaurant menus, delivery apps, and recipe blogs — sells a plated experience. The hero is the food on the plate, and the goal is "I want to eat that right now."
Food product photography sells something you can buy and take home. The hero is the SKU, and the label matters as much as the lasagna. You're usually shooting a whole line, so consistency across dozens of products is critical. And because you're selling on regulated marketplaces, accuracy matters in ways a menu photo never has to worry about.
| Prepared-dish photography | Food product photography | |
|---|---|---|
| Hero | The plated dish | The packaged SKU + its contents |
| Goal | Crave the meal | Trust and buy the product |
| Where it lives | Menus, delivery apps, editorial | Amazon, retail shelves, DTC, ads |
| Success metric | Orders and covers | Add-to-cart, sell-through, fewer returns |
If you run a restaurant, the prepared-dish world is yours, and our guide to commercial food photography covers it. If you're a packaged brand, read on.
The 4 essential CPG food shots every brand needs
Before you dream up elaborate campaigns, every SKU needs a core set. Get these four right — shot from the right angles and lit well — and you can sell anywhere.
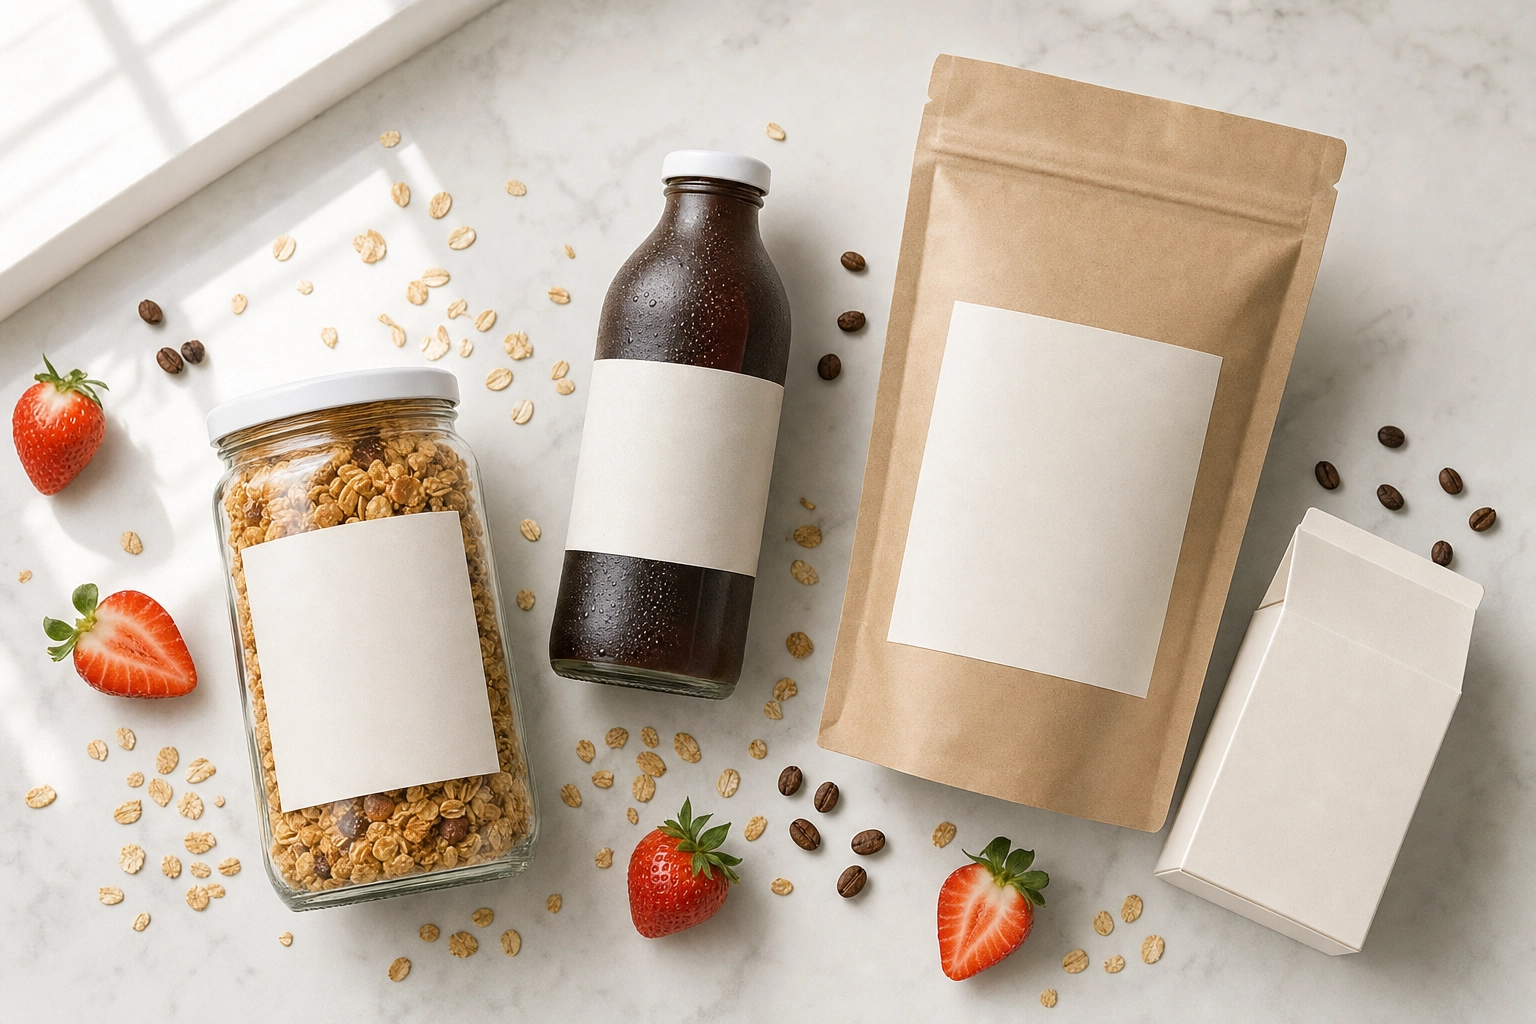
1. The packaging hero (label-readable)
This is the front-of-pack image that does the most work — your marketplace main image and your shelf equivalent online. The job is simple and unforgiving: the brand name, product name, flavor, and size must be crisp and perfectly readable at thumbnail size, because most shoppers are scanning on a phone. Keep the background clean, the composition centered, the crop consistent, and the label legible. Here, accuracy beats artistry.
2. The in-use / lifestyle shot
Now you build desire. Show the product in a real moment — cereal poured into a bowl with milk mid-splash, sauce simmering in a pan, a protein bar tucked into a gym bag, cold brew over ice on a sunny counter. Lifestyle shots add context and aspiration. A few well-chosen props, soft natural light, and simple styling turn a plain product into a scene people can picture in their own kitchen. On marketplaces, these belong in your secondary slots, where props and styling aren't just allowed but encouraged.
3. The ingredient story
"Made with real Alphonso mango" lands harder when shoppers can see the mango. Arrange the key ingredients around or alongside the product to communicate quality, freshness, and a clean label. This shot is gold for produce-forward and better-for-you brands — the same techniques used in fruit and produce photography translate directly. It quietly answers the question every health-conscious shopper asks: what's actually in this?
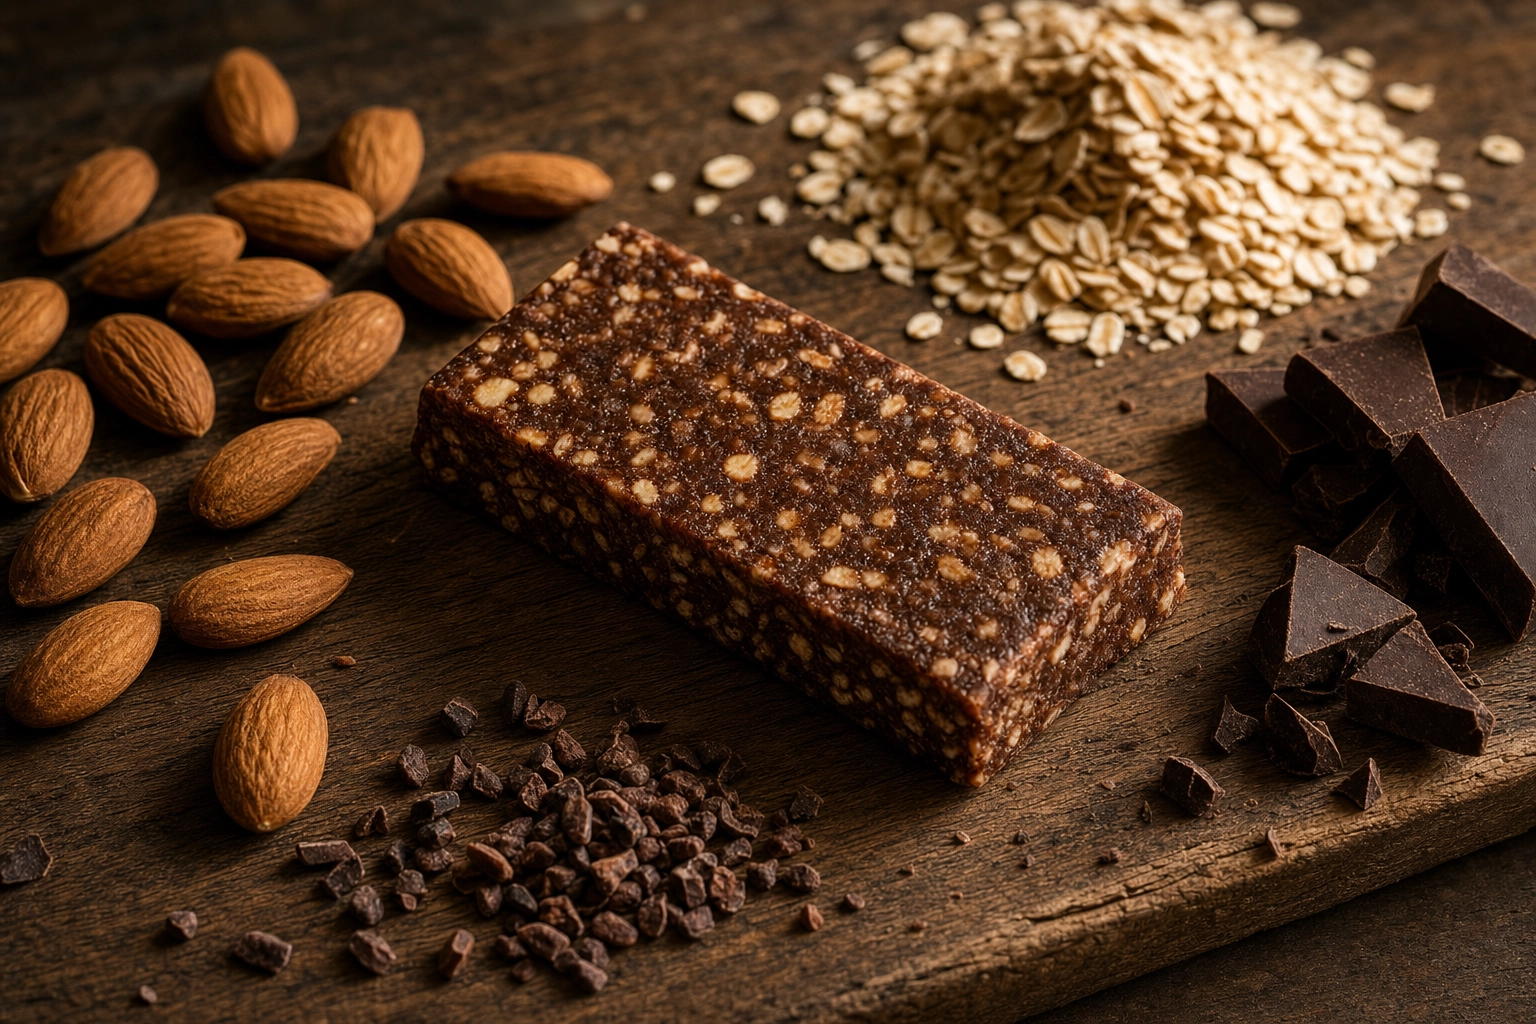 Ingredient story shot of an oat-and-chocolate snack bar with raw almonds and oats, a key food product photography concept
4. The beauty / product detail shot
Finally, the appetite hero — a tight, macro look at the food itself. The glossy pour of honey, the crumb of a cookie snapped in half, the melt on a slice, the clustered texture of granola. This is where the food photography craft earns its keep: great light, careful styling, and a focus on the single most crave-able detail. Shoot tight — often from directly overhead in a top-down flat-lay, or from a low angle — and let soft light rake across the surface so every droplet and crumb of texture pops. It's the image that makes someone hungry enough to buy.
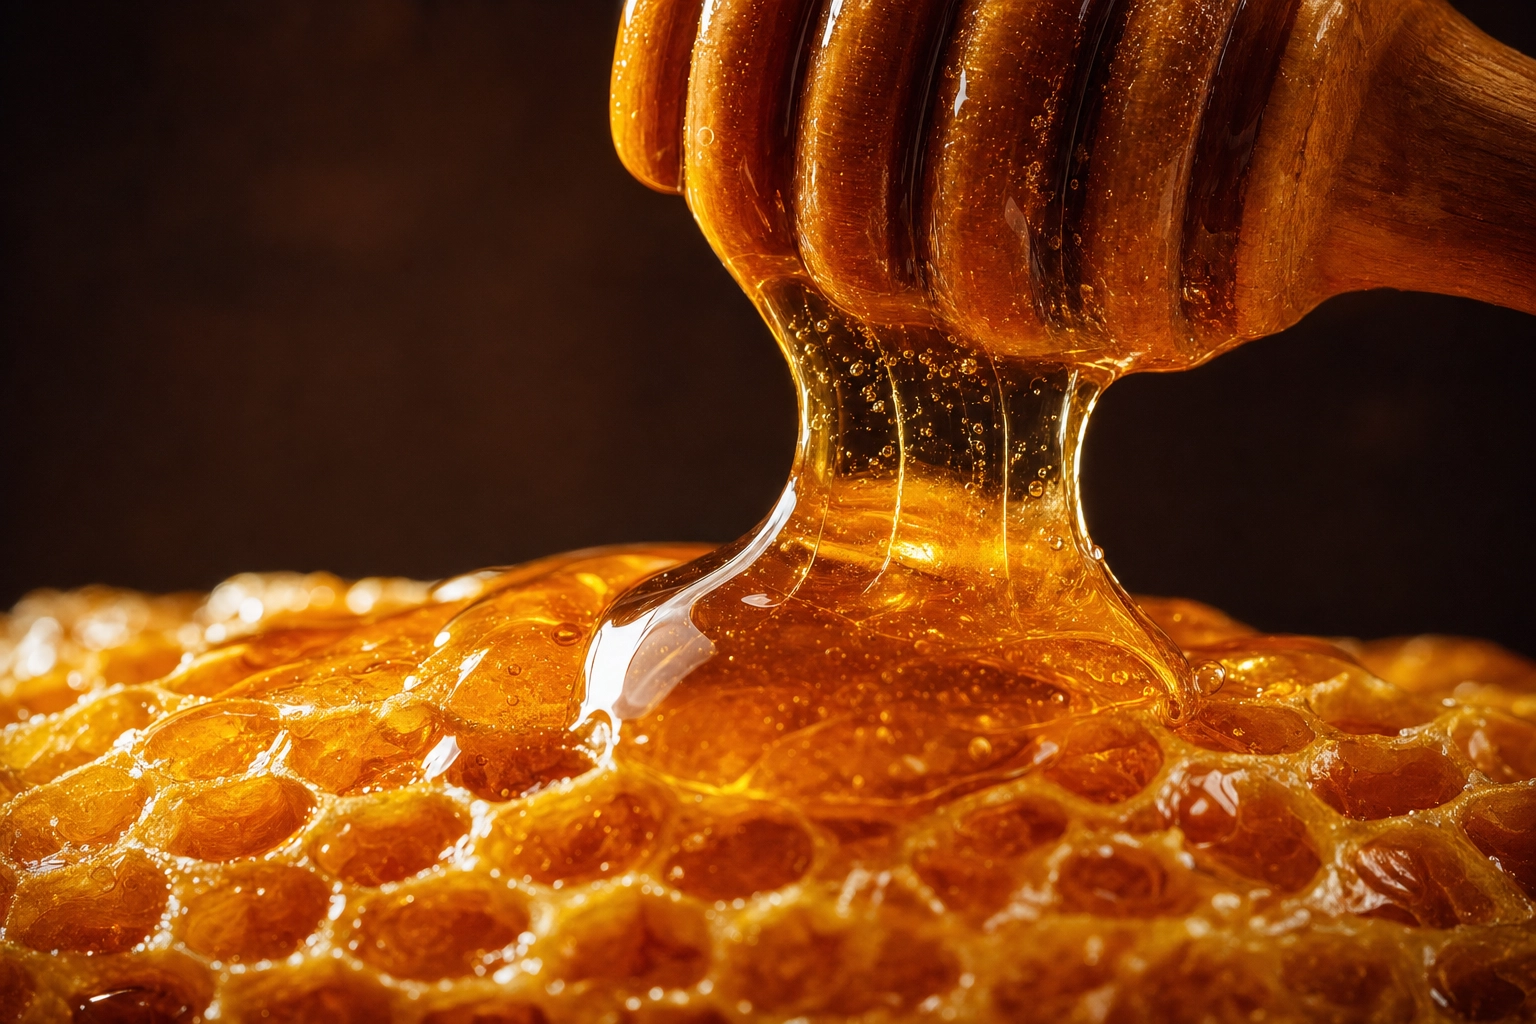 Macro beauty detail shot of golden honey pouring onto honeycomb, the appetite-driving food product photography hero
Amazon and e-commerce specs that actually matter
Marketplaces have rules, and breaking them gets your listing suppressed. Amazon is the strictest, so build to its standard and you'll clear almost everywhere else.
For the main image, Amazon requires:
- A pure white background — exactly RGB 255, 255, 255. Not cream, not light gray; the algorithm scans for it and flags off-white.
- The product filling at least 85% of the frame, fully visible, with no cropping.
- No text, logos, watermarks, badges, or inset graphics — just the product.
- A minimum of 1,000 pixels on the longest side, which switches on hover-zoom; around 1,600 px makes zoom reliable, and 1,600–2,000+ px is the practical sweet spot. (Files can run up to 10,000 px, and JPEG is preferred.)
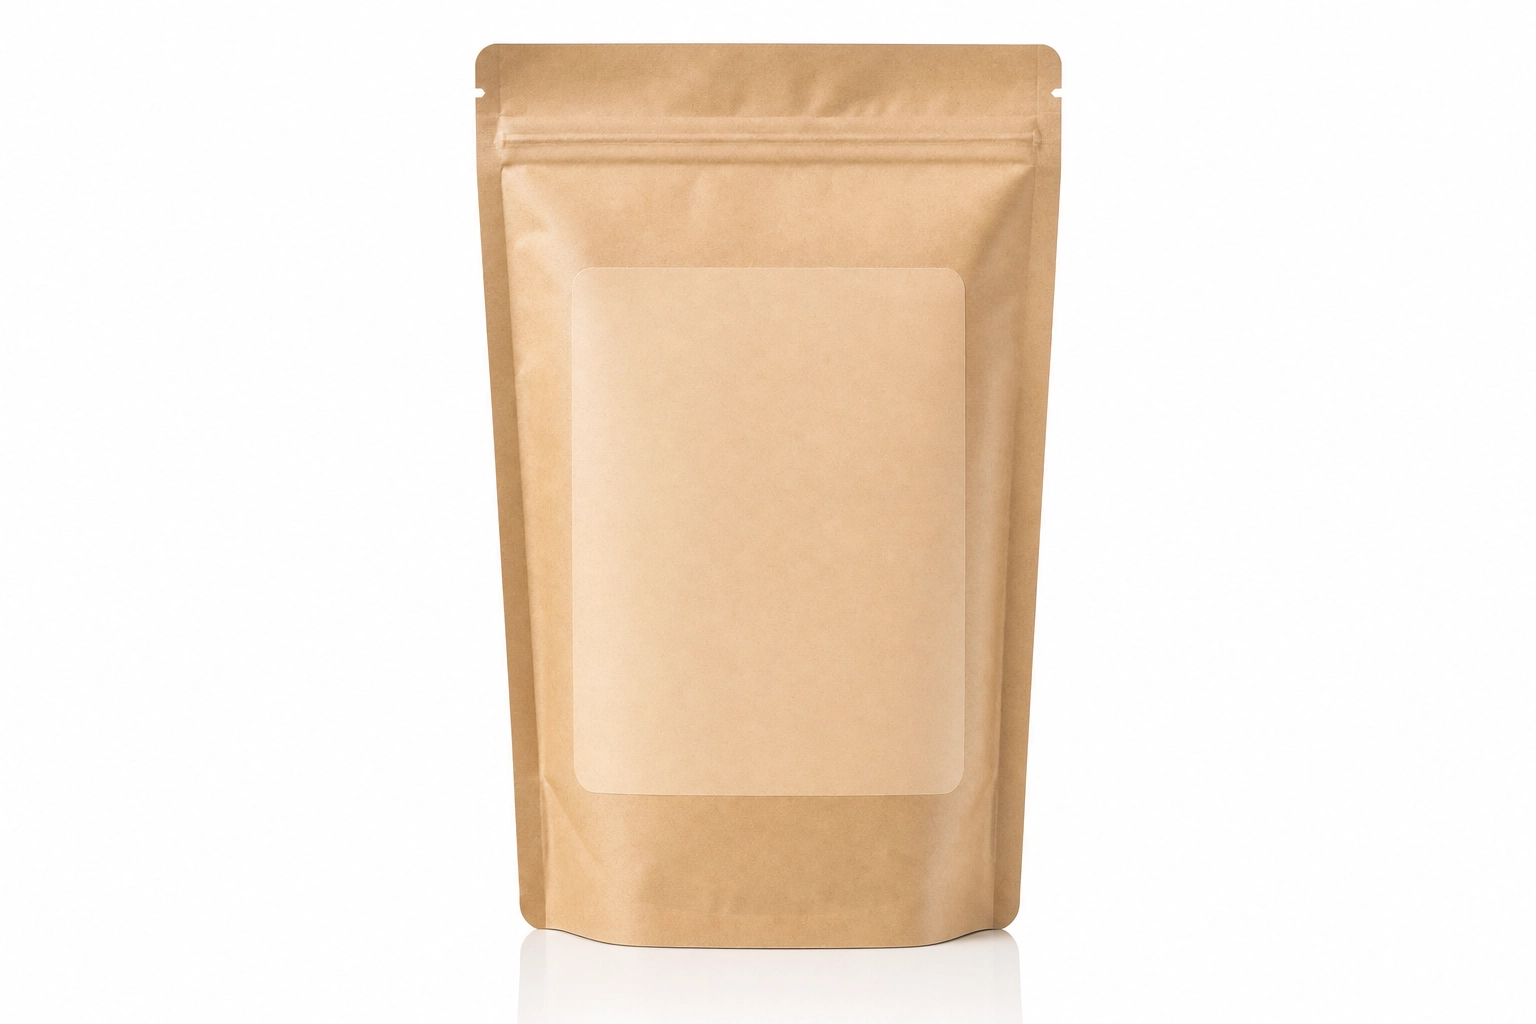 Clean pure-white-background pack shot of a coffee pouch — the Amazon main image style for food product photography
One nuance trips up brands in 2026: Amazon allows AI to edit real product photos, but it does not permit fully AI-generated main images. In plain terms, you can clean a background, fix lighting, or remove a stray crumb, but the main image has to honestly represent the real product. And because food carries claims — organic, gluten-free, nutrition facts — your imagery must stay consistent with your actual FDA food labeling. Misleading photos are the fastest route to returns and bad reviews.
The secondary image stack
The main image gets you compliant; the secondary slots get you the sale. A strong food listing usually includes:
- Lifestyle / in-use — the product in a real moment (shot #2 above).
- Secondary angle — a slight turn of the package to show depth, shape, and the side panels the straight-on hero hides.
- Scale / size shot — the package in a hand or next to a familiar object like a mug, so nobody is surprised by the size on delivery. Size confusion is a leading cause of returns.
- Infographic — feature and benefit callouts: key ingredients, dietary claims, servings per container, how to use it. Text and graphics are welcome here.
- Back-label / nutrition — a clean, readable shot of the panel for shoppers who flip every package over.
- Variant grid — if you sell flavors or multipacks, show them together so people can compare at a glance.
Brand-registered sellers can go further with A+ Content modules. The principle holds across Shopify, Google Shopping, and retail sell sheets: lead with a clean, accurate hero, then stack the context.
How to light packaged products without glare
Lighting packaged food is its own sport, because so much of it is shiny: glass jars, glossy labels, foil pouches, plastic bottles, frosty trays. Two rules solve most problems.
Rule one: go big and soft. A large, diffused light source — a sizeable softbox, or a diffusion panel between your light and the product — produces a soft, broad highlight you can control, with gentle shadows that give the package shape. A bare bulb or small flash gives you a hard, ugly hotspot. Counterintuitively, more light isn't better; over-lighting blows out glossy labels and washes out color.
Rule two: angle of incidence equals angle of reflection. If you can see the light reflected in the label, the camera will too. Move your key light off to the side and up until that bright reflection slides off the label and out of frame. Small changes in angle make a big difference.
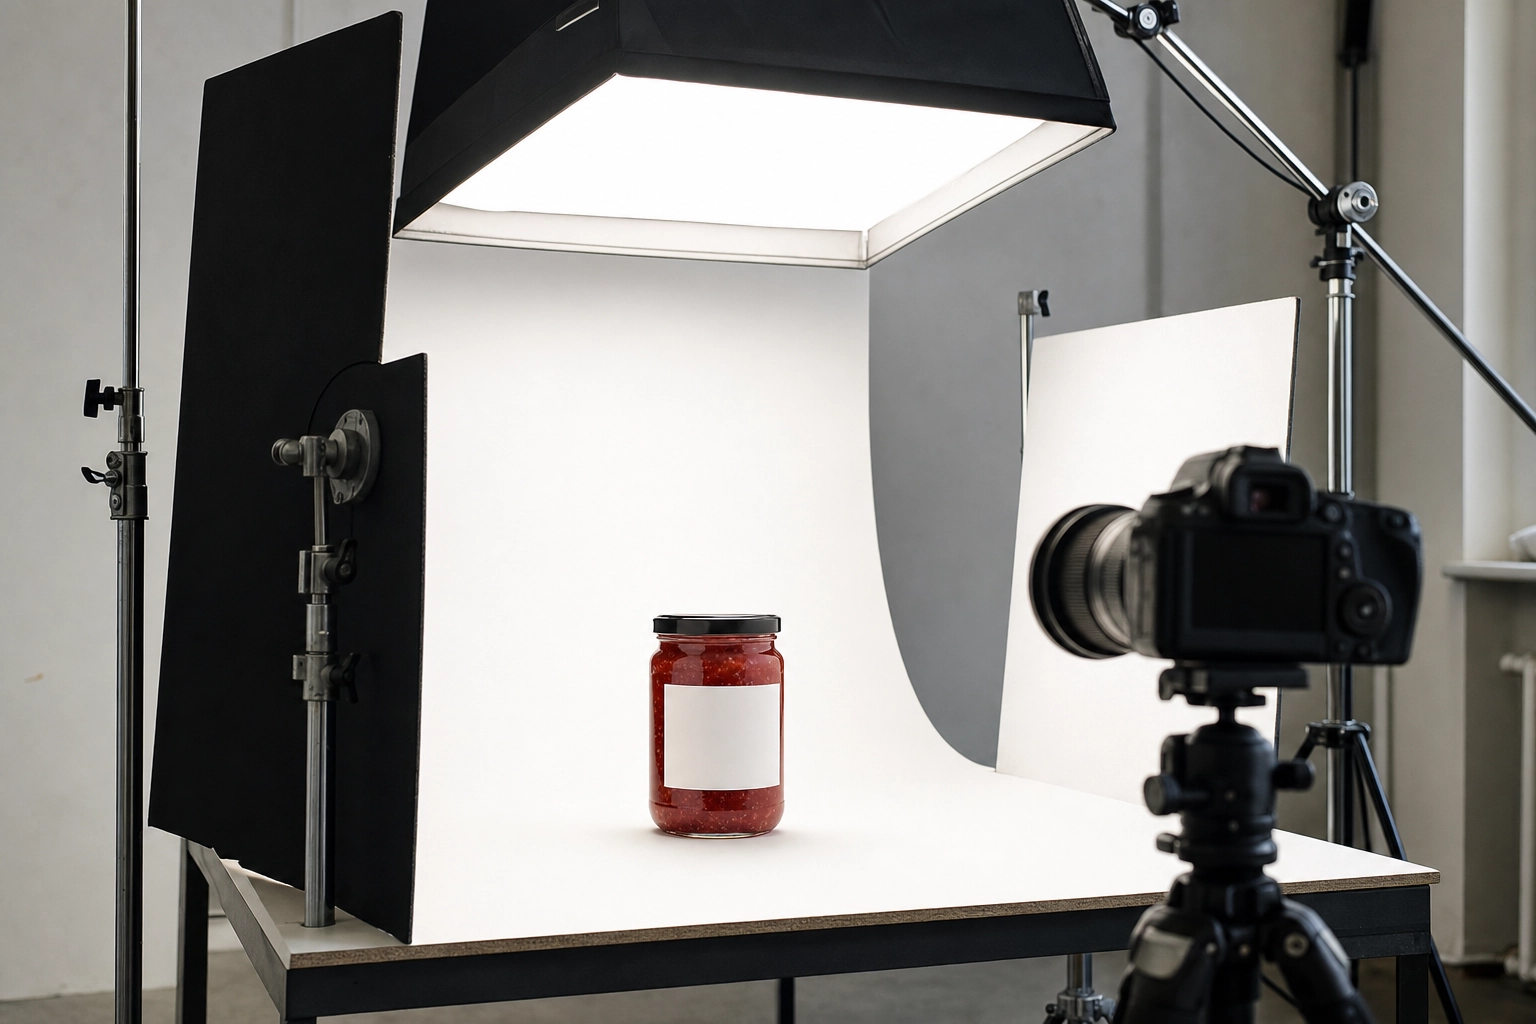 Studio lighting setup for a glass jar with softbox, black flags and white bounce cards to control glare on packaged food
From there, it's about the material:
- Glass jars and bottles. Backlight the contents so translucent foods (jam, cold brew, olive oil) glow. Place black cards or flags just out of frame on each side; the dark "negative fill" gives clear glass crisp, defining edges so the bottle reads against a light background. White cards add clean highlight strips.
- Glossy labels and foil. A circular polarizing filter on your lens can tame glare on varnished labels and the bright highlight on curved glass — but it does little for metallic foil. For stubborn foil or heavy varnish, cross-polarization (a polarizer on the light and the lens) kills glare completely; the trade-off is that it also kills natural shine, so pros use it as a clean base and rebuild highlights in editing.
- Mirror-like surfaces. If you can see yourself or the camera in the product, shoot through a hole in a large white card — a simple tent that gives the surface something clean to reflect.
Finally, balance legibility against appeal. Expose for the label so highlights don't blow out, set white balance to daylight (around 5500K) so flavor colors stay true — reds shouldn't drift orange, matte black shouldn't read gray — and shoot around f/5.6 to f/11 to keep the whole front panel sharp for a perfect, distortion-free packshot. A tiny tilt of the product can push a reflection off the lens entirely.
Product-category playbook: jars, bottles, boxes, bags and more
Every package type has its own quirks and best angles. Here's how to handle the most common CPG formats.
- Jars & sauces. Light to reveal the contents through the glass, and backlight translucent sauces for that perfect glow. Control glare on the lid and shoulder with soft, off-axis light. Add a "what's inside" shot — a spoonful of chunky salsa, a ribbon of nut butter — so texture sells the flavor.
- Bottles & beverages. Backlight the liquid for that signature glow, use dark-field flags to carve clean edges on clear bottles, and add condensation or a light mist for cold drinks to scream "refreshing." Kill label glare with diffusion plus angle, then show a pour or a served glass.
- Snack boxes & cartons. Keep the box edges crisp and parallel — shoot close to straight-on, keep your camera height consistent, or correct the keystone distortion so the carton doesn't look like it's tipping over. Light the front panel evenly for legibility, add a slight three-quarter turn for depth, and place a few of the actual snacks (crackers, bars, cookies) beside the box.
- Bagged & pouch products. Your enemies are wrinkles and foil glare. Use a big soft source with white fill cards on both sides, stand a gusseted pouch up and style it full and plump, and add a pour-out or bowl shot for the contents — granola, chips, coffee beans, pet treats.
- Frozen meals. Frozen food looks unappetizing on its own, so pair the package with a prepared serving suggestion — the cooked, plated version with a little steam — and label it clearly as such. Keep the packshot itself legible and honest.
- Condiments. Show the product in action: a drizzle of hot honey, a dollop of aioli, ketchup mid-pour. Tame glare on glossy squeeze bottles, and pair the in-use shot with a clean hero.
- Supplements. Legibility of the supplement facts panel is non-negotiable — shoot it sharp and readable. Lead with a clean white-background hero, then show what's inside: capsules poured out, a scoop of powder, or the product mixed into a glass.
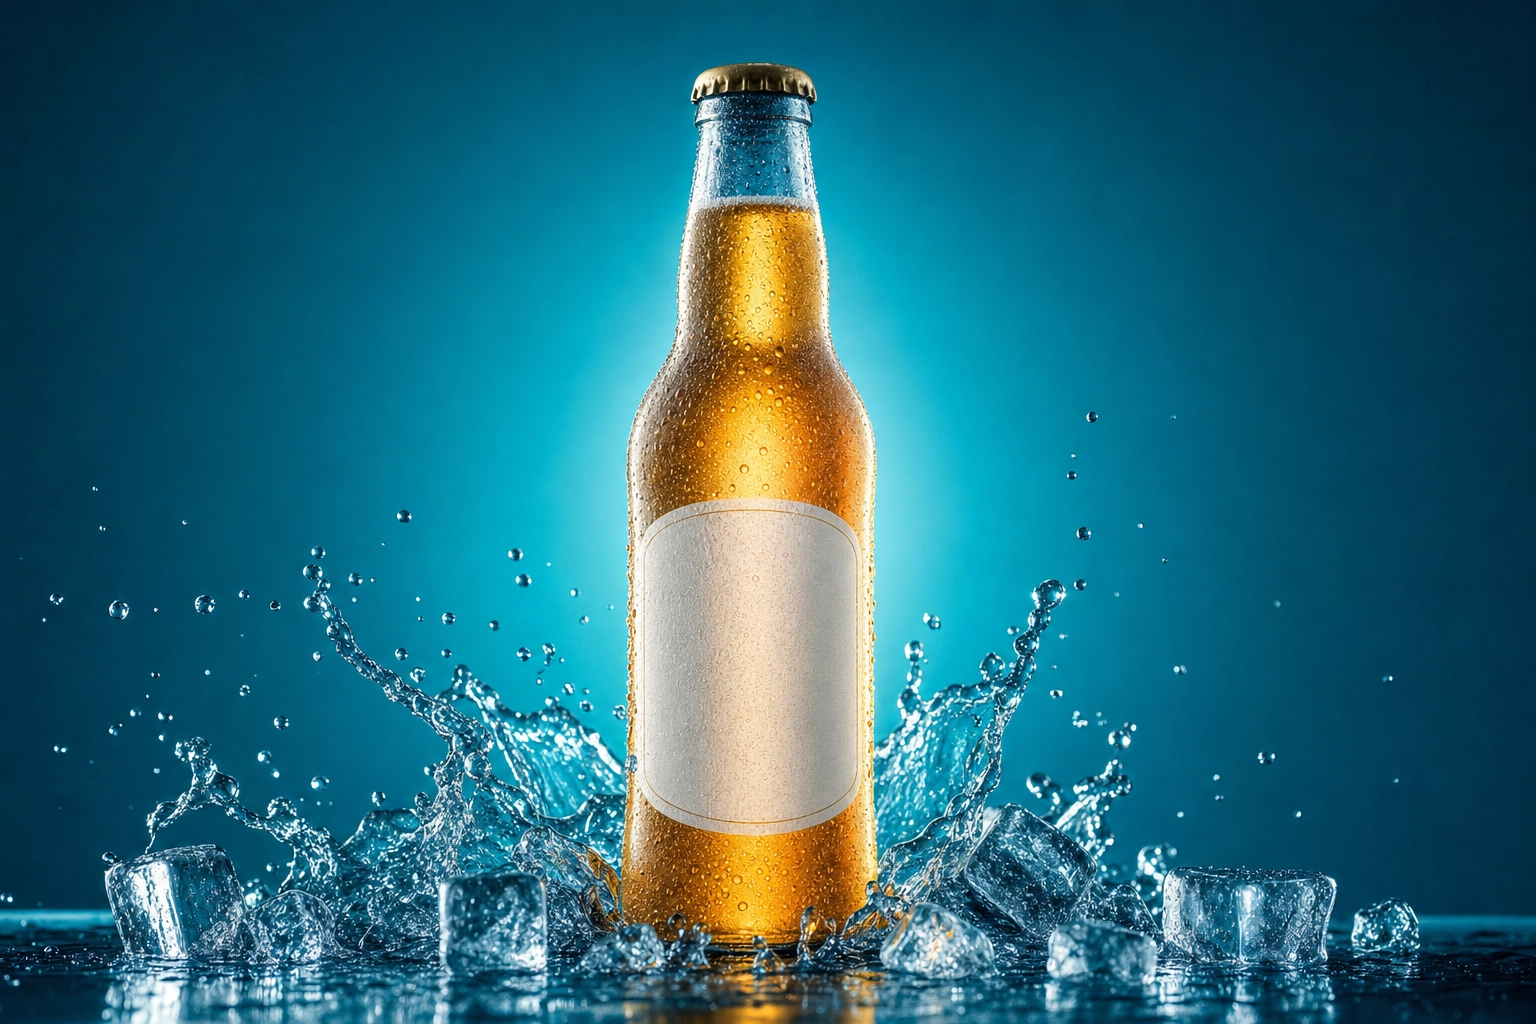 Backlit frosted beverage bottle with condensation and ice splash, a category example of food product photography
Photography vs CGI vs AI rendering: when each makes sense
There are three ways to create CPG product images today, and the smartest brands use more than one.
Traditional photography is the gold standard for accuracy and authenticity. When you have the physical product in hand and you're shooting the compliant marketplace main image or a flagship campaign, nothing beats a real photo. It's also the only fully compliant option for that Amazon hero, since fully AI-generated main images aren't allowed. The catch is cost and time — more on that below.
CGI / 3D rendering builds photorealistic images entirely in software from a 3D model of your package. It shines when you need visuals before packaging is even manufactured, when you want infinite flavor and variant permutations across a big catalog, or when you need virtual shelf and retail mockups. Build the model once, reuse it forever. The downsides: high upfront cost (often $500–$5,000 per image), you need a skilled 3D artist, and specialty finishes like varnish, holographic foil, and matte coatings are genuinely hard to render. It's a big-brand, big-catalog play.
AI enhancement takes a different route: photograph the real product or food with a phone, then transform it into studio-quality imagery in seconds. It's unbeatable for the food-forward half of your catalog — lifestyle scenes, in-use shots, ingredient stories, serving suggestions, and social or ad creative — and for keeping a consistent look across dozens of SKUs. The caveat: keep a human in the loop for anything with text, because AI shouldn't be inventing label or nutrition copy.
For most CPG brands, the answer isn't one or the other. It's a hybrid: a real, accurate packshot where compliance and legibility are non-negotiable, plus fast, affordable AI for the lifestyle and food photography that fills out every listing, ad, and feed.
Hiring a photographer vs AI enhancement: the real cost
Let's talk numbers, because this is where strategy meets budget.
A commercial product or food photographer typically charges $500–$3,000 per day, and the most in-demand pros command $5,000–$10,000 or more. Per-image pricing for straightforward packaged goods often runs $25–$70 a shot, and a broad commercial or packaging license can add two to three times the creative fee on top. Then layer in studio rental, a food stylist, props, your own time, revisions, and a turnaround measured in days or weeks. For the full breakdown, see our guide to what food photography actually costs and your options for food photography services.
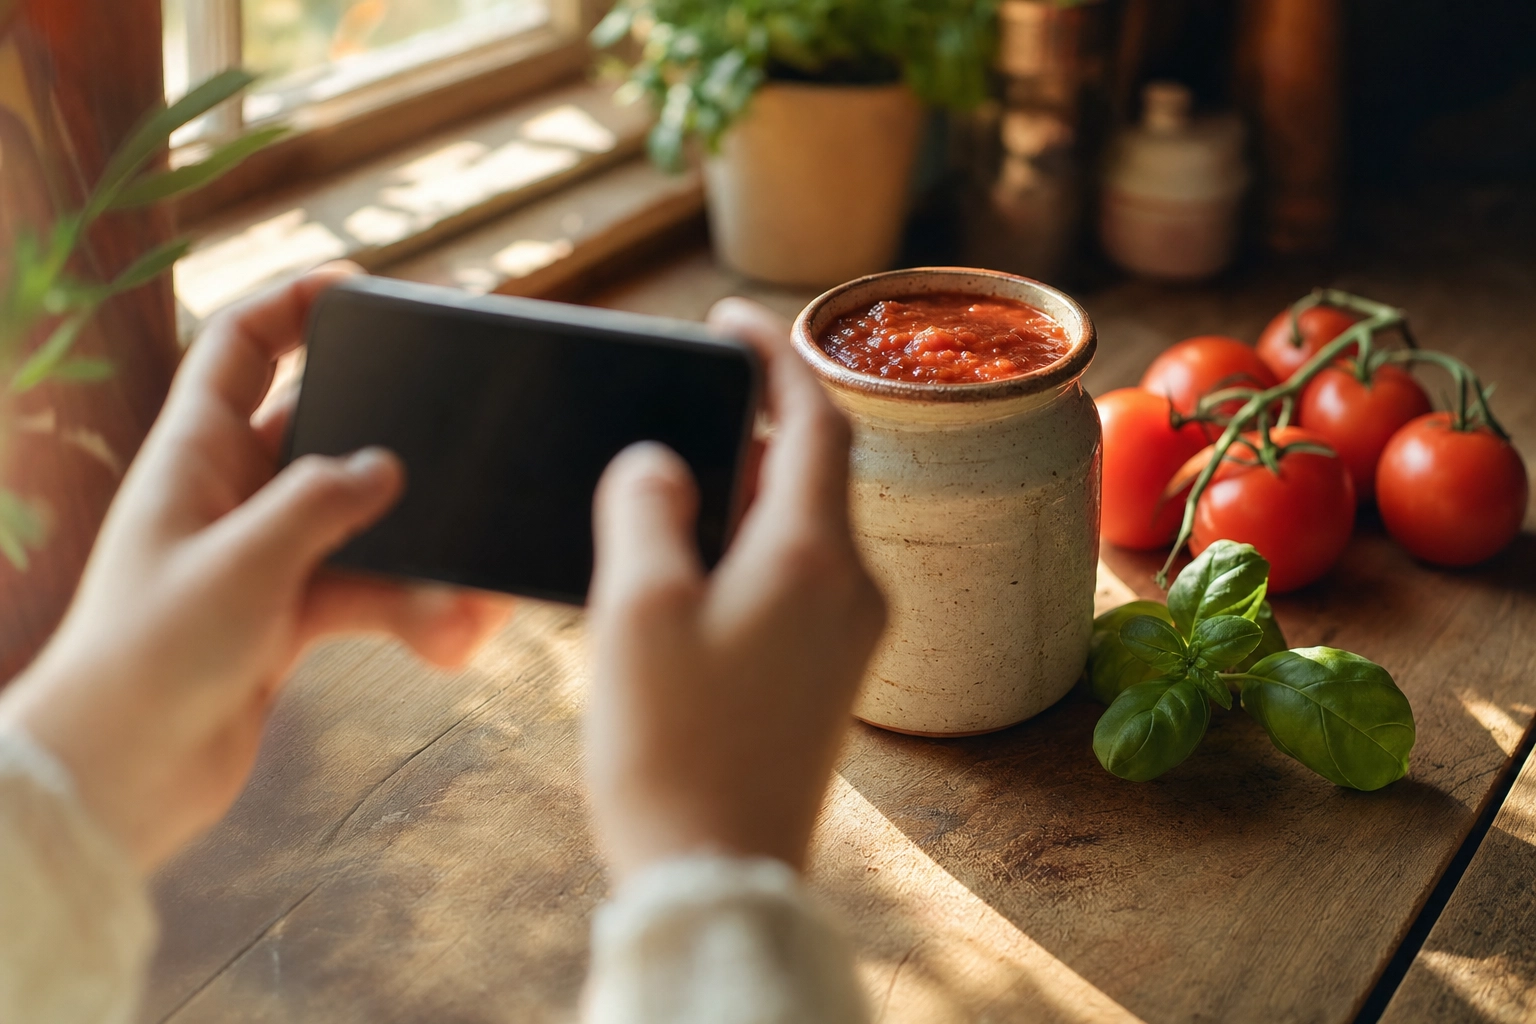 Hands using a smartphone to photograph a ceramic sauce jar on a sunlit counter — phone-plus-AI food product photography
AI enhancement flips the math. Tools like FoodShot start around $15 a month, turn a phone photo into a polished image in about 90 seconds, and let you restyle as many times as your credits allow. For a brand running dozens of SKUs and refreshing imagery every season, that difference compounds fast.
The honest recommendation: spend on photography (or CGI) where accuracy is legally critical — your compliant main image — and lean on AI for the lifestyle, ingredient, and beauty shots — the everyday food photography that makes up the bulk of your catalog. You get authority where it counts and speed everywhere else.
The AI-powered approach with FoodShot
FoodShot AI was built for exactly this kind of work. You upload a real phone photo of your product or the food itself, pick a look, and get studio-quality, catalog-ready imagery in about 90 seconds — at roughly 95% less than a traditional shoot.
A few things make it a fit for packaged brands:
- 200+ styles, including clean white backgrounds for marketplace listings and moody, branded surfaces for your DTC site and ads.
- My Styles. Upload one reference image from your existing brand photography and every new SKU matches it — same lighting direction, color temperature, surface, and mood. That's how you keep a 40-product catalog looking like one cohesive shelf without re-briefing a photographer every launch.
- Builder Mode to compose a scene from a surface, a serving vessel, and your food, so your whole line shares a visual system.
- Multi-variation output from a single upload, 4K resolution for print and packaging comps, and a commercial license on every paid plan. Need volume? Bulk processing kicks in on the Scale plan.
Be clear-eyed about scope. FoodShot shines at the food-forward shots — lifestyle, in-use, ingredient stories, serving suggestions, and beauty details — and at polishing real product photos with better light and backgrounds through the AI food photo editor and food image enhancer. It isn't a label generator: for the strict, legally accurate packshot, start with a real photo of your actual package and review any text by hand. Used that way, it covers the majority of your image needs while your packshot stays bulletproof.
Want to see it on your own products? Explore AI commercial food photography for brands, browse the AI food photography platform, or check pricing — the free plan lets you test it before you commit. Turn a phone snap into CPG-ready brand photos in 90 seconds.
Frequently Asked Questions
Can you photograph or edit product labels with AI?
AI is excellent for the photography around your label — cleaning up backgrounds, balancing lighting, fixing color, and removing distractions from a real photo. What it shouldn't do is invent or alter label and nutrition text, because generative models can garble small type and you'd be misrepresenting your product. Keep the real label real, review every image by hand, and remember that Amazon bans fully AI-generated main images. Edit real photos; don't fabricate claims.
What are Amazon's image requirements for food products?
The main image needs a pure white background (RGB 255, 255, 255), the product filling at least 85% of the frame, no text or logos, and a minimum of 1,000 pixels on the longest side — aim for 1,600–2,000+ px so zoom works. Secondary images are far more flexible: that's where your lifestyle shots, infographics, scale references, and nutrition panels belong.
Lifestyle vs catalog images — which do I need?
Both, and in that order. The clean catalog (white-background) shot earns recognition and keeps you compliant, so it leads the gallery. Lifestyle shots build desire and context, so they follow. Catalog images answer "is this the right product?" while lifestyle images answer "do I want it?" A complete listing needs both questions answered.
How much does food product photography cost?
Hiring a photographer typically runs $500–$3,000 per day plus licensing, or roughly $25–$70 per image for simple packaged goods. AI enhancement starts around $15 a month. Your real cost depends on how many SKUs you have, how many channels you sell on, and how often you refresh — which is why many brands mix one paid packshot with AI for everything else.
Can I shoot CPG product photos with just a phone?
For most shots, yes. A modern phone, soft window light, a steady angle, and a clean surface will capture plenty of detail — then AI enhancement brings it to studio quality. Phone-plus-AI covers the lifestyle, ingredient, and beauty shots beautifully — most of your food photography, in other words. The exception is highly reflective packaging (mirror-finish foil, intricate glass), where controlled studio lighting still earns its fee.
