A great salad can be the freshest, most colorful thing on your menu — and the trickiest to photograph. Plate it the way you'd actually eat it and your salad images come out looking like a wet bowl of greens: limp, shadowy, and strangely dull for a dish that's bursting with color in real life.
Here's the good news: salads aren't hard because you lack talent. They're hard for three fixable reasons — they wilt fast, they sit low and flat in the bowl, and they read as one muddy shade of green on camera. Solve freshness, structure, and color, and a salad becomes the most crave-worthy photo on your page. Below is exactly how to style and shoot salad pictures that look bright, vibrant, and menu-ready — whether you run a cafe, a healthy-bowl concept, or a food blog.
Quick Summary: Salads photograph badly when they're over-dressed, buried in deep bowls, and shot in dull light, so they look like a flat pile of greens. Style standout salad images by building height in a shallow vessel, dressing lightly and selectively (a pipette gives pro-level control), lighting bright and slightly from behind, and adding warm color against the green. Then capture four shots — an overhead bowl, a 3/4 hero, an ingredient close-up, and a build or lifestyle frame.
Why salads are the hardest dish to photograph (and how to win anyway)
Ask a food photographer which dish makes them nervous and salad comes up fast. As one popular salad styling guide puts it, the fear is that your bowl ends up looking like "a big bowl of wet greens" — tasty, but visually flat.
Three things conspire against you:
- Dressing wilts greens within minutes. The acid and oil that make leaves glossy also make them collapse, so a salad that looked crisp at noon looks tired five minutes later.
- Deep bowls swallow the food. High sides cast shadows across the ingredients and hide everything below the rim.
- Green-on-green reads as mush. Unlike a seared steak or a melty pizza, a salad has no built-in browning or sheen, so without contrast it flattens into a single color.
Now the reframe: a salad is actually one of the most generous subjects you'll ever style. You have more colors, shapes, and textures to work with than almost any other dish, so you rarely need props to fill the frame. The moment you stop plating it to eat and start styling it for the camera, the whole thing gets easier.
And it pays off. In a study of 275 diners, professionally styled food photography significantly influenced dining decisions and how much people thought a dish was worth (ResearchGate). A Queen Mary University of London study similarly found that adding pictures changes how diners evaluate menu items (QMUL), and Cornell University research has put the lift at roughly 6.5% more orders per item when a strong photo is added. For a cafe selling a $14 grain bowl, that's real revenue sitting inside a better picture.
The winning formula is simple: fresh ingredients + built height + restrained dressing + fast shooting + deliberate color. Let's take them one at a time.
Start with fresh, structured ingredients
Freshness is the one thing you genuinely can't fix later. A good edit rescues exposure and color, but it can't un-wilt a sad leaf — great salad photos start at the cutting board.
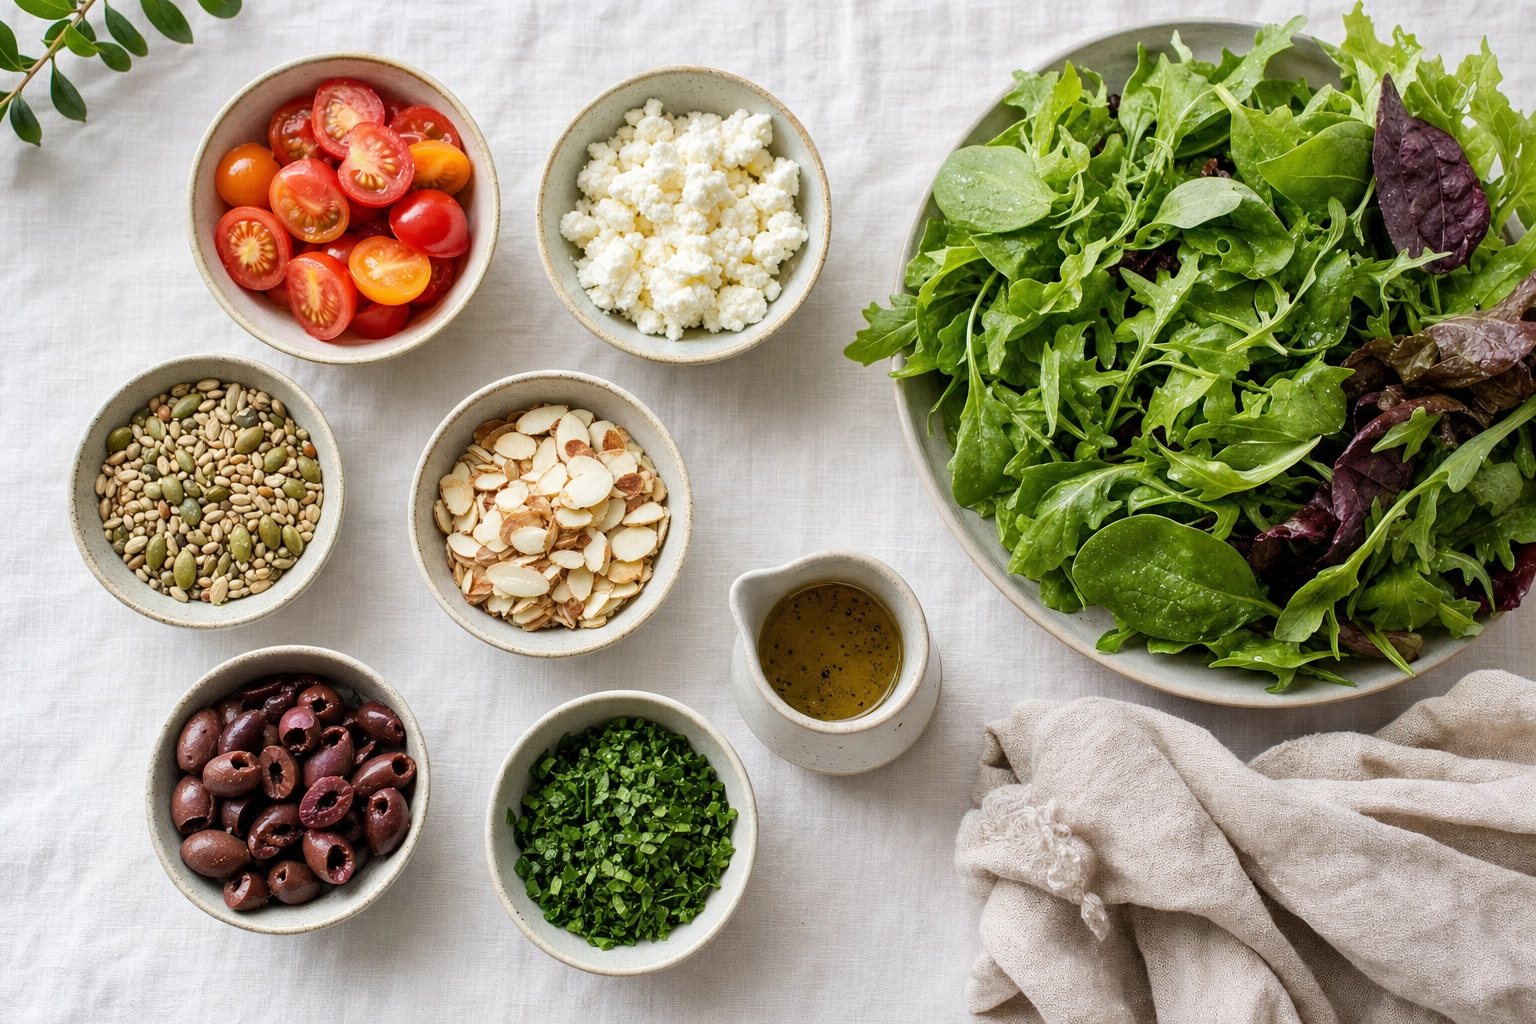 Overhead salad mise en place with prepped components in small bowls, a jug of vinaigrette and loose greens on linen
Great salad images are won before you ever pick up the camera. Lay out every component as mise en place — greens washed, herbs picked, dressing whisked, hero pieces prepped — so you can build fast and shoot before anything wilts. The best stylists always set the scene first and plate last.
Source and revive for peak freshness
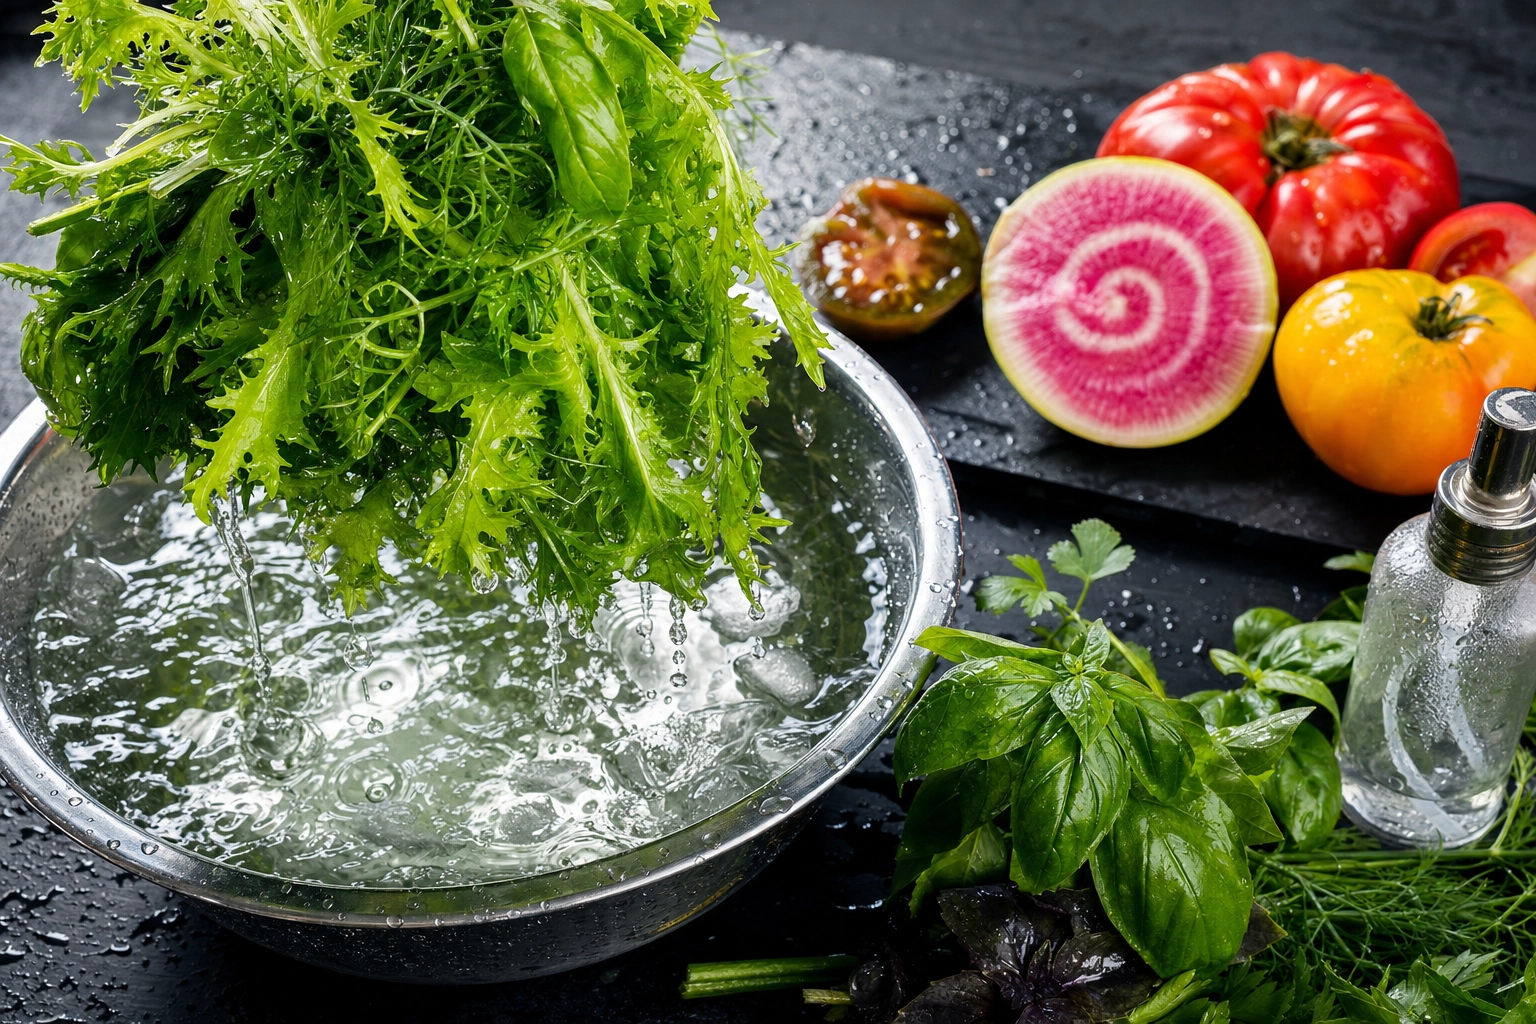 Crisp salad greens lifted dripping from ice water beside fresh heirloom tomatoes and a halved watermelon radish on slate
Buy the best-looking produce you can find and pick your "stars" — the reddest tomatoes, the crispest little gem, the herbs with real personality. For the camera, always choose the pieces you'd want to photograph, not just the ones you'd happily eat.
A few freshness tricks the pros lean on:
- Ice-water bath. Soak leafy greens and herbs in cold water for 10–15 minutes, then spin or pat them dry. They perk up and stand taller.
- A 1–2 minute steam brightens firm vegetables like asparagus, green beans, and snap peas to a vivid green. Pull them early and shock them in ice water — over-steaming turns them army-drab and soft.
- A fine mist of water on the leaves right before you shoot reads as just-washed dew. Keep a small spray bottle on set.
The same "fresh first" rule drives every great produce shot — our guide to fruit and produce photography digs deeper into capturing real gloss and true color on raw ingredients.
Prep for texture and contrast
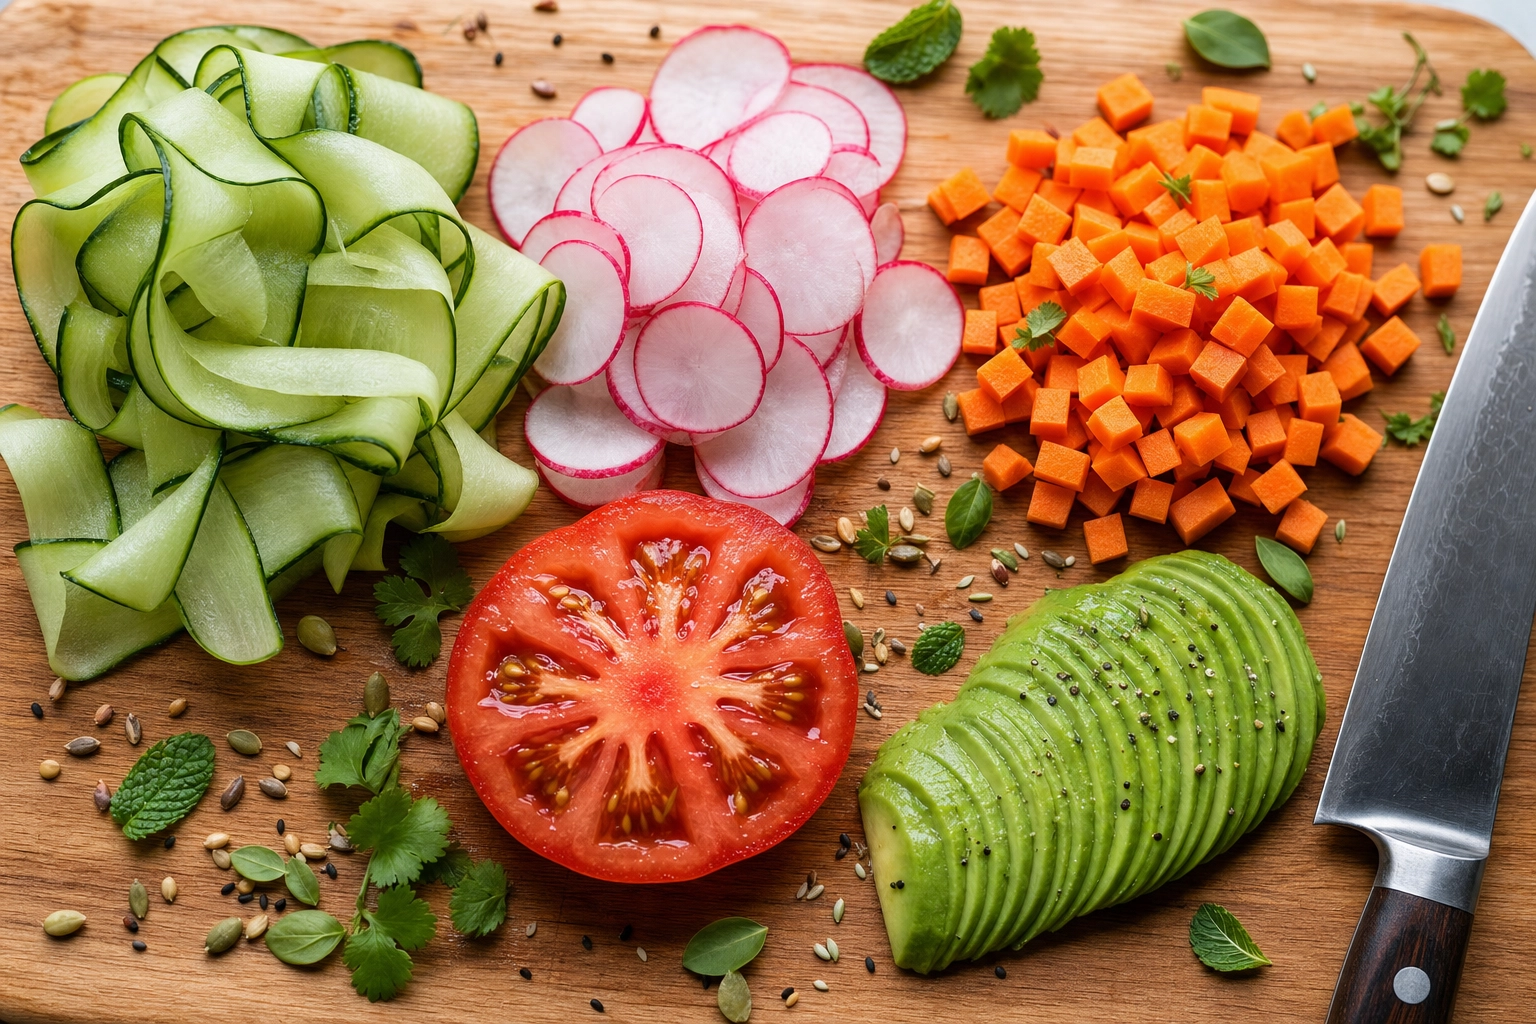 Overhead cutting board with cucumber ribbons, shaved radish, diced carrot and a tomato cross-section showing varied salad cuts
The exact same recipe can read as a jumble or a work of art, and the difference is texture. When every piece is the same size and shape the bowl looks like mush, so vary your cuts into different shapes the eye can separate: chop some ingredients, shave others into ribbons, dice a few, and slice cross-sections to reveal the jewel-like interiors of tomatoes, figs, or radishes.
Keep a handful of perfect, whole pieces aside, too — a few uncut cherry tomatoes, a sprig of basil, a clean wedge of avocado. These become your finishing touches and hero pieces, and loose extras can trail off the plate to create leading lines into the bowl.
Build height and structure (the fix for flat-bowl syndrome)
This is the step that separates a styled salad from a pile of greens. A photographed salad should always have peaks, valleys, and a clear high point — not a flat, even layer pressed into the bottom of a dish.
 Hands using tongs to sculpt and layer a salad with height and distinct ingredient clusters in a shallow stoneware bowl
Pick a shallow, wide vessel
Skip the deep salad bowl. Those high sides cast shadows and bury your ingredients in the dark. Reach instead for a wide, shallow bowl — or even a dinner plate with a low rim — so light can flood across every ingredient. A slight lip helps, keeping loose pieces from sliding off without hiding them.
Layer from the base up to create volume
When you're unsure where to start, deconstruct the recipe and build like a stylist, not a line cook:
- Start with greens as a loose, airy nest. Don't pack them flat — lift and fluff so air gets underneath.
- Prop the volume. Hide a small upturned ramekin or a wad of paper towel under the greens to push the center up. The half-empty-bowl problem is real, and a hidden lift fixes it instantly.
- Mound toward the back and center, then let pieces lean and overlap so you get natural peaks and valleys.
- Break the rim. Let a few ingredients spill slightly over the edge for a relaxed, abundant, just-tossed feel.
Place hero ingredients last, on top
Sculpt — don't dump. Set your star pieces individually and intentionally: a fanned avocado, a jammy soft-boiled egg sliced to show the center, a torn ball of burrata, roasted cross-sections, toasted nuts. Build two or three clear focal points, and use longer pieces to draw the eye inward. Finish with garnish that makes flavor sense — torn herbs, a scatter of seeds, shaved cheese — for that final layer of dimension. Our full food styling guide covers these plating principles across every kind of dish.
Master the dressing — where most salad photos die
If you take one thing from this guide, make it this: the way you dress a salad to eat is the opposite of how you dress one to photograph. To eat, you coat everything and toss. To photograph, you go light, targeted, and last-minute.
Light toss for a natural sheen
A completely undressed salad can look dry and dull. The fix is a whisper of vinaigrette. Lightly toss your leaves in a small amount of oil-based dressing with clean hands or tongs until they just glisten. Many stylists skip the dressing entirely and mist the leaves with plain oil instead — you get the same appetizing sheen without the sogginess.
Selective drizzle and the pipette trick
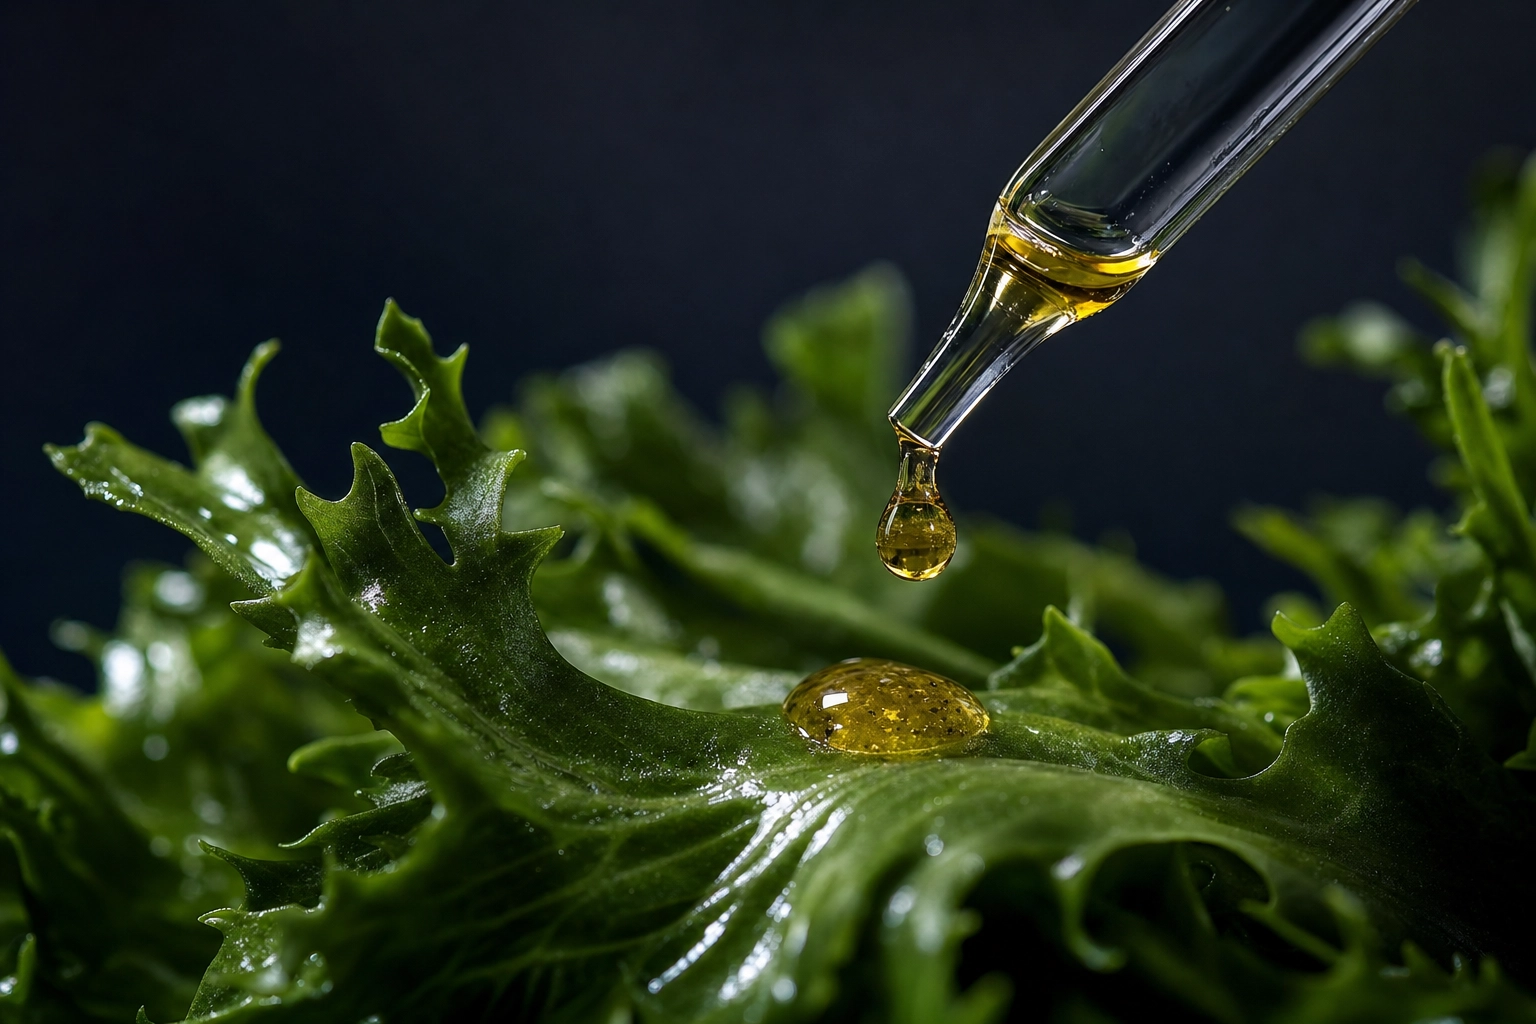 Glass pipette placing a single golden vinaigrette droplet onto a glistening green lettuce leaf in macro detail
Don't drown the bowl. Drizzle dressing only where the camera is actually looking — across the hero ingredients and a few hand-picked leaves. For real precision, use a pipette, a dropper, or the tip of a small spoon to place each drip exactly where you want it. A few deliberate drips and one small glossy pool of vinaigrette read as fresh and intentional, never messy.
Dress last, shoot fast
Acidity is a clock. Once dressing hits the leaves you have only a few minutes before they soften and dull, so set everything up first — lighting, background, props, camera, focus — then dress as the very last move and shoot immediately. Always keep a couple of pristine backup leaves nearby to swap in if anything wilts mid-shoot.
The 4 essential salad images every menu needs
You don't need fifty photos of one bowl. You need four salad images that each do a different job — together they cover your menu, your delivery listings, and your social feed. These are the salad pictures that do the heavy lifting, and once you've nailed the styling on one recipe, the same four shots work for every salad on your menu.
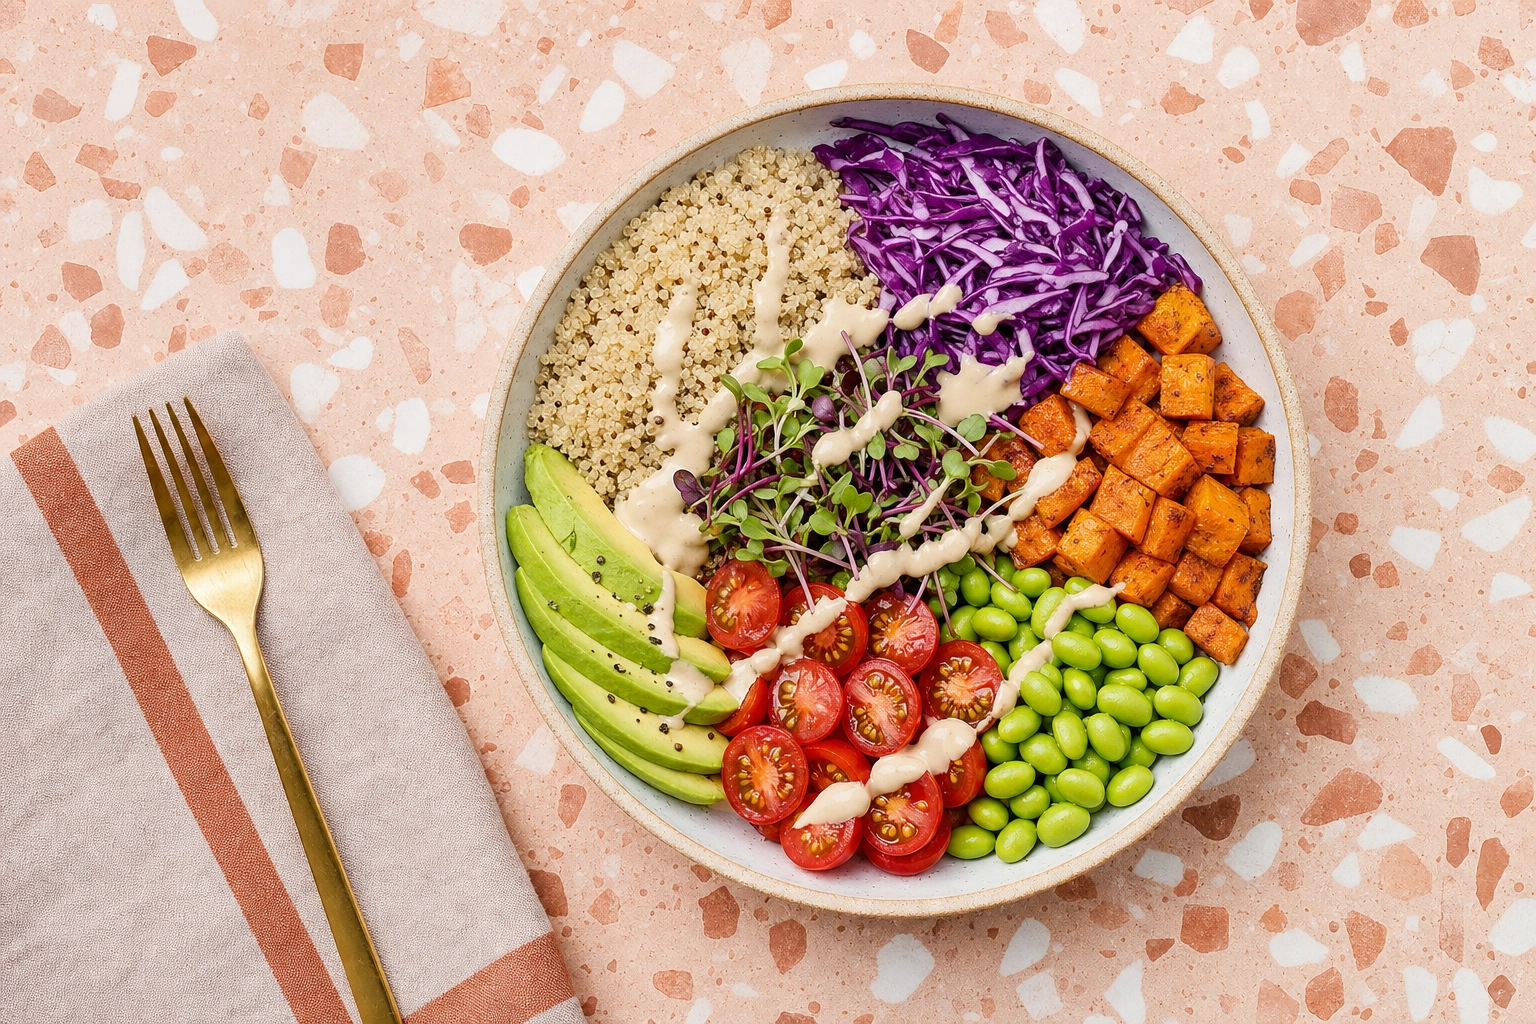 Overhead flat-lay of a colorful grain and greens bowl arranged as a tidy color map on a terracotta terrazzo surface
1. The overhead bowl (flat-lay)
Shot straight down, the overhead is your storyteller. It lays out the full color map and every ingredient at once, which makes it perfect for composed, chopped, and grain or poke-style bowls. Use the rule of thirds, leave a little negative space, and you've got a clean, scannable image — exactly what grain and poke bowls and busy delivery-app menus need to convert a hungry scroller.
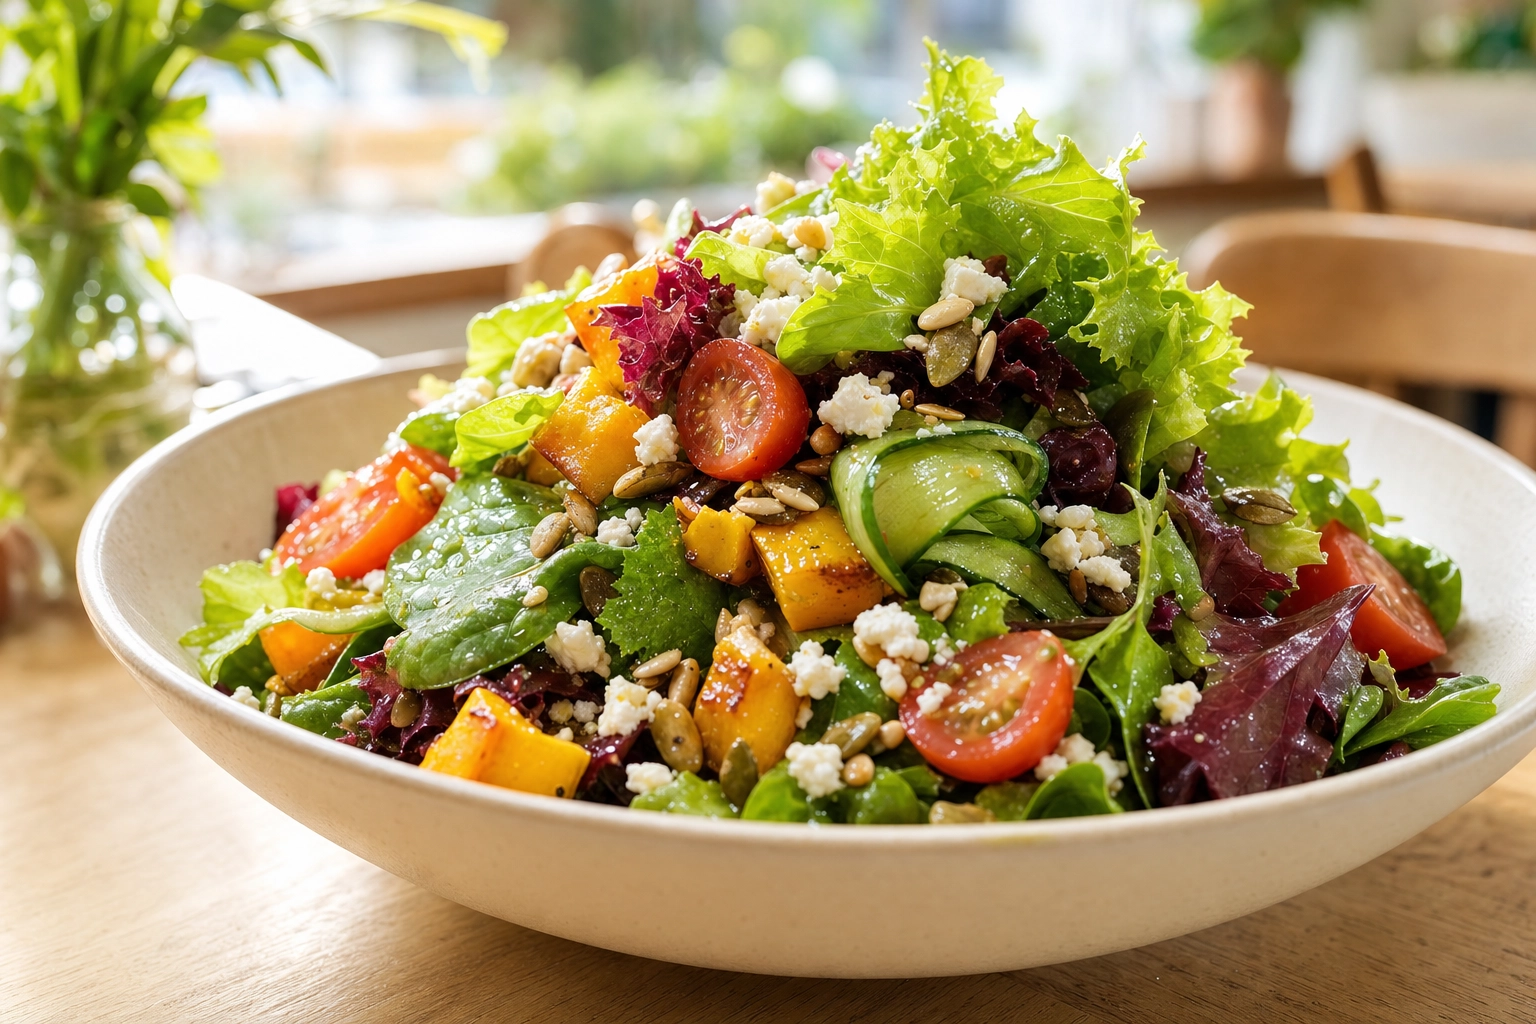
2. The 3/4 angle hero
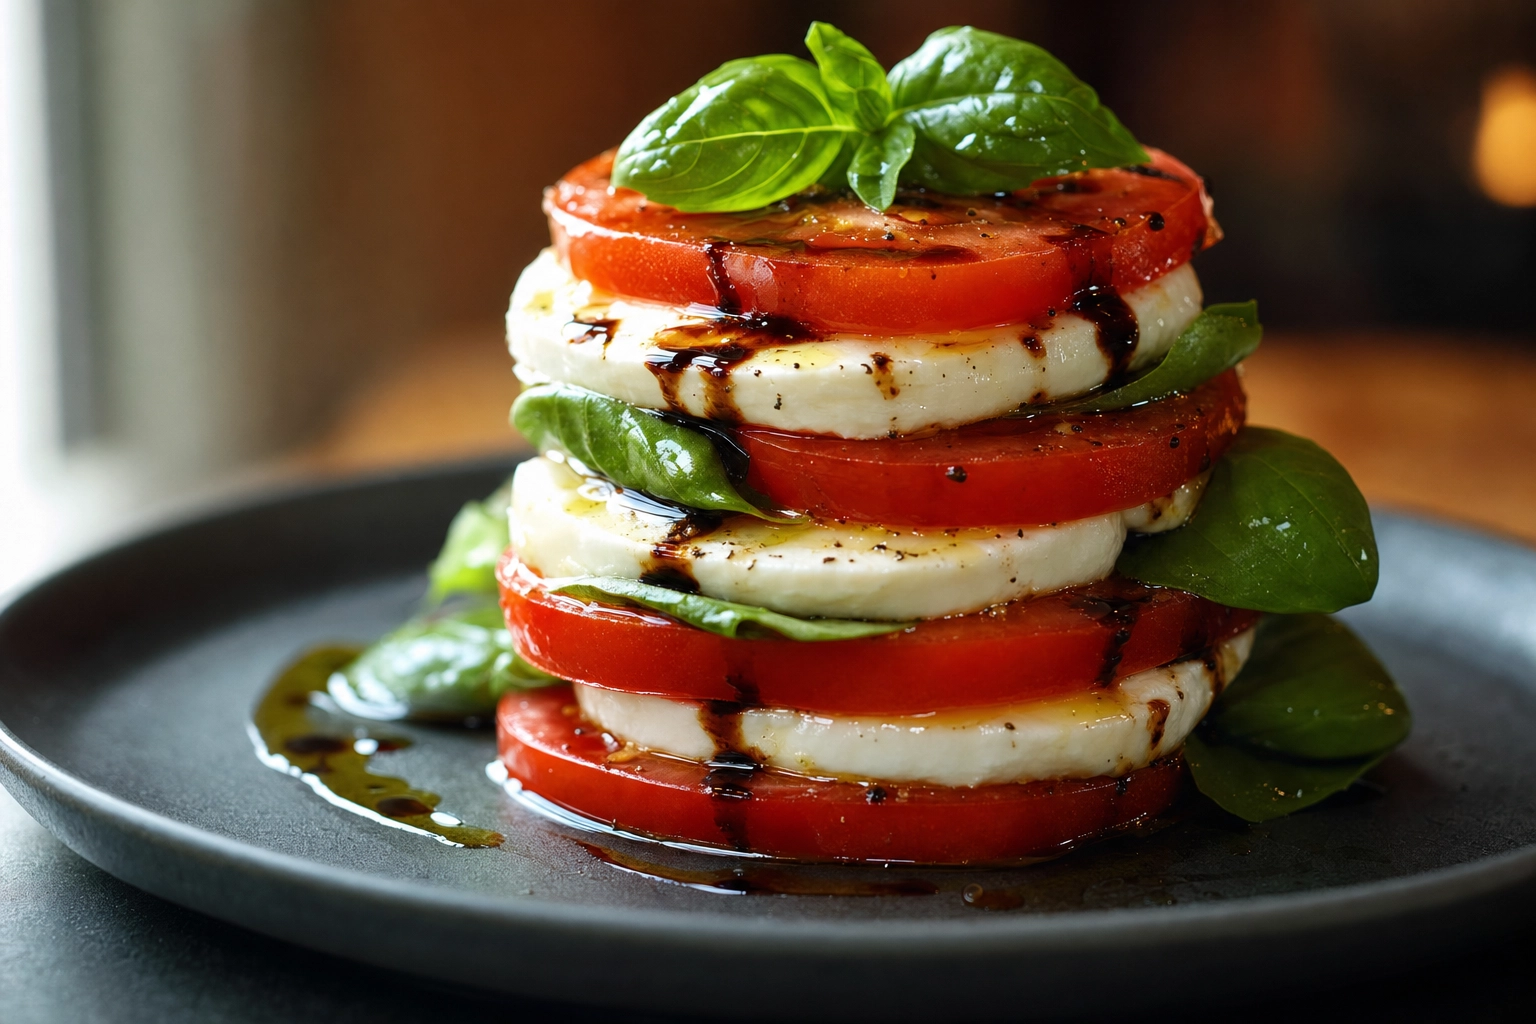 Three-quarter angle Caprese salad stacked into a leaning tower of tomato, mozzarella and basil with a balsamic drizzle
Shoot from roughly 30–45 degrees and all that height you built suddenly pays off. The 3/4 angle is the most appetizing, pull-up-a-chair view — it shows layers, depth, and the glisten on top. This is your money shot for tossed and leafy salads with real volume, and for stacked dishes like a Caprese tower.
3. The ingredient close-up
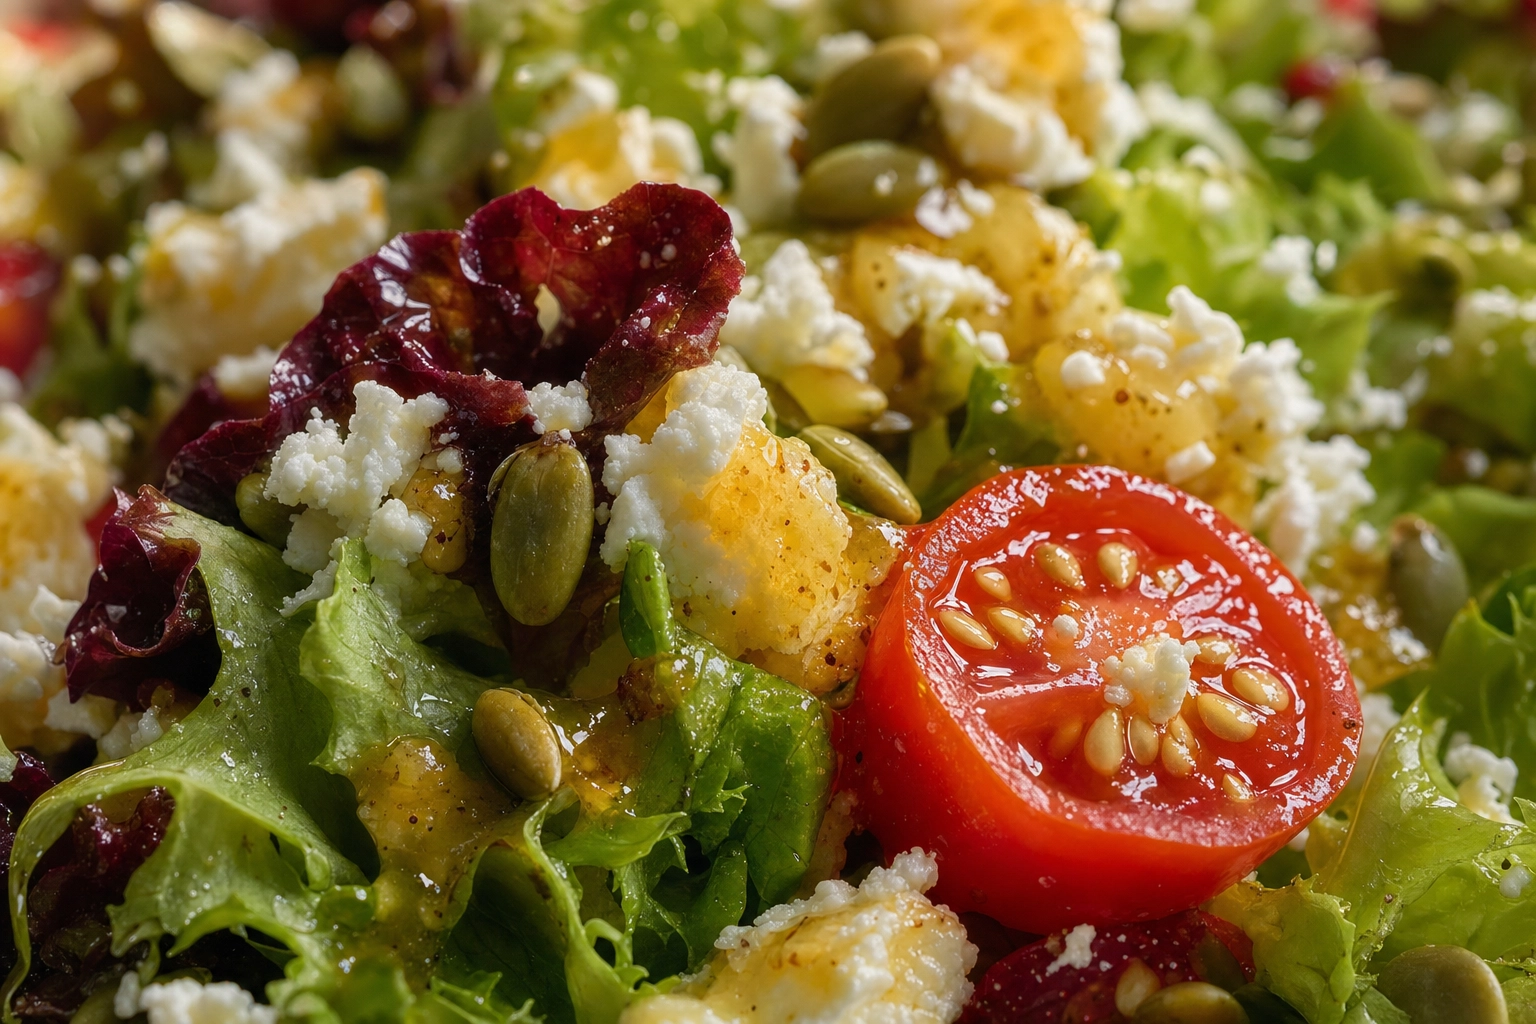 Macro close-up of crumbled feta and golden dressing over frilly greens with a halved cherry tomato and toasted pumpkin seeds
Move in tight and let texture do the selling: dew on a frilly leaf, the crumble of feta, a glossy ribbon of dressing, the seeds inside a halved cherry tomato. A shallow depth of field melts the background and proves your ingredients are genuinely fresh — which builds craving and trust at the same time.
4. The build or lifestyle shot
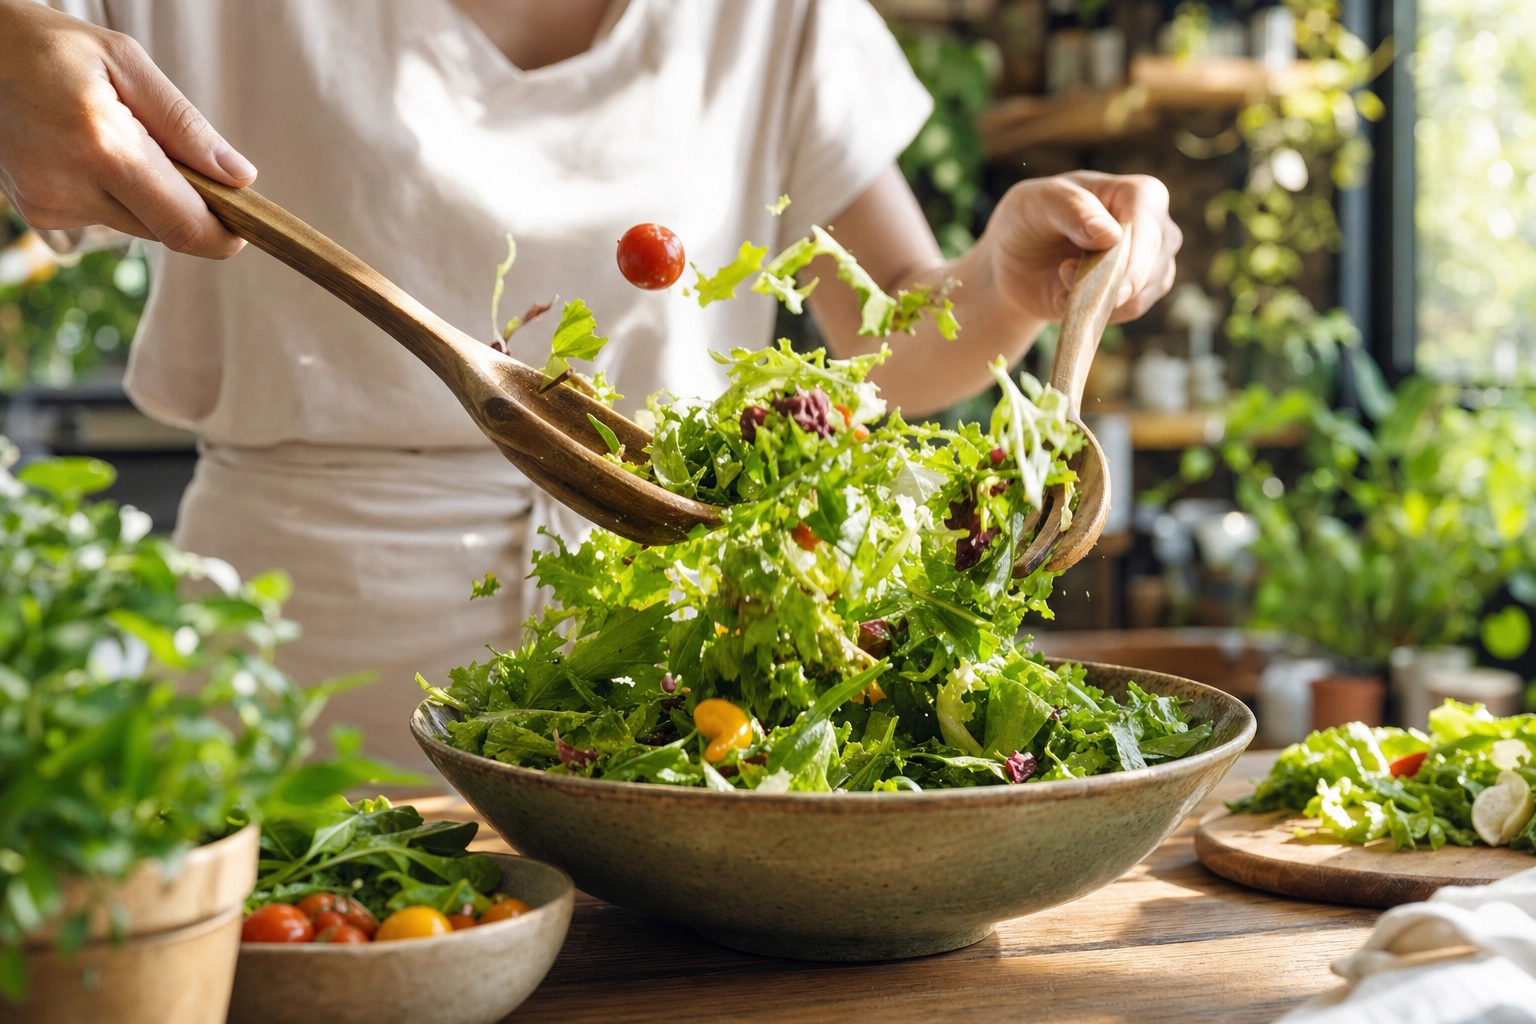 Hands tossing a leafy green salad with wooden servers, leaves caught in mid-air motion in a sunny cafe kitchen
Bring in motion and a human touch: catch hands mid-toss with serving spoons, a stream of dressing being poured, or the salad sitting on a sunny table mid-meal. These frames tell a story and feel alive, which is why food content creators and cafes lean on them so hard for social. A faster shutter speed freezes a few leaves in mid-air for extra energy.
Light and color: make greens pop, not muddy
Salads are cool, crisp, fresh dishes — and they want light and color to match, so your salad images read crisp and vibrant instead of flat.
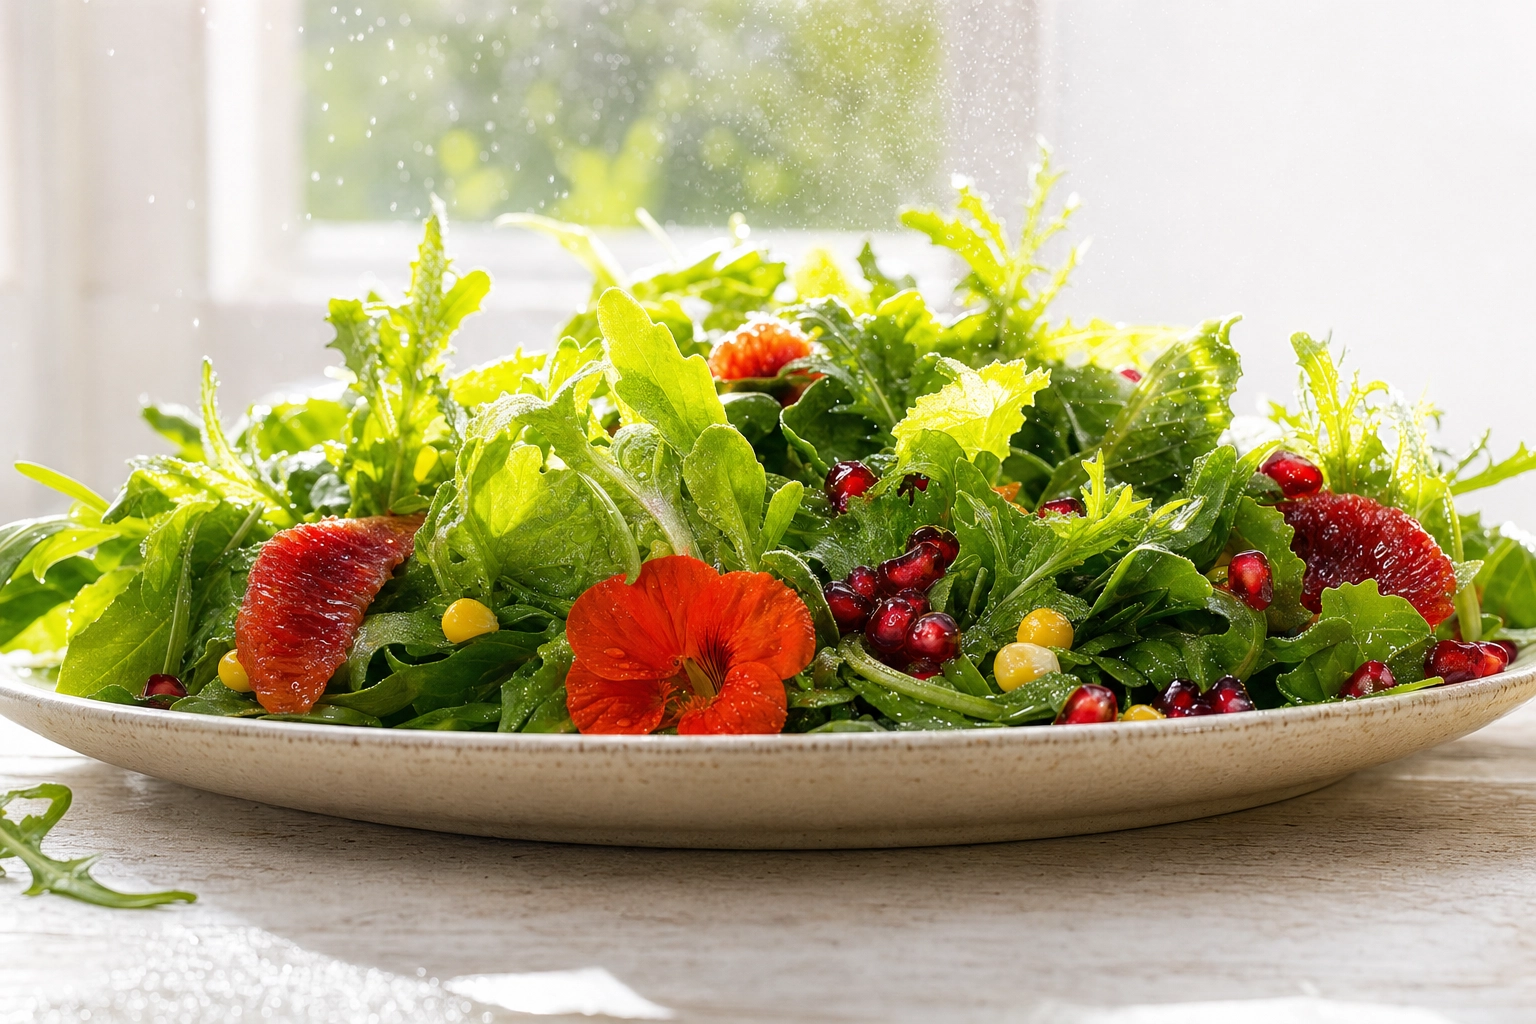 Backlit leafy salad glowing translucent by a window with blood orange, pomegranate and an edible flower for color contrast
Light bright, soft, and slightly from behind
Go for bright, airy, soft light; a big window with a sheer curtain is ideal. Position your main light to the side or slightly behind the salad: backlight makes leaves turn translucent and glow, and it lights up every drip of dressing. Bounce a white reflector — or just a piece of foam board — on the opposite side to fill the shadows so the contrast stays gentle, never harsh.
Build color contrast on purpose
Green-on-green is the enemy. Wake the bowl up with warm, saturated pops: cherry tomatoes, blood-orange segments, edible flowers, watermelon radish, shaved purple cabbage, golden corn. Then choose a background that complements rather than competes — a warm neutral, a soft pastel, pale wood, or matte ceramic. Keep props minimal and let the salad be the loudest, most vibrant thing in the frame.
Style it for your salad type
No two salads photograph the same way, so adapt the styling playbook for the bowls you actually serve.
Leafy and tossed salads. Height is everything here. Build a loose, airy mound, dress with a whisper of vinaigrette, and shoot the 3/4 hero so all that volume reads. These are the classic salad images most cafe menus lean on, and good styling and freshness make or break them.
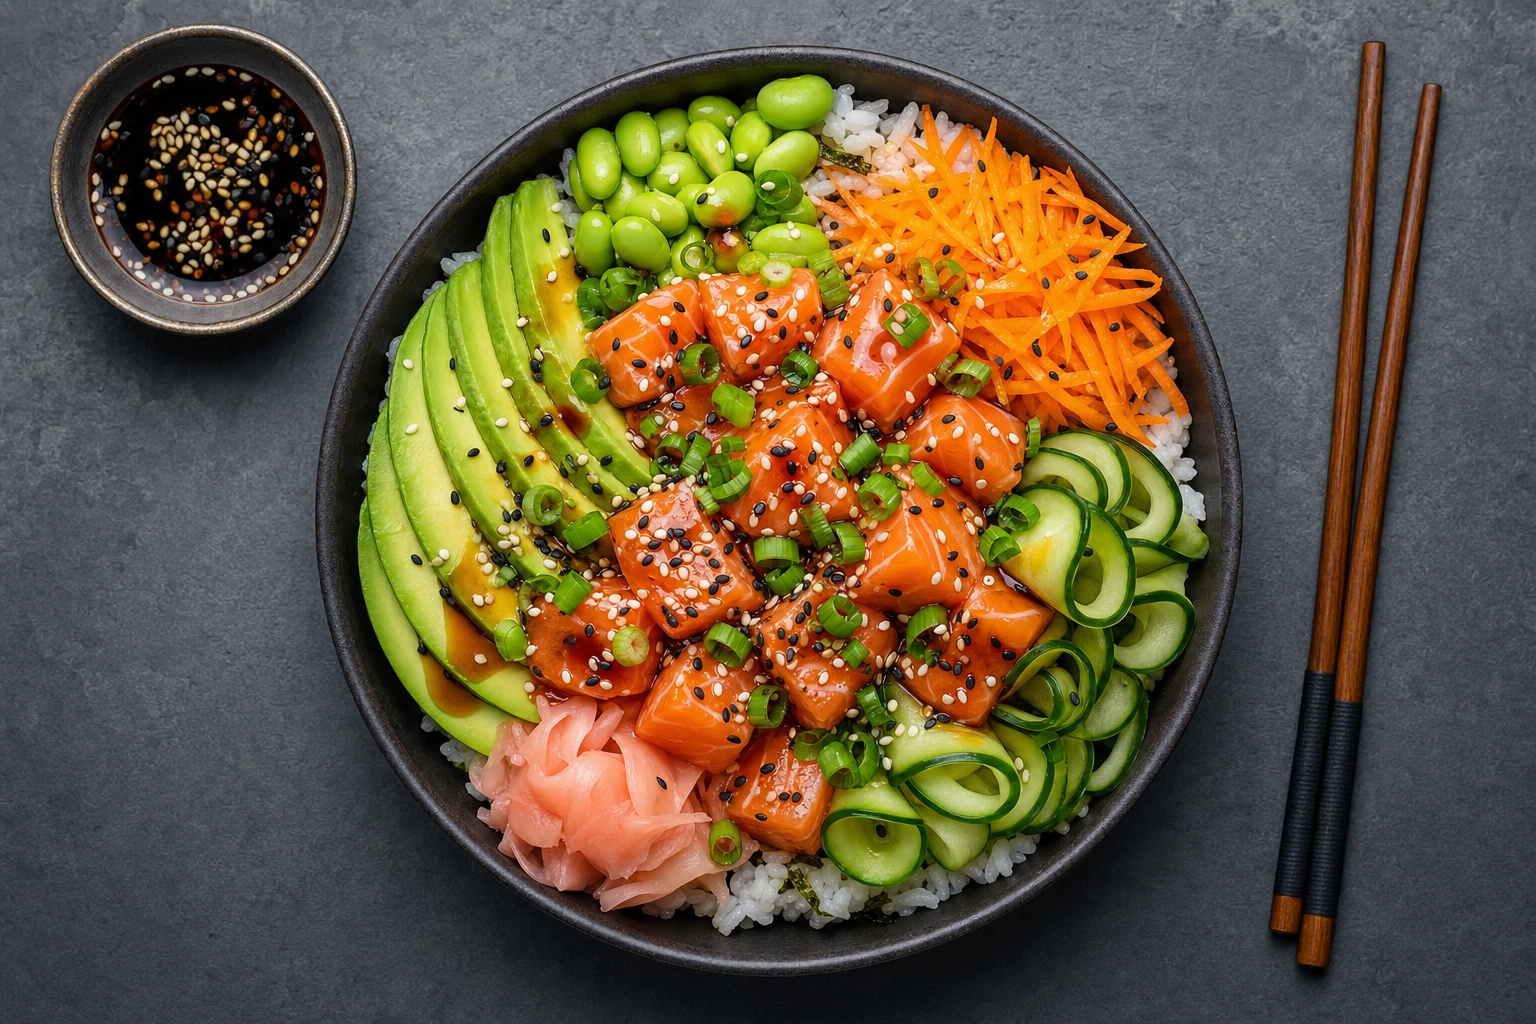 Overhead salmon poke bowl with sushi rice, avocado, edamame and sesame arranged in neat sections on a slate surface
Grain and poke bowls. Composition beats height. Arrange the rice, protein, and vegetables in tidy, separate sections and shoot straight down so every ingredient stays legible — the overhead is king for poke and grain bowls.
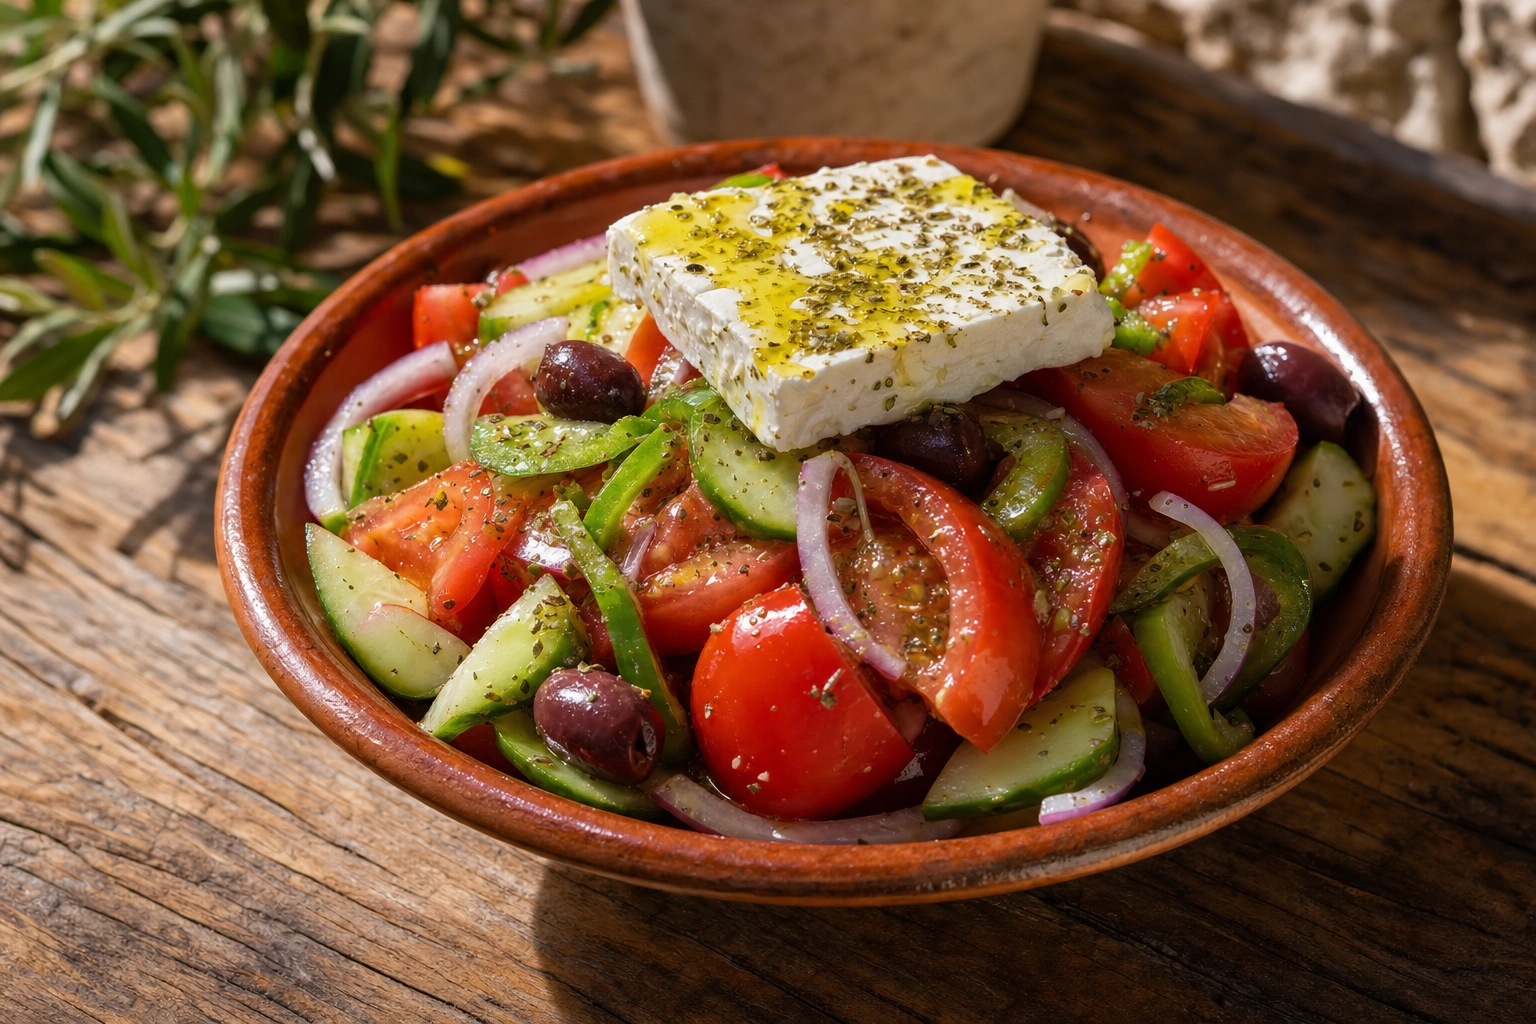 Rustic Greek salad with chunky tomato, cucumber, olives and a feta slab with oregano in a terracotta bowl at a three-quarter angle
Chunky and composed salads. Greek, panzanella, and Caprese-style salads — the staples of Mediterranean food photography — are all about bold, recognizable chunks. Stack them with height, let the feta or mozzarella stand proud, and shoot at a 3/4 angle on a rustic surface. That abundant look also suits catering spreads, hotel buffets, and fine-dining plates.
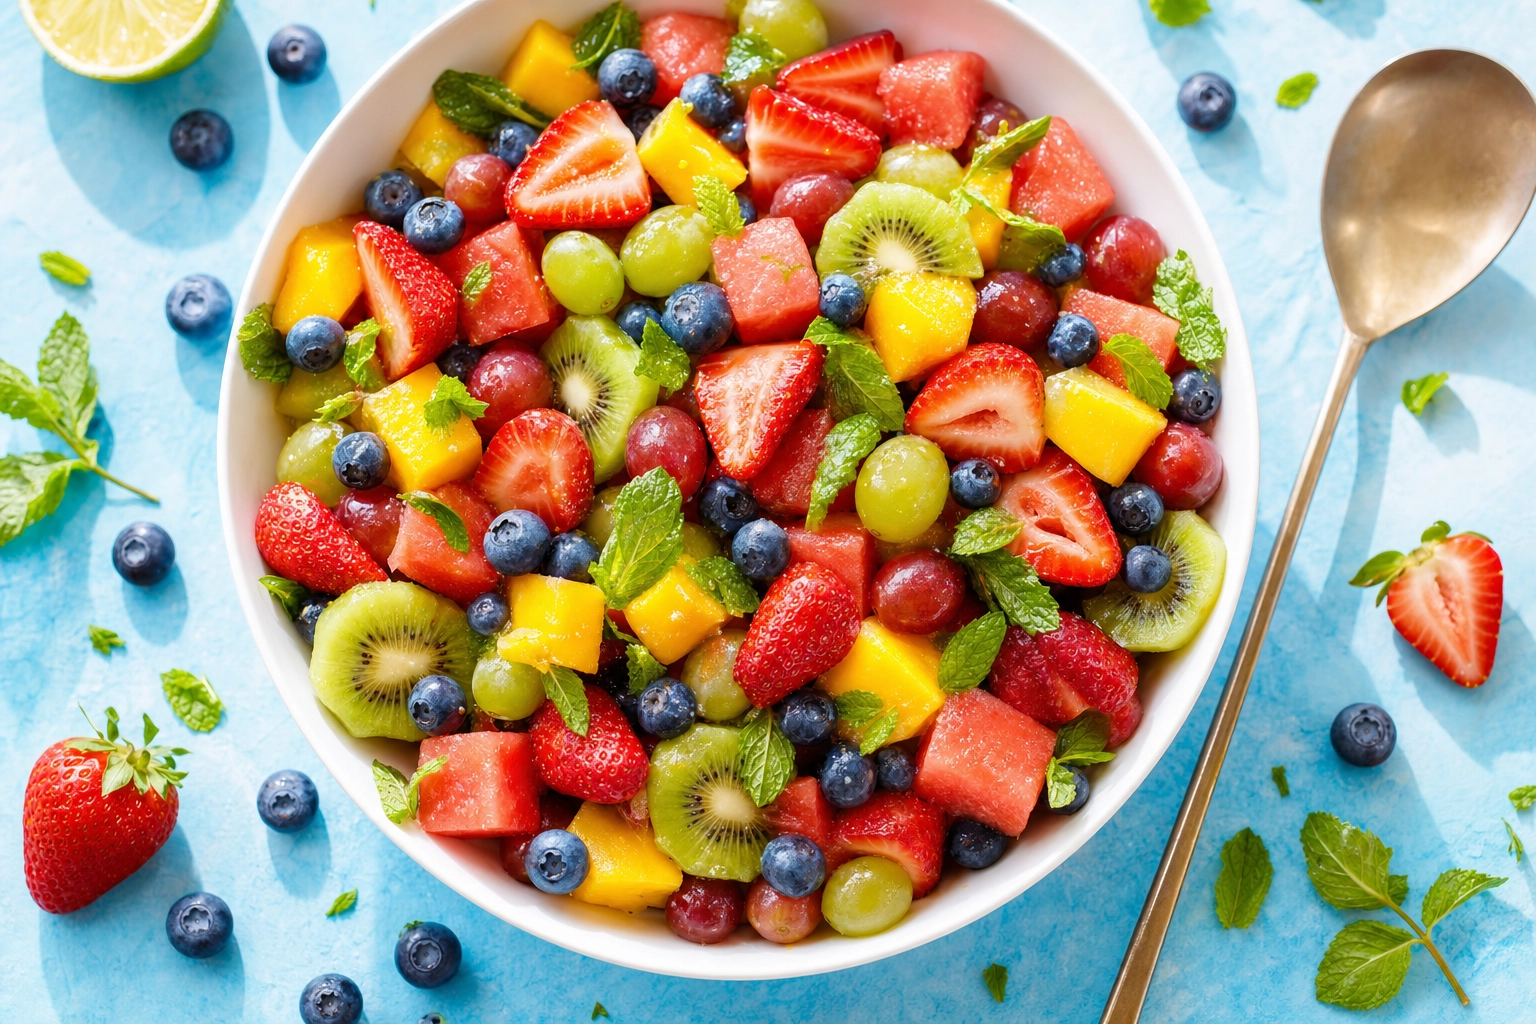 Overhead fresh summer fruit salad with strawberries, blueberries, watermelon, mango and mint in a white bowl on pastel blue
Fruit salads. With fruit, color is the hero and gloss sells freshness, so keep the light bright and high-key and let the natural rainbow do the work. The same principles from our fresh fruit photography approach apply.
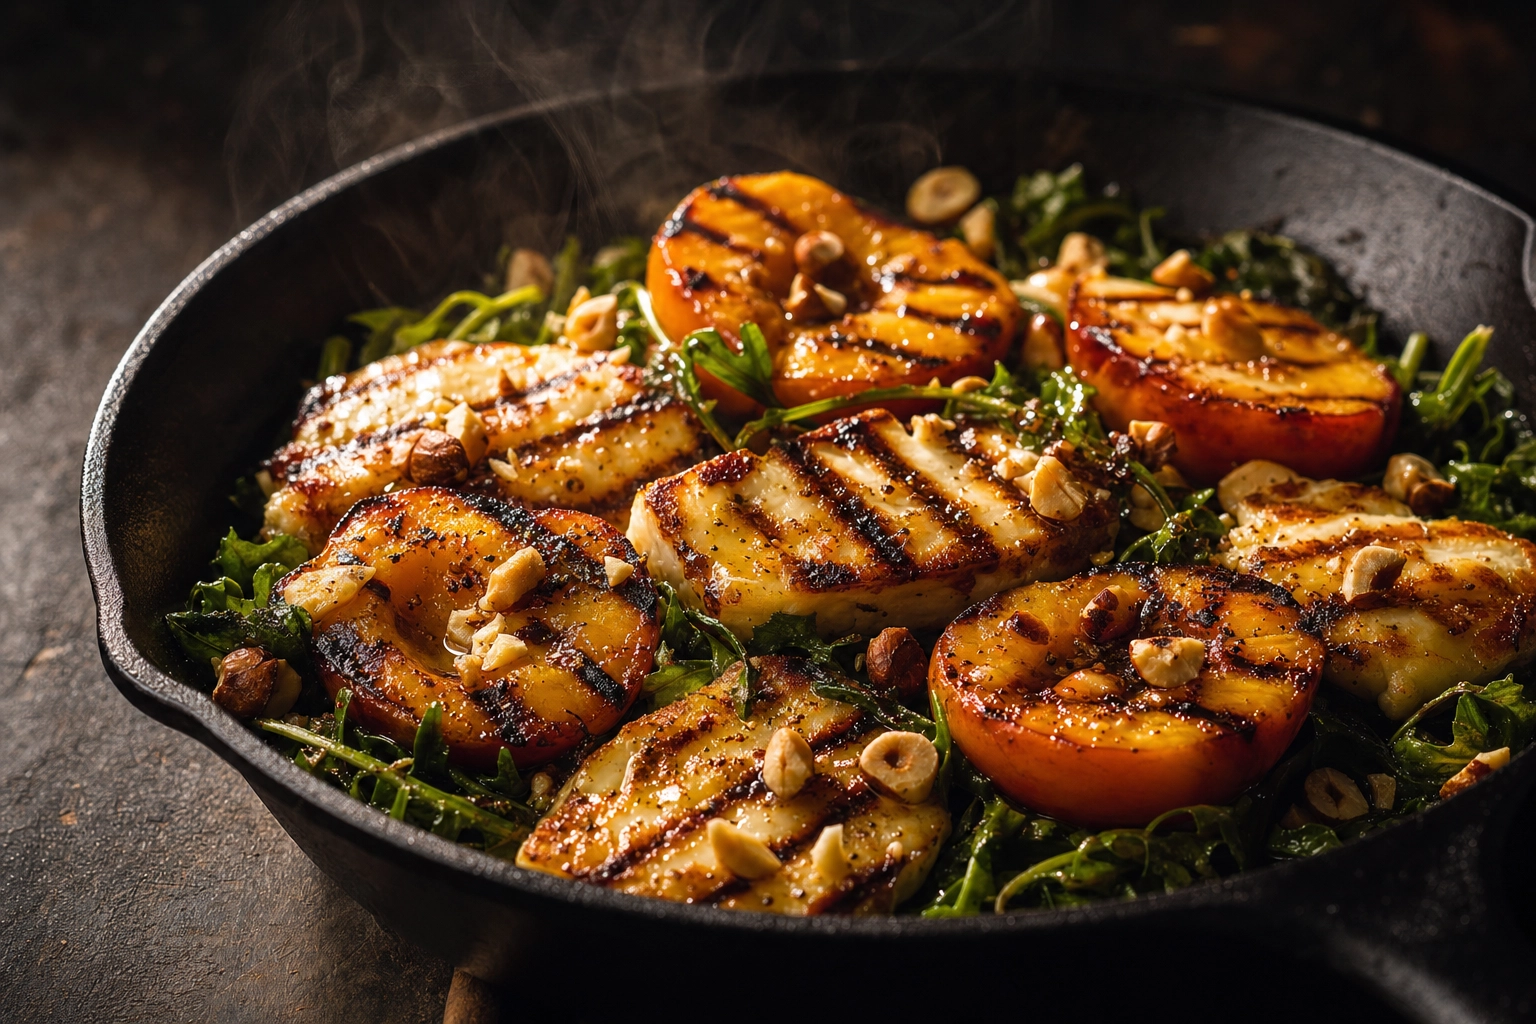 Warm grilled salad with charred peaches, grilled halloumi and arugula in a cast-iron skillet under moody side light
Warm and grilled salads. Char, steam, and caramelization are your friends here. Go moodier — a darker surface and stronger side light — to make the grill marks and glossy edges pop against the tender greens. Whatever the recipe, the styling fundamentals stay the same.
The gear you actually need
You don't need a studio to make great salad images — just a few cheap tools, good light, and smart styling.
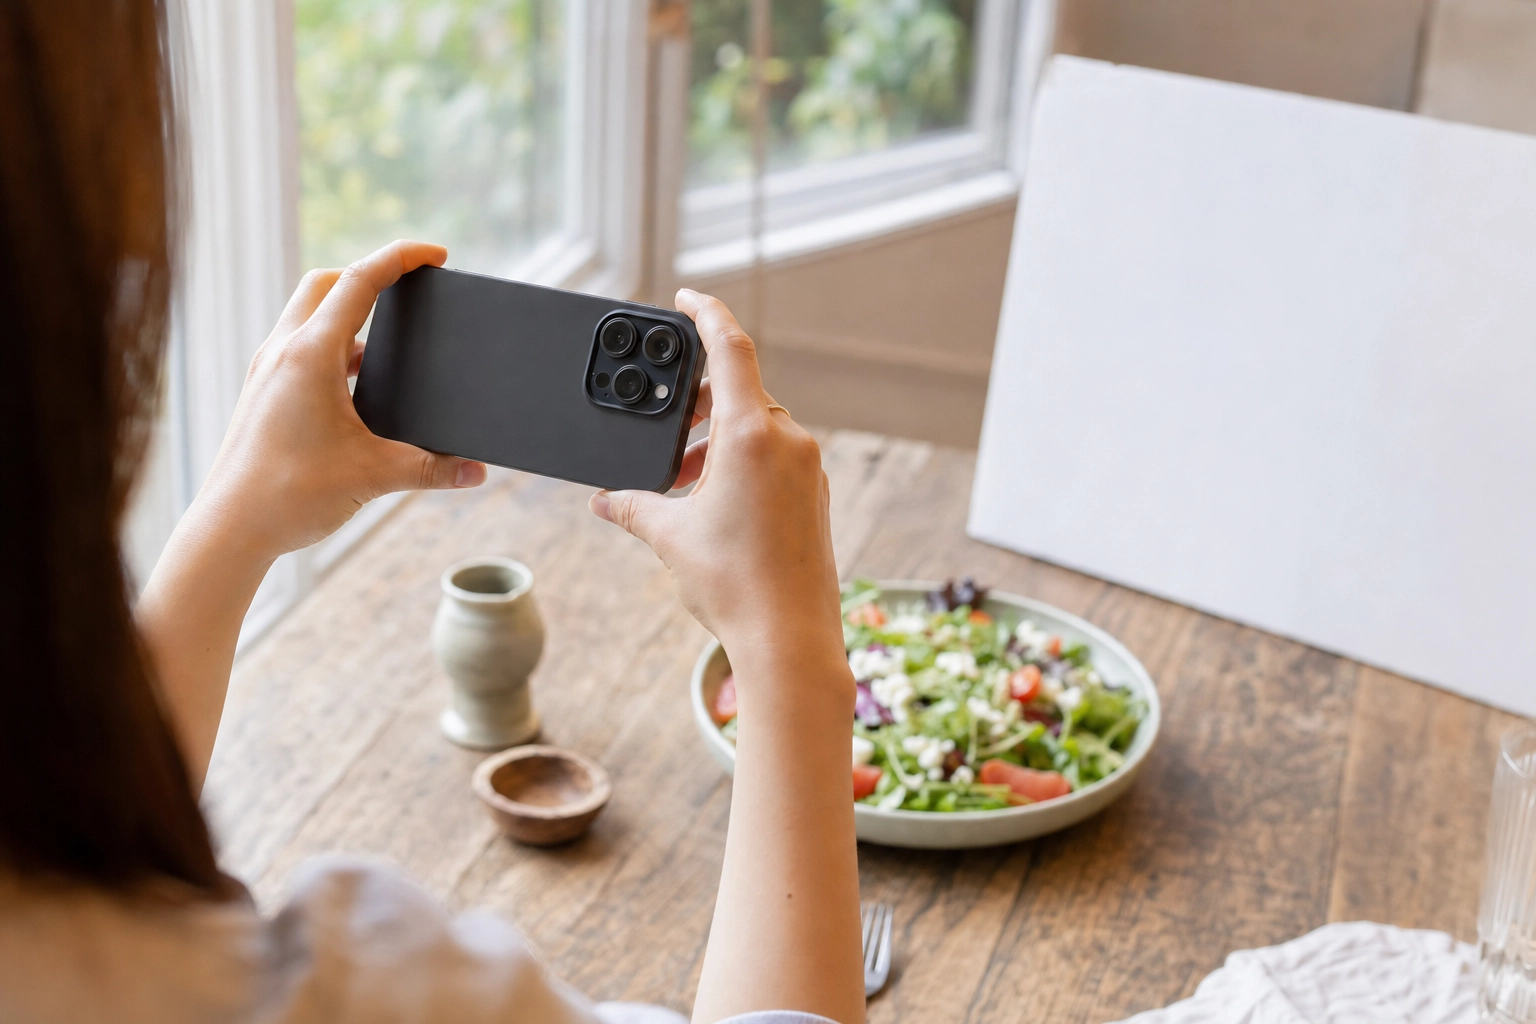 Hands holding a smartphone from behind to photograph a styled salad by a bright window with a white foam-board reflector
- A phone or any camera. Modern phone cameras are more than enough for menu and social shots.
- A bright window. Free, soft, flattering natural light beats most lighting kits for salads.
- A reflector. A white foam board or sheet of paper bounces light back to soften shadows.
- Shallow bowls and plates. Low rims let the light in and show off the height you built.
- Tweezers, tongs, and a pipette. For sculpting the salad and placing dressing with control.
- A spray bottle. A fine mist keeps greens looking dewy and fresh between frames.
Before and after: turning a phone snap into menu-ready salad images
Even when you nail the styling, phone cameras fight you. Indoor light goes yellow, the overhead angle flattens the height you worked for, greens turn olive, and a perfectly light-dressed salad can still photograph slightly soggy. That gorgeous bowl on your counter becomes a dull rectangle on the screen.
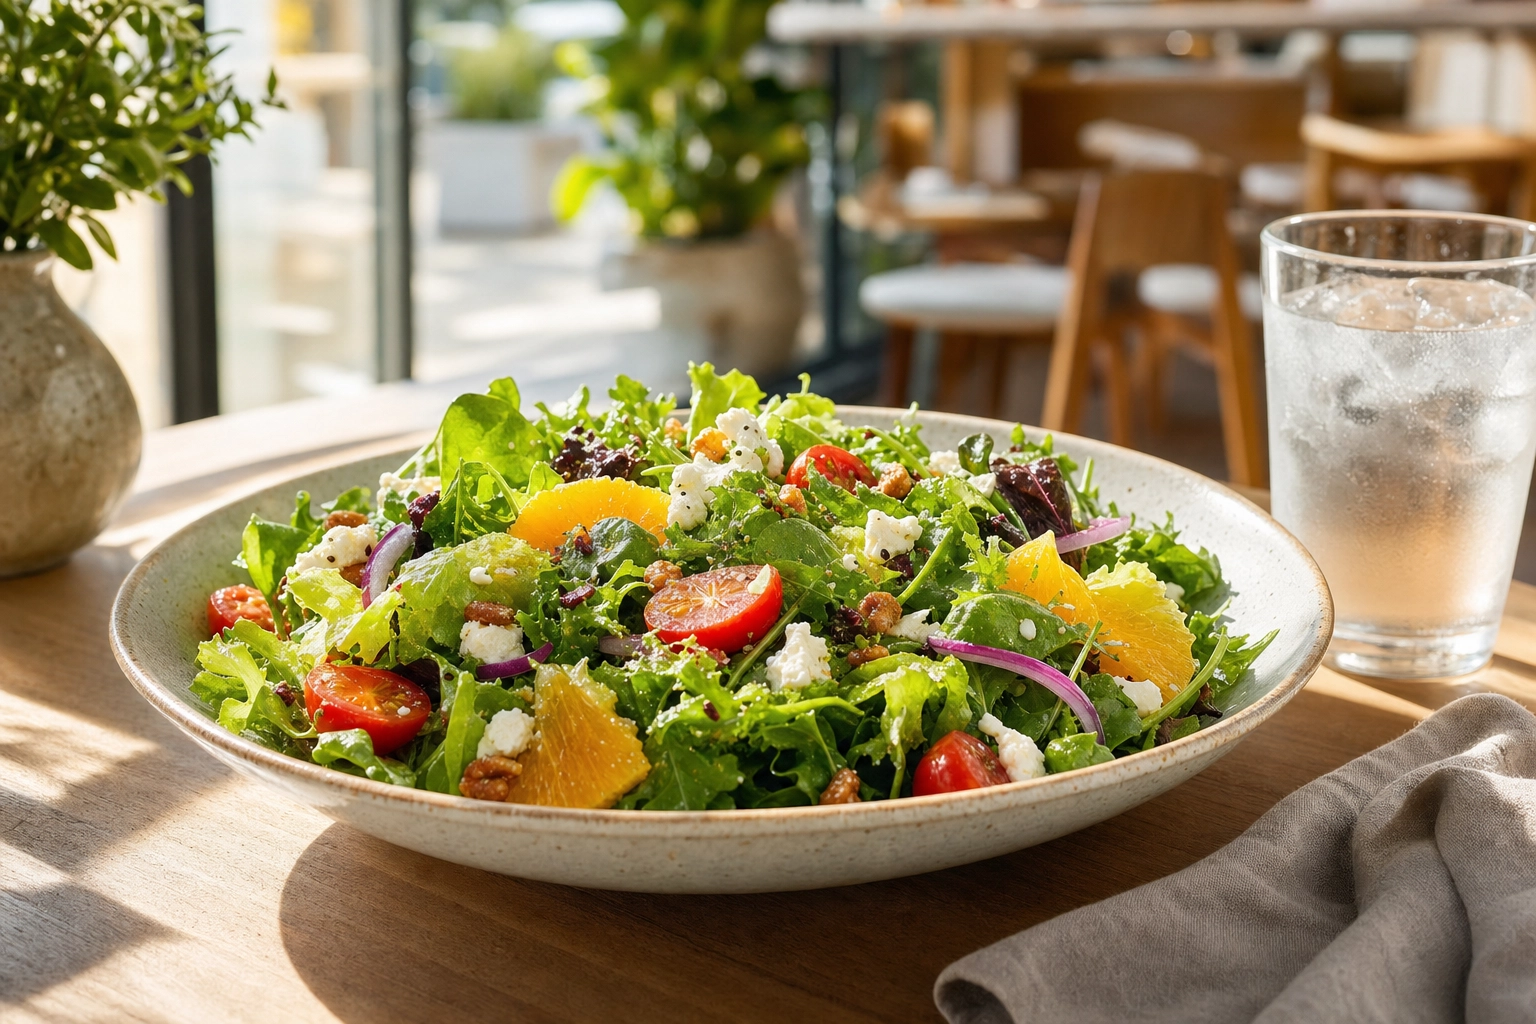 Menu-ready composed salad plated on a sunlit cafe table beside iced water, looking crisp, glossy and professionally styled
This is where AI food photography earns its keep. Upload a real photo of your actual salad and FoodShot AI restyles the shot into something menu-ready in about 90 seconds: it trues up the color so greens read green, relights the dish so the leaves look crisp and the dressing glistens, adds depth, and drops the bowl onto a clean cafe-style surface. From a single upload you can spin off variations — a bright overhead for Uber Eats and DoorDash, a moody 3/4 for the dinner menu, a punchy square for Instagram — all in one consistent brand look.
The cost math is the kicker. A traditional salad shoot means a photographer, a stylist, props, and a studio; what food photography really costs can run from several hundred to several thousand dollars per session. Online menus reward that visual polish, too — research on digital menus links stronger visual appeal to higher purchase intent (NIH). Doing it yourself with AI runs a fraction of the price, which is why so many cafés, restaurants, ghost kitchens, and packaged-salad brands now restyle their own salad photos in-house.
Your salad styling checklist
Keep this next to your camera for sharper salad photos:
- Source fresh. Pick your best produce, ice-water-bath the greens, and mist for dew.
- Prep for texture. Vary the cuts; reserve whole hero pieces and finishing touches.
- Build height. Shallow wide vessel, loose greens, a hidden lift, then mound, overlap, and break the rim.
- Place heroes last. Sculpt clear focal points and garnish with intention.
- Dress smart. Light toss or oil mist, selective drizzle, a pipette for control — and always dress last.
- Light it bright. Soft window light from the side or behind, with a reflector to fill.
- Add color. Warm pops against the green and a simple, complementary background.
- Shoot the four. Overhead, 3/4 hero, close-up, and a build or lifestyle frame — fast, before it wilts.
Frequently Asked Questions
How do you make a salad look good in photos?
Style it for the camera, not the table. Build height in a shallow, wide bowl so it isn't flat, dress it lightly and only where the camera looks, light it bright and slightly from behind so the leaves glow, and add a few warm-colored ingredients to break up all that green. Then shoot quickly, before the dressing wilts the greens.
Why do my salads look like a wet bowl of greens?
Usually three culprits: too much dressing (it makes leaves collapse and clump), a deep bowl (the high sides throw shadows and hide ingredients), and flat, dull light. Dress lightly and last, switch to a shallow wide vessel or a low-rim plate, and shoot in bright, soft light — that combination fixes the "wet greens" look almost every time.
What is the best angle to photograph a salad?
A 3/4 angle (about 30–45 degrees) is the most flattering for tossed and leafy salads because it shows off the height and layers. Shoot composed, chopped, and grain or poke bowls from directly overhead instead, since a flat-lay reveals the whole arrangement. Different salads suit different angles, so when in doubt, capture both and pick the stronger frame.
How do you keep salad fresh and crisp during a photo shoot?
Prep everything else first so the salad spends as little time under the lights as possible. Keep greens and herbs in ice water until the last moment, mist them with a fine spray for a dewy look, and have backup leaves ready to swap in. Always dress the salad as your final step, then shoot right away.
How do you photograph salad dressing without making it look soggy?
Use far less than you would to eat. Lightly toss the leaves in a little oil-based dressing — or simply mist them with oil — for a natural sheen, then add a selective drizzle only on the hero ingredients. A pipette or dropper lets you place each drip exactly where you want it, so the salad looks freshly dressed instead of drenched.
Can I create professional salad images without hiring a photographer?
Yes. Style and shoot your real salad on a phone using the tips above, then use an AI tool like FoodShot's food photo editor to relight it, true up the color, and generate clean, brand-consistent versions for your menu, delivery apps, and social — in about 90 seconds and at a fraction of the cost of a studio shoot.
Fresh, vibrant salad photos for your cafe or healthy brand
Salads sell on freshness, and freshness sells on the photo. Get the styling right — height, a light hand with dressing, bright light, and real color — and you'll have salad images that look as crisp and vibrant as the bowl tastes.
When you want that studio polish without the studio, FoodShot AI turns a quick phone photo of your salad into menu-ready images in seconds, with fresh, clean styles built for cafe menus and healthy concepts. Start free, upload one bowl, and watch your greens finally pop — your next round of AI salad photography is about ninety seconds away.
