Baking Photography: Capture the Art of Bakery Magic
There's a reason the slow stretch of a sourdough or the swirl of buttercream can stop your thumb mid-scroll. Baking is theater. Flour hangs in a shaft of morning light, hands press and fold a living dough, and then the oven door swings open and steam curls off a golden crust. Great baking photography doesn't just show the finished loaf — it captures the whole ritual. Think of it as food photography with an extra act: the process itself.
This guide covers it all: the five shots every baker needs, how to light a flour-dusted kitchen, how to style raw ingredients, and how to nail the trickiest moments — steam, airborne flour, and your own hands in the dough. Whether you're a home baker growing an Instagram, a recipe blogger, or a bakery owner who needs menu photos, these baking photography tips work at any skill level.
Quick Summary: Strong baking photography tells the full story — process and result. Shoot near a window with warm, raking side light to reveal crust and crumb texture, style raw ingredients like characters, and freeze motion (steam, flour dust, kneading hands) with a fast shutter against a dark background. Short on time? AI tools can turn one phone photo of your bake into studio-quality images in about 90 seconds.
Why baking photography hits different
Most food photography shows a plated dish at the finish line. Baking is special because the process is just as beautiful as the payoff. The pour of flour, the stretch of an enriched dough, the lattice woven over a pie — these are moments other cuisines simply don't have. Lean into them — your photos gain a story most food photos never tell.
There's a warmth to baking, too, and your images should feel it. Browse the r/Baking community and the same note comes up again and again: cool, bluish photos make a beautiful loaf look like a hardware-store prop, while warm tones make it feel fresh and worth eating. Bakes should look homey, not clinical.
For anyone who sells what they bake, those photos are a sales tool. Grubhub tells its restaurant partners that adding food photos can increase online orders by 30% or more, and surveys consistently find roughly 40% of diners will try a new place after seeing its food online. Research from Queen Mary University of London found that a simple picture beside a menu item measurably nudges what people order. If you run a bakery, learning AI food photography for bakeries — or how to shoot it yourself — pays for itself fast.
The 5 baking shots every baker needs
Before you preheat the oven, plan your shot list. These five images are the backbone of good baking photography. Captured in sequence, they hand you content for a blog post, a menu, or a week of social posts.
1. The finished-bake hero
The money shot: the glossy, perfectly styled portrait of the finished bake — golden crust, glistening glaze, a clean plate. Shoot it at a 45-degree angle to show height and dimension, or drop to eye level for a dramatic, scroll-stopping look. For anything with layers or crumb, get in close and macro the cross-section.
2. The in-progress process shot
Hands kneading. A whisk lifting ribbons of batter. A piping bag laying down a swirl. Caught mid-motion, these shots prove a human made this, by hand, with care — exactly the authenticity audiences crave.
3. The ingredient flat-lay
Shoot straight down on your mise en place: a mound of flour, cracked eggs, cubed butter, a bowl of sugar, a couple of measuring spoons. It sets the scene and makes a perfect opening image for a recipe.
4. The oven-fresh steam shot
Steam is the universal signal for fresh, warm, eat me now. It's also the hardest shot in baking — the wisps vanish in seconds. Nail it and the photo radiates heat.
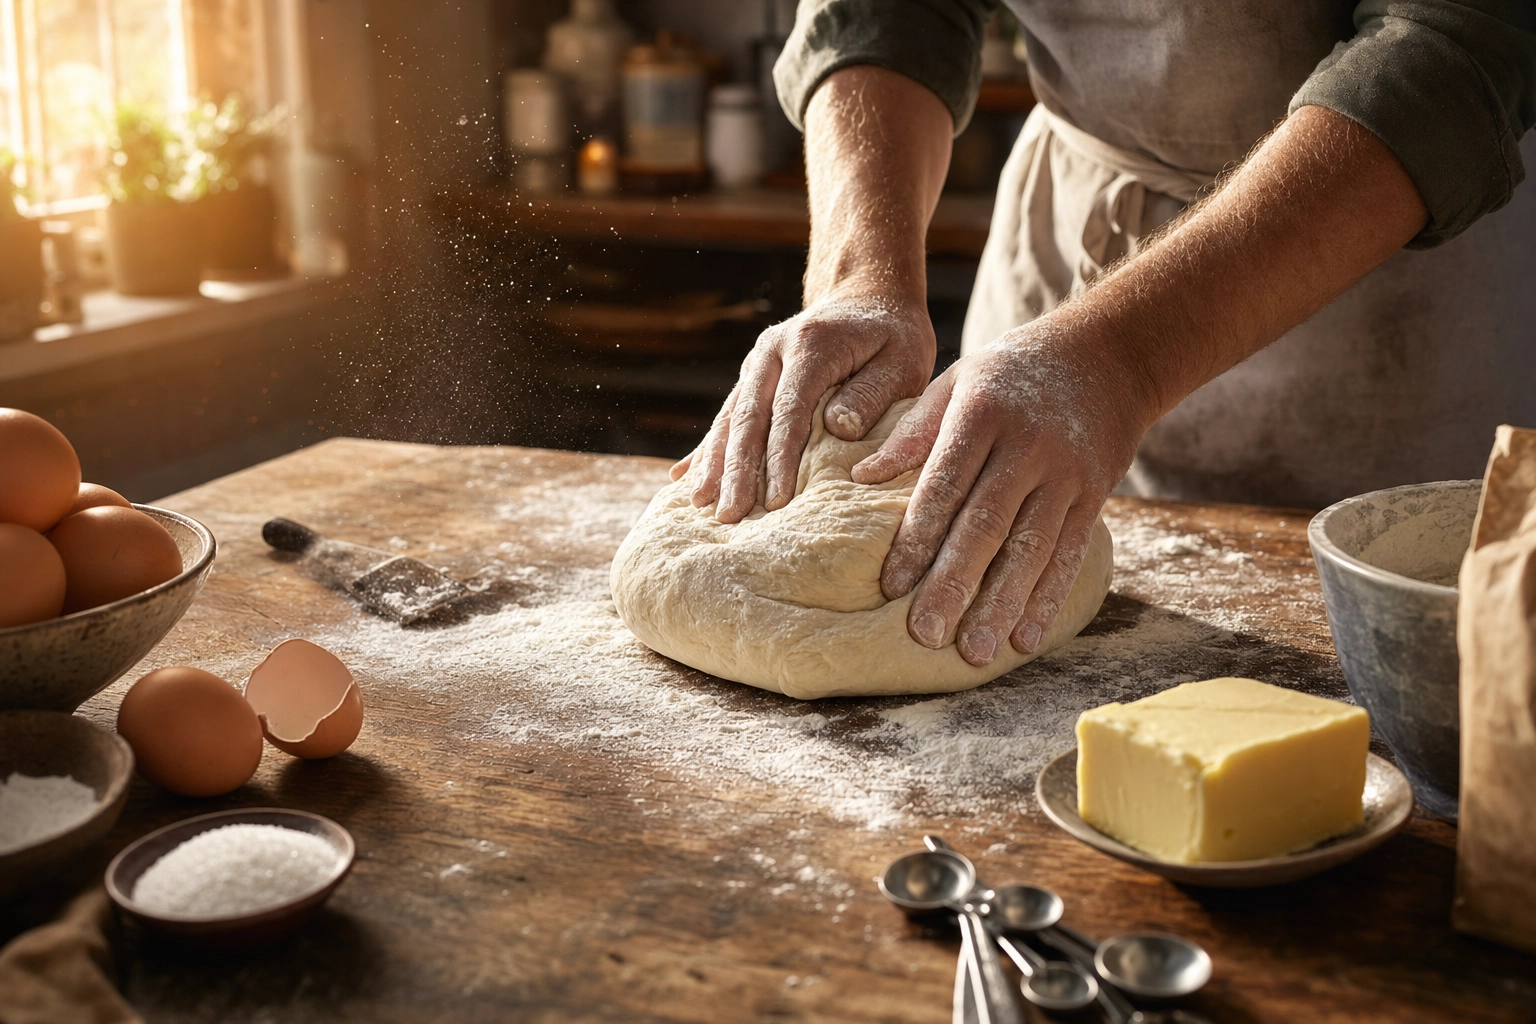
5. The hands-in-action shot
A dusting of flour mid-toss, fingers crimping a crust, a knife slicing into a warm loaf. Slightly messy, flour-dusted hands read as genuine — far more inviting than a too-perfect setup.
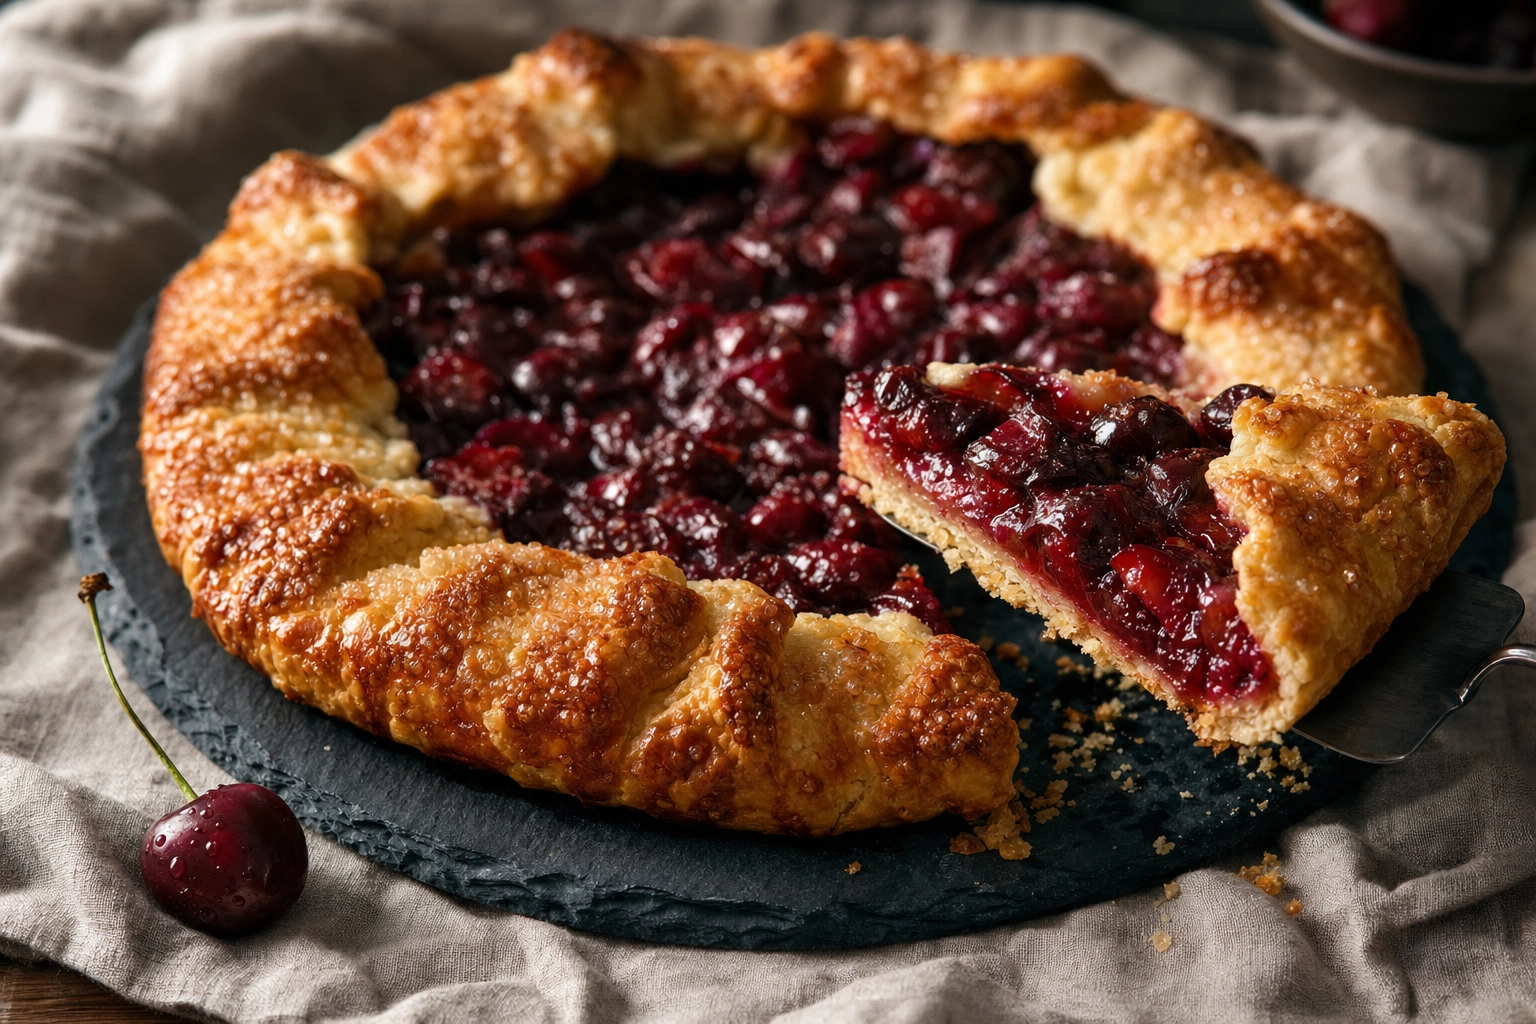 Macro of a flaky fruit galette with a slice lifted to reveal glossy cherry filling on slate
Lighting a baking scene (window light, warm tone, flour dust)
Light is 80% of the photo. Get it right and even a phone snap looks professional; get it wrong and a beautiful cake falls flat. Here are the lighting tips that matter most.
Use the window. Soft, natural light from a window is the most flattering and forgiving light there is. Set up a foot or two from the glass and shoot in early morning or on a bright overcast day. If the sun is harsh and direct, diffuse it — a sheer white curtain, a bedsheet, or an inexpensive scrim turns hard light into a soft, even glow.
Go side, not flat. Position the light to the side of your bake rather than behind you. Side light rakes across the surface and reveals everything that makes baked goods irresistible: the crackle of a crust, the open holes of a sourdough crumb, the sparkle of sugar crystals. Front-on light flattens all of it. A trick borrowed from food photographers: light from camera-left, since the eye travels left to right across a frame.
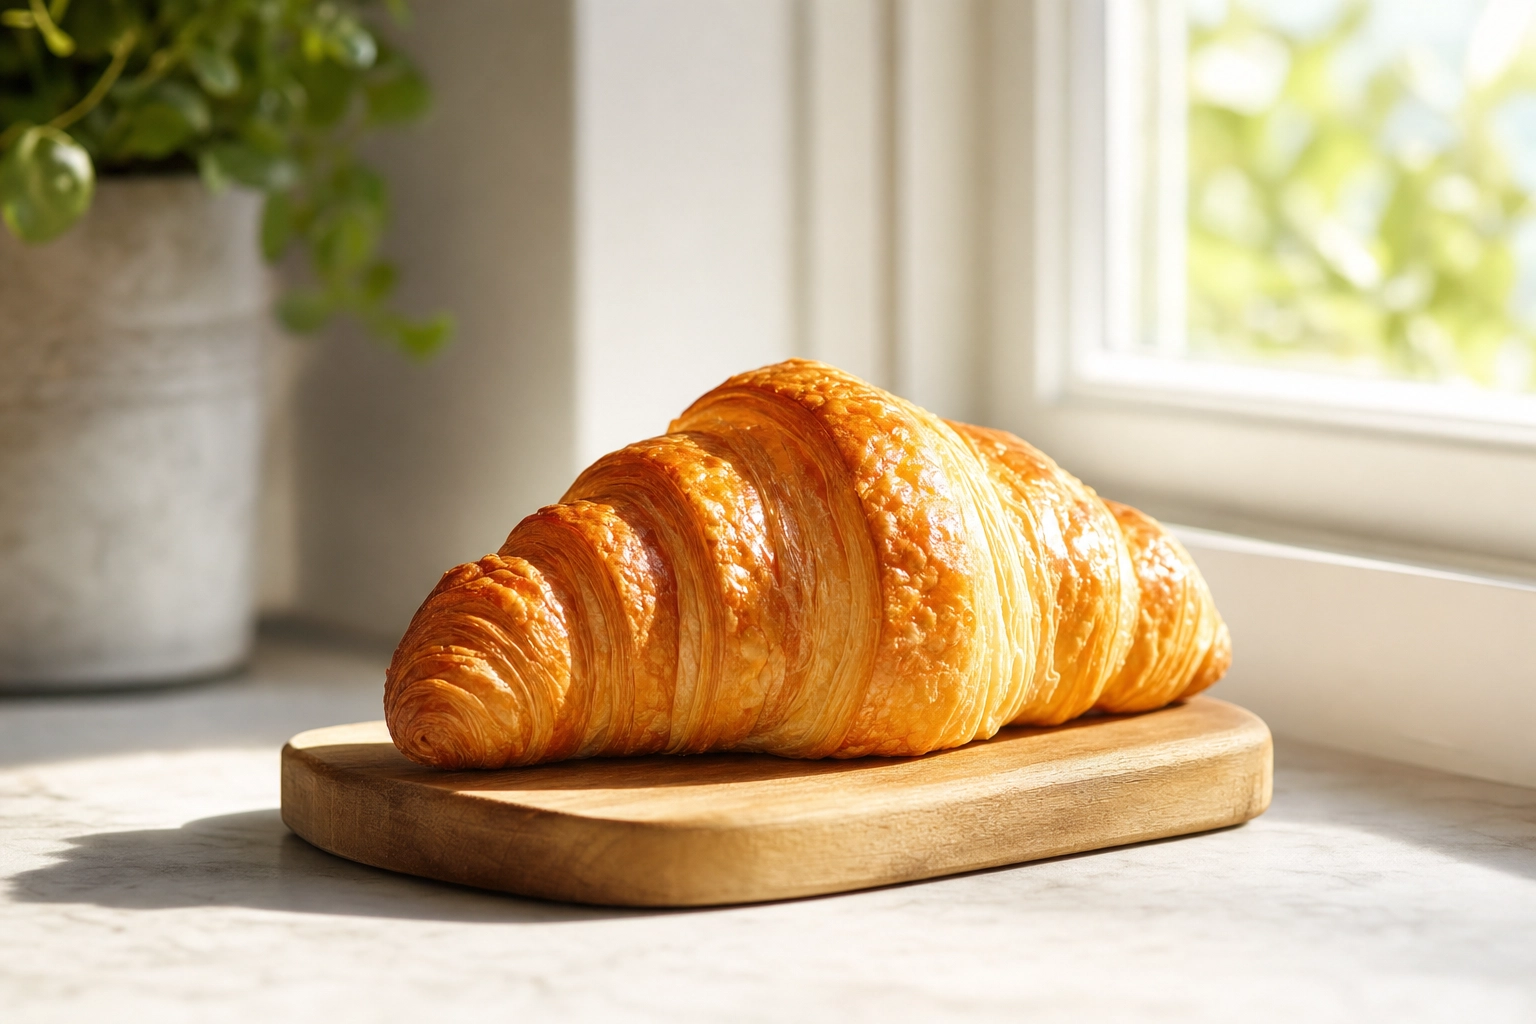 Golden flaky croissant by a bright window with raking side light revealing its layers
Keep it warm. Nudge your white balance toward warm. Baked goods live in the golden-brown family, and a slightly amber tone makes them feel cozy and fresh. Cool, blue-tinted photos are the single biggest reason home bakes look unappetizing.
Catch the flour dust. Want that magazine shot of flour suspended in a sunbeam? Put a darker background behind the action and let light come from behind or to the side so the particles glow against the shadow. (Exact settings to freeze it sharply are in the FAQ.)
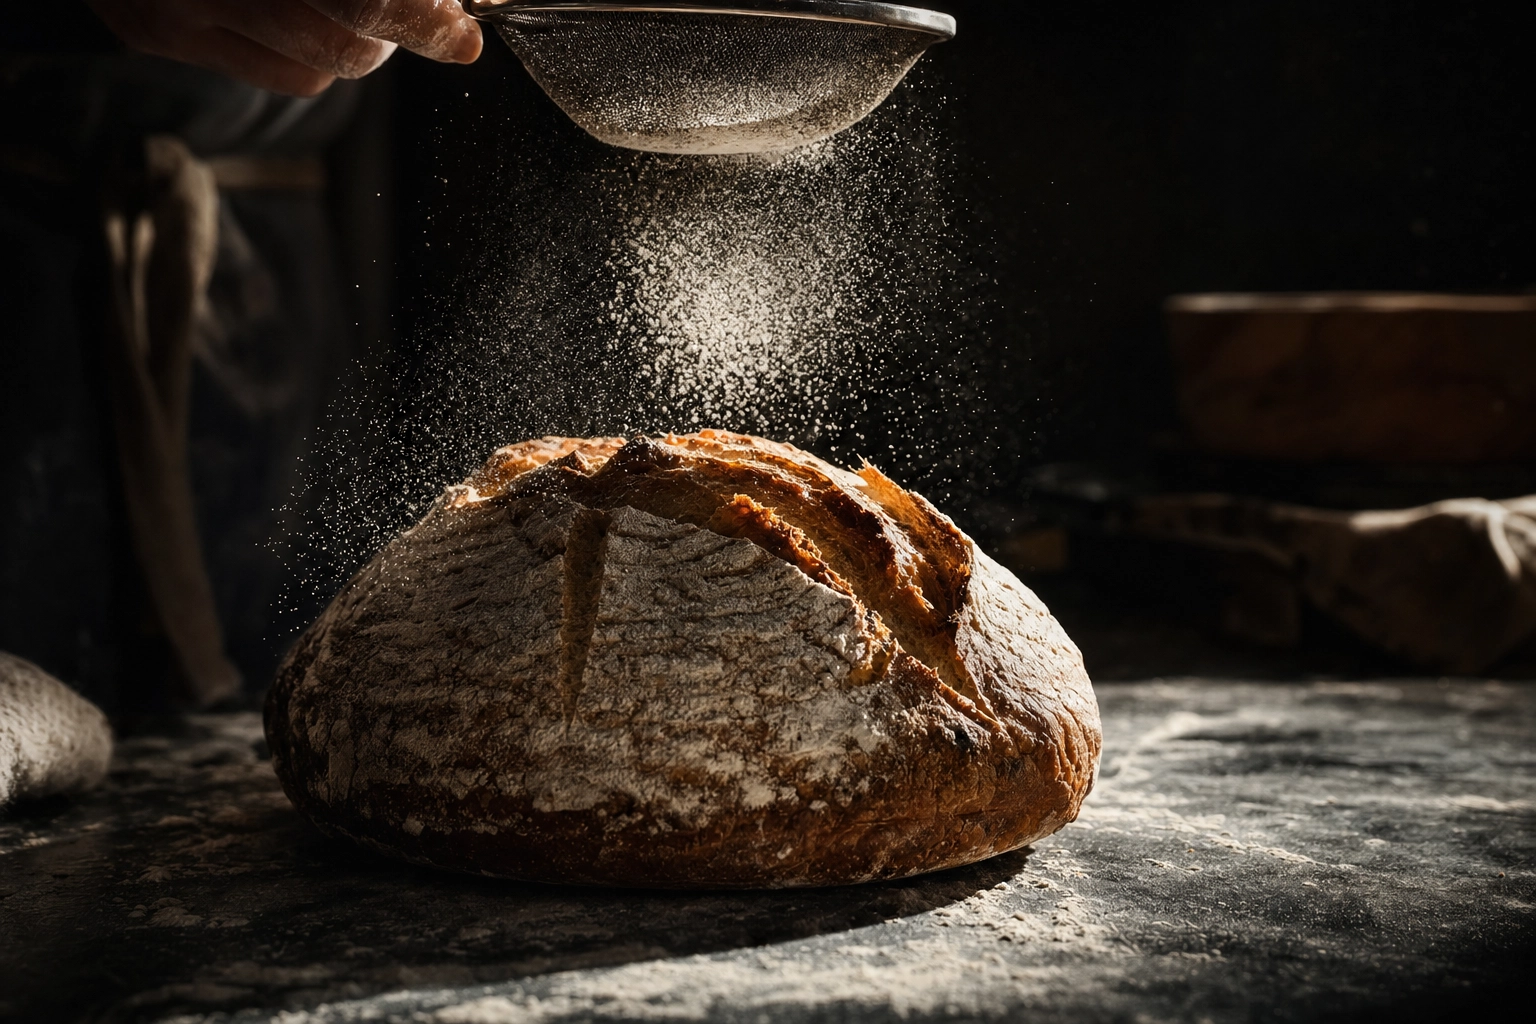 Flour cloud sifted over an artisan loaf glowing in a backlit beam against a dark background
Styling the ingredients: flour, eggs, butter, sugar
Raw ingredients are characters in your story, so cast them well. A few styling tips turn a cluttered counter into a deliberate, beautiful scene.
Arrange with purpose. Group ingredients in small bowls and let a few spill naturally — a cracked egg, a scoop of flour, a curl of butter. Odd numbers and a loose triangle composition feel more natural than a rigid grid.
Play with contrast. Baking ingredients are a color-and-texture gift: snow-white flour against dark wood, golden butter beside brown sugar, glossy yolks in a ceramic bowl. Lean into those contrasts and the flat-lay does the work for you.
Dust flour the right way. Here's the mistake nearly every beginner makes — dumping flour on the finished loaf to look "artisan." It reads as raw and unbaked. Instead, sift a light dusting onto the board or surface around the bake, through a fine sieve, with a gentle hand. It signals handmade craft without burying your crust.
Choose props that whisper "bakery." A wooden cutting board, a slab of marble, a linen tea towel, a wire cooling rack (which instantly says just baked), a vintage ceramic mixing bowl. Keep the palette warm and rustic and your scene feels like a real kitchen, not a stock photo.
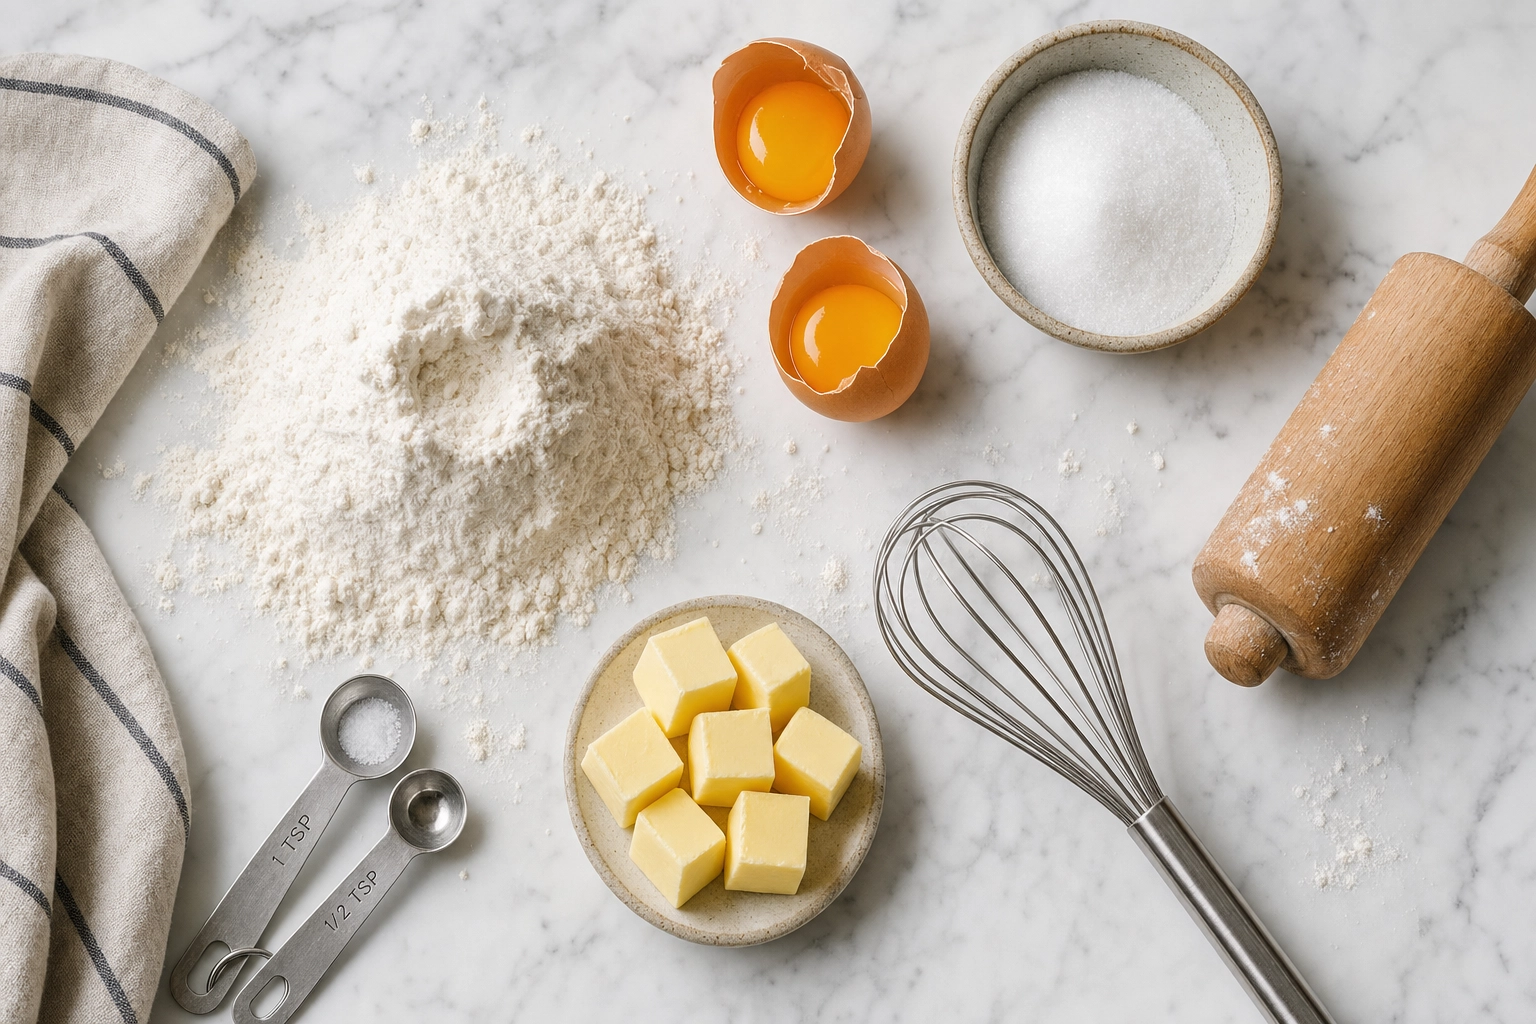 Overhead flat-lay of flour, cracked eggs, butter cubes, sugar and a whisk on white marble
Shooting the process, step by step
This is where baking photography pulls ahead of every other food genre. Document the whole arc and you'll have a dozen images from a single bake.
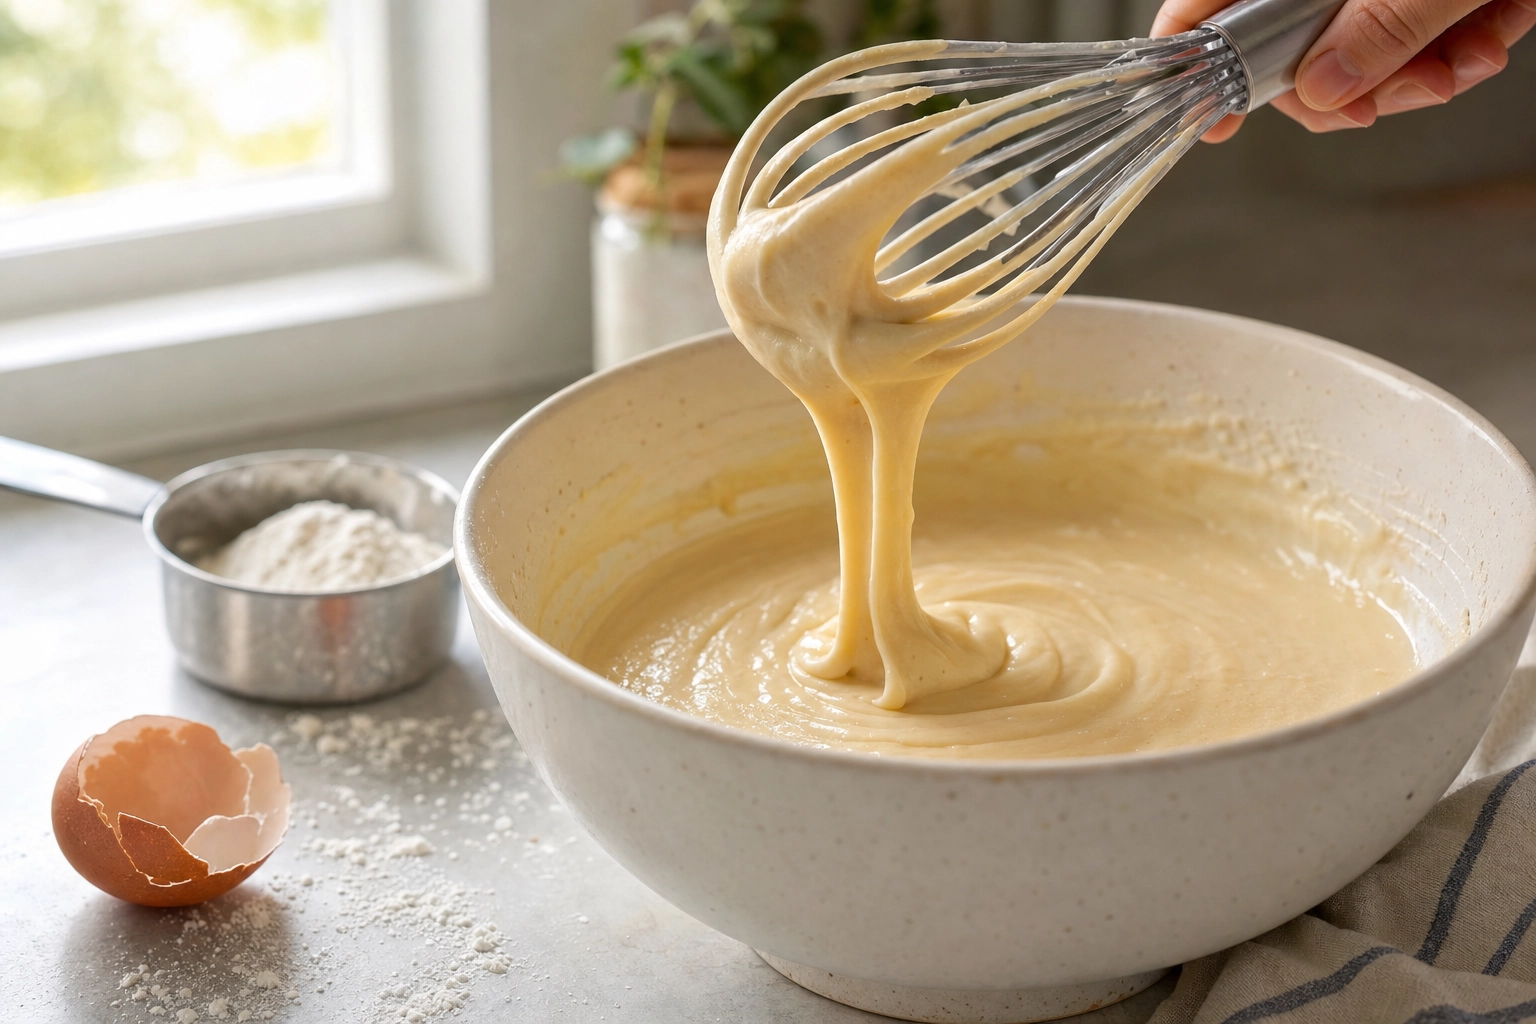 Whisk lifting glossy ribbons of pale cake batter from a ceramic mixing bowl in soft light
Work through the stages and shoot each one:
- The mixing bowl — batter folding over itself, a whisk lifting peaks, dry meeting wet.
- Dough rising — a before-and-after of dough doubling in a bowl; even a simple two-frame comparison is satisfying.
- Shaping and the sheet pan — rows of cookie-dough balls, a shaped boule, croissants lined up before the oven.
- The oven moment — the door swinging open on a tray of golden bakes, steam and heat-haze rolling out. This is your hero process shot.
- Decorating in action — piping buttercream, glazing a tart, scattering sprinkles, dusting powdered sugar.
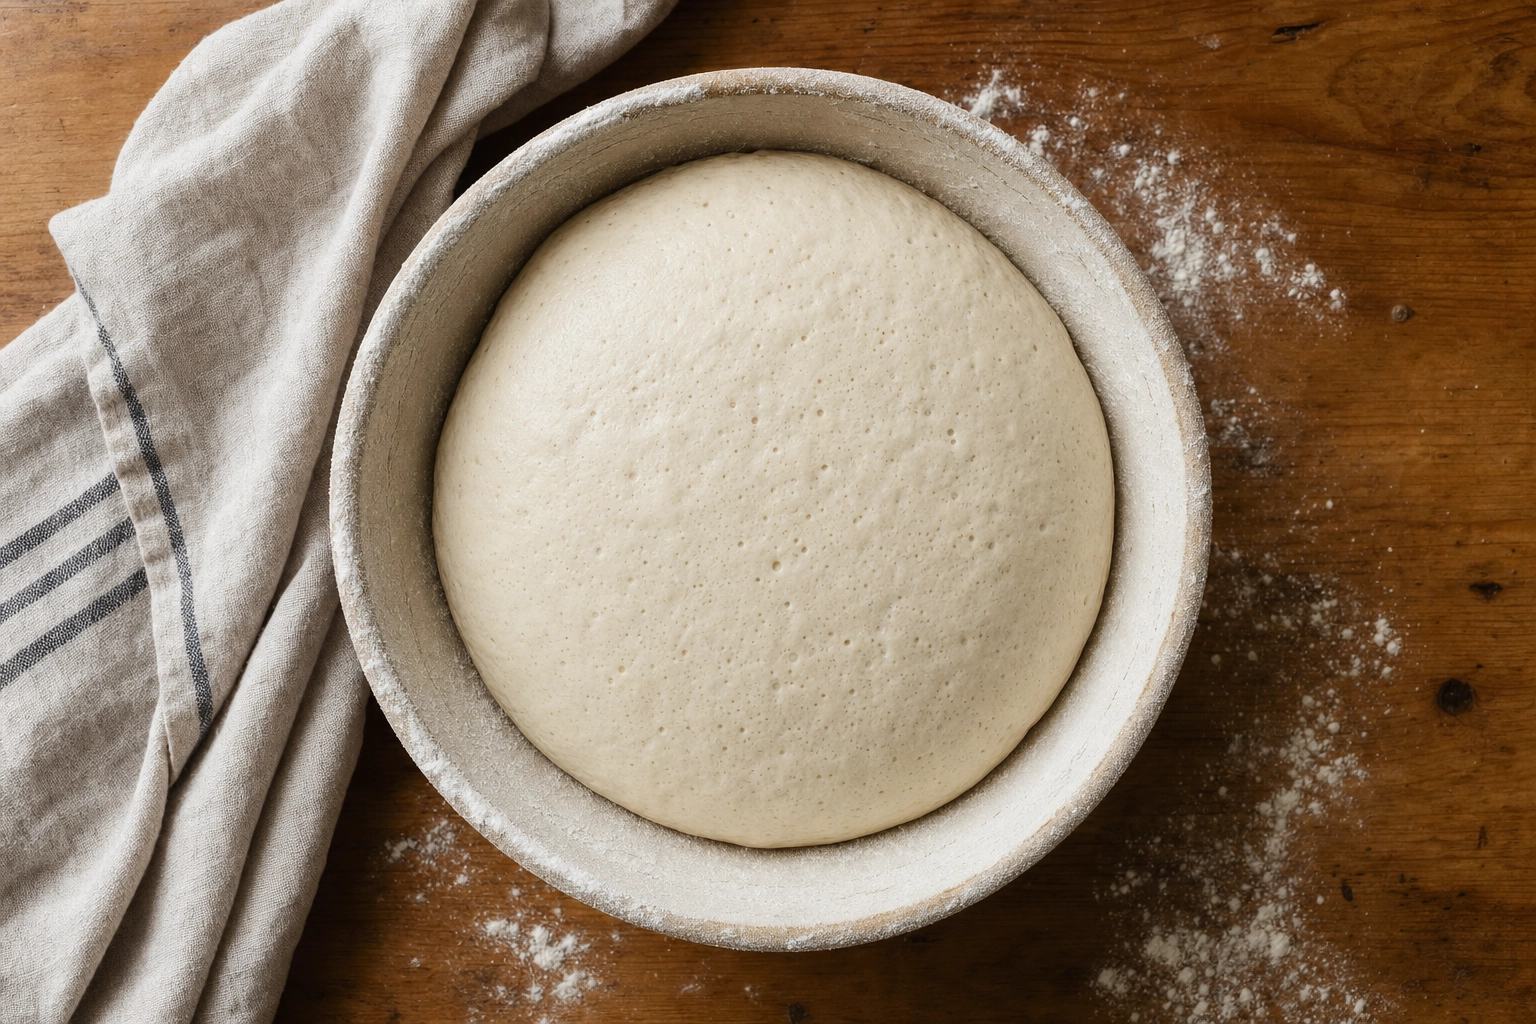 Overhead of risen sourdough dough proofing in a flour-dusted bowl on a wooden counter
Free your hands. You can't knead and shoot at once, so mount your camera (or phone) on a tripod and trigger it with a wireless remote or a 2–3 second self-timer to keep both hands in the dough. A tip from working food photographers: wrap the remote in a small plastic bag so floury, buttery fingers don't gum it up.
Set up the finish first. The single best habit in baking photography is to build and pre-focus your final hero shot before the bake comes out of the oven. Baked goods peak in the first 60 seconds — bread caves and loses its "loaf-y" dome as it cools, and glaze or frosting dulls within about five minutes. Have everything ready so you can place the bake and fire instantly.
Vary your angles. Don't shoot every step from the same spot or the series feels static. Go overhead for flat-lays, 45 degrees for action, eye level for the hero, and shoot in burst during motion to catch the frame where the dough stretches just right.
 Mitted hands pulling a golden artisan loaf with billowing steam from a glowing warm oven
Finished-bake hero shots, bake by bake
Every bake has a signature angle and a styling cue that makes it sing. Here's the cheat sheet — each links to a deeper guide.
Bread and loaves
Show the crust texture and, if you slice it, the open crumb in cross-section. A fresh-from-oven loaf with visible steam on a flour-dusted board is the gold standard. Our full bread photography guide digs into scoring, crumb, and steam.
Cookies
Stack them three or four high to show thickness, snap one in half for a gooey center or a chocolate pull, and scatter a few crumbs for life. Warm, close, and slightly messy wins — see the cookie photography guide for setups.
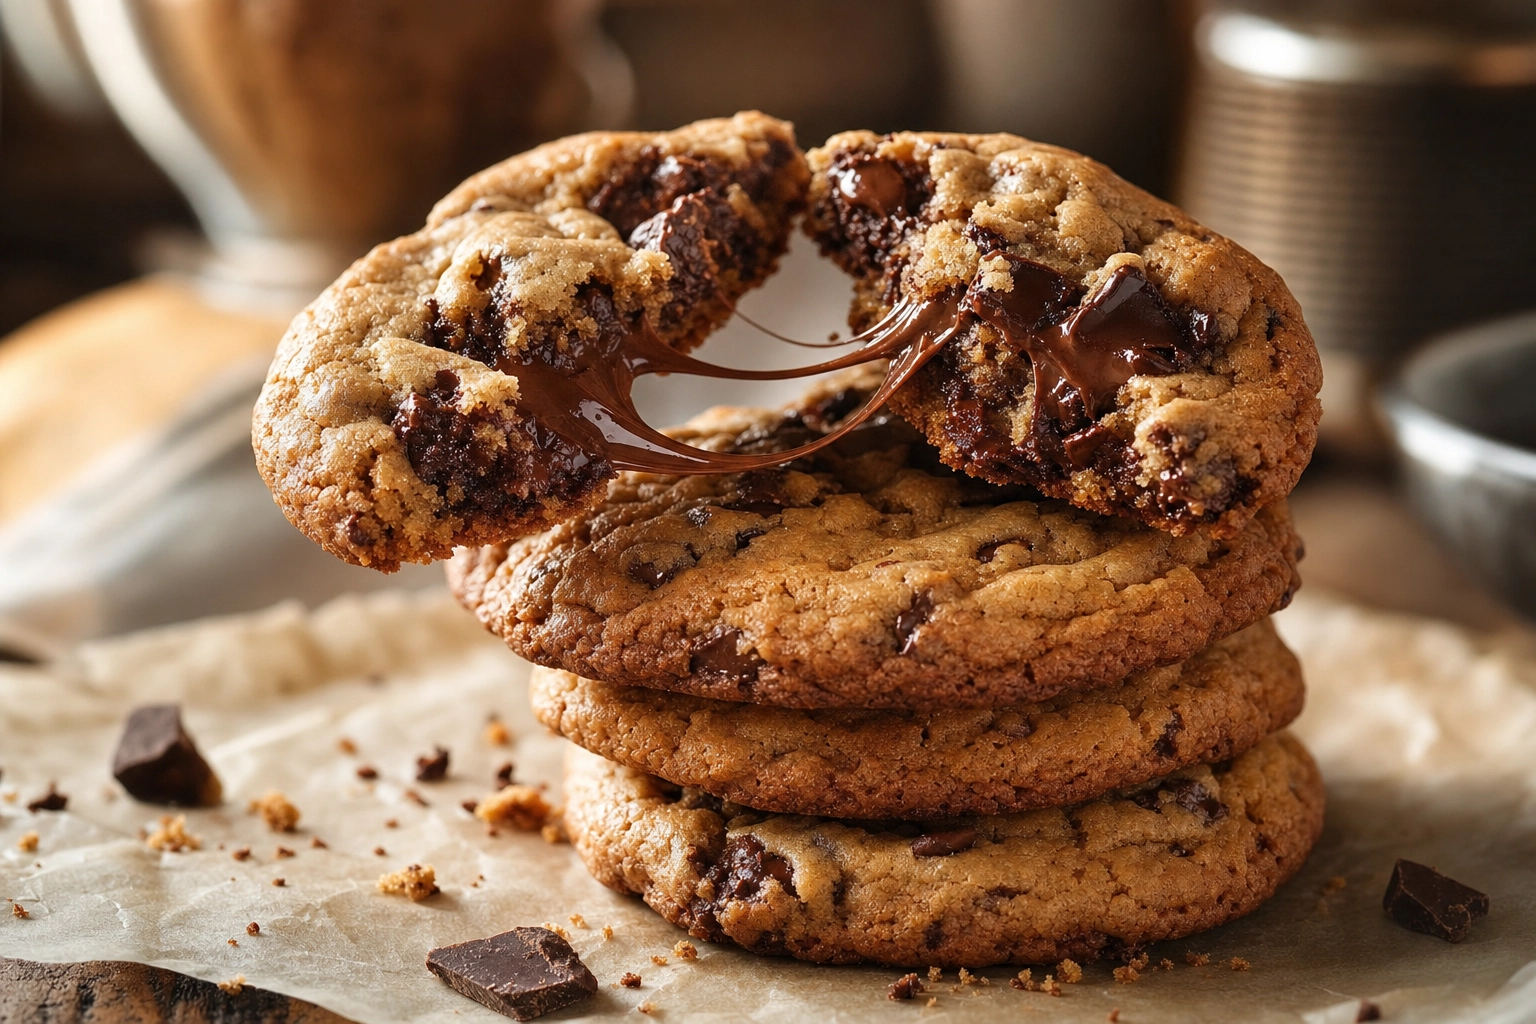 Stack of chocolate chip cookies with the top one broken to show a gooey chocolate pull
Cakes and cupcakes
Slice a layer cake and shoot the cross-section so the layers read instantly. For frosting, catch the swirl and texture with side light, then add a sprinkle or a drip for movement. The cake photography and cupcake photography guides go deeper on angles and styling.
Pies, tarts, and pastries
Lattice tops, glossy fruit fillings, and flaky, shattering layers are the heroes here — a slice pulled to reveal the filling sells the whole pie. Glazed donut photography and powdered-sugar pastries follow the same rules; our dessert photography guide covers the lot.
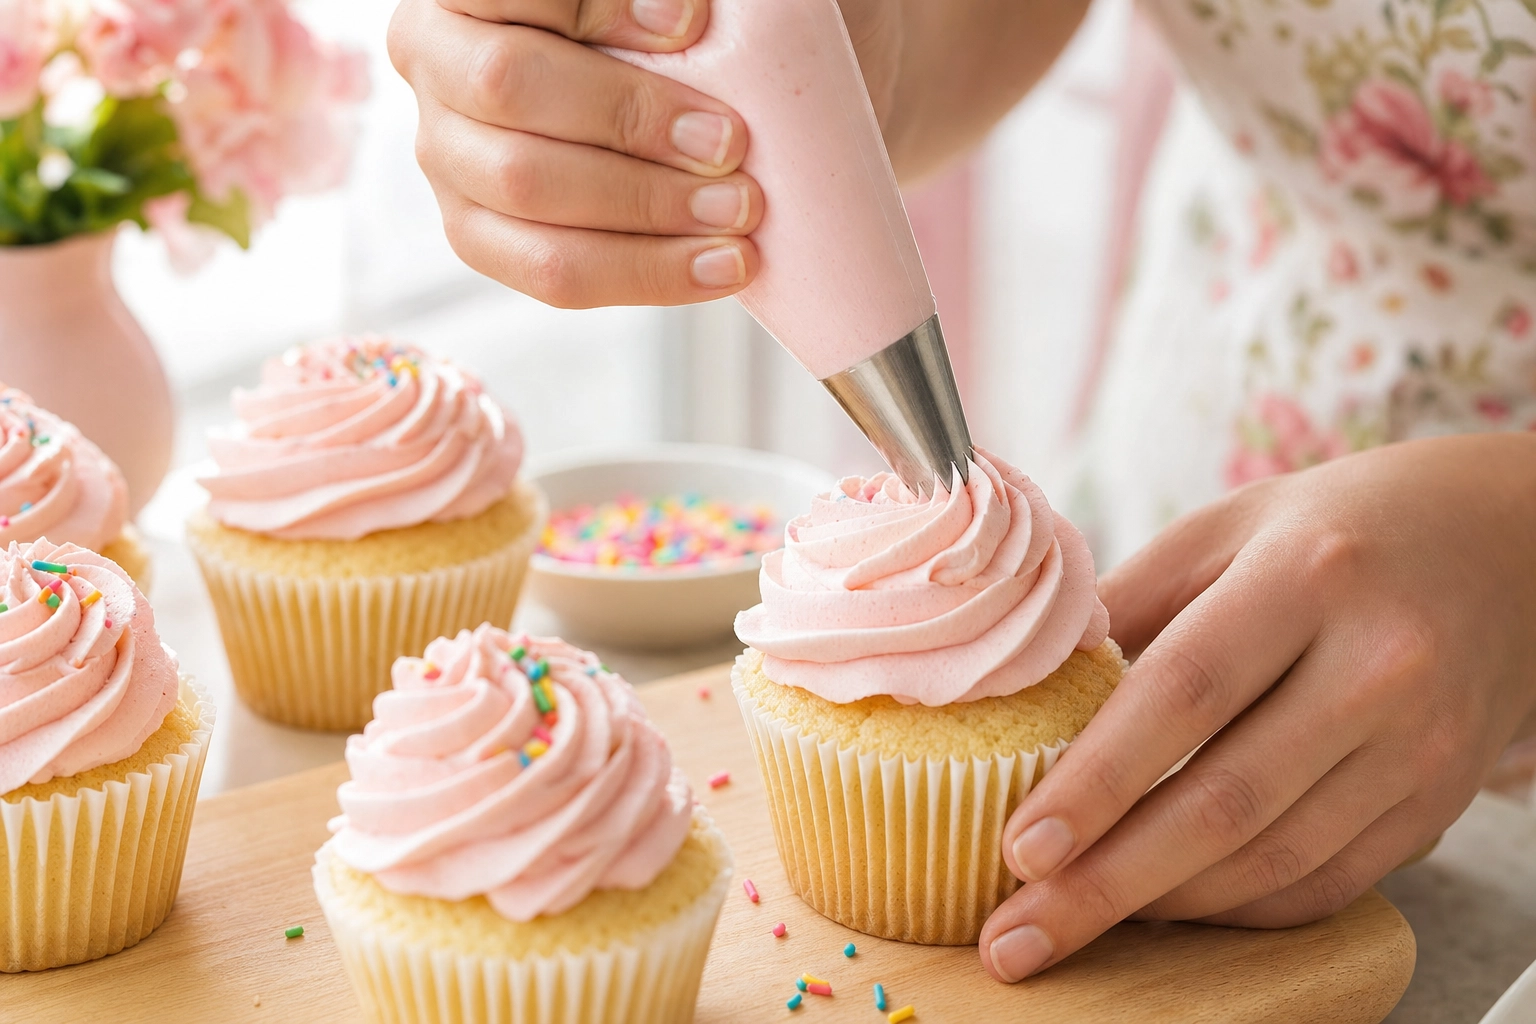 Hands piping a swirl of pink buttercream onto a cupcake among finished frosted cupcakes
Cookbook vs. blog vs. Instagram vs. commercial
The same bake gets photographed very differently depending on where it will live. Know the destination before you shoot.
Cookbook. Clean, consistent, and instructional. Cookbook photography favors steady overhead or 45-degree angles, neutral backgrounds, even lighting, and deliberate negative space where text and captions sit. Consistency across every recipe matters more than any single dramatic frame.
Recipe blog. This is process storytelling's home turf. Readers want to follow along, so step-by-step shots, a relatable kitchen, and a warm lifestyle feel build trust and keep people scrolling to your recipe card. If that's your goal, our guide on how to become a food blogger pairs perfectly with this one.
Instagram and social. Scroll-stopping is the only metric that counts. Shoot vertical (4:5 or 9:16), go bold and bright, and lead with one irresistible hero — a chocolate pull, a cut cake, a steaming loaf. A little movement (a drizzle, a dusting) earns extra engagement.
Commercial and menu. Now it's about selling. Commercial food photography needs to look appetizing and accurate, stay on-brand, and — critically — stay consistent across your entire menu so the lineup feels cohesive. This is exactly where many bakeries struggle: shooting 30 items in one uniform style is genuinely hard with a camera alone.
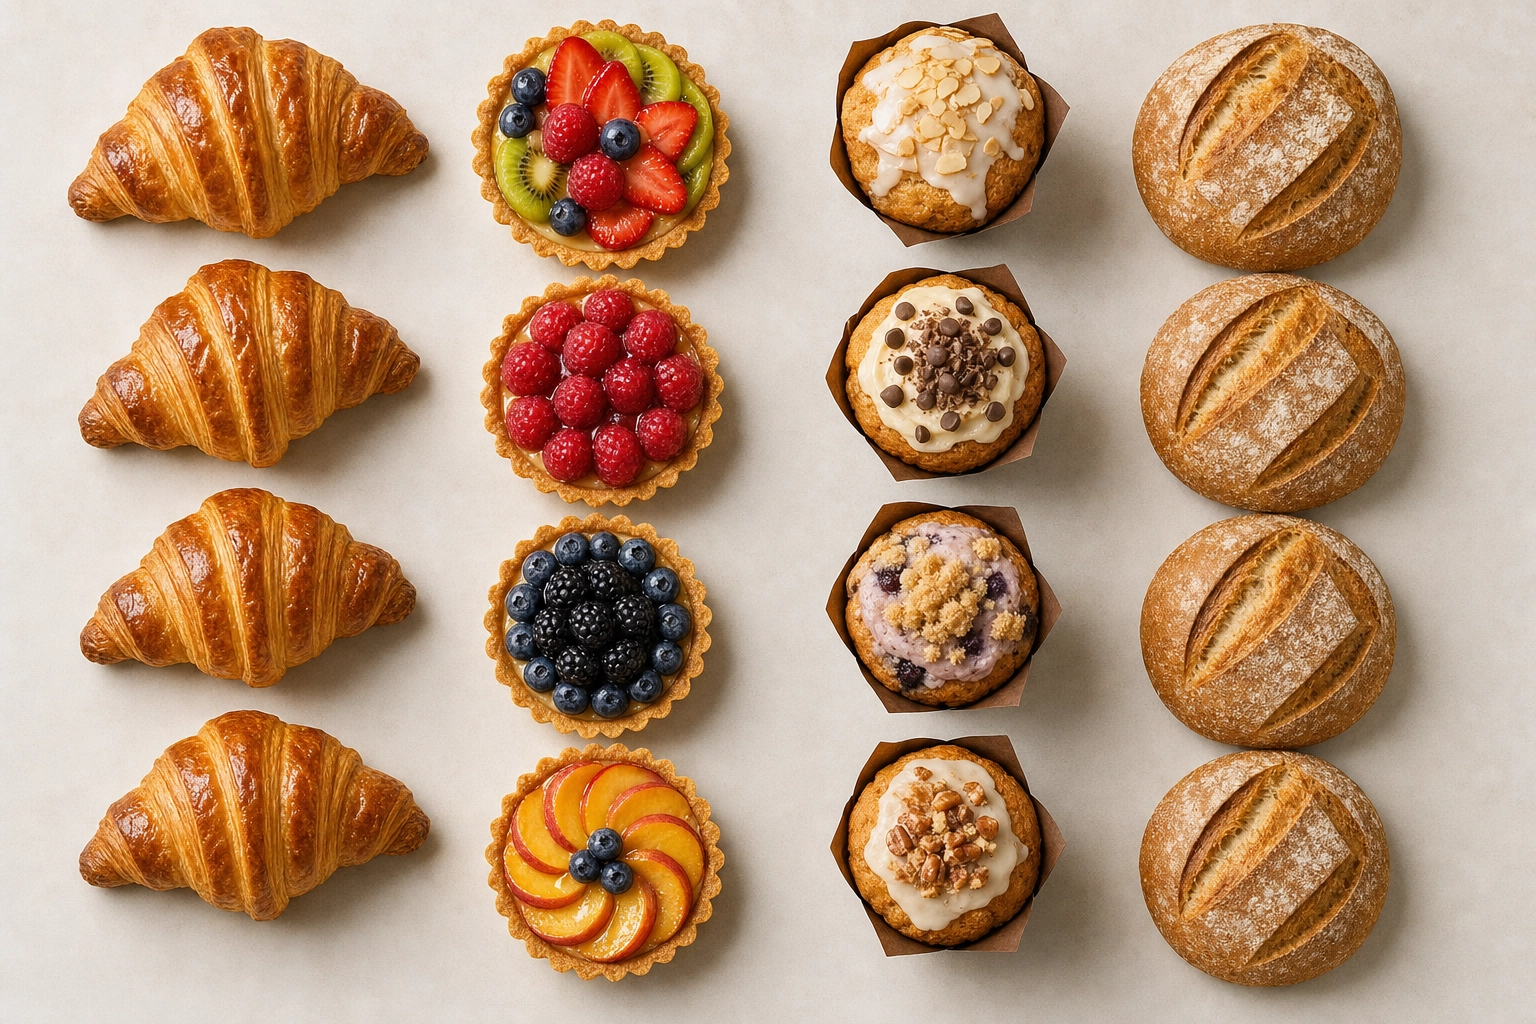 Overhead grid of croissants, fruit tarts, muffins and a loaf styled for a consistent bakery menu
The 90-second shortcut: AI baking photography
The honest truth: not every baker has time to set up a tripod, chase the light, and style a full shoot — especially at 5 a.m. with a wholesale order due. That's the gap AI fills.
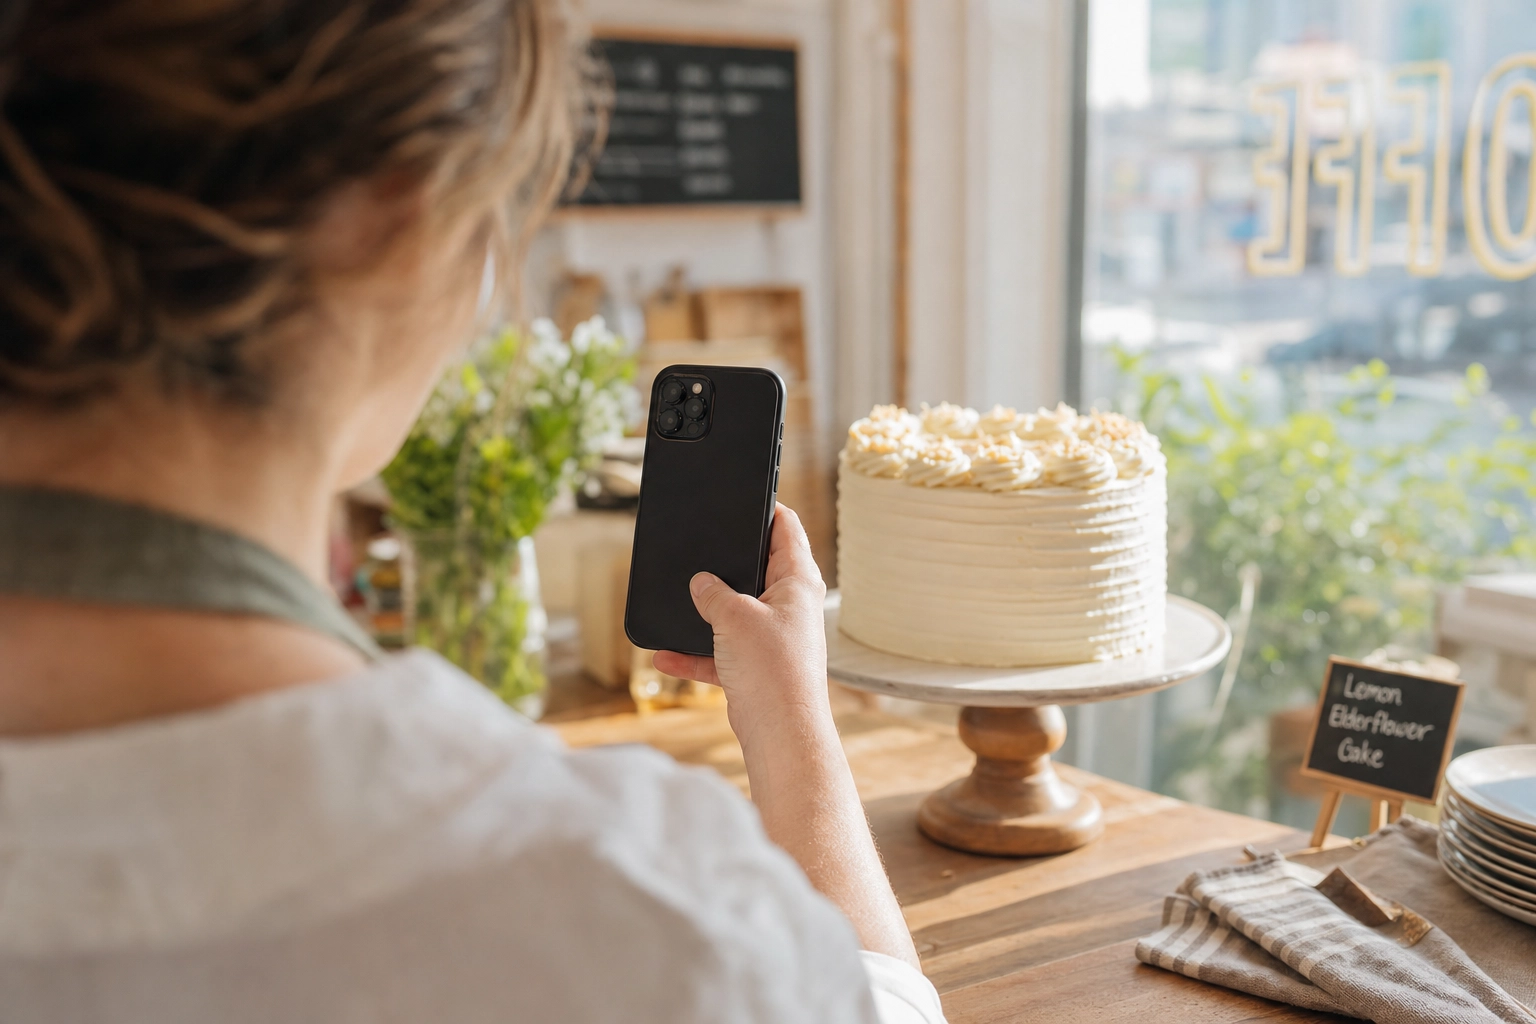 Baker photographing a frosted layer cake with a smartphone on a sunlit bakery counter
With an AI food photo editor like FoodShot, you snap a normal photo of your real bake on your phone, upload it, and get studio-quality, menu-ready images back in about 90 seconds. It isn't inventing fictional food — you photograph the actual croissant or cake you made, and the AI handles the lighting, background, and polish you'd otherwise need a studio for. (It works on real photos only, and it's built for food, not video.)
For bakeries, the killer feature is consistency. Builder Mode lets you combine backgrounds, surfaces, and styles, and you can upload your own brand reference photos so every product — from sourdough to celebration cakes — shares one cohesive look across your menu and delivery apps. Outputs come in 4K with a commercial license on paid plans. Explore the full toolset on the AI food photography page, and plans start at just a few dollars a month — see pricing.
It won't replace the joy of a slow, well-lit shoot. But when you need bakery-perfect photos right now, it's the fastest path from oven to feed.
Frequently Asked Questions
How do I photograph flour in the air without it looking blurry?
Two things make airborne flour read sharp: light and shutter speed. Backlight the flour against a dark background so each particle glows, then freeze the motion with a fast shutter — start around 1/250 and push to 1/1000 or faster for crisp, defined specks (slower speeds like 1/80 give a softer, blurrier cloud). Sift or toss the flour from above, shoot in burst mode, and pick the best frame. If you use a flash, the very short flash duration does the freezing for you, so shutter speed matters less — it's the same backlight-plus-flash combination professional powder-dance photographers rely on.
How do I capture steam rising from fresh-baked bread?
Steam only shows up against a dark background with light coming from the side or behind it — backlight is what makes the wisps visible. The catch is timing: steam from a fresh loaf fades within seconds, so set up, pre-focus, and fire the moment it leaves the oven, shooting a quick burst. If the natural steam isn't enough, food stylists cheat it — tuck a small handheld steamer, or a microwaved damp cotton ball or cloth, just out of frame behind the bake to send up a fresh plume. Keep your shutter around 1/250 or faster so the wisps stay defined.
How do I photograph hands kneading dough when I'm baking alone?
Put the camera on a tripod and trigger it hands-free with a wireless remote or a 2–3 second self-timer, so both hands stay in the dough. Wrap the remote in a small plastic bag to keep flour and butter off it. Light from the side to show the texture of the flour and the sheen of the dough, focus on the spot where your hands will be, and shoot in burst mode as you knead, stretch, and fold — then choose the frame where the motion looks best.
Do I need a professional camera, or will my phone work for baking photos?
Your phone is more than enough to start. Modern smartphone cameras shoot beautiful baking photos in good light, and technique — lighting, styling, angle, timing — matters far more than gear. Nail the window light and a warm tone and a phone snap can look genuinely professional; good light helps far more than an expensive lens. And if a photo is close but not quite menu-ready, an AI food photo editor can finish the job, turning a clean phone shot into a polished, studio-grade image in seconds.
Ready to make every bake look as good as it tastes? Turn your next phone photo into bakery-perfect, menu-ready photography in about 90 seconds with FoodShot AI.
