Breakfast Photography: Eggs, Pancakes & Brunch Made Beautiful
It's 9:40 on a Saturday morning. The brunch rush is twenty minutes out, the kitchen just slid a plate across the pass, and the light through the front window is the best it'll be all day. You've got about ninety seconds before that plate goes cold and the next ticket lands. That overlap — good light, hot food, a free hand — is exactly where great breakfast photography happens.
This guide is for the people working the morning: diner owners, brunch-spot operators, cafe managers, hotel breakfast teams, and breakfast brands who need photos that feel like a slow weekend even when the kitchen is slammed. No studio, no food stylist, no afternoon to spare — just a phone, a window, and a repeatable system for shooting eggs, pancakes, and the whole spread.
Quick Summary: Great breakfast photography comes down to three moments — soft morning window light, a glossy runny yolk caught at its peak, and a slow syrup pour — captured at the right angle before the food cools. Nail five repeatable hero shots on a phone, then polish them to menu-ready quality in seconds.
Why breakfast photography is its own thing
Breakfast sells a feeling no other meal can. Lunch is fuel and dinner is occasion, but breakfast — and especially brunch — sells warmth, comfort, and abundance: the slow weekend, the second cup of coffee, the table nobody's in a hurry to clear. Capture that and you make someone hungry at 9 a.m. and again at 9 p.m.
Three things make breakfast food unusually photogenic:
- Soft morning light. Breakfast is served when the sun is low and the light is naturally gentle — the exact quality professional photographers chase all day.
- The gloss of a yolk. A runny yolk is liquid gold. It catches light, it moves, and it triggers an almost universal craving.
- Built-in motion. Syrup pouring over pancakes, butter melting into a waffle, steam off a fresh cup — breakfast is full of moments, and moments stop the scroll.
Commercially, it's the meal most worth shooting well. Brunch carries high margins and is the most shareable service on social media — a bright, glossy plate reads as "drive across town for this" where a dim one reads as "sad cafeteria." Same eggs, different revenue.
The 5 breakfast shots every morning menu needs
You don't need forty images. You need five repeatable hero shots that cover your menu, your delivery listings, and your social grid. Nail the composition on these and you've handled roughly 90% of what a cafe, diner, or hotel breakfast program actually uses.
1. The hero plate (the full breakfast)
The menu workhorse: the complete plate, shot at 45 degrees or true overhead (90°). Use 45° when the plate has height — stacked toast, sausage links, a piled hash. Switch to overhead when it's flat and busy, like a full English with everything fanned out. Keep one clear hero element (usually the eggs), wipe the rim, add garnish last, and keep the background clean so the plate stays the hero.
2. The egg yolk break
 Close-up of a fork breaking a runny egg yolk spilling golden over toasted sourdough, backlit to glow
The most appetite-driving image in all of breakfast food photography is a runny yolk mid-flow. Shoot it close and low — macro or near-macro — with light from the side or behind so the yolk glows instead of going flat. The catch: the peak-yolk window is short. Set up the frame, lock focus on the yolk, then break it and shoot a burst. You can't un-break an egg.
3. The pancake stack and the syrup pour
Shoot pancakes and waffles at eye level or slightly low to show the height of the stack and the cascade of syrup. A pat of butter on the crown, start the pour, let it run down the sides into a small pool, and backlight it so the syrup glows amber. (Full technique below — it earns its own section.)
4. The coffee-and-breakfast scene
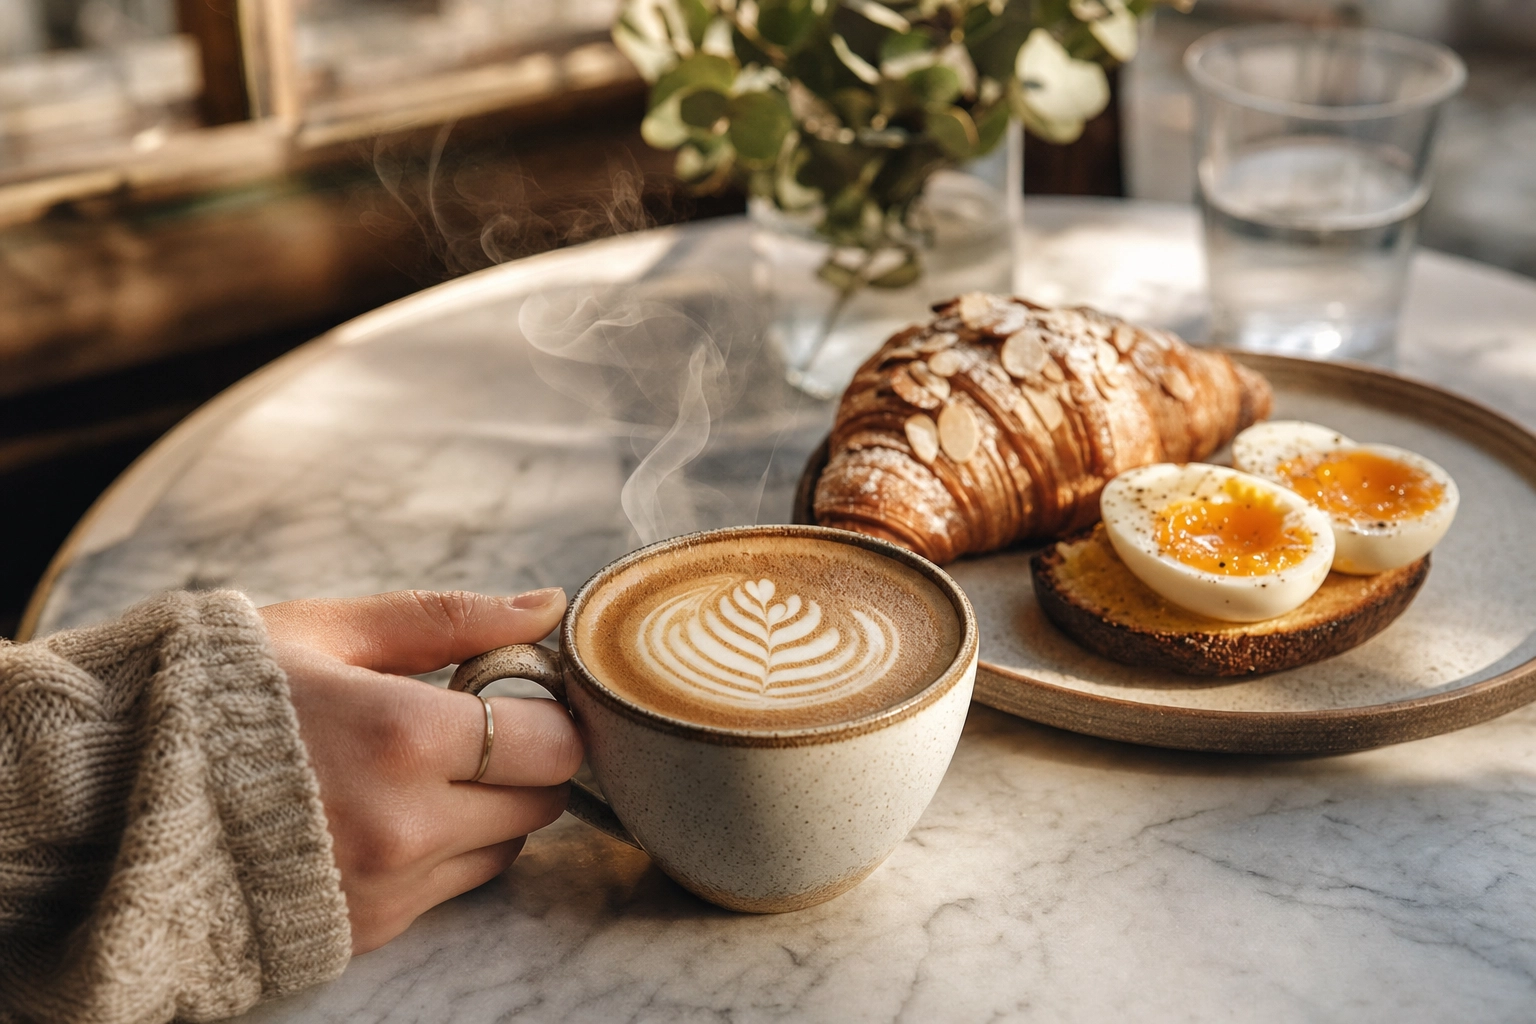 Hand holding a latte with rosetta art beside a croissant and soft egg on toast in warm cafe morning light
The lifestyle shot: a plate, a cup, soft light, and a human touch — a hand on the mug, a fork mid-bite, steam rising. It signals "just served, sit down, stay a while." Coffee is its own craft, so if drinks are central to your brand, our coffee photography guide covers latte art and cafe shots in depth.
5. The brunch table spread
The abundance shot: multiple plates from directly overhead. Build a simple color triangle — yellow (eggs, juice), red (berries, tomato, hot sauce), green (herbs, avocado) — and the frame reads fresh and generous. Add mimosas, linen, and a hand or two reaching in to imply a shared table. This is the image that gets reposted.
Lighting breakfast: morning window light is the whole game
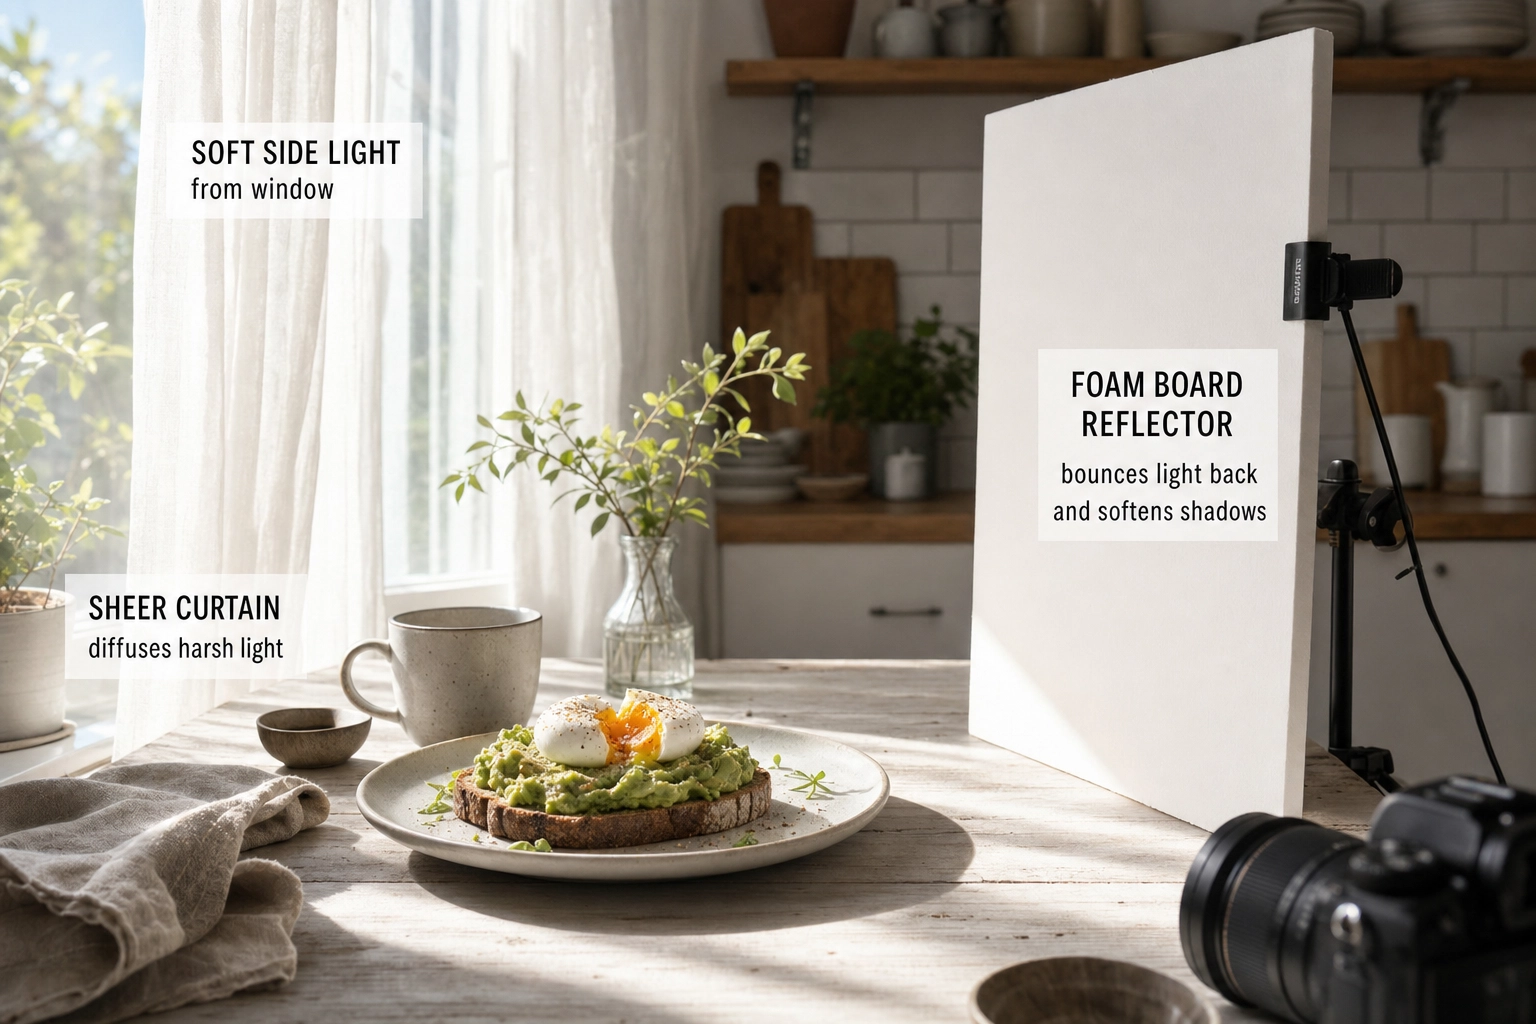 Breakfast plate lit by soft window light with a sheer-curtain diffuser and white reflector card setup
Remember one thing: soft, natural light from a window is the gold standard for breakfast, and you almost certainly already have it. Low, directional, slightly warm — the light pros build whole rigs to imitate. Pull a table to your biggest window and let the sun work.
A few rules make it foolproof:
- Light from the side or behind, never the front. Side light (about 90° to the plate) rakes across the food, separating highlights from shadows to reveal texture; backlight (behind the dish, ~135°) makes yolks, syrup, and steam glow. Direct on-camera flash flattens everything and kills appetite.
- Diffuse harsh sun. If light is blasting in, hang a sheer white curtain or tape baking paper over the glass. Hard sun becomes soft studio light.
- Bounce the shadows back. Prop white foam board (or a napkin-wrapped tray) on the dark side of the plate to fill shadows — the cheapest reflector in the building.
No windows at 5 a.m.? Simulate sunrise. Color temperature is measured in kelvin: midday daylight sits around 5,000–6,500K, while the warm glow of golden hour falls closer to 3,000–4,000K — a color temperature you can recreate with one warm-toned LED (about 2,700–3,200K). Place it low and to one side, diffuse it through a white cloth, and nudge white balance slightly warm for golden tones. One soft, low, golden source beats a ceiling of flat fluorescents every time. For more on direction and diffusion, our food photography lighting guide applies the same principles to plated dishes.
The syrup pour, shot by shot
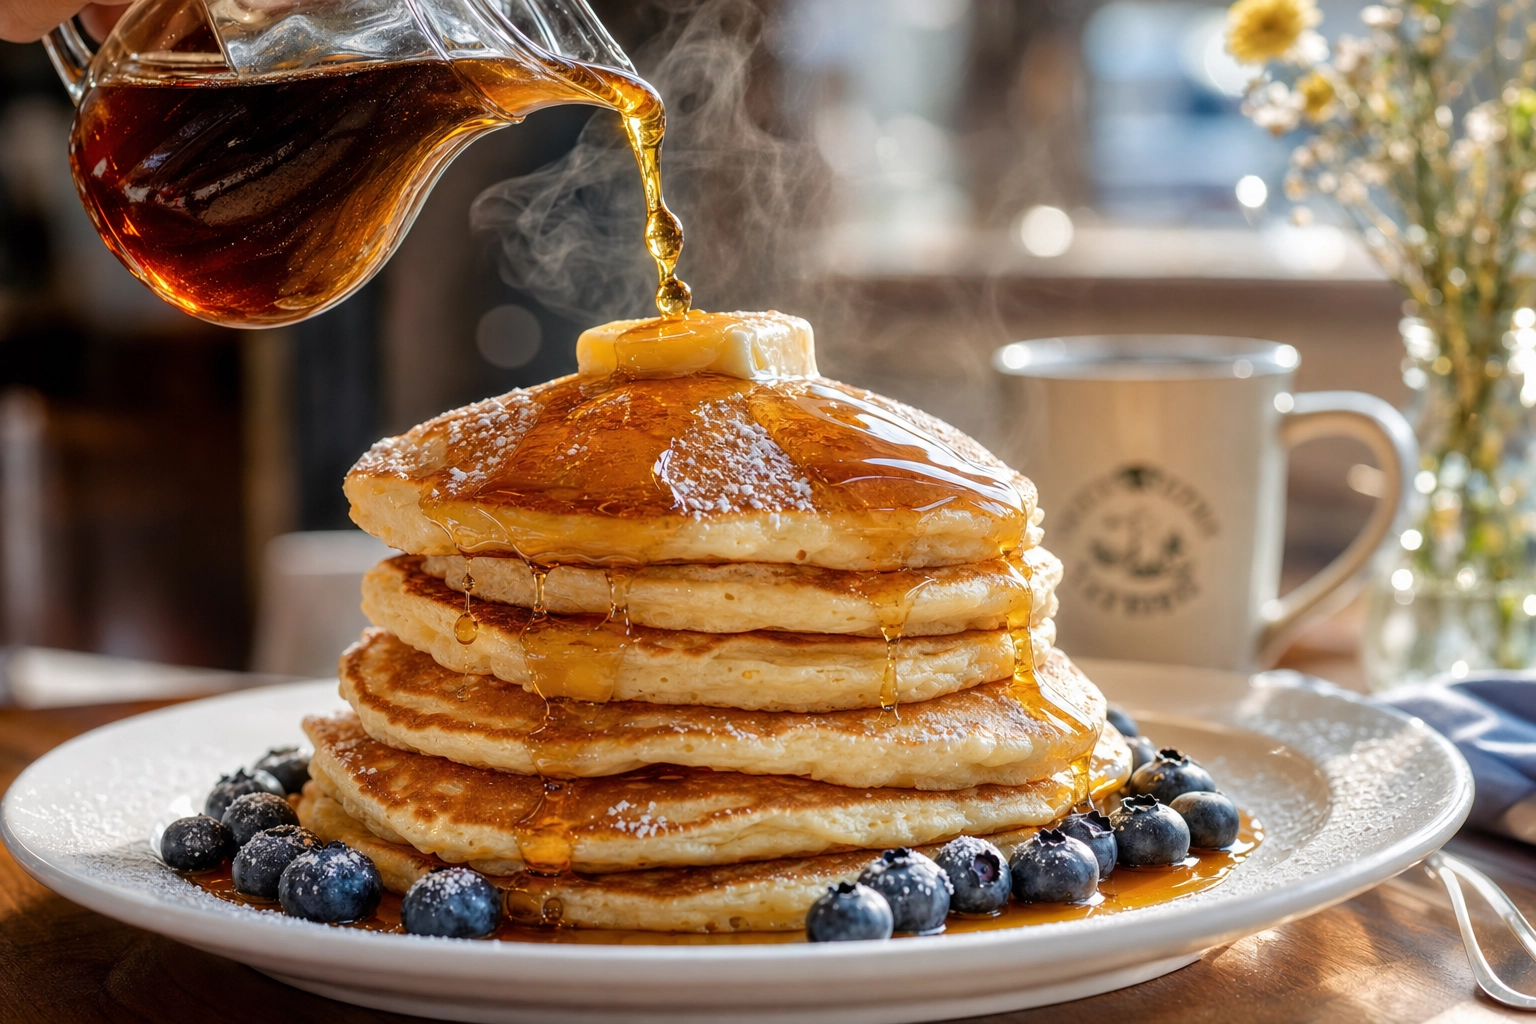 Maple syrup pouring over a tall stack of fluffy pancakes with melting butter, backlit at eye level
The syrup pour is the most-loved and most-botched shot in breakfast photography. Here's how to land it.
Shoot dry first. Capture your clean, lightly dressed frames before the syrup goes on. Once it soaks in, the pancakes darken and slump, and there's no going back. Work in order: dry stack → powdered sugar and fruit → butter → syrup last.
Make the syrup behave. Thin syrup vanishes into the stack and pours too fast to catch. Chill real maple syrup, or reduce it gently on the stove, so it falls in a slow, glossy ribbon. (The old commercial trick was motor oil, which never soaks in — but for a real menu, use real syrup. Your photo has to match the plate you serve.)
Angle and focus. Pour from the side with the camera at eye level so you see the ribbon fall, and pre-focus where the syrup lands, not on the jug.
Get a second pair of hands. One pours, one shoots in burst mode. Fire continuously as the syrup hits, then pick the frame where the stream is unbroken and a drip is about to fall. Keep pancakes at room temperature — hot ones steam and wilt. For more motion-shot mechanics, our 12 food photography techniques breaks down pour shots and angles.
A food-by-food breakfast styling playbook
Every breakfast dish has its quirks. Quick, specific recipes for the plates that dominate morning menus:
Eggs: sunny-side, over-easy, scrambled, poached
For sunny-side-up and over-easy, the yolk is the hero — a light brush of neutral oil adds glisten, and you shoot within that short peak window before it skins over. Scrambled eggs want soft, glossy curds pulled slightly early; plate and shoot immediately. For poached eggs and eggs Benedict, the magic is the cut-and-reveal: slice so the yolk breaks over glossy hollandaise, then shoot the flow.
Pancakes, waffles & French toast
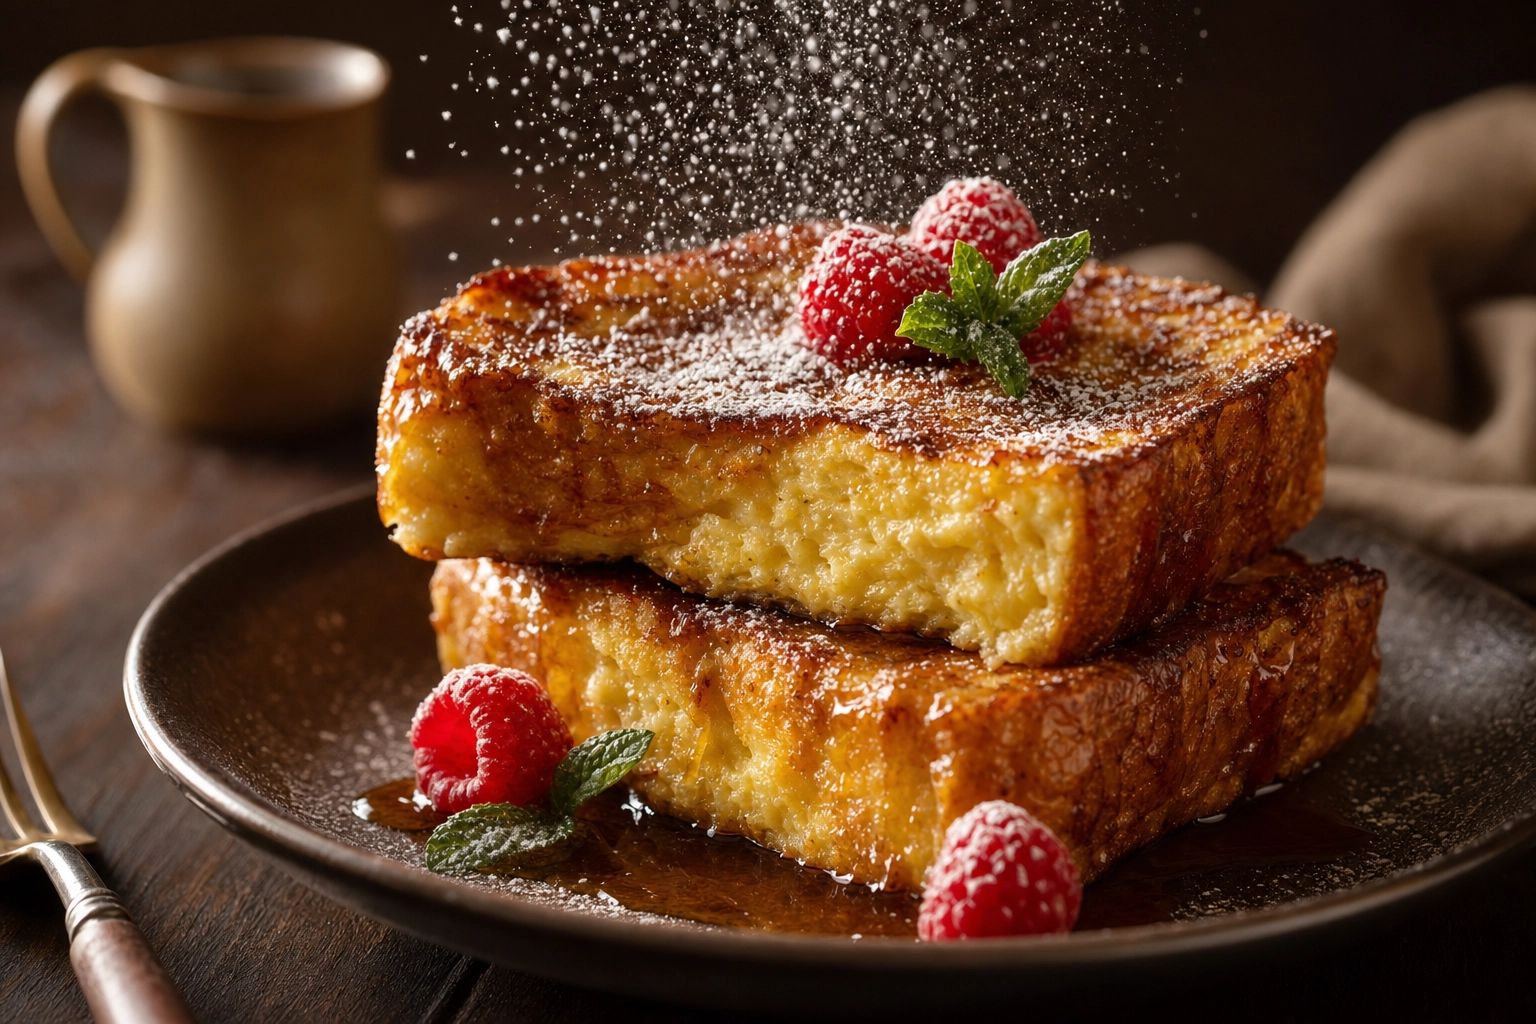 Side close-up of thick brioche French toast with custardy center, syrup, raspberries and falling powdered sugar
Shoot all three at room temperature, not piping hot. For real height, food stylists slip food-safe cardboard discs between the layers so the stack stands tall instead of crushing itself. Waffles shine from overhead because their deep grids catch syrup and shadow. For French toast, show the custardy cross-section from the side, and dust powdered sugar through a fine sieve at the last second — it melts into the surface within about 90 seconds, a timing detail our food styling guide covers in depth. Need preset looks? See our pancake and waffle photography styles.
Bacon, sausage & breakfast meats
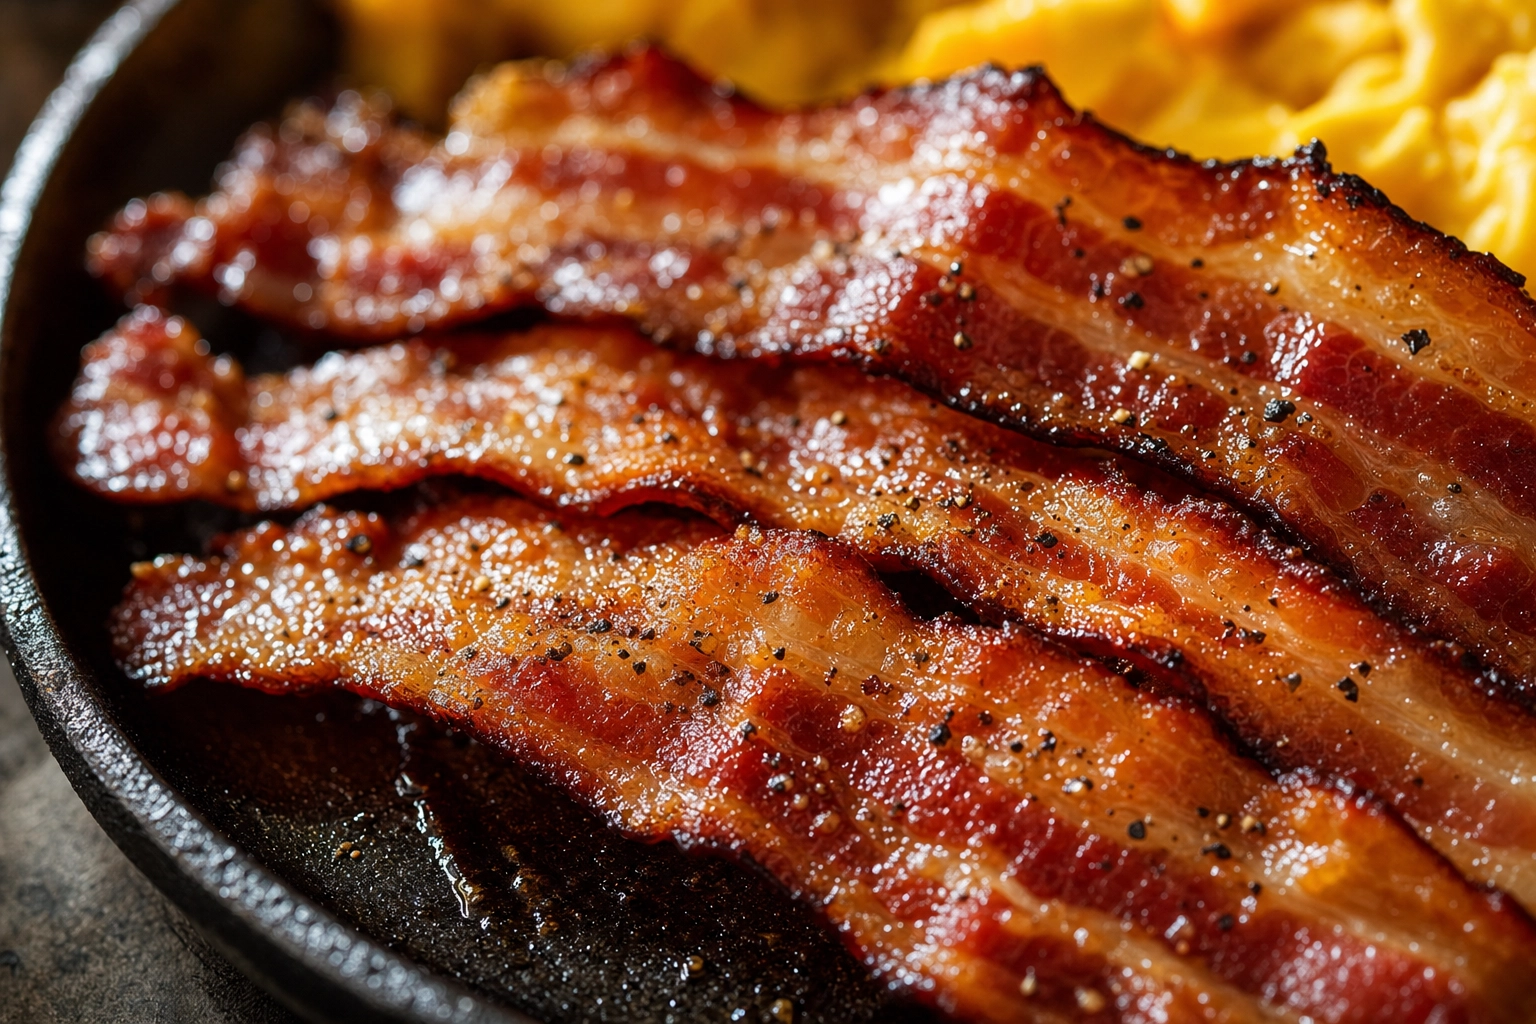 Extreme close-up of rippled thick-cut bacon strips with caramelized edges and glossy texture in warm light
Bacon is all texture. Arrange strips rippled or standing rather than flat, and pick the deep-mahogany pieces — caramelized char reads as crispy, while pale strips read as undercooked. Pat off excess grease for sheen, not greasy shine; a little side light brings out the ridges. Sausages want a glossy surface and, ideally, one split to show the inside.
Breakfast sandwiches, burritos & avocado toast
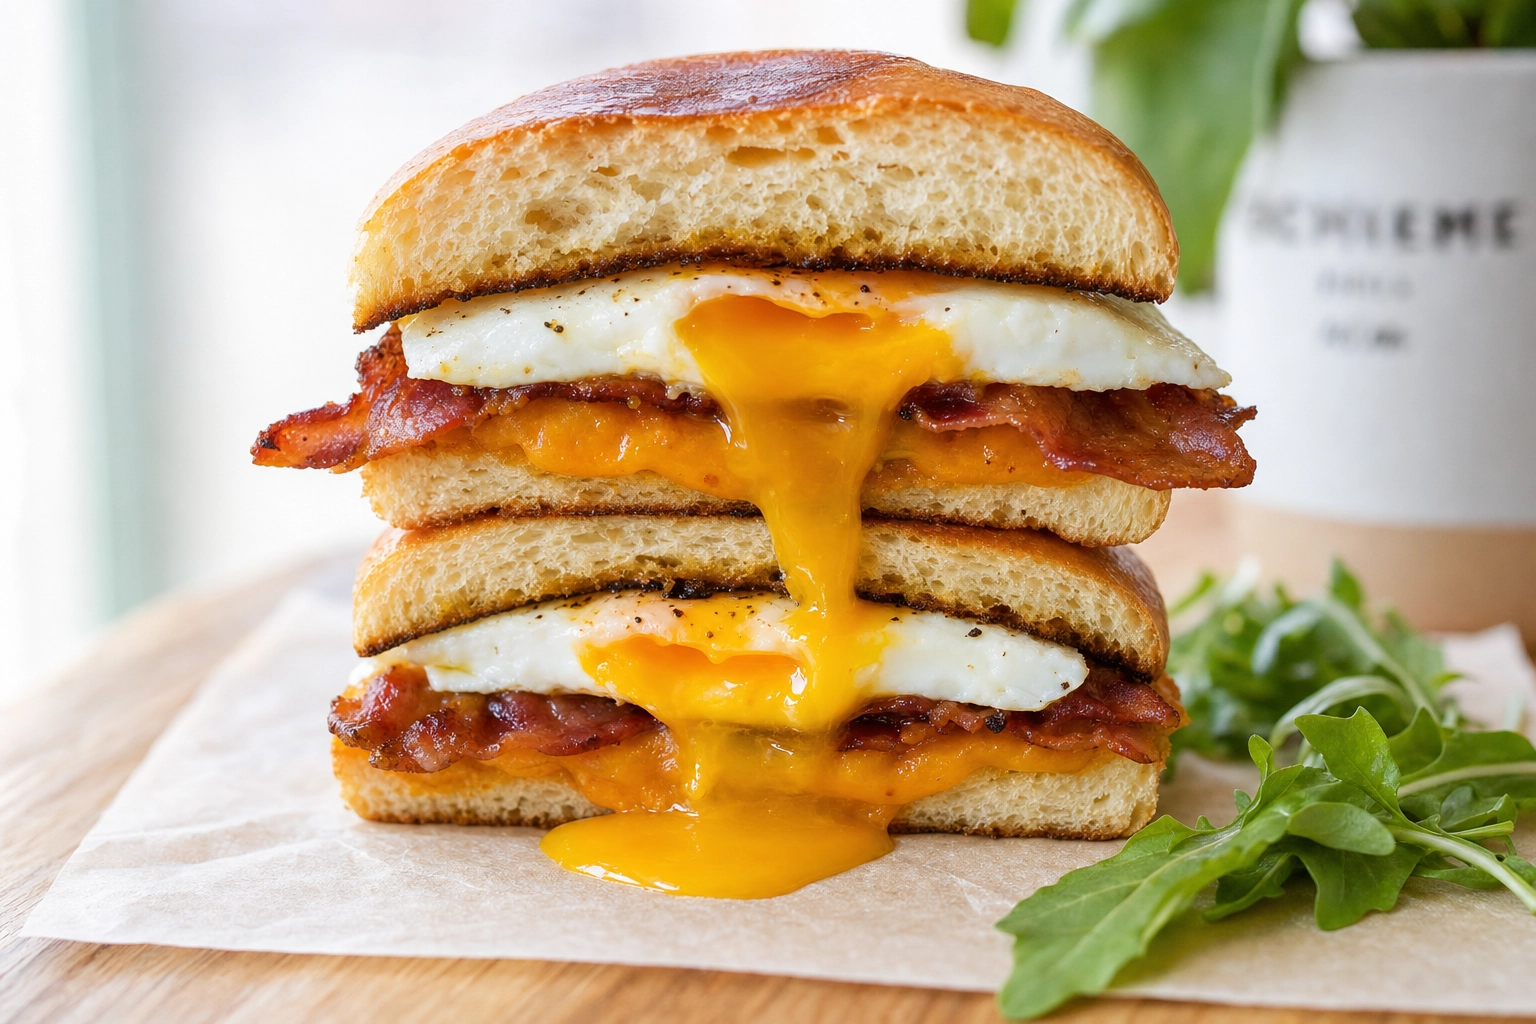 Eye-level breakfast sandwich halves showing runny egg yolk, melted cheddar and bacon on toasted brioche
For breakfast sandwiches, cut clean and stack the halves so the camera sees the cross-section — egg, cheese, runny yolk peeking out. (Browse our breakfast sandwiches styles for reference.) Burritos get the same diagonal-cut, runny-center treatment. Avocado toast is a texture-and-color play: fan or cross-hatch the avocado, add flaky salt, a soft egg, chili flakes, or a drizzle of oil, and shoot at eye level for height or 45° for the topping. Thick-cut sourdough always out-photographs thin bread — see thick-cut toast and avocado toast ideas.
Smoothie bowls, parfaits & granola
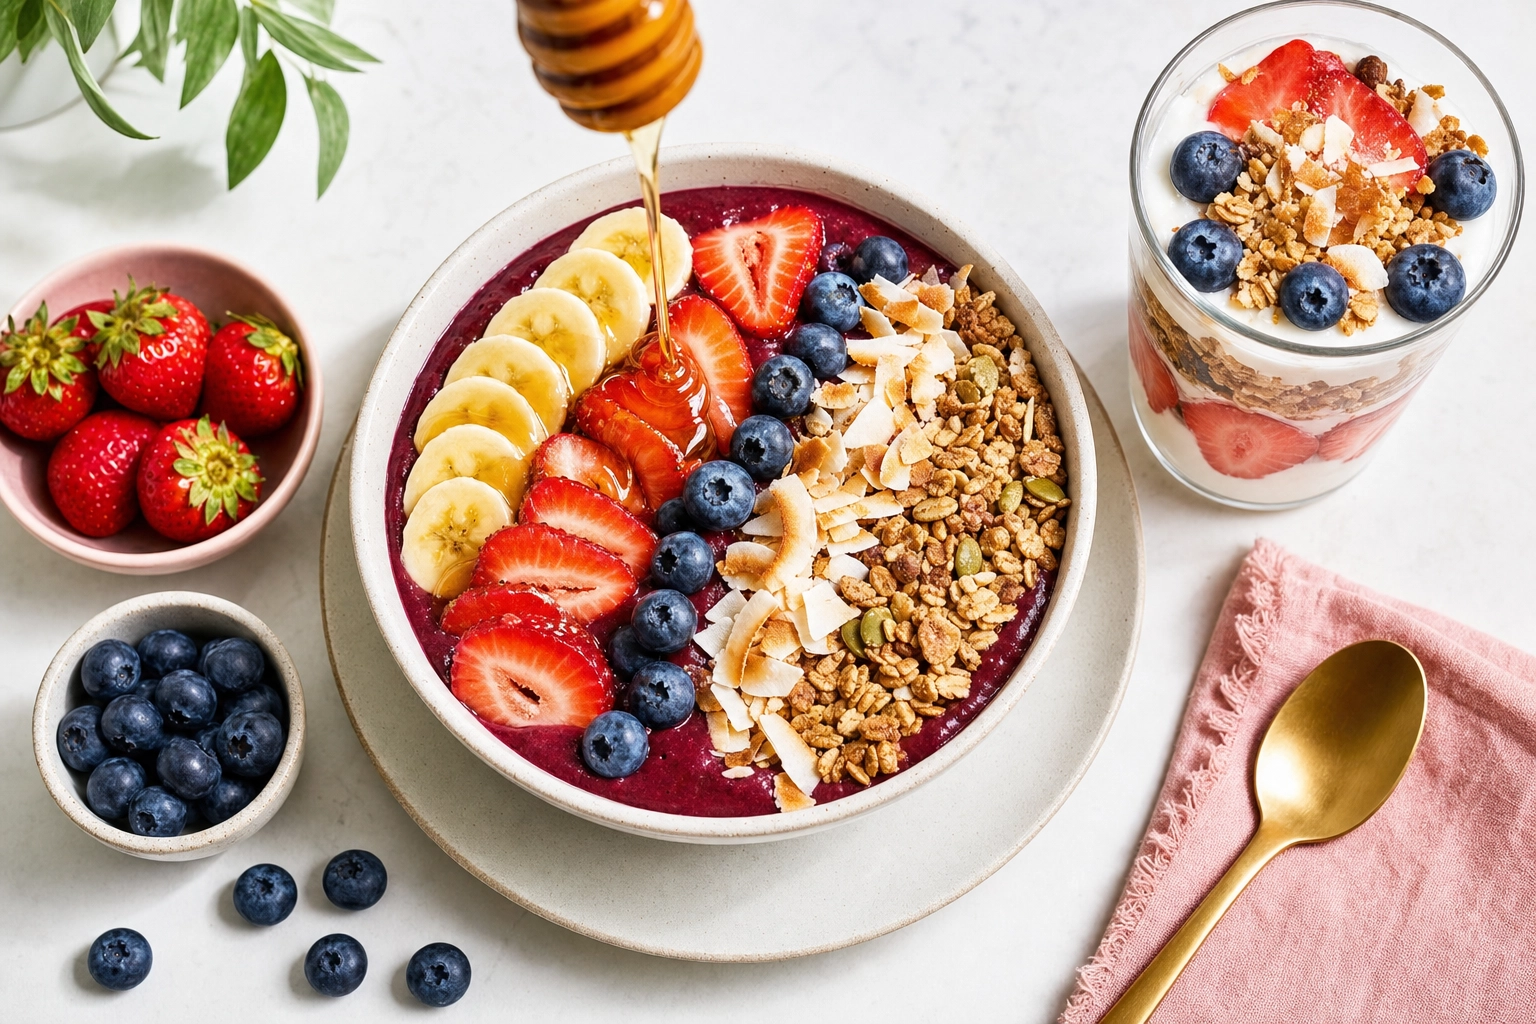 Overhead vibrant acai smoothie bowl with banana, berries, granola and honey beside a yogurt parfait
These are overhead shots, full stop. Arrange toppings in tidy rows or arcs for that color-blocked, scroll-stopping look, and build them fresh — fruit dulls and granola goes soggy within minutes. Lean into texture contrast: glossy yogurt, matte granola, bright berries, a honey drizzle poured from above in the frame. For juices and blended bowls, our smoothie bowls and juices styles keep the colors vivid.
Brunch styling: cocktails, lifestyle, and the art of abundance
Brunch isn't just breakfast served late — it's a vibe, and it has been since the word was coined. British writer Guy Beringer first proposed "brunch" in an 1895 essay, pitching a cheerful, sociable, cocktail-friendly alternative to the stiff Sunday meal (the Smithsonian has the origin story). Photograph it like the social occasion it is.
Cocktails carry the mood. Mimosas and bloody marys shoot best at eye level with visible condensation, a clean garnish, and a little backlight to make the glass glow. Catch two flutes mid-clink and you've got an instant "weekend" cue. For drink-specific looks, see mimosas and brunch cocktails.
Lifestyle sells abundance. A single plate says "meal." Multiple plates, reaching hands, a few props — linen, a vintage jug, fresh flowers — and a little negative space say "gather your friends." Crumbs and a half-eaten pastry aren't mistakes; they're proof a human is enjoying this. These spreads are gold for cafe menu photography and the kind of Instagram food photography that actually gets shared.
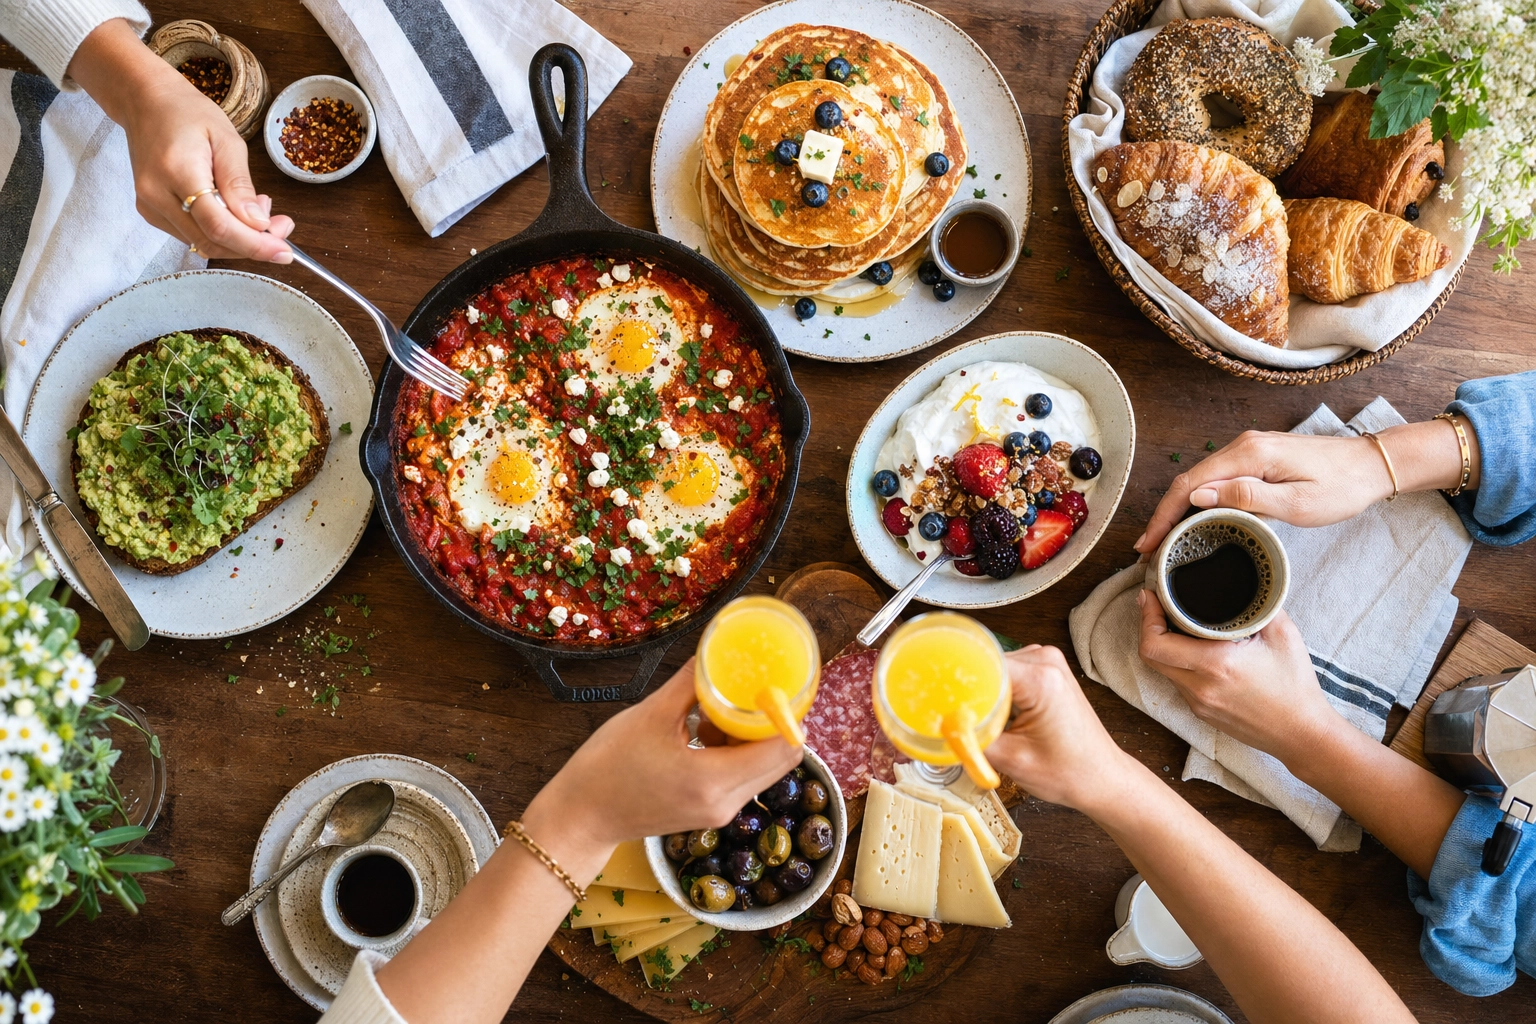 Overhead brunch spread with shakshuka, pancakes, avocado toast, berries and mimosas, hands reaching in
Cafe, hotel, or diner? Match the mood to the room
The same plate of eggs needs three different treatments depending on where it's served. Match your photos to your room.
The cafe & brunch spot
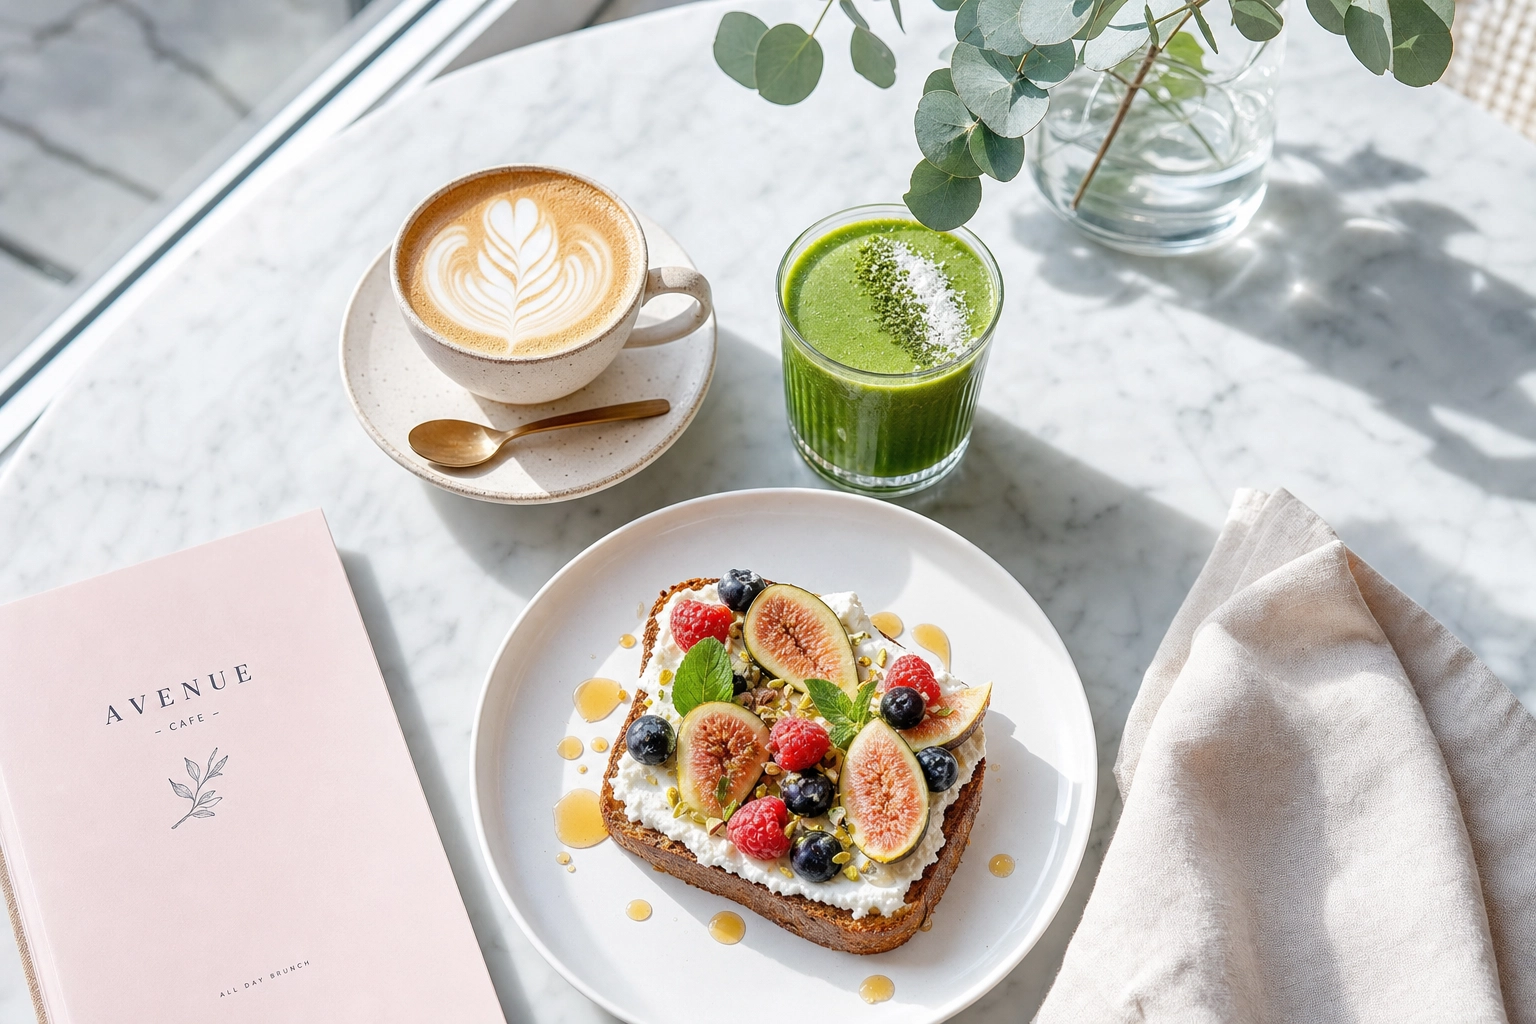 Bright airy cafe brunch on white marble with flat white, green smoothie and ricotta toast in morning light
Bright, airy, natural light, Instagram-forward. Marble or pale wood, flat whites, avocado toast, lots of overhead flat-lays and lifestyle moments. The mood is aspirational-weekend, and consistency across the menu matters because your photos live as a grid. This is the heartland of brunch content.
The hotel & resort
Polished and brand-consistent across every outlet — buffet, room service, lobby cafe, afternoon tea. A hotel needs the same eggs Benedict to look identical on an OTA listing, a printed in-room menu, and Instagram. The register is premium and the lighting is clean. Our hotel and resort F&B teams page and the dedicated hotel food photography guide go deeper on multi-outlet consistency.
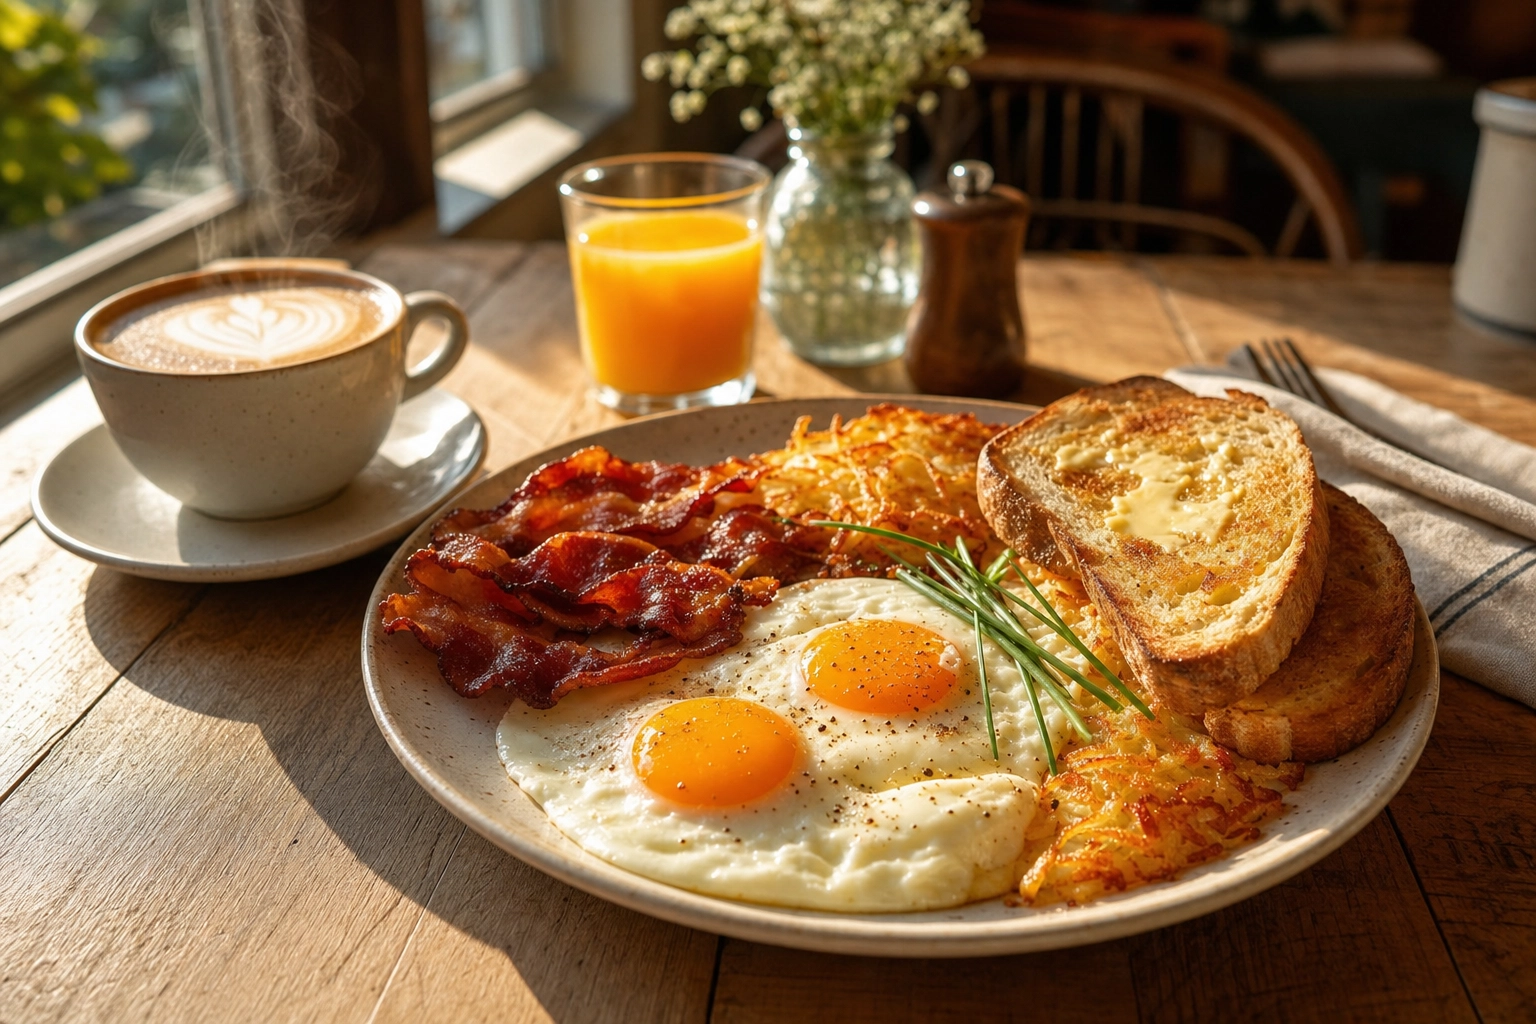
The diner
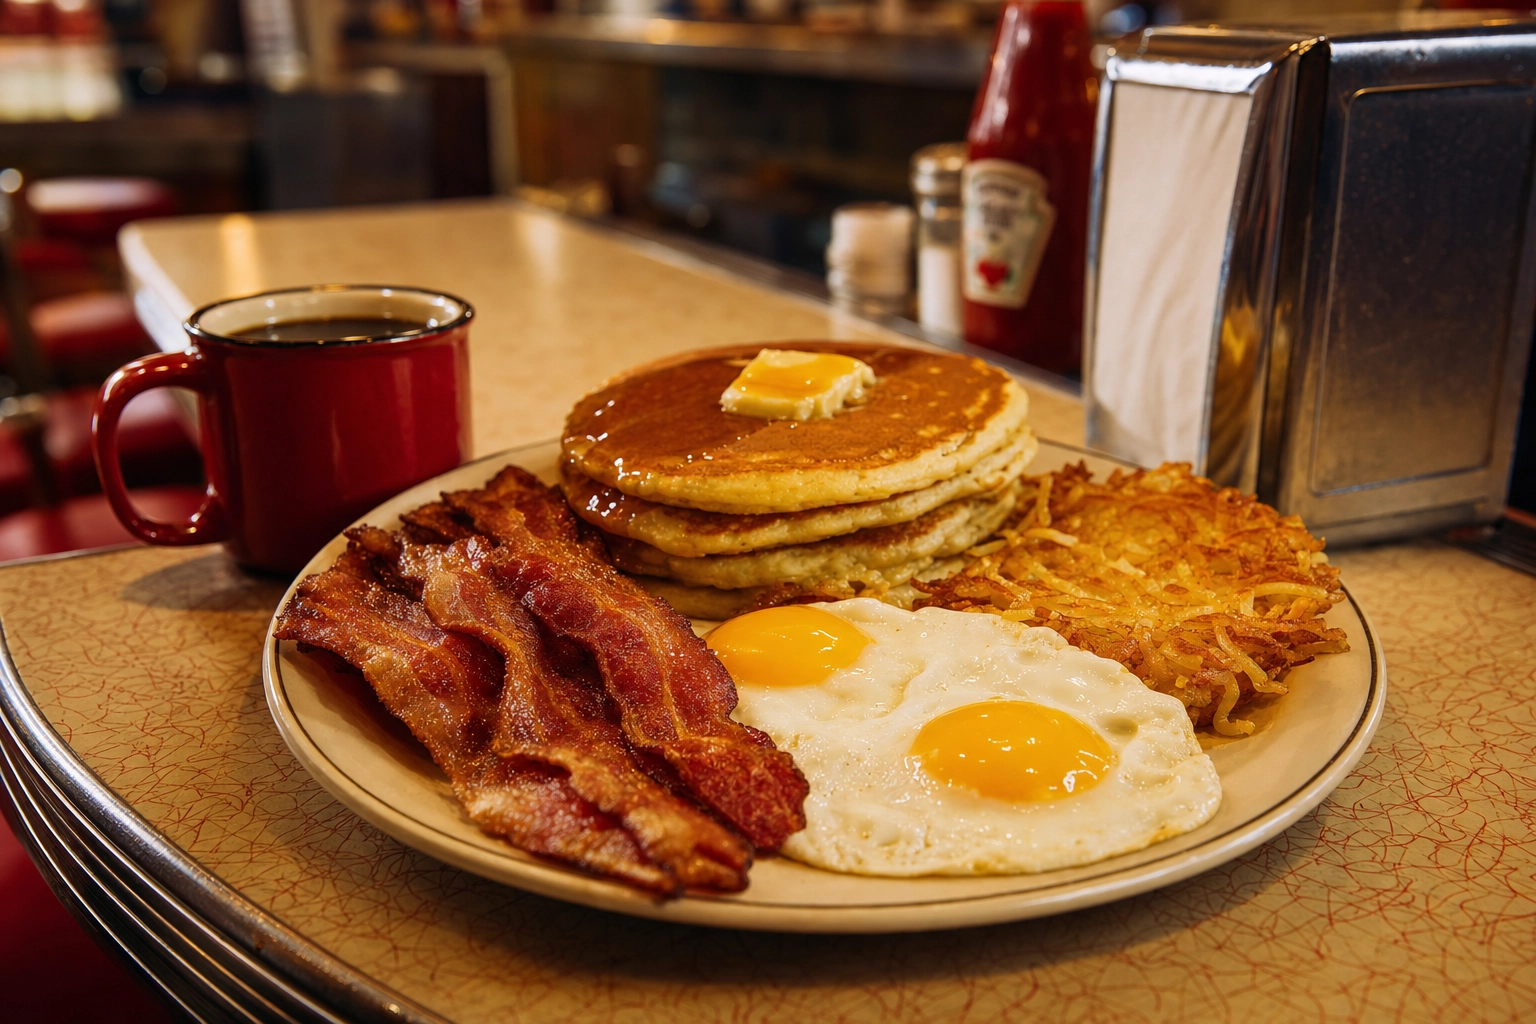 Hearty diner breakfast of over-easy eggs, bacon, hash browns and pancakes with a red mug in warm tungsten light
Hearty, nostalgic, generous. Warm tungsten light, the grand-slam plate, a runny yolk beside crispy bacon and a stack of pancakes, maybe a red enamel mug on a Formica counter. Here, portion size is the selling point — fill the frame and let the abundance talk. It's the look that makes diners and full-service restaurants feel like home.
The AI workflow: from phone snap to brunch-ready in 90 seconds
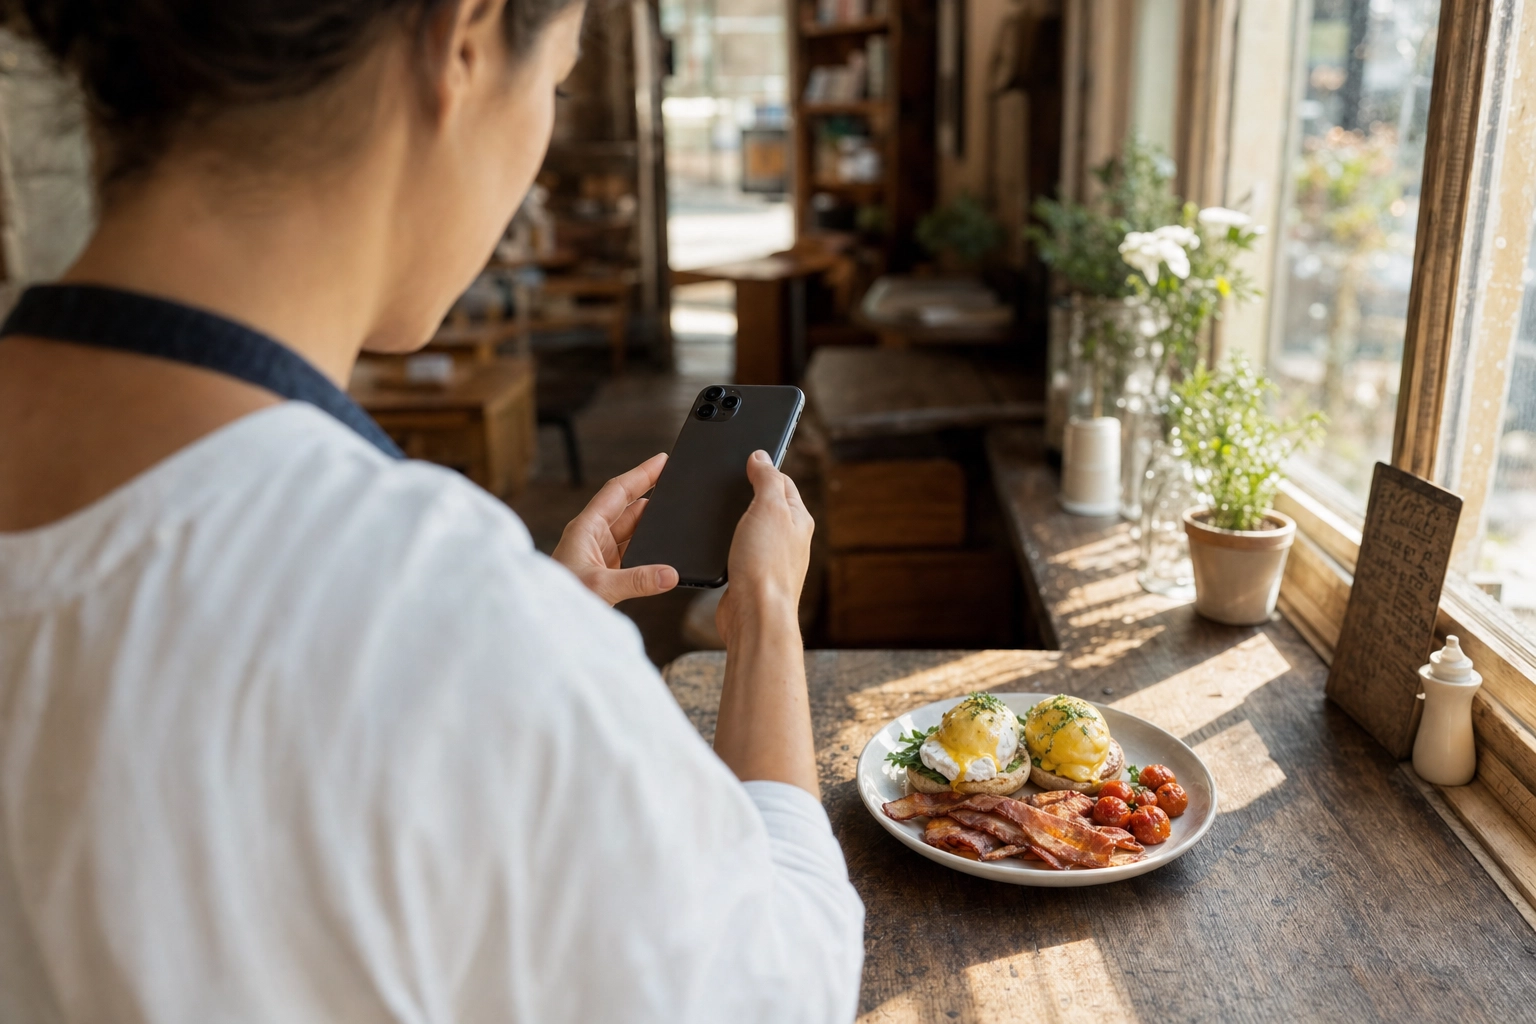 Cafe owner photographing a plated eggs Benedict breakfast with a smartphone by a sunny window
Here's the honest version for 2026. You don't need a DSLR or a four-figure shoot — just a clean phone photo and a tool that finishes it.
The key word is finishes. AI food photography enhances your real breakfast — it doesn't invent fake food from a text prompt. You shoot the actual plate by the window, then upload it, so your menu stays honest: the photo matches what lands on the table.
- Shoot a clean snap. Plate the real dish, find your window light, shoot at 45° or overhead, keep the background simple.
- Upload and pick a style. Choose a Menu, Delivery, or brunch-cafe look from the purpose-built breakfast photography styles. In about 90 seconds you get a studio-quality, 4K image.
- Compose with Builder Mode. Swap the surface (Carrara marble, weathered brunch wood, a cast-iron skillet), the vessel, the props (syrup ramekin, butter pat, microgreens), and the light (bright brunch morning or warm diner tungsten) until it matches your room.
- Lock your look with My Styles. Upload three or four reference photos and the AI food photo editor learns your aesthetic, so your eggs, pancakes, and toast all read as one restaurant. Prompt edits handle the rest — "make the yolk glossier," "add a light syrup drizzle."
It runs about 95% cheaper than a traditional shoot, works on iOS and Android, and adds a commercial license on paid plans (the free tier is watermarked for personal use). See the plans and test it on your next batch of brunch photos.
Quick reference: the breakfast shot cheat sheet
| Shot | Best angle | Light | Timing tip |
|---|---|---|---|
| Full breakfast plate | 45° (or 90° if flat) | Side window light | Garnish last, wipe the rim |
| Egg yolk break | Macro / low | Side or backlight | Set up, then break and burst |
| Pancake + syrup pour | Eye level | Backlight | Shoot dry first; pour last |
| Coffee & breakfast scene | 45° | Soft side light | Catch the steam early |
| Brunch table spread | Overhead (90°) | Bright, even | Build fresh; add hands |
| Smoothie bowl / parfait | Overhead (90°) | Bright, even | Assemble just before shooting |
Frequently Asked Questions
How do I photograph a perfect runny yolk?
Cook the egg sunny-side-up or over-easy and stop just as the white sets but the yolk is still domed and glossy — that peak window lasts a minute or two. Set up first (close, low, focus locked on the yolk) with light from the side or behind. Break the yolk last and shoot a quick burst as it flows. A tiny brush of neutral oil adds extra glisten.
When should I pour the syrup — before or during the shot?
During, and last. Capture your clean, dry frames first, because syrup is irreversible once it soaks in. Then have one person pour while another shoots in burst mode. Use real maple syrup that's been chilled or lightly reduced so it falls slowly, backlight it so it glows, and pre-focus where it lands. Pick the frame with an unbroken ribbon and a drip about to fall.
How do I make a stack of pancakes look tall and fluffy in photos?
Shoot at eye level so the camera sees the layers, and offset each pancake slightly instead of stacking them dead-flat. For hero shots, food stylists tuck food-safe cardboard discs between the layers to add height and stop compression. Add a pat of butter on top, shoot at room temperature (hot pancakes steam and slump), and save the syrup for last.
What's the best angle for breakfast photos?
Three angles cover almost everything. Use 45° for most plates — it's how we naturally see food. Use eye level for anything with height: pancake stacks, layered sandwiches, drinks, and pour shots. Use overhead (90°) for flat, busy scenes: smoothie bowls, parfaits, and full brunch spreads. When unsure, shoot all three and keep the strongest.
How do I get warm morning light if I'm shooting in a windowless kitchen?
Simulate it. Use one warm-toned LED (about 2,700–3,200K), place it low and to one side, and diffuse it through a sheet or sheer curtain. Bounce a white card on the opposite side to soften shadows, and set white balance slightly warm for golden tones. One soft, low, warm source mimics sunrise far better than overhead ceiling lights.
Can I use AI for breakfast photography without faking the food?
Yes — that's the whole point. Tools like FoodShot AI enhance a real photo of your actual dish: better lighting, a cleaner background, menu-ready polish. They don't generate imaginary food, so what customers see is what they're served. Shoot the real plate on your phone, upload it, and keep your menu accurate while still getting studio-quality breakfast photos.
Brunch-ready in 90 seconds. Snap your next plate of eggs, pancakes, or avocado toast by the window, run it through FoodShot AI, and put menu-quality breakfast photography to work before the rush even starts.
