Italian Food Photography: Pasta, Pizza & Antipasti
Italian food is the most photogenic cuisine on the planet — and somehow the easiest to shoot badly. A bowl of cacio e pepe practically glows on the table, yet the quick phone snap of it ends up looking like beige string in a dark room. That gap is exactly why so many restaurants give up and reach for stock photos instead.
Here's the problem with that. Search "italian food pictures" and you'll scroll through a million near-identical plates of someone else's spaghetti. None of it is your food, and diners can smell a stock photo from across a delivery app. The trattoria down the street that posts its own steaming pappardelle wins the order every single time.
This guide is about making your own italian food images look like they belong in a magazine — without a studio, a food stylist, or a $1,000 photographer. We'll cover the rustic-elegant aesthetic that says "Italy" in a single glance, the five shots that carry almost any Italian menu, the styling and lighting tricks the pros lean on, and the 90-second AI shortcut for when the lunch rush won't wait.
Quick Summary: Great Italian food pictures come down to three things: the rustic-elegant look (the red-white-green palette on marble, wood and linen, lit with soft natural light), five workhorse shots (the pasta twirl, the pizza overhead or cheese pull, the antipasti board, the risotto and a dessert hero), and consistency across your menu. You can shoot them on a phone — or turn phone snaps into menu-ready images in about 90 seconds with an AI editor like FoodShot.
The Rustic-Elegant Aesthetic: What Makes Italian Food Pictures Work
Before you think about cameras or apps, you need to know what you're aiming for. Great Italian food pictures almost always share one quality: rustic-elegant. That means humble, honest ingredients — a few tomatoes, good oil, a knob of cheese — shot with refined light and a lot of restraint. Picture a Tuscan farmhouse table crossed with a glossy editorial magazine. Warm, lived-in, a little imperfect, but never messy.
Paint with the Italian flag
The fastest shortcut to "this looks Italian" is the palette. Red, white and green show up again and again: tomato and sauce, mozzarella and Parmigiano, basil and a slick of extra-virgin olive oil. It's no accident — the Margherita pizza was famously created in Naples in 1889 for Queen Margherita in the colors of the Italian flag. Build at least two of those three colors into every frame and the dish reads as Italian before anyone even clocks what it is.
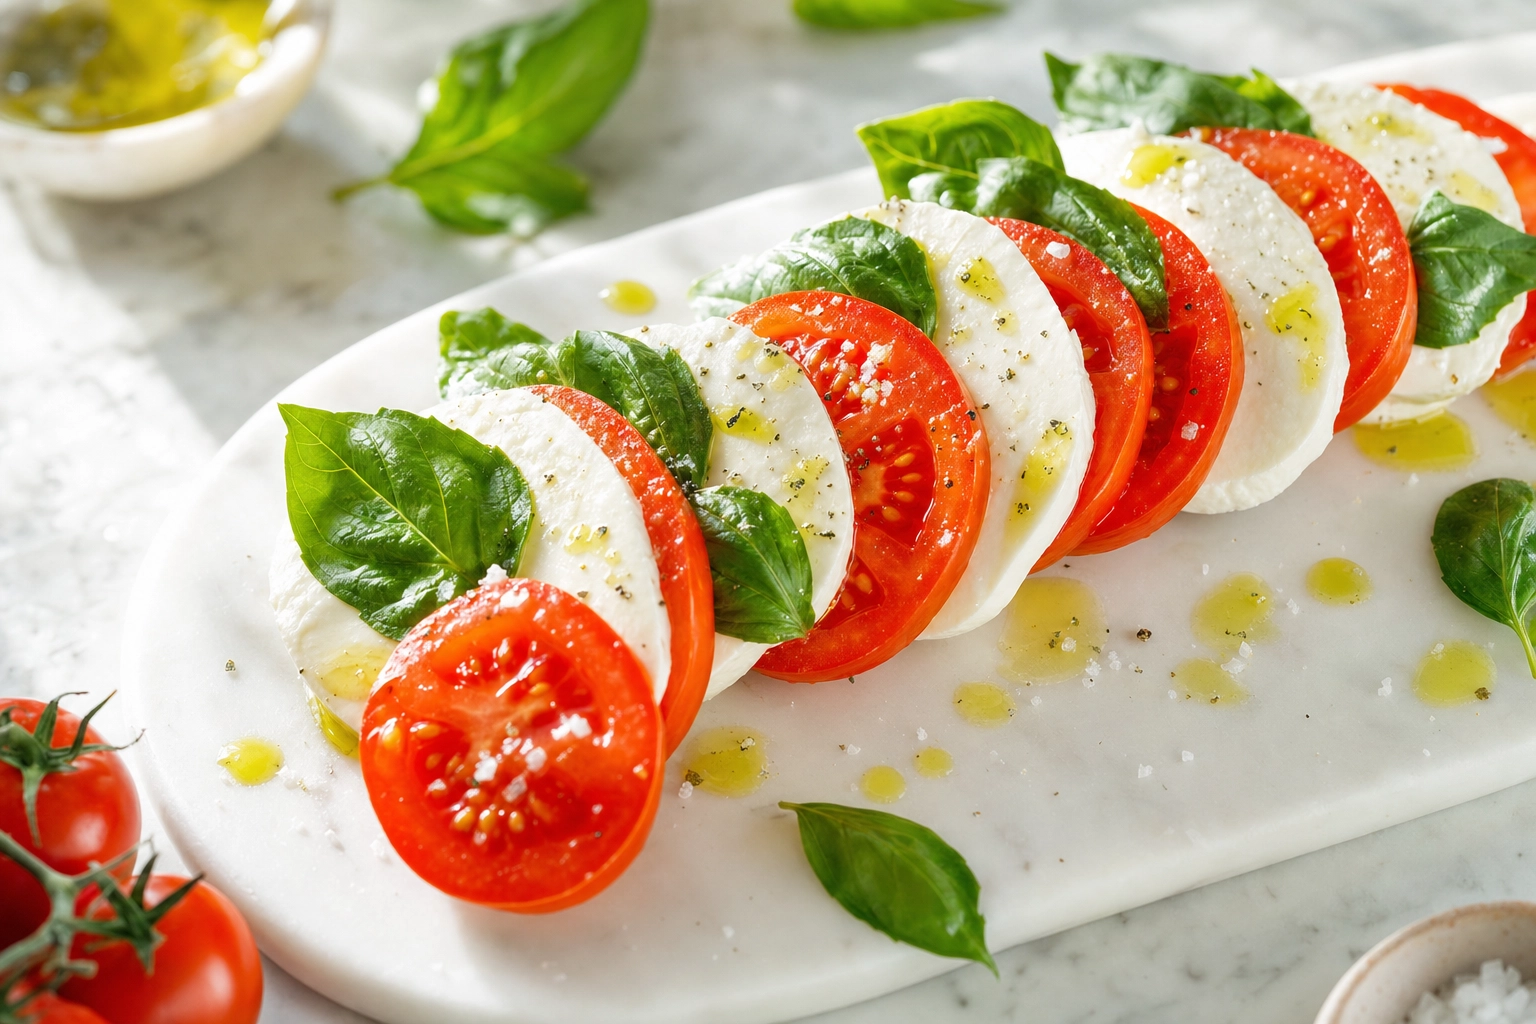 Bright caprese salad of tomato, mozzarella and basil on white marble showing the Italian flag colors
Surfaces and props that tell the story
Italian food belongs on materials with a little age and texture:
- Marble — the classic. A pale Carrara slab makes pasta and antipasti look like a Roman deli counter.
- Weathered or reclaimed wood — warmth for rustic dishes, boards and bread.
- Terracotta and plain ceramic — earthy and handmade, never fussy.
- Linen napkins — a rumpled fold adds softness and the sense of a real meal in progress.
- One vintage prop — an antique fork, a wine glass with a sip already gone, an olive-oil cruet, a wedge of Parmigiano with the rind showing.
The keyword there is one. The single biggest mistake in home-brewed Italian food images is cramming the frame with garlic, tomatoes, a checkered cloth, a wine bottle and a basil plant all at once. Pick one or two props that hint at a story, then stop.
Two looks, both unmistakably Italian
There are two lighting moods that both shout "Italy," and the trick is matching them to the dish:
- Bright and airy — Mediterranean midday light, pale surfaces, clean soft shadows. Perfect for caprese, seafood, summer antipasti, citrusy Amalfi-style plates and gelato.
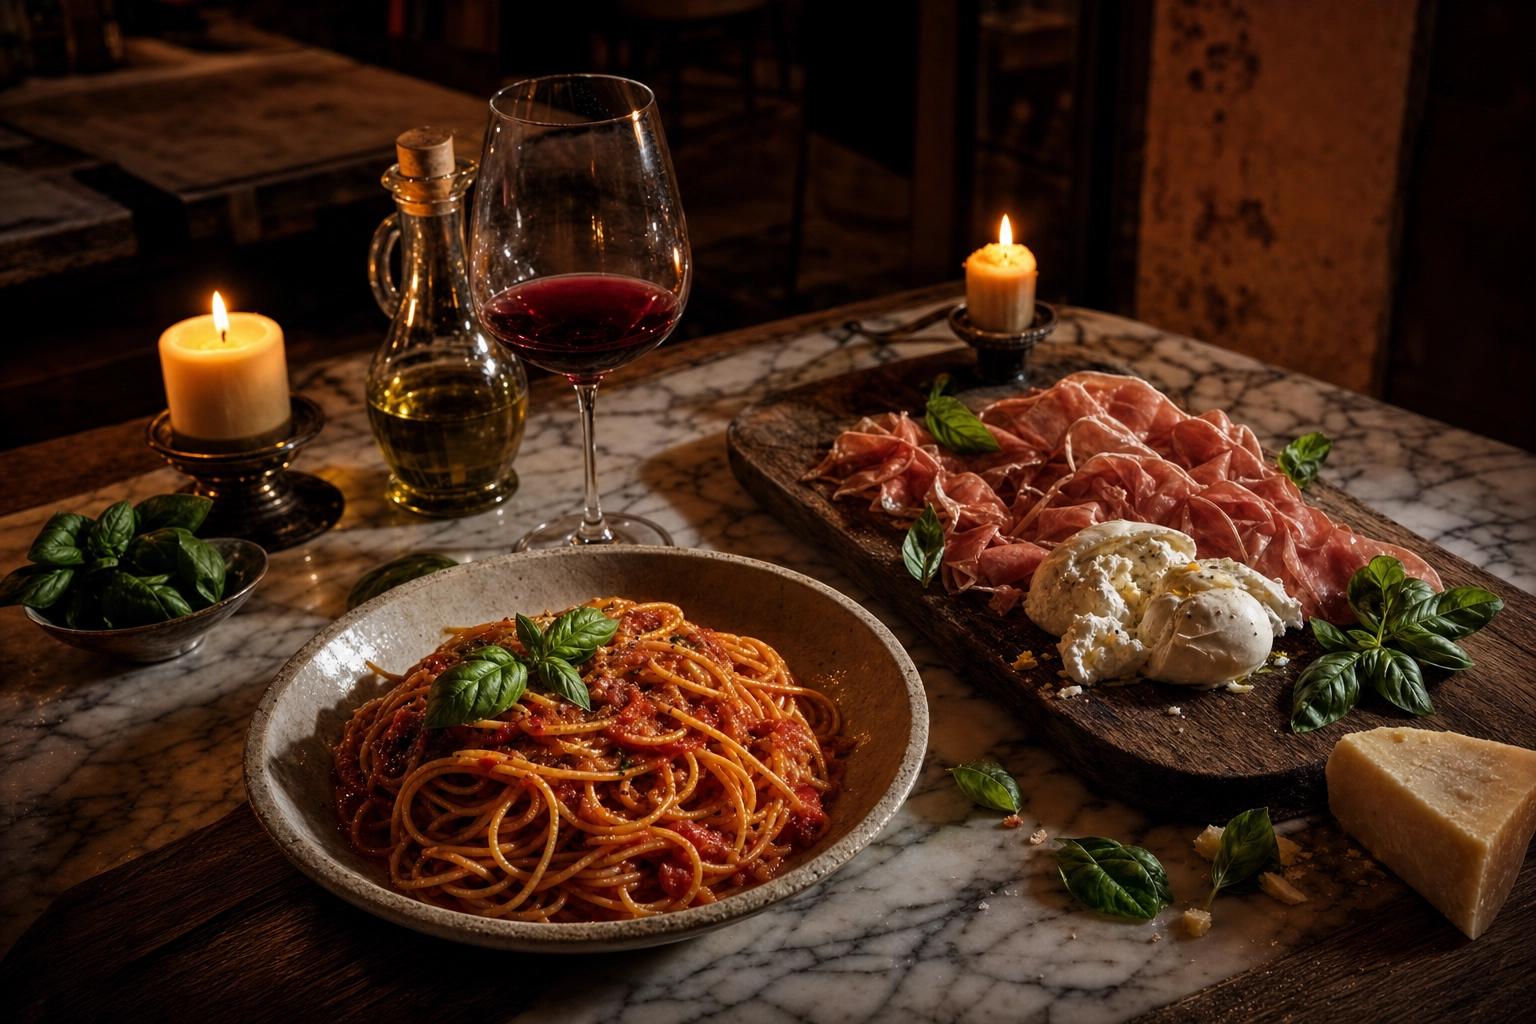
- Dark and moody — a chiaroscuro, Old-Master feeling with deep shadows and a single shaft of light. Made for ragù, baked pasta, braised secondi, a glass of Barolo and tiramisu.
Pick one direction per shoot and commit to it. Mixing a bright, breezy salad shot with a brooding, candlelit pasta shot on the same menu page is the visual equivalent of a waiter switching accents mid-sentence.
The 5 Essential Italian Food Shots Every Menu Needs
You don't need to photograph all sixty items on the menu — in fact, that can backfire (more on that later). Five italian food pictures do most of the selling for almost any Italian restaurant, because they cover the dishes diners look for first. Nail these and your menu looks complete. Here's exactly how to frame, light and style each of the popular Italian dishes that earn their photo.
1. The Pasta Twirl (and the Lasagna Cross-Section)
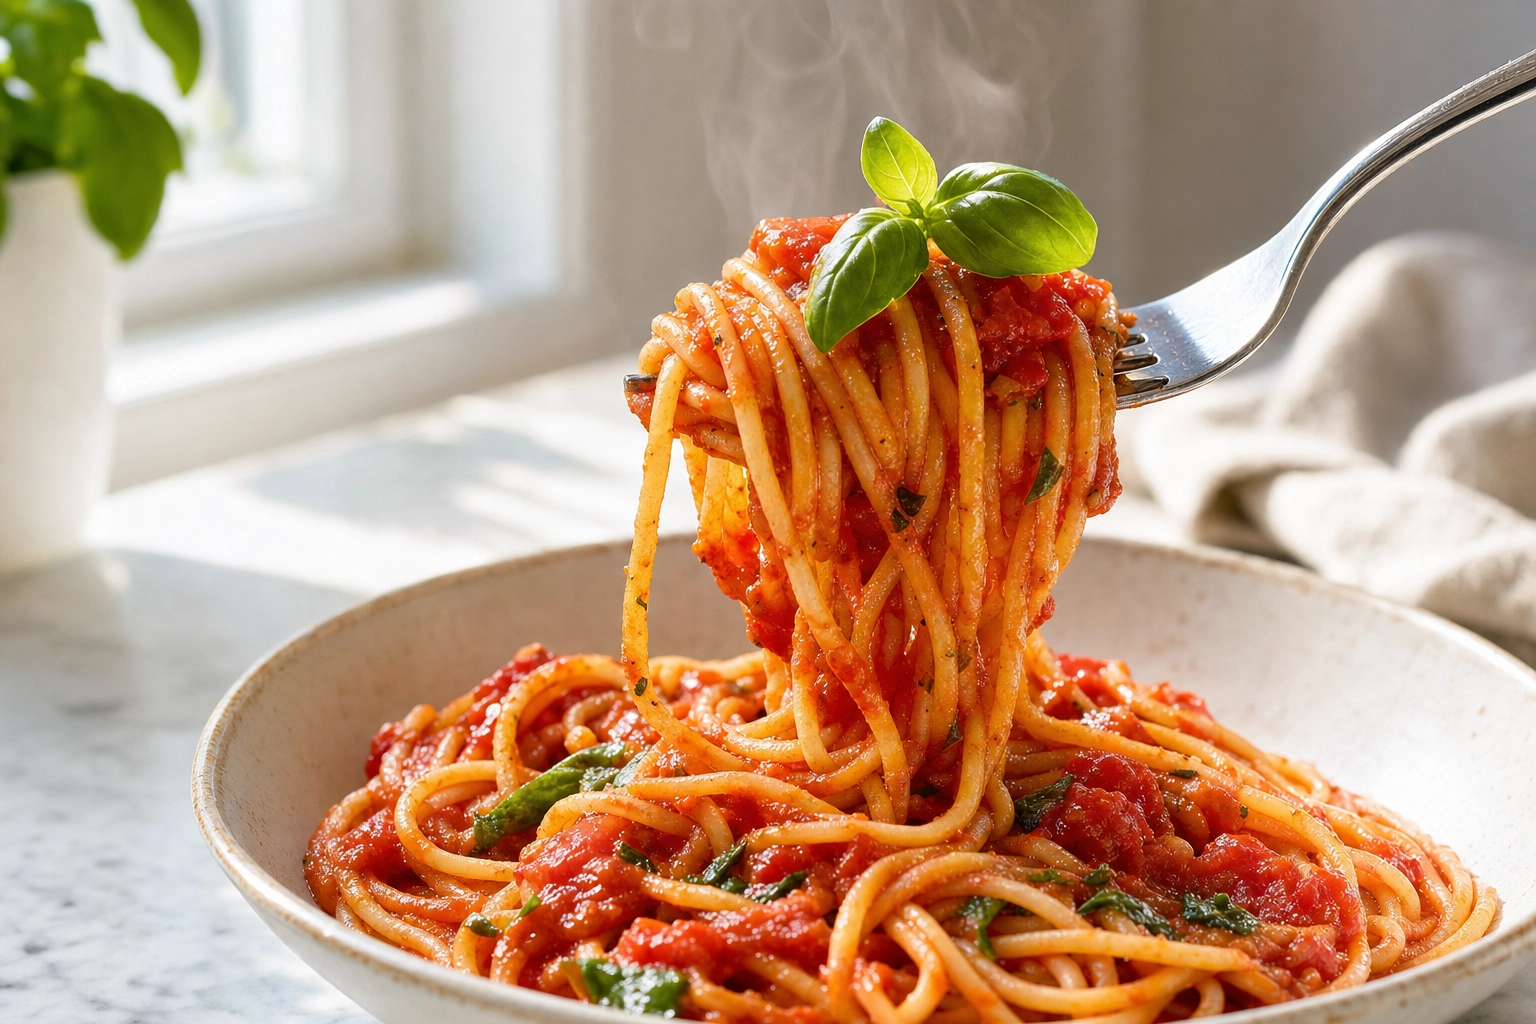 Forkful of spaghetti al pomodoro twirled above the bowl with fresh basil in bright natural light
Pasta is the headline act, and the twirl is its money shot. Wind a forkful against the curve of a spoon or the bowl of a ladle, lift it just above the plate, and shoot the moment the strands hang with sauce still clinging. That lifted forkful adds height, motion and an "about to eat it" tension a flat plate never delivers.
A few things separate a great pasta twirl from a sad one:
- Sauce sheen is everything. Glossy sauce reads as fresh and rich; dull, cooled sauce reads as cafeteria. Shoot fast, while it's hot, and you'll catch the shine.
- Choose a dish with structure. Carbonara (guanciale, pecorino, a storm of cracked pepper), cacio e pepe, or a simple spaghetti al pomodoro with one perfect basil leaf photograph beautifully because they have texture and contrast.
- Angle it at 45 degrees or near eye level. That's how you show the lifted fork, the depth of the bowl, and any steam rising off the top.
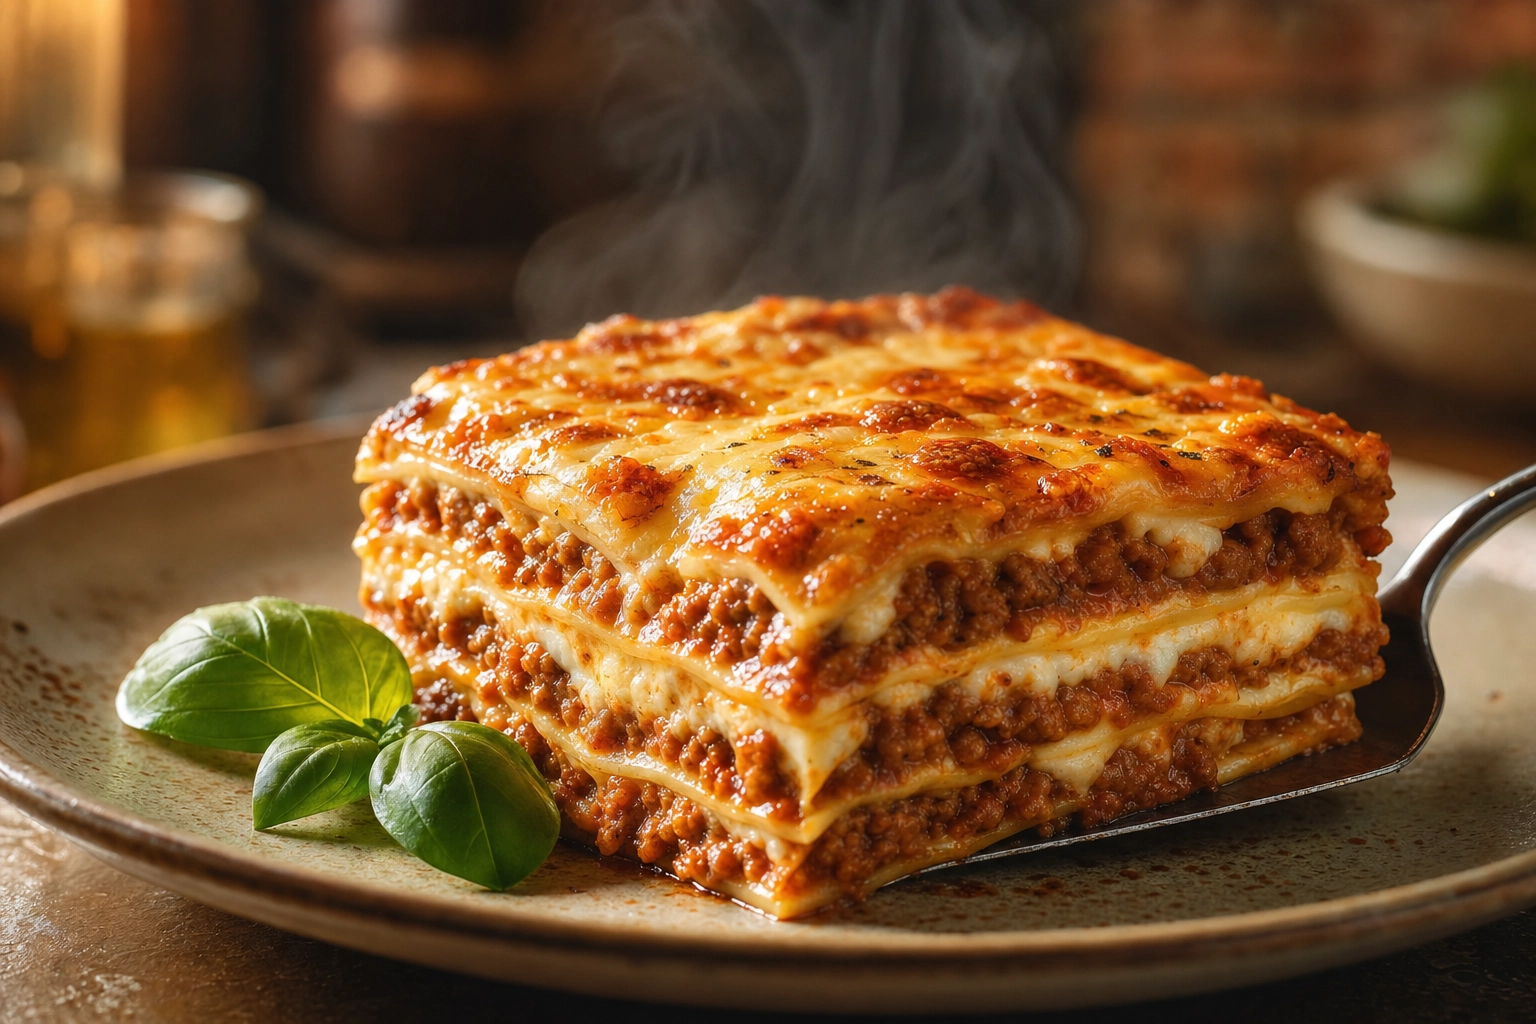 Cross-section of layered lasagna alla Bolognese showing pasta, ragu and bechamel in warm light
Don't forget the baked classics. Lasagna images live or die on the cross-section: let the dish rest a few minutes so it holds its shape, then cut a clean, confident square with a sharp knife so every layer of ragù, béchamel and pasta stays razor-sharp on the plate. A collapsing, oozing slab looks like leftovers; a crisp, layered wall looks like Sunday at nonna's.
For a deeper, shape-by-shape breakdown — ravioli, gnocchi, wide ribbons like pappardelle — see our full pasta photography guide, or browse the AI pasta photography styles built for exactly these challenges.
2. The Pizza Overhead & the Cheese Pull
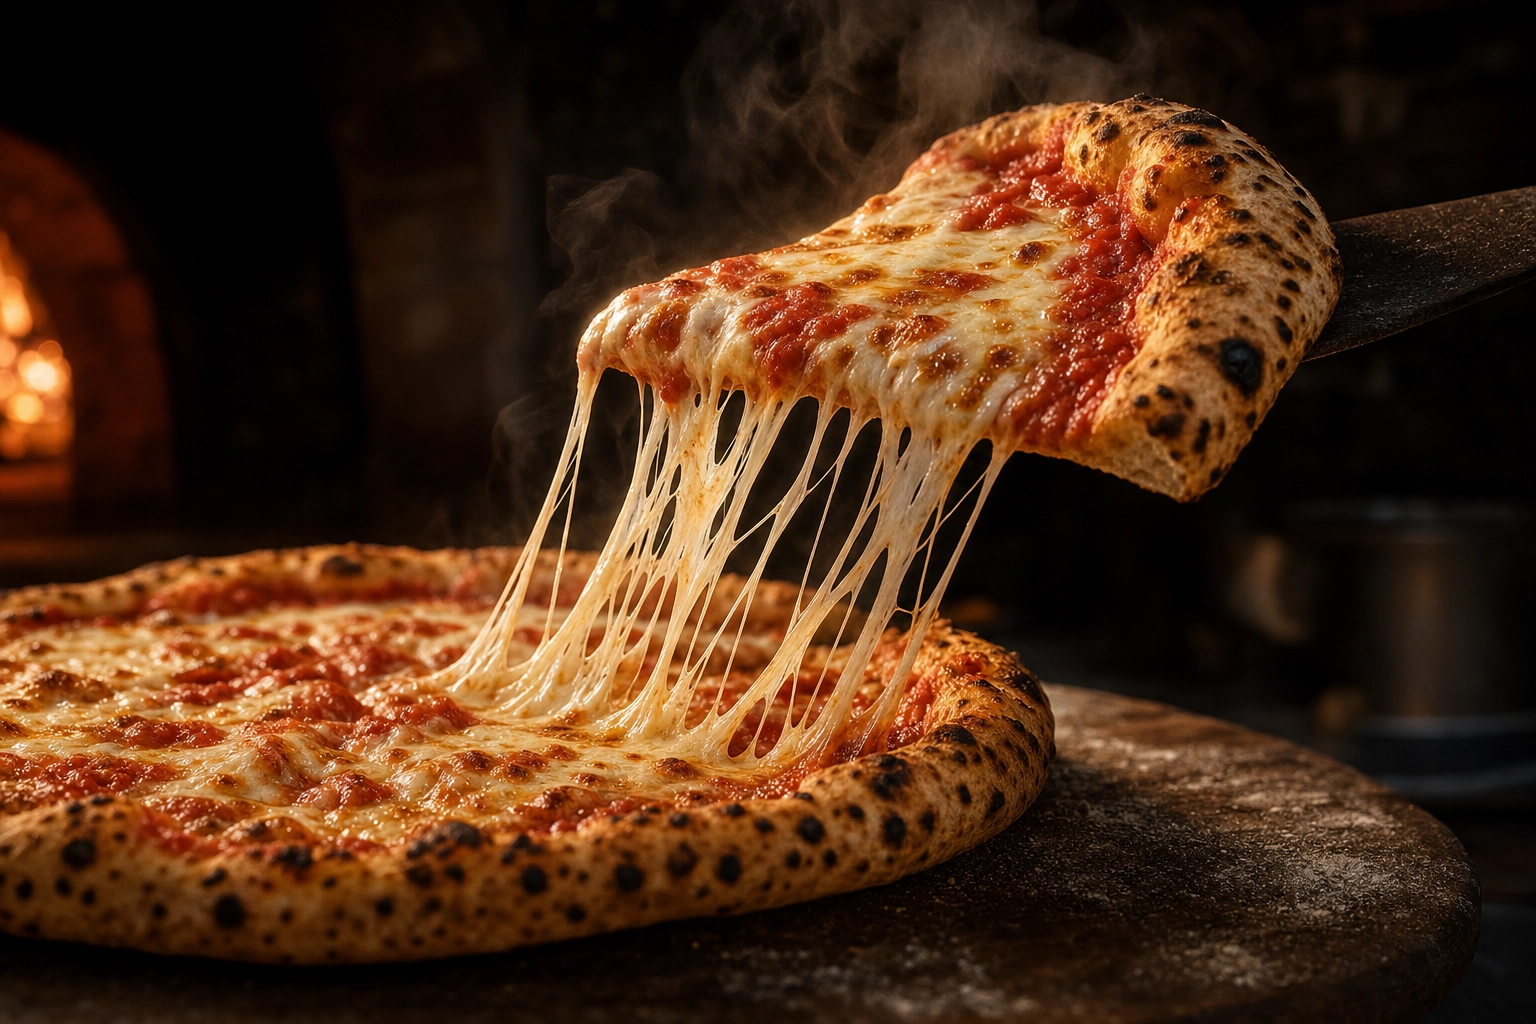 Cheese pull on a New York-style pizza slice with mozzarella strands stretching in dramatic side light
When you photograph a Neapolitan pizza, you're capturing a protected art form: in 2017, the Art of Neapolitan Pizzaiuolo was added to UNESCO's Representative List of the Intangible Cultural Heritage of Humanity. Treat it with that respect and shoot it two ways.
The overhead whole pie. Stand directly above and shoot straight down. From the top you capture the charred, leopard-spotted cornicione (the puffed rim), the bubbled fior di latte, and the basil laid out like a flag. Overhead is also the most honest angle for showing toppings edge to edge, which is why it's the workhorse shot for menus and delivery apps.
The cheese pull. The action hero of pizza photography. Lift a slice — a New York-style slice works best — and shoot the mozzarella stretching into glossy strands. It's genuinely a two-person job: one to pull, one to fire the shutter. Get low, light it from behind or the side so the strands and steam glow, and take twenty frames to land one.
The enemy here is time. Mozzarella sets and the gloss dies within about 90 seconds of the pizza leaving the oven. So plan the frame before the pie comes out: camera ready, surface set, angle chosen, hands in position. Hesitate and you're reheating.
For style-by-style detail — Detroit, Roman al taglio, Sicilian, deep dish — dig into our complete pizza photography guide, or the pizza photography styles tuned for crust char and cheese.
3. The Antipasti & Salumi Board
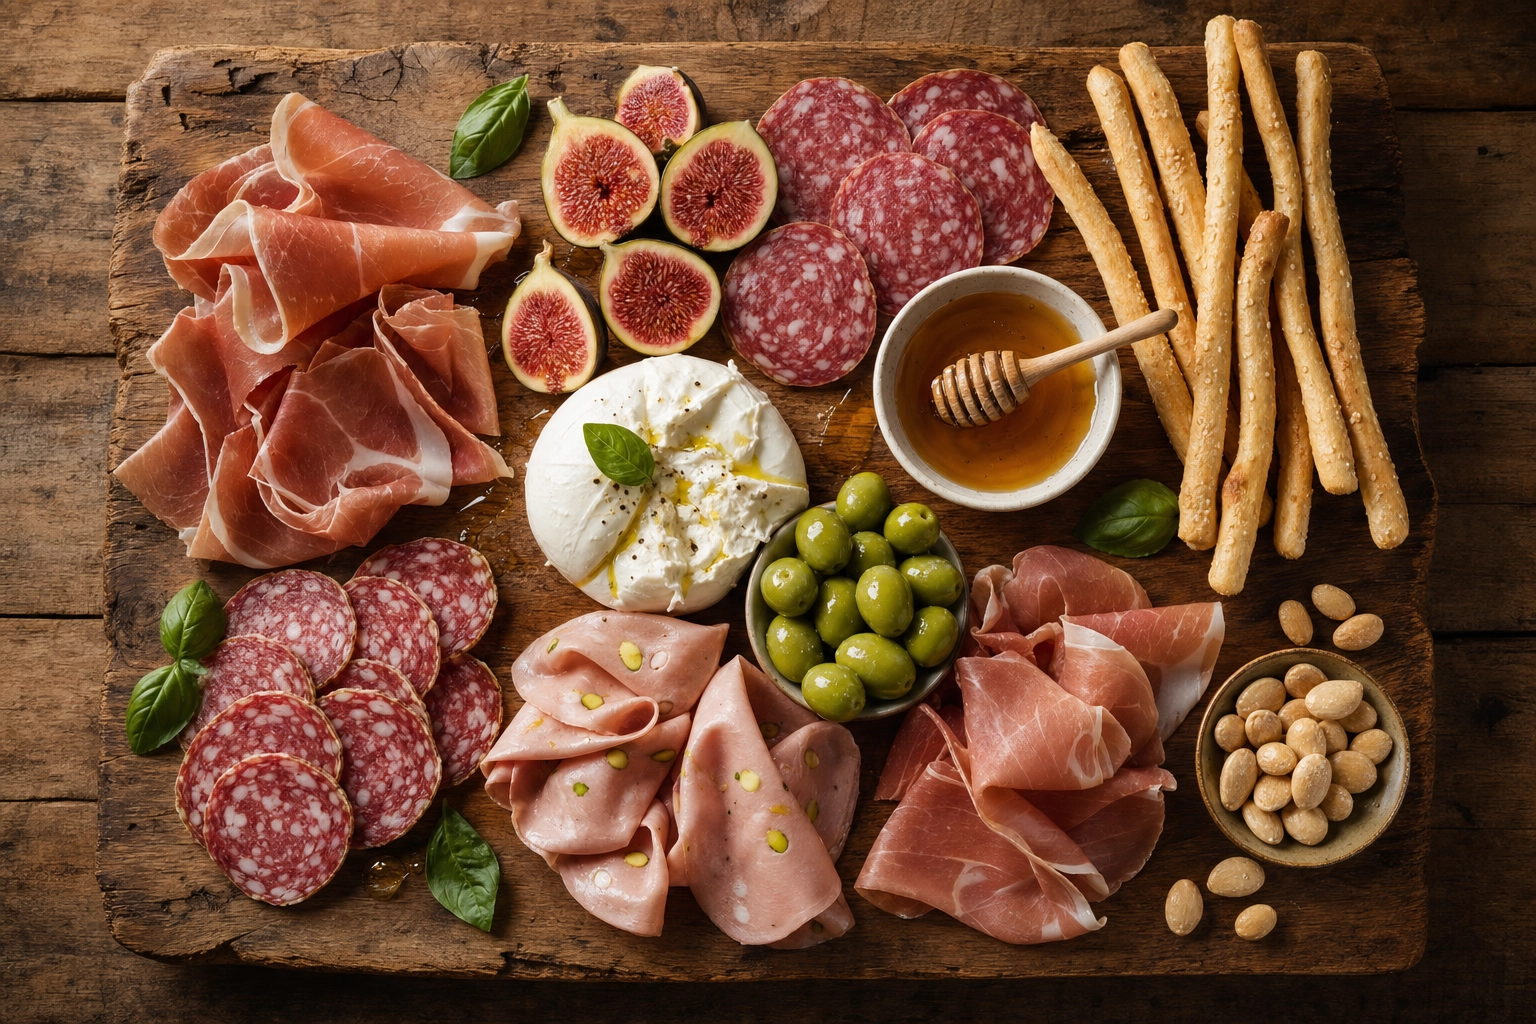 Overhead Italian antipasti and salumi board on rustic wood with prosciutto, burrata, figs and grissini
If pasta is the headline, antipasti photography is the cover model — the single most shareable Italian shot you can make. A generous board of cured meats, cheese and little accompaniments is abundance you can see, and it's the fastest way to say "come hungry."
Build it for the camera:
- Meats (salumi). Prosciutto di Parma is the star — sliced paper-thin and folded into loose ribbons or rosettes so it catches the light, never laid flat like deli slices. Add salami, mortadella with its pistachio dots, capicola, or a smear of spicy 'nduja.
- A creamy anchor. Every great board needs a soft focal point: a torn ball of burrata spilling its cream, fresh mozzarella, or a wedge of Parmigiano with the crystals showing.
- Color and texture in the gaps. Castelvetrano olives, grissini breadsticks standing up for height, fresh figs halved to show the pink, marcona almonds, a small dish of honey, a few leaves of basil.
Now compose it. Shoot straight down — antipasti is the one Italian dish that truly belongs overhead. Vary the size, shape and color of everything you place, and resist the urge to fill every inch. A little breathing room (negative space) actually makes a board look more abundant and intentional, not emptier. Marble or weathered wood underneath, a thread of olive oil over the cheese, and you're done.
4. The Risotto (Capturing the All'Onda Wave)
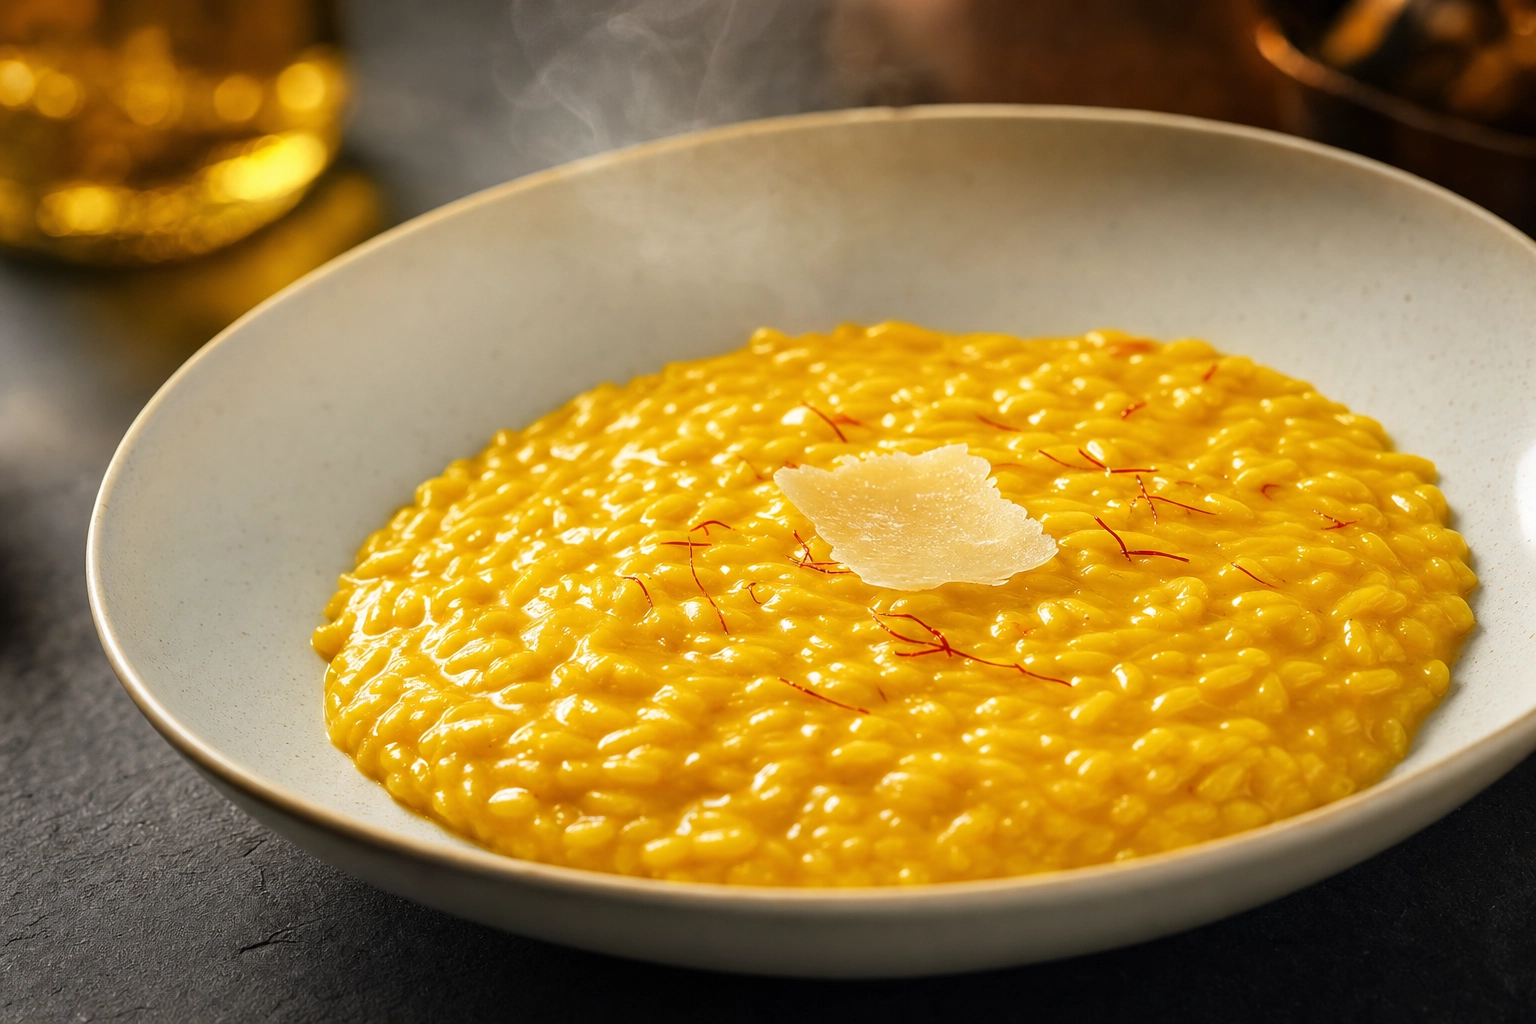 Close-up of saffron risotto alla Milanese showing the glossy all'onda wave in a wide shallow bowl
Risotto images are won or lost on one Italian word: all'onda, meaning "wavy." A proper risotto should never sit on the plate like a scoop of rice pudding. It should spread slowly, like the tide pulling back on a beach, and ripple — flow almost like lava — when you tilt the plate. As La Cucina Italiana puts it, the texture should be "neither too dry nor too brothy." Capture that movement and the photo looks alive; miss it and it looks like sticky leftovers.
Here's how to plate and shoot it:
- Use a wide, shallow bowl. Risotto needs room to spread into its wave. A deep bowl hides the texture entirely.
- Tap the plate. Give the base a gentle bang on the counter so the risotto settles into a smooth, even wave with a glossy surface.
- Move fast. Risotto forms a skin and stiffens within a minute or two. Shoot the second it's plated, before the mantecatura sheen — that gloss from cold butter and Parmigiano beaten in off the heat — dulls over.
- Side-light it. Low, raking light is what makes the glossy surface gleam and reveals the wave.
The showpiece is risotto alla Milanese, golden with saffron — keep the garnish to almost nothing, just a few saffron threads or a single shaving of Parmigiano. With a wine-braised osso buco resting alongside, a saffron risotto is one of the most luxurious shots on any Italian menu. Frame it close, at about 45 degrees, so you read both the wave and any wisp of steam.
5. The Tiramisu (and the Italian Dessert Hero)
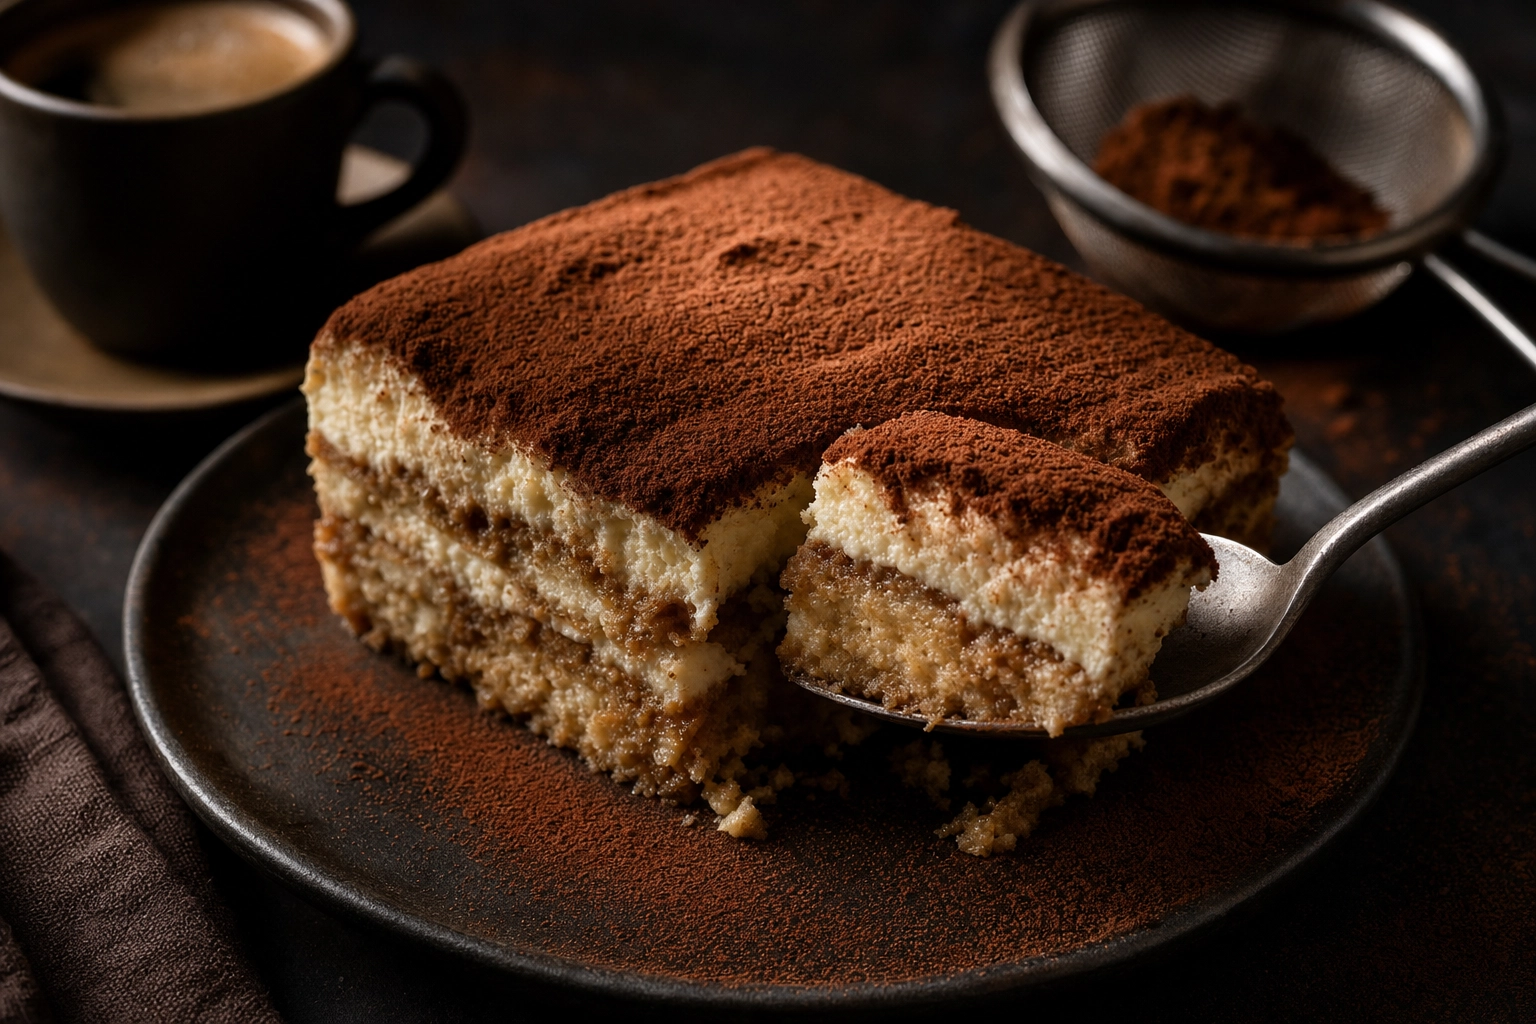 Moody tiramisu portion with a spoon revealing espresso-soaked layers and cocoa dusting beside espresso
Dessert closes the sale, and Italian dolci — tiramisu, panna cotta, cannoli, gelato, affogato — are some of the most crave-worthy images you can post. Tiramisu is the one to master first.
Shoot it two ways:
- The cross-section. Lift a portion with a spoon or a server, or cut a clean square, so the camera sees the layers — espresso-soaked savoiardi (ladyfingers), cloud-like mascarpone cream, and a dark cap of cocoa. Layers tell the story; a brown blob doesn't.
- The dusted-cocoa close-up. Get in tight on the velvety, cocoa-dusted surface with a side light skimming across it to show the soft texture.
Tiramisu wants the dark and moody treatment: a deep, shadowy background, one directional side light, and a couple of honest story props — an espresso cup, a dusting sieve with a little cocoa still in it. For the broader playbook on layers, drips and sugar, see our dessert photography guide.
Italian Food Photography: The Styling & Lighting Toolkit
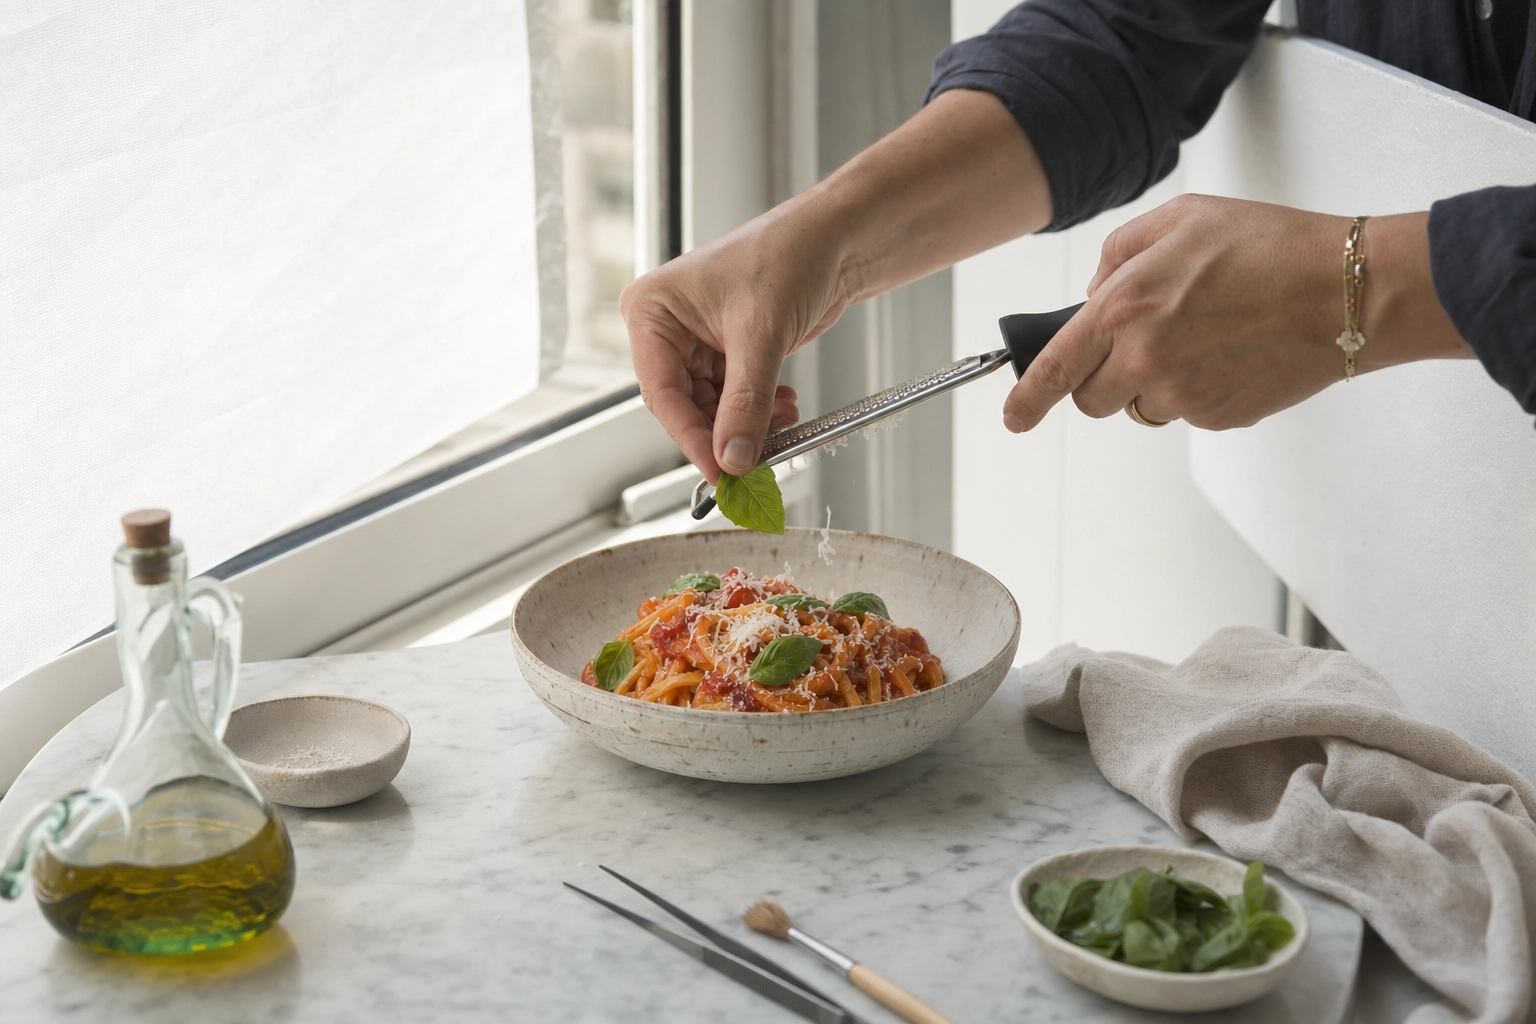 Food stylist's hands garnishing Italian pasta with basil beside a diffused window during a photo shoot
You can shoot every one of those five dishes with gear you already own. What separates amateur Italian food images from professional ones isn't the camera — it's styling and light.
Backgrounds: build a tiny kit. You don't need a prop warehouse. Four surfaces cover roughly 90% of Italian dishes:
- A pale marble slab or tile (deli-counter elegance)
- A piece of dark slate or a matte black board (drama for moody shots)
- A panel of weathered wood (rustic warmth)
- A couple of neutral linen napkins
Garnish like a stylist — last, and on camera. The finishing touches go on right before you shoot, while the dish is at its freshest:
- A few leaves of fresh basil (always fresh, never tired)
- A microplane flurry of Parmigiano drifting down
- A thread of good olive oil for life and shine
- Cracked pepper or a scatter of chili for contrast
- A squeeze of lemon or a little gremolata where it fits
Light: one big, soft source beats ten gadgets. Put your dish next to a large window and switch off the overhead kitchen lights (mixed light turns sauce muddy). Position that window light to the side or slightly behind the plate — never straight on — so it rakes across the food and reveals texture, sauce sheen and steam. If the sun is harsh, tape a sheet of baking paper over the glass to diffuse it. Then prop a white card (even a piece of paper) on the shadow side to bounce light back and soften the darkness. That's the entire setup behind most editorial-looking Italian food pictures.
Two honest tricks the pros use: a light brush of neutral oil on meat or pasta revives the "just-served" sheen on camera, and shooting hot food immediately keeps it from looking cold and congealed. Both make a real dish look its best — they don't fake anything that isn't on the plate.
Mistakes that quietly kill Italian photos:
- Shooting everything from overhead (great for boards and pizza, terrible for a tall lasagna or a glass of wine)
- Over-saucing until the dish drowns
- Letting the food go cold so the sauce dulls and congeals
- Too many props fighting the food
- Flat, head-on light with no shadow, which makes everything look 2D
For a full, dish-agnostic walkthrough of these techniques, our food styling guide goes deep.
Shooting a Whole Italian Menu: Consistency Is the Brand
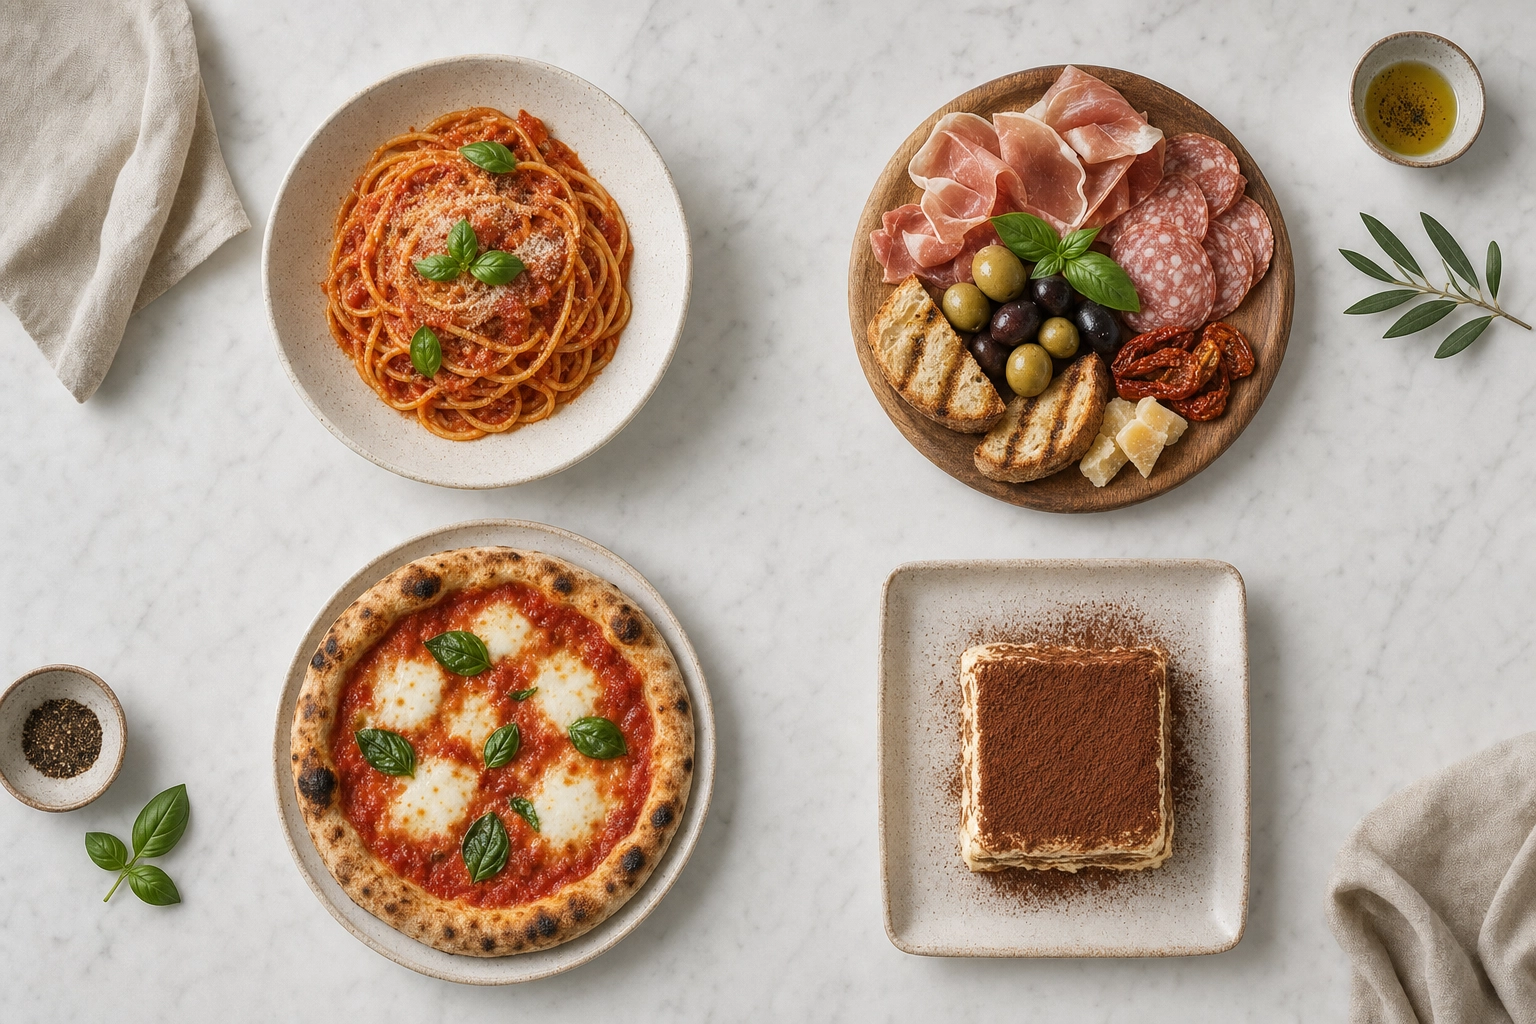 Overhead menu set of four Italian dishes styled consistently on marble for a restaurant brand
One beautiful photo is nice. A consistent set of photos is a brand. The thing that makes a restaurant's gallery look professional isn't any single image — it's that every dish shares the same light direction, the same palette and the same family of surfaces, so your antipasti, primi and dolci clearly belong to the same kitchen. (Our menu photography guide walks through building that consistent set step by step.)
A practical way to think about coverage: photograph across the menu, not down it. One strong antipasti board, a pasta or two, a pizza, a risotto or a secondo, and a dessert will represent the popular Italian dishes your guests are already searching for — far more useful than fifty mediocre thumbnails.
And resist the urge to photograph every item. A 2019 study by Yue, Tong and Prinyawiwatkul found that one or two high-quality photos per menu page actually lifted order rates, while menus with a picture next to every single item were perceived as lower quality and tended to reduce what diners spent. Photos work like visual anchors — they pull the eye toward the dishes you most want to sell. We dig into the research and the "how many photos" question in our guide to why visual menus boost orders.
From Phone Snap to Studio-Quality: The 90-Second AI Shortcut
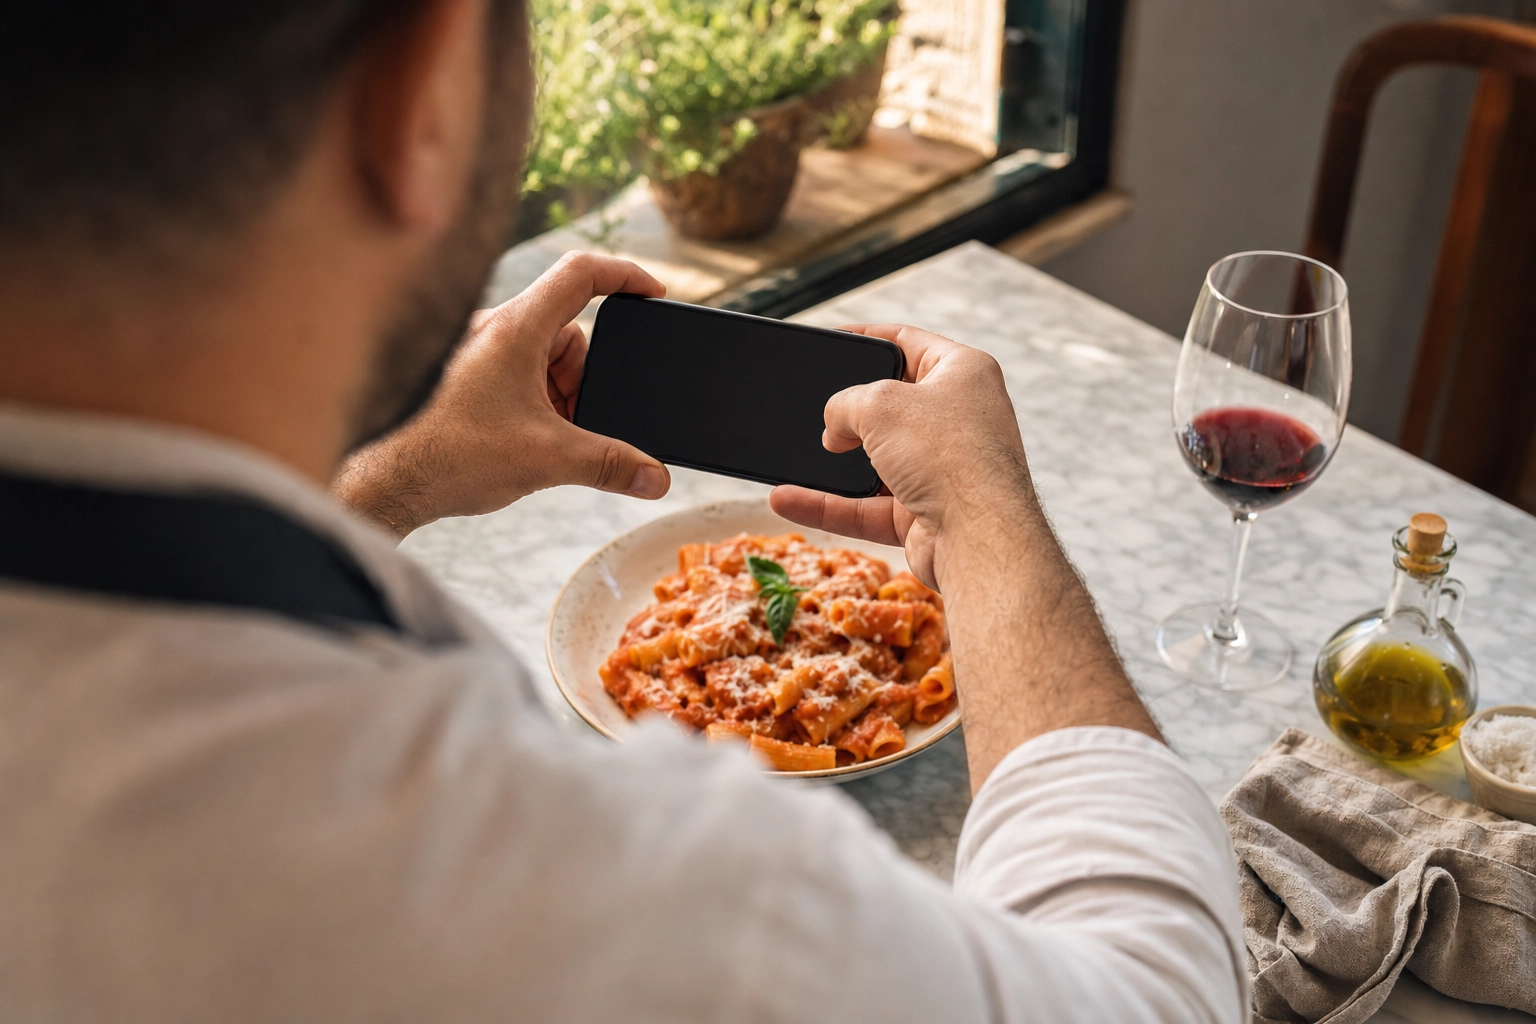 Restaurant owner photographing a bowl of pasta with a smartphone on a marble trattoria table
Here's the honest tension every Italian restaurant lives with. A professional food shoot runs $700–$1,400 a session, takes weeks to book, and has to be redone every time you tweak the menu or add a special. Meanwhile the lunch rush is right now, and that gorgeous plate of pappardelle is getting cold on the pass.
That's the gap the FoodShot AI food photo editor was built to close. You photograph your real dish with your phone — exactly as it leaves your kitchen — and the AI restyles the lighting, surface and plating into a menu-ready image in about 90 seconds. Worth being clear about what that means: FoodShot enhances and restyles a genuine photo of real food. It doesn't fabricate a fake dish you don't serve — what your guests order is what they saw. (If that distinction matters to you, our take on AI-generated food images, real vs fake, is worth a read.)
A few features map directly onto everything above:
- Italian and fine-dining style presets bake in the rustic-elegant look — warm light, marble and wood, the red-white-green palette — without you owning a single prop. Browse the Italian food photography style collection to see the range.
- My Styles lets you upload a reference shot of your own best photo (or a look you love) and clone that exact aesthetic across the whole menu — instant consistency.
- Builder Mode lets you set the background surface, the plate and the dish, so a saffron risotto lands in the right bowl every time.
- Multi-variation spits out delivery-app, menu and social crops from a single upload, and 4K output is print-ready for physical menus.
The before-and-after, in practice: that dim, cluttered snap of a carbonara shot under yellow kitchen lights — steam gone, sauce flat — comes back as a warm trattoria editorial shot on a marble counter, sauce glossy, pepper sharp, a basil leaf catching the light. Same dish, same portion. Better light and styling, at roughly 95% less cost than a photographer, with a commercial license on every paid plan.
It's the same approach used for upscale rooms — see how it plays out for fine-dining food photography — and it scales from a single café to a multi-location restaurant group.
Frequently Asked Questions
How do I take good Italian food pictures with my phone?
Use one big, soft light source and shoot fast. Set the dish beside a window with the light coming from the side or slightly behind it, turn off the overhead kitchen lights, and bounce the shadows with a sheet of white paper. Shoot while the food is hot so the sauce stays glossy, frame at 45 degrees or straight overhead, and keep props to one or two. A modern phone on its highest-resolution setting is more than enough — our walkthrough on how to take food photos with your phone covers the rest. Light and styling matter far more than the camera body.
What background works best for Italian food photography?
Marble, weathered wood, dark slate and linen are the four surfaces that cover almost every Italian dish. Pale marble gives a clean deli-counter elegance to pasta and antipasti; wood adds rustic warmth to bread and boards; dark slate brings drama to braised dishes and tiramisu; linen softens the whole frame. A small kit of those four lets you shoot an entire menu without buying anything else.
Should Italian food be photographed on a dark or light background?
Match the background to the dish's mood. Bright, fresh dishes — caprese, seafood, summer salads, gelato — look best on light, airy backgrounds with clean shadows. Rich, slow-cooked dishes — ragù, baked pasta, osso buco, tiramisu — come alive on dark, moody backgrounds lit by a single directional light (the chiaroscuro look). Both read as authentically Italian; the key is picking one mood per shoot and staying consistent.
How do you photograph pasta so it doesn't look dull or clumpy?
Shoot it hot and give it height. Twirl a forkful against a spoon and lift it just off the plate so the strands hang with sauce clinging — that motion beats a flat pile every time. Glossy sauce is the difference between "fresh" and "cafeteria," so work quickly before it cools, light from the side to catch the sheen, and don't over-sauce: the pasta should be coated, not drowning.
What props make food look authentically Italian?
A few specific, restrained touches do it: a linen napkin, a vintage fork, a wine glass, an olive-oil cruet, a wedge of Parmigiano with the rind showing, fresh basil, and a couple of whole tomatoes or a head of garlic. The secret is restraint — one or two props that suggest a real Italian table, not a cluttered set. Lean on the red-white-green palette and you'll signal "Italian" before anyone identifies the dish.
Can I use AI to create Italian food images for my restaurant menu?
Yes — the most practical route is to photograph your real dishes and use an AI editor like FoodShot to transform those phone snaps into studio-quality, menu-ready images in about 90 seconds. It restyles the light, surface and plating (and includes Italian and fine-dining presets) rather than inventing fake food, so the photo still represents what you actually serve. It costs around 95% less than a professional shoot and keeps every dish consistent across your menu, delivery apps and social feeds. You can start free in the FoodShot AI food photo editor.
Italian food gives you a head start — it's gorgeous before you even pick up a camera. Learn the rustic-elegant look, master those five shots, light them with one good window, and keep them consistent, and your italian food pictures will do more selling than any line of menu copy. When the rush won't wait, upload a phone snap to the FoodShot AI food photo editor, try the Italian and fine-dining styles, and have a menu-ready image before the plate gets cold. Cooking something other than Italian tonight? Browse food photography by cuisine for the same playbook applied to kitchens around the world.
