How to Plan a Menu Photoshoot (Step-by-Step Guide)
A menu photoshoot can transform how customers see your restaurant — and how often they order. But without a solid plan, it can also drain your budget, eat up two full days of your time, and leave you with photos you're not happy with.
Quick Summary: A successful menu photoshoot comes down to six steps: define your goals and pick your dishes, build a detailed shot list, set a realistic budget ($1,500–$5,000 for 30 dishes), decide between DIY and professional, nail shoot-day logistics (cold items first, hot items last), and handle post-production efficiently. Or skip the traditional photoshoot entirely — AI tools like FoodShot can transform phone photos into professional menu images in minutes.
Research from Mondelez International Foodservice shows 75% of diners choose a restaurant based on the photos they see online. That makes your menu photoshoot one of the highest-ROI investments you'll make this year. Here's how to plan one that actually delivers results.
Step 1: Define Your Goals and Pick Your Dishes
Before calling a photographer or grabbing your phone, answer one question: where will these photos live?
The answer shapes everything — from the number of dishes you shoot to the aspect ratios you need:
- Printed menus → High-resolution images (300 DPI), horizontal or vertical depending on layout
- Delivery apps (Uber Eats, DoorDash, Grubhub) → Specific dimensions per platform (more on this in Step 6)
- Social media → Square or vertical crops, styled for scroll-stopping impact
- Website → Wide hero images for banners, smaller thumbnails for your online menu pages
Once you know the destination, pick your dishes strategically. You don't need to photograph everything on your menu. Focus on:
- Hero dishes — Your top 5–8 bestsellers. These get the most screen time and deserve the most attention during the photoshoot.
- High-margin items — Dishes you want people to order. Great food photography nudges customers toward profitable choices.
- Visually striking dishes — Some dishes just photograph well. A colorful poke bowl sells itself; a beige chicken breast needs more styling help.
- Seasonal specials — If you're launching a summer menu, shoot those items first.
- New additions — Any dish customers haven't seen yet.
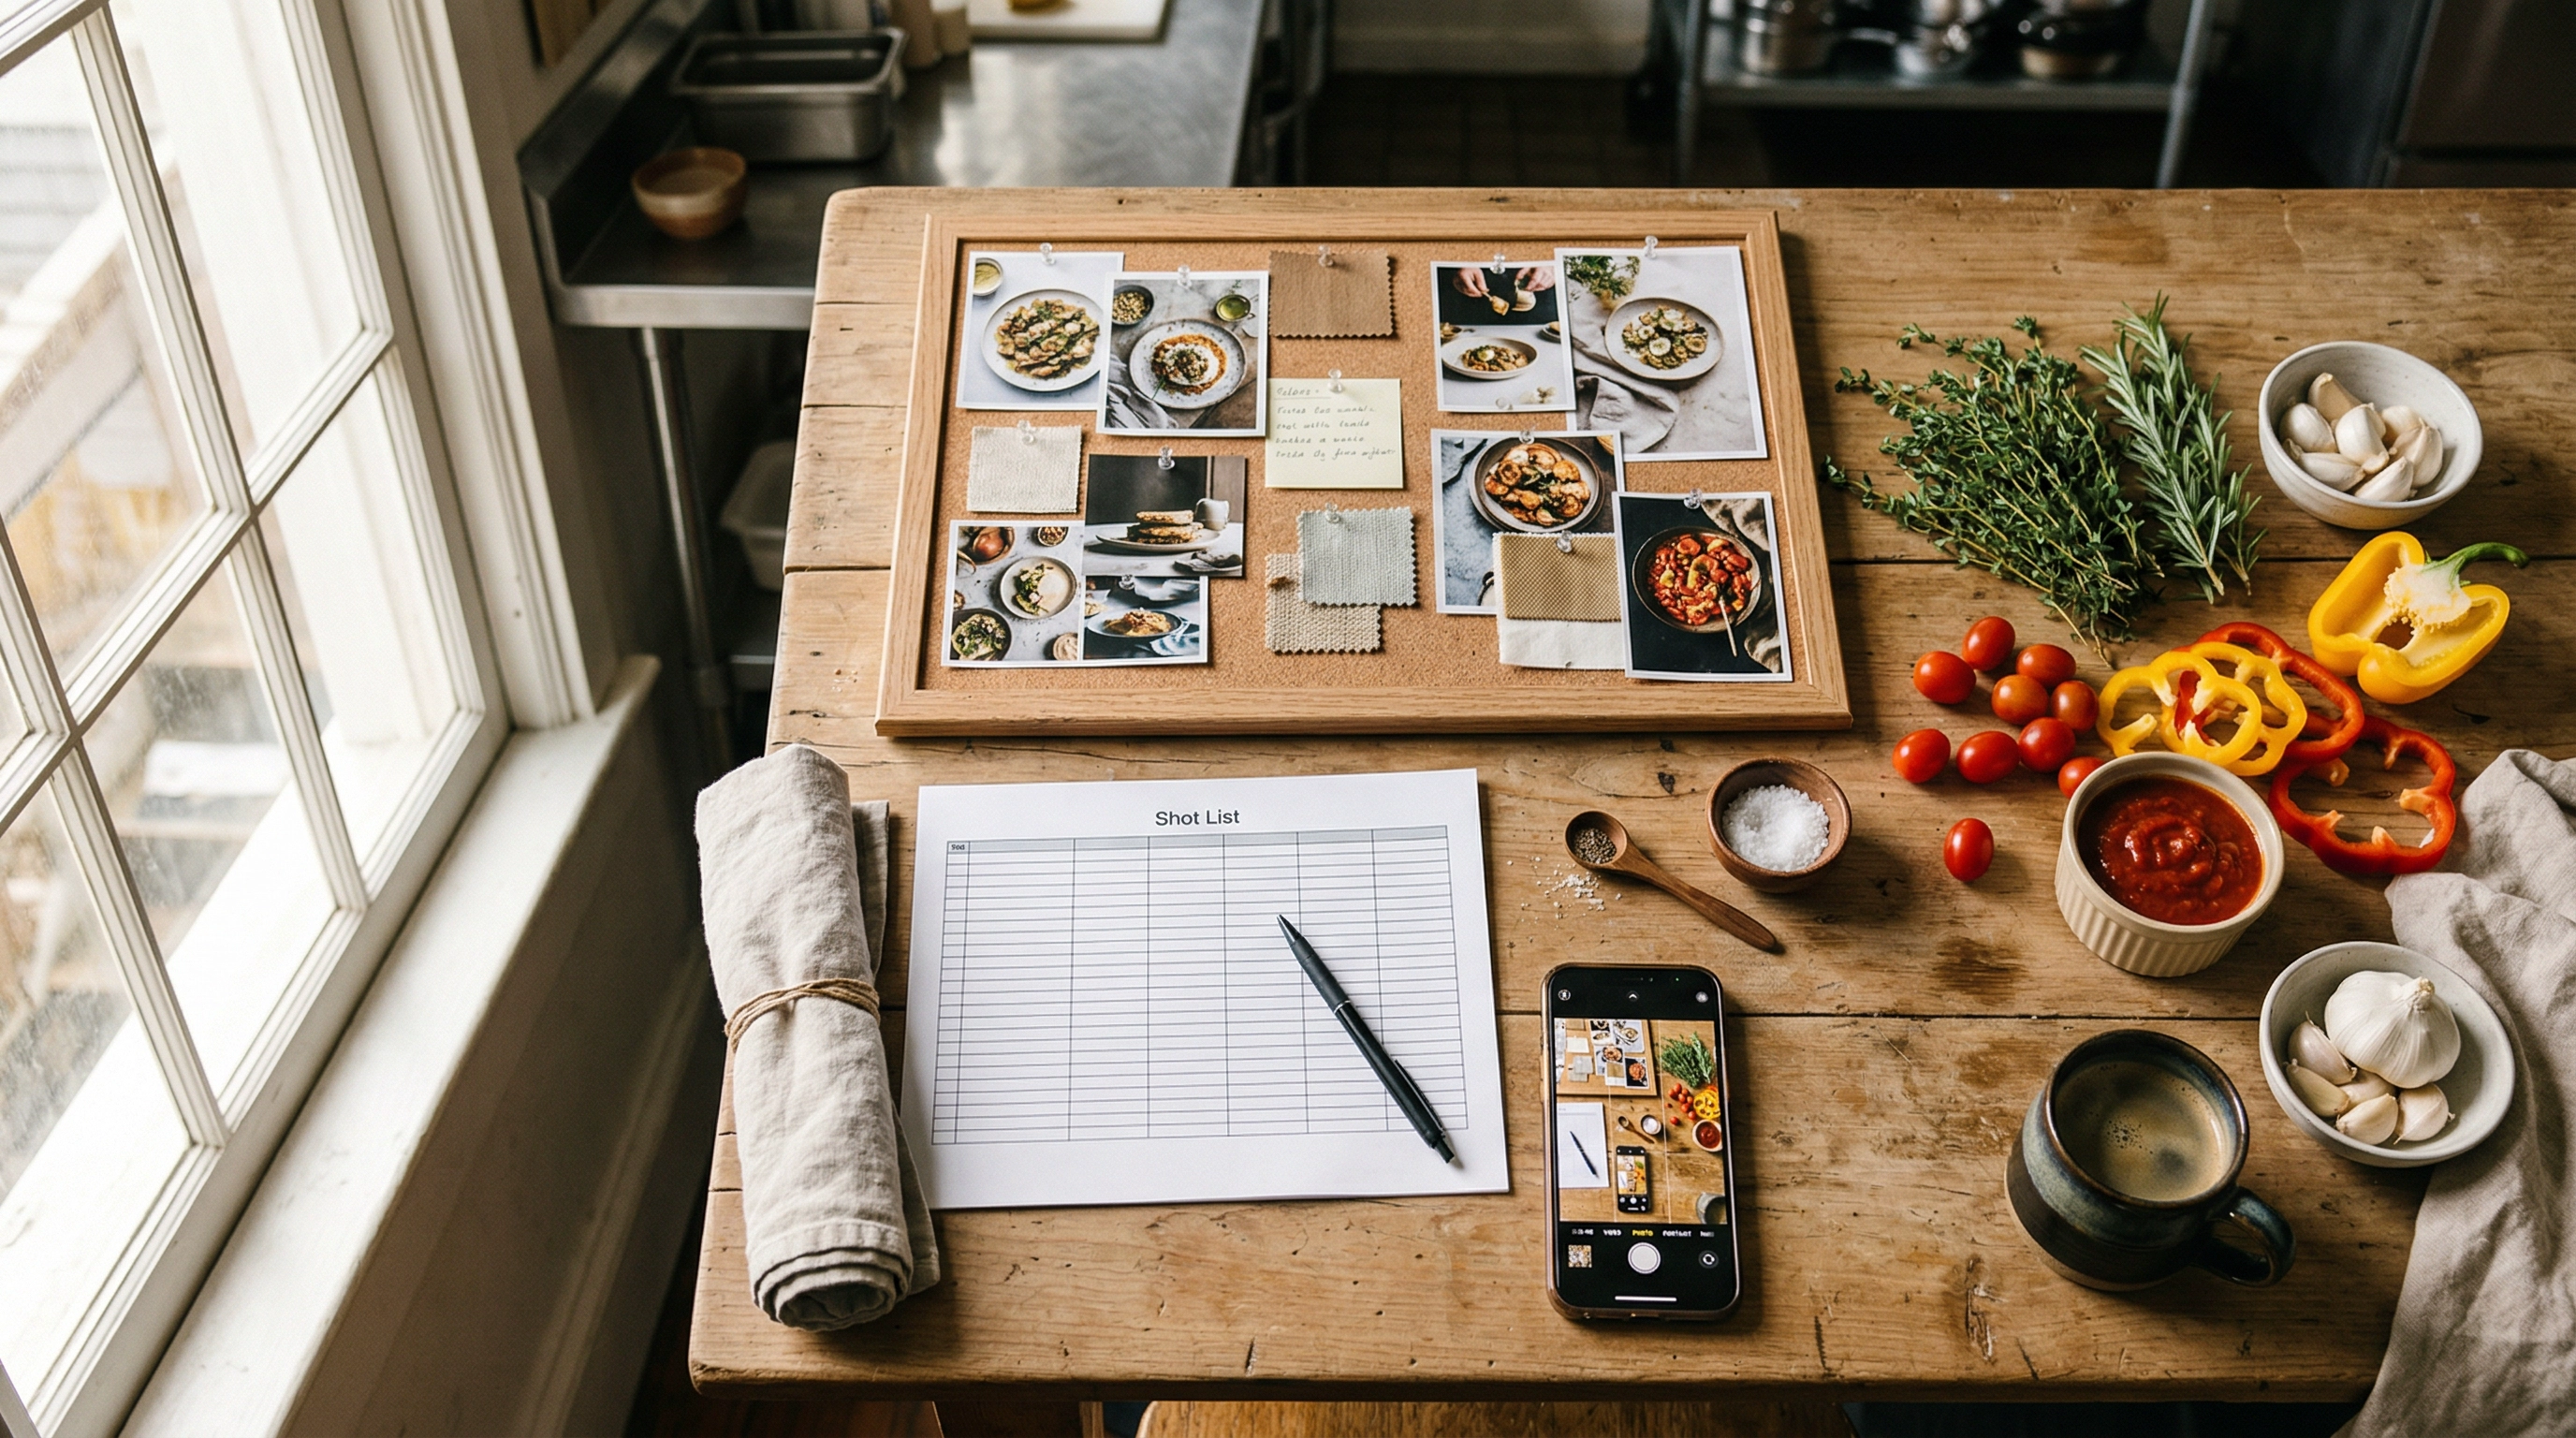
Most restaurant menu photoshoots cover 20–50 dishes. If you're shooting your full menu for the first time, aim for 30–40 hero shots plus a handful of ambiance and lifestyle images of your space, your kitchen, and your team.
 Hands holding highlighted menu photoshoot shot list over kitchen prep counter with fresh ingredients
Step 2: Build Your Shot List
A shot list is the single most important document in your menu photoshoot. It prevents wasted time, forgotten dishes, and the dreaded "we should have shot that differently" realization two weeks later.
Create a simple spreadsheet with these columns:
| Dish Name | Category | Angle | Orientation | Props/Styling Notes | Platform | Priority |
|---|---|---|---|---|---|---|
| Wagyu Burger | Mains | 45° | Landscape | Rustic board, side of fries visible | Menu + DoorDash | Hero |
| Tiramisu | Desserts | Overhead | Square | Clean white plate, cocoa dust action shot | Instagram + Menu | Hero |
| Caesar Salad | Starters | 45° | Landscape | Wooden bowl, parmesan shaving mid-air | Uber Eats | Secondary |
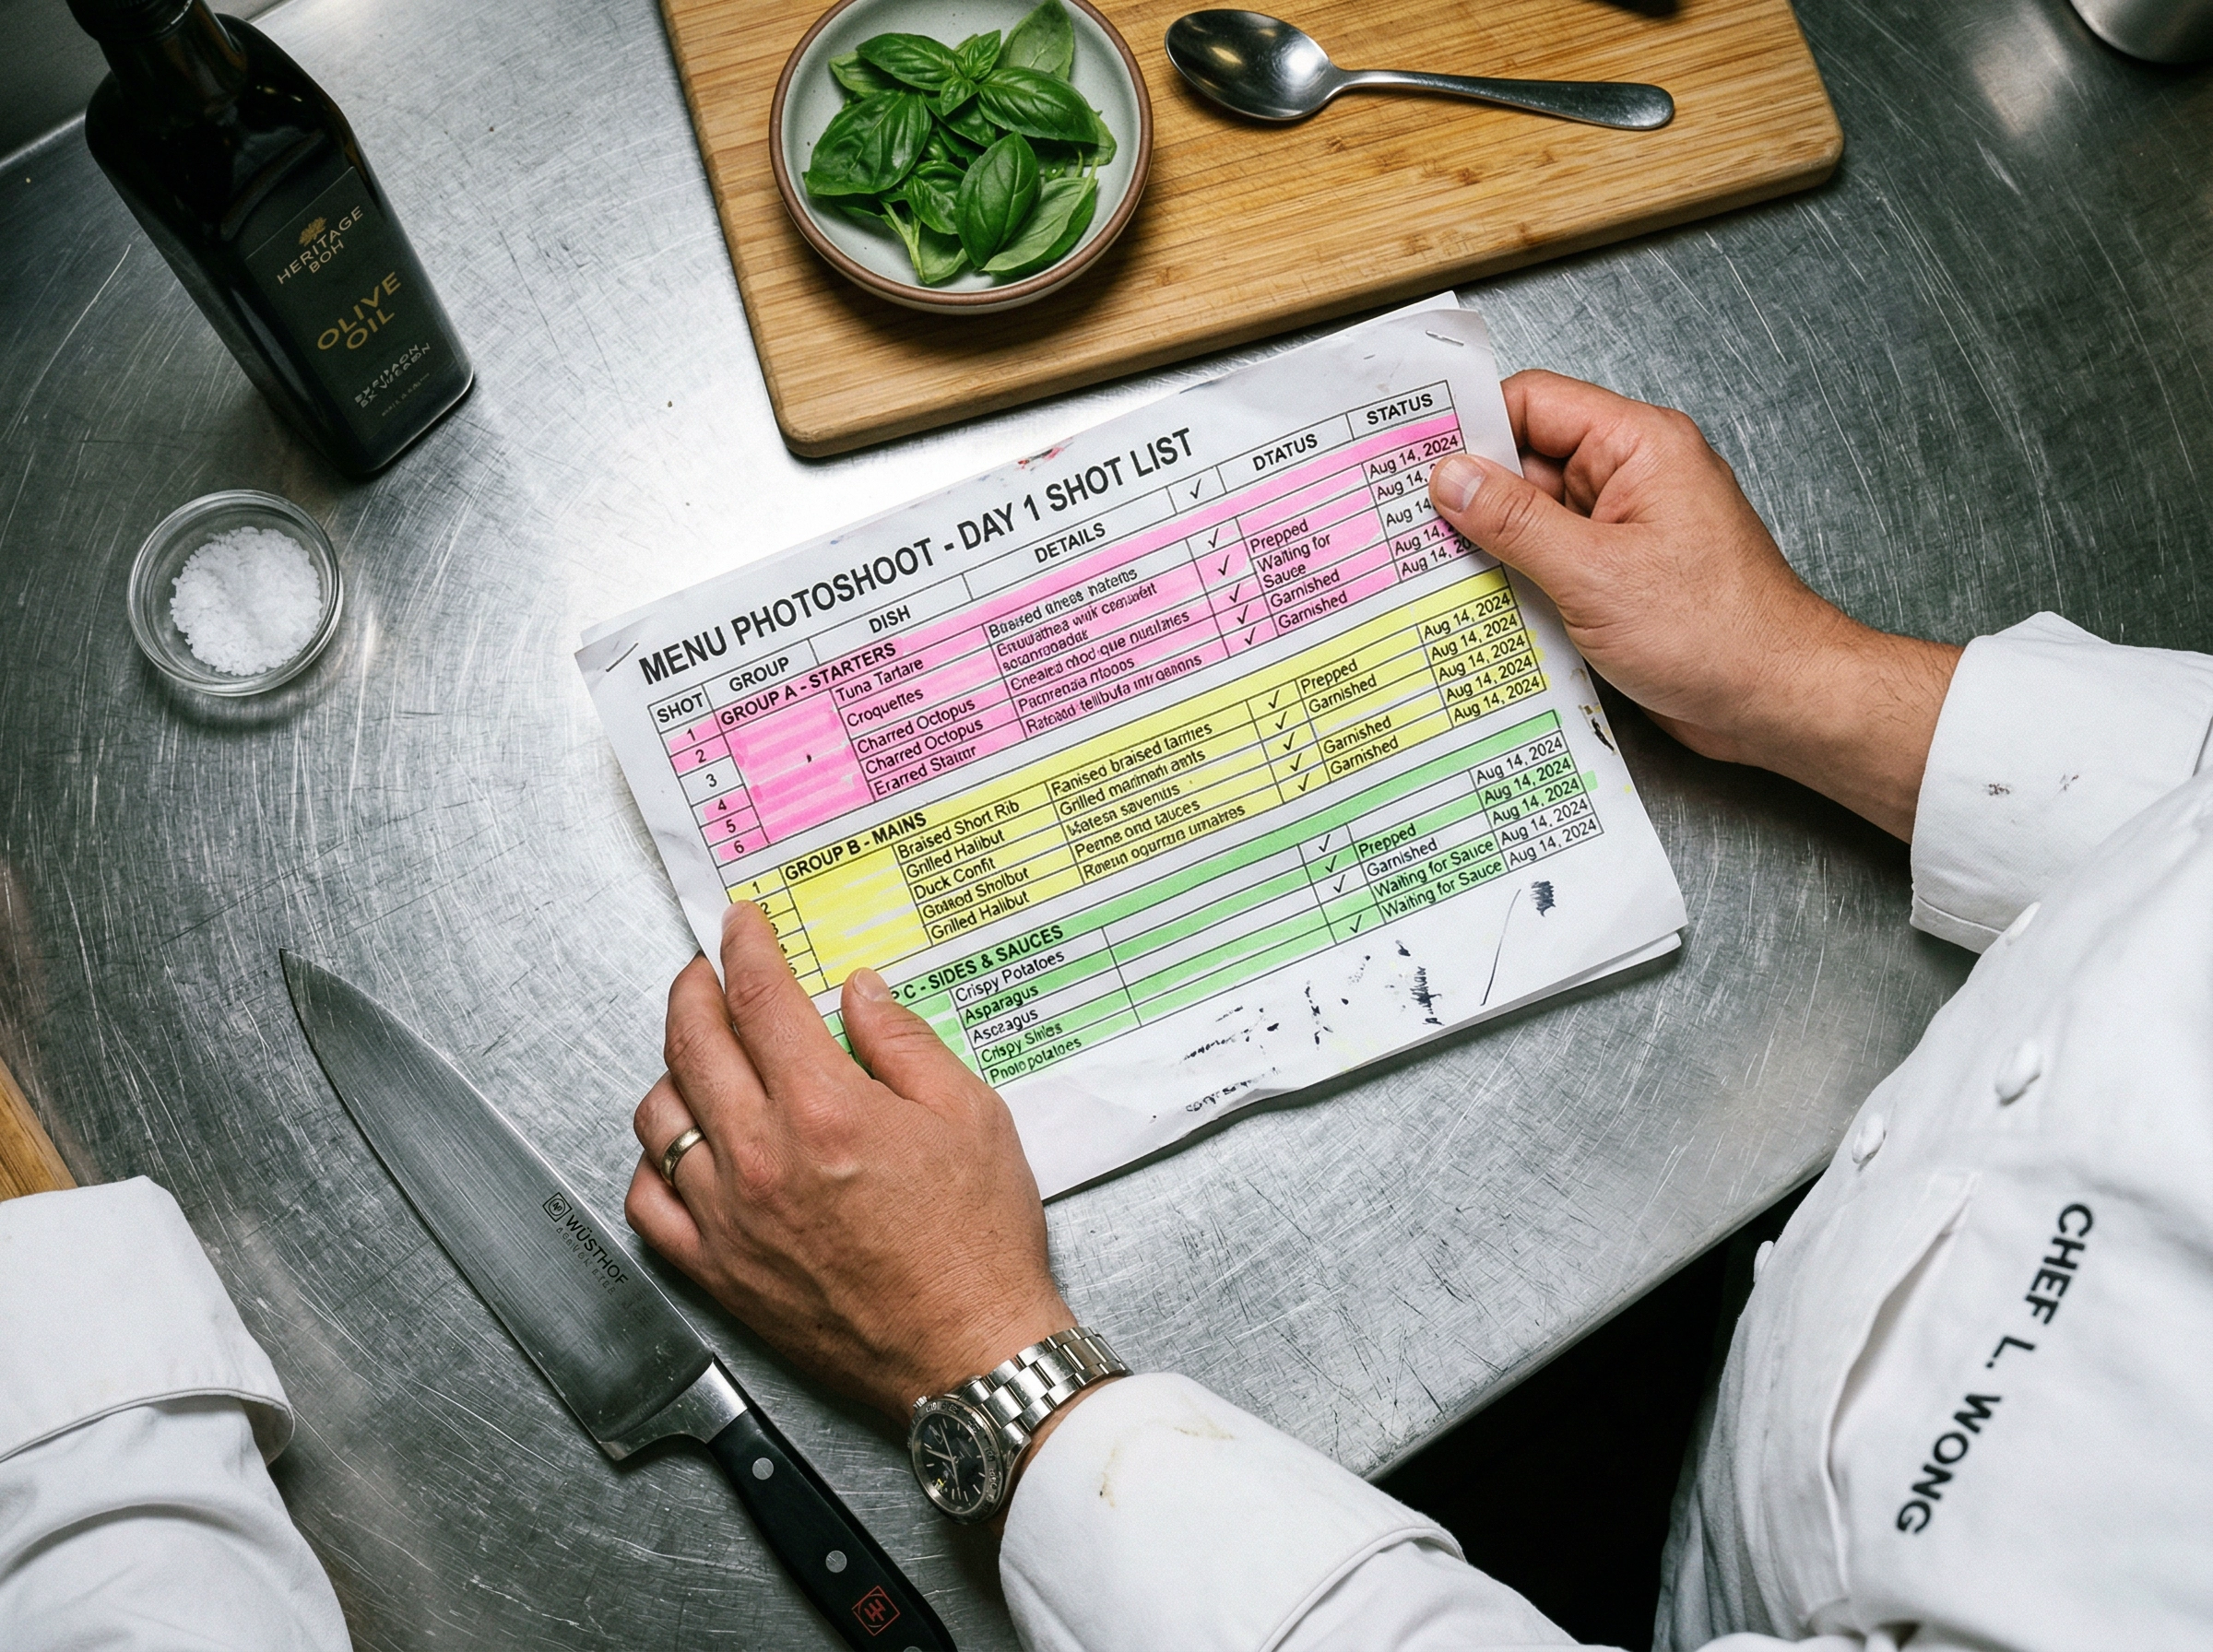
Group shots by setup, not by menu category. This is the pro move that saves hours. If your burger and your steak both need the same dark wood surface and moody side lighting, shoot them back-to-back — even though they're in different menu sections. This minimizes backdrop changes and keeps your food photography workflow efficient.
Allocate time per shot:
- Hero dishes: 15–20 minutes each (multiple angles, styling adjustments, several compositions)
- Secondary dishes: 5–10 minutes each (one or two angles, minimal restyling)
- Ambiance/lifestyle shots: 10–15 minutes each
For a 30-dish shoot, that's roughly 6–8 hours of actual shooting time. Add setup, breakdown, and food prep delays, and you're looking at a full day — or two half-days.
Need help choosing the right angles and composition for specific dishes? Our guide to food photography for restaurant menus breaks down what works best for each dish type.
 Restaurant dishes organized by shooting groups on marble table for menu photoshoot shot list planning
Step 3: Set Your Budget
Here's where most restaurant owners get surprised. The photographer's fee is just the starting point for your menu photoshoot budget.
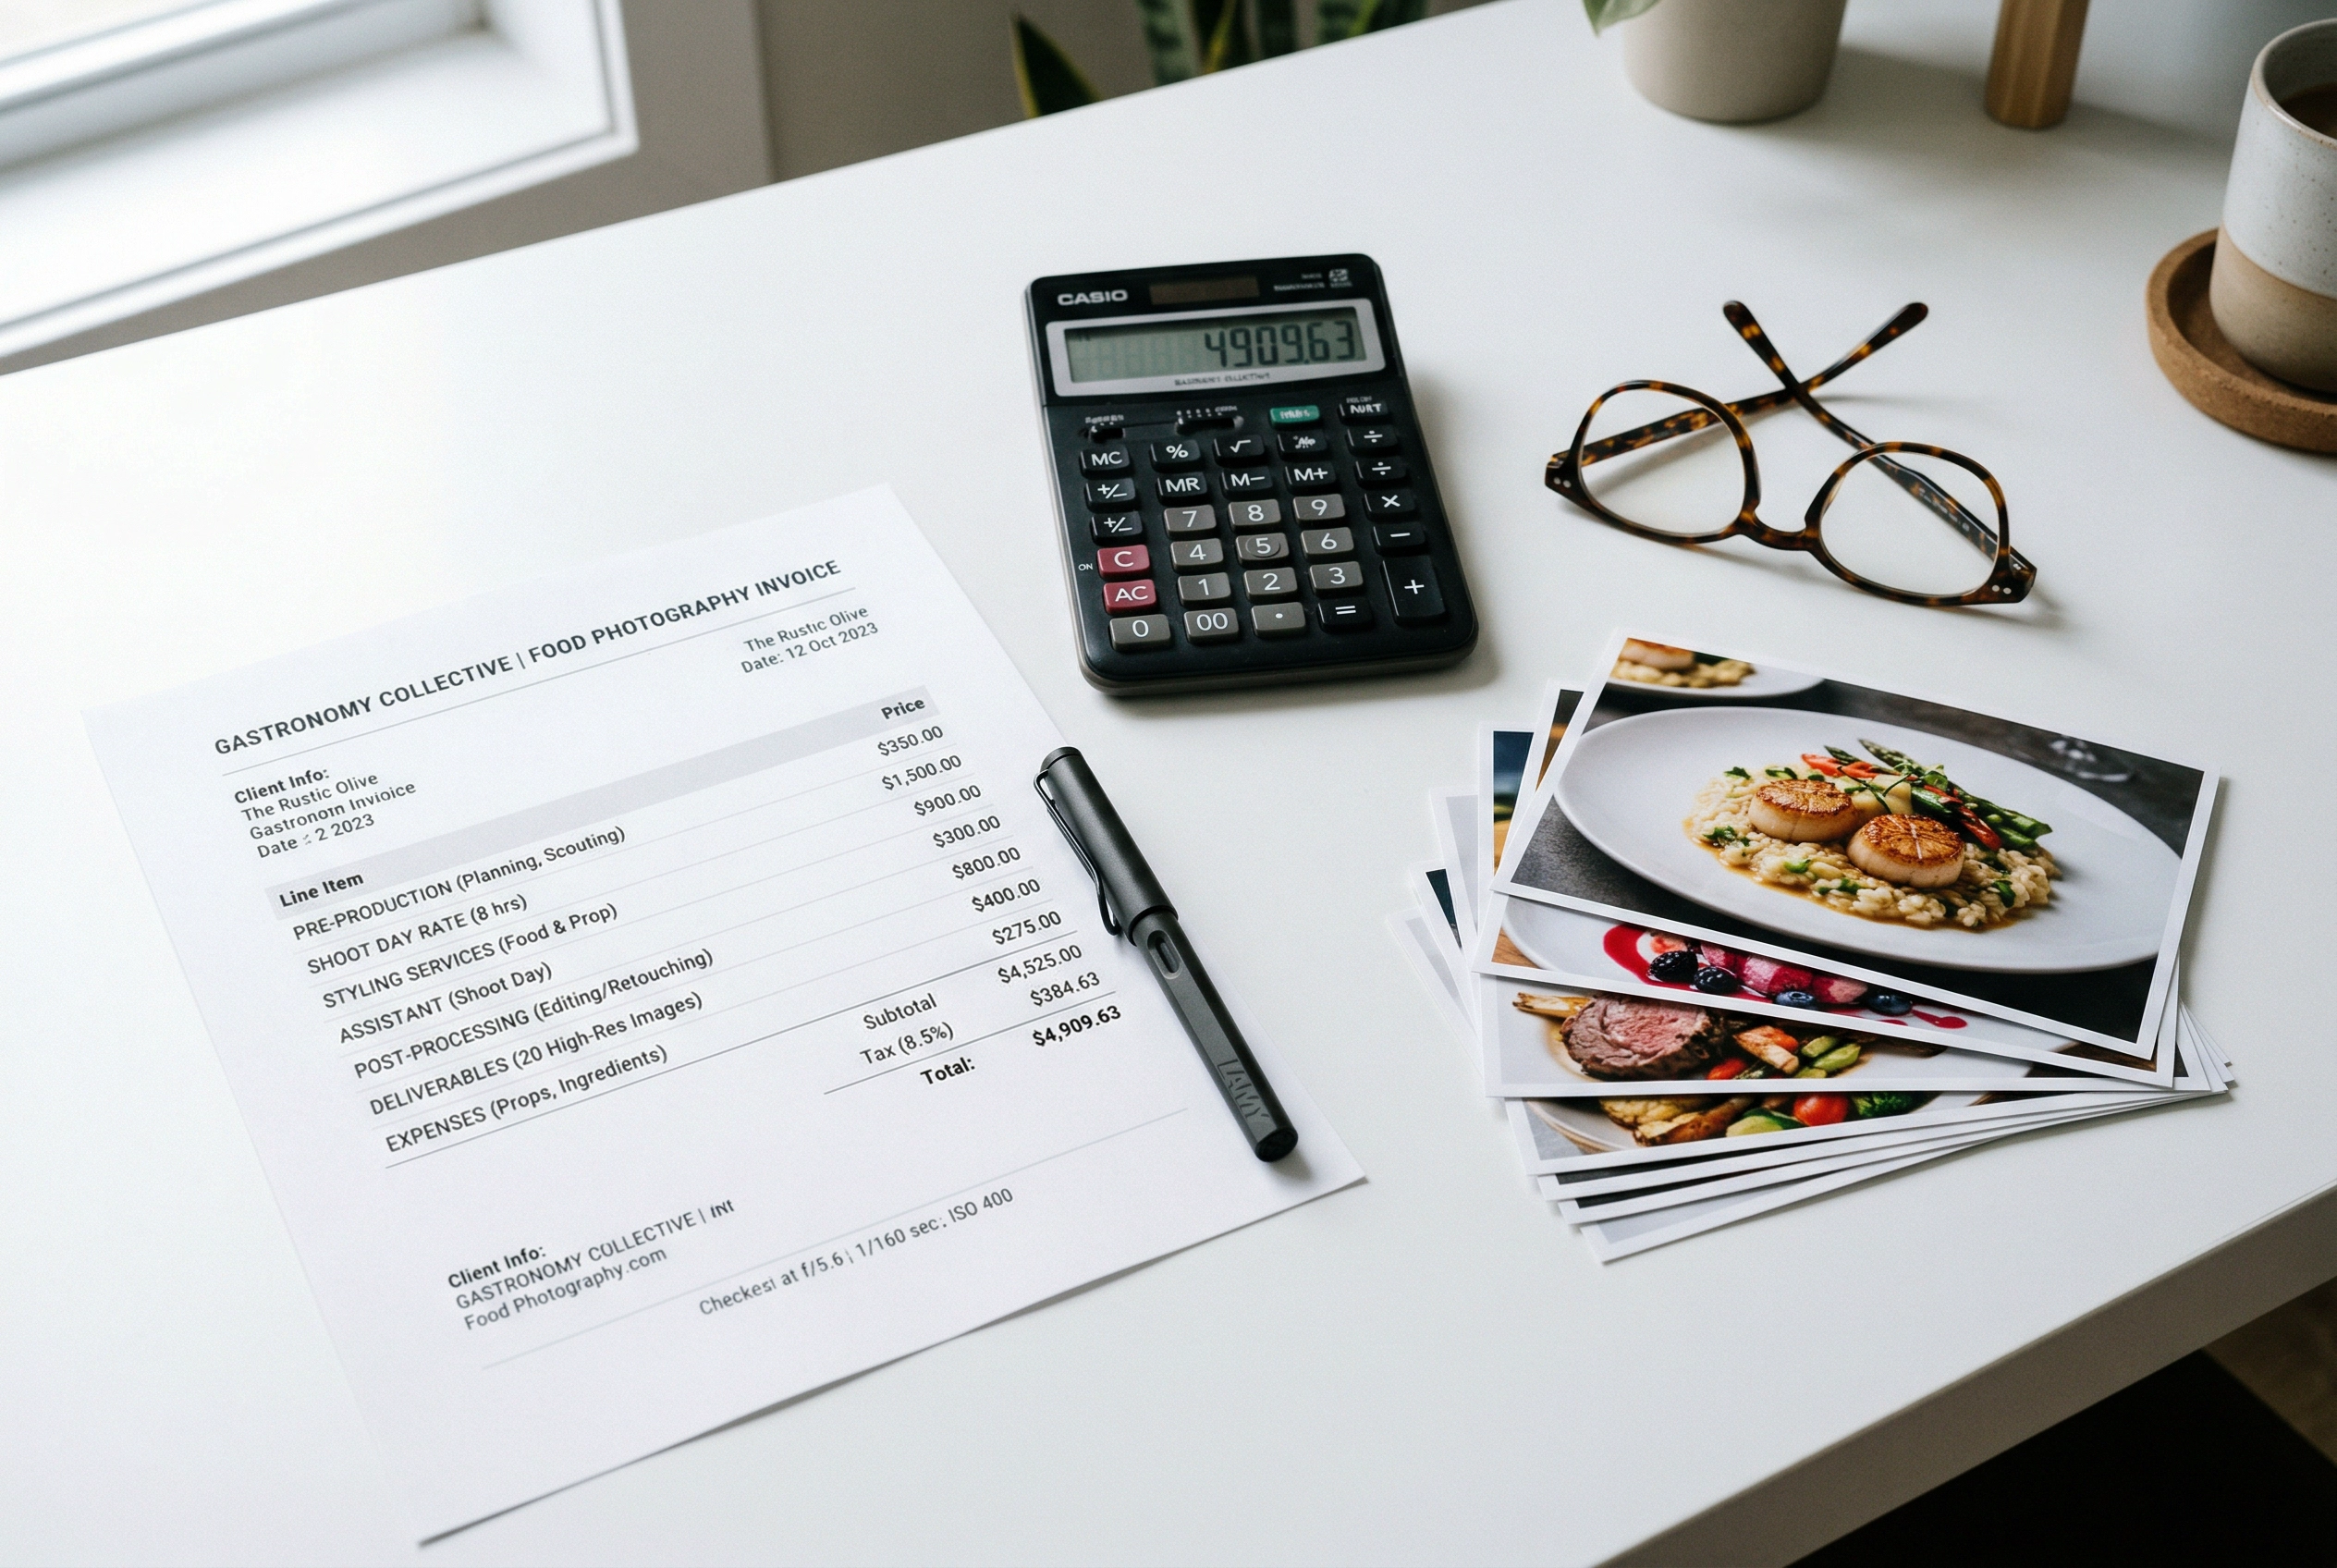 Menu photoshoot budget planning with invoice, calculator, and printed food photography deliverables on desk
Typical costs for a 30-dish restaurant menu photoshoot in 2026:
| Line Item | Budget Range | Notes |
|---|---|---|
| Photographer (half-day) | $700–$2,500 | Depends on experience and city |
| Food stylist | $500–$1,200/day | Editorial rate vs. advertising rate |
| Props & surfaces | $150–$400 | Boards, linens, utensils, fresh garnishes |
| Food cost | $200–$500 | Dishes prepared specifically for the shoot |
| Retouching/editing | $10–$50/image | Color correction, blemish removal, cropping |
| Total | $1,500–$5,000+ | For 30 finished, retouched images |
Hidden costs that catch restaurant owners off guard:
- Usage licensing — Some photographers charge extra for commercial use or multi-platform rights. Clarify this before signing.
- Reshoots — If three dishes don't turn out right, you'll pay again for those.
- Studio rental — $750–$2,500/day if you're not shooting on-location at your restaurant.
- Revenue loss — Closing during lunch service for a photoshoot has a real opportunity cost.
That puts your all-in per-image cost at roughly $50–$170 for a professional food photography session. For a deeper breakdown across different city tiers and pricing models, see our restaurant photography pricing guide — it covers everything from per-image rates to monthly retainer packages.
Step 4: DIY vs. Hiring a Professional
This isn't an either/or decision. It's about matching the right approach to the situation.
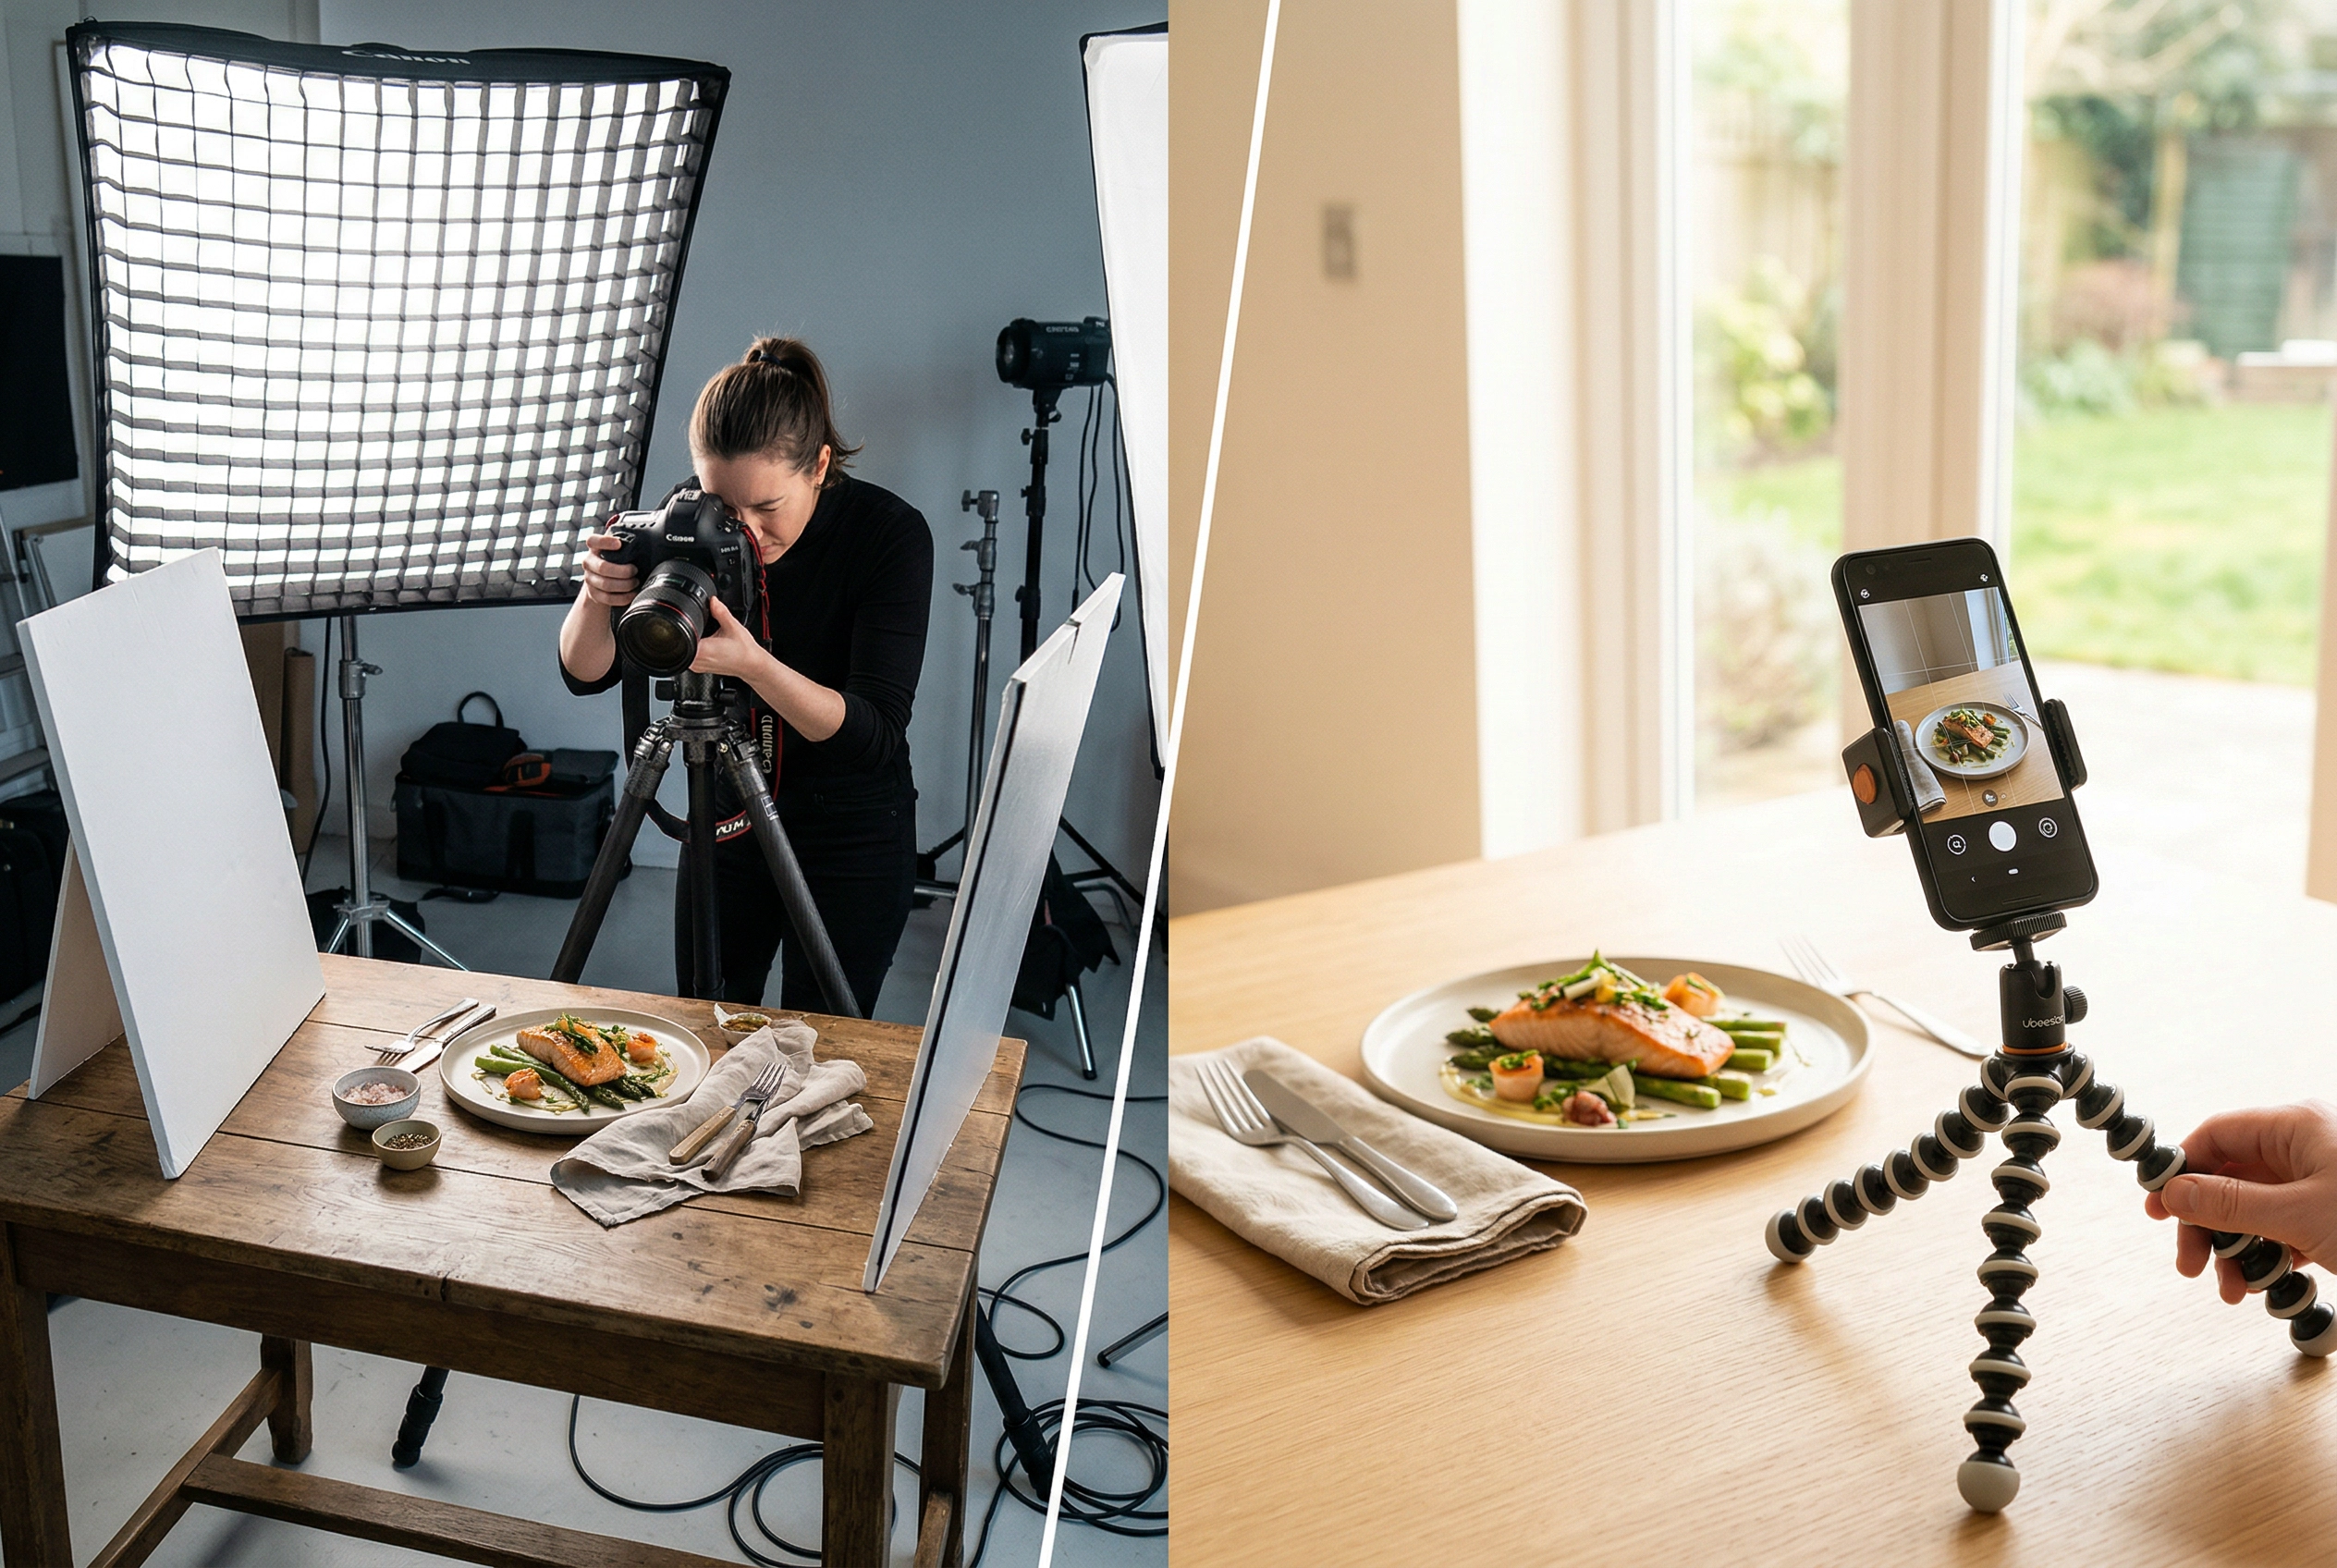 Side-by-side comparison of professional studio food photography setup versus simple DIY smartphone approach
Hire a professional photographer when:
- You're rebranding or opening a new location and need a complete image library
- Photos will be used in print materials (menus, signage, advertising)
- You need a specific, polished aesthetic (fine dining, editorial-style food photography)
- Your budget supports it and you want it done right the first time
DIY with your phone when:
- You're updating a few dishes on delivery platforms
- You need quick social media content between professional shoots
- Budget is tight and you have decent natural light in your restaurant
- You're testing new menu items before committing to a full photoshoot
If you go the DIY route, check out our guide on taking food photos with your phone — it covers camera settings, angles, and food styling basics that make smartphone photos look surprisingly professional.
The third option is using AI to bridge the gap between amateur phone photos and expensive professional food photography. More on that in the final section — but the short version is: you can snap quick photos of each dish during regular service, then use an AI food photo editor to transform them into polished, styled images. No photoshoot day required.
For a side-by-side comparison of cost, quality, and turnaround across all three approaches, see our full guide: AI vs. hiring a food photographer.
Step 5: Shoot Day — Logistics That Make or Break Your Results
You've planned, budgeted, and hired (or charged your phone). Now it's game time. These shoot-day logistics separate a smooth, productive menu photoshoot from a stressful mess.
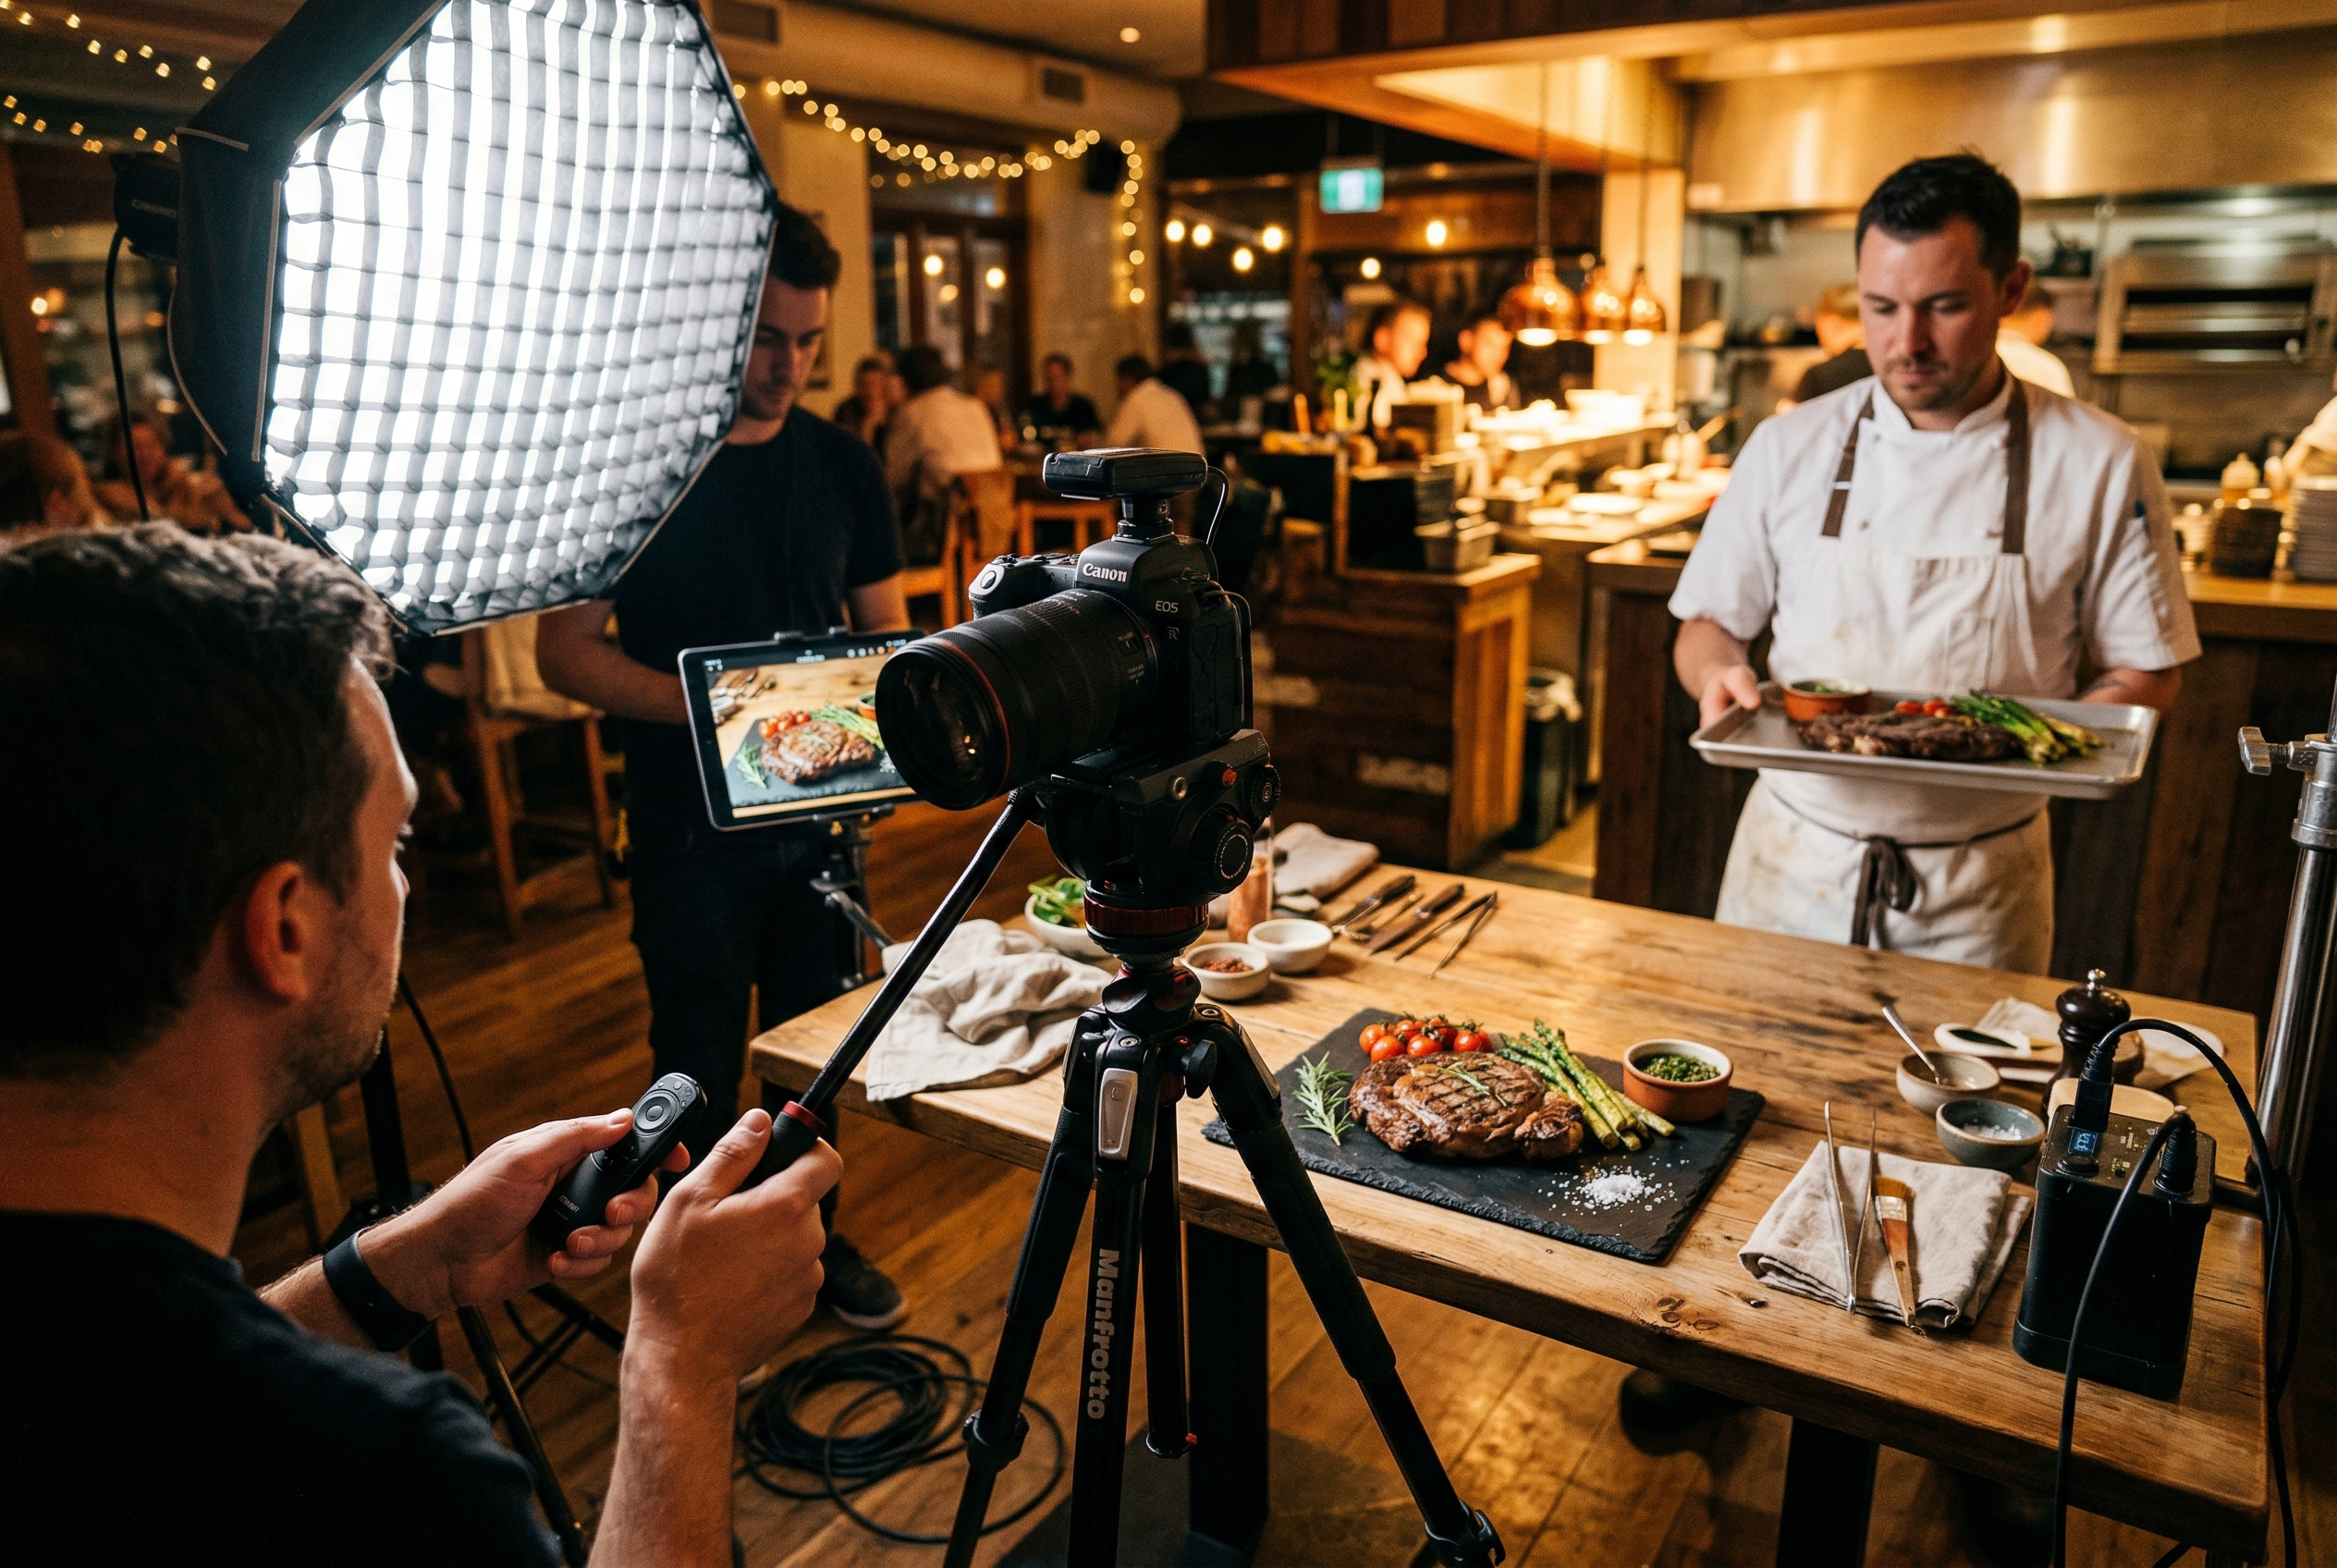 Behind-the-scenes restaurant menu photoshoot with camera on tripod and chef ready with next dish
Schedule Smart
- Best option: A closed day or the morning before service starts. Your kitchen staff can focus entirely on plating for the camera.
- Second best: A slow weekday afternoon (Tuesday or Wednesday, 2–4 PM) when you can block off a section of the restaurant.
- Avoid: Shooting during or right before a rush. Kitchen attention will be split, and it shows in the food.
If you're using natural light for your photography, schedule around it. Morning light (9–11 AM) or late afternoon (3–5 PM) gives you soft, directional light that makes food glow. Midday overhead sun creates harsh, unflattering shadows. For more on using light effectively in food photography, see our lighting guide.
Set Up Your Station
Pick a spot near the kitchen but out of the dining flow. You need:
- A stable surface (table or portable shooting table)
- Your backdrops and props laid out and ready to swap quickly
- Cleaning supplies (wet towels, tweezers, a spray bottle for adding moisture to dishes)
- A laptop or tablet for reviewing shots in real time
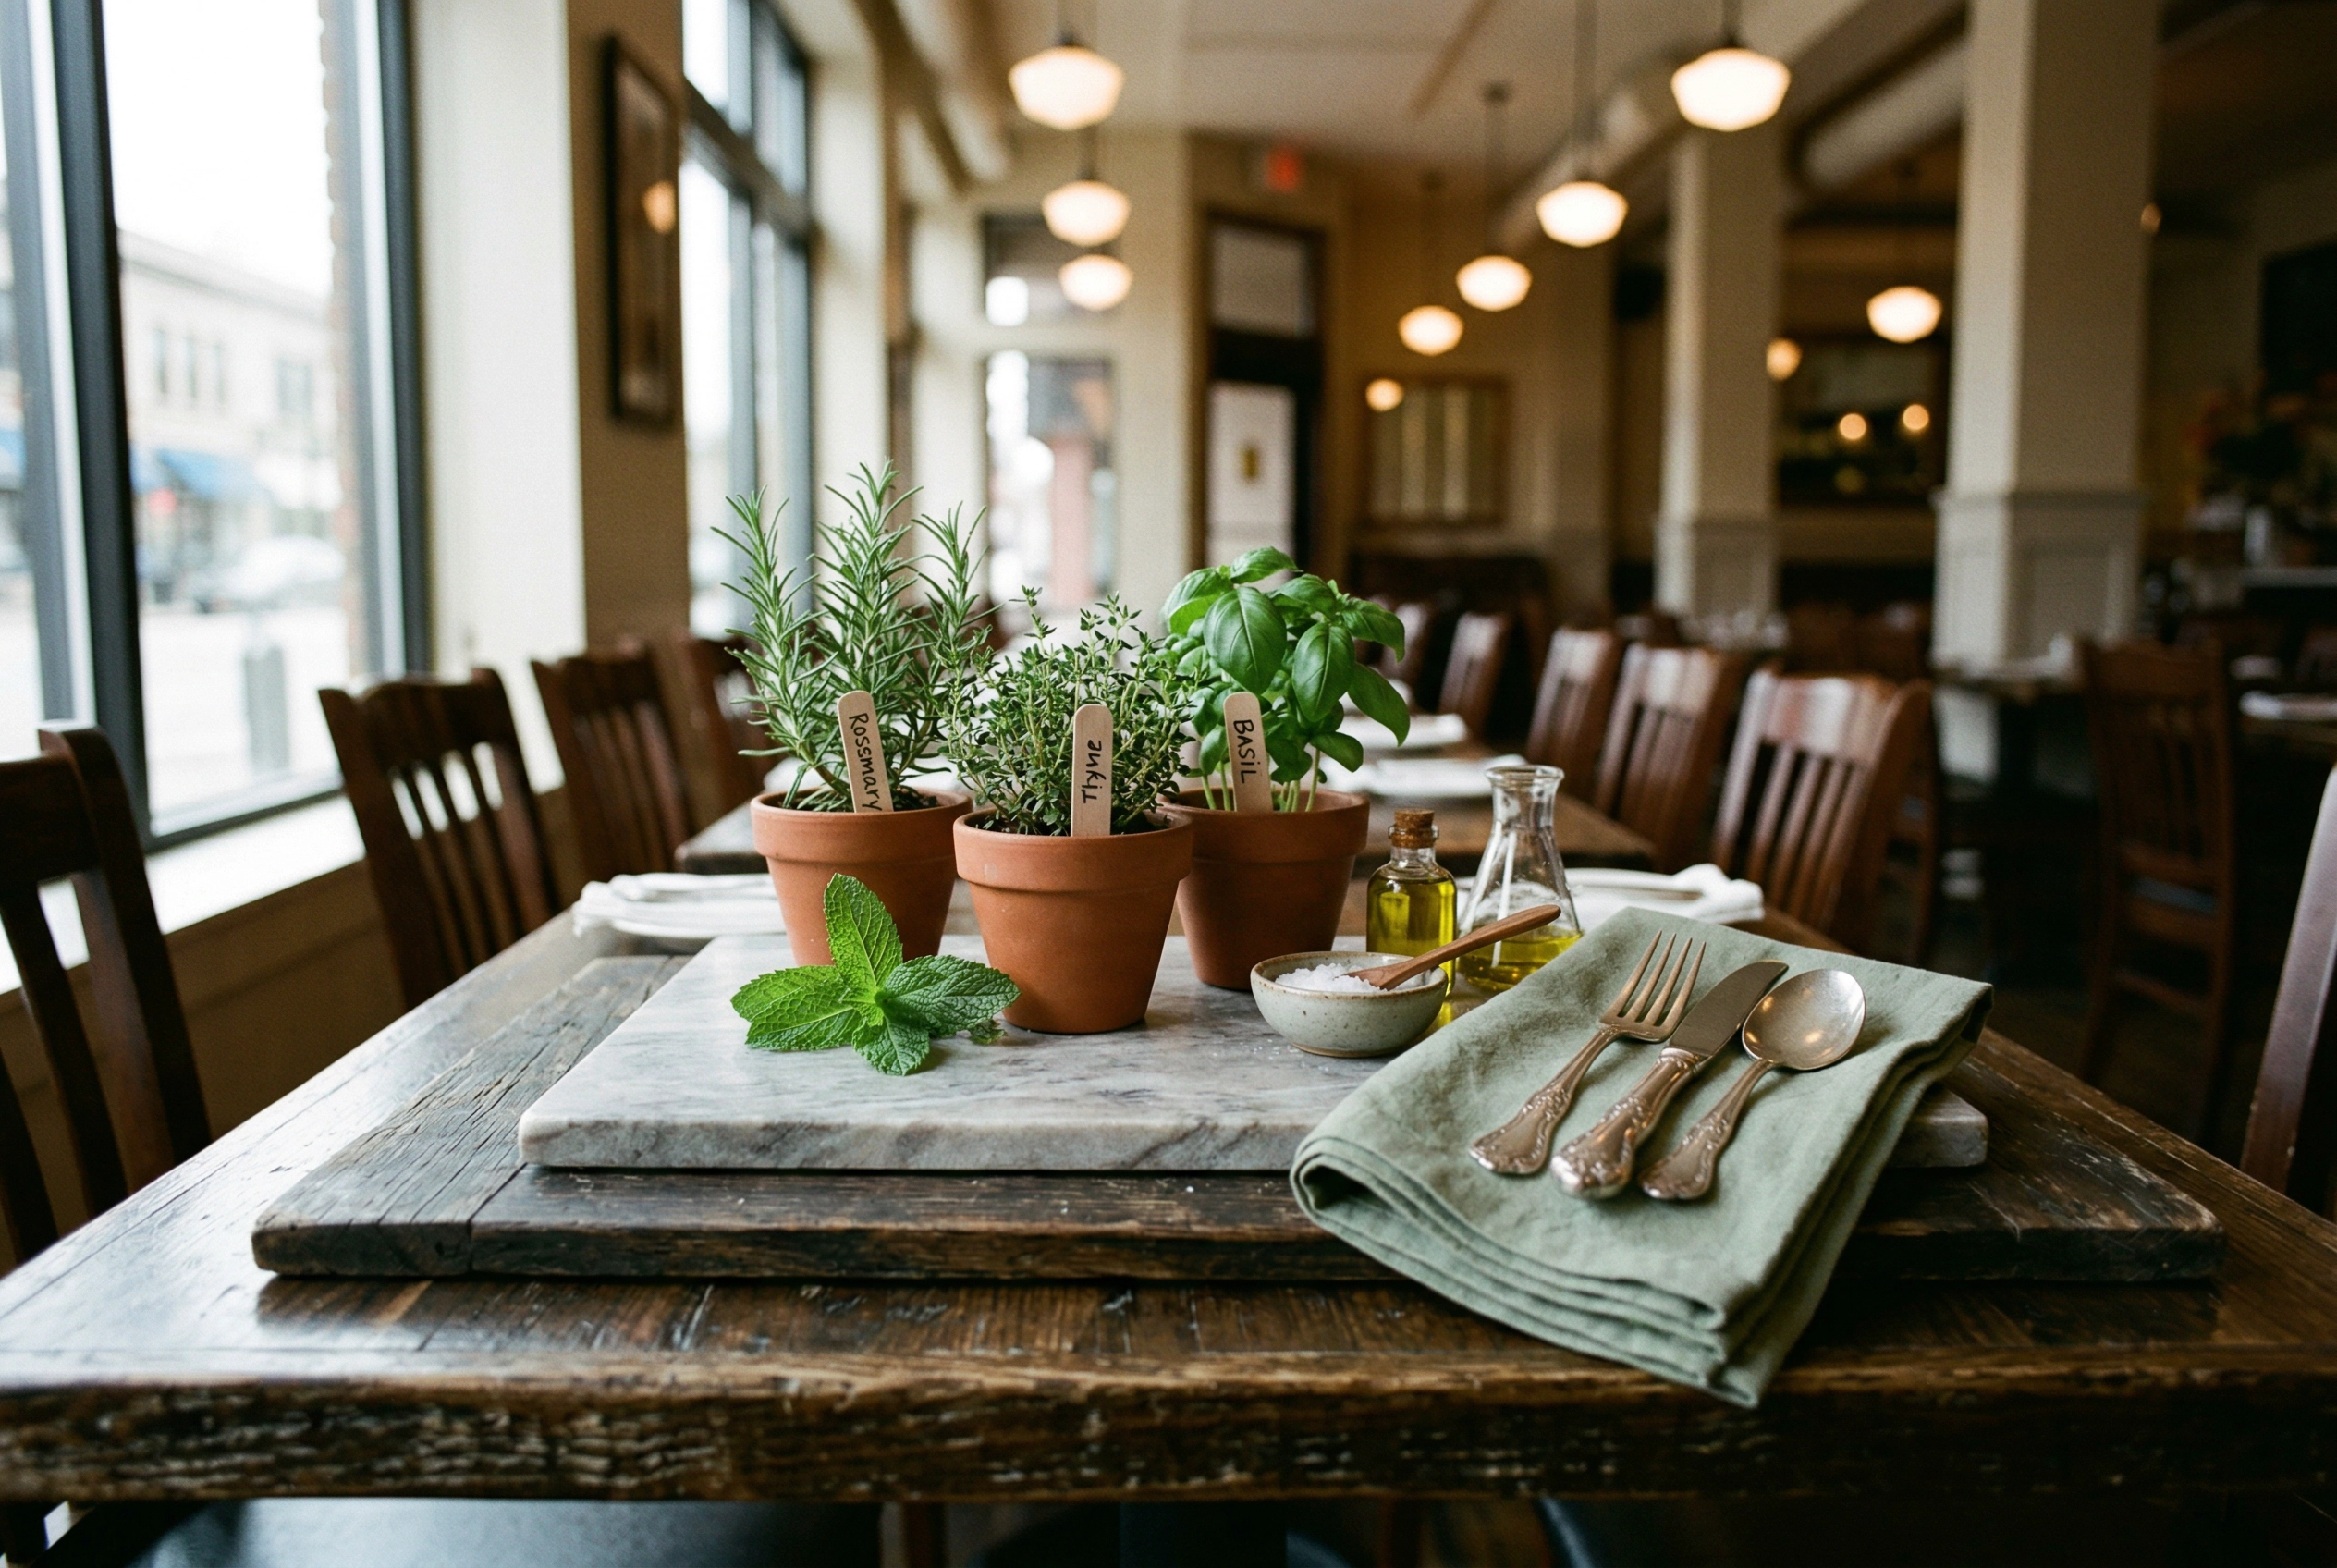 Restaurant table set up as temporary food photography station with backdrops, props, and natural morning light
Assign one kitchen liaison — a chef or line cook who will plate every dish to spec. This single decision prevents the "who's making the next plate?" confusion that kills momentum during a photoshoot.
The Shooting Order That Saves Hours
This is the single most overlooked detail in menu photoshoot planning. The order you photograph dishes directly impacts how appetizing they look in the final images.
Shoot in this sequence:
- Cold desserts and salads — Ice cream, panna cotta, tartare, fresh salads. These deteriorate fastest under photography lights. Shoot them first, within 5–10 minutes of plating.
- Room-temperature items — Bread, charcuterie boards, cheese plates, pastries. These hold their appearance well for 20–30 minutes.
- Fried and crispy dishes — Fries, tempura, fried chicken. Crispiness and texture fade within 10–15 minutes. Have these come out fresh right before shooting.
- Hot entrées — Steaks, pasta, curries. Steam looks great on camera, but the window is narrow. Plate and shoot within 5 minutes for the best results.
- Beverages — Cocktails, coffee, smoothies. Condensation and foam change quickly. Shoot immediately after preparation.
 Menu photoshoot shooting order showing cold to hot dish progression from salad to cocktail
Pro tip: Have backup ingredients ready for your top 5 hero dishes. If a burger bun gets soggy or a sauce smears wrong, you don't want to wait 20 minutes for a replate. For detailed food styling techniques that keep dishes camera-ready longer, we've got a full guide.
Step 6: Post-Production and File Delivery
The photoshoot is done. Now the editing work begins — and how you handle post-production determines whether your images actually get used or sit forgotten in a folder.
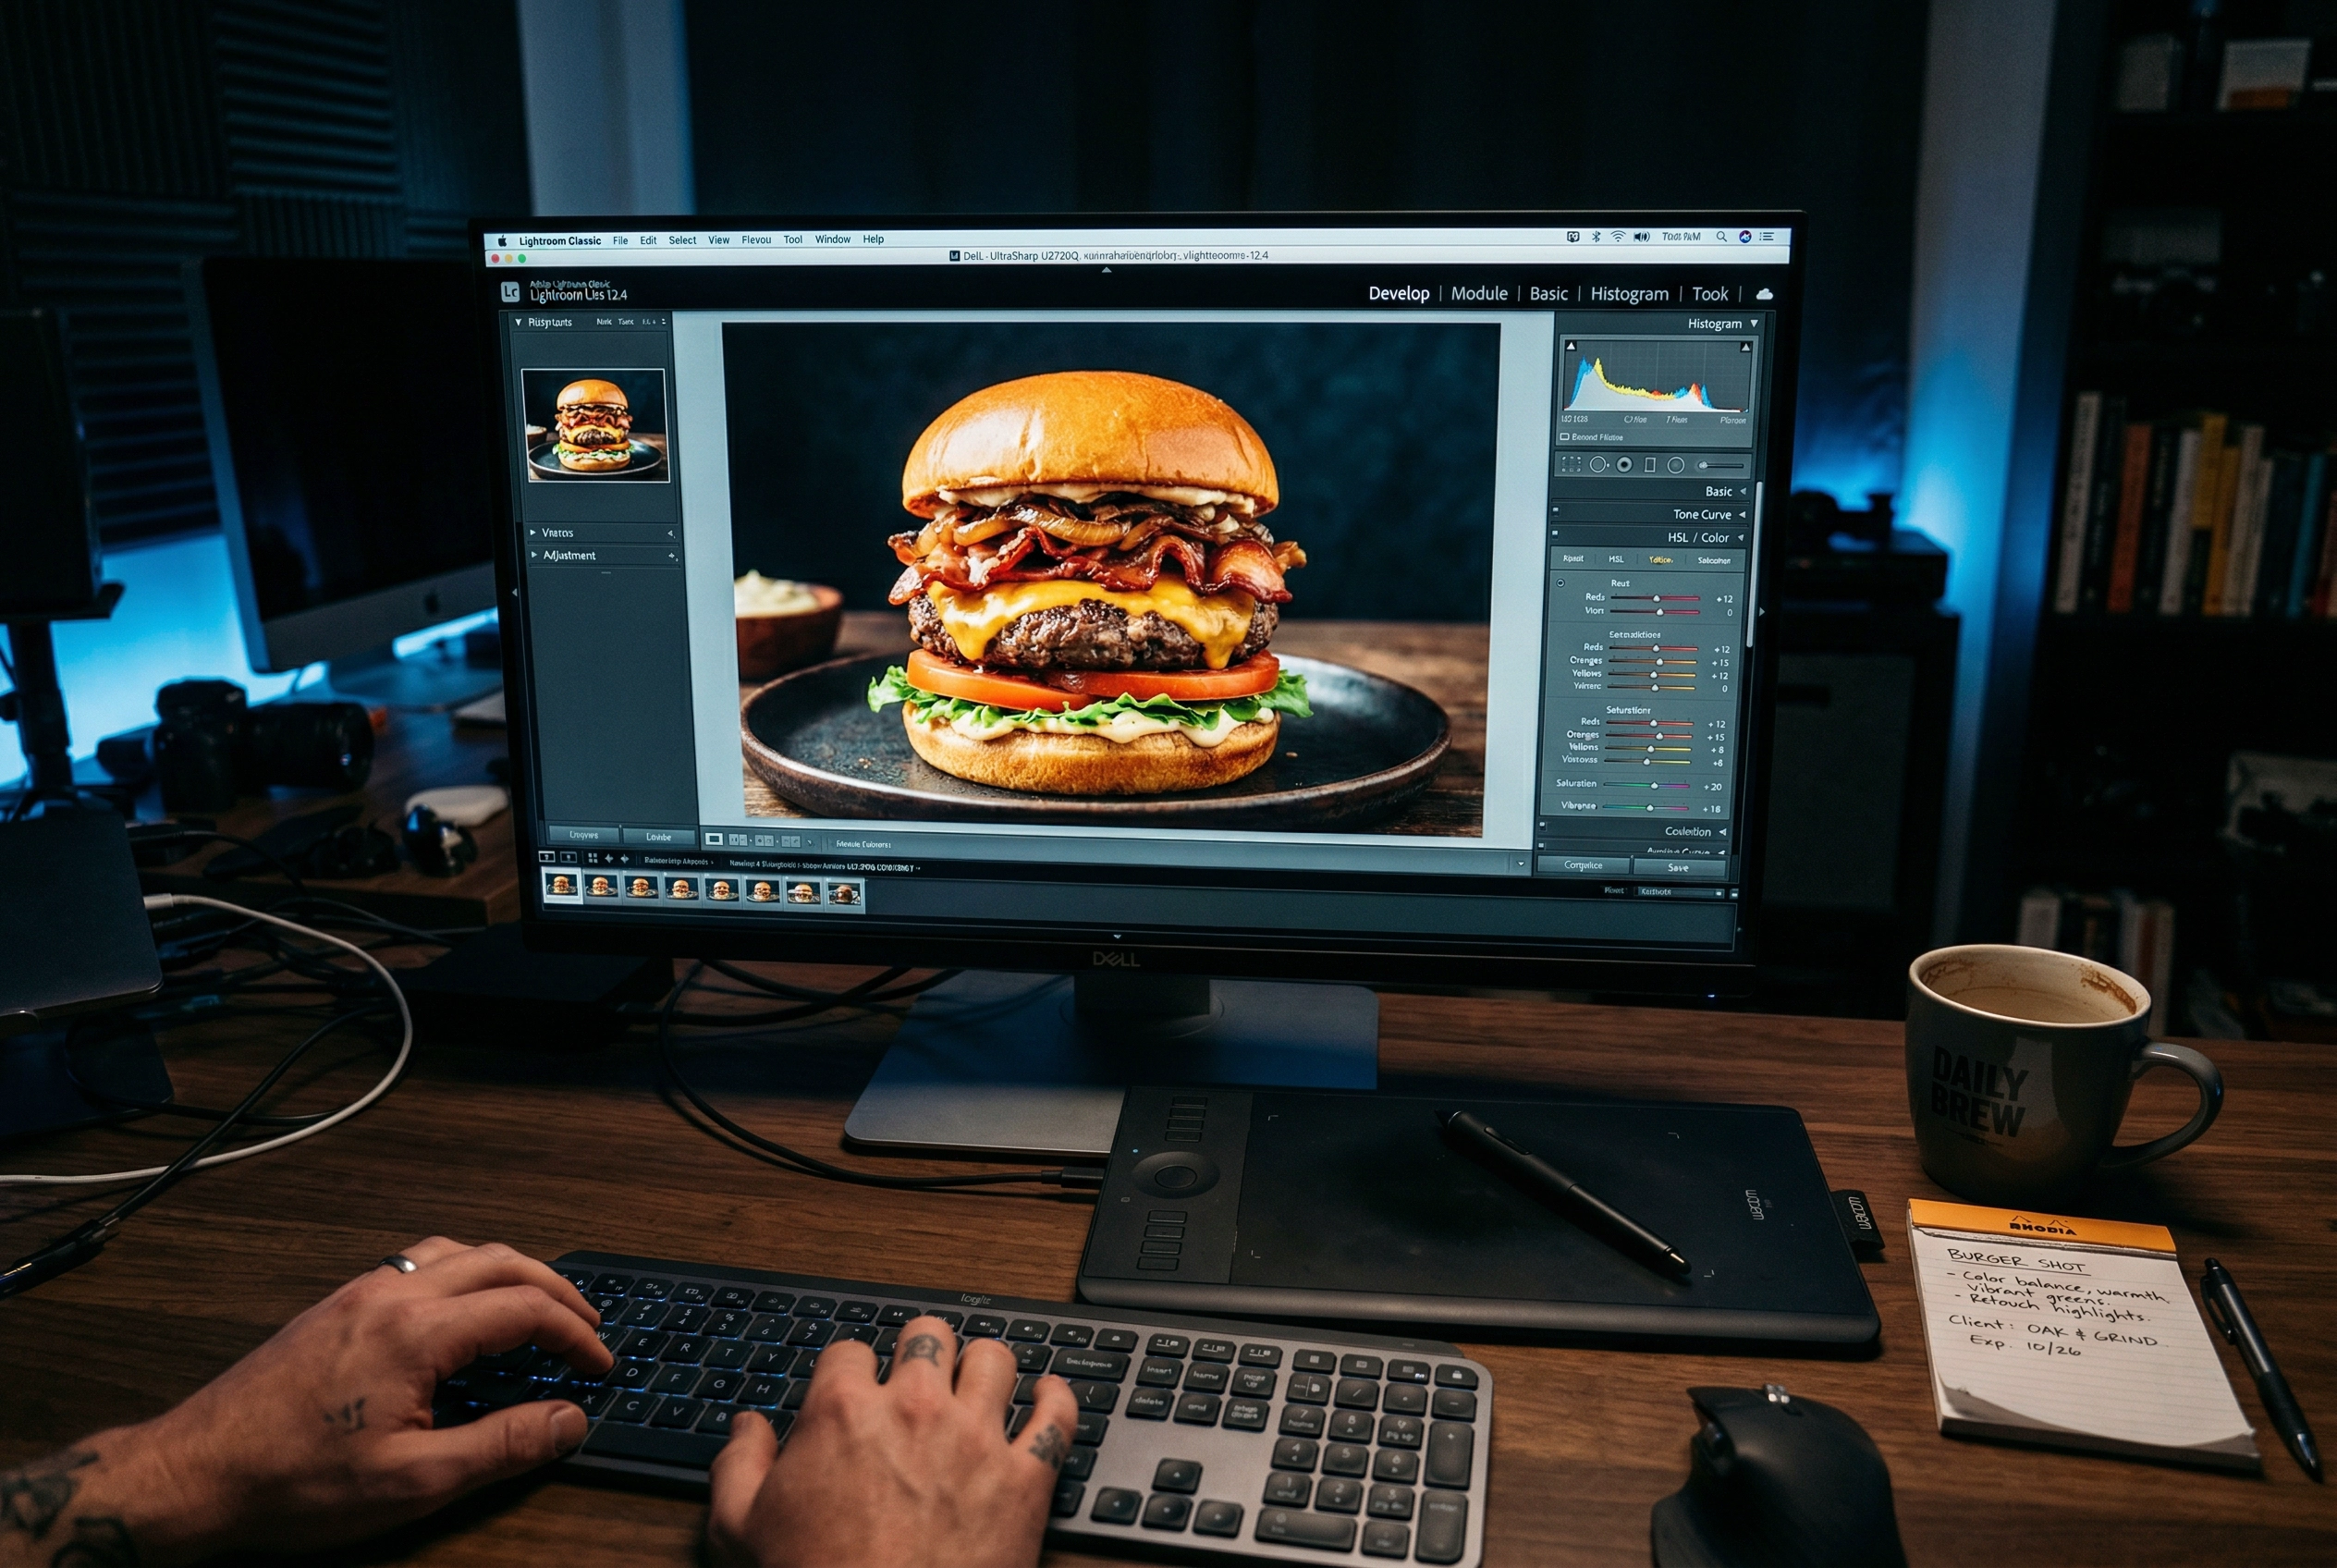 Food photo post-production editing workflow with burger image being color-corrected on desktop monitor
The Editing Workflow
Whether you hired a professional photographer or did the shoot yourself, the editing process follows the same steps:
- Culling — Review every shot and select the best 1–3 photos per dish. Reject the rest immediately.
- Color correction — Adjust white balance, exposure, and contrast so food colors look true-to-life. Oversaturated food looks fake and drives customers away.
- Retouching — Remove crumbs, fingerprints on plates, and stray drips. Keep it natural — the goal is "clean," not "airbrushed."
- Cropping — Create platform-specific versions from each master image for your different marketing channels.
- Export — Save in the right format and resolution for each destination.
Delivery Specs by Platform
| Platform | Recommended Size | Aspect Ratio | Format |
|---|---|---|---|
| Uber Eats | 1200 × 800 px | 3:2 | JPEG |
| DoorDash | 1920 × 1080 px | 16:9 | JPEG/PNG |
| Instagram Feed | 1080 × 1080 px | 1:1 | JPEG |
| Instagram Stories | 1080 × 1920 px | 9:16 | JPEG |
| Printed Menu | 300 DPI minimum | Varies | TIFF or high-res JPEG |
| Website | 1600 × 1067 px | 3:2 | WebP or JPEG |
File naming matters. Use a consistent format like restaurant-name_dish-name_platform_date.jpg so your team can find any image in seconds six months from now.
If you hired a professional photographer, expect edited files in 1–3 weeks. If that timeline feels long, discuss turnaround expectations before signing the contract.
Skip the Photoshoot: The AI Alternative
Here's the uncomfortable truth about traditional menu photoshoots: they capture your menu at a single point in time. Add three new dishes next month? You need to book another session, match the original styling, and pay again.
This is the fundamental problem that AI food photography solves.
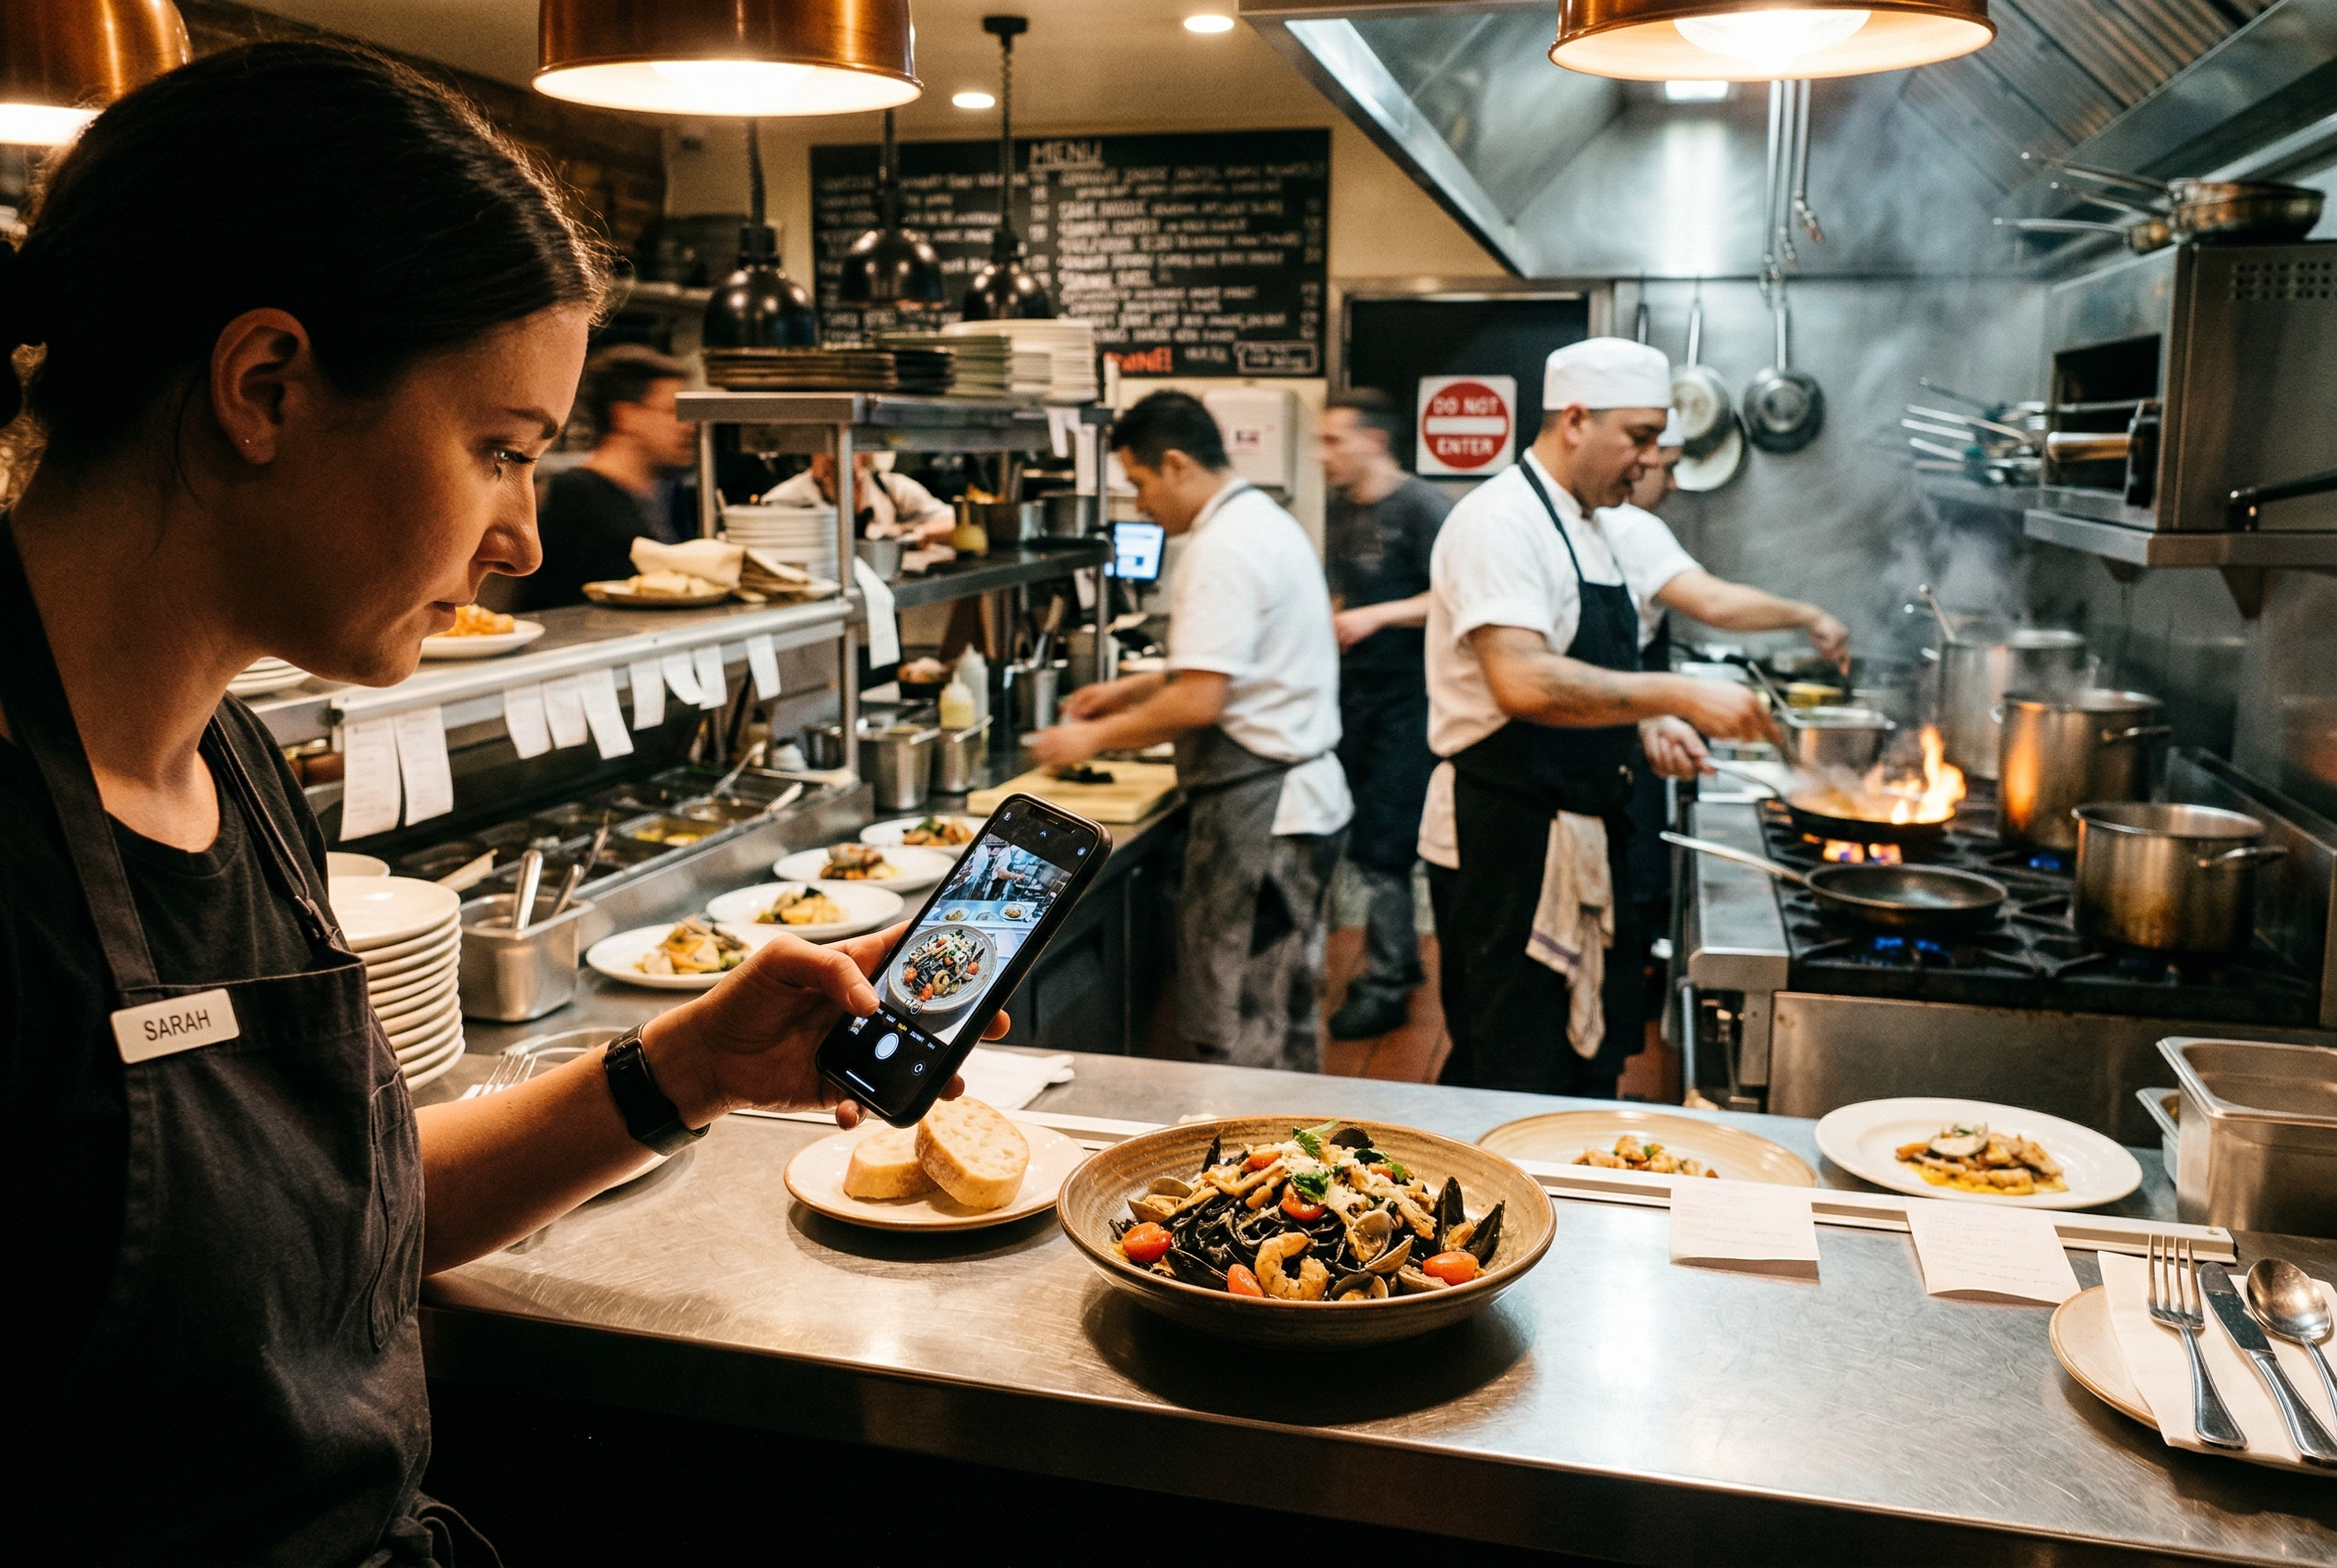 Restaurant manager photographing plated dish with smartphone during busy kitchen service for AI enhancement
The approach is simple:
- During regular service, photograph each dish with your phone as it comes out of the kitchen. Don't worry about styling, lighting, or backgrounds — just capture the dish as it is.
- Upload those photos to FoodShot.
- Choose from 30+ style presets — Delivery, Restaurant, Fine Dining, Instagram, and more — and get transformed, professional images in about 90 seconds.
That's it. No booking a photographer. No closing your restaurant during service. No waiting weeks for edited files.
The comparison:
| Traditional Photoshoot | AI with FoodShot | |
|---|---|---|
| Time investment | 1–2 full days | 1–2 hours |
| Cost (30 dishes) | $1,500–$5,000 | $9–$99/month |
| Time to first image | 1–3 weeks | ~90 seconds |
| Adding new dishes | Rebook + repay | Snap, upload, done |
| Style consistency | Depends on photographer | Built-in presets ensure it |
| Commercial license | Often costs extra | Included on paid plans |
This doesn't mean traditional photoshoots are obsolete. For a grand opening, a rebrand, or editorial-quality images for a magazine feature, a professional photographer still delivers something AI can't fully replicate. But for the other 90% of situations where you need good-looking, consistent menu photos across delivery apps, social media, and your website — the math has changed dramatically.
You can even upload a reference photo from Pinterest or a competitor's menu and have FoodShot match that exact style across all your dishes — the kind of visual consistency that would cost thousands in styling and art direction fees at a traditional shoot.
For a complete comparison of costs, quality, and use cases, read our full breakdown: AI food photography vs. hiring a photographer.
Frequently Asked Questions
How long does a menu photoshoot take?
Plan for 6–10 hours of total time for a 30-dish shoot, including setup, food prep, shooting, and breakdown. Most restaurants split this across two half-days to reduce kitchen strain. With an AI approach using FoodShot, you can photograph dishes during regular service over a few days and process all the images in 1–2 hours.
How many dishes should I photograph for my menu?
At minimum, photograph your top 10 bestsellers — these drive most of your orders. Ideally, shoot 30–50 dishes to cover your full menu including appetizers, mains, desserts, and drinks. Delivery platforms like Uber Eats and DoorDash prioritize listings with professional food photos in their search rankings.
Can I use my phone for menu photography?
Yes — modern smartphones produce excellent base images for food photography. The key factors are good natural light, a clean background, and steady hands (or a small tripod). For delivery app listings and social media, phone photos enhanced with AI editing often outperform amateur DSLR shots taken without proper lighting or styling.
How often should I reshoot my menu?
Every time your menu changes significantly — at minimum once per season. Restaurants with delivery app presence should update photos whenever they add, remove, or significantly modify a dish. This is where AI tools like FoodShot shine: instead of rebooking a photographer four times a year, snap photos of new items and transform them to match your existing style in minutes.
What's the most affordable way to get professional menu photos?
The cheapest path to professional-looking menu photos in 2026 is a hybrid approach: take decent phone photos of your dishes using natural light (see our phone photography guide), then use FoodShot's AI editor to transform them into styled, platform-ready images. Total food photography cost: under $100/month for up to 250 images, compared to $1,500+ for a single professional photoshoot session.
