DSLR Food Photography: Settings, Setup & Is It Worth It?
 Ali Tanis38 min read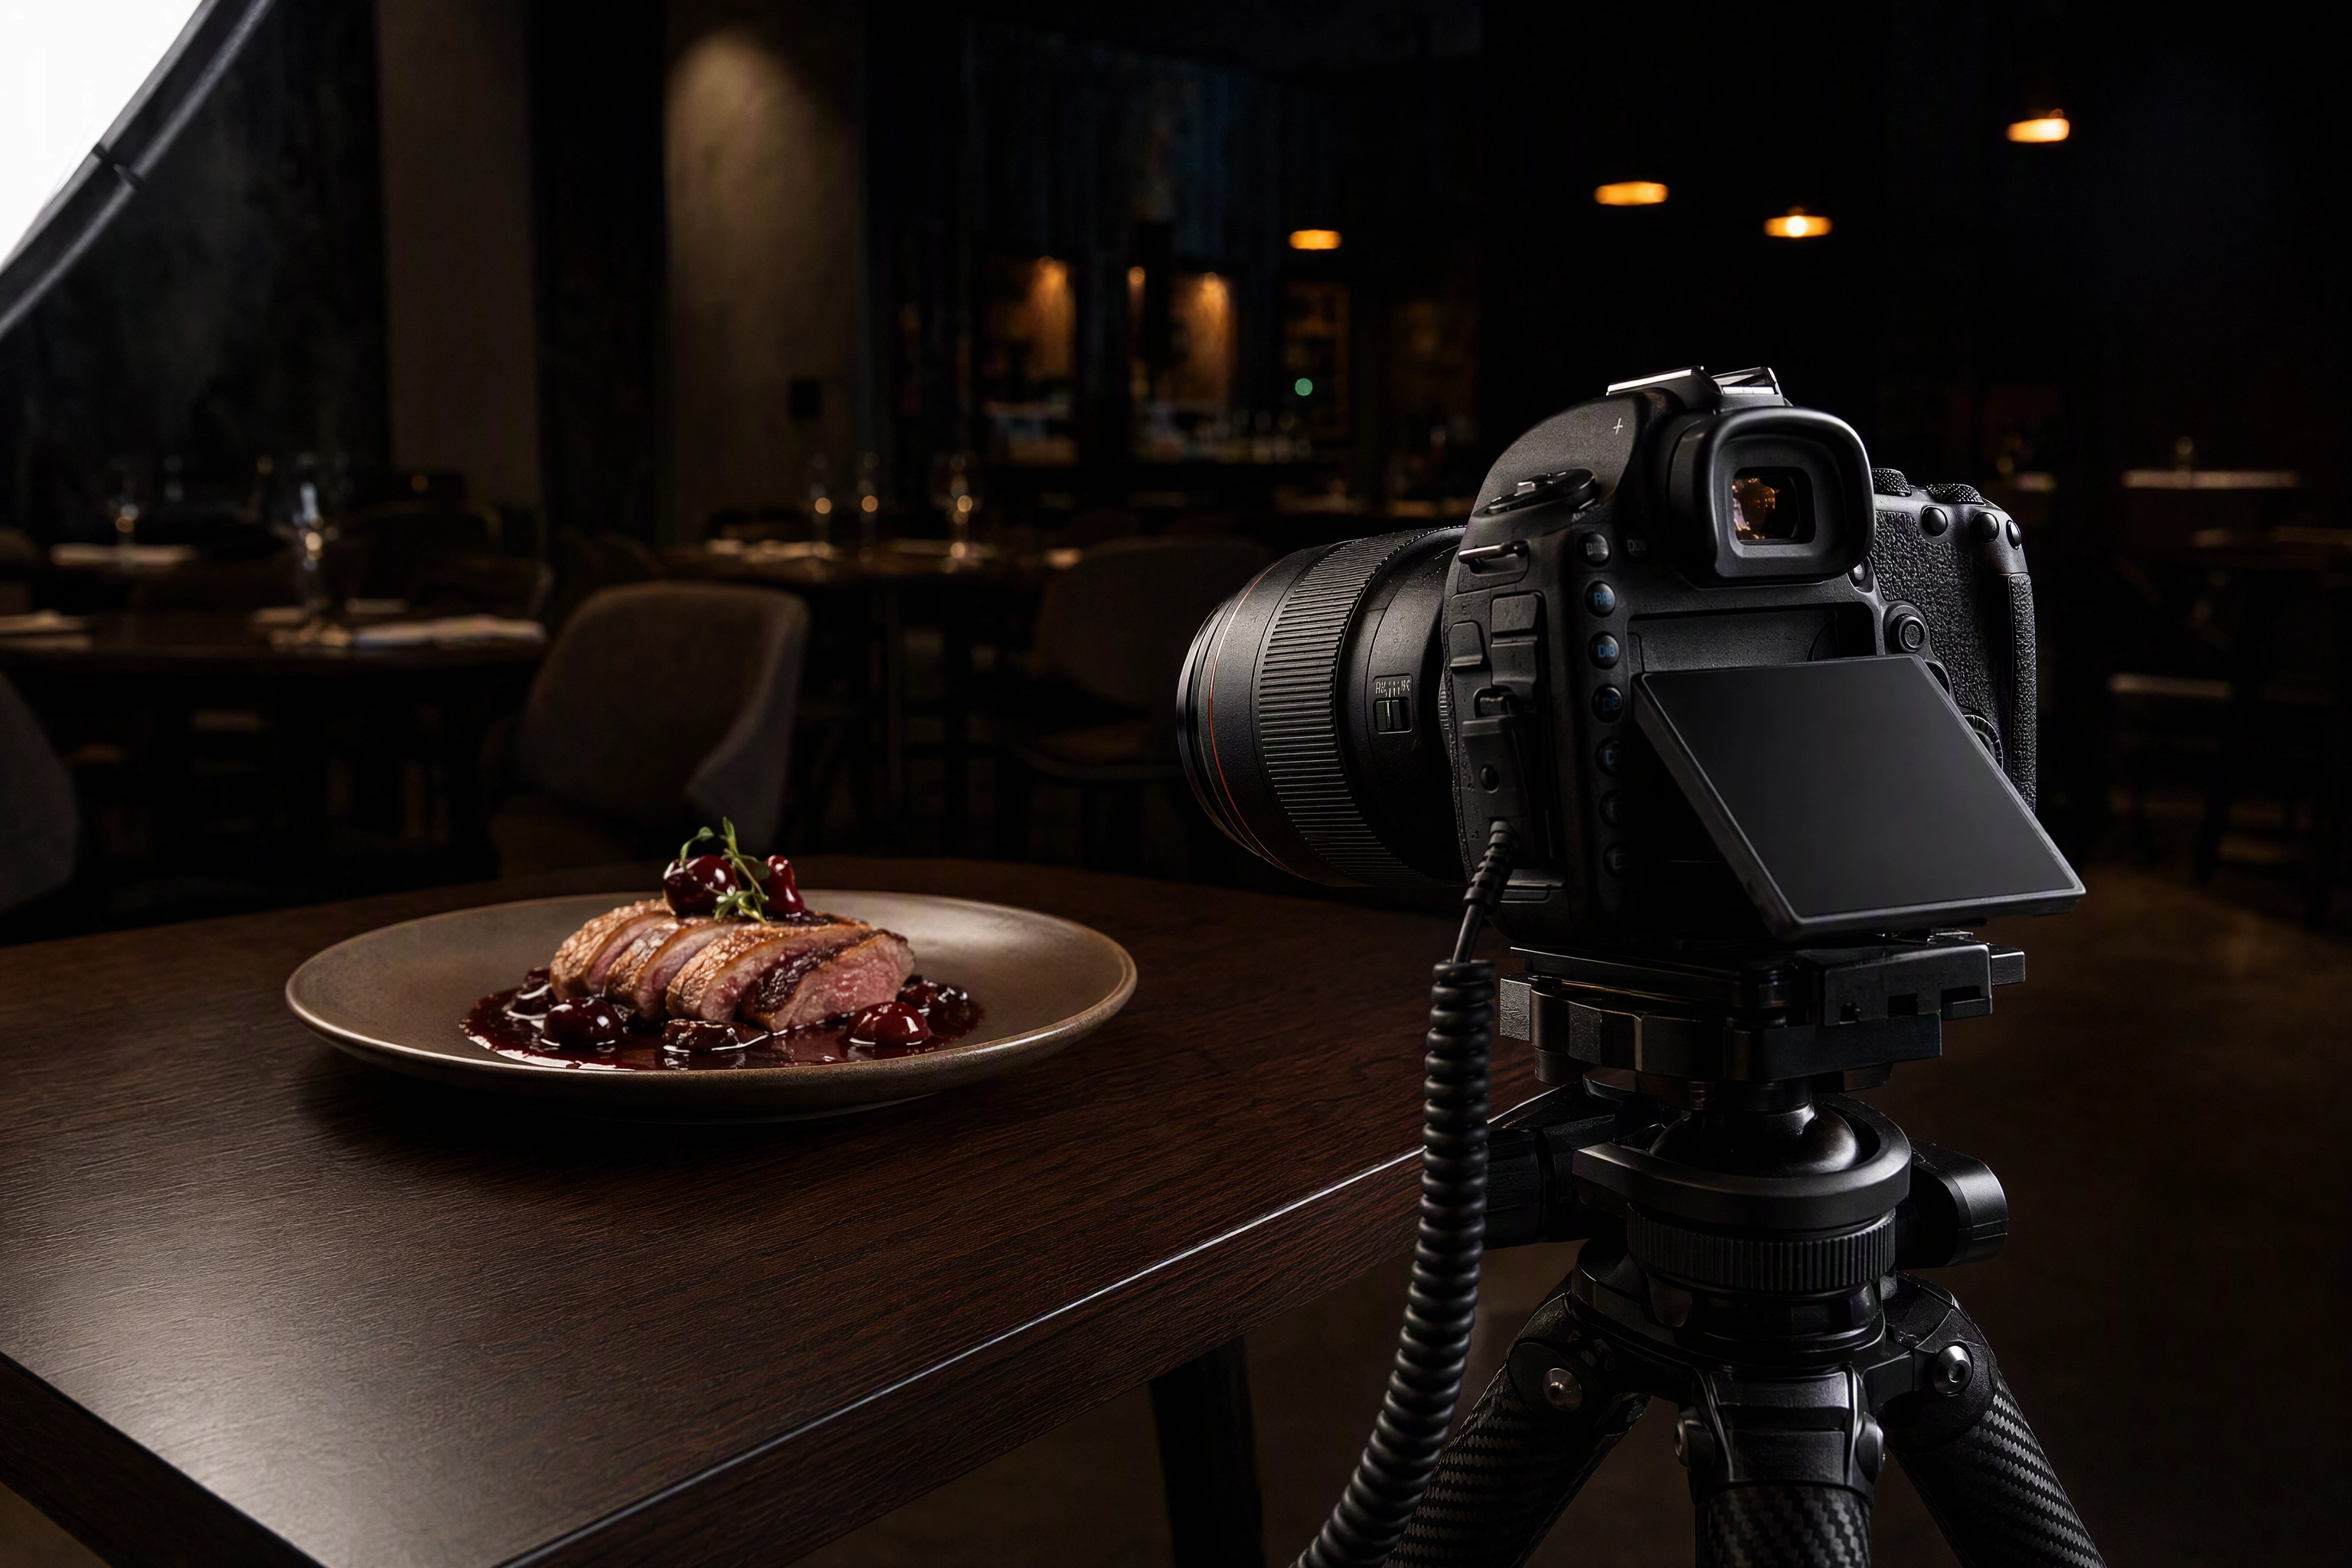
DSLR food photography rests on one undisputed fact: a DSLR will out-shoot a phone in a dark dining room. That was true a decade ago and it's still true in 2026. What's changed is everything around it — the phone in your apron pocket got dramatically better, the camera companies stopped building new DSLRs, and the actual reason most restaurant photos look bad turned out to have nothing to do with the sensor.
So this guide does two jobs. First, the real manual — the exact apertures, ISOs, shutter speeds and white balance numbers that work for food, with the reasoning behind each one. Then the honest verdict: whether picking up a DSLR is a good use of your week if you run a kitchen and need twelve new dishes photographed by Friday.
Quick Summary: For DSLR food photography, start at f/8, 1/125s, ISO 400, custom white balance, RAW. Open to f/5.6 for a single hero plate, close to f/11 when the whole dish must be sharp. Set white balance manually — auto white balance under mixed tungsten and LED restaurant lighting is the single most destructive mistake in food photography. A DSLR genuinely beats a phone on low light, control and print files, but for weekly menu updates the bottleneck is lighting, styling and time, not your camera.
The Short Answer: What a DSLR Actually Buys You
Four things, concretely.
Light-gathering. A full-frame sensor is roughly 2.4× the area of an APS-C sensor and something like 30× the area of a phone's main sensor. More area means more photons, which means a cleaner file at ISO 3200 in a room lit to dinner-service levels.
Real optical control. Depth of field on a DSLR comes from physics — focal length, aperture, distance — not from an algorithm guessing where the edge of a plate is. Phones fake background blur and they still fake it badly around steam, sauce drips and glassware stems.
Flash sync. You can put a strobe on a DSLR and freeze a pour at an effective 1/15,000s. No phone does this.
Print-grade files. A 24–30MP RAW file holds up on a menu board, a window poster or a trade-show banner. A phone JPEG does not.
None of that is controversial. DSLR cameras were built to give a photographer control, and control is exactly what a difficult room demands.
What a DSLR does not buy you: better light in your dining room, a food stylist, or six free hours on a Tuesday. Those are the variables that actually decide whether a photo sells a dish, and we'll get to why that matters.
One framing note before the settings. Everything below applies equally to DSLR and mirrorless cameras — the exposure physics is identical. The only real differences are that mirrorless bodies show you the exposure live in the viewfinder, and that you're now buying DSLR gear used.
DSLR Food Photography Settings: The Working Baseline
Memorise one starting point and adjust from there:
f/8 · 1/125s · ISO 400 · custom white balance · RAW · single-point AF · tripod
That combination is deliberately boring. It gives a full plate that's sharp front to back, a shutter fast enough to survive a bumped table, an ISO clean on any camera made in the last decade, and a colour reference you control. Nine out of ten restaurant dishes will be fine on those numbers.
Shoot in Manual (M), not Aperture Priority. This is not gatekeeping. Aperture Priority re-meters every frame, so a white ceramic plate and a dark cast-iron skillet come out at different brightnesses even under identical light. When you're shooting twelve dishes that all have to look like they belong on the same menu, consistency beats convenience.
Set it once, check the histogram, then leave it alone until the light changes.
Aperture: f/5.6 to f/11, and Why Wide Open Fails
Aperture is the setting most beginners get emotionally attached to and technically wrong. The dreamy f/1.8 look you've seen on food blogs works for one hero shot of a single cupcake. It's the wrong tool for a menu.
Here's the working range:
| Situation | Aperture | Why |
|---|---|---|
| Single plated dish, normal lens, 45° angle | f/5.6–f/8 | Hero element sharp, background softens |
| Whole dish sharp — burgers, bowls, layered plates | f/8–f/11 | Full depth across the plate |
| Overhead flat-lay of a table spread | f/8–f/11 | Everything sits on one plane, but plates have height |
| Macro work, lens very close to the food | f/11–f/16 | Depth of field collapses at short distances |
| Deliberate hero portrait of one small item | f/2.8–f/4 | Only when isolation is the point |
Working food photographers converge on f/5.6–f/8 as a default on a normal lens, then close down to f/11 or f/16 when they're shooting close with a macro lens. That last part surprises people. The closer the lens gets to the subject, the thinner the plane of acceptable sharpness becomes, so macro work needs more aperture, not less.
Why f/1.8 fails on a menu: a burger is about 10cm tall. At f/1.8 on a 50mm lens at burger-filling distance, your sharp zone is thinner than the top bun. The sesame seeds are crisp and the bacon is mush. A guest scanning a delivery app can't read the sandwich, so they scroll past.
There's a second reason to avoid the extremes. Most lenses are optically weakest wide open and start losing sharpness to diffraction past f/16. The sweet spot on a typical prime is two to three stops down from maximum — which lands you at, yes, f/5.6 to f/8.
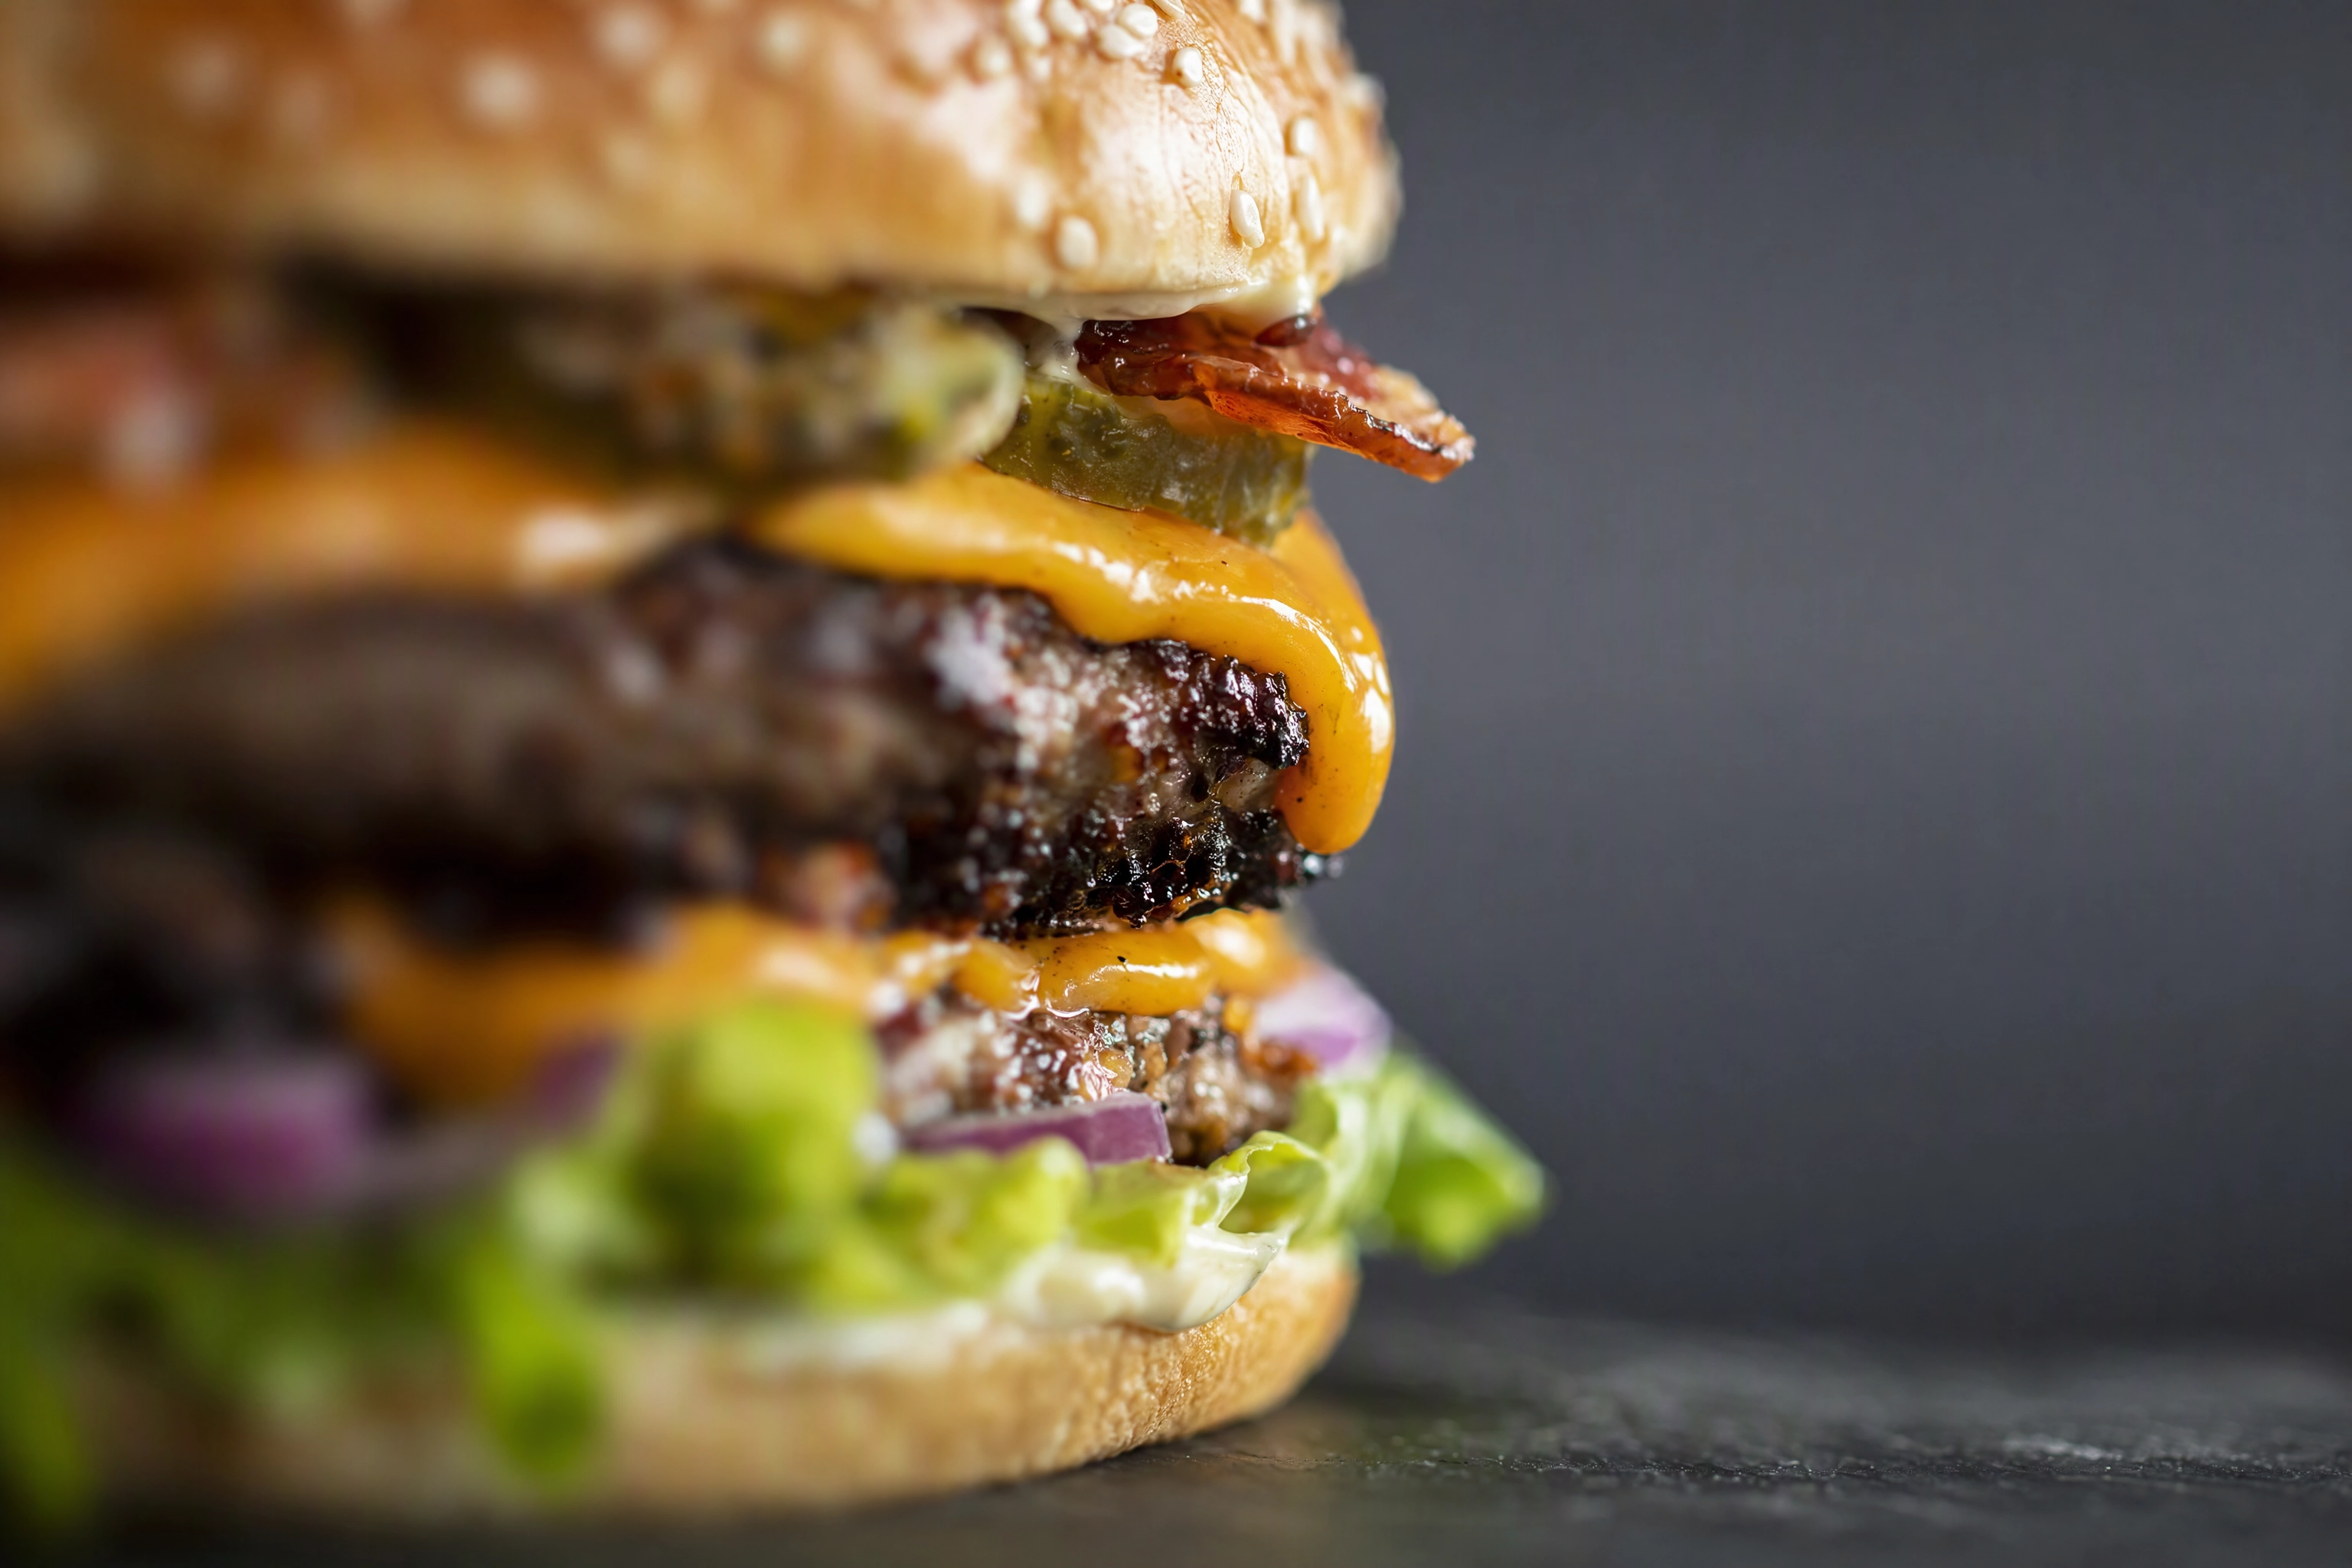 Macro side view of a burger with only a thin band in sharp focus, showing shallow depth of field at wide aperture
Shutter Speed: The Reciprocal Rule, Steam and Pours
For static food on a tripod, shutter speed is a free variable. Use it to balance the exposure and stop worrying about it.
Handheld is different. The reciprocal rule says your shutter shouldn't be slower than 1/focal length: 1/50s on a 50mm lens, 1/100s on a 100mm. On a crop-sensor body, multiply the focal length by the crop factor first — 1.5× on Nikon and Sony APS-C, 1.6× on Canon APS-C. That 50mm on a Canon Rebel behaves like an 80mm, so you want 1/80s minimum.
In practice, in a restaurant, handheld at 1/60s is where photos start quietly going soft. If your images look slightly mushy but the focus was correct, this is usually why.
Now the two moving subjects food photography actually cares about:
Steam. Steam is slow. 1/125s to 1/250s freezes it with plenty of shape. The bigger problem is that steam is nearly invisible unless it's backlit against a dark background, which is a lighting decision, not a shutter decision. Our food photography lighting guide covers the backlight geometry in detail.
Pours, splashes and cheese pulls. These are fast, and here is where beginners waste an evening: you cannot freeze a splash with shutter speed alone in a normal room. There isn't enough light. You freeze it with flash duration.
A speedlight at 1/16 power fires for roughly 1/10,000 to 1/20,000 of a second. In a dim room, that burst is the only meaningful light hitting the sensor, so the flash duration becomes your effective exposure time — regardless of whether the shutter says 1/200s. Set the camera to its maximum X-sync speed (typically 1/160s to 1/250s on a DSLR — check your manual), kill the ambient, and let the strobe do the freezing. Exceed your flash sync speed and you'll get a black band across the frame where the shutter curtain blocked the sensor.
ISO: Discipline in a Dark Dining Room
Here's the number that reframes restaurant shooting. The ANSI/IES RP-11 residential and hospitality lighting recommendations put a formal dining tabletop at around 5 footcandles — roughly 54 lux — and everyday dining around 10 footcandles, about 108 lux. The Illuminating Engineering Society publishes these as maintained averages, and most restaurants dim below them deliberately, because low light flatters faces.
Overcast daylight outdoors is 1,000 to 10,000 lux.
So a dinner-service dining room is roughly four to seven stops darker than the window light every food photography tutorial assumes you have. That's not a small gap. That's the entire reason "just use natural light" advice falls apart at 7pm on a Friday.
Working ISO ladder:
- ISO 100–200 — tripod, window light, or strobes. Cleanest files, use whenever possible.
- ISO 400 — the honest default. Every modern sensor is essentially noiseless here.
- ISO 800–1600 — handheld in an interior. Full-frame bodies stay clean; APS-C starts showing texture in shadows.
- ISO 3200 — emergency ceiling. Usable on full-frame, visibly grainy on crop, and food noise reads as "dirty," not "moody."
- ISO 6400+ — don't. Get a tripod or add light.
One correction to common advice: many food photography blogs insist everything should be shot at ISO 100. A Nikon staff article on food photography at home pushes back on exactly that, and it's right — treating ISO as untouchable just means you underexpose instead, and lifting a dark RAW file by two stops in editing produces more visible noise than shooting at the correct higher ISO in the first place.
Expose for the highlights, keep the histogram off the right wall, and let ISO float.
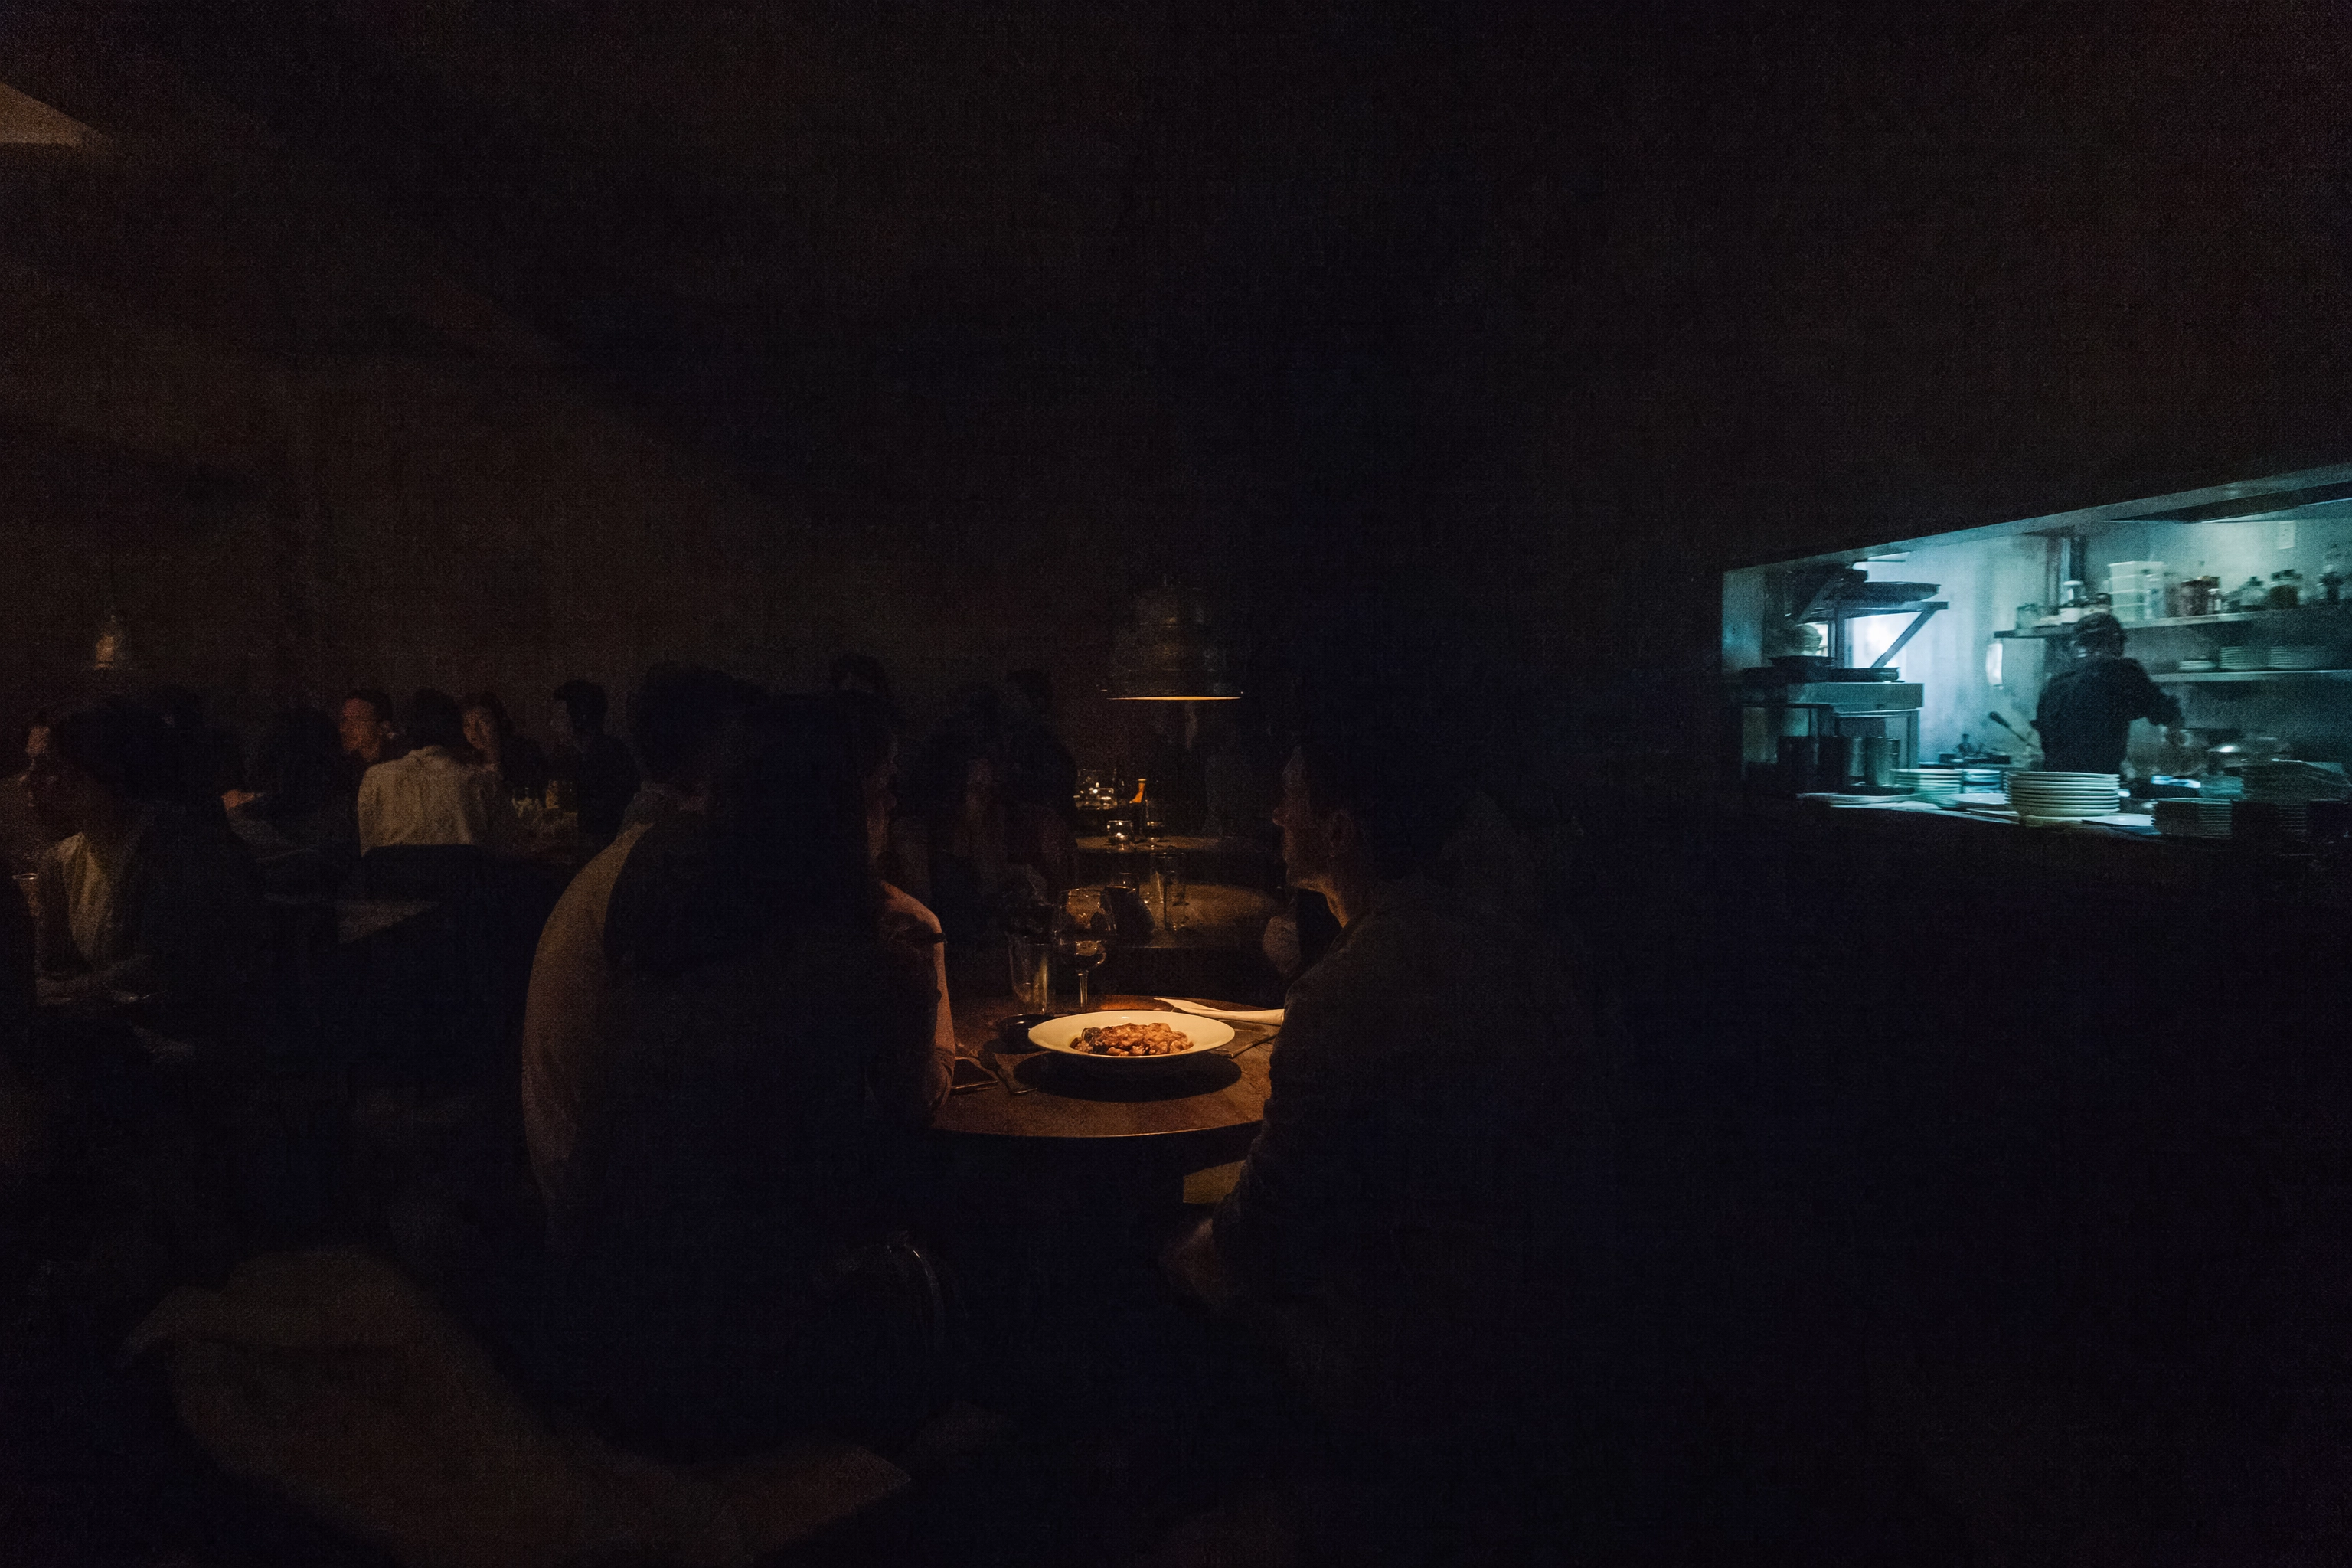 Dim restaurant dining room at dinner service showing the low light levels that challenge food photography cameras
The Settings Cheat Sheet for Four Real Situations
| Scenario | Aperture | Shutter | ISO | White balance |
|---|---|---|---|---|
| Prep table by a north window, tripod | f/8 | 1/60s | 100 | 5,500K or grey card |
| Dim dining room, handheld, no flash | f/4–f/5.6 | 1/100s | 1600–3200 | Custom, ~3,000K |
| Kitchen pass under LED downlights | f/8 | 1/125s | 800 | Custom, ~4,300K + magenta |
| Two-light setup, ambient killed | f/8–f/11 | 1/200s | 100 | 5,500K (flash) |
Print that, tape it inside your camera bag, and you've covered most of what a working week throws at you.
Two of those rows really are the whole job for most restaurants: window light during prep, and a controlled two-light setup after service. If you only ever learn those two, you'll get consistent shots without needing to know why the other rows exist.
White Balance: The Mistake That Ruins the Most Restaurant Photos
If you fix one thing after reading this, make it this section.
A restaurant dining room is almost never lit by one kind of light. There's warm tungsten or filament-look pendants over the tables, cooler LED downlights in the ceiling, a bit of daylight leaking through the front window, coloured bounce off a painted wall, and the green-tinged fluorescent glow spilling out of the kitchen pass. That's four or five different colour temperatures landing on the same plate.
Auto white balance responds by averaging them. The result is the look you've seen on a thousand delivery listings: orange-brown proteins, grey-green vegetables, and a plate rim that isn't white anywhere. Nothing in editing fully rescues it, because the different casts are on different parts of the same frame.
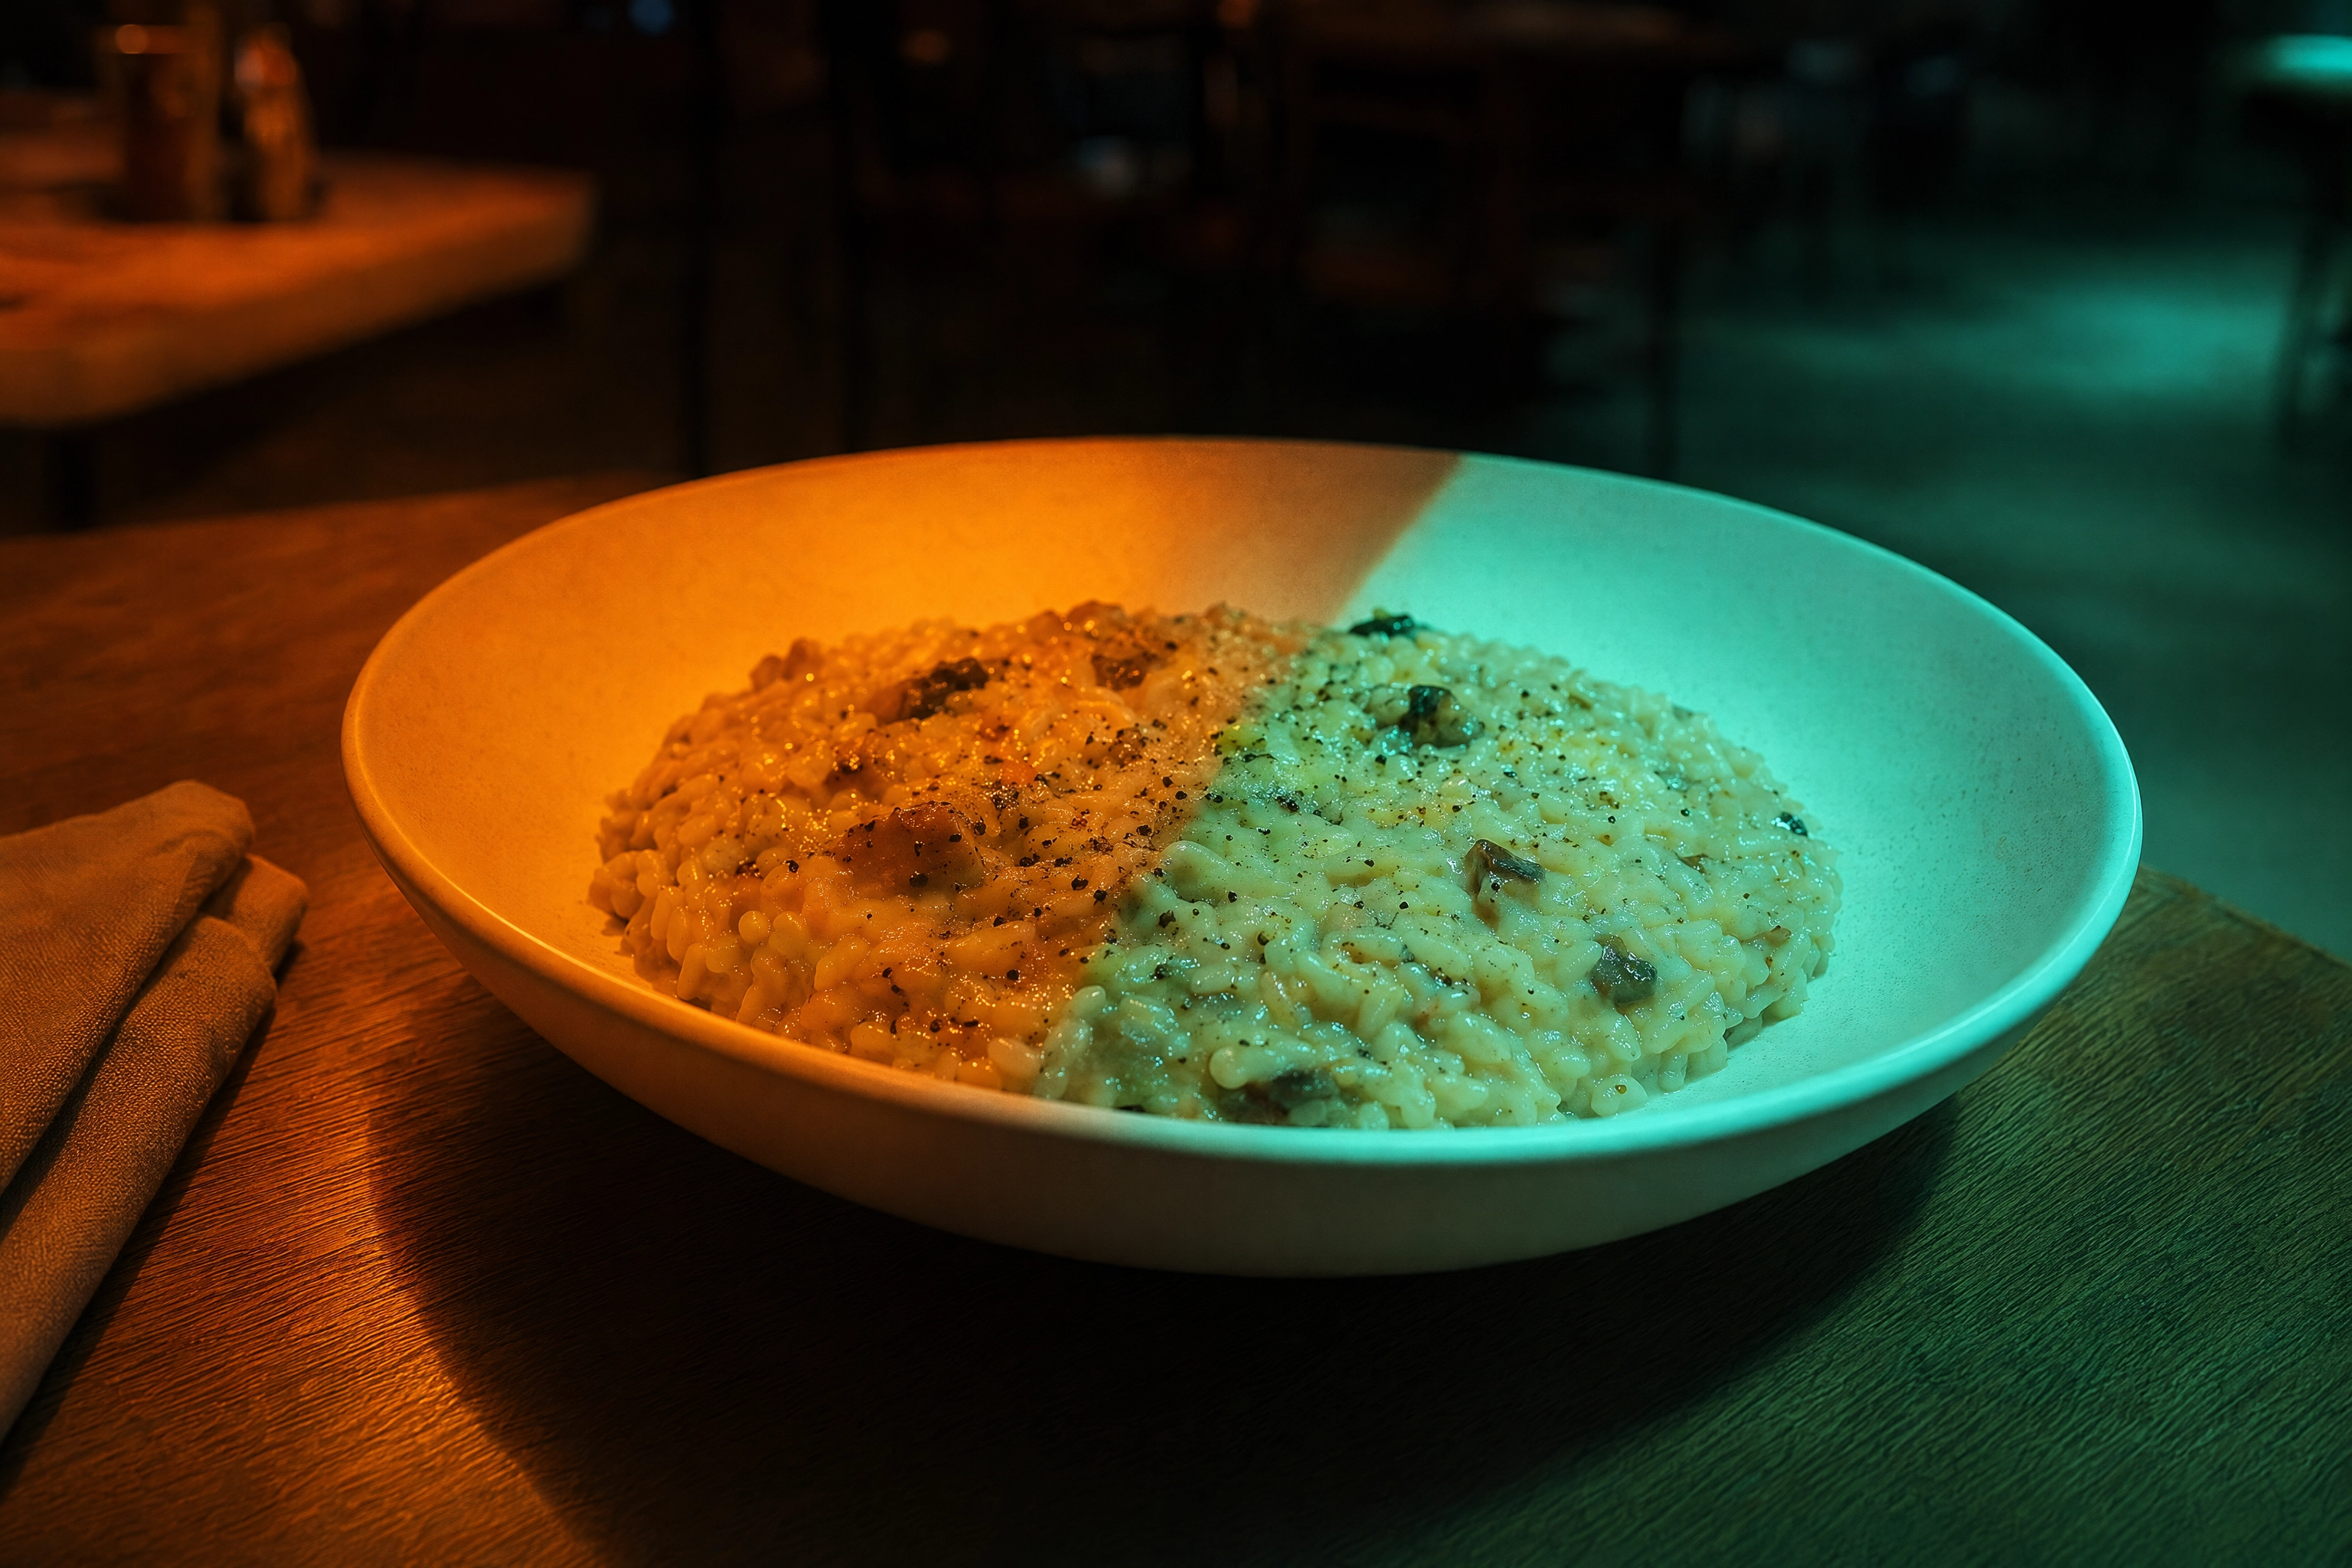 Bowl of risotto split between orange tungsten and green LED light, showing mixed restaurant lighting white balance problems
Pick One Light Source as the Truth
The professional move isn't to balance the mix. It's to eliminate it.
Choose one source, make it dominant, and suppress everything else. Three practical ways to do that:
Move the food to the light. The simplest fix in the entire craft. Carry the plate to the window table, shoot it there, carry it back. Two minutes, zero equipment.
Overpower the room. A single strobe through a diffuser at f/8 and 1/200s will out-punch dim ambient light by several stops. The room's tungsten and LED contributions effectively vanish from the exposure.
Switch the room off. During prep hours, before service, you often can. Kill the ceiling LEDs over your shooting corner and let one pendant or one window own the scene.
Whatever you choose, the goal is a single dominant colour temperature. Then one white balance setting is correct for the whole frame.
Kelvin Starting Points You Can Dial In Tonight
If you're setting Kelvin manually, start here and refine by eye:
| Light source | Starting Kelvin | Note |
|---|---|---|
| Bright window daylight | 5,200–6,000K | Cooler on overcast days |
| Tungsten / filament bulbs | 3,000–3,200K | Very warm, very common in dining rooms |
| Mixed restaurant LED | 4,000–4,800K | Add magenta tint to kill the green cast |
| Studio strobe / speedlight | 5,500K | Daylight-balanced by design |
| Shade or blue hour | 7,000–8,000K | Rare indoors, common on patios |
The grey card method takes sixty seconds and beats guessing every time. Put an 18% grey card exactly where the plate will sit, under the exact light you're going to use. Shoot one frame. Then either set custom white balance in-camera from that frame, or — easier — use it as your eyedropper reference in editing and sync the correction across the whole shoot.
For a twelve-dish menu shoot, that single grey-card frame is what keeps dish four and dish eleven looking like they came from the same restaurant.
LED Flicker, Banding and Low-CRI Reds
Two LED problems that ruin frames in ways beginners never diagnose.
Flicker and banding. Cheap LED drivers and dimmers pulse the light rather than running it continuously. Lighting technicians generally want at least 550–600Hz to be safe, and 2,500Hz or higher to be genuinely flicker-free. Below that, a fast shutter can catch the light mid-pulse — you get horizontal banding, or the same dish coming out visibly different brightnesses across a burst. Most DSLRs have an anti-flicker or flicker-reduction mode that times the shutter to the mains cycle. Turn it on, or slow the shutter to 1/60s.
Low CRI. Colour Rendering Index measures how faithfully a light source renders colour against a reference. Incandescent light is effectively CRI 100. Budget LED fixtures often sit in the 70s and are especially weak on R9 — deep, saturated red.
Which is a problem, because red is where food lives. Tomato, chilli, strawberry, seared beef, paprika, cured meat. Under a low-R9 fixture, a rare steak photographs a dull brownish-pink no matter what you do in editing, because the wavelengths simply weren't in the light. If your reds never look right in one particular room, this is why — and the fix is a different light, not a different camera.
Drinks suffer the same way. Espresso goes muddy and cocktails lose their jewel tones under low-CRI fixtures, which is why our coffee photography work almost always starts by changing the light source rather than the settings.
RAW vs JPEG: Not Really a Debate for Menu Work
Shoot RAW. Here's the actual reason, in numbers.
A 14-bit RAW file records 16,384 tonal levels per colour channel. An 8-bit JPEG records 256. That's a 64× difference in tonal information, and it's the difference between recovering a blown-out highlight on a glazed donut and having a flat white blob.
More important for restaurant work: RAW stores white balance as editable metadata. The camera writes down what you told it, but nothing is baked in. Get the Kelvin wrong on all forty frames of a menu shoot, and in RAW you fix it once and sync. In JPEG, the wrong colour is permanently cooked into every pixel, and correcting it tears the file apart.
Given how hostile mixed restaurant lighting is, that alone settles it.
Two practical notes. Shoot RAW+JPEG if someone needs a photo on Instagram before you get home — you post the JPEG, you keep the RAW. And storage really is not the constraint people think it is: a 24MP RAW is roughly 25–30MB, so a twelve-dish shoot with sixty frames per dish is about 20GB. That's a $10 memory card.
If you're using an older DSLR, check whether it offers 12-bit or 14-bit RAW in the menu. Some cameras default to the smaller 12-bit file to speed up burst shooting, which costs you tonal information you'll want back later. Food doesn't move, so there's little reason not to take the bigger file.
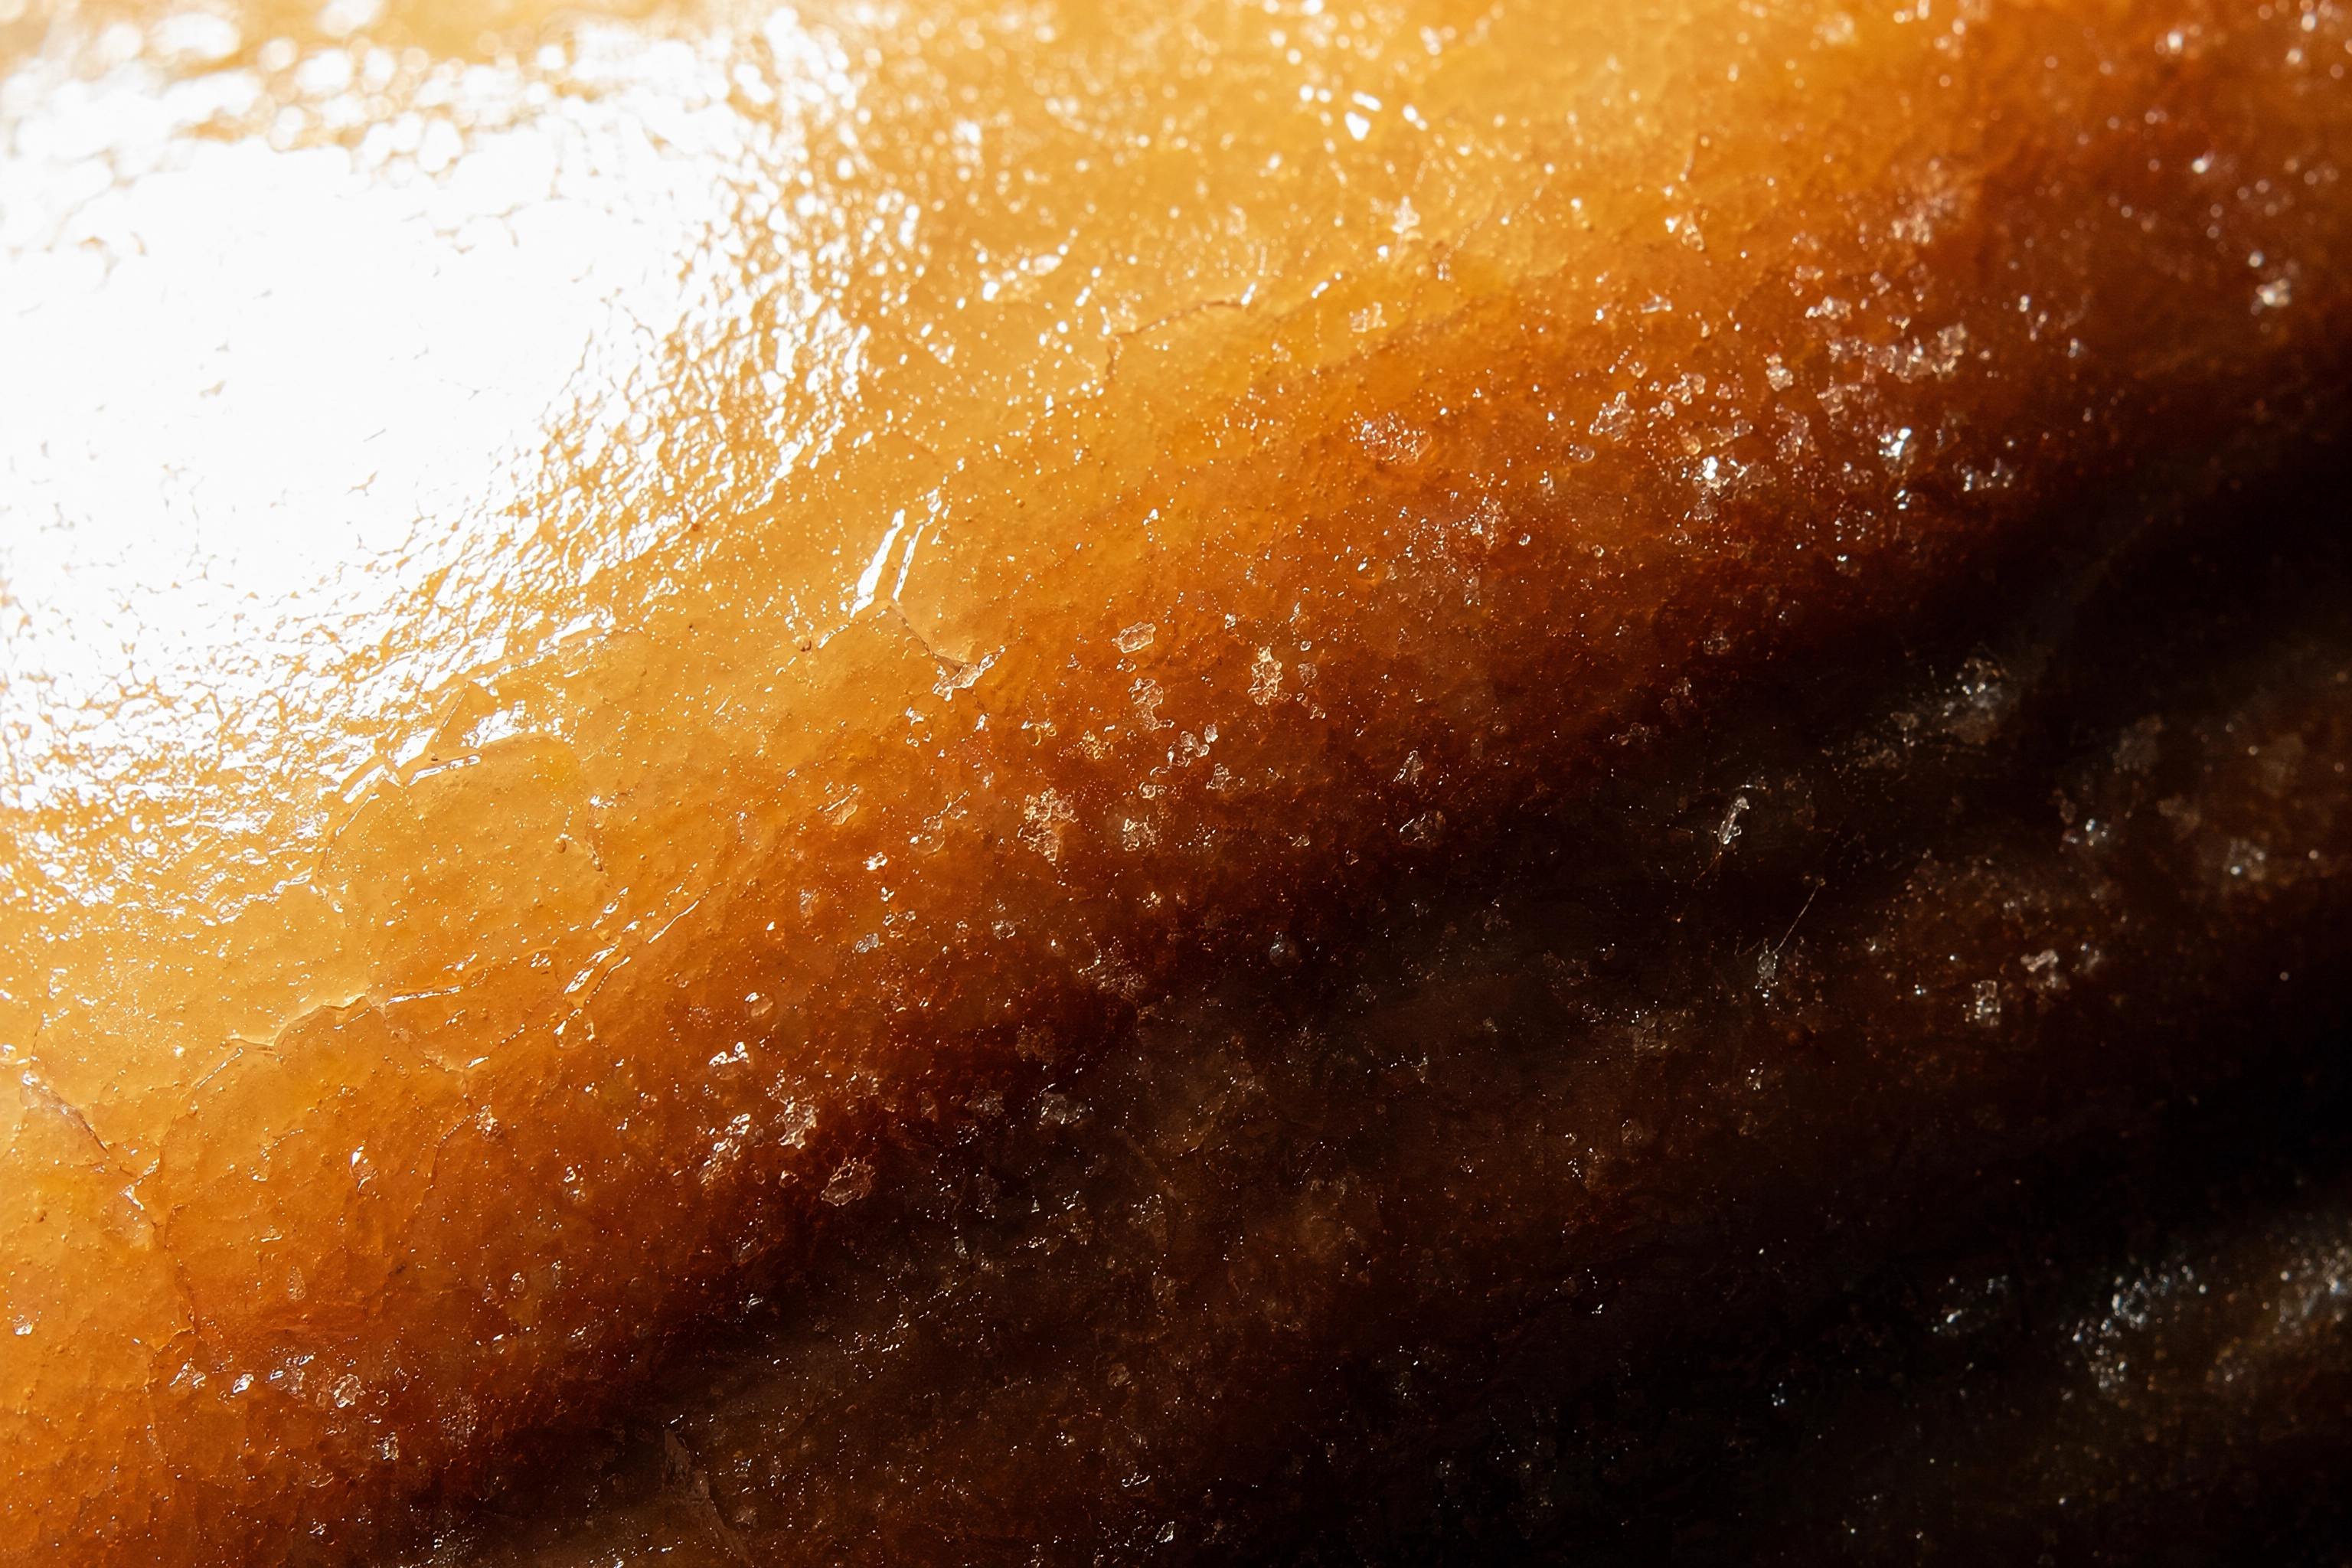 Macro of glazed doughnut surface from blown highlight to deep shadow, illustrating the tonal range a RAW file records
Focus: Put the Sharp Plane Where the Appetite Is
Sharpness in food photography isn't about being sharp everywhere. It's about being sharp on the one thing that makes someone hungry.
The rule: focus on the front edge of the hero element. On a burger, that's the point where the patty meets the cheese, not the top bun. On a bowl of ramen, it's the egg yolk or the chashu, not the rim. On a cocktail, it's the near edge of the garnish. On a slice of cake, it's the front layers where the crumb structure reads.
Single-Point AF, Live View, and Back-Button Focus
Three settings changes that do more than most gear upgrades.
Use single-point AF, not zone or auto-area. Let the camera choose and it will lock onto the highest-contrast thing in the frame, which is frequently a fork, a plate rim or a napkin fold. You want to place the point yourself.
Focus in Live View, not through the viewfinder. This is counter-intuitive on a DSLR, since the optical viewfinder is the whole point of the mirror. But Live View uses contrast-detect straight off the sensor, which is slower and far more accurate — and there's no phase-detect calibration error. For static food on a tripod, magnify Live View to 5× or 10× and focus manually. It's the most accurate focus a DSLR can produce.
Separate focus from the shutter. Back-button focus assigns focusing to the AE-L/AF-ON button on the rear. You lock focus once, then shoot as many frames as you like — repositioning garnish, adjusting steam, swapping props — without the camera re-focusing every time you press the shutter. On a tripod shoot where the plate doesn't move, this is a genuine time saver.
When You Actually Need to Focus Stack
Rarely. But if you're shooting a tall, layered subject very close with a macro lens, and even f/16 won't hold the front and back edges, you can shoot several frames at different focus distances and blend them.
This is a fine-dining and packaging technique, not a weekly-specials one. If you're stacking frames for a delivery thumbnail that renders at 1200 pixels wide, you've lost the plot on time.
Lenses: Still the Part That Matters More Than the Body
Camera bodies are commodities. Lenses are the choice that shapes every image you make with them, and this is where a DSLR budget should go.
Two lenses cover almost everything in food work:
A 50mm prime lens for table scenes, multiple dishes, flat-lays and cramped rooms. Cheap, sharp, light. On an APS-C body, a 35mm lens gives you the same field of view.
A 90–105mm macro lens for single plated dishes, texture and hero shots. It compresses the scene flatteringly and focuses close enough to fill the frame with a scallop.
Those two lenses handle roughly 95% of restaurant work between them. If you're only buying one, buy the 50mm first. It's the more forgiving lens in a real dining room, and it's usually the cheapest lens either Canon or Nikon ever made.
What to avoid: wide-angle lenses on plated food. At 24mm, the near rim of a plate renders dramatically larger than the far rim, so a round plate turns into an egg and a burger leans backwards. That distortion is a property of the lens, not a mistake you can shoot your way around.
Zoom lenses aren't disqualifying. A kit 18–55mm zoom at the 55mm end, at f/8, produces perfectly usable menu photos, and the 24–70mm f/2.8 that lives on most working photographers' cameras is a genuinely capable food lens. But wider than about 35mm is where dishes start looking wrong, so keep the zoom at its long end.
The working-distance trap catches people in real restaurants. A 100mm macro lens on full-frame needs about 80cm of clearance to fill the frame with a dinner plate. In a booth or a narrow galley kitchen you may simply not have 80cm, and the shorter lens becomes the only one that physically works. We break the optics down properly in our guide to the best lens for food photography, including why long lenses flatter a stacked burger.
Two more lens notes worth knowing. Older DSLR lenses are frequently better value now that Canon and Nikon have both moved development to mirrorless mounts — a used Nikon 105mm micro or Canon 100mm macro costs a fraction of its mirrorless equivalent, and the optics didn't get worse. And if your lens has image stabilisation, switch it off on a tripod; stabilised lenses can hunt against a locked-down camera and quietly soften the shot.
If you own exactly one lens and it's the kit zoom, shoot at its longest end, at f/8, and spend your money on light instead. Lenses help. Light decides.
A Two-Light Setup You Can Build for Under $400
Once you stop relying on the room, food photography becomes repeatable. Two lights is all a restaurant needs.
The counter-intuitive part: the main light goes behind and to the side of the dish, not in front of it. Backlight and side-light rake across the surface, revealing the texture — the sheen on a sauce, the char on a crust, the condensation on a glass. Front light flattens all of that into a passport photo of a plate.
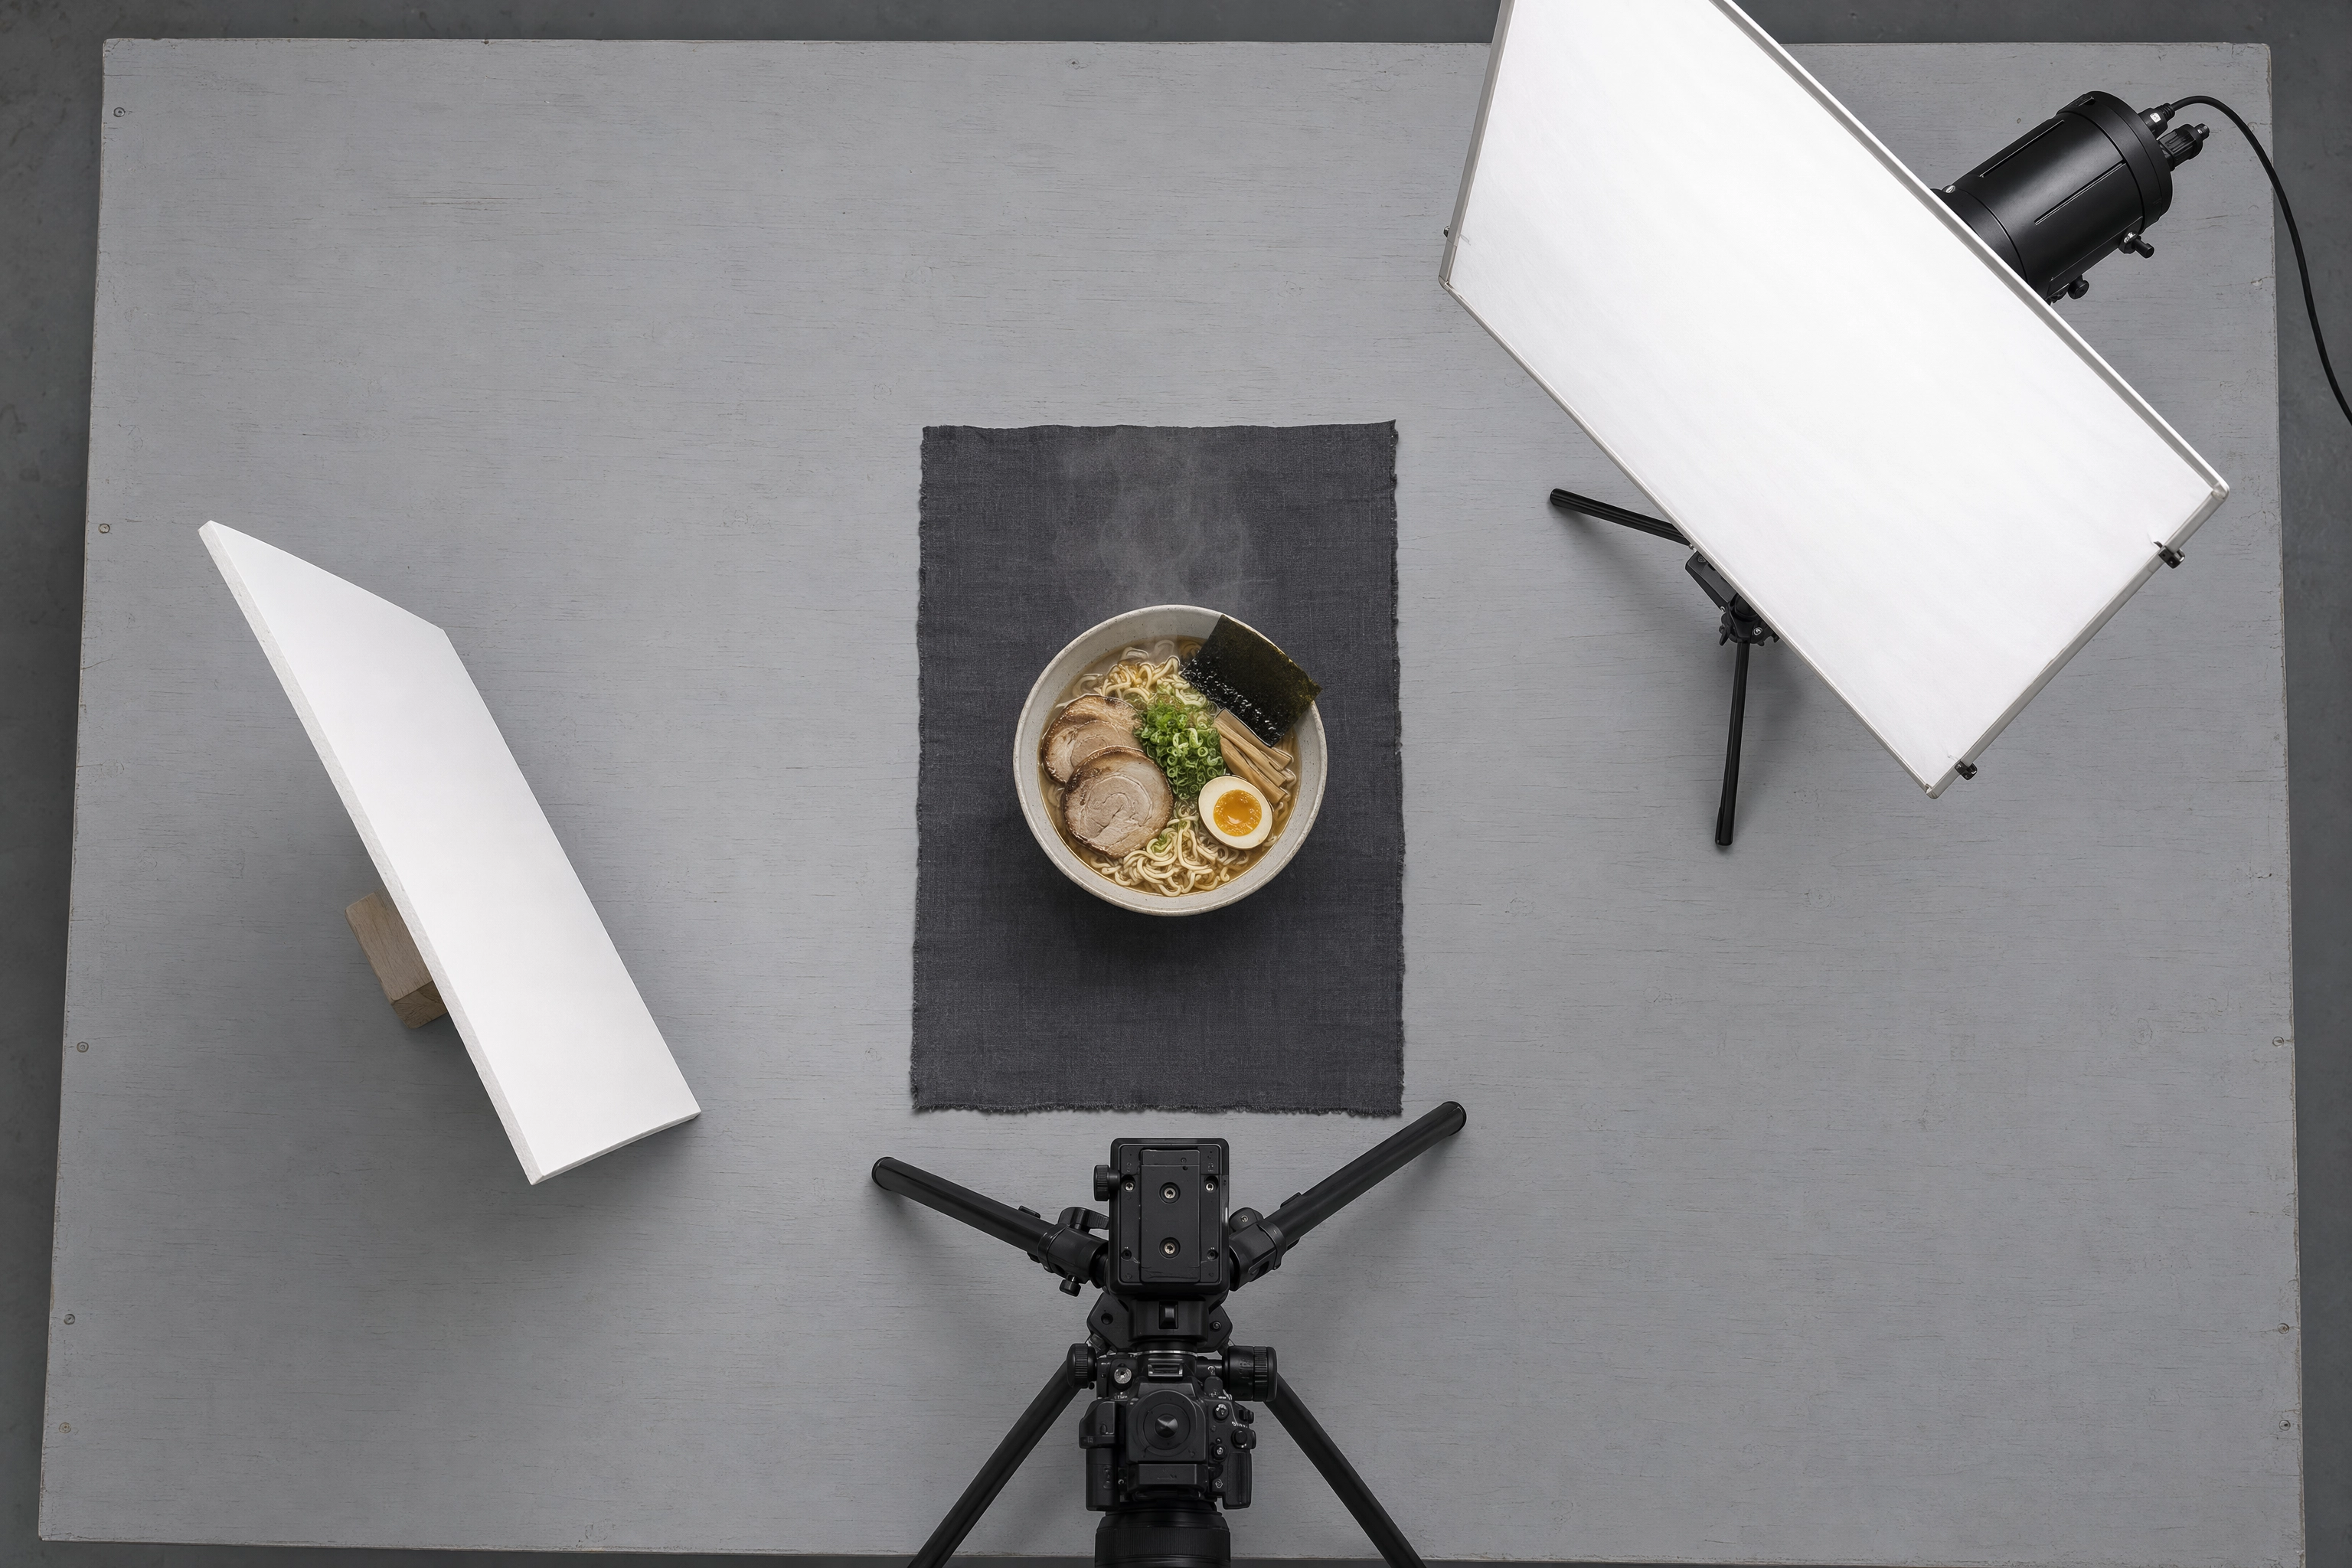 Overhead view of a two-light food photography setup showing diffusion panel, bounce card, tripod and a bowl of ramen
The Key Light: Big, Soft, and Behind the Dish
Position it at roughly 10 o'clock or 2 o'clock if the plate is the centre of a clock face, slightly above and behind.
Size matters more than power. A bigger light source relative to the subject gives softer shadow edges, and a plate is small, so even a modest 60×60cm softbox is enormous relative to a bowl of pasta. That's why a cheap speedlight in a softbox looks better than an expensive bare strobe.
Speedlight or continuous LED panel? A speedlight freezes motion and overpowers ambient light, which makes it the right pick for pours, splashes and dim rooms. A continuous LED panel lets you see exactly what you're getting before you press the shutter, which is far more forgiving while you're learning. For static plated food, the LED panel is the easier tool.
Fill, Negative Fill and the $8 Bounce Card
The second "light" usually isn't a light at all.
A white foam board propped opposite the key light bounces a little illumination back into the shadow side, opening up detail without adding a second shadow. Cost: about $8 at any art supply shop. It does 80% of what a second strobe does, for 2% of the price.
Flip it to black — negative fill — and you deepen the shadows instead. That's the move for steak, chocolate, whisky, dark ceramics and anything you want to read as rich rather than cheerful. Our steak photography and cocktail photography pages show what that contrast does to specific dishes.
A diffuser between the light and the food completes the kit. A $15 shoot-through umbrella, a translucent shower curtain, or a sheet of baking parchment taped to a frame all work. Harsh light is the enemy; anything that spreads it will help.
Once this setup is built, leave it built. The people who get consistent images out of a two-light kit are the ones who marked the tripod legs and light stands with tape, so next month's shots match last month's without re-inventing the geometry. Using the same corner every time is worth more than any gear upgrade.
Tethered Shooting: The Pro Habit Worth Stealing
Tethering means running a USB cable from the camera to a laptop so every frame appears on a big screen the instant you shoot it. Professional food photographers do this on essentially every commercial job, and for menu work it's the single highest-value workflow change available.
The reason is brutally simple: a 3-inch rear LCD lies. On that screen, everything looks sharp and everything looks clean. On a 15-inch laptop you immediately see the crumb on the plate rim, the fingerprint on the glass, the herb that started wilting four minutes ago, and the focus that landed 2cm behind where you wanted it.
Finding those problems while the dish is still in front of you costs thirty seconds. Finding them at home costs a re-shoot.
There's a second benefit that matters in a working restaurant. The chef can stand next to the laptop and approve the plating in real time. That conversation — "the sauce needs to go on the other side," "that garnish reads as brown on screen" — doesn't happen if you're hunched over a viewfinder.
Practically: most DSLRs made in the last decade tether over USB into Lightroom Classic or Capture One, both paid desktop applications. You'll want a 5m cable rather than the 1m one in the box, a clamp to keep the port from taking strain, and the laptop on a separate surface from the shooting table.
If you're shooting more than about eight dishes in a session, tether. Below that, the setup time isn't really worth it — you'll spend longer looking for the right cable than you save. Our menu photography guide covers the rest of the shot-list planning that makes a session like this go quickly.
One caveat: not every camera plays nicely with every version of the software, and older Nikon and Canon bodies sometimes need a specific driver. Test the connection the day before, not while a chef is waiting with a plate of scallops.
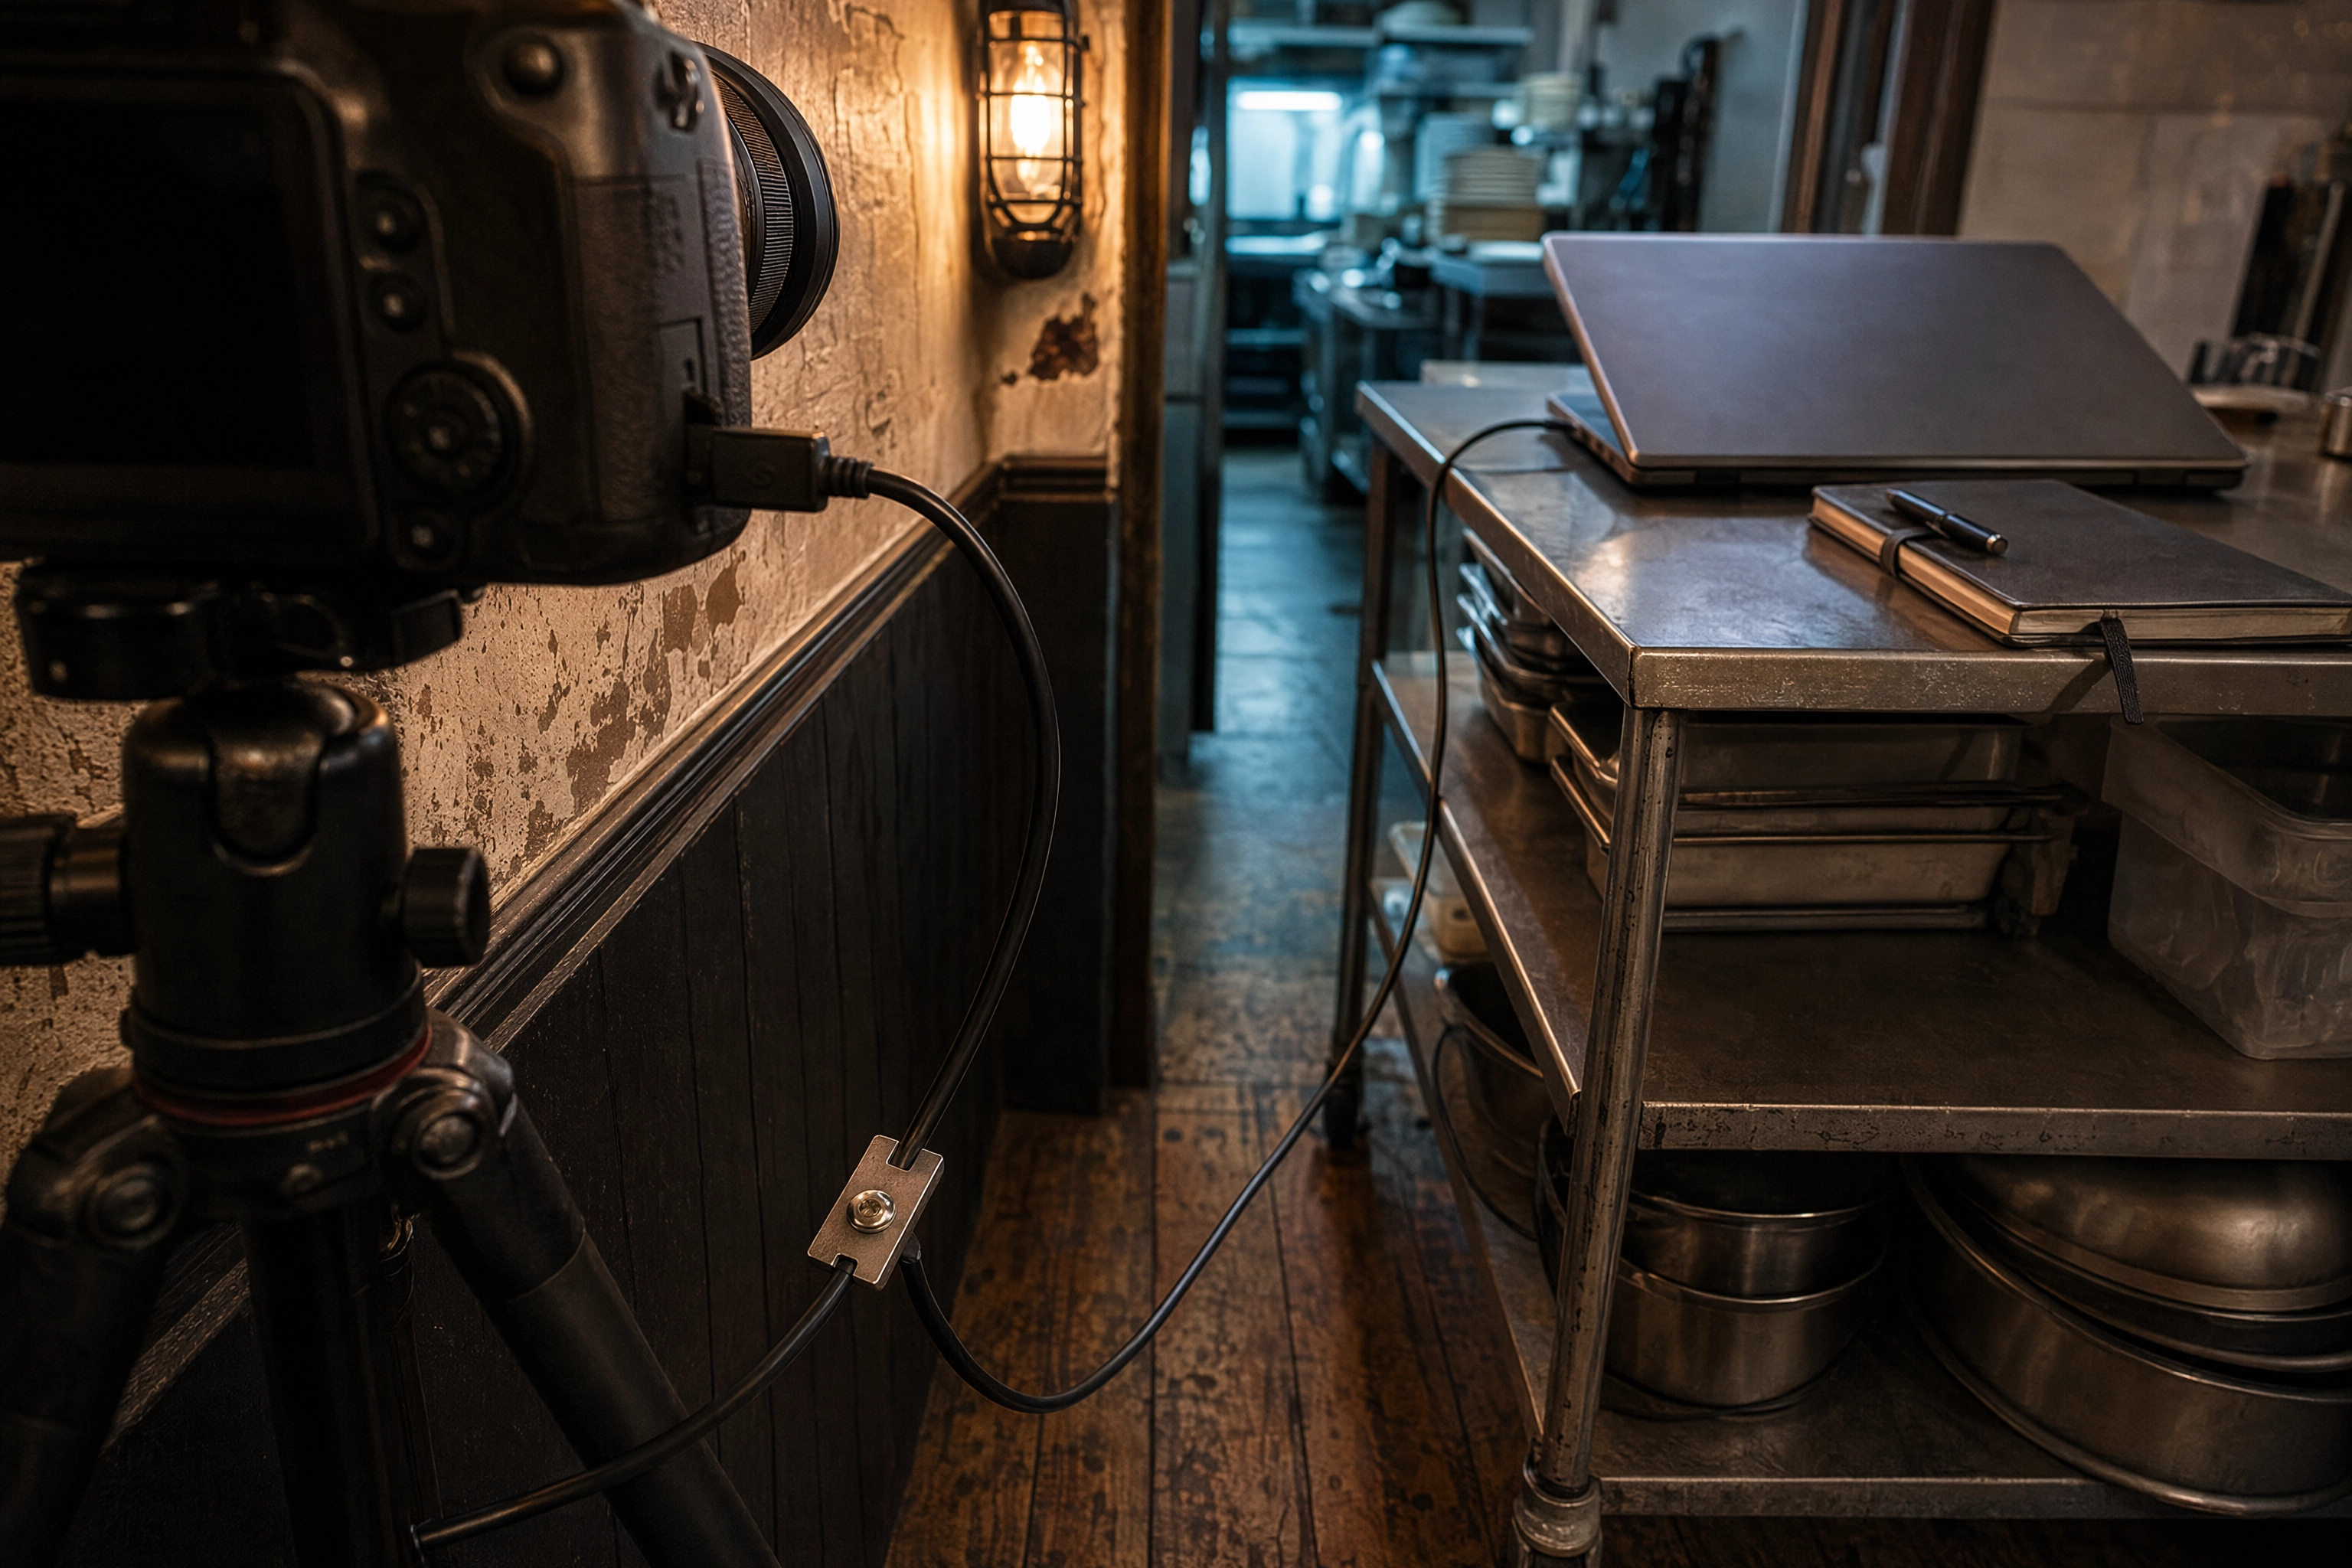 Tether cable running from a DSLR on a tripod through a clamp to a laptop cart, the tethered shooting setup for menu work
A 12-Dish Menu Shoot, Start to Finish
Nobody publishes the timeline, so here it is honestly. This is a full-menu refresh done properly with a DSLR, by one competent person who isn't a professional.
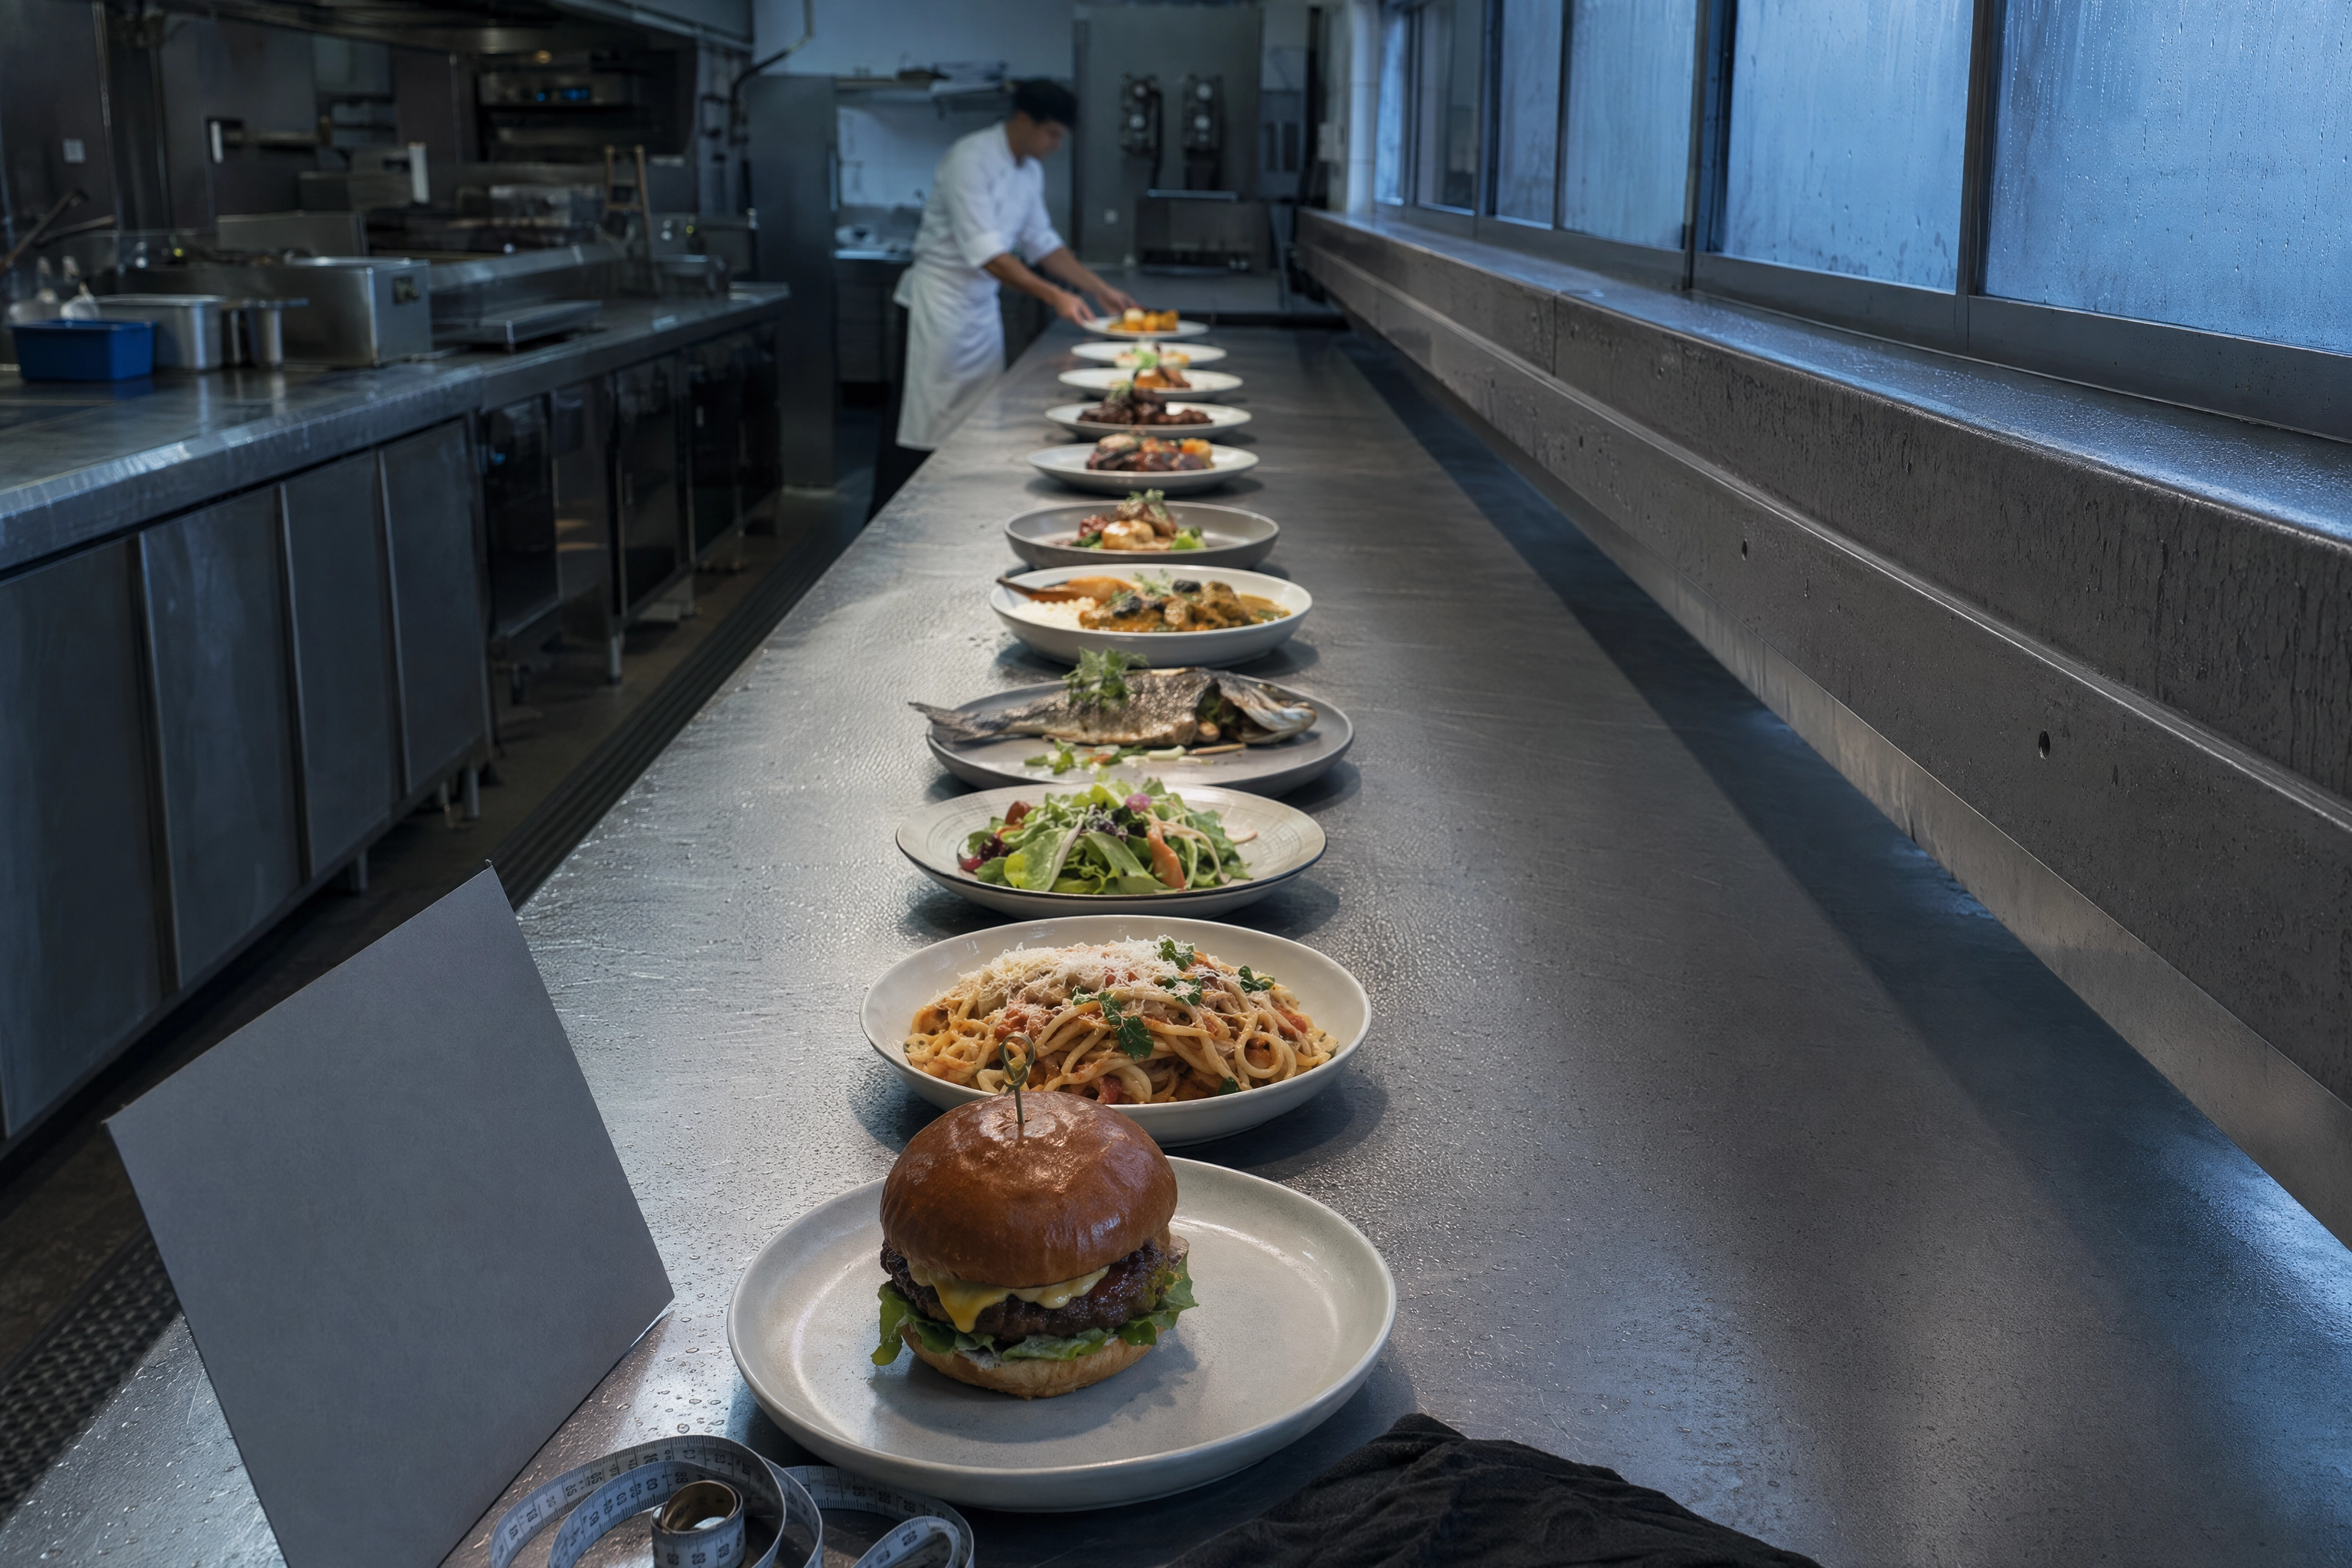 Twelve plated dishes lined up on a stainless kitchen pass with a grey card, ready for a full menu photography shoot day
Before the day (60–90 min). Agree the shot list with the chef. Decide surfaces and props. Charge batteries, format cards, pack.
Setup (45–60 min). Clear a corner, build the table, position the key light and diffuser, set the tripod, shoot a grey card, dial in the baseline exposure, confirm tethering.
Per dish (8–15 min). The kitchen plates it. You place it, adjust the props, take the 45° angle, the overhead, and one detail frame, review on the laptop, then ask for a re-plate if the garnish died. Three usable shots per dish is a realistic target; two of those shots will be the ones you use. Hot dishes give you about four minutes before they photograph as leftovers — melted cheese sets, greens wilt, foam collapses, ice cream is over in ninety seconds.
Teardown (20 min). Everything goes back. The kitchen needs the space.
Culling and editing (2–3 hours). Import roughly 500 frames, pick 12–24 keeper images, sync the white balance from the grey card, adjust each file, then crop for each destination — square for Instagram, 16:9 for the website hero, 3:2 for the delivery apps. Exporting the same images at three aspect ratios takes longer than people expect.
Realistic total: 6 to 9 hours for twelve dishes, spread over a shoot day and an editing evening. Add a kitchen staff member's time for plating, and the food cost of dishes that get photographed and then thrown out.
That's the number to hold in your head for the rest of this article. Not the price of a camera — the price of a working day, every time the menu changes.
DSLR vs Phone in 2026: The Honest Verdict
We published a full guide to iPhone camera settings for food photography, so this comparison isn't us talking our own book. Both approaches are legitimate. They're just legitimate for different jobs.
Where the DSLR Genuinely Still Wins
Low light. Not close. At the 50–110 lux of a real dining room, a full-frame DSLR at ISO 3200 produces a file you can actually deliver. A phone at the same light level leans hard on multi-frame noise reduction, and the result is smeared texture — sauce loses its sheen, bread crust turns into plastic.
True optical depth of field. Real background blur has gradual falloff and renders specular highlights as clean discs. Computational blur draws a mask and blurs everything outside it, which is why phone portrait mode chews the edges of steam, wire whisks, glass stems and herb sprigs.
Flash sync and strobes. Freezing a pour, overpowering a dim room, sculpting a dark and moody set — all of this needs strobes, and strobes need a camera with a sync connection.
Print and large format. A 24–30MP RAW file scales to a menu board, a window decal or a trade-show banner. Phone files don't hold up past about A4.
Colour depth for brand consistency. If you need forty dishes to look like one coherent brand across a printed menu, 14-bit RAW and a grey card get you there.
Where the Gap Has Basically Closed
Bright, window-lit shooting. With good light on the plate, a recent flagship phone and a mid-range DSLR produce images most people cannot tell apart at web sizes. The computational HDR on modern phones handles a bright window and a dark plate rim better than a single DSLR exposure does — and that really is a case where the phone wins outright.
Delivery app thumbnails. Uber Eats, DoorDash and the rest render menu images at a few hundred to about 1,200 pixels wide, often on a phone screen held at arm's length. Every advantage listed above becomes invisible at that size. Your delivery app photos are judged on lighting, colour and appetite appeal — not on which of the two cameras captured them.
Speed. The phone is in your pocket, it's already unlocked, and the special sells out at 8pm. A camera that's in a bag in the office does not exist. Half the value of using a phone is simply that the shots get taken at all.
Video. Not covered in this guide, but worth stating: phones are simply better at casual food video, and stabilised handheld pours look fine straight off the sensor.
The Bottleneck Was Never the Sensor
Here's the thing five years of restaurant photos make obvious. Rank the variables by how much they change the final image:
- Light — the difference between a great photo and an unusable one
- Styling and plating — the difference between appetising and technically correct
- Angle and composition — the difference between a menu photo and a snapshot
- Lens — meaningful, but a distant fourth
- Camera body — barely registers until you're in the dark
A $3,000 full-frame body shooting a beautiful dish under a ceiling downlight loses, badly, to a phone shooting the same dish at a window with a foam board. That comparison isn't a hypothetical — it's what happens in practice, and it's why gear-first advice keeps failing restaurant owners.
Put another way: both cameras are capable of taking the photo you want. Only one of the five variables above is something a purchase can fix, and it's the one that matters least.
Which means the honest question isn't "DSLR or phone?" It's "where is my time going, and is a camera really the thing that's stopping me?"
Should You Buy a DSLR in 2026?
Some context that changes the maths.
Canon and Nikon have both stopped developing new DSLRs. There are no new models coming, DSLR lens production is winding down, and third-party lens makers have moved to mirrorless mounts. DPReview argued years ago that the writing was on the wall, and it has been comprehensively borne out. Ricoh's Pentax division is the only maker still actively releasing DSLRs. DigitalCameraWorld's 2026 DSLR guide says the same.
This cuts both ways.
The bad news: you'd be buying into a system that has stopped moving. No new bodies, a shrinking lens roadmap, and eventual difficulty getting service.
The good news: used DSLR prices have collapsed, and the cameras themselves didn't get worse. A 2016 full-frame body still has a 2016 full-frame sensor, which is dramatically more capable than any phone in a dark room. Even new, the Canon EOS 5D Mark IV — a 30.4MP full-frame body — has been discounted to around $1,799, and used prices sit far below that. Photographers on r/canon and r/AskPhotography have been making this exact argument for a few years now.
For static studio-style food work — tripod, controlled light, no autofocus tracking required — the features mirrorless bodies win on barely matter. Food doesn't move.
Three Realistic Kits at Three Budgets
Under $500 — the used crop kit. A used Canon Rebel-series or Nikon D5000-series body ($150–250) plus a used 50mm f/1.8 lens ($90–120) plus a tripod ($60) plus foam boards ($10). These cameras are a decade old and they will still beat a phone in a dark dining room, while teaching you every setting in this guide.
$700–1,200 — the used full-frame kit. A used Canon 6D or Nikon D750 ($450–700), a 50mm f/1.8 and a used 100mm macro lens ($250–400), tripod, and a speedlight with a small softbox ($120). Both of those cameras are genuinely excellent in low light, and this is the sweet spot for a restaurant that wants to bring photography in-house.
$1,800+ — new territory. At this budget, buy mirrorless instead. New DSLR cameras in 2026 mean buying into a system with no future, and the equivalent mirrorless body gives you live exposure preview, better focus confirmation and a lens roadmap that still exists.
A note on what to skip: megapixel counts. Cameras in every one of these tiers have more resolution than a delivery listing or a printed menu will ever use. Spend the difference on lenses and light.
If you're weighing a permanent shooting corner against renting one, our piece on building a food photography studio works through the space and cost trade-offs, and our comparison of food photography services covers what freelancers and studios charge to do it for you.
One more line item people forget: editing software. Lightroom Classic or Capture One are subscription or licence purchases, and you'll want one of them if you're shooting RAW for menu work. Our food photography equipment guide has the full gear breakdown at each level, and what food photography actually costs covers the hire-versus-DIY maths.
When to Skip the Camera Entirely
Be honest about which category your work falls into.
A DSLR is the right answer for: the six to ten hero images that define your brand, printed menus and large-format signage, a launch or rebrand shoot, packaging and CPG product work, and anything a photo editor will scrutinise. If you run a fine dining room, this is most of your important imagery.
A DSLR is the wrong answer for: this week's special, forty delivery-app items that need refreshing, seasonal LTOs that live for three weeks, and daily social posts. The work is recurring, the output is small, and the shoot-day cost repeats every single time.
That second list is where most restaurants actually spend their photography energy — and where a six-to-nine-hour shoot day, every time the menu shifts, stops being sustainable.
Where AI Restyling Actually Fits
The practical middle path most operators land on: use the camera for the images that deserve a shoot day, and use AI restyling for the recurring volume.
FoodShot AI takes a phone photo of a real dish — your dish, plated by your kitchen — and restyles it into a menu-ready image in about 90 seconds. You pick from a library of over 200 styles across delivery, menu and fine-dining looks, or build a look yourself by combining a background surface with a plate style. Output is 4K and print-ready, and paid plans include a commercial licence.
What it doesn't do is invent food. It works from your own upload, which is exactly why it fits weekly specials: the kitchen plates the dish once, someone shoots it on a phone in thirty seconds, and the styling problem — the part that was really eating your afternoon — gets solved without a lighting setup.
It also solves a consistency problem that trips up in-house shooters. Using one style across a whole menu makes forty images look like they belong to one restaurant, which is hard to achieve by hand when dish four and dish thirty-eight were photographed on different days under different light.
Where the honest line sits: for a hero image going on a printed menu at A3, or a campaign shot that has to be perfect, shoot it properly with a camera and lights. For the forty items on your restaurant menu, the rotating specials at your cafe, or the full catalogue for a ghost kitchen launching three virtual brands at once, the shoot-day economics don't work and never did. Pricing starts at $15/month; you can see the tiers on our pricing page or read more about AI food photography.
Both tools, used for what each is good at.
Nine Mistakes That Show Up in Almost Every First DSLR Food Shoot
-
Leaving white balance on auto. Covered at length above. It's the most common and the most damaging, because it degrades every frame of the shoot at once.
-
Shooting wide open at f/1.8. The plate needs to be legible, not dreamy. Start at f/8.
-
Front-lighting the food. The light belongs behind and to the side. Front light kills every texture that makes food look edible.
-
Shooting from standing height at whatever angle is convenient. Flat dishes want overhead. Tall dishes want straight-on. The 45° angle is a default, not a law. Our food photography techniques guide covers angle selection by dish type.
-
Letting the camera pick the focus point. It will choose the fork. Use single-point AF and place it on the front edge of the hero element.
-
Shooting JPEG to save space. Storage is $10. A ruined menu shoot is a day.
-
Photographing food that's been sitting. You have about four minutes on a hot plate and ninety seconds on ice cream. Shoot the set with a stand-in dish first, then bring the real one out.
-
Ignoring the background. A cluttered kitchen behind the plate is the fastest way to make expensive cameras and lenses look cheap. A sheet of painted MDF costs $20 and helps more than a lens upgrade.
-
Underexposing "to protect highlights," then lifting in editing. This creates more noise than simply raising ISO. Expose correctly at capture, and use the histogram rather than the rear screen to judge it — that screen is too bright in a dark room and too dim in daylight.
Canon's own food photography training article makes a related point worth repeating: plan the dish before you plan the shot. Think about the shape, height and dimension of the food, and what makes it special, before the camera comes out at all.
Frequently Asked Questions
What camera settings should I use for food photography with a DSLR?
Start at f/8, 1/125s, ISO 400, in Manual mode, shooting RAW with a custom white balance and single-point autofocus. Open to f/5.6 for a single plated hero, close to f/11 when the entire dish must be sharp, and raise ISO before you slow the shutter below 1/100s handheld. On a tripod with controlled light, drop to ISO 100. Those numbers are a little conservative on purpose — they're designed to be right for most dishes rather than perfect for one.
Is a DSLR better than an iPhone for food photography?
In a dim restaurant, yes — meaningfully. A full-frame sensor gathers far more light than a phone sensor, and the difference at ISO 3200 is obvious. In bright window light, at web sizes, most people really cannot tell the two cameras apart. The DSLR also wins for print, strobe work and true optical background blur. The phone wins on speed and on the fact that it's always with you.
What ISO should I use for food photography in a dark restaurant?
ISO 800–1600 handheld, and ISO 3200 as your ceiling on a full-frame body. On a crop sensor, treat 1600 as the practical limit. Better: put the camera on a tripod, drop to ISO 100–400, and use a slower shutter — the food isn't moving. Best: add one light and stop fighting the room entirely.
Do I need a full-frame camera for food photography?
No. An APS-C body with good lenses and good light produces excellent food images. Full-frame buys you roughly one to two stops of usable ISO headroom and slightly easier shallow depth of field. If you shoot mostly during daylight prep hours or with strobes, that headroom rarely gets used. If you shoot during dinner service, it's worth real money. Crop-sensor cameras are also lighter, which matters more than you'd think when you're leaning over a pass.
What lenses do I need to start food photography?
One, to begin with: a 50mm f/1.8 prime, or 35mm on a crop body. Add a 90–105mm macro lens when you start shooting texture and single-plate heroes. Those two lenses cover almost all restaurant work. Avoid wide-angle lenses on plated food — they stretch the near edge of the plate and make round dishes look oval.
Should I shoot food in RAW or JPEG?
RAW, especially for menu work. A 14-bit RAW file holds 16,384 tonal levels per channel versus 256 for an 8-bit JPEG, and — more importantly — it keeps white balance editable rather than baked in. Given how mixed restaurant lighting is, that alone is decisive. Shoot RAW+JPEG if you need something postable immediately.
What is the best aperture for food photography?
f/5.6 to f/8 on a normal lens is the working default. Go to f/8–f/11 when the whole dish needs to be sharp, such as burgers, layered bowls and overhead spreads. Go to f/11–f/16 only when a macro lens is very close to the subject, because depth of field collapses at short distances. Avoid f/1.8 for anything a customer needs to read.
Is it still worth buying a DSLR in 2026?
Used, yes — for a specific reason. Canon and Nikon have stopped DSLR development, which crashed used prices while the cameras themselves stayed just as capable. A used full-frame body plus a 50mm lens is the cheapest route to genuinely good low-light food photography. If you're spending over about $1,800 new, buy mirrorless instead, because the DSLR mount has no roadmap left.
How long does it take to shoot a full restaurant menu with a DSLR?
Plan on 6 to 9 hours for twelve dishes: roughly an hour of setup, 8–15 minutes per dish including plating and review, and two to three hours of culling and editing. Add kitchen labour for plating and the food cost of dishes that get photographed and discarded. That recurring day is the real reason most restaurants don't keep menu photography in-house.
One last thought. If you already own a DSLR, use it — the control it gives you over light and depth is real, and the settings in this guide will get you most of the way there in an afternoon. Start with white balance and aperture; those two changes alone will visibly improve your next set of shots.
If you're weighing whether to buy one to solve a menu-photo problem, work out how many shoot days your menu will demand this year first. That number, not the sensor size, is the one that decides it. Camera bodies and lenses are a one-off purchase. Shoot days are not, and that's the cost that quietly compounds.