
Macro Food Photography: Your Focus Is 1mm Deep
 Ali Tanis14 min read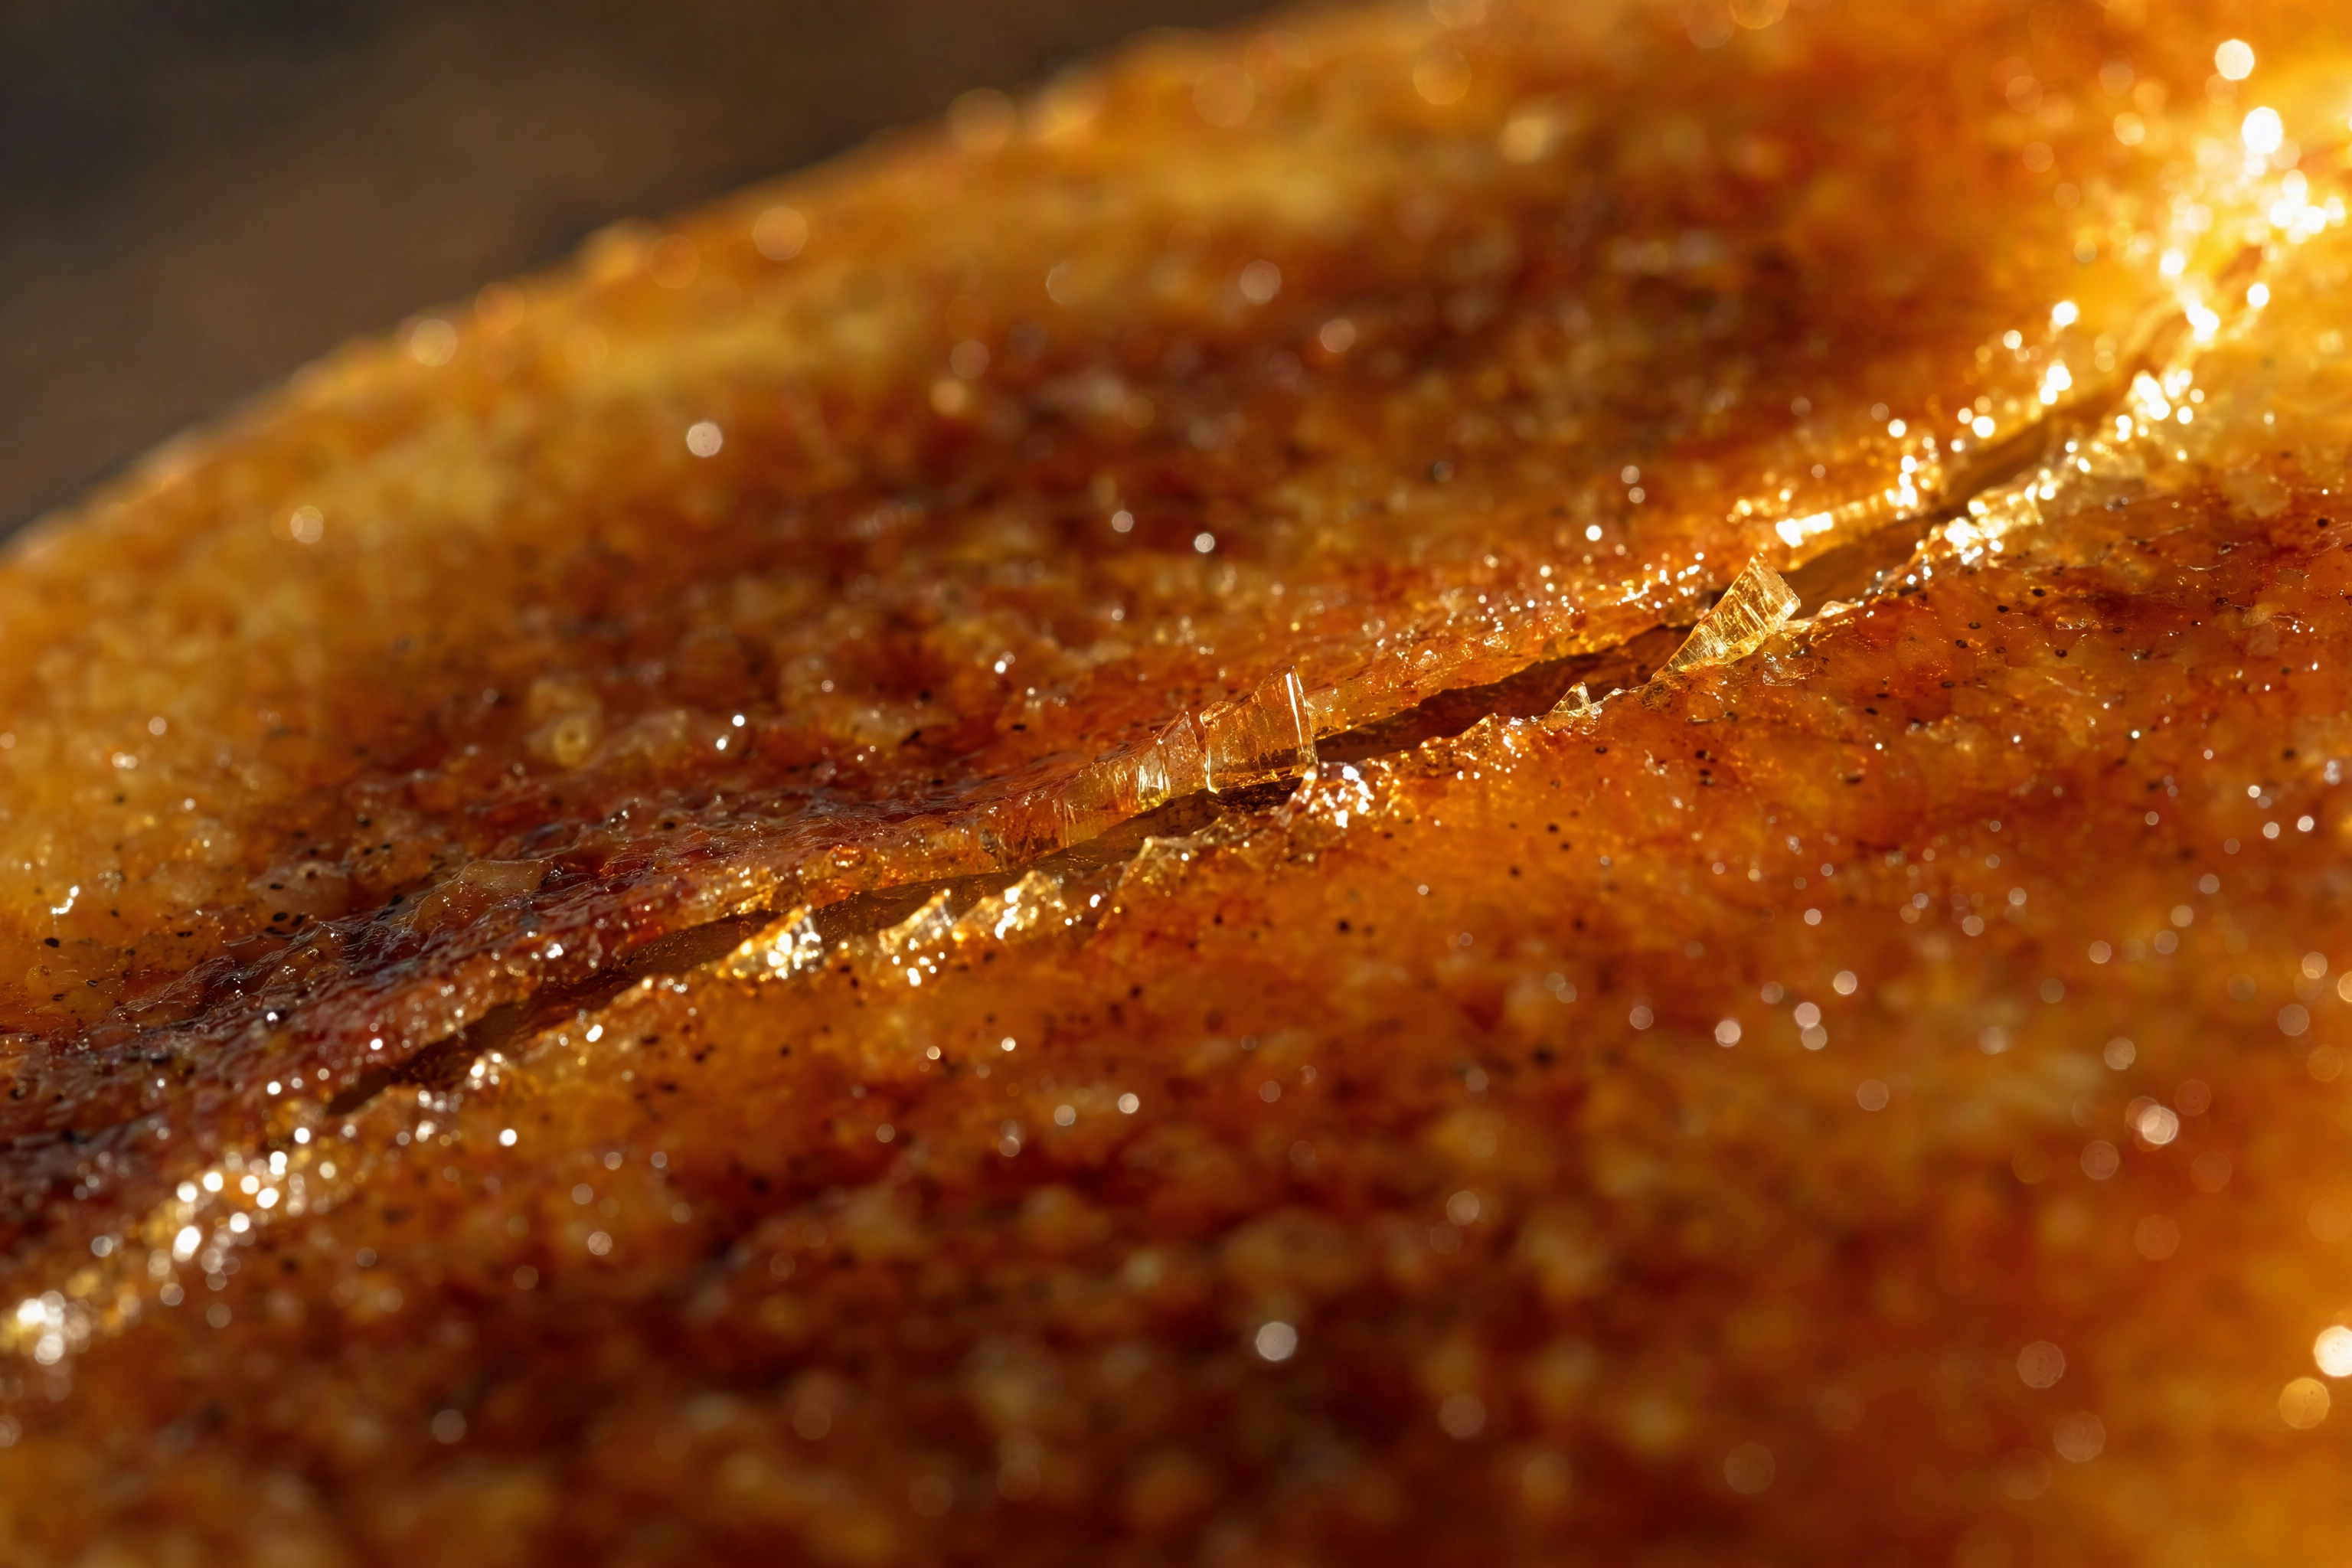
Macro food photography is where gear stops being a matter of taste and becomes physics. Move in until a single crumb fills the frame, and the depth of field you trust on a whole plate collapses to less than a millimetre. The aperture you always shoot at is suddenly wrong. So is your shutter speed, so is your lighting, and so is the way you focus.
This is the last post in our gear cluster, and the most technical one. Below is what really happens at high magnification, with numbers you can check, plus the part most guides skip: when a macro shot is the wrong photo to take.
Quick Summary: At 1:1 on a full-frame camera, f/2.8 leaves about 0.34 mm in focus and f/8 leaves about 1 mm. Use f/8–f/11, focus stack anything deeper, and treat macro food photography as supporting cast — your delivery listing still needs the whole dish.
What Macro Food Photography Actually Means
Macro has a definition, and it is not "close-up". A macro lens reproduces the subject life-size on the sensor at its minimum focusing distance. That is 1:1, also written 1.0x. A full-frame sensor measures 36 x 24 mm, so at 1:1 the long edge of your picture covers exactly 36 mm of real food. Roughly one strawberry, edge to edge.
Step back and the ratios open up fast. At 1:2 you cover 72 mm — a whole macaron with a little space around it. At 1:4 you cover 144 mm, which is most of a side plate. B&H keeps a plain-English glossary of macro terms if the notation still feels slippery.
Now the interesting part. Most of the macro food photography you admire online sits between 1:4 and 1:2, not at 1:1. Push the magnification far enough and food stops being recognisable. A ginger root becomes a random stick, and nobody viewing it can tell what the subject is. That is a failed photo, however sharp it is.
Macro photography grew up around insects and flowers, where extreme ratios pay off. Food is a different case. Our subjects are already large, and the details that matter — a bubble, a flake, a bead — sit comfortably at half life-size.
Cropping a normal file is also not macro. Cropping throws pixels away. Magnification records details that were never on the sensor before.
Depth of Field Collapses to Millimetres
This is the whole story, and the reason your first attempts look soft. Depth of field shrinks with the square of magnification. Doubling how near you get does not halve the sharp zone — it quarters it.
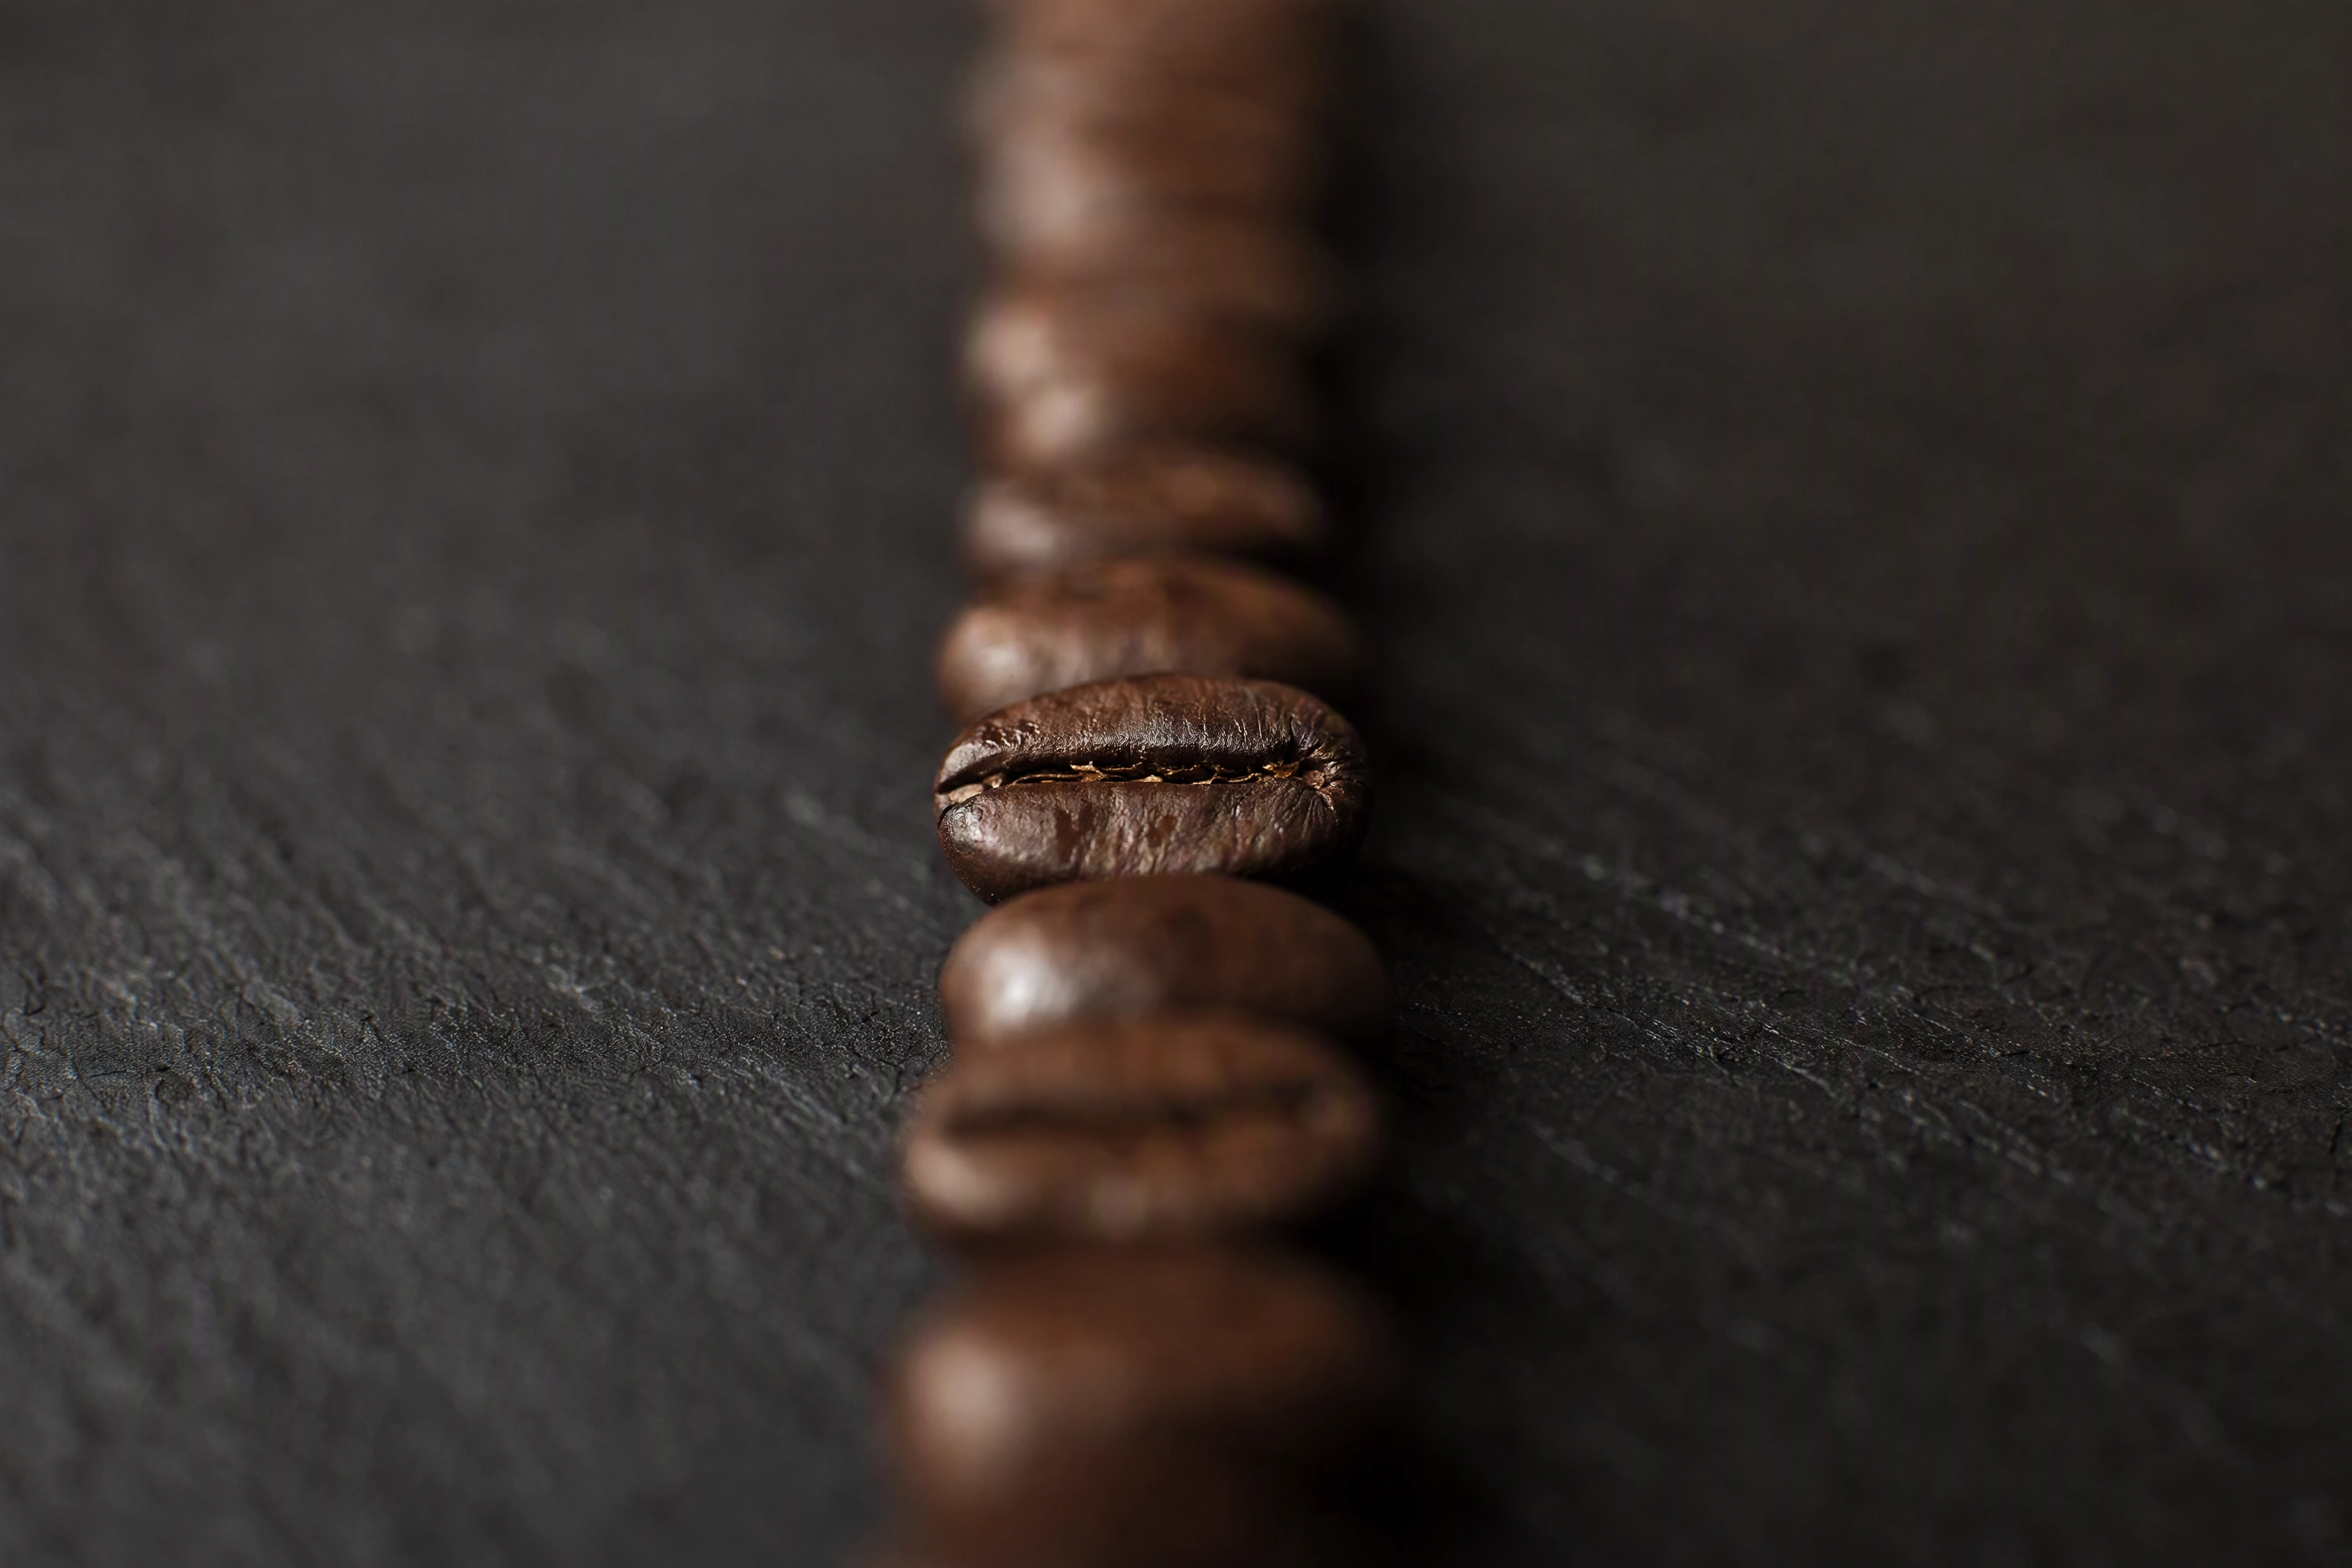 Row of coffee beans with only one bean sharp, showing the sub-millimetre depth of field in macro food photography
Run the standard depth of field maths on a full-frame camera, with the usual 0.03 mm circle of confusion, and you get this:
- A whole plate at 1:10 magnification, f/2.8: about 18 mm of sharpness.
- The same plate at f/8: about 53 mm.
- A 1:2 close-up at f/8: about 2.9 mm.
- A true 1:1 close-up at f/2.8: about 0.34 mm.
- A true 1:1 close-up at f/8: about 0.96 mm.
- A true 1:1 macro shot at f/16: about 1.9 mm.
Read the first and fourth lines together. The same f/2.8 that gives you nearly two centimetres of sharpness on a plated dish gives you a third of a millimetre on a crumb. That is a 50-fold collapse from an identical setting. Every wide-open habit you built while photographing plates now counts against you.
So stop down hard — but not forever. Magnification also changes your effective aperture, which is the marked f-number multiplied by (1 + magnification). At 1:1 that doubles it. Marked f/8 behaves like f/16: you lose two stops of light and you inherit f/16 diffraction. By marked f/22 the whole picture goes mushy.
The practical setting is f/8 to f/11 marked, which is where most macro lenses are sharpest anyway. Then, before stopping down further, rotate the camera so the sensor sits parallel to the surface you care about. A flat plane of focus laid along the icing, the crust or the sear buys more apparent sharpness than two extra stops ever will.
Focus Stacking: How the Money Shots Are Made
When 1 mm is not enough, you do not stop down. You shoot a stack. Most of the macro food photography you see in cookbooks is made this way. Focus stacking means capturing 8 to 40 exposures, nudging the focus point a fraction deeper each time, then merging those images into one file where everything is sharp.
Every system uses a different name for the capture step. Canon, Sony and OM System call it Focus Bracketing. Nikon calls it Focus Shift Shooting. Panasonic and OM System bodies can composite in camera; most others hand you the stack and expect you to merge it in Helicon Focus, Zerene Stacker or Photoshop.
The advantage is not only depth. Stacking lets you work at your sharpest aperture instead of a diffraction-softened f/22, so a stacked image beats a single stopped-down one twice over. Macro photographers on Reddit make exactly this argument.
The conditions are strict, though. You need a locked-down tripod, manual exposure, constant light, and a subject that does not move a hair for 20 seconds. That rules out a lot of food. Ice cream slumps. Herbs droop. Steam drifts. Melted cheese sets and goes matte. For those, get the plane of focus right in one exposure and accept the softness behind it.
Working Distance: Why You Will Block Your Own Light
Two numbers get confused constantly, and the difference between them decides whether your setup is usable at all.
Minimum focusing distance is measured from the sensor plane — the little ⊖ mark on top of your camera. Working distance is the clear air between the front of the barrel and the food. The second number is always much smaller, and it is the interesting one.
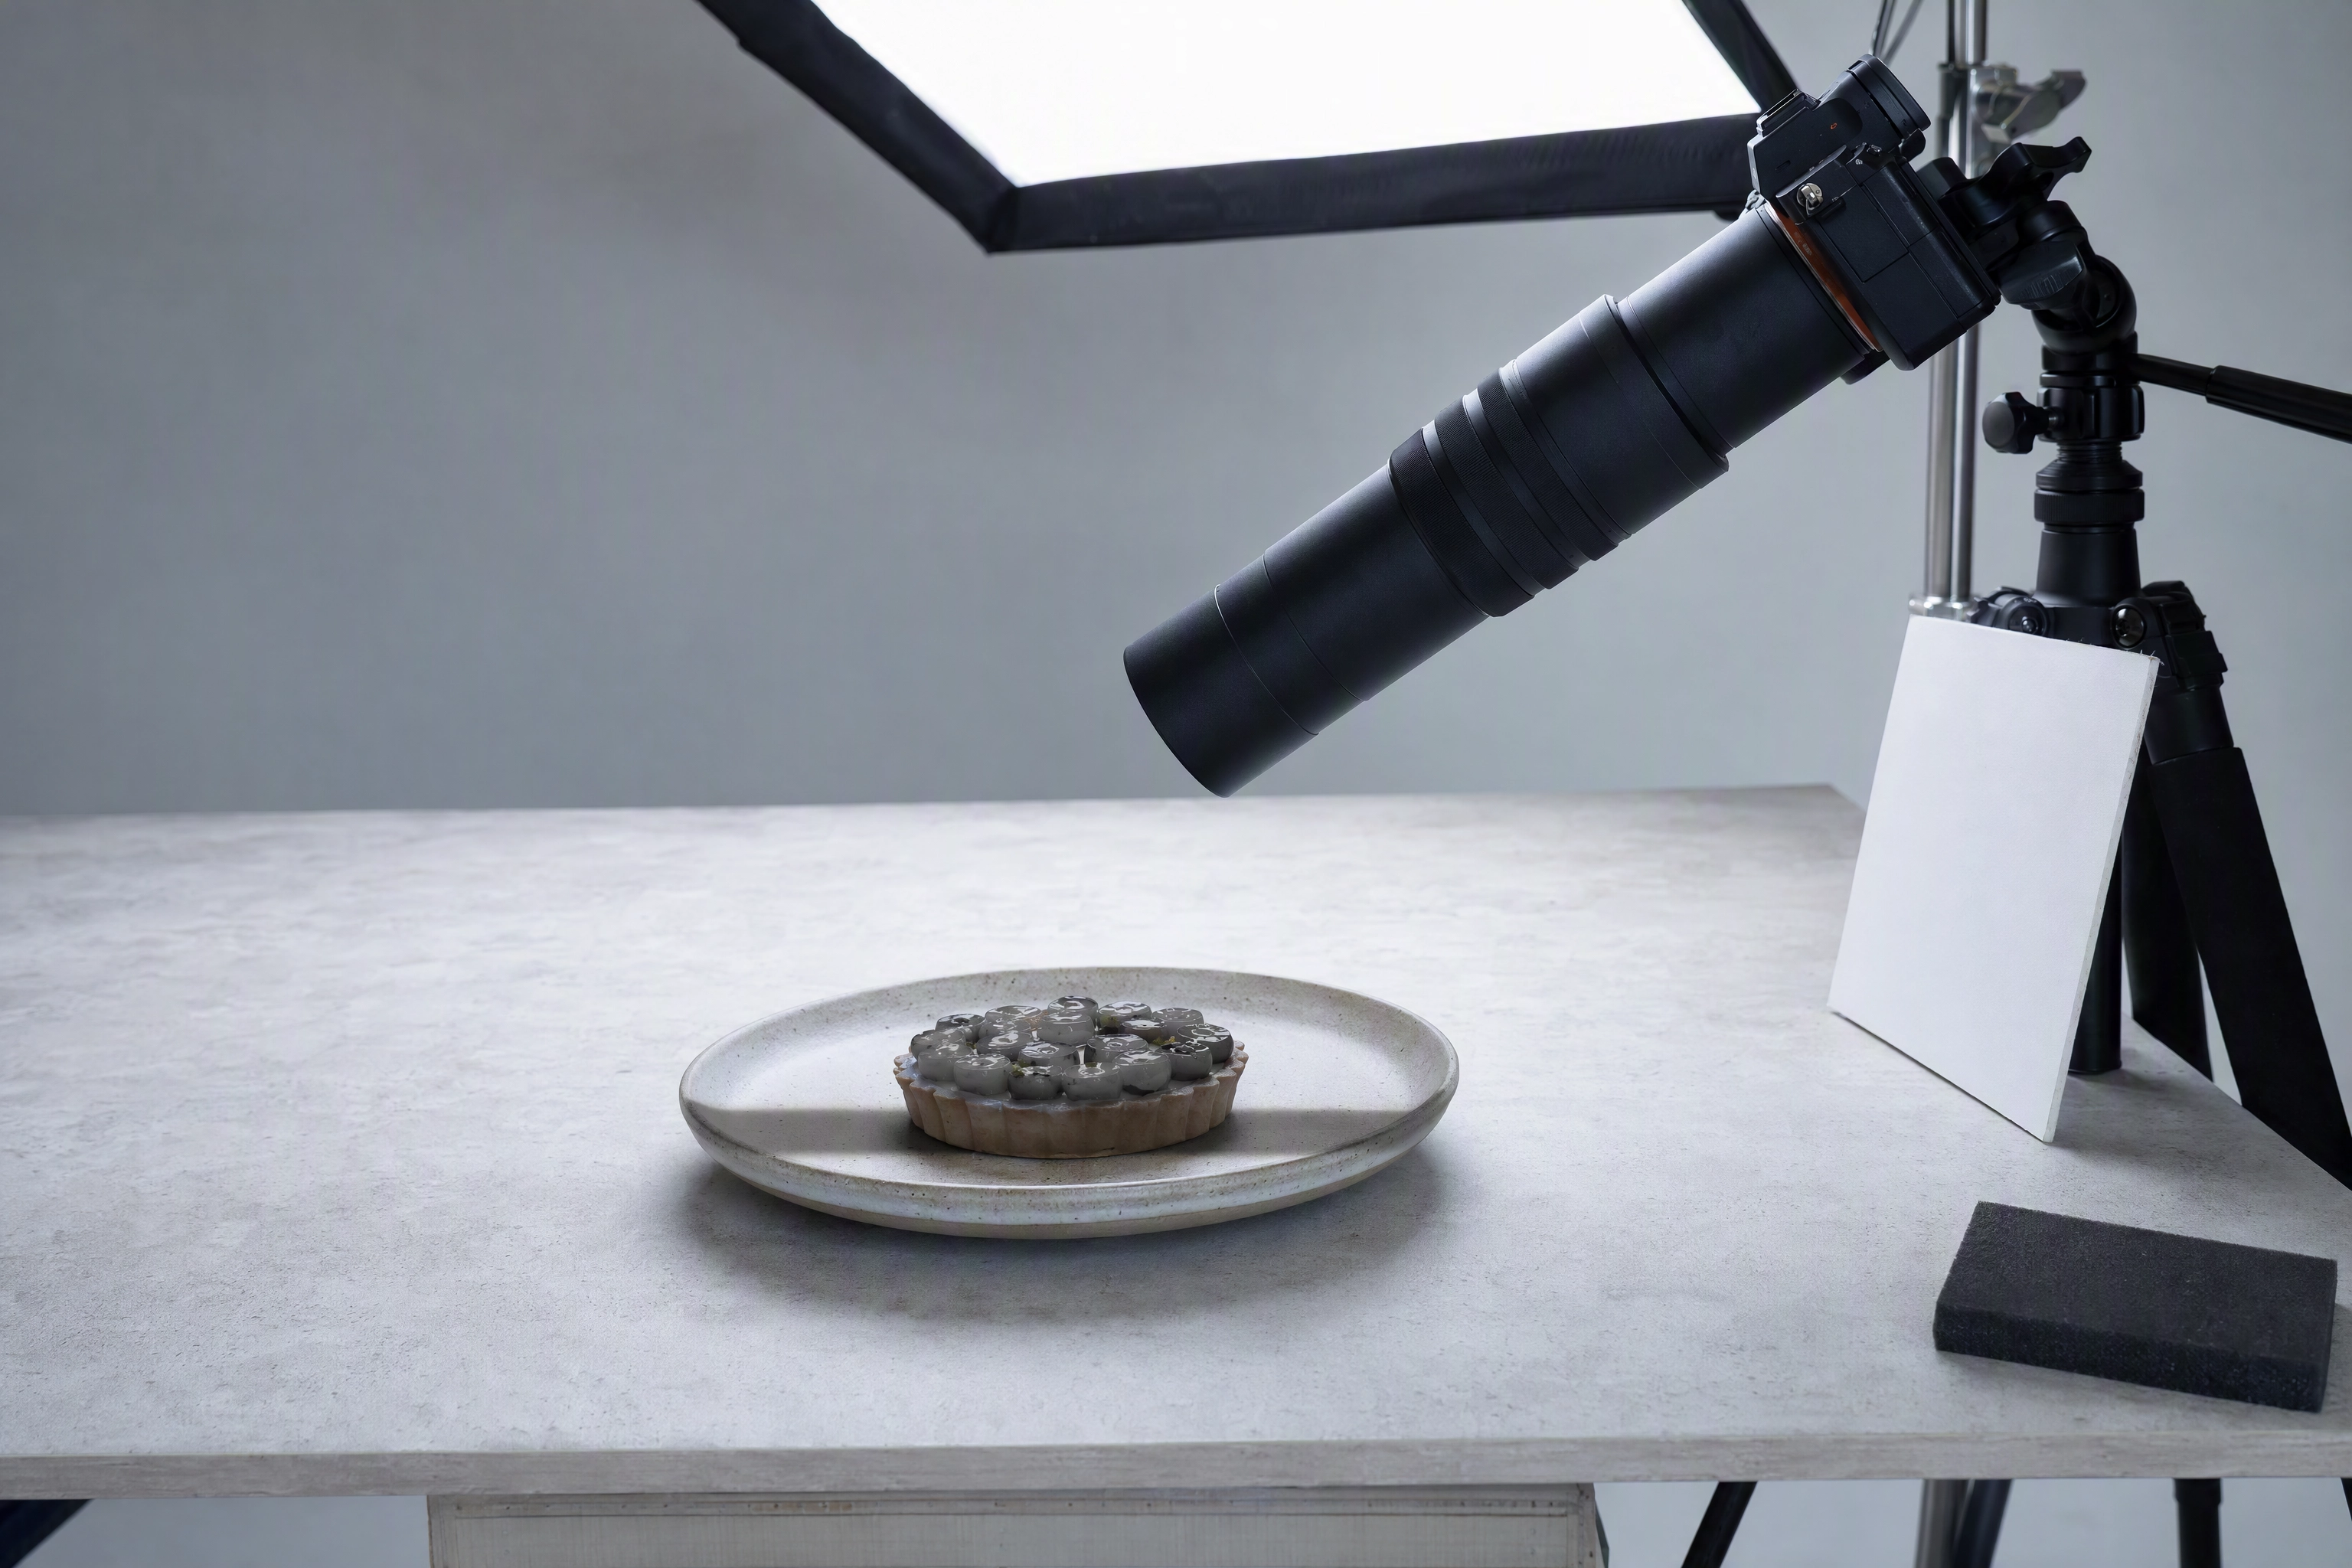 Long macro lens leaning in over a small tart under a softbox, the working distance problem in macro food photography
Canon's EF 100mm f/2.8L Macro focuses down to 30 cm, yet owners who have checked it report only 13 to 15 cm of clear air at 1:1. The newer RF 100mm f/2.8L Macro reaches 26 cm at 1.4x, which leaves roughly 9 cm. A 50 mm or 60 mm macro hits 1:1 with about 5 cm of air — the barrel now sits inside your key light.
That is the trap, and it is the single most common reason macro food photography looks dim and flat. Three fixes, in order of how much they help:
- Choose a 90–105 mm optic over a 50 mm one. Longer macro lenses buy back roughly 10 cm of room.
- Move the light behind or across the dish rather than over it. A raking beam picks out texture anyway, which is exactly what you want. Our lighting guide covers the angles, and a plain window helps here because it is a huge, soft source.
- Fill the shadow side with a small white card or a mirror tile. At this distance a business card is a big reflector.
Camera Shake Is Amplified as Much as the Detail
Magnification multiplies movement exactly as much as it multiplies detail, and it catches out almost everyone new to macro food photography.
At 1:1, one millimetre of table wobble moves the subject one millimetre across the sensor. On a 6000-pixel-wide file, that is about 167 pixels of smear. At normal plate distance the same wobble costs you 17 pixels, which nobody would notice. High magnification turns an invisible problem into a different problem entirely: a ruined photo.
Practical answers, all cheap:
- Put the camera on a proper tripod. The 1/focal-length shutter rule does not survive high magnification, and stabilisation loses most of its rated stops at 1:1.
- Trigger with a 2-second timer, a remote or your phone app. Never with your finger.
- Switch stabilisation off when the camera is locked down. On a rigid tripod it can hunt and add its own blur.
- Focus by moving the camera, not the ring. Turning a macro focus ring changes magnification and re-frames the picture. A cheap focusing rail, or gentle rocking on a beanbag, is more precise.
- Kill the vibration sources. An extractor fan, a fridge compressor or footsteps on a wooden floor all show up at this scale.
What Macro Food Photography Is Genuinely For
Macro is not a style you apply to everything. It answers one question: what is this food like to eat? Seven jobs it does better than any wide photo.
Crumb structure. An open, irregular crumb is the proof of a well-made loaf, and it only reads up near. See our bread photography guide for the cut and the lighting.
Coating texture. The craggy shell on fried chicken is the entire promise of the dish. A fried chicken detail shot sells crunch in a way a whole basket cannot.
Condensation beads. Water on cold glass is a temperature cue, and viewers read it instantly. It matters most for beer and for bottled drinks.
Salt and sugar crystals. Flaky salt on chocolate or crystals on a cookie tell the eye that seasoning was a decision, not an accident.
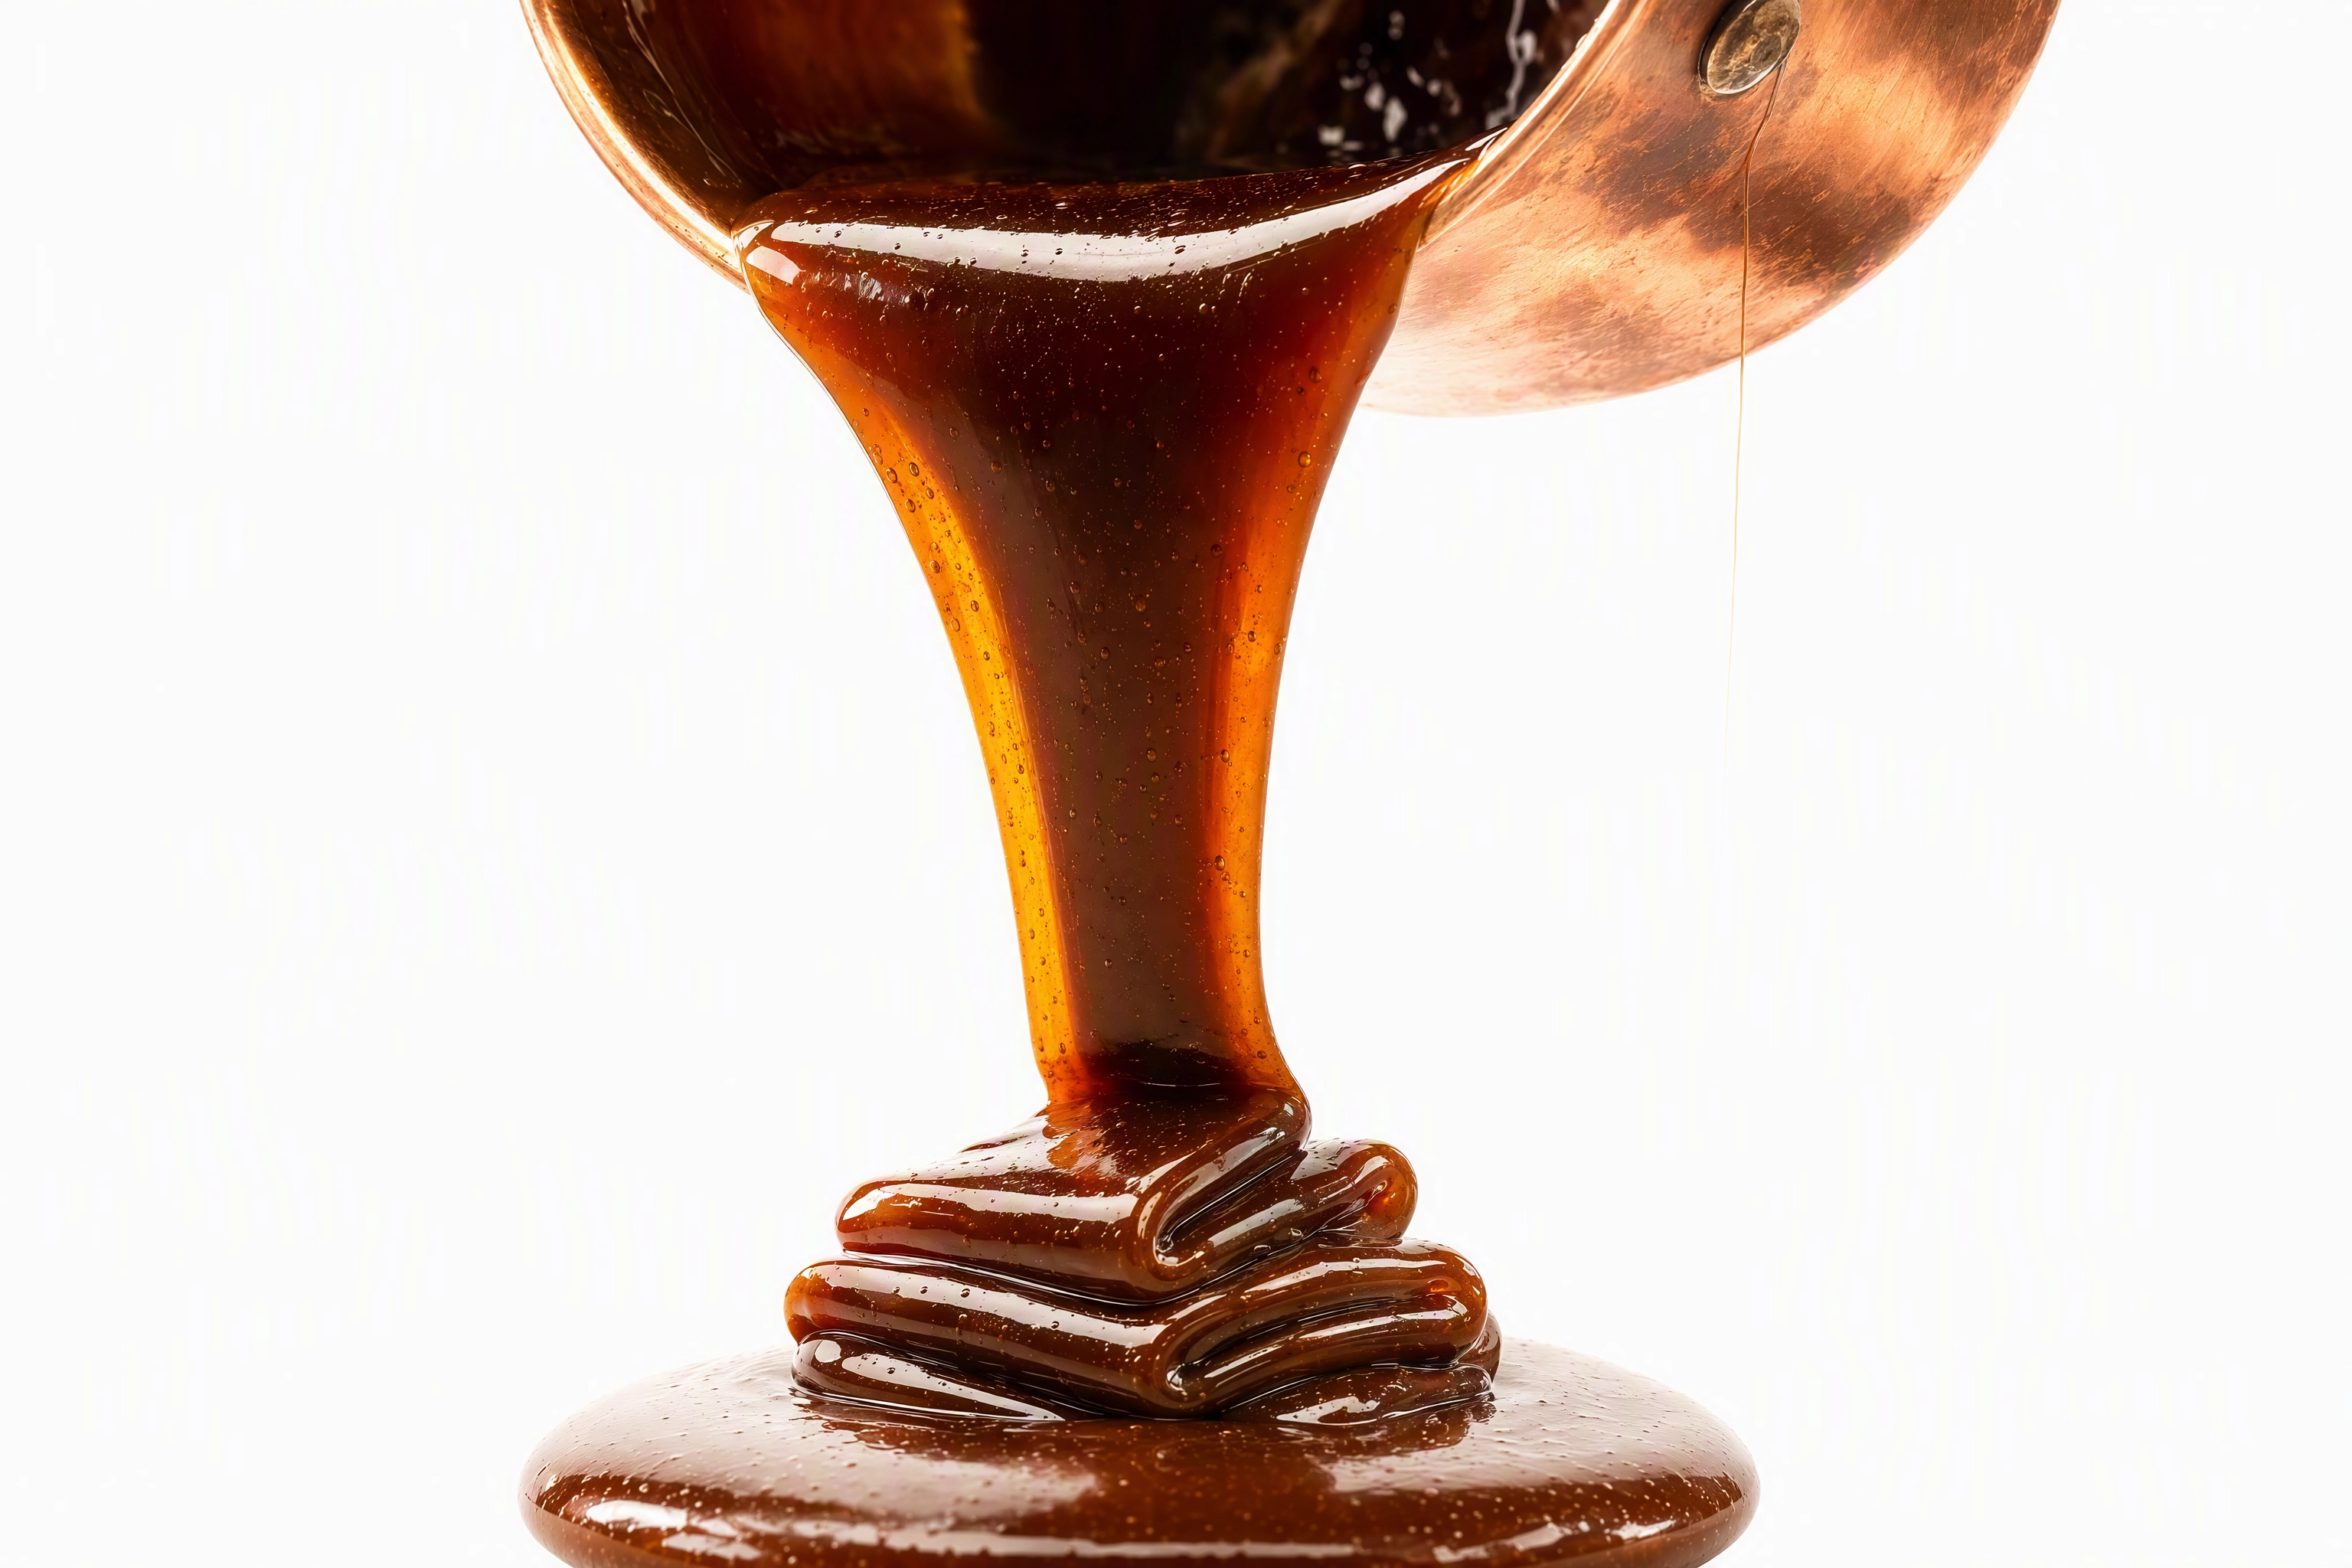 Backlit macro of a thick caramel ribbon pouring and folding, showing sauce viscosity in close-up food photography
Sauce viscosity. How a sauce ribbons off a spoon, or drags behind it, is the only honest way to show thickness in a still picture. It is far more interesting than a puddle.
Cheese pull strings. A pull is a motion cue trapped in a frozen image. Our pizza photography guide covers the timing, which is unforgiving.
Sear, char and glaze. Rendered fat, grill marks and a cracked glaze all live in a few millimetres of surface. Worth a look on steak and on cakes.
These seven have something important in common. Each is evidence of craft that a whole-plate photo flattens away. That is the honest case for macro food photography, and it is a strong one.
The Honest Limit: Detail Shots Are Supporting Cast
Here is the part your favourite macro tutorial will not tell you. A delivery listing thumbnail renders at roughly 200 pixels wide on a phone. At that size a 1:1 crumb is an abstract orange texture. Hungry people scrolling a menu skip it, because they cannot tell what it is.
Detail pictures do not sell dishes on their own. They support the photo that does. Get your priorities in this order:
- The whole dish, recognisable, well lit against a clean background. This is the listing photo and the menu photo.
- A three-quarter or overhead hero of the same dish, styled.
- One detail shot, for the places where atmosphere is allowed.
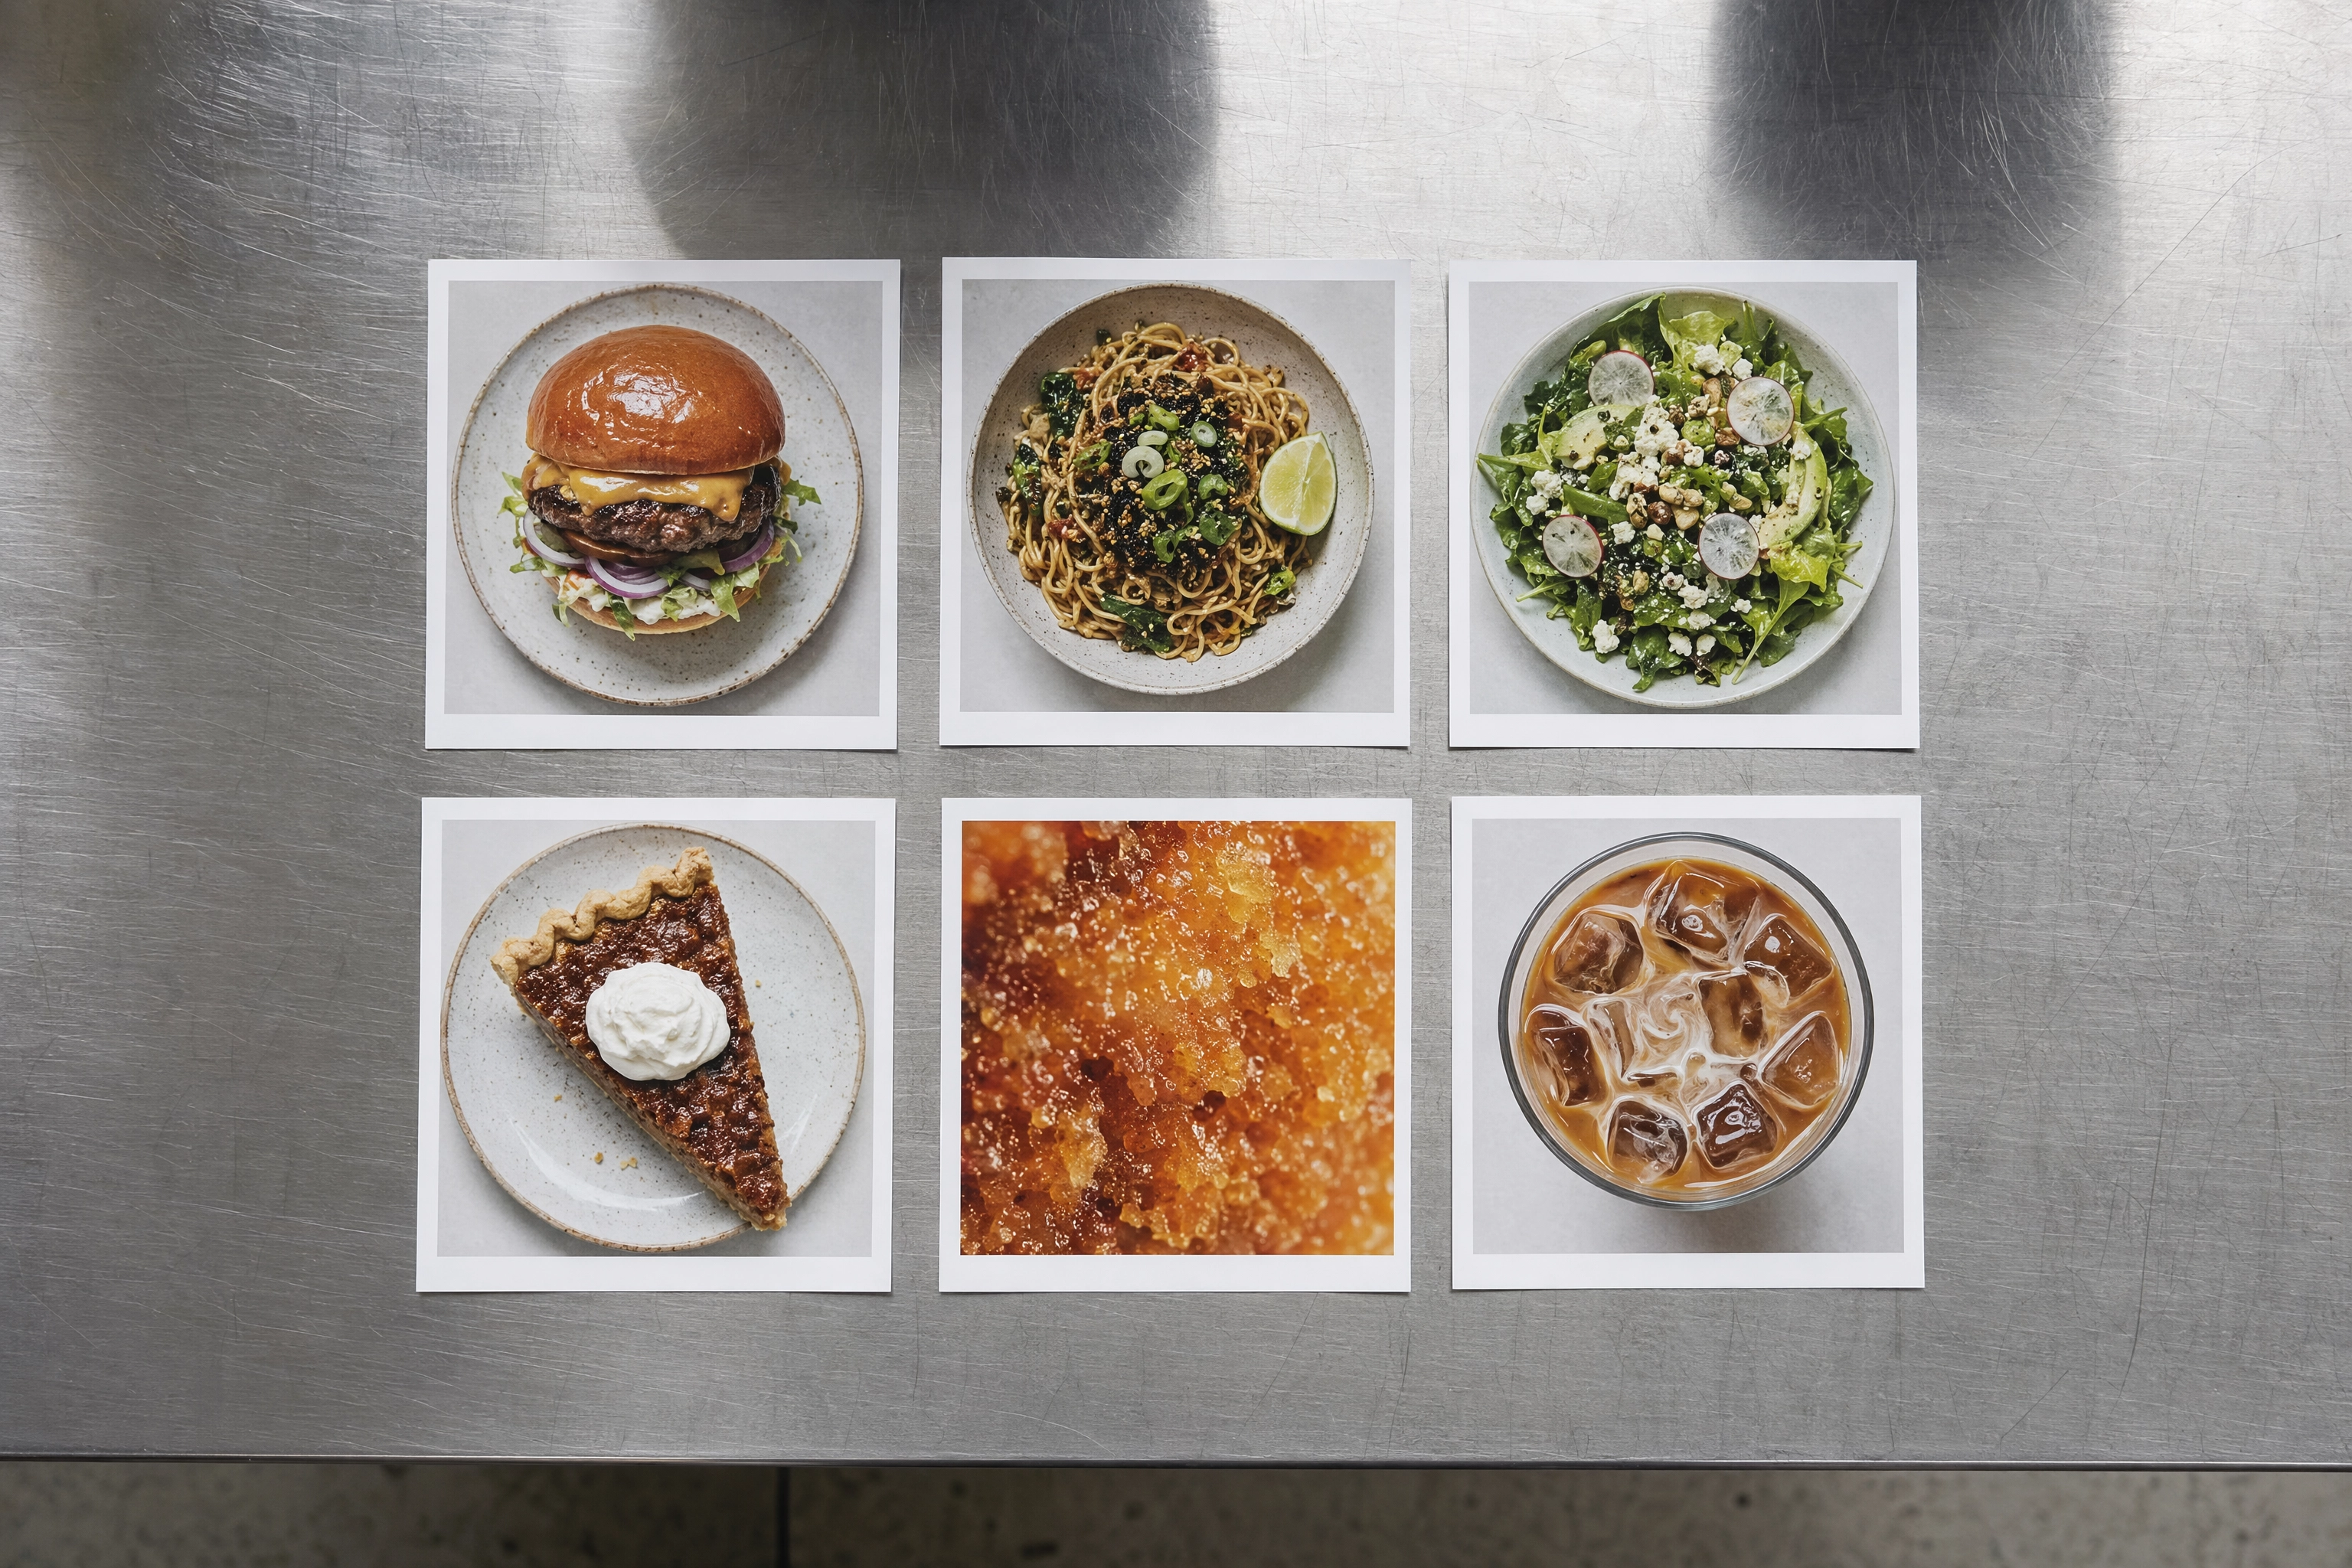 Six menu prints on a steel pass where one unreadable macro texture crop stands out among five recognisable dishes
A useful ratio from real menu projects is about one macro shot per five whole-dish images. Detail pictures earn their keep on social, on printed menus, on web headers and behind poster type — never as the primary picture on a delivery app listing. Our menu photography guide sets out which photos a full menu needs, and restaurant food photography covers the business case behind them.
That is the interesting tension in macro food photography: the sharpest picture is rarely the one that sells. Nobody has ever ordered a dish because of a crumb.
Macro Without a Macro Lens
You can start macro food photography without buying a dedicated optic at all. Four routes, cheapest first, each with an honest cost.
A phone. Supported iPhones automatically switch to the Ultra Wide camera and focus from 2 cm away. The smaller sensor gives far more depth of field, which is a genuine advantage on tiny subjects. Corner softness is the trade. Our iPhone camera settings and phone food photos guides go deeper.
Extension tubes. Hollow spacers with no glass, from about $25. They move any lens nearer and cost you a stop or two and infinity focus. Nothing degrades optically.
Close-up filters. Screw-on magnifiers. Cheap singles soften the corners badly; achromatic doublets are much better and cost more.
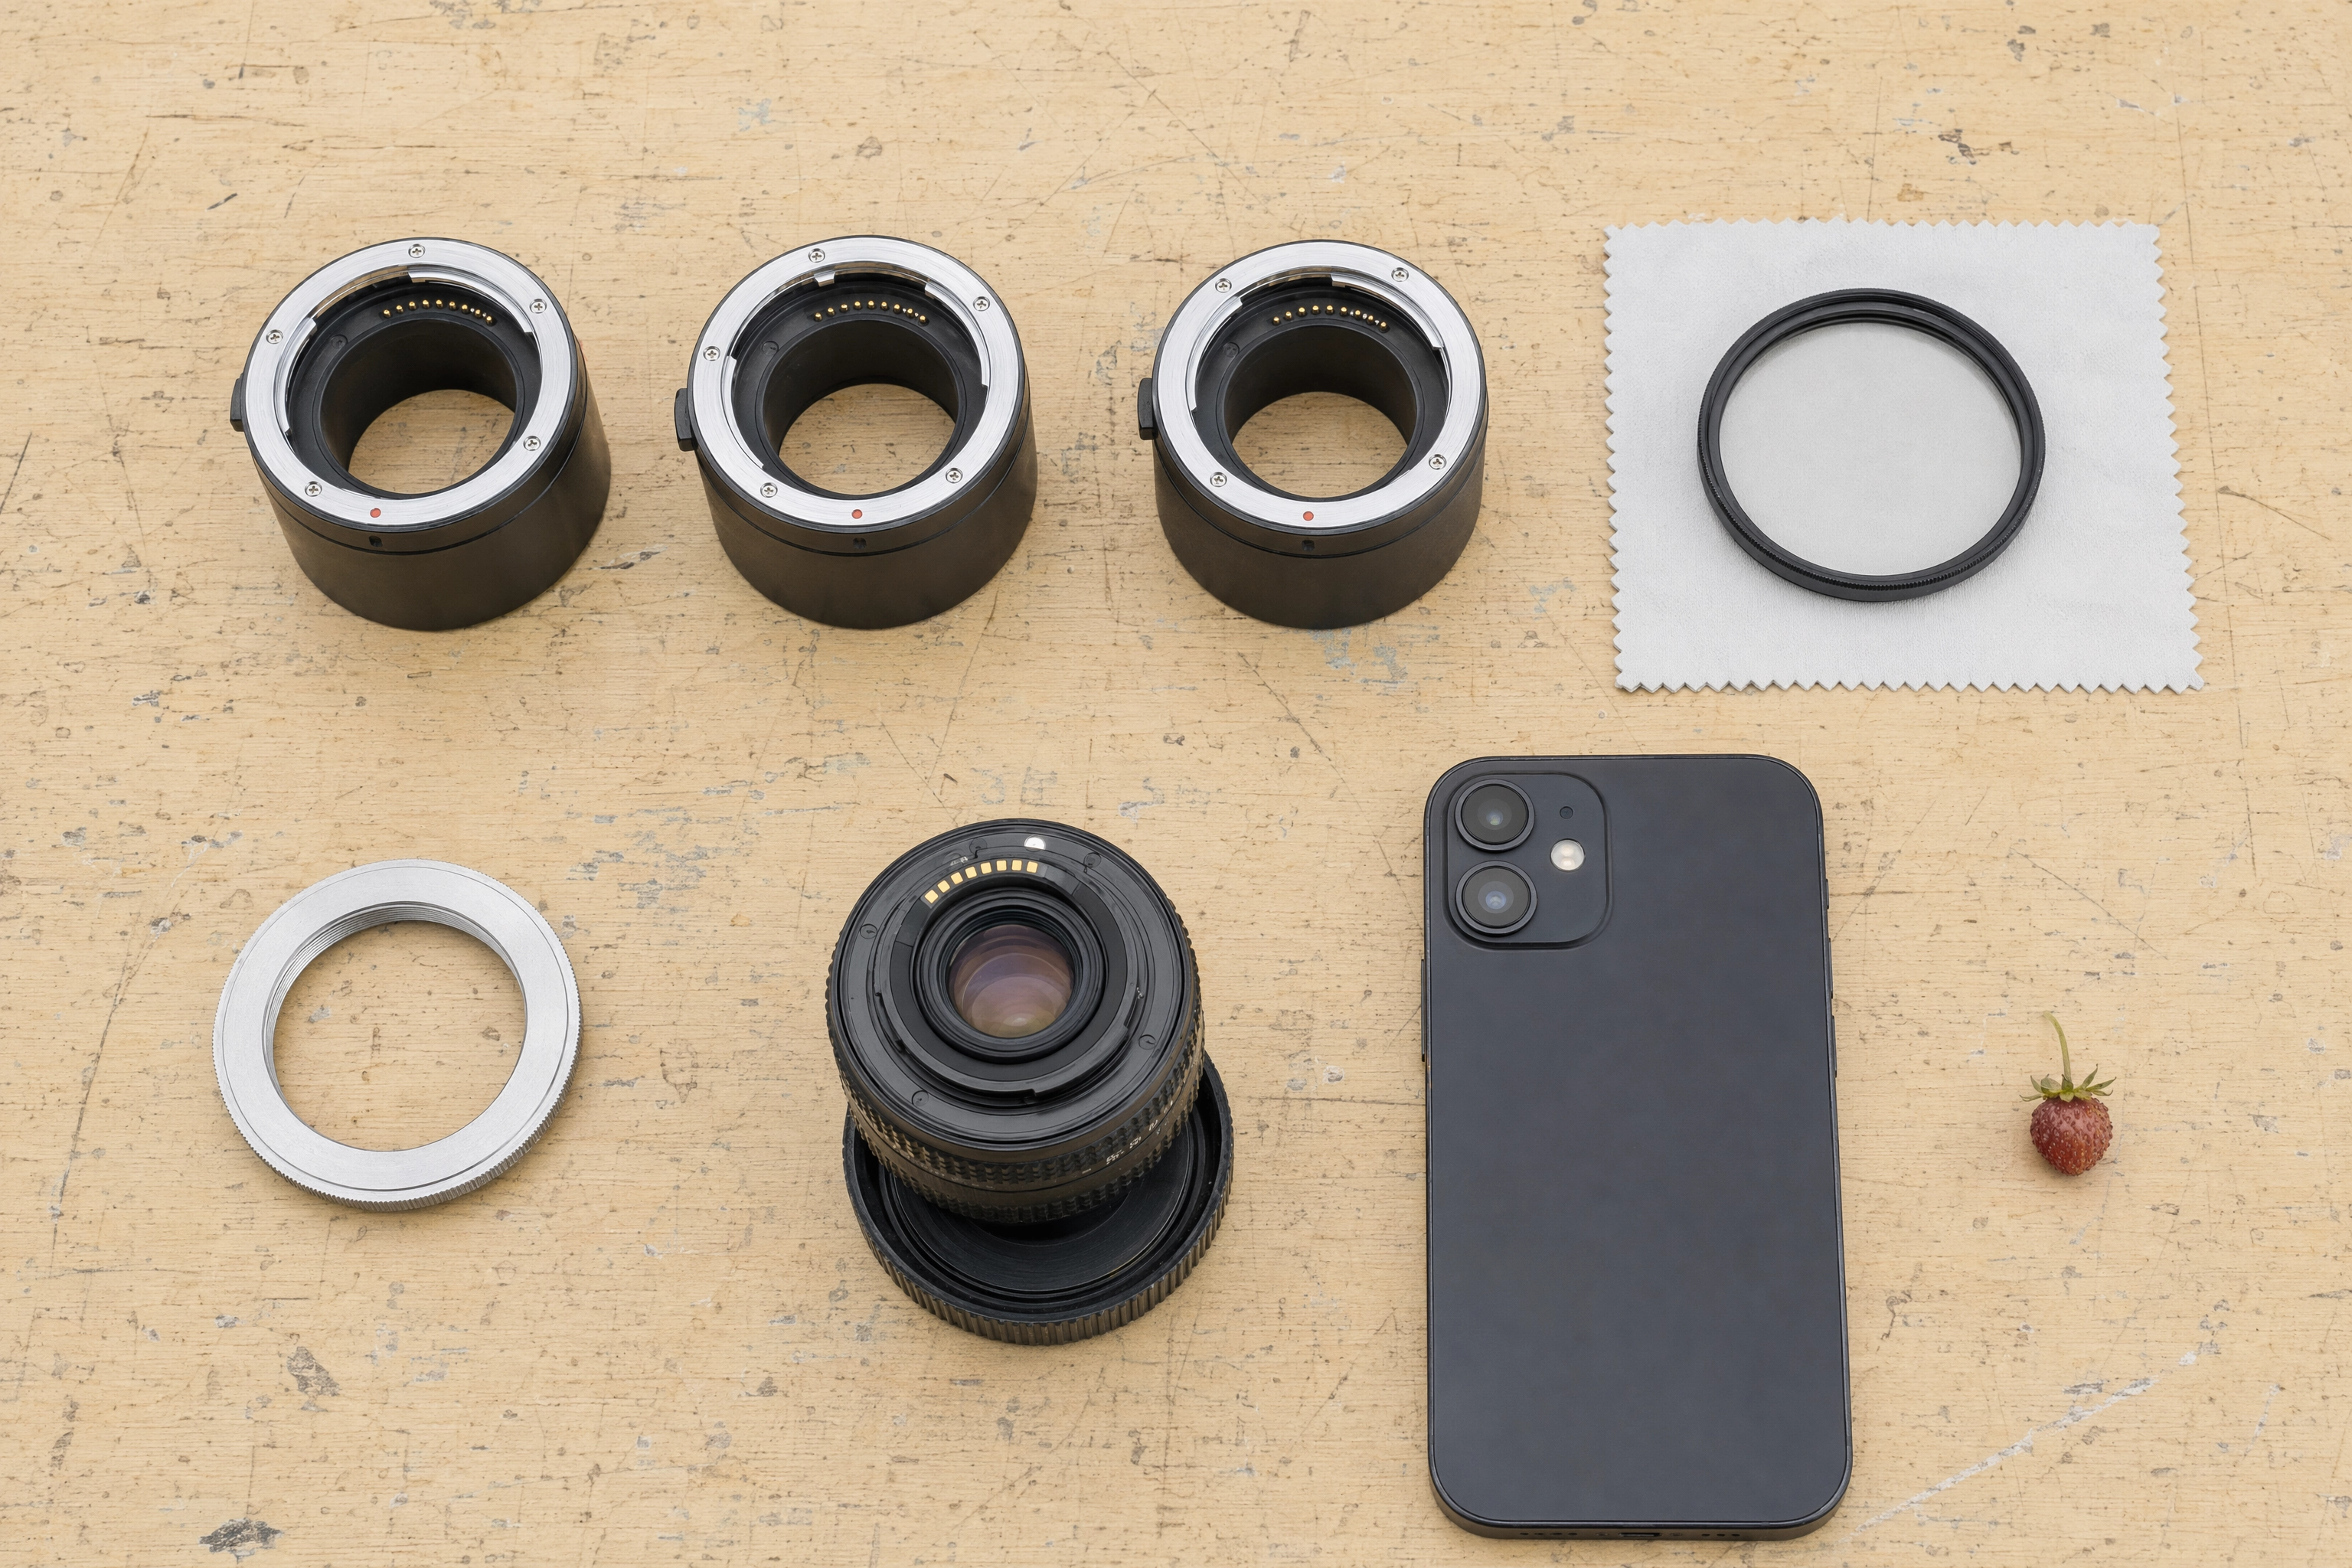 Overhead flat-lay of extension tubes, close-up filter, reversing ring and a phone, budget macro food photography gear
A reversing ring. Mount a 50 mm prime backwards for high magnification on a tiny budget. You lose autofocus and aperture control, and the barrel ends up a couple of centimetres from the food.
Third-party macro lenses from Sigma and Tamron undercut the first-party options by a wide margin. If you photograph small subjects often, a 90–105 mm macro is still the right buy. Our best lens for food photography post compares the options, DSLR settings covers the body side, and the equipment guide covers everything around it.
Gear Solves Capture. Light and Styling Are the Hard Part
That is how this gear cluster ends, and macro proves it better than any other topic.
Sensor, lenses, tripod and stacking software decide one thing: whether the picture is sharp. They have no opinion about whether it is appetising. A tack-sharp grey stew is still a grey stew. Sharpness is table stakes, not a result. Macro photography rewards patience far more than it rewards spending.
What decides the result is light direction, background and styling. A single raking lamp across a croissant does more than any lens upgrade. So does the right backdrop, the right props, and knowing how to stage a plate before you touch the camera. The techniques post and our styling guide are worth more practice hours than any purchase, and creative food photography has ideas beyond the flat lay. Even the best food photographer in your city would rather move a lamp than change the glass.
This is also where FoodShot AI fits. It turns a phone snap of a plated dish into a 2K, menu-ready photo in about 2 minutes, which covers the whole-dish images every listing needs. That frees your camera time for the detail work only a real macro setup can do. To repair existing files, the food photo editor handles that, and plans start at $15 a month. It generates from your own uploads — not a stock library, and it does not do video.
Frequently Asked Questions
What lens do I need for macro food photography?
A 90–105 mm macro with 1:1 magnification. The longer focal length is not about reach; it buys working distance, so the barrel is not sitting in your light. A 50–60 mm macro reaches the same ratio at roughly 5 cm of clear air, which makes the whole setup genuinely difficult.
What aperture should I use for macro food photography?
Start at f/8 to f/11 marked. Wider and you get well under a millimetre of sharpness; narrower and diffraction softens everything, because effective aperture at 1:1 is double the marked number. If you need more depth than f/11 gives, stack rather than stop down.
Can you do macro food photography with a phone?
Yes, and better than most people expect. A modern phone focuses to about 2 cm, and its small sensor gives more depth of field than any 1:1 macro ever will. The limits are corner softness, low-light noise and no real control over the plane of focus.
Do I really need to focus stack?
Only for pictures where the whole subject must be sharp — a full macaron, a mound of salt crystals, a cross-section. For a texture study, a thin plane of focus is the point, not a flaw. Stacking also fails on anything that melts, droops or steams.
What magnification is right for food?
Usually 1:4 to 1:2. At 1:1 many foods become unrecognisable abstractions, and an unidentifiable photo sells nothing. Fill about half the picture with the recognisable feature and let the background fall away.
Why are my macro food photos so dark?
Two problems stack up. Effective aperture at 1:1 costs two stops before you touch a dial, and the lens itself is shadowing the subject from a few centimetres away. Move the light to the side or behind, then bounce a card into the shadow.
How many detail shots does a restaurant menu need?
Few. Photograph every dish whole first, then add roughly one macro shot per five dishes for social and print use. Delivery platforms and menus want the recognisable plate; detail pictures are there for atmosphere, and it is the last thing to worry about.